Gloria: OBS build thread

#152
 02-24-2015, 09:25 PM

 . It's not how I did mine but I give everyone credit for hanging over that rad trying to torque them down.
 Great job Andrew!!!!

#153
02-24-2015, 09:30 PM
#154
02-24-2015, 11:20 PM

#155
03-01-2015, 07:03 PM
Join Date: Mar 2007
Posts: 256
Likes: 0
Received 0 Likes
on
0 Posts
Alright guys,
Had a good weekend of work, doesn't seem like I accomplished a lot, but did get some things sorted out.
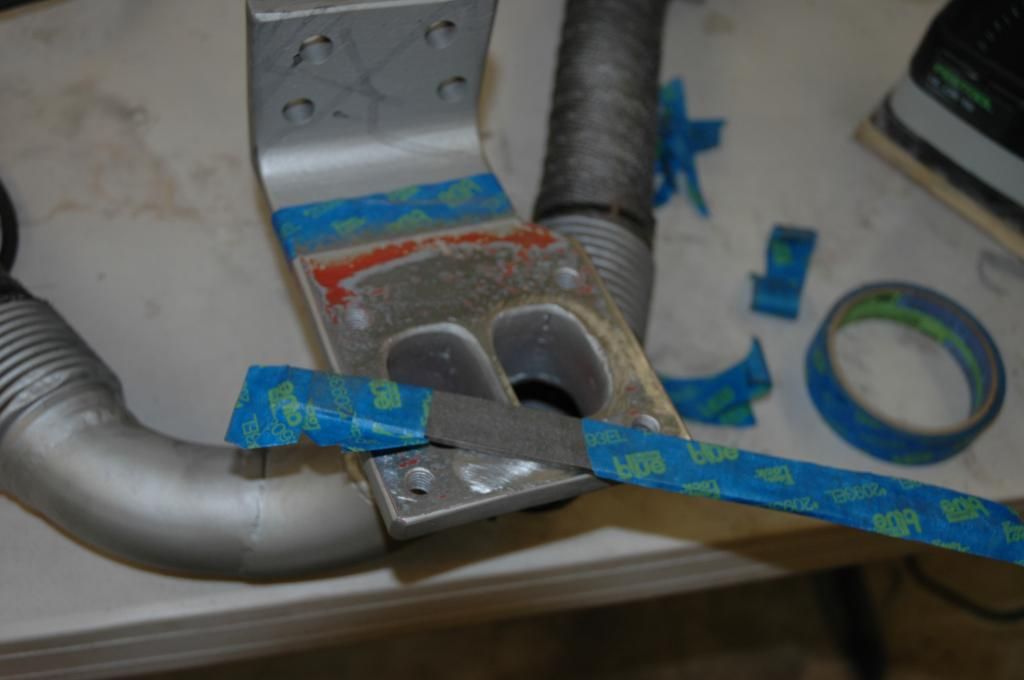
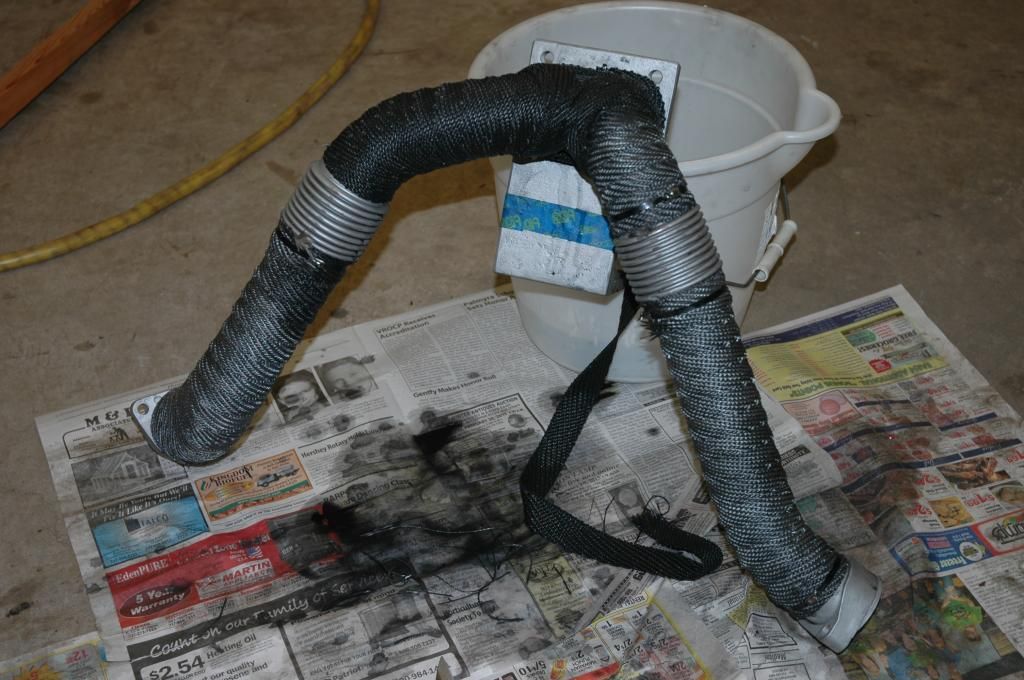
I'll start with the up pipes, they were primered and painted with VHT flame proof paint. I wanted to do ceramic coating, but they are getting wrapped, and seeing as though they are stainless Im really not that worried about it.
Once they were painted and baked, I was going to take a DA sander to the mating face of the turbo mount, and try to get it as smooth as possible. Well I hadn't realized it before, but right off the bat, I had a big high spot. I guess some of the head we laid into the angle iron pulled/pushed it around a bit, and a straight edge across felt like a teeter-totter.
So I didn't really know what to do short of taking it to a machine shop. Pretty much resorted to the good old file.
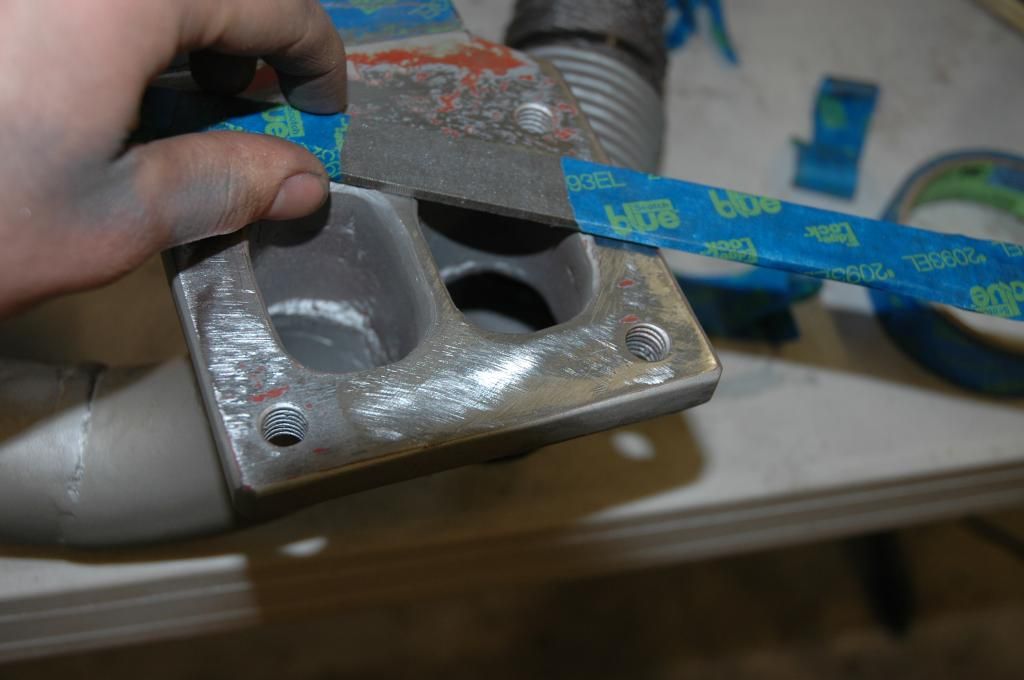
You can see the high spot here ^ on the top of the plate roughly above the web space/divider. Spent a good couple hours carefully hand filling everything down.
Then they got the exhaust wrap, which is why I was never too worried about the appearance of these thing, I think they look sweet now!
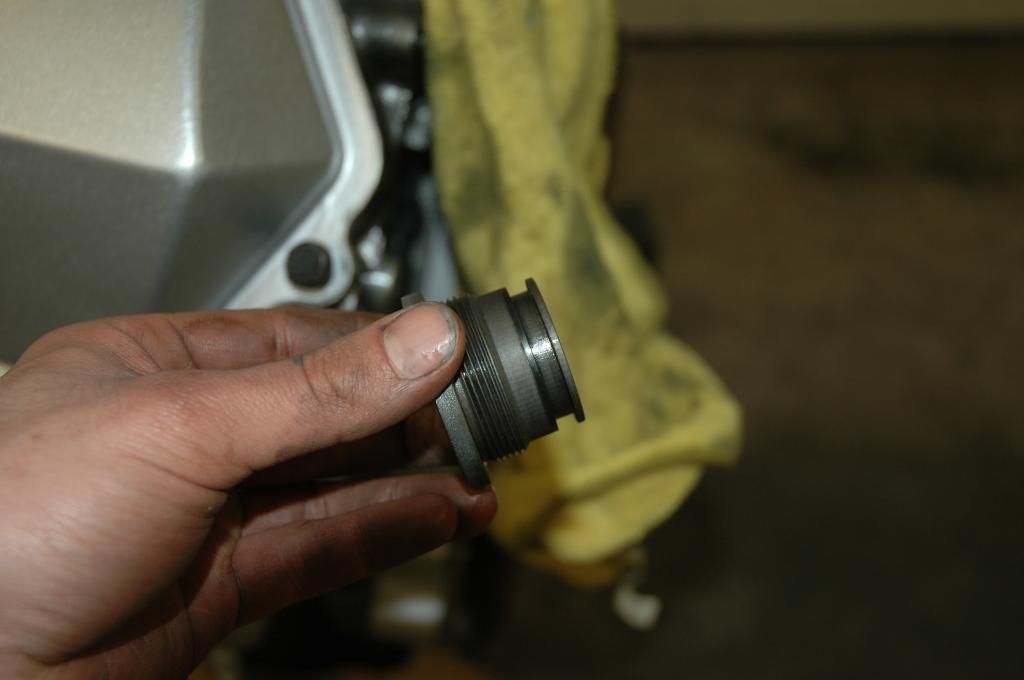
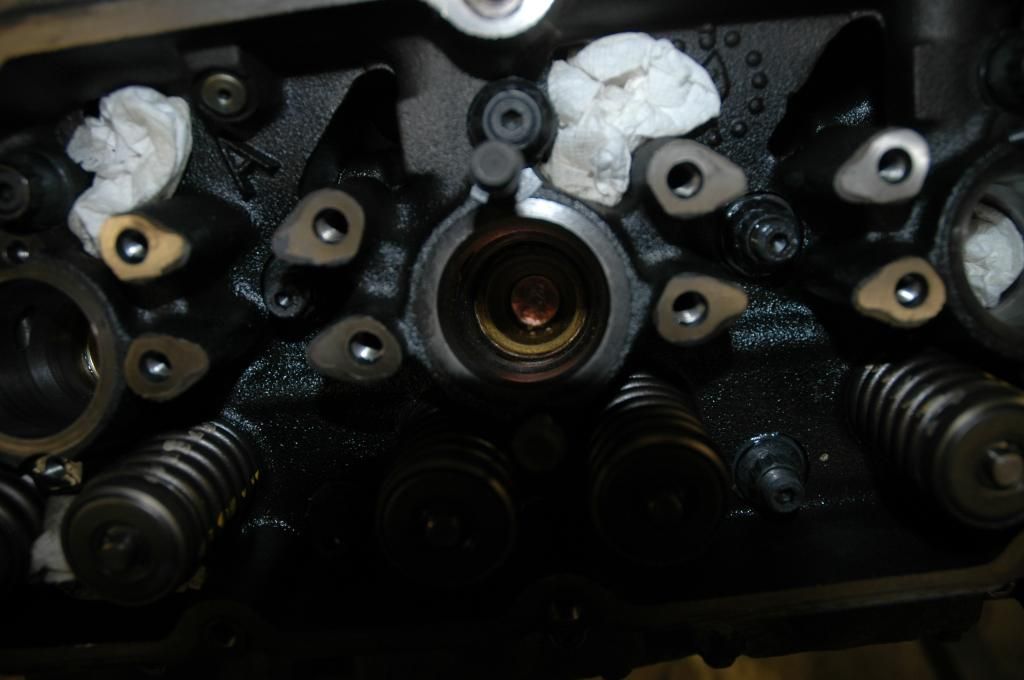
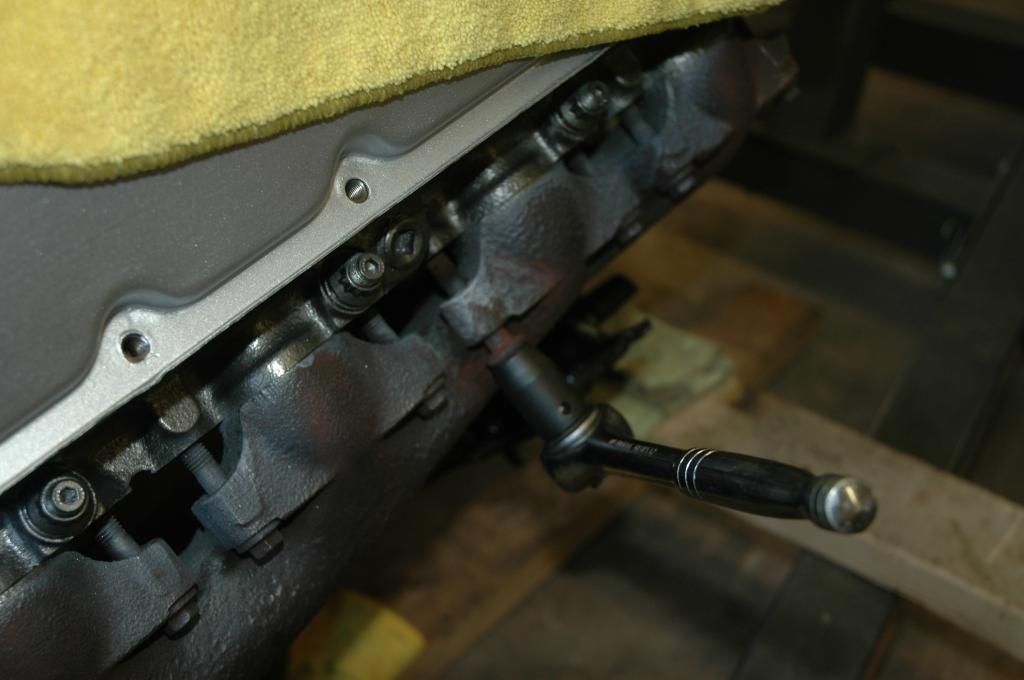
Then I went after the oil rail end plugs on the back. Got them removed, the NEED a bit of heat. I didn't know this at first, and was legitimately bouncing my entire weight on the end of a breaker bar, and they would not break loose. A bit of heat from a propane torch, and they came free. Here is the plug with seal removed.
And the new seal from Guzzle. The original is black.
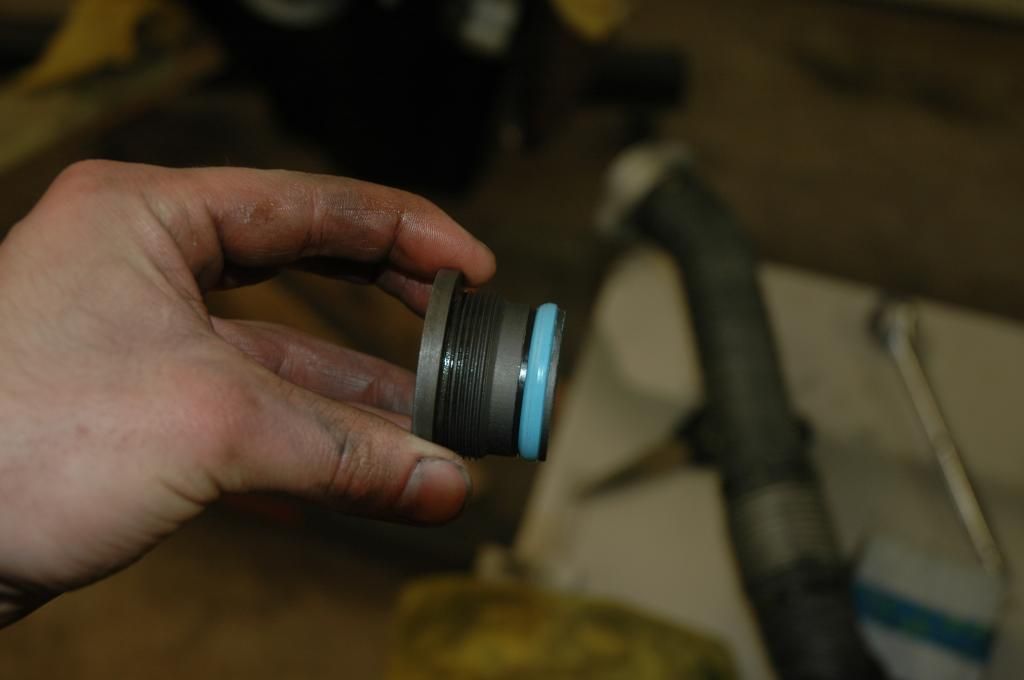
Then you put loctite 277 on the threads, and they go back in to 60Ft/LBS.
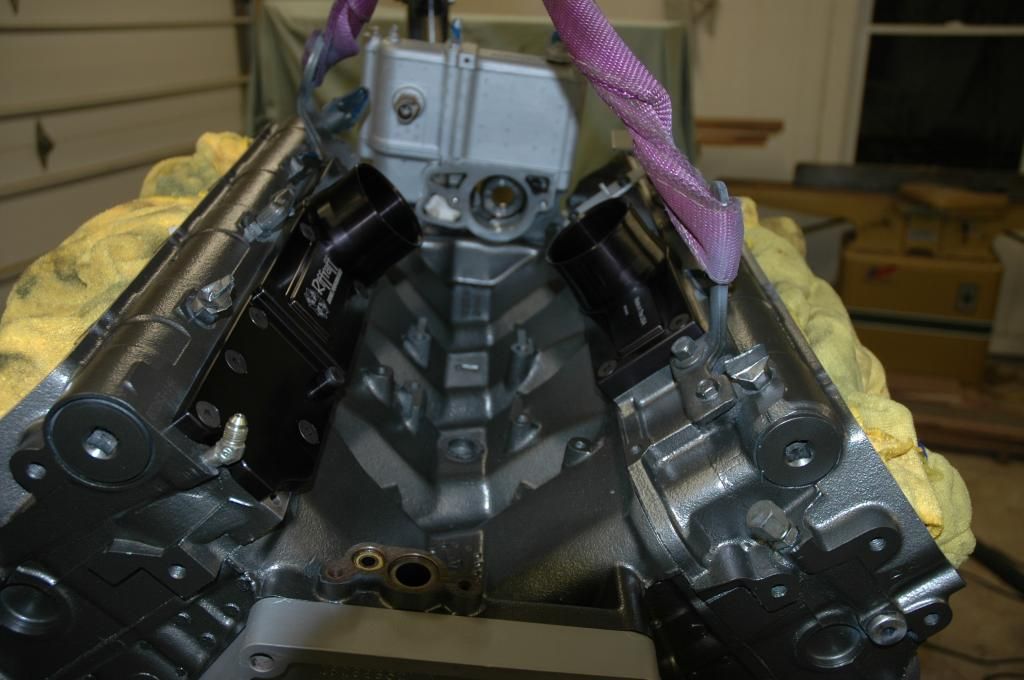
Then, time to put the intake plenums on for real. Clay's have this nifty o-ring seal, which is ultimately the reason I went with these at a bit more cost than other options. Have read one too many stories of guys checking for boost leaks and finding they didn't quite get a good seal in one corner of their plenum with ford grey, and had to do it all over again. No thanks..
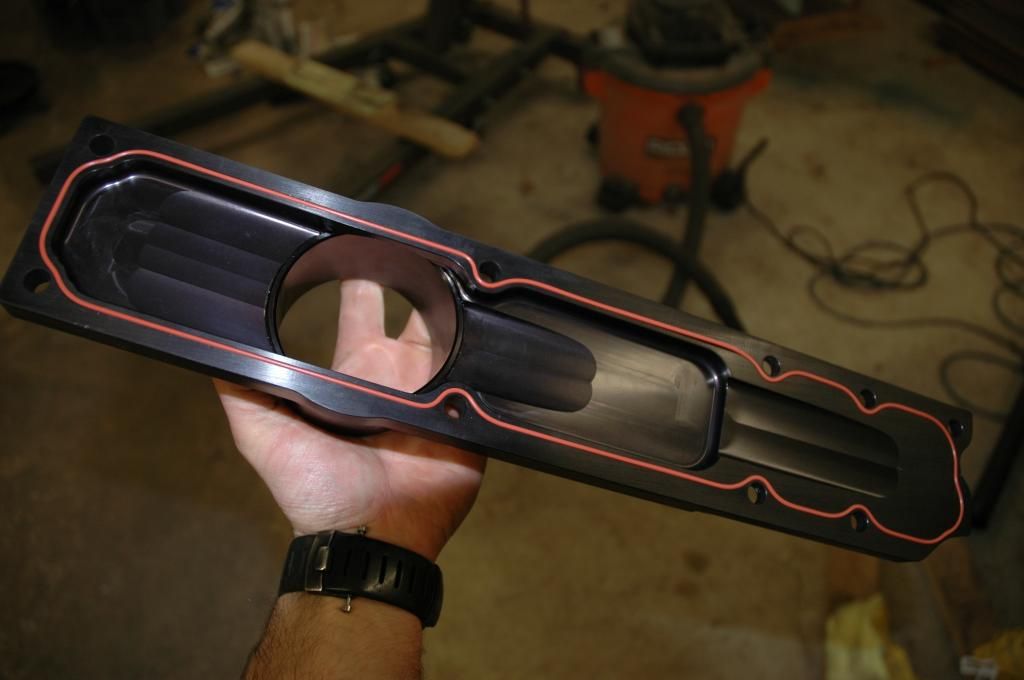
Bolted down, can't recall the torque spec here.
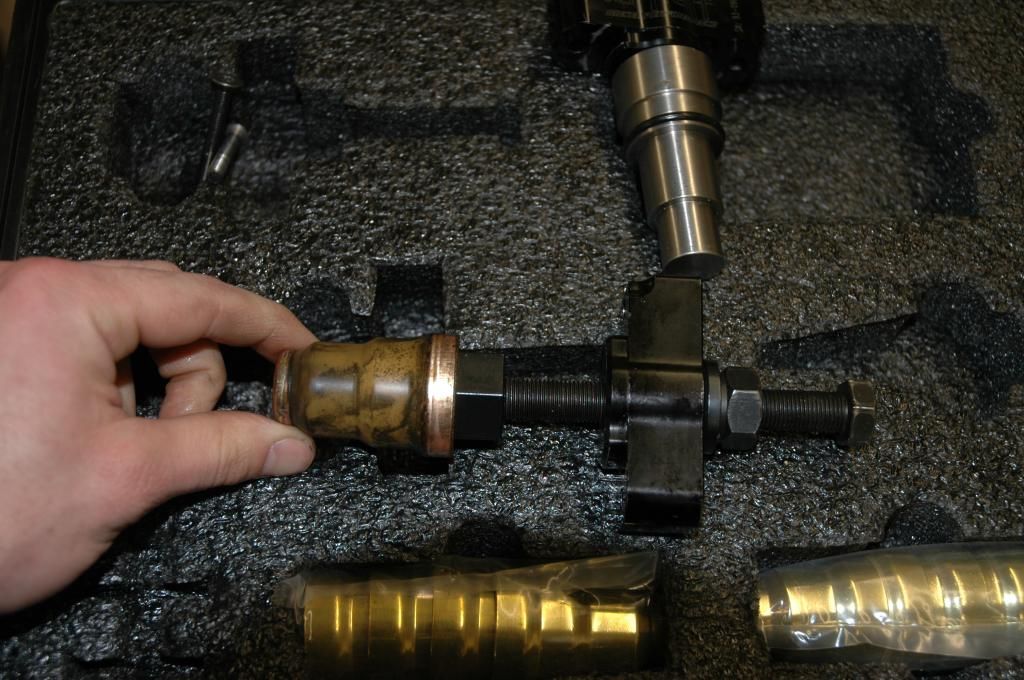
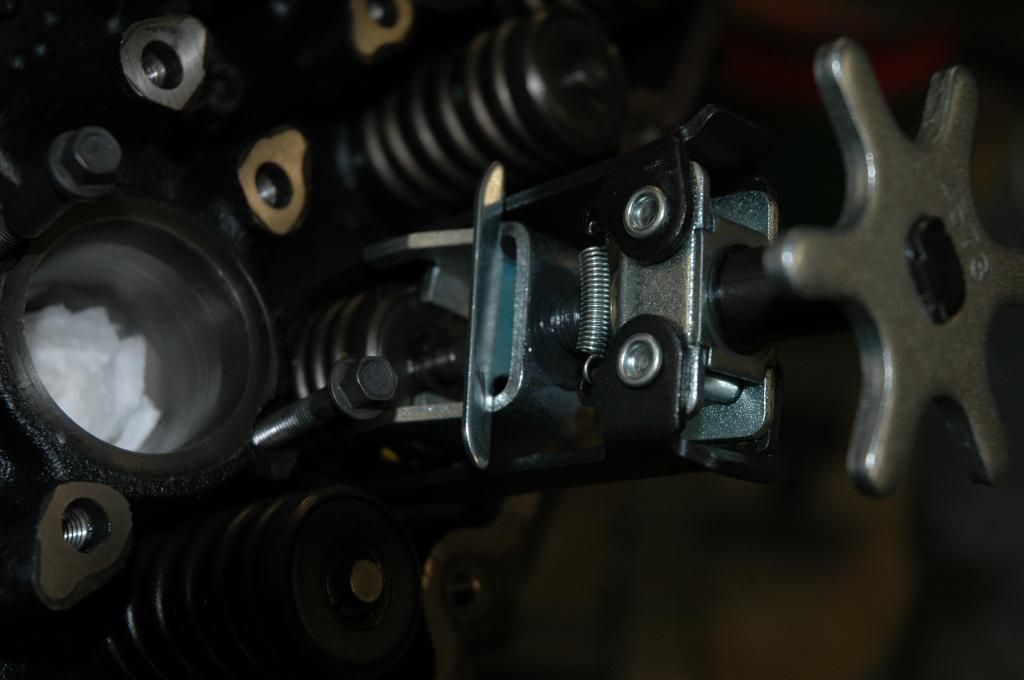
And finally, the big wait was over, and I got this sweet little unit from Clay as well. This is the injector cup too set, on the left is the remover, and the right is the installer.
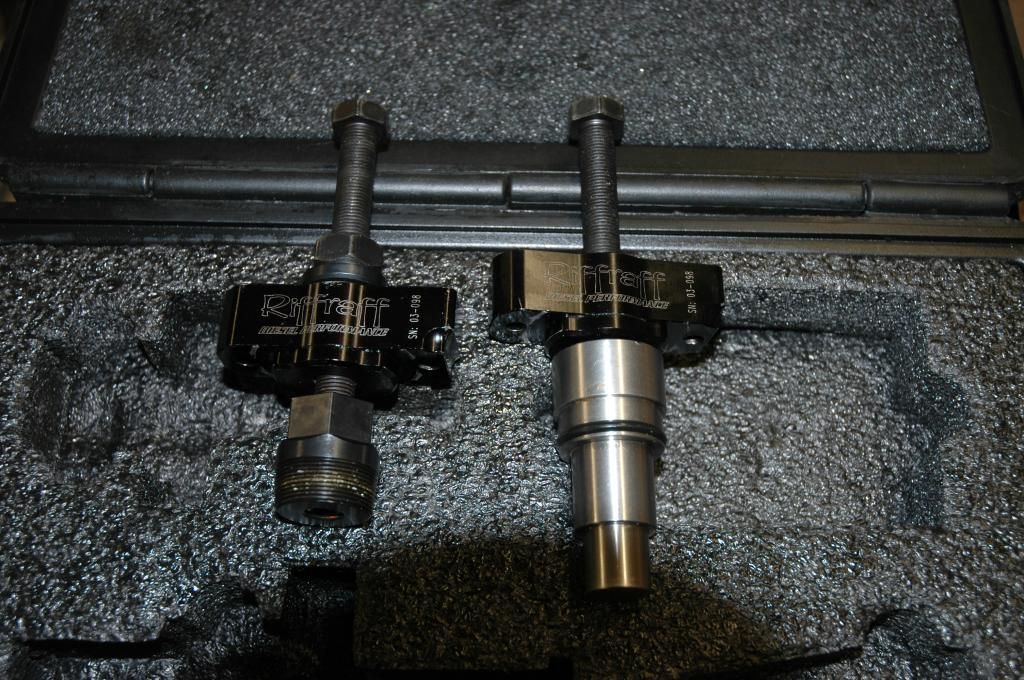
Both of them bolt down onto the injector hold down bolt-holes.
With the arrow facing the springs..
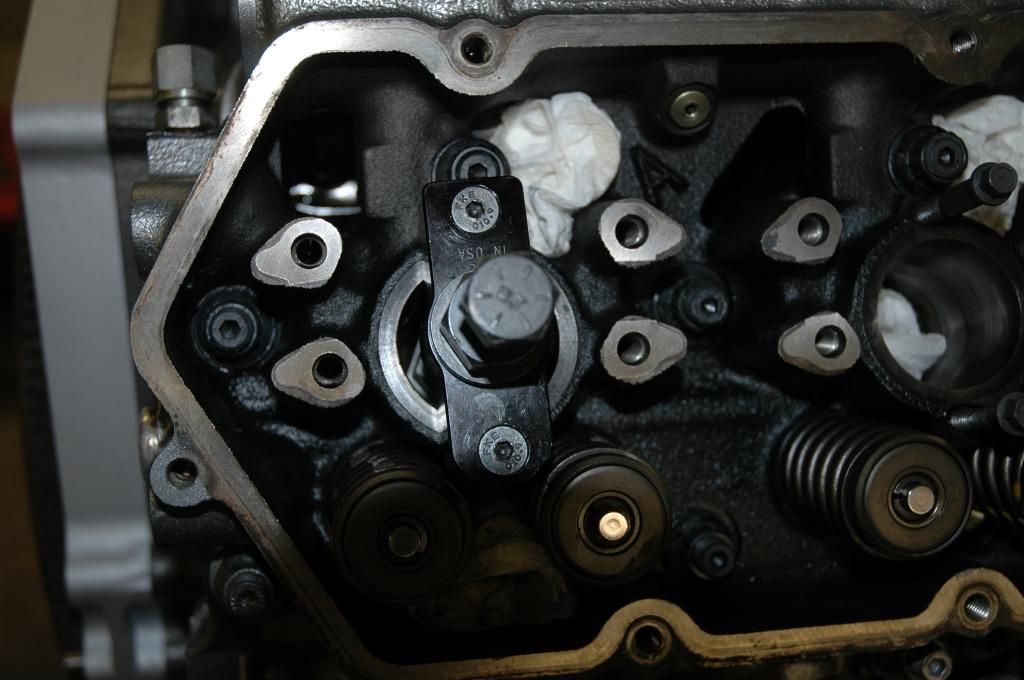
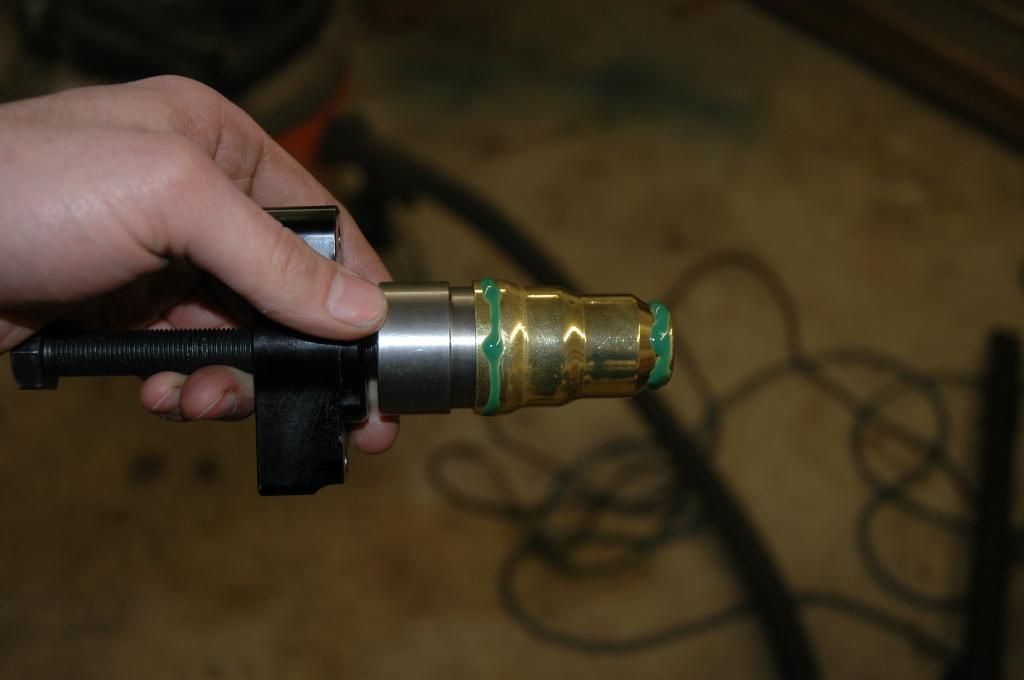
One tip I will mention, I just saw this on a youtube vid, is that to insure no shavings from the injector cups end up in the cylinder as the removal tool bites into it, you can throw a penny down in the injector cup. Pretty much a perfect fit, and if there was going to be anything fall down there, it'll come up with the injector cup.
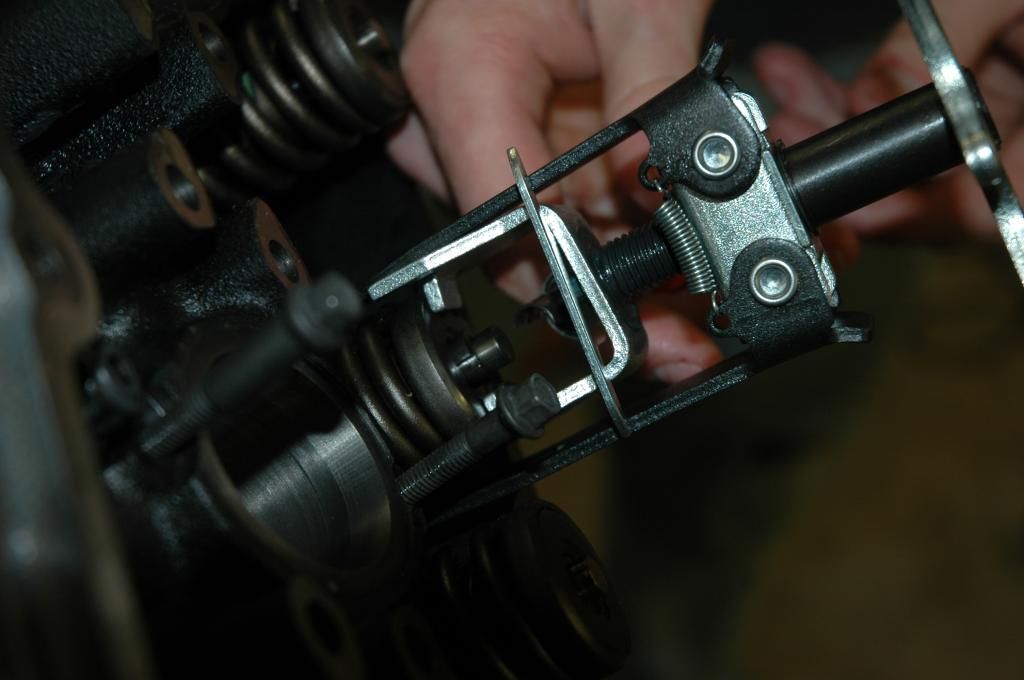
So once you thread the removal tool in, and then thread it up, the old one pops right out.
The new once gets prepped, clean the bore with a circular wire brush on a drill or something,
And stick em in.
-Andrew
Had a good weekend of work, doesn't seem like I accomplished a lot, but did get some things sorted out.
I'll start with the up pipes, they were primered and painted with VHT flame proof paint. I wanted to do ceramic coating, but they are getting wrapped, and seeing as though they are stainless Im really not that worried about it.


Once they were painted and baked, I was going to take a DA sander to the mating face of the turbo mount, and try to get it as smooth as possible. Well I hadn't realized it before, but right off the bat, I had a big high spot. I guess some of the head we laid into the angle iron pulled/pushed it around a bit, and a straight edge across felt like a teeter-totter.
So I didn't really know what to do short of taking it to a machine shop. Pretty much resorted to the good old file.

You can see the high spot here ^ on the top of the plate roughly above the web space/divider. Spent a good couple hours carefully hand filling everything down.

Then they got the exhaust wrap, which is why I was never too worried about the appearance of these thing, I think they look sweet now!

Then I went after the oil rail end plugs on the back. Got them removed, the NEED a bit of heat. I didn't know this at first, and was legitimately bouncing my entire weight on the end of a breaker bar, and they would not break loose. A bit of heat from a propane torch, and they came free. Here is the plug with seal removed.

And the new seal from Guzzle. The original is black.

Then you put loctite 277 on the threads, and they go back in to 60Ft/LBS.
Then, time to put the intake plenums on for real. Clay's have this nifty o-ring seal, which is ultimately the reason I went with these at a bit more cost than other options. Have read one too many stories of guys checking for boost leaks and finding they didn't quite get a good seal in one corner of their plenum with ford grey, and had to do it all over again. No thanks..

Bolted down, can't recall the torque spec here.

And finally, the big wait was over, and I got this sweet little unit from Clay as well. This is the injector cup too set, on the left is the remover, and the right is the installer.

Both of them bolt down onto the injector hold down bolt-holes.

With the arrow facing the springs..

One tip I will mention, I just saw this on a youtube vid, is that to insure no shavings from the injector cups end up in the cylinder as the removal tool bites into it, you can throw a penny down in the injector cup. Pretty much a perfect fit, and if there was going to be anything fall down there, it'll come up with the injector cup.

So once you thread the removal tool in, and then thread it up, the old one pops right out.

The new once gets prepped, clean the bore with a circular wire brush on a drill or something,

And stick em in.

-Andrew
#156
03-01-2015, 07:12 PM
#157
03-01-2015, 07:28 PM
Join Date: Mar 2007
Posts: 256
Likes: 0
Received 0 Likes
on
0 Posts
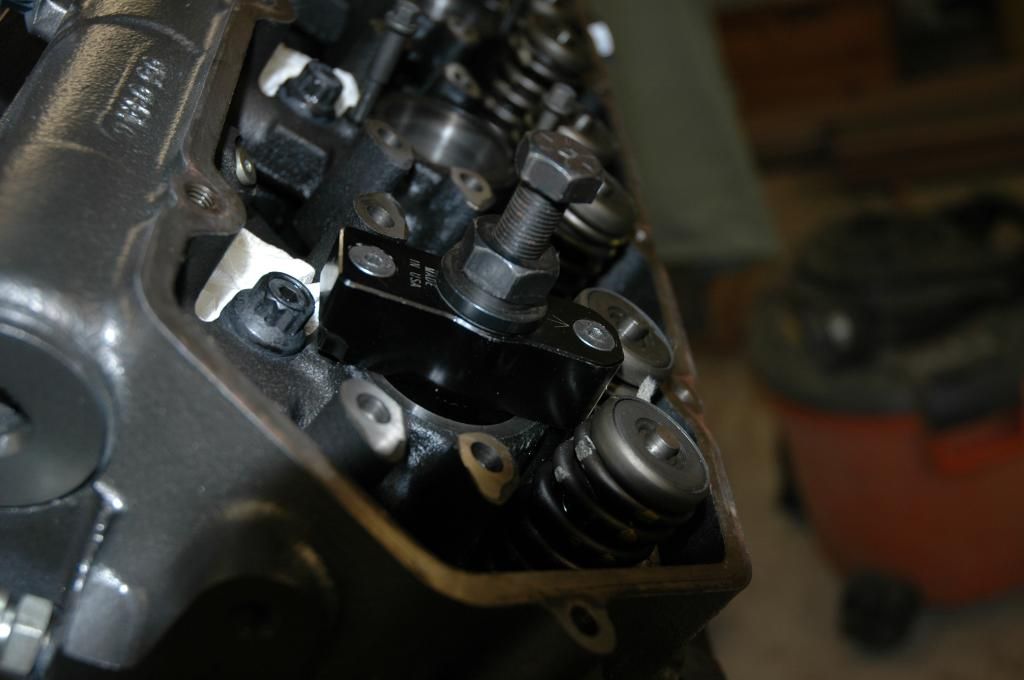
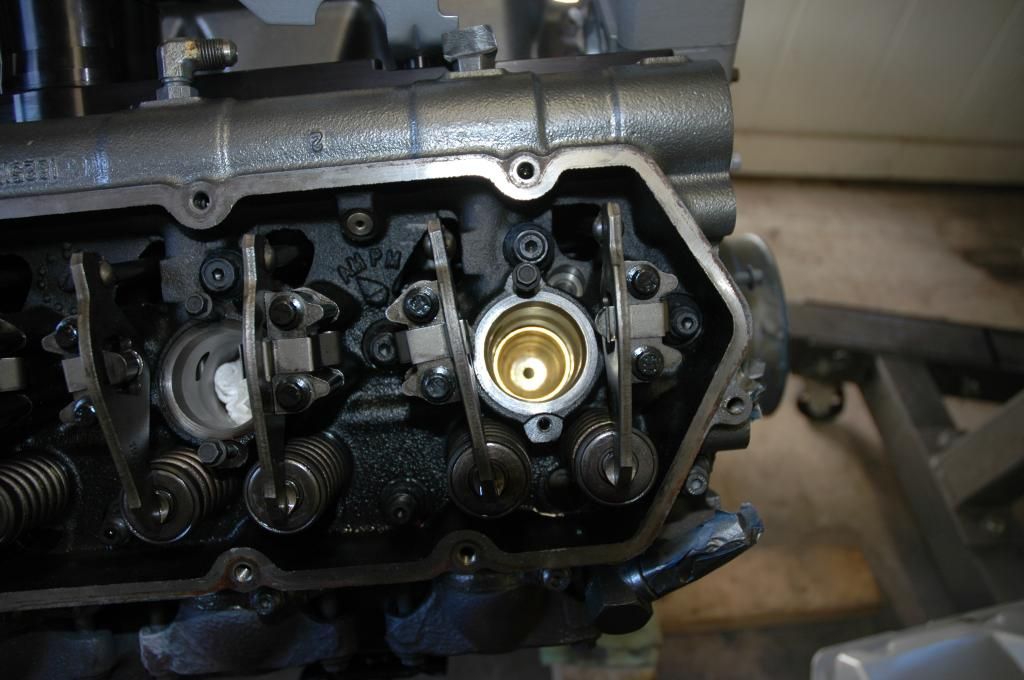
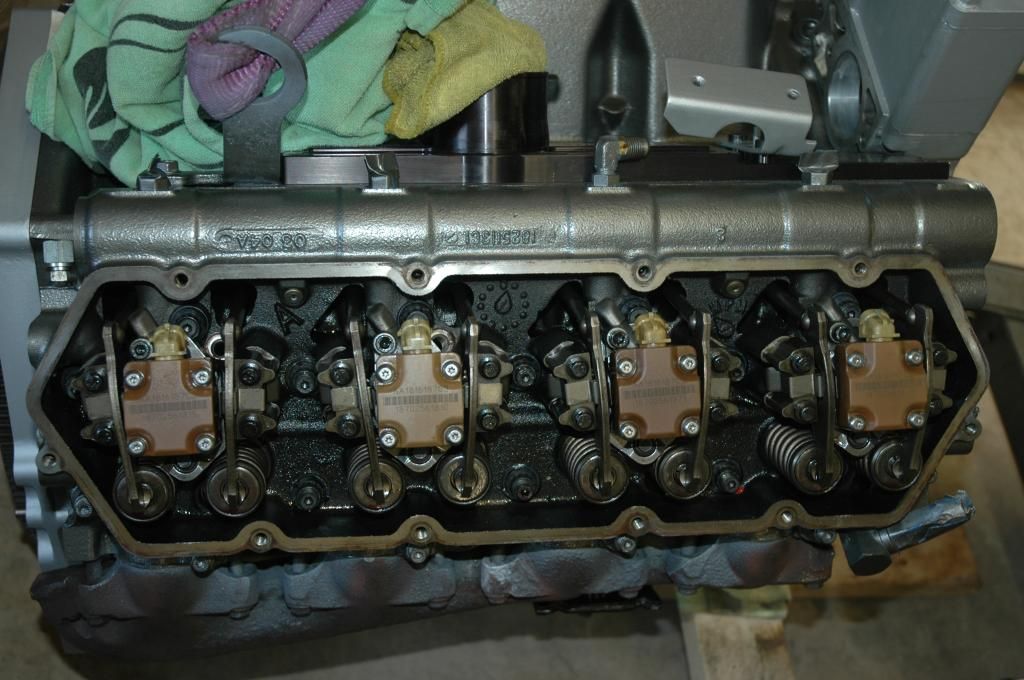
And next come valve springs. These are comp 910's, and a .0030 shim.
Bought this valve spring compressor tool off amazon for 17 bucks. Did the job fine. Cant use this in truck I guess, but of course thats not the case here so got it done.
Once compressed, get a magnet and grab the keepers out. In most cases, I had to push the spring around a bit in order for them to let the keepers go.
After that, the spring comes right out. Take the top plate and put it on the comp springs and compress them for install. Coat the new valve seal in oil and the shim goes on first, then the valve seal.

Put the new compressed spring over the seal, and work the keepers back in (this is a task on some, depends if the spring compresses perfectly or not), And you are done. Repeat 16 times.
Once done, the valve train components can go back on and new take up space. I am using some Permatex assembly lube.
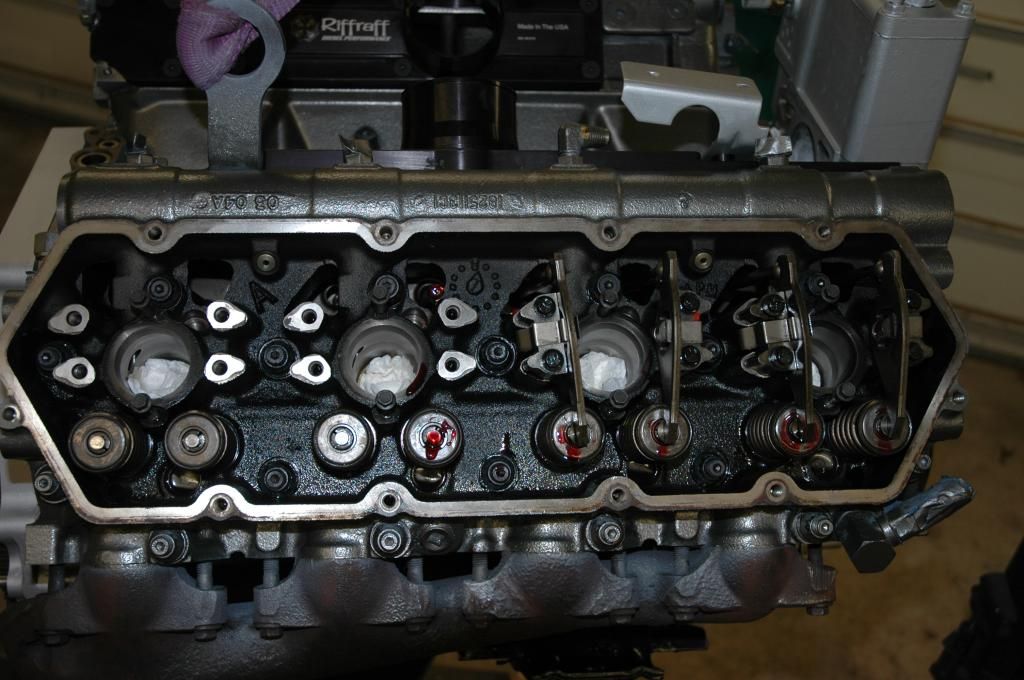
Cant remember the torque spec on the rocker arm hold down bolts, but I found them on this site somewhere.
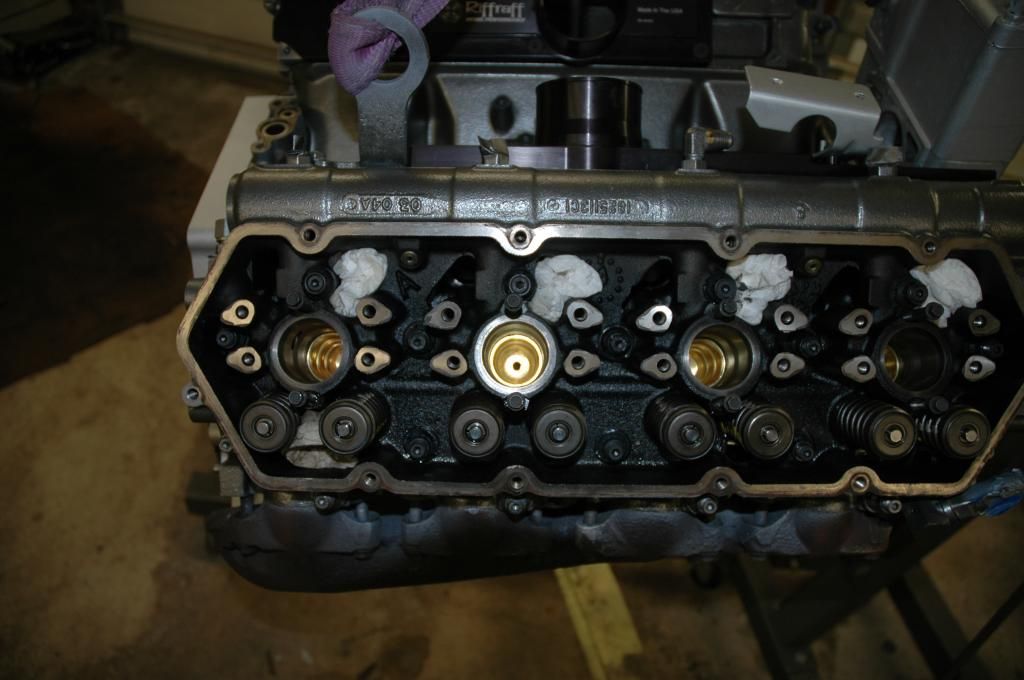
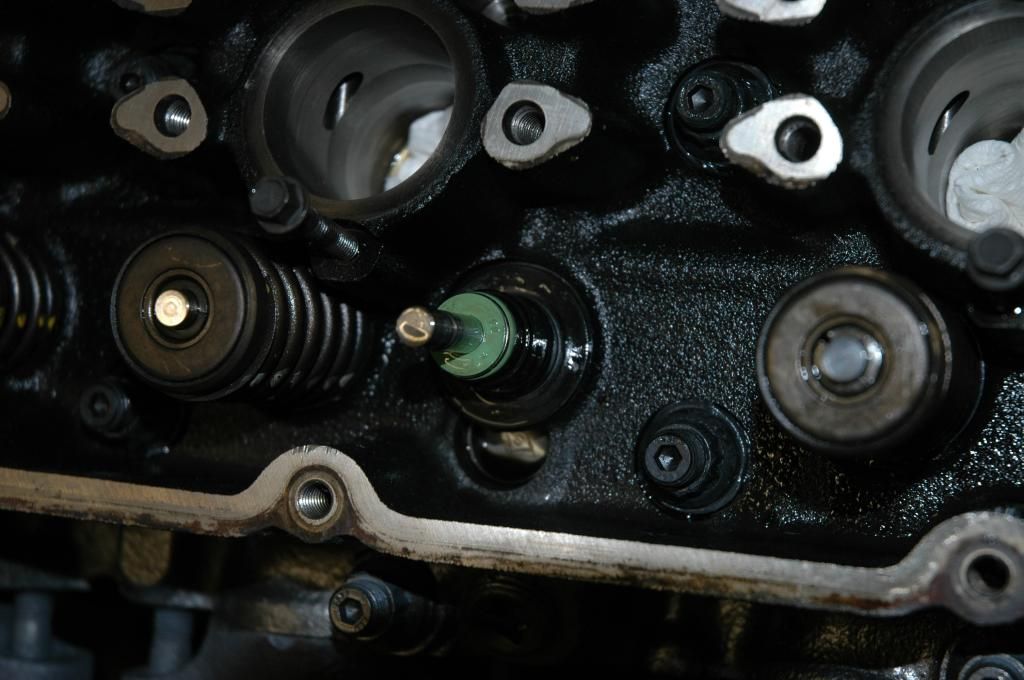
And looky what else showed up on friday! My injectors made it back,
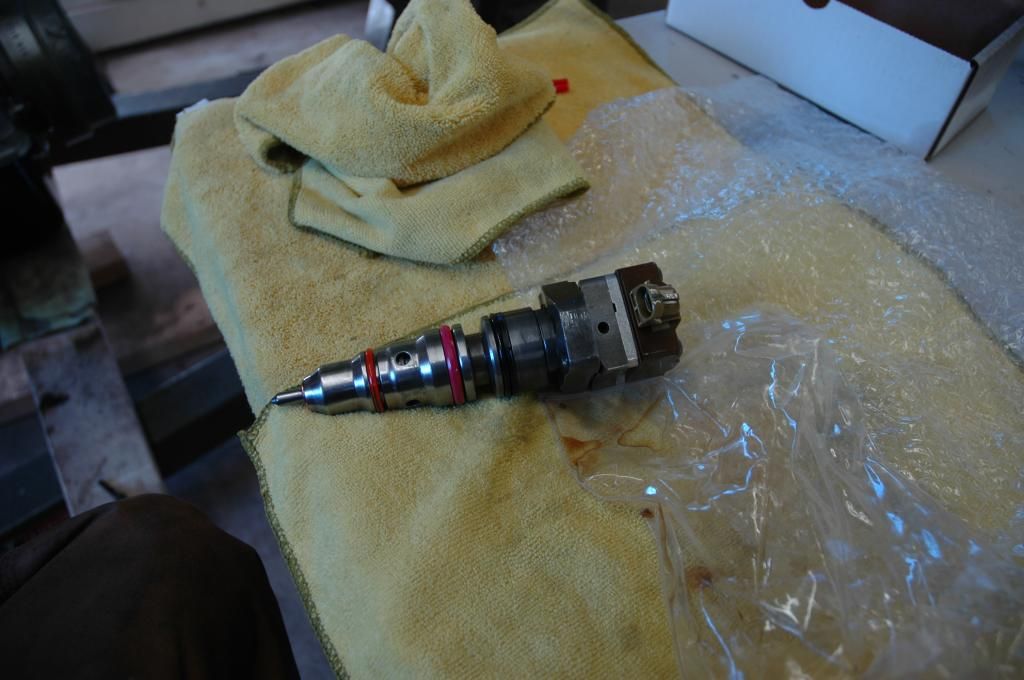
And they are going in shiny new cups, which have had time to cure now.
Got them all in, the top down bolt is bottomed out on shoulder at 120 INCH/Lbs, and the lower hold down bolt is torqued to 120 INCH/Lbs (it will not bottom out).
Either my hands arnt manly enough, or the new orings were tight, but I needed to gently use a rubber mallet to fully seat the injectors.
Then the oil deflectors, they go to 106 Inch/Lbs
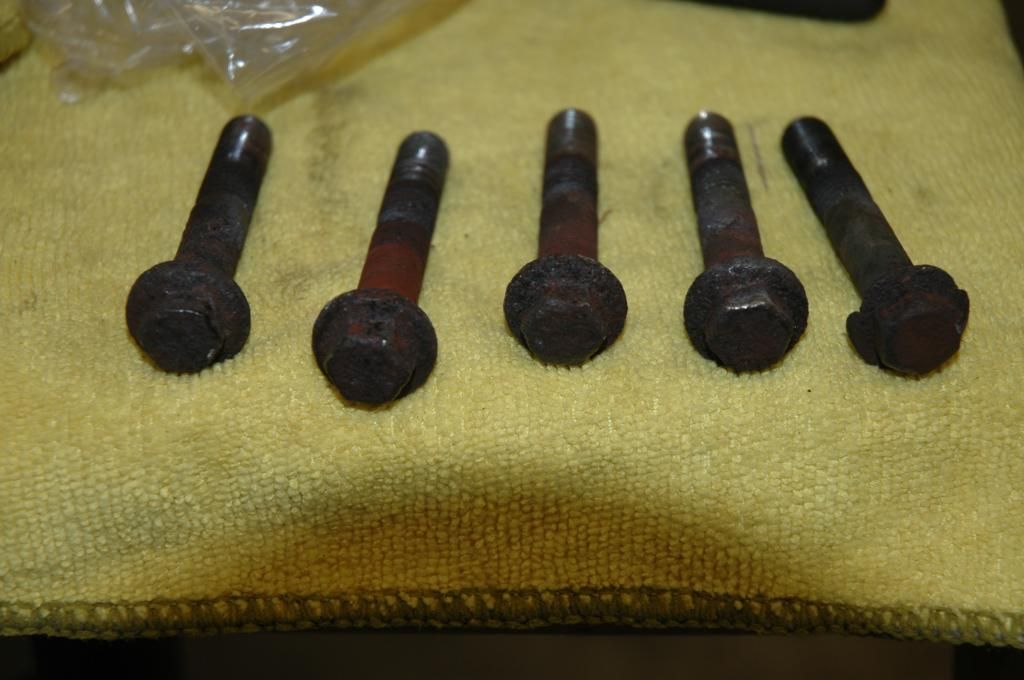
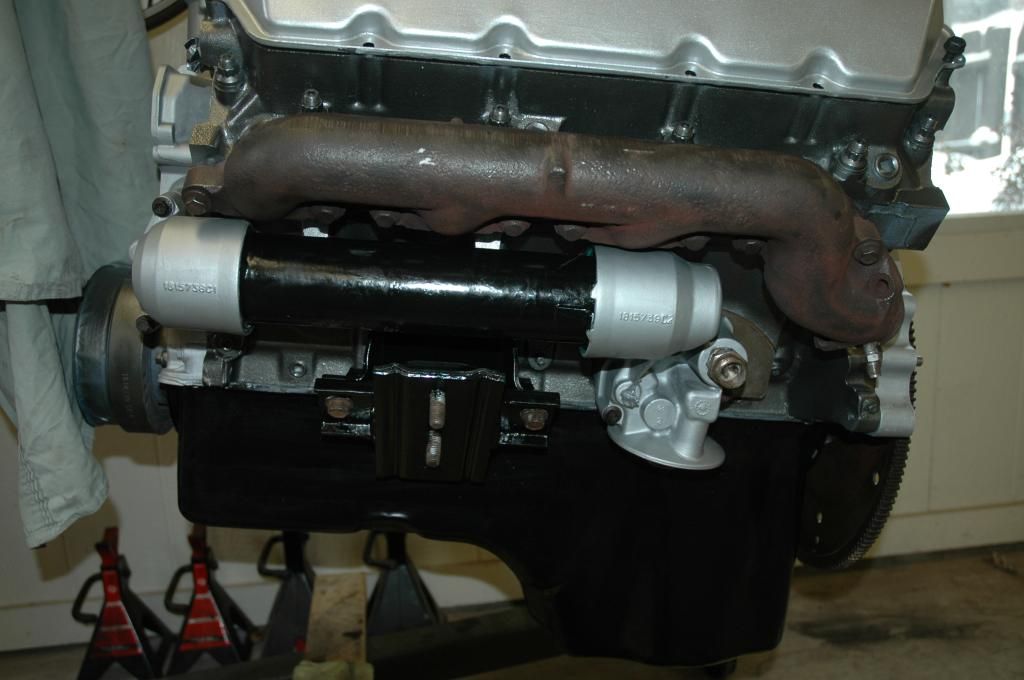
Next, I had some suspect looking exhaust manifold bolts, so I decided to risk it and try replacing them one at a time with good ones. Not all of them looked bad, only 5. I got really lucky and didn't have any break on me. So got them changed while the motor was out.
These are the ones that looked bad to me
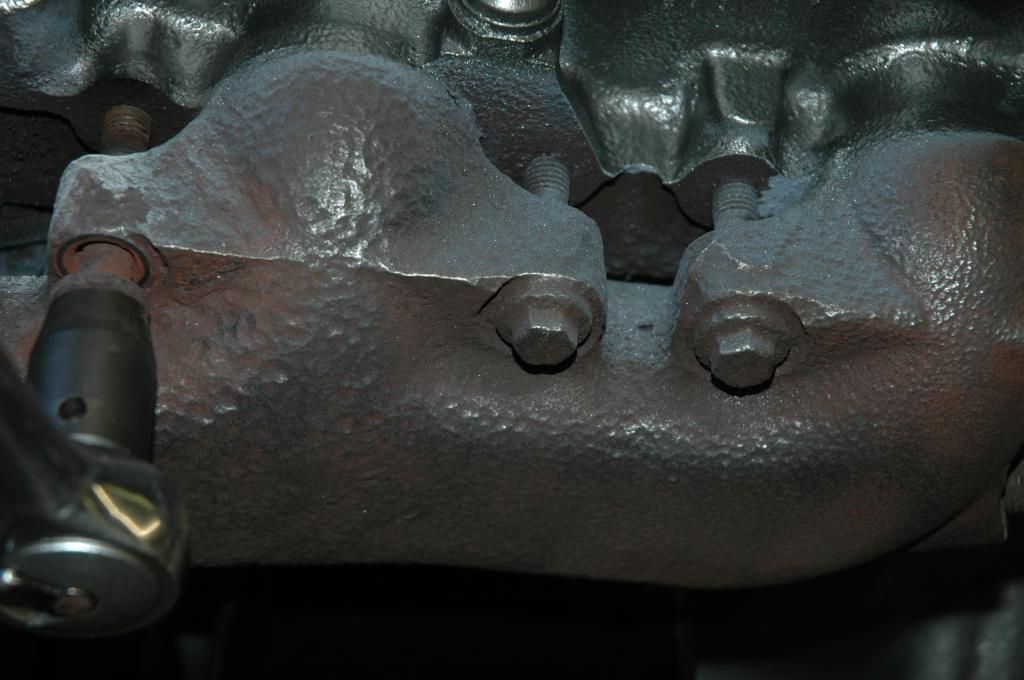
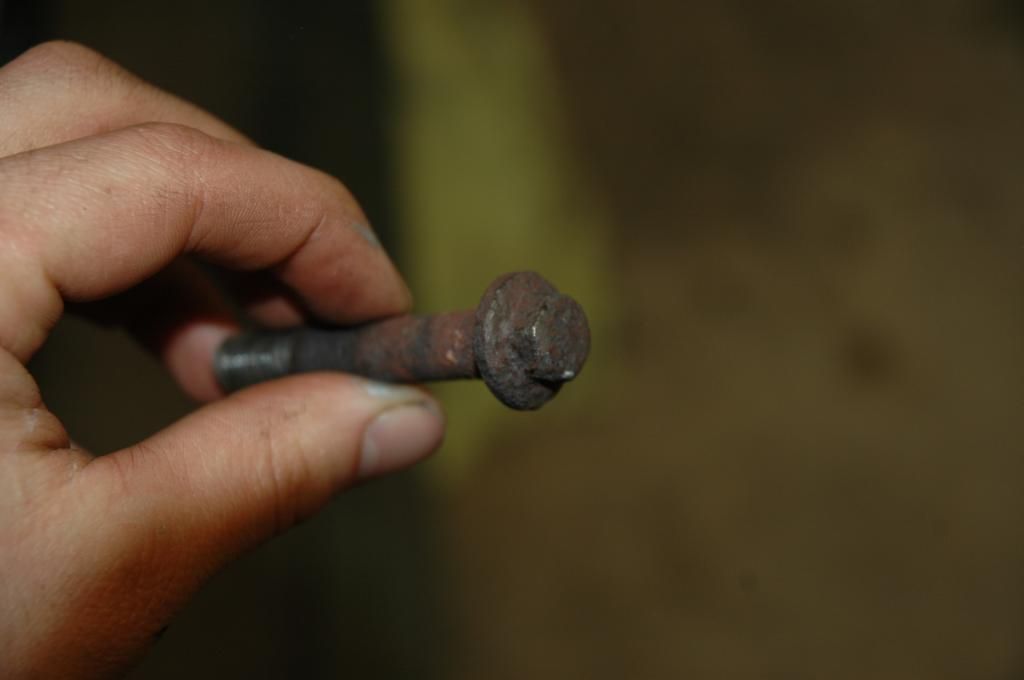
There are the 5 I removed, the one on the far right had some chipping on the head.
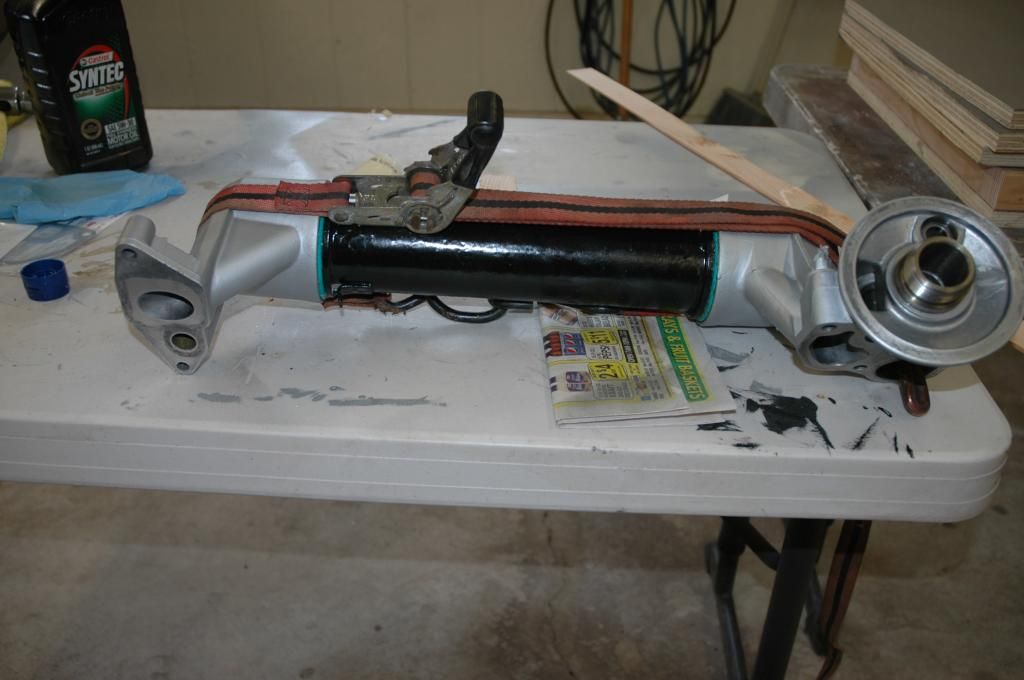
Then it was oil cooler time.
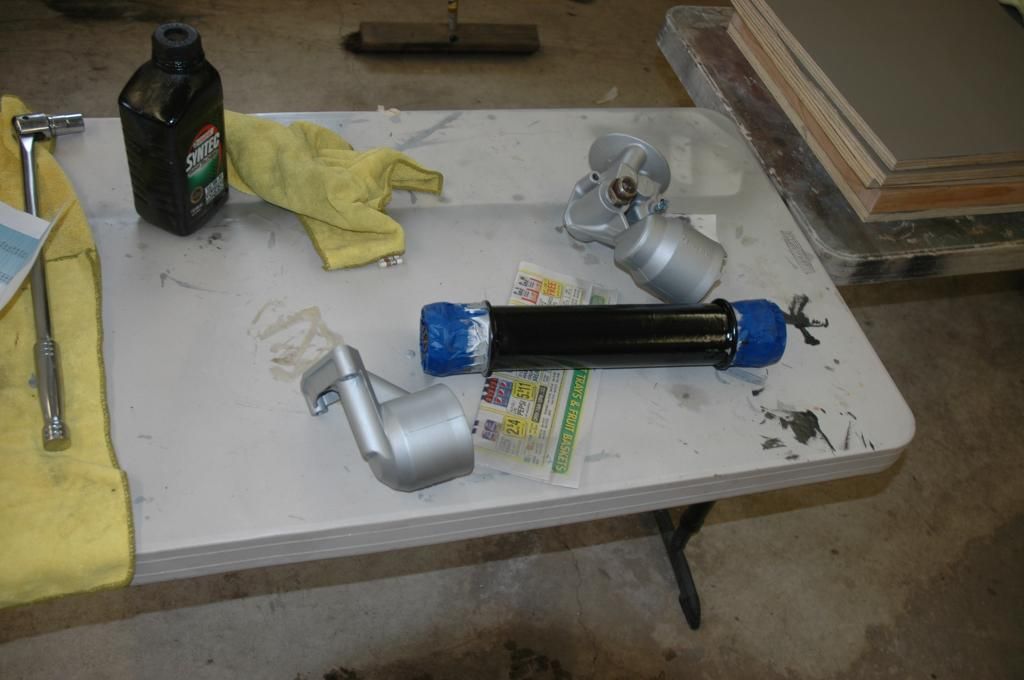
I used vaseline
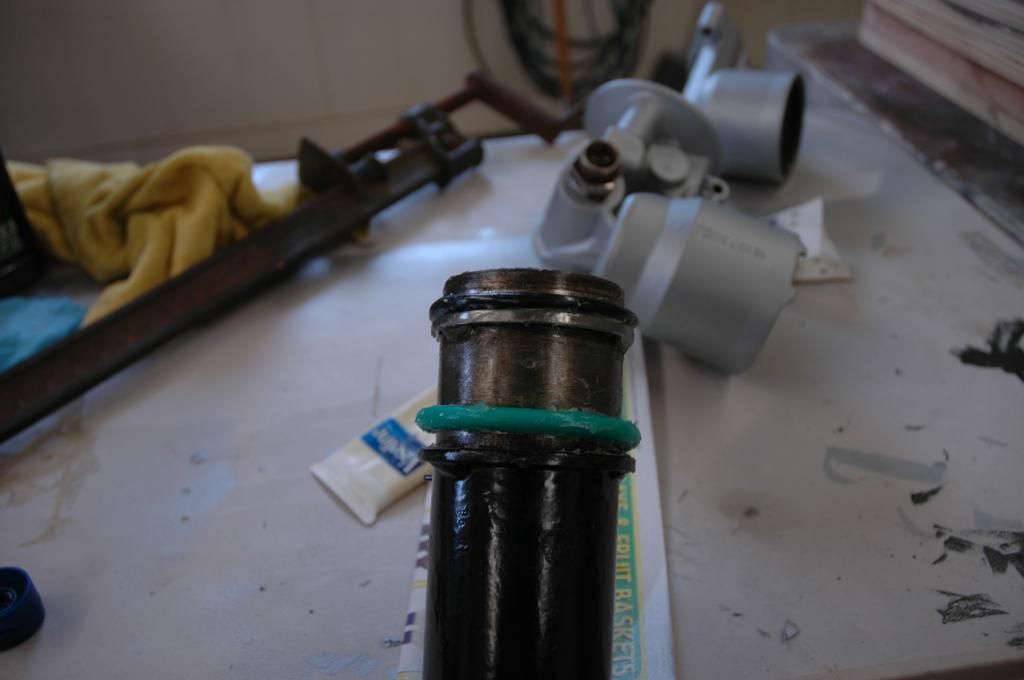
And a racket strap to compress it. Worked well
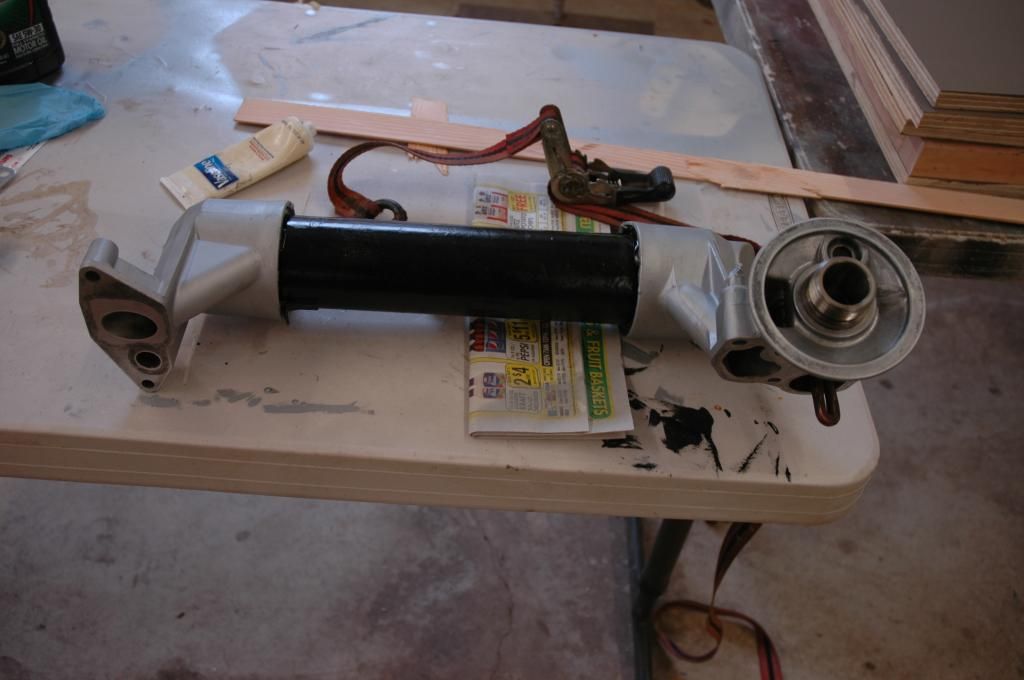
And it goes on, shop is slowly loosing clutter.
Look what else showed up!
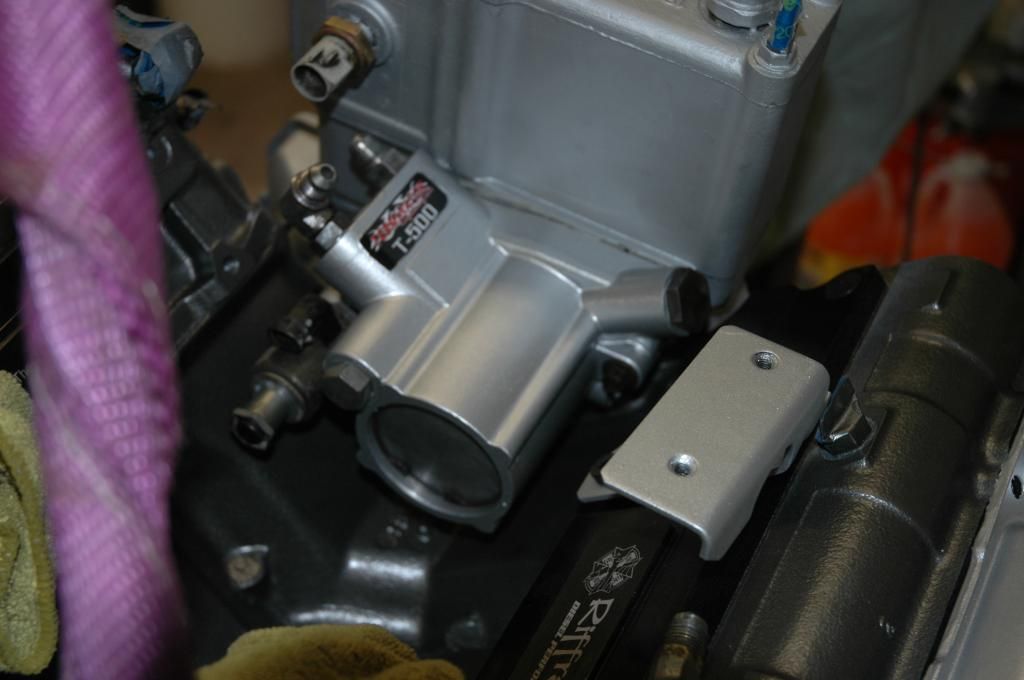
Then tapped things off again..
Painty painty
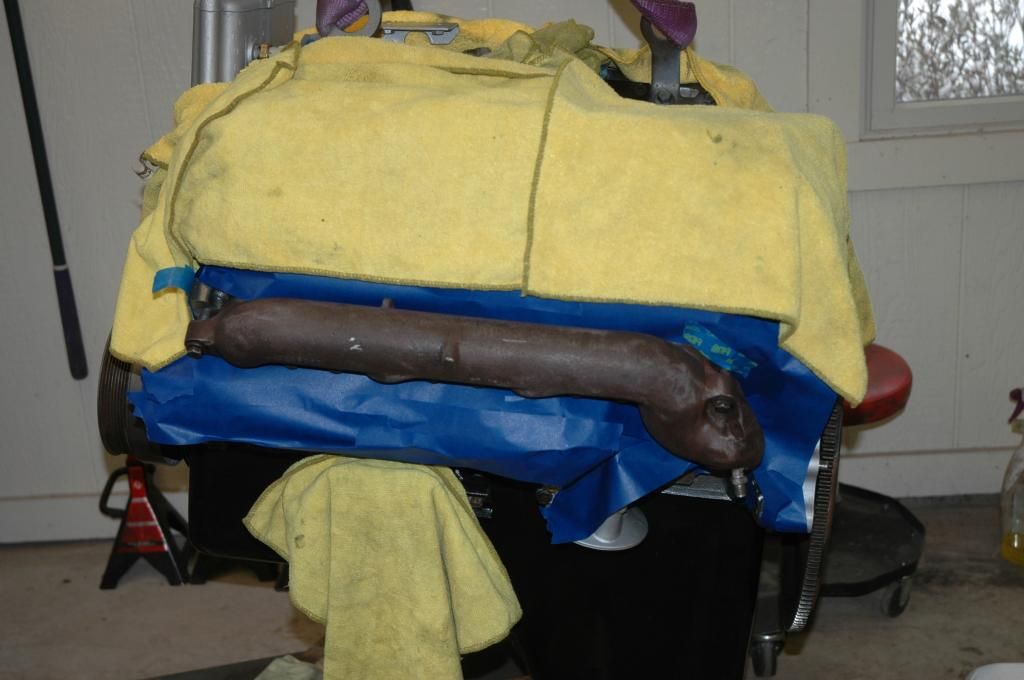
And this is how she is looking
Hoping to get the TConverter this week and be able to put this back into the truck.
-Andrew
Bought this valve spring compressor tool off amazon for 17 bucks. Did the job fine. Cant use this in truck I guess, but of course thats not the case here so got it done.

Once compressed, get a magnet and grab the keepers out. In most cases, I had to push the spring around a bit in order for them to let the keepers go.

After that, the spring comes right out. Take the top plate and put it on the comp springs and compress them for install. Coat the new valve seal in oil and the shim goes on first, then the valve seal.


Put the new compressed spring over the seal, and work the keepers back in (this is a task on some, depends if the spring compresses perfectly or not), And you are done. Repeat 16 times.
Once done, the valve train components can go back on and new take up space. I am using some Permatex assembly lube.

Cant remember the torque spec on the rocker arm hold down bolts, but I found them on this site somewhere.
And looky what else showed up on friday! My injectors made it back,

And they are going in shiny new cups, which have had time to cure now.

Got them all in, the top down bolt is bottomed out on shoulder at 120 INCH/Lbs, and the lower hold down bolt is torqued to 120 INCH/Lbs (it will not bottom out).
Either my hands arnt manly enough, or the new orings were tight, but I needed to gently use a rubber mallet to fully seat the injectors.

Then the oil deflectors, they go to 106 Inch/Lbs


Next, I had some suspect looking exhaust manifold bolts, so I decided to risk it and try replacing them one at a time with good ones. Not all of them looked bad, only 5. I got really lucky and didn't have any break on me. So got them changed while the motor was out.

These are the ones that looked bad to me


There are the 5 I removed, the one on the far right had some chipping on the head.

Then it was oil cooler time.

I used vaseline

And a racket strap to compress it. Worked well


And it goes on, shop is slowly loosing clutter.

Look what else showed up!

Then tapped things off again..

Painty painty


And this is how she is looking


Hoping to get the TConverter this week and be able to put this back into the truck.
-Andrew
#159
03-01-2015, 08:45 PM
Post Fiend
#160
03-01-2015, 09:10 PM
#161
03-02-2015, 06:51 AM
Looks good.
One quick tip on the Injector Sleeve Extraction.
Never, Never, Never use a penny to plug the hole.
I used to do this until one sleeve bottom broke off in the head (many of the sleeves fail this way) and the penny disappeared into the head water passages.
You should always just cut a piece of rag and stuff down in the sleeve to block the nozzle hole. You can at least grab that with long remote fingers or something, the penny isn't even magnetic and you're stuck pulling the head like I did.
__________________
'96 7.3 F-350 Reg Cab 4x4 - bought new.
'04 6.0 E-350 custom 4x4
'08 6.4 F-550 Reg Cab 6 spd 4x4
'17 6.7 F-250 KR ccsb 4x4
'96 7.3 F-350 Reg Cab 4x4 - bought new.
'04 6.0 E-350 custom 4x4
'08 6.4 F-550 Reg Cab 6 spd 4x4
'17 6.7 F-250 KR ccsb 4x4
#162
03-02-2015, 09:03 AM
Join Date: Mar 2007
Posts: 256
Likes: 0
Received 0 Likes
on
0 Posts
Looks good.
One quick tip on the Injector Sleeve Extraction.
Never, Never, Never use a penny to plug the hole.
I used to do this until one sleeve bottom broke off in the head (many of the sleeves fail this way) and the penny disappeared into the head water passages.
You should always just cut a piece of rag and stuff down in the sleeve to block the nozzle hole. You can at least grab that with long remote fingers or something, the penny isn't even magnetic and you're stuck pulling the head like I did.
One quick tip on the Injector Sleeve Extraction.
Never, Never, Never use a penny to plug the hole.
I used to do this until one sleeve bottom broke off in the head (many of the sleeves fail this way) and the penny disappeared into the head water passages.
You should always just cut a piece of rag and stuff down in the sleeve to block the nozzle hole. You can at least grab that with long remote fingers or something, the penny isn't even magnetic and you're stuck pulling the head like I did.
#163
03-02-2015, 10:56 AM
Join Date: Mar 2007
Posts: 256
Likes: 0
Received 0 Likes
on
0 Posts
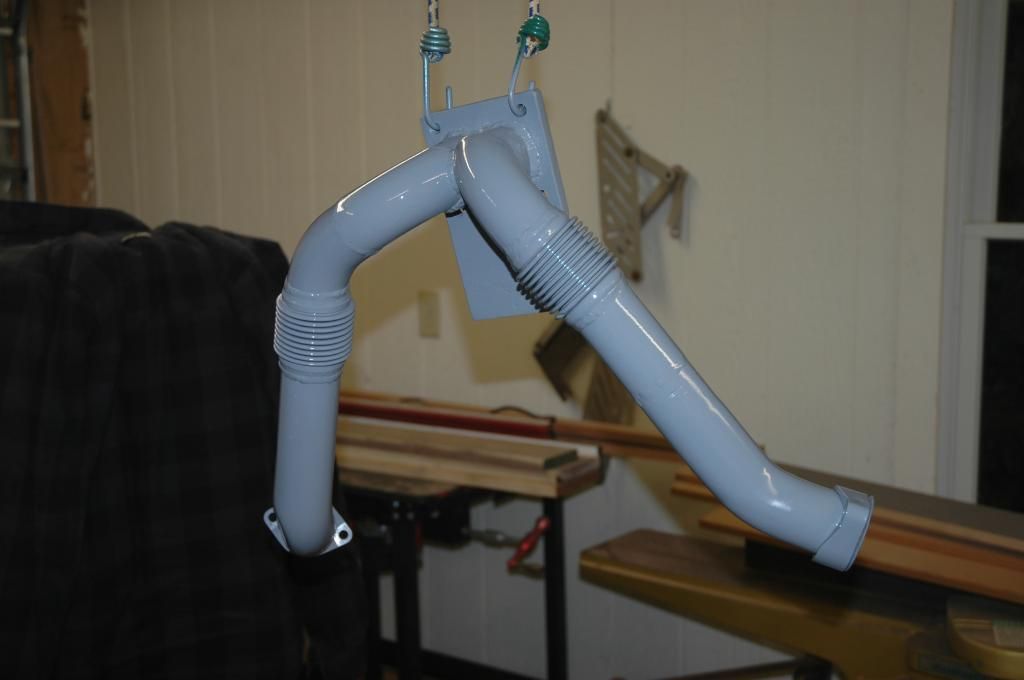
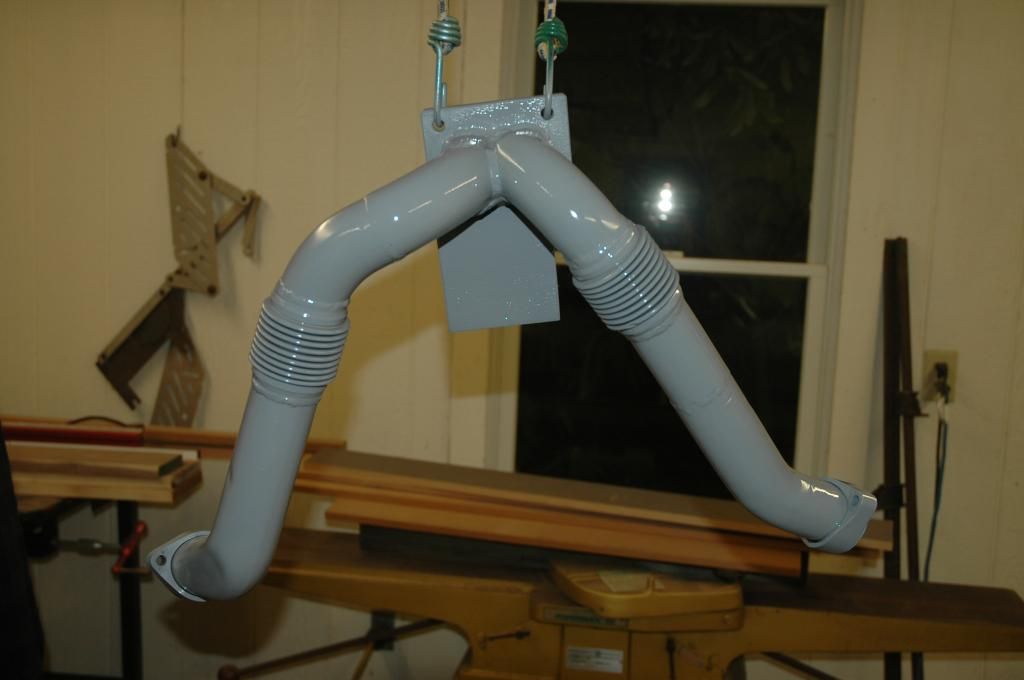
I'll also throw this out there. I built these bellowed up pipes back when I was originally going to keep stock turbo. I now no longer need them. Should fit a stock OBS turbo set just fine. Have gaskets with them. I'll let them go for what I have into them, about 100 bucks plus the ride.
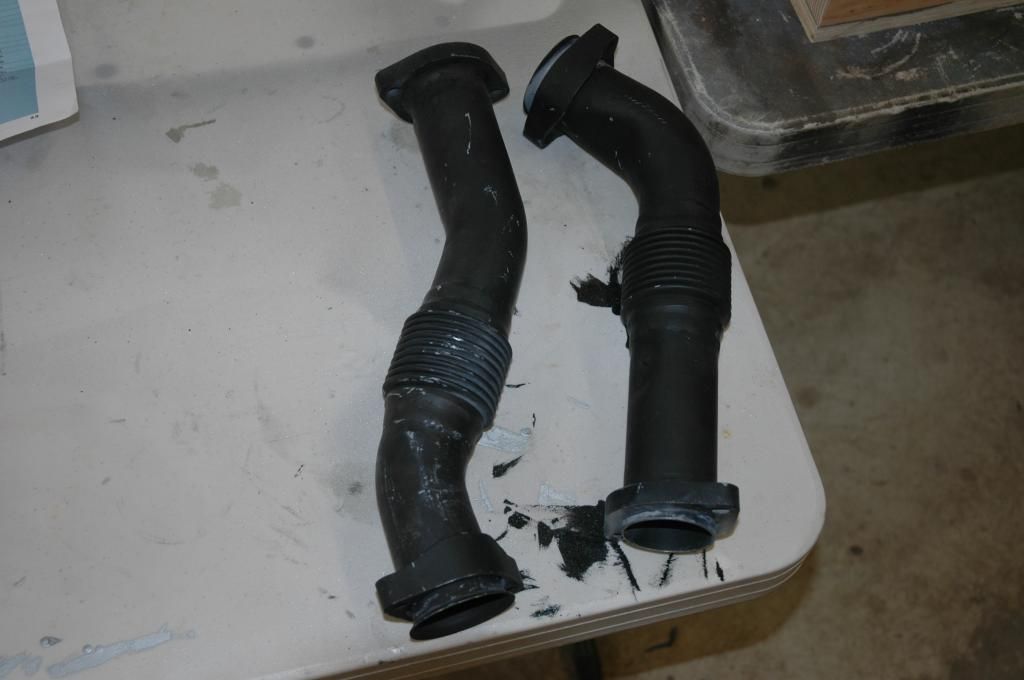
Just shoot me a message, would like to see them put to good use.
-Andrew

Just shoot me a message, would like to see them put to good use.
-Andrew
#164
03-02-2015, 11:55 AM
Postmaster
#165
03-02-2015, 12:04 PM
Postmaster