Lets do it again! 1951 Ford F1 LT1 supercharged, 4L80E, EFI, jag IFS, etc..
#376
 04-22-2016, 04:55 PM


#378
04-23-2016, 03:09 PM
LOL guru? not me, I knew nothing about it before seeing it done here by others, so I cant take the credit. But once I used it I found the jag setup just seems to be the perfect width for the old junker cars I deal with, and the good brakes and rack and pinion just seal the deal.
If the crown vic IFS wasn't so wide I would be using it, but it is just too wide. If I get into the 1960s trucks I think it would fit better.
The jag for the F1 is a no brainer, it fits so well it is amazing. Just remember to do the front sway bar mounts before boxing the front rails, got bit on that one with truck #1 and did it right on truck #2. We are all still learning, it is what makes this hobby fun.
Good luck with your build, it is coming along great!
#379
07-15-2016, 09:13 PM
Wow time flies, but actually looks like I will get to finish this up in between other projects! I think it has been long enough judging by the dust on the dash!
Nova thrash done and leaves next week
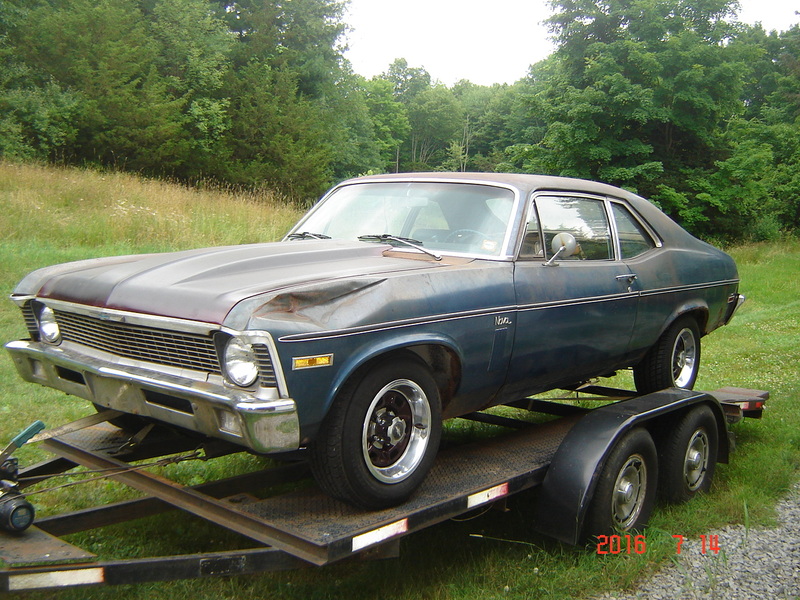
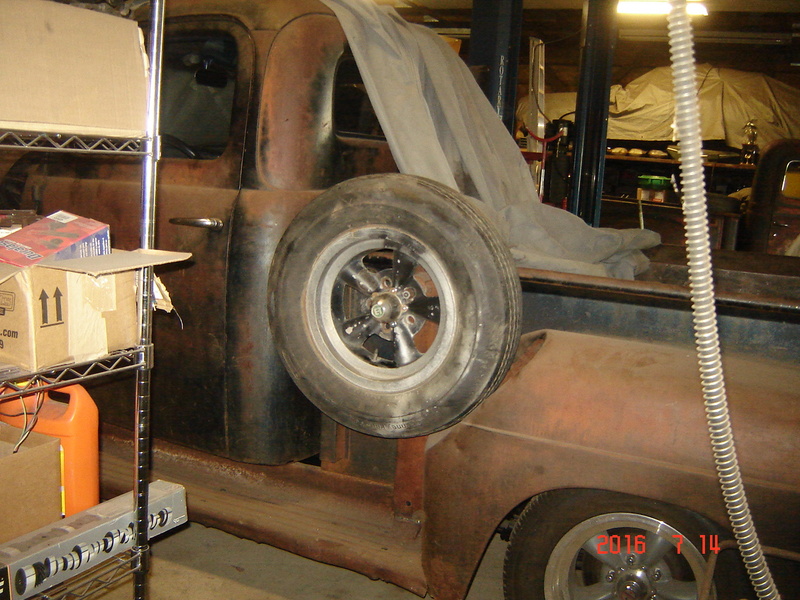
Got my super special spare tire mounted
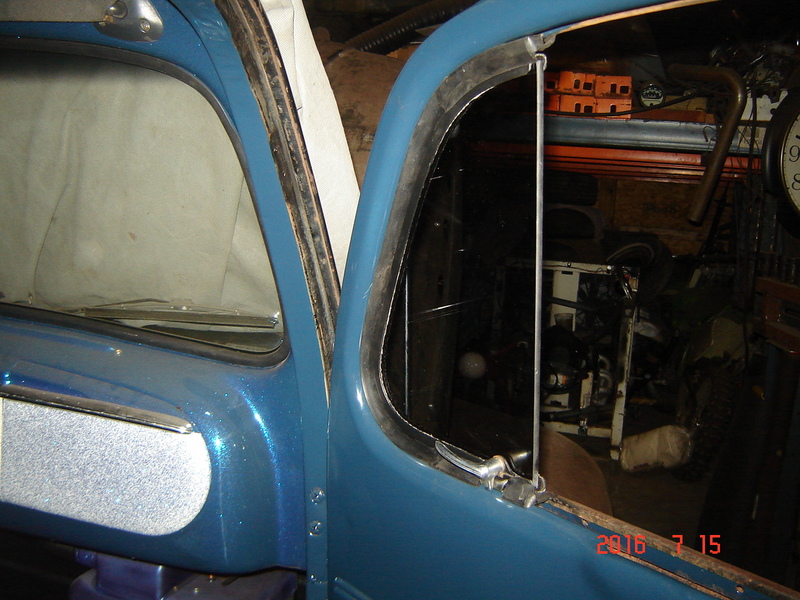
Got the passenger side vent window rebuilt with new glass and rubber, then ran out of time. Door assembly will continue.
Once the doors are done there should not much else left. Dome light, rear license plate light, radio, speakers, tail gate, and some tail pipes. This thing is LOUD, if the tail pipes dont quiet it down enough I will be changing mufflers and putting on the electric cutouts
Nova thrash done and leaves next week

Got my super special spare tire mounted

Got the passenger side vent window rebuilt with new glass and rubber, then ran out of time. Door assembly will continue.

Once the doors are done there should not much else left. Dome light, rear license plate light, radio, speakers, tail gate, and some tail pipes. This thing is LOUD, if the tail pipes dont quiet it down enough I will be changing mufflers and putting on the electric cutouts
#380
07-19-2016, 08:38 PM


#381
07-23-2016, 07:15 PM
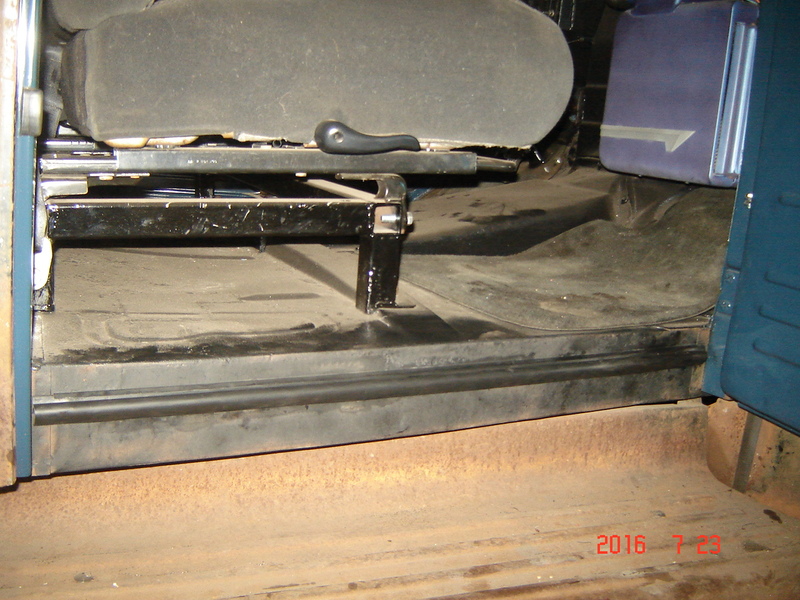
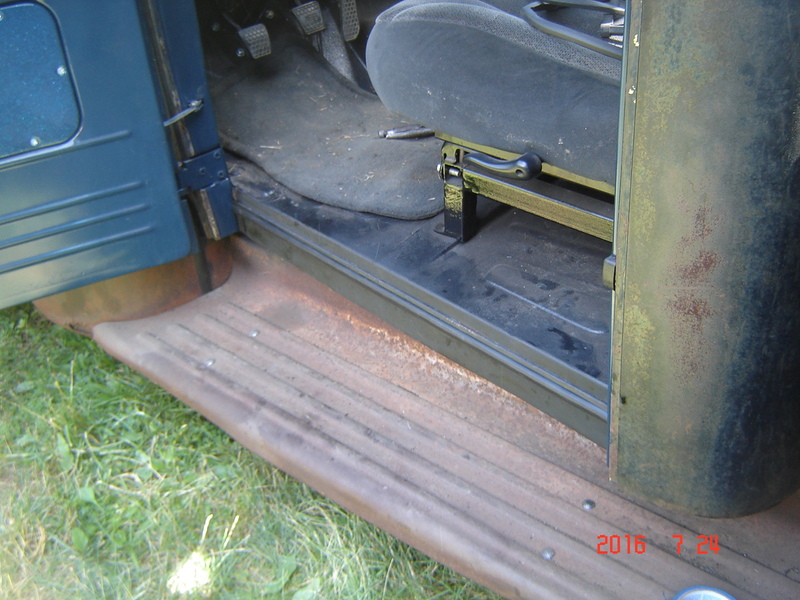
Both doors assembled, just have to clean up the inside door handles and put them on.
Knocking out the mini projects to get this truck finished.
Replaced the right side lower door channel, original was rusted out. Drilled some holes in it and plug welded to the rocker.
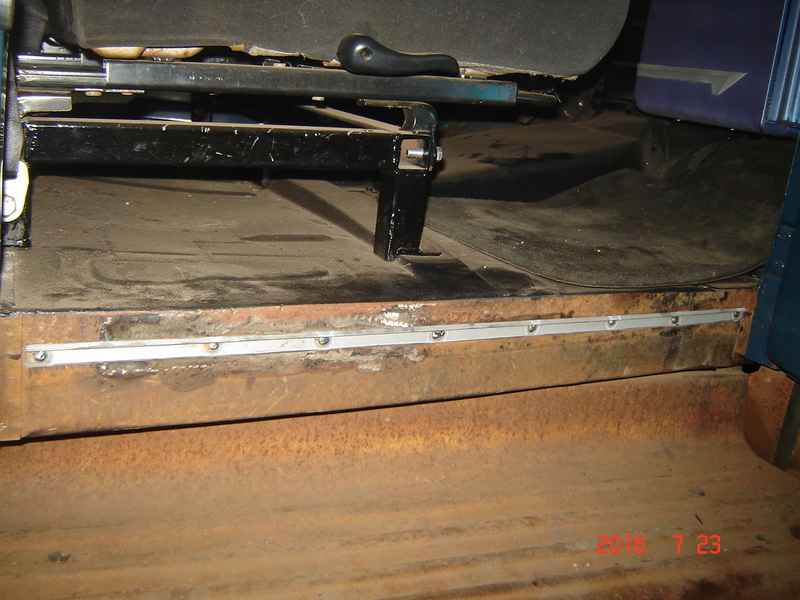
Ground down the welds, quick spray and put the seal in. Seal was a tight fit but I found that it was easiest to fit the seal into the upper half of the channel first and then work the lower half in. Went pretty quick that way.
I was going to save the original drivers side channel but it looks like the seal will not fit it, I may try prying it open more before swapping it out.
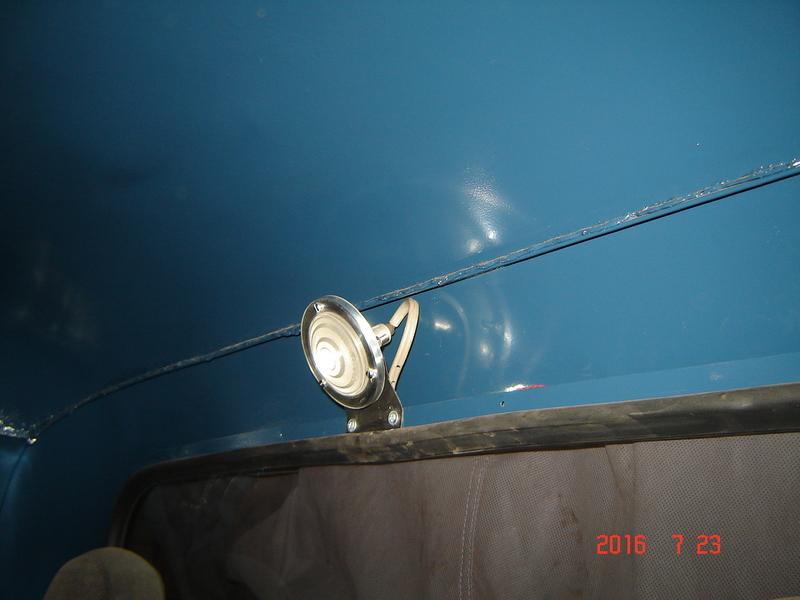
Also made a quick bracket for my low buck dome light and installed. Works off either door or the headlight switch.

#383
07-24-2016, 07:55 AM
#384
07-24-2016, 08:38 AM
#385
07-24-2016, 08:14 PM
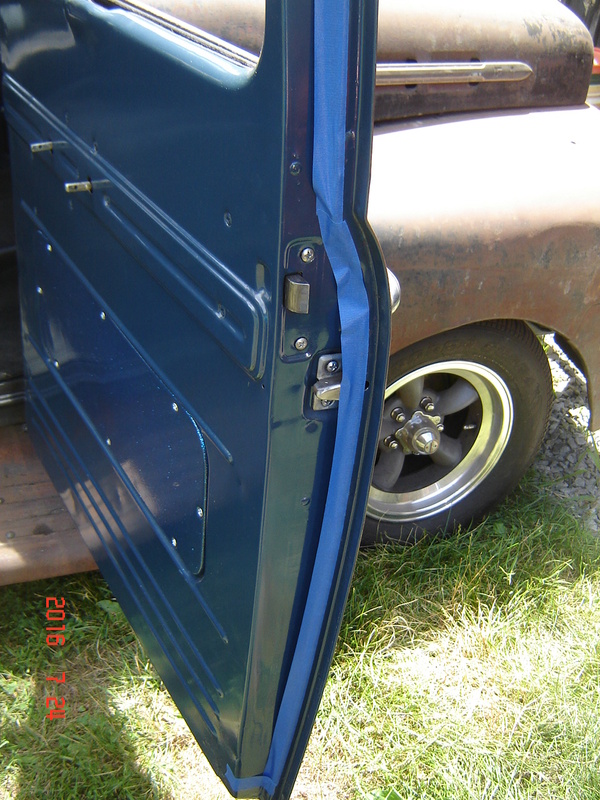
More stuff done today, and I actually got the new lower door seal to fit into the original seal channel.
Opened upper and lower edges a little with an adjustable wrench
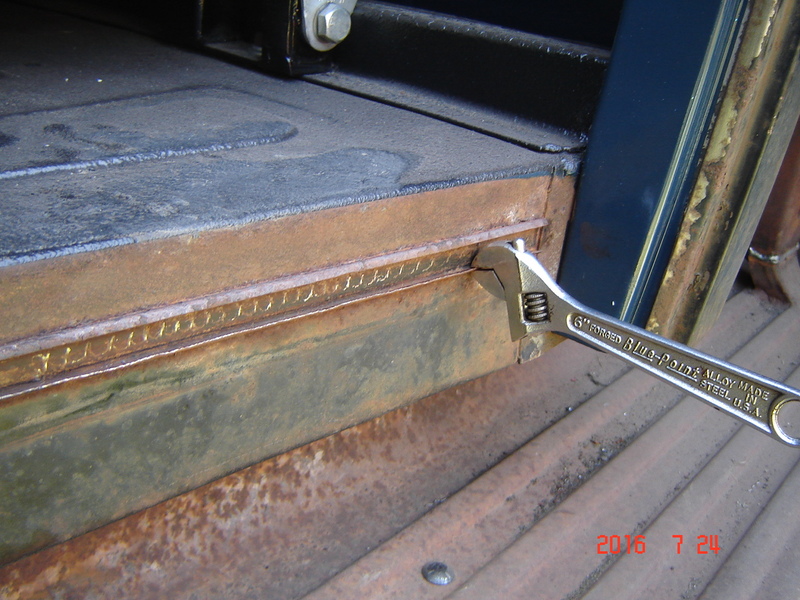
And I was able to install the seal the same was as the other side, slid up into the upper part first and then compressed up into the lower edge. I put some WD40 on the seal first to make it easier to slip into position. Fit fine, just as good as the other side with the new channel.

#386
07-25-2016, 03:01 PM
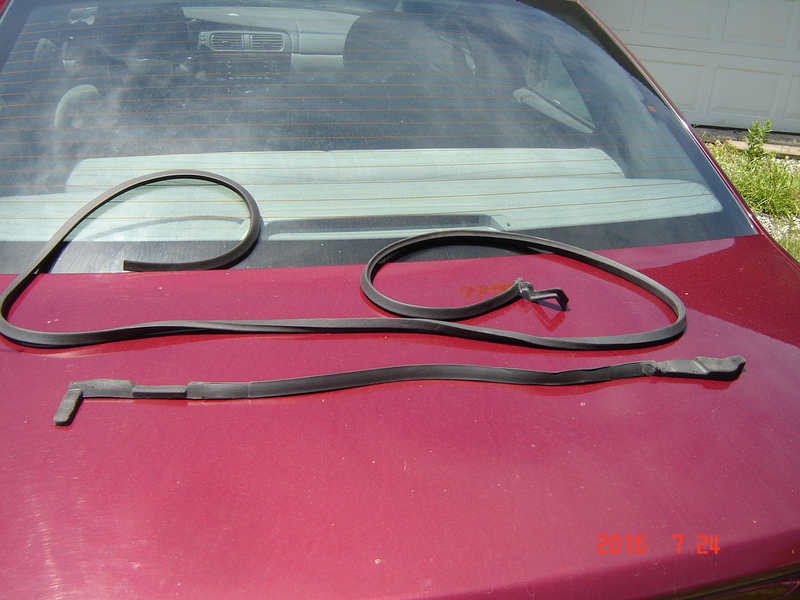
Door weatherstripping done yesterday as well. This is solid core rubber but very soft and pliable. Came in two piece sections for each door. I let them sit in the sun while I got ready for the install.
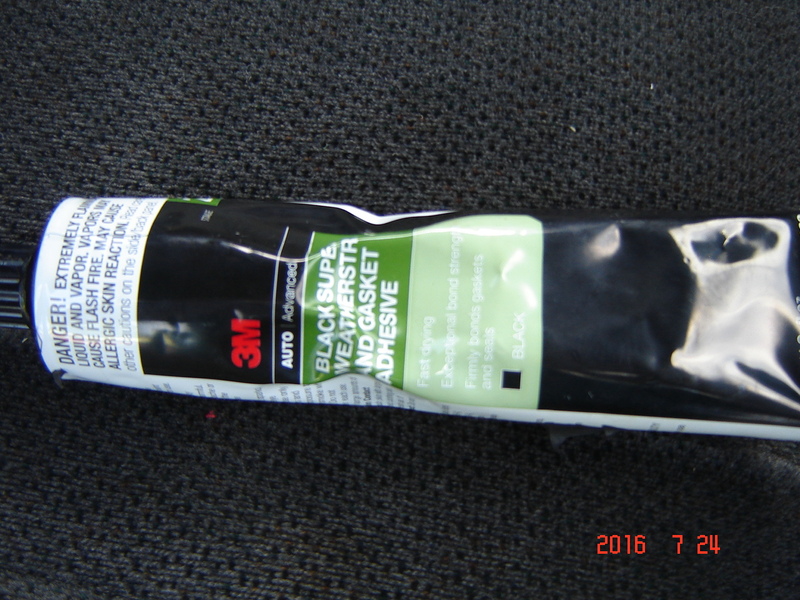
Using this adhesive
Taped off an edge so I could spread the adhesive in place and not get it all over. I did the lower section first.
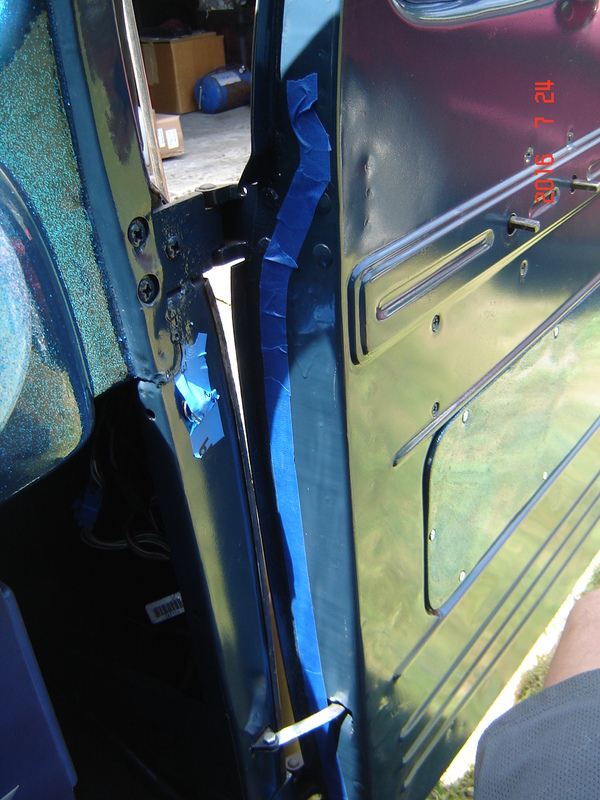
I cleaned the door and the rubber with solvent and then spread a thin layer of adhesive on both parts. Let them dry 5 minutes or so until the adhesive was dry. It was probably 90 degrees out so it dried fast. Then I just stuck the rubber piece to the door. The adhesive is a contact cement and sticks to itself VERY well, you get one shot and it is not easy working alone to get the rubber in place without it sticking to itself or in the wrong spot.
First piece in
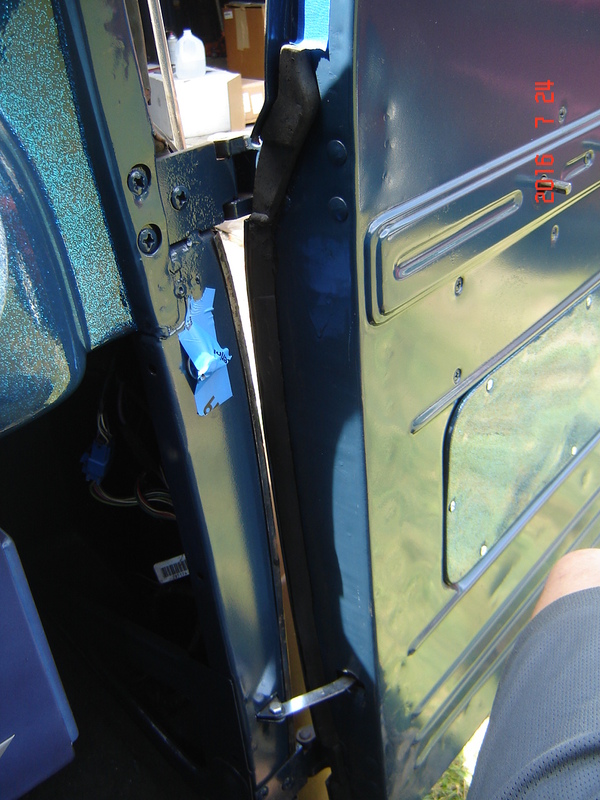
Taped off for next piece, then same deal, adhesive spread thinly on the door and the rubber. I put a bead on the parts and spread it out with my finger wearing latex gloves.
Second piece in. The tape was removed after the rubber was installed. Second piece was long, so it was trimmed to fit up with the first piece that was already on the door.
Both of my doors before the rubber install needed a good push to close, not slammed, but a light push would not get the door fully latched. After the rubber install there was no change with the right side door, closed exactly the same. Left side was tougher to close so I had to adjust the striker outward, after that it was back to normal.
Fit seems good, only place I can see a gap is the rear lower corner of the door, it looks like the rubber isn't molded to the exact shape needed. Not a big deal, I doubt it will be an issue.
One more thing off the list!

Using this adhesive

Taped off an edge so I could spread the adhesive in place and not get it all over. I did the lower section first.

I cleaned the door and the rubber with solvent and then spread a thin layer of adhesive on both parts. Let them dry 5 minutes or so until the adhesive was dry. It was probably 90 degrees out so it dried fast. Then I just stuck the rubber piece to the door. The adhesive is a contact cement and sticks to itself VERY well, you get one shot and it is not easy working alone to get the rubber in place without it sticking to itself or in the wrong spot.
First piece in

Taped off for next piece, then same deal, adhesive spread thinly on the door and the rubber. I put a bead on the parts and spread it out with my finger wearing latex gloves.

Second piece in. The tape was removed after the rubber was installed. Second piece was long, so it was trimmed to fit up with the first piece that was already on the door.

Both of my doors before the rubber install needed a good push to close, not slammed, but a light push would not get the door fully latched. After the rubber install there was no change with the right side door, closed exactly the same. Left side was tougher to close so I had to adjust the striker outward, after that it was back to normal.
Fit seems good, only place I can see a gap is the rear lower corner of the door, it looks like the rubber isn't molded to the exact shape needed. Not a big deal, I doubt it will be an issue.
One more thing off the list!
#387
07-25-2016, 04:35 PM
#388
07-28-2016, 02:55 PM
Thanks, weatherstripping has always intimidated me for the same reasons, but the older I get the more I just say "who cares just do it" and it gets done.
Another update
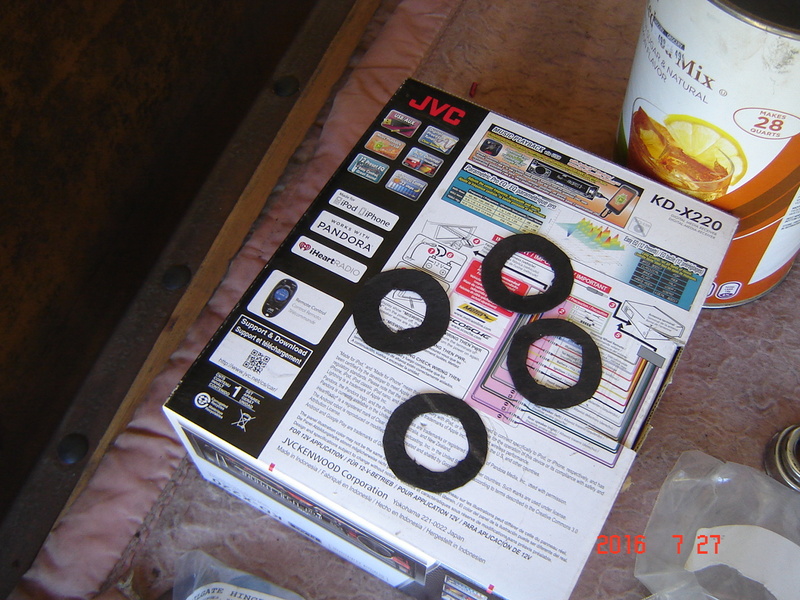
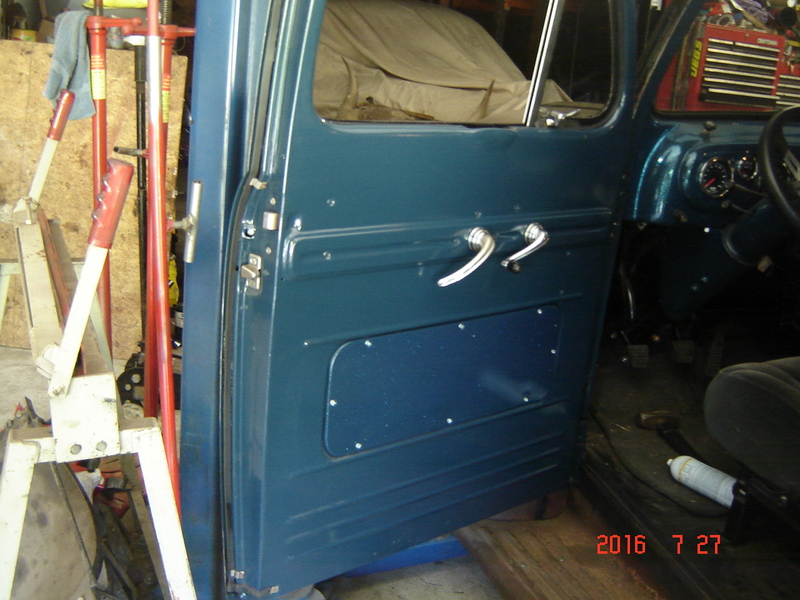
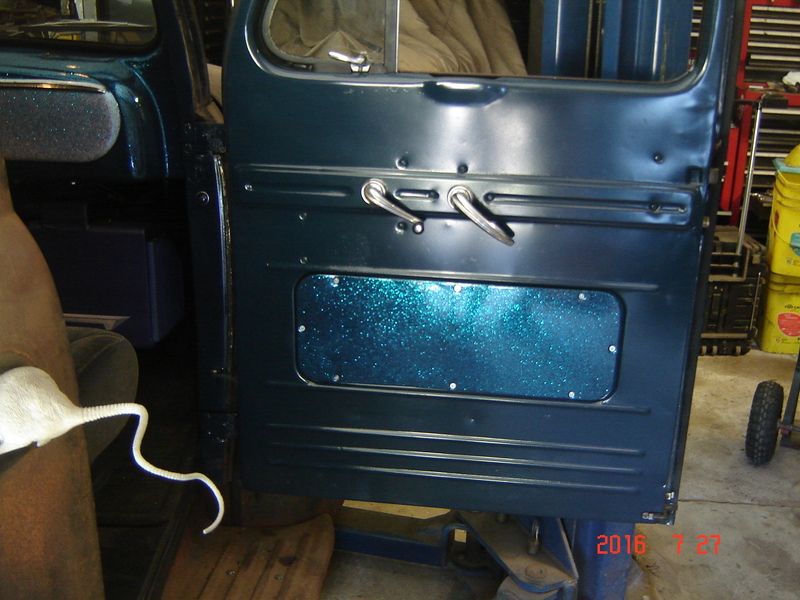
Finishing up the doors, made some gaskets out of roofing felt for the door handles to keep the paint from getting torn up.
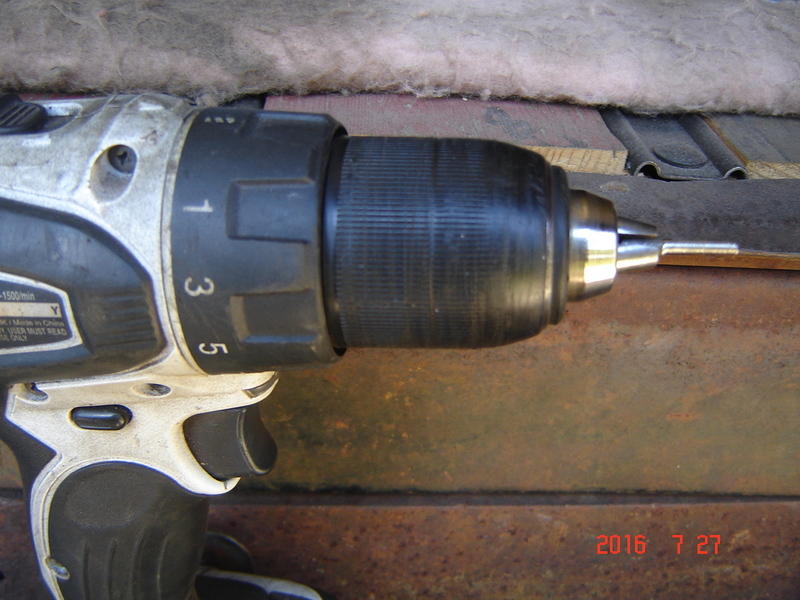
I was missing of the door handle pins, found a piece of steel rod and turned down a new pin in the hand held lathe
Side of a cutting disc in a grinder laying on the rod while it was spinning in the drill worked great to get the right size.
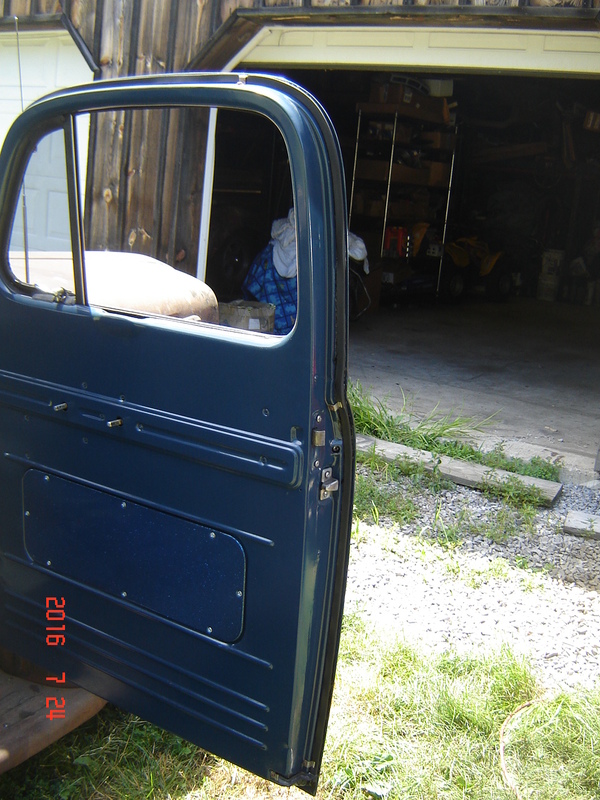
Doors done
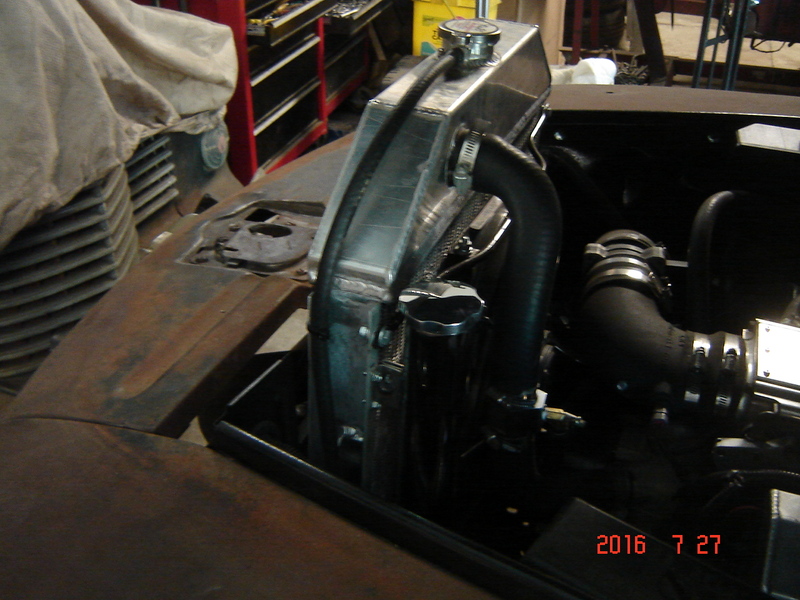
My overly fancy overflow bottle
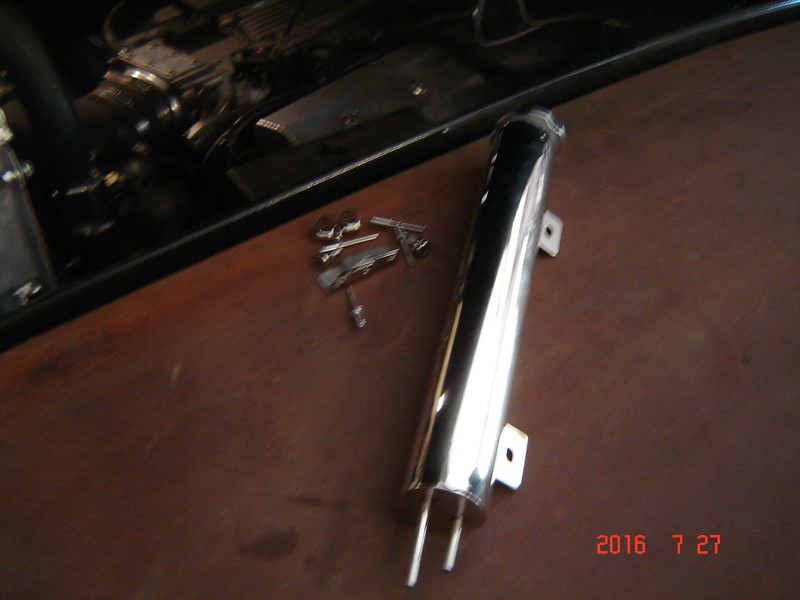
Installed
Another update
Finishing up the doors, made some gaskets out of roofing felt for the door handles to keep the paint from getting torn up.

I was missing of the door handle pins, found a piece of steel rod and turned down a new pin in the hand held lathe
Side of a cutting disc in a grinder laying on the rod while it was spinning in the drill worked great to get the right size.

Doors done


My overly fancy overflow bottle

Installed

#389
07-29-2016, 12:15 PM
Another small update to make the truck a little different. I had the usual holes drilled in the tops of the fenders for the add on turn signals, and rather than just fill the holes I picked up these 1959 T bird fender ornaments.
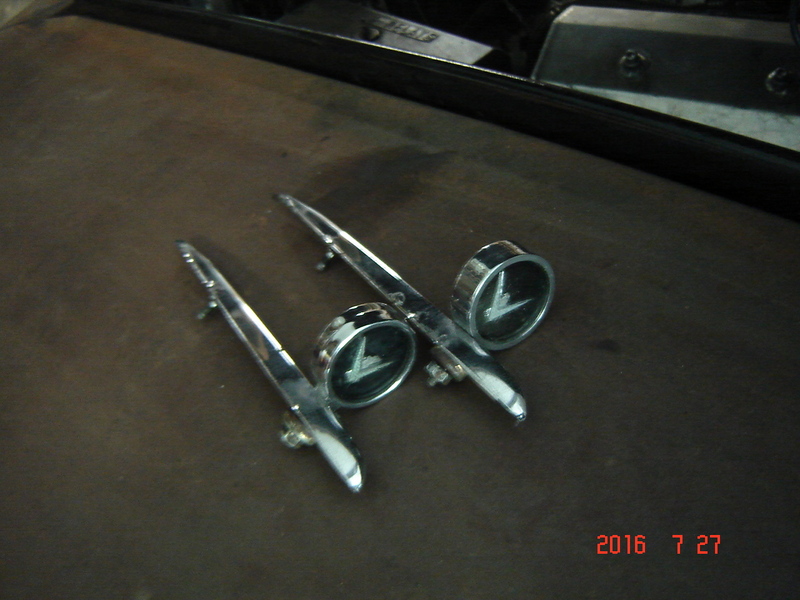
Installed, I think they are pretty cool.
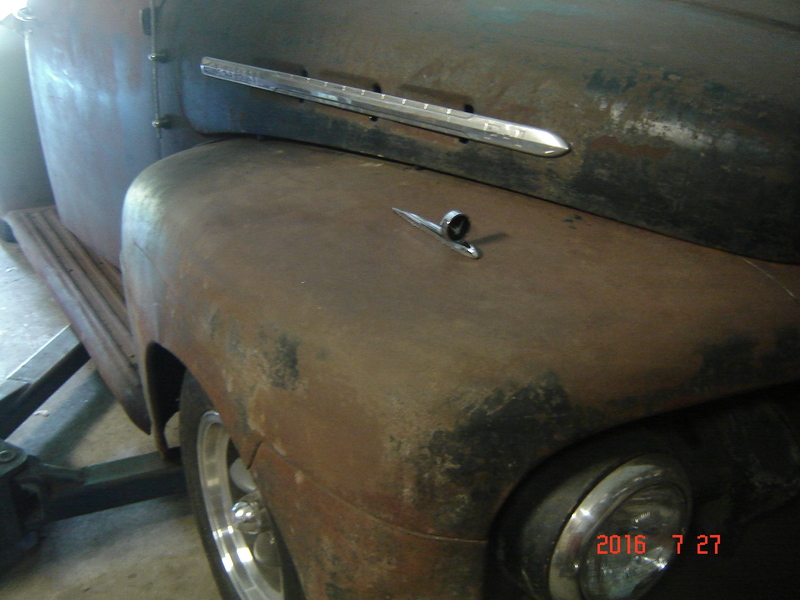
Also I took the truck out for a quick run up and down the road, still work to do but I couldn't wait. It goes good

Installed, I think they are pretty cool.

Also I took the truck out for a quick run up and down the road, still work to do but I couldn't wait. It goes good