Lets do it again! 1951 Ford F1 LT1 supercharged, 4L80E, EFI, jag IFS, etc..
#226
 05-29-2015, 05:51 AM


#227
06-15-2015, 09:38 PM
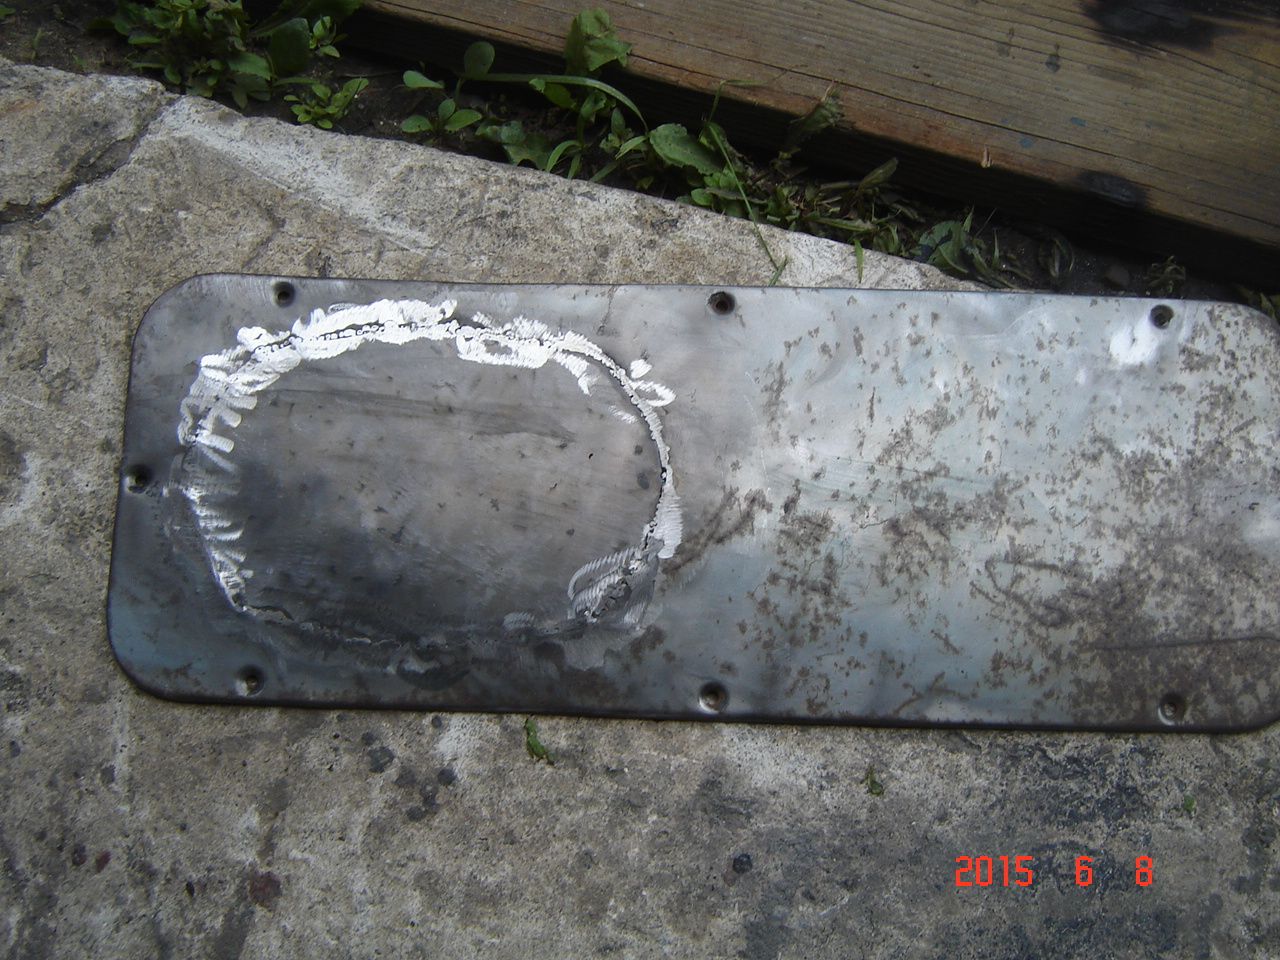
Been doing small stuff, keep forgetting to take pics of progress, lots of little stuff to do. One of my door inspection panels had a big speaker hole in it, trying to keep the budget down so patched it rather than replacement.
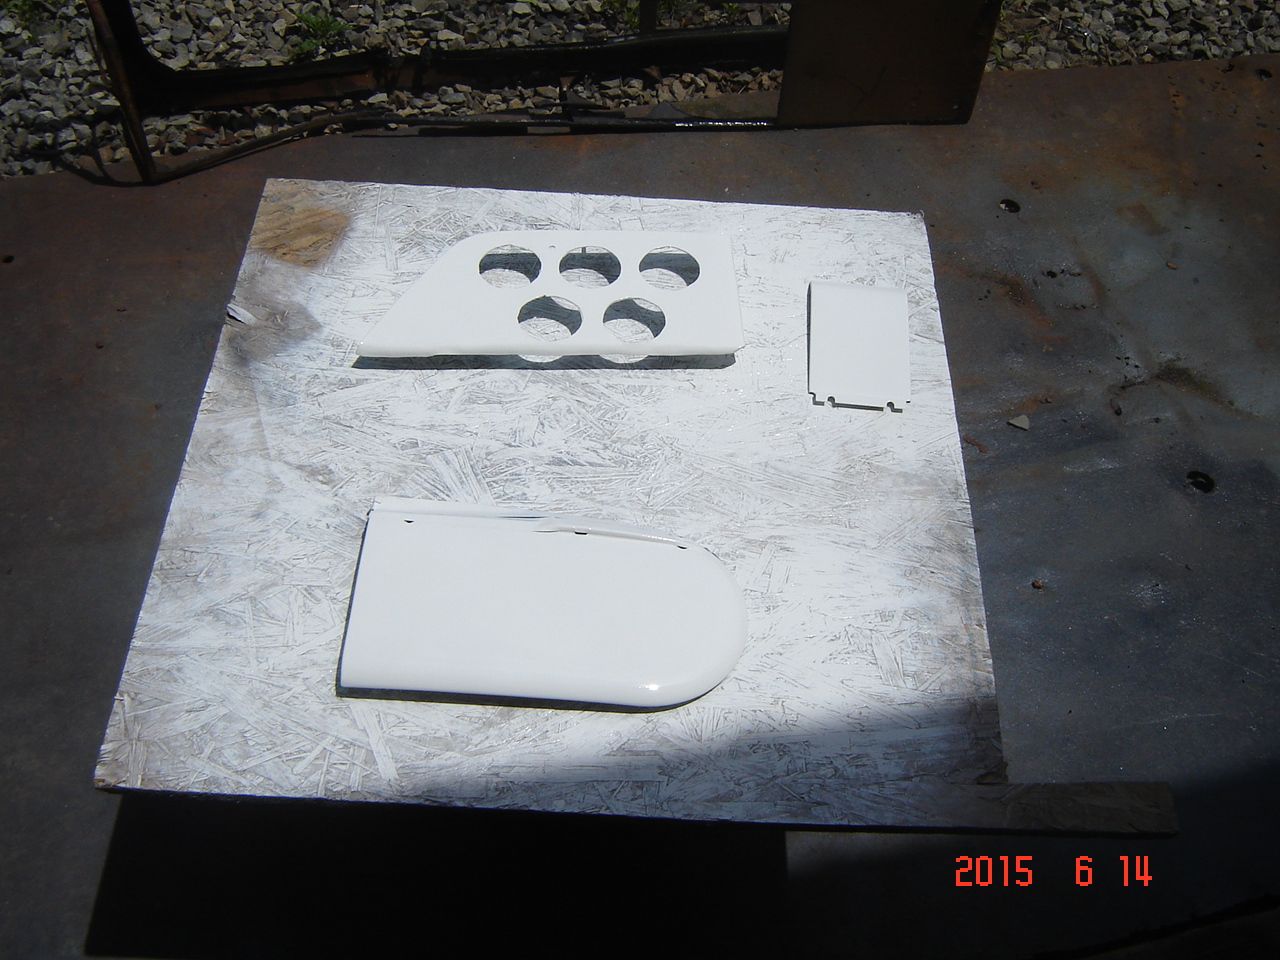
Two toning the dash so sprayed some white, top of the glove box door is the same blue as the cab.
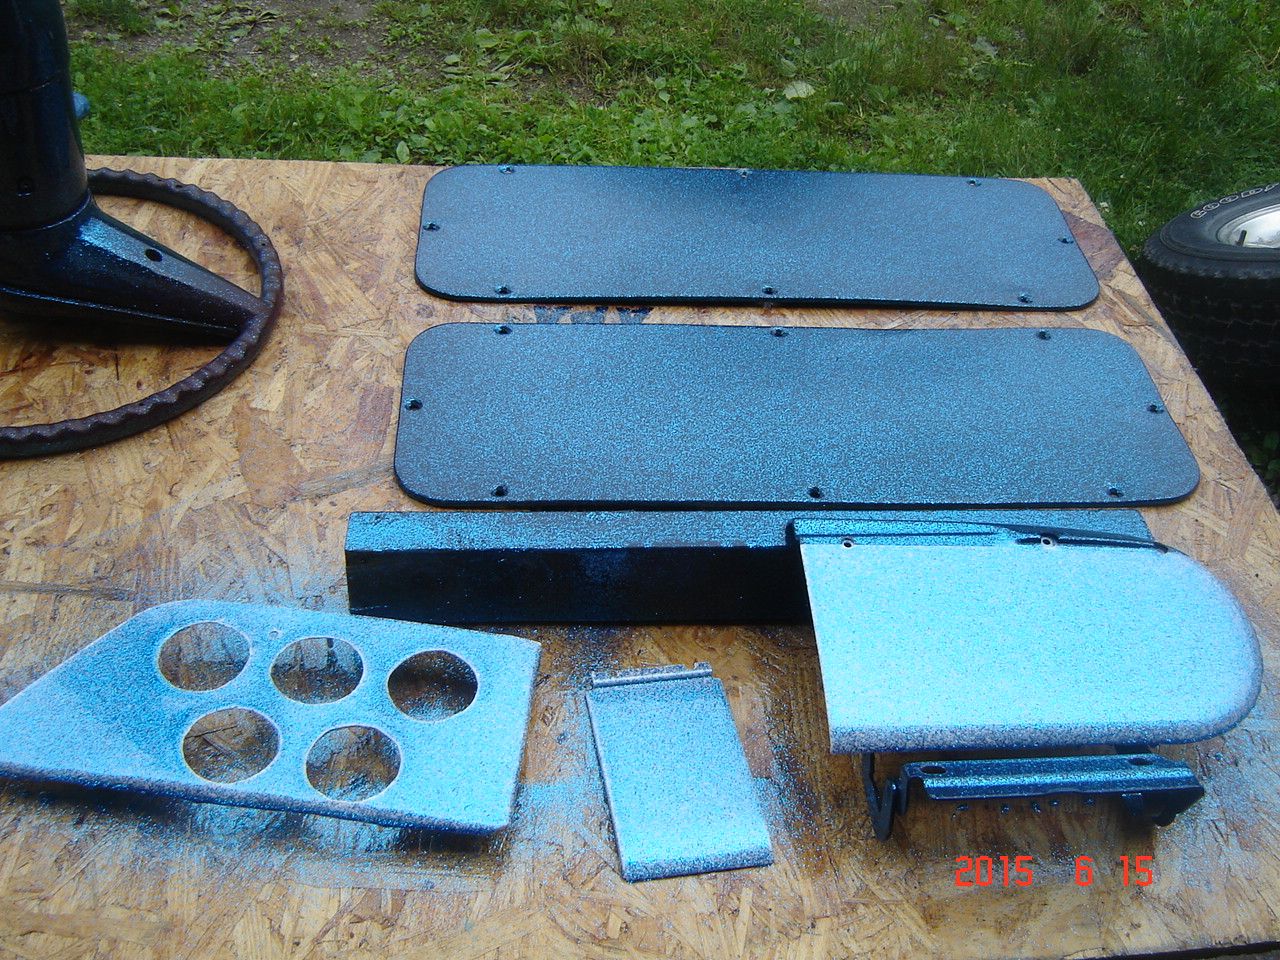
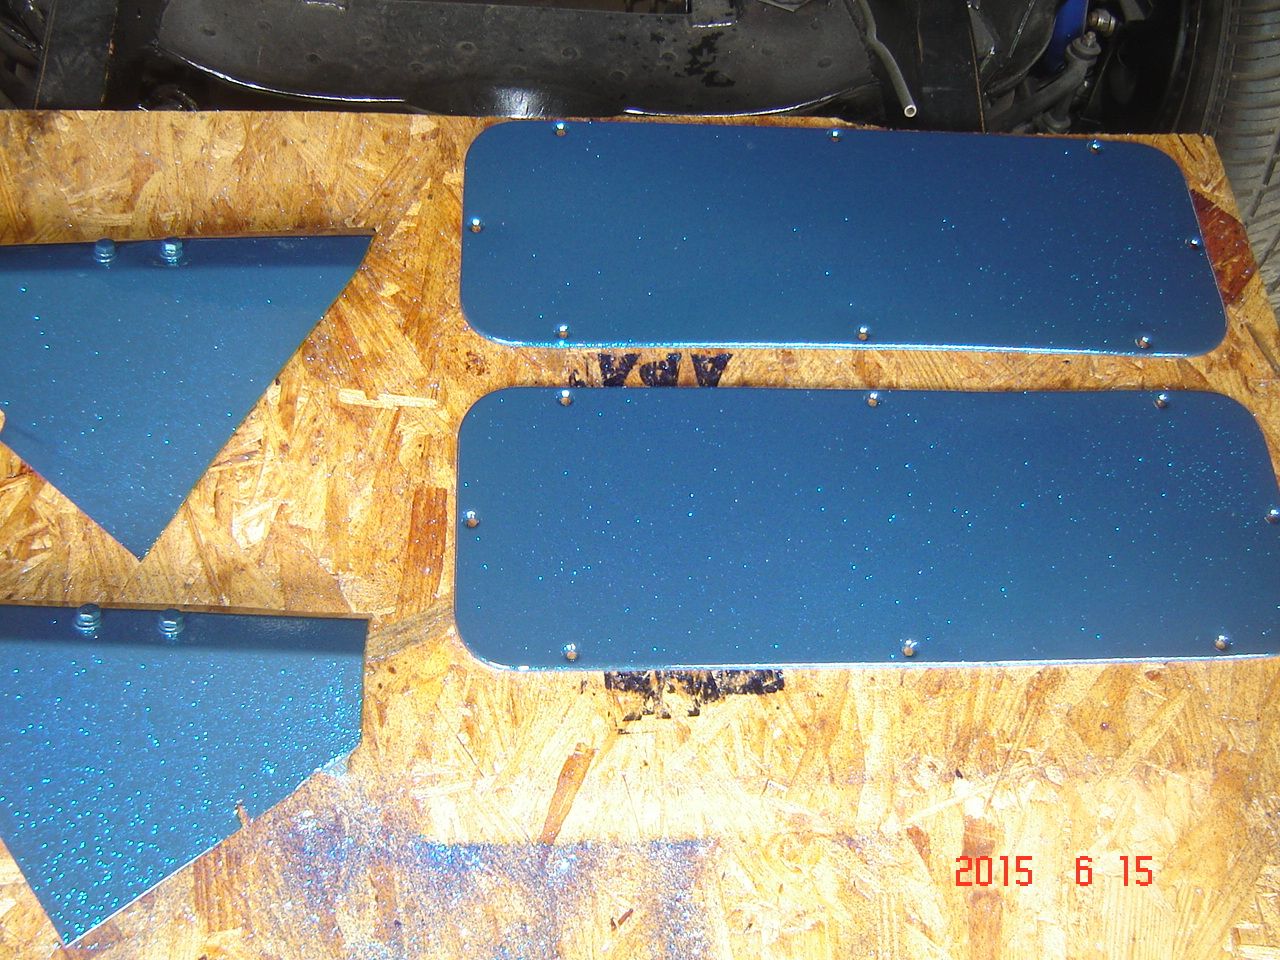
Sprayed some Roth Bad Azz Blue .015 flake on the dash parts today, should be spraying the dash tomorrow. Pretty sparkly, hard to show what it really looks like in pictures. Wife loves sparkles, I can guarantee the superchaged LT1 /4L80E combo will end up in this truck next year unless I can teach my wife how to drive the 6 speed. Should be fun
Once the paint is done the engine will go back in, let it out since it is easier to push the truck in and out of the shop as a roller, rather do the cab painting outside rather than inside.

Two toning the dash so sprayed some white, top of the glove box door is the same blue as the cab.

Sprayed some Roth Bad Azz Blue .015 flake on the dash parts today, should be spraying the dash tomorrow. Pretty sparkly, hard to show what it really looks like in pictures. Wife loves sparkles, I can guarantee the superchaged LT1 /4L80E combo will end up in this truck next year unless I can teach my wife how to drive the 6 speed. Should be fun


Once the paint is done the engine will go back in, let it out since it is easier to push the truck in and out of the shop as a roller, rather do the cab painting outside rather than inside.


#230
06-17-2015, 03:32 PM
Upside is I work cheap!Fun though isnt it doing it yourself? Even if it isn't perfect there is a special feeling driving something that you brought back from the dead. I always wonder about the history of these old cars and trucks and who used to drive them.
Also have to add that I think the majority of the guys here are building out of their own garages, at least the build threads I follow are home built stuff.
#231
06-22-2015, 10:23 AM

#232
06-22-2015, 10:47 AM
Nut and bolt clean up
Here is how I clean up most of the hardware for a build, I have a blast cabinet but this works great since I can do it while working on other stuff..I was doing this while I was getting the engine setup and back in the truck.
I was missing some door hardware and Denny (firstrider) was nice enough to send me some spares, here is how they looked in original state.
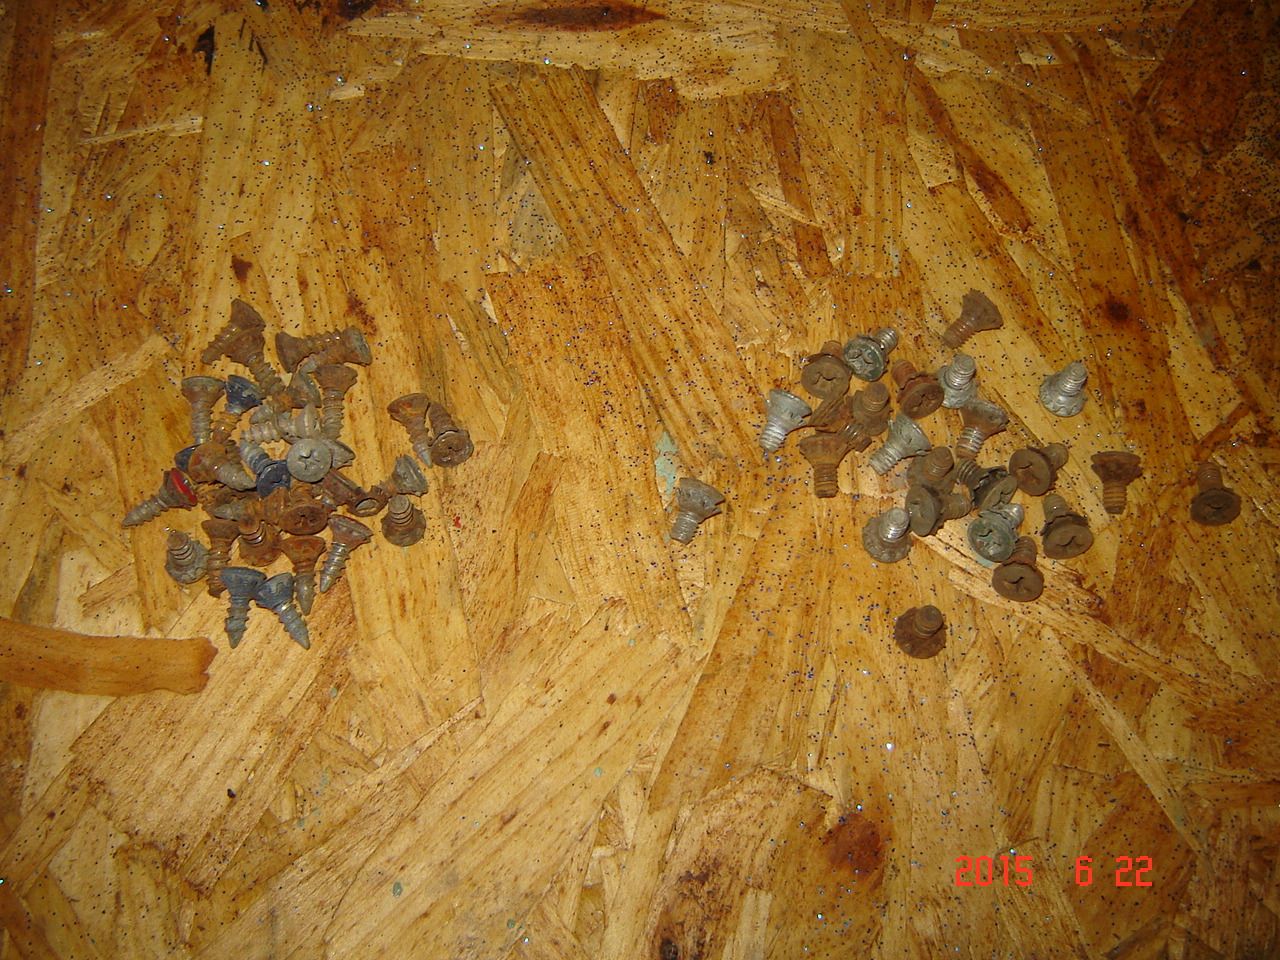
I keep some Prep and Etch in a plastic paint cup for this kind of stuff. It is sold at Home Depot.
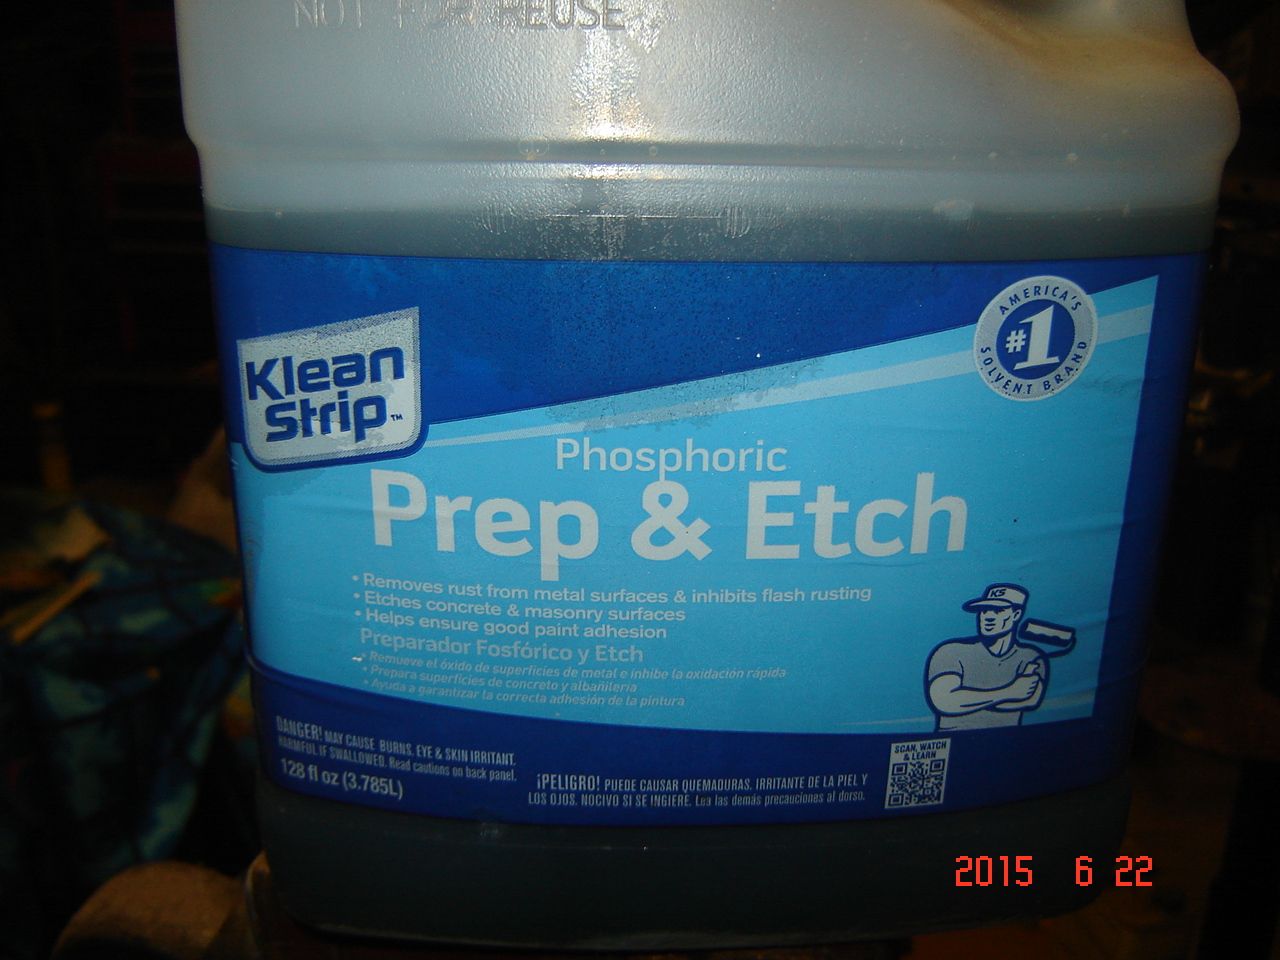
This is phosphoric acid, green in color. Mine in the cup is a nasty brown from being used, I use it until it stops working. Threw the screws in. The foaming action is the acid eating the rust.
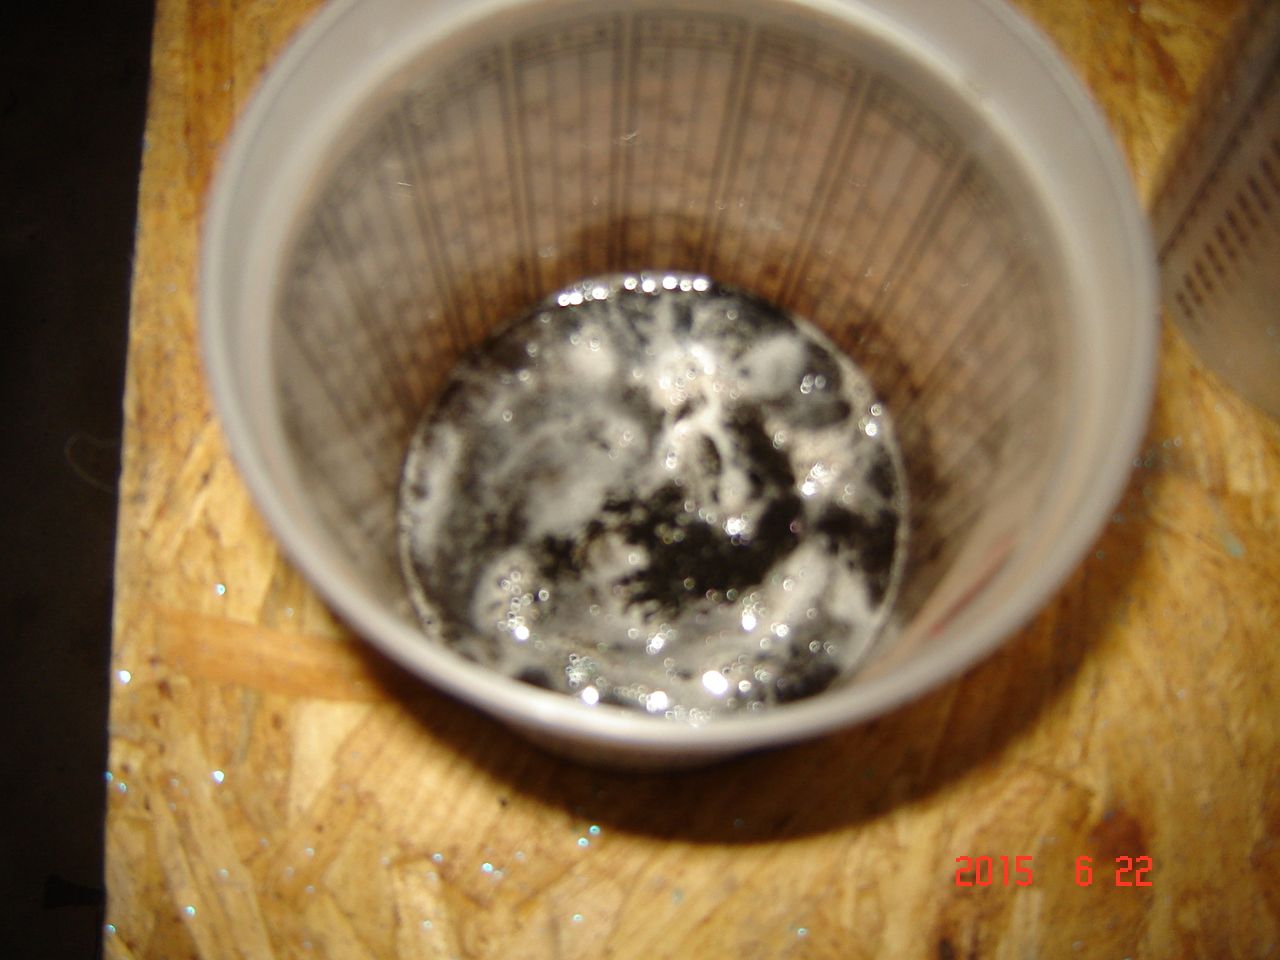
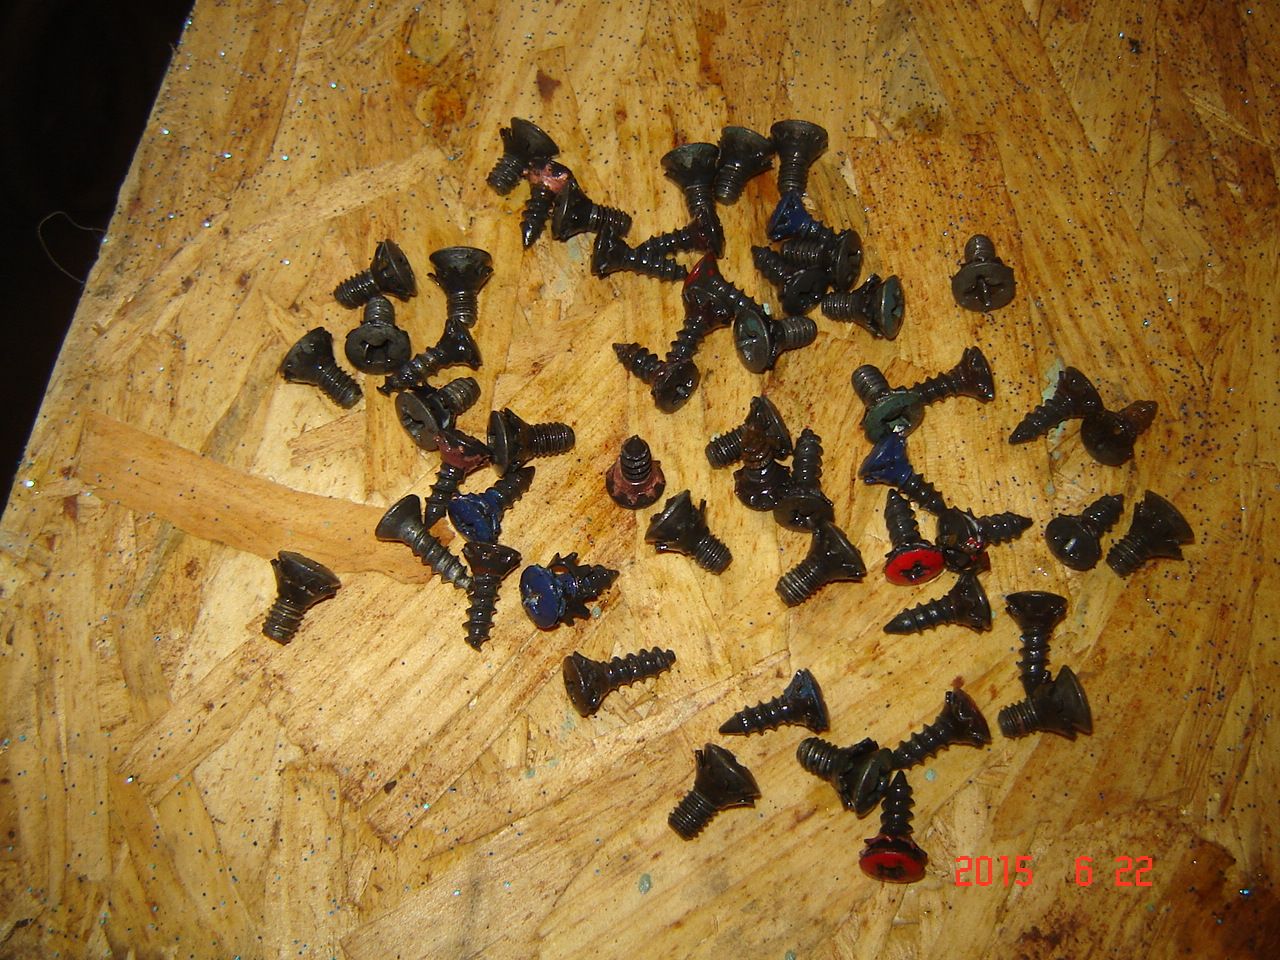
I use a paint strainer and strain the acid into another cup, then rinse off the screws with water. The acid leaves a nice grey phosphate coating that does not affect paint adhesion, in fact the metal etch actually helps paint stick. This is after 1 hour, dont want to leave them in there too long or the thin lock washers will disintegrate! And dont leave them longer than needed, if you forget about them for days it makes a big mess. I will paint these and they will be ready to use.
I also keep a spray bottle handy of this stuff, works great for spraying rusted areas that are hard to get completely clean, like the inside corners of the cab.
I was missing some door hardware and Denny (firstrider) was nice enough to send me some spares, here is how they looked in original state.

I keep some Prep and Etch in a plastic paint cup for this kind of stuff. It is sold at Home Depot.

This is phosphoric acid, green in color. Mine in the cup is a nasty brown from being used, I use it until it stops working. Threw the screws in. The foaming action is the acid eating the rust.

I use a paint strainer and strain the acid into another cup, then rinse off the screws with water. The acid leaves a nice grey phosphate coating that does not affect paint adhesion, in fact the metal etch actually helps paint stick. This is after 1 hour, dont want to leave them in there too long or the thin lock washers will disintegrate! And dont leave them longer than needed, if you forget about them for days it makes a big mess. I will paint these and they will be ready to use.

I also keep a spray bottle handy of this stuff, works great for spraying rusted areas that are hard to get completely clean, like the inside corners of the cab.
The following users liked this post:
#233
06-22-2015, 01:37 PM
Elder User
Join Date: Jun 2013
Location: Metro Detroit-MI
Posts: 949
Likes: 0
Received 0 Likes
on
0 Posts
#234
06-22-2015, 07:24 PM
Thanks, still trying to keep moving forward. This afternoon I removed the booster pump that was for the supercharged engine and dropped the tank and installed a walboro 255 in tank pump. Fuel system is going in now, supply line, return line, vent line, and EVAP system. Lines and fittings are all from the donor car the engine and trans came out of, so other than time for modification they are free
#237
06-23-2015, 06:04 PM
Nothing done on the 56 Dodge other than keeping an eye out for parts, also picked up a 1995 or so Dakota for the chassis, may be doing a frame swap on that build.

Finished up the fuel lines today, mostly modern nylon and steel, but did have to use some FI rated rubber at the sending unit.
EVAP canister mounted behind the left running board

I am using a 1995 camaro canister just because it came from the donor car so it is free. Just have to run the line up to the engine, going to use either an EVAP solenoid that will be picked off a temp controlled switch or a thermal vacuum switch. Normally the PCM would control an EVAP solenoid, but this is a hybrid setup running an LS1 style PCM that has had the emissions items programmed out.
I will put a restrictor in the vacuum line since turning on the solenoid basically opens up a vacuum leak.
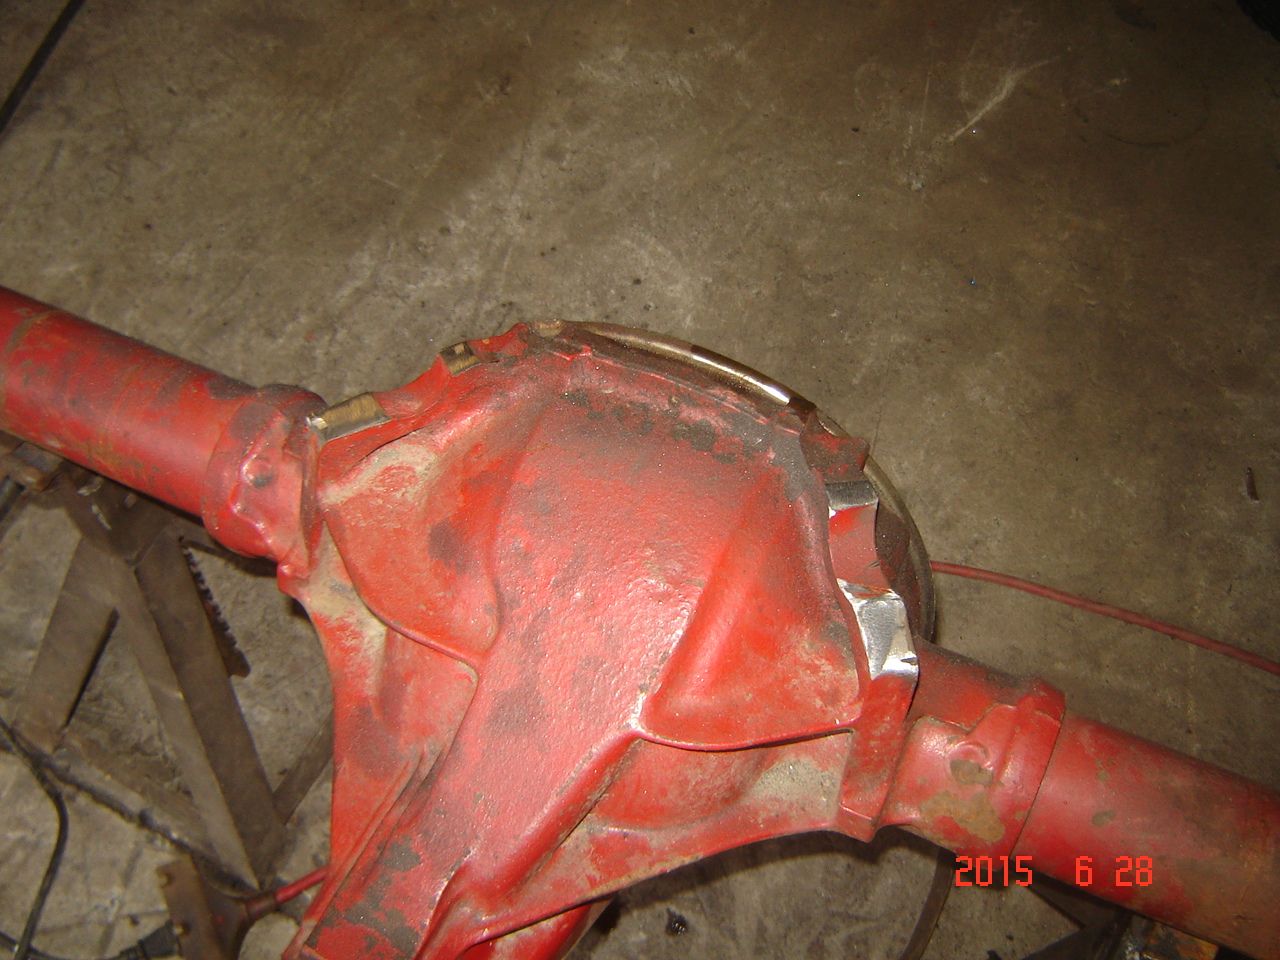
Also pulled the 3:08 posi rear out and started prepping the 4:11 posi rear. Have to add the disc brakes and I am going to replace the wheel bearings and seals. This was a chevelle rear that someone half welded some leaf spring pads on, this was in the middle of cleaning them off.

#238
06-28-2015, 08:14 PM
Rainy messy day today, got some work done inside.
Burned half a day just setting up the rear axle, but it was relaxing to just listen to some music and do some welding.
So first off I do not set up pinion angle until the project vehicle is close to final weight, not really a big deal with a 4 link but with leafs the pinion angle changes quite a bit from an unloaded to loaded leaf spring suspension. I checked mine when done from unloaded to loaded and there was a 3 degree difference with these springs.
Truck is assembled enough to get the rear welded up. there will be some weight added to the nose with the sheet metal and radiator, and some to the rear with the battery, tail gate, and gas, so the current ride rake should stay about the same.
So first off had to tighten up all the leaf spring hanger bolts. Dont want to do that either until close to final weight, and with all the weight on the springs. So the rear was put back in, wheels taken off, and lowered the truck down onto jack stands to put full weight on the suspension. Tightened all the hanger bolts, they were also installed with anti-seize just in case they ever have to come out again.
Next was to center the rear on the springs with the U bolts loose, then the u bolts were snugged but not cranked down yet. I pulled my backing plates because I am installing disc brakes, but it is obviously not necessary.
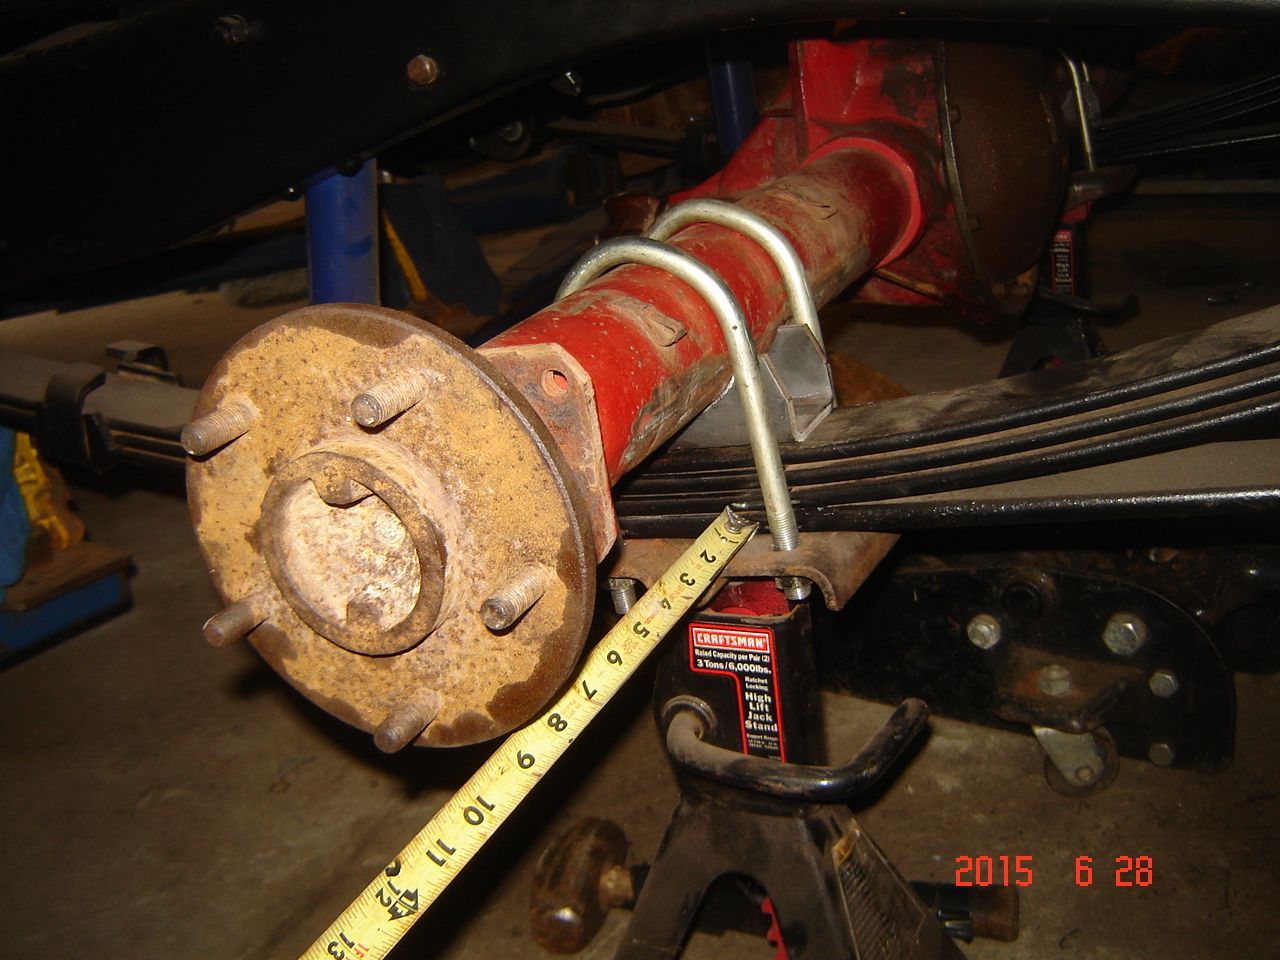
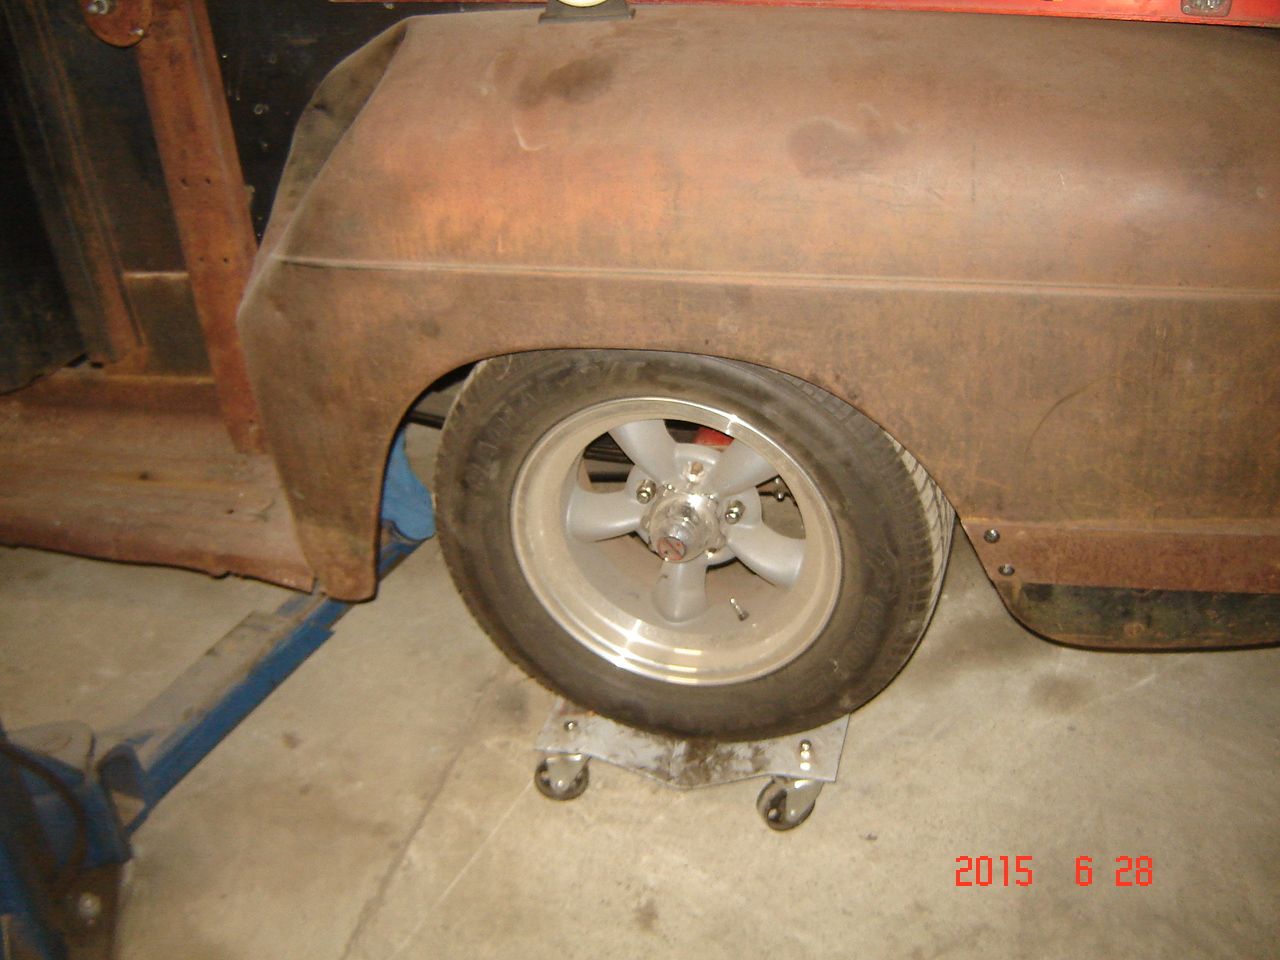
Rear tires were put back on and the truck was set on the ground on skates at all four corners just to give some room to get under the truck.
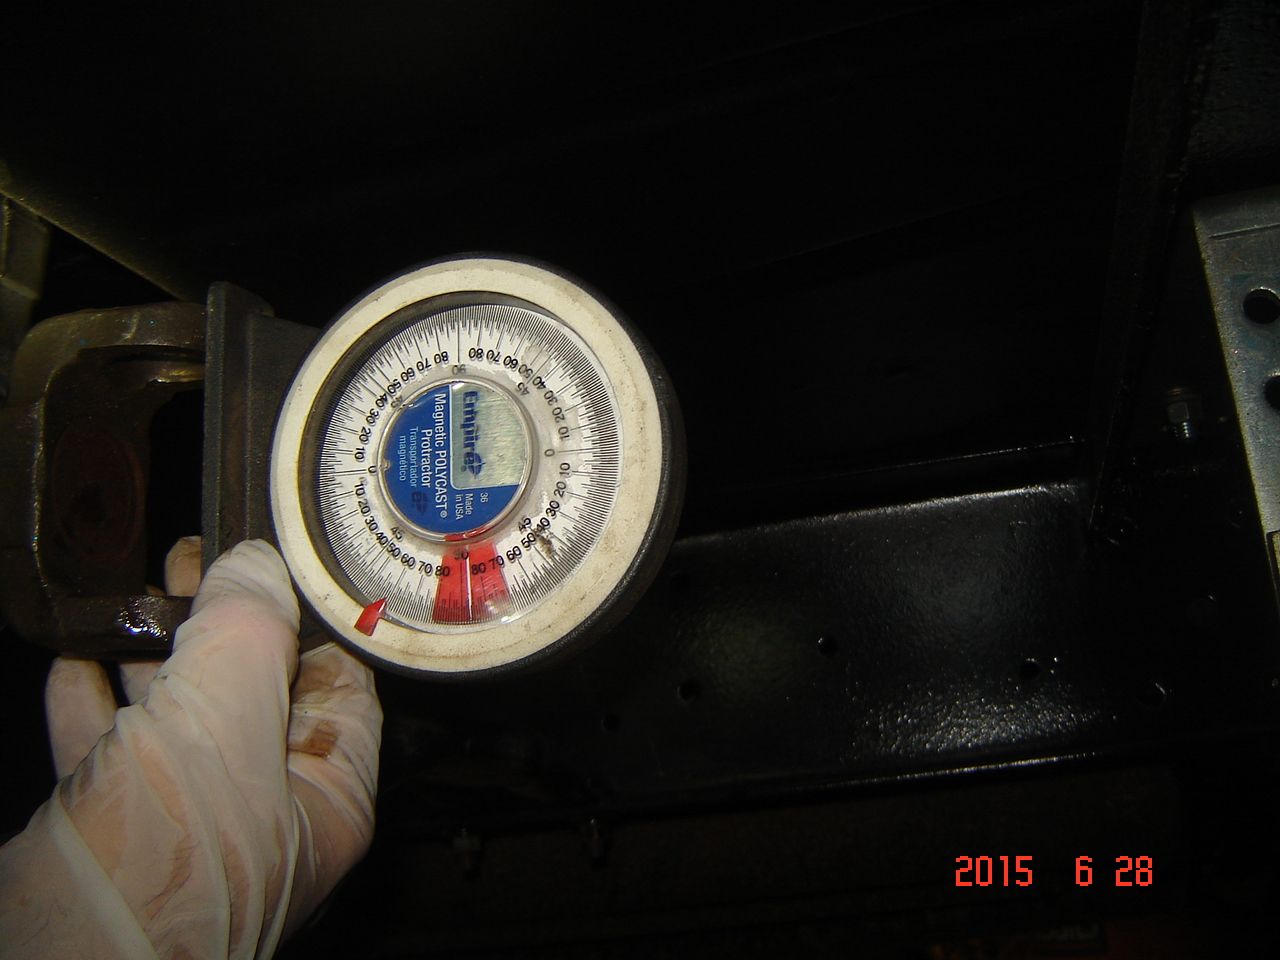
Trans yoke checks out at 4 degrees down, just where I put it originally
Fuel injected engine can be just about any angle unlike a carbed engine, I normally go 3 degrees but wanted a little more clearance for the driveshaft in upward movement.
With the truck now on the ground and full weight on it the rear axle was rotated up until the pinion was at 4 degrees up. Yes racing information will say to set it downward to compensate for wrap up during acceleration, but this is not a drag truck, and I have done this many times matching the trans angle to the pinion angle. Smoooooth running Hell yes it is going to wrap up if I stomp on it but that is not at every stop light, just some.
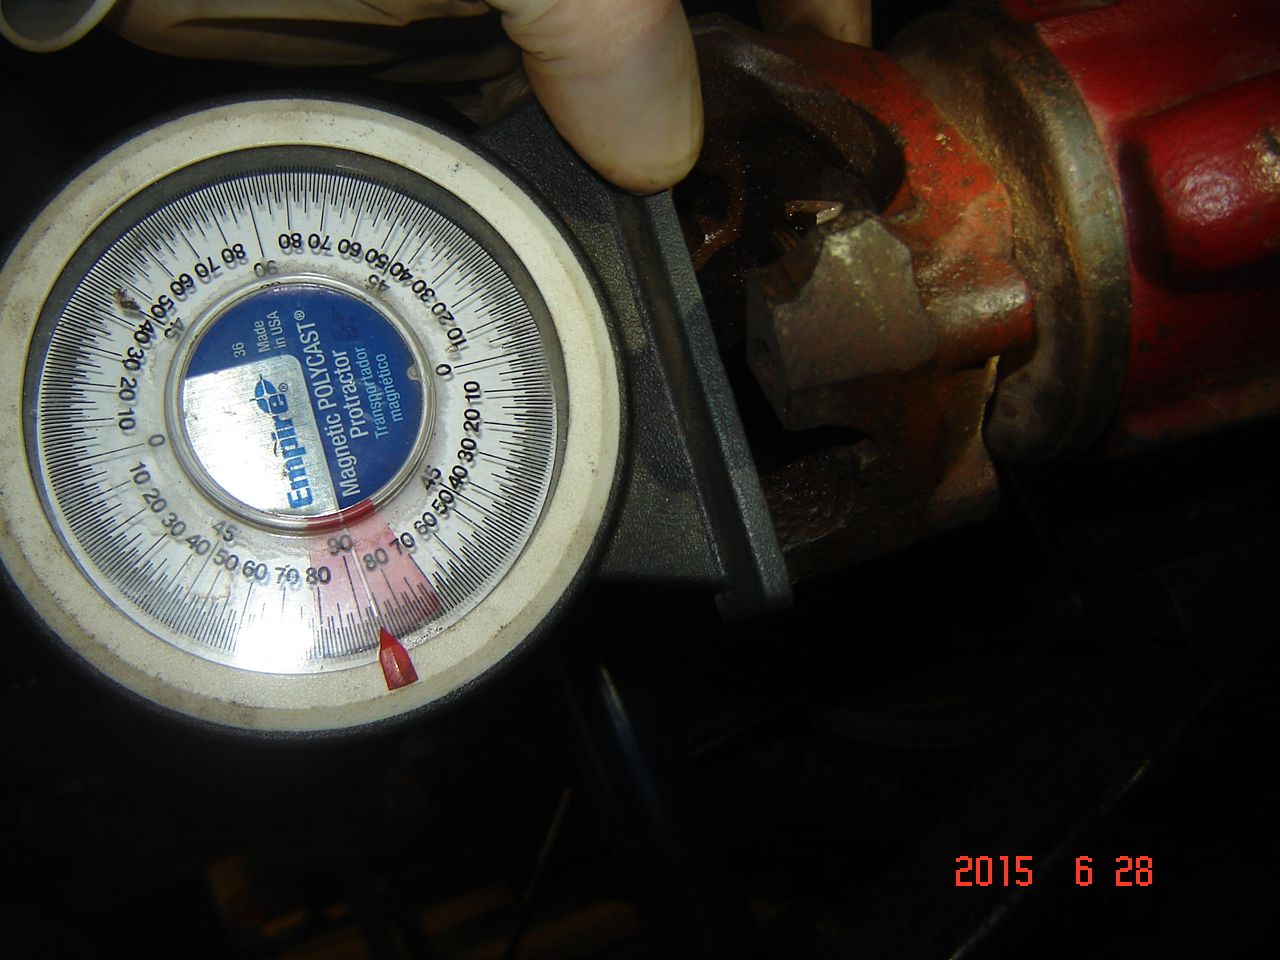
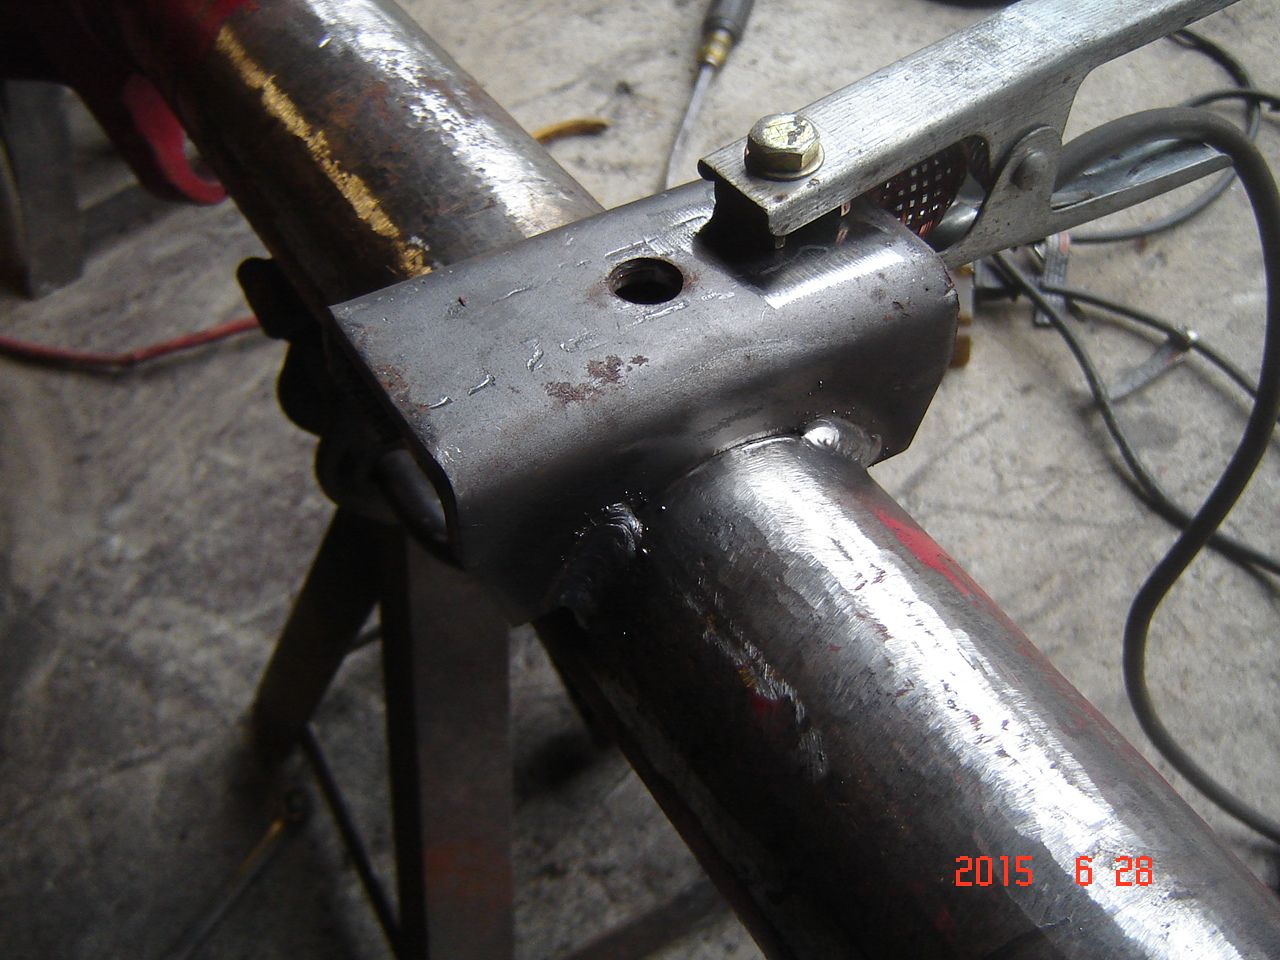
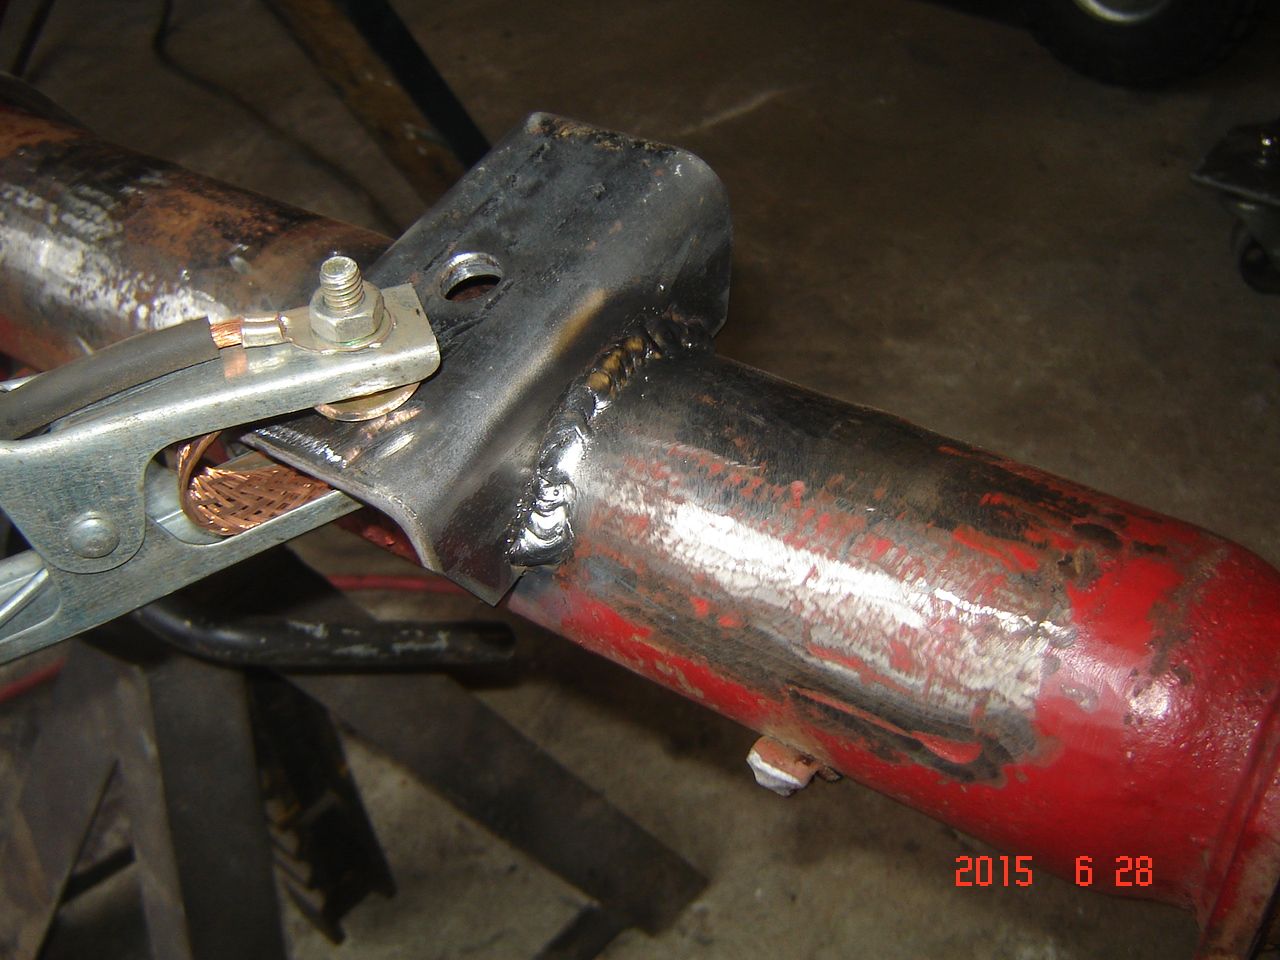
At this point the axle pads were tacked to the housing. Make sure the ground for the welded is at the pads, you do not want to send electricity through any bearings, yes it will waste them.
Rear was removed and put on jack stands for final welding. Again, welder ground set to the pad that is being welded. Tacked at each corner, then welded up in the center. Anything I have read says that welding on a rear housing will absolutely warp the tubes, but I do a couple things that I think help me because I have not had any issues so far. First I leave the axles in the housing, I believe they act to hold the tube from bending. Second I strike the arc on the leaf pad and drag the puddle to the tube, keeping the heat on the tube only as much as needed. Do these tubes bend? Maybe they do, but so far never enough to cause any issues with the rears I have done so far.
Cleaned off the upper bushing mounts, they were only a couple inches from the bed bottom and I didnt want them to hit.
If all goes well tomorrow I will be painting the rear, installing it, replacing the rear wheel bearings, and installing the rear disc brakes...fingers crossed!
Burned half a day just setting up the rear axle, but it was relaxing to just listen to some music and do some welding.
So first off I do not set up pinion angle until the project vehicle is close to final weight, not really a big deal with a 4 link but with leafs the pinion angle changes quite a bit from an unloaded to loaded leaf spring suspension. I checked mine when done from unloaded to loaded and there was a 3 degree difference with these springs.
Truck is assembled enough to get the rear welded up. there will be some weight added to the nose with the sheet metal and radiator, and some to the rear with the battery, tail gate, and gas, so the current ride rake should stay about the same.
So first off had to tighten up all the leaf spring hanger bolts. Dont want to do that either until close to final weight, and with all the weight on the springs. So the rear was put back in, wheels taken off, and lowered the truck down onto jack stands to put full weight on the suspension. Tightened all the hanger bolts, they were also installed with anti-seize just in case they ever have to come out again.
Next was to center the rear on the springs with the U bolts loose, then the u bolts were snugged but not cranked down yet. I pulled my backing plates because I am installing disc brakes, but it is obviously not necessary.

Rear tires were put back on and the truck was set on the ground on skates at all four corners just to give some room to get under the truck.

Trans yoke checks out at 4 degrees down, just where I put it originally
Fuel injected engine can be just about any angle unlike a carbed engine, I normally go 3 degrees but wanted a little more clearance for the driveshaft in upward movement.

With the truck now on the ground and full weight on it the rear axle was rotated up until the pinion was at 4 degrees up. Yes racing information will say to set it downward to compensate for wrap up during acceleration, but this is not a drag truck, and I have done this many times matching the trans angle to the pinion angle. Smoooooth running
Hell yes it is going to wrap up if I stomp on it but that is not at every stop light, just some.
At this point the axle pads were tacked to the housing. Make sure the ground for the welded is at the pads, you do not want to send electricity through any bearings, yes it will waste them.
Rear was removed and put on jack stands for final welding. Again, welder ground set to the pad that is being welded. Tacked at each corner, then welded up in the center. Anything I have read says that welding on a rear housing will absolutely warp the tubes, but I do a couple things that I think help me because I have not had any issues so far. First I leave the axles in the housing, I believe they act to hold the tube from bending. Second I strike the arc on the leaf pad and drag the puddle to the tube, keeping the heat on the tube only as much as needed. Do these tubes bend? Maybe they do, but so far never enough to cause any issues with the rears I have done so far.


Cleaned off the upper bushing mounts, they were only a couple inches from the bed bottom and I didnt want them to hit.

If all goes well tomorrow I will be painting the rear, installing it, replacing the rear wheel bearings, and installing the rear disc brakes...fingers crossed!
#239
06-29-2015, 09:38 PM
Got some work done today, not as much as hoped but I dont have any way to make paint dry faster.
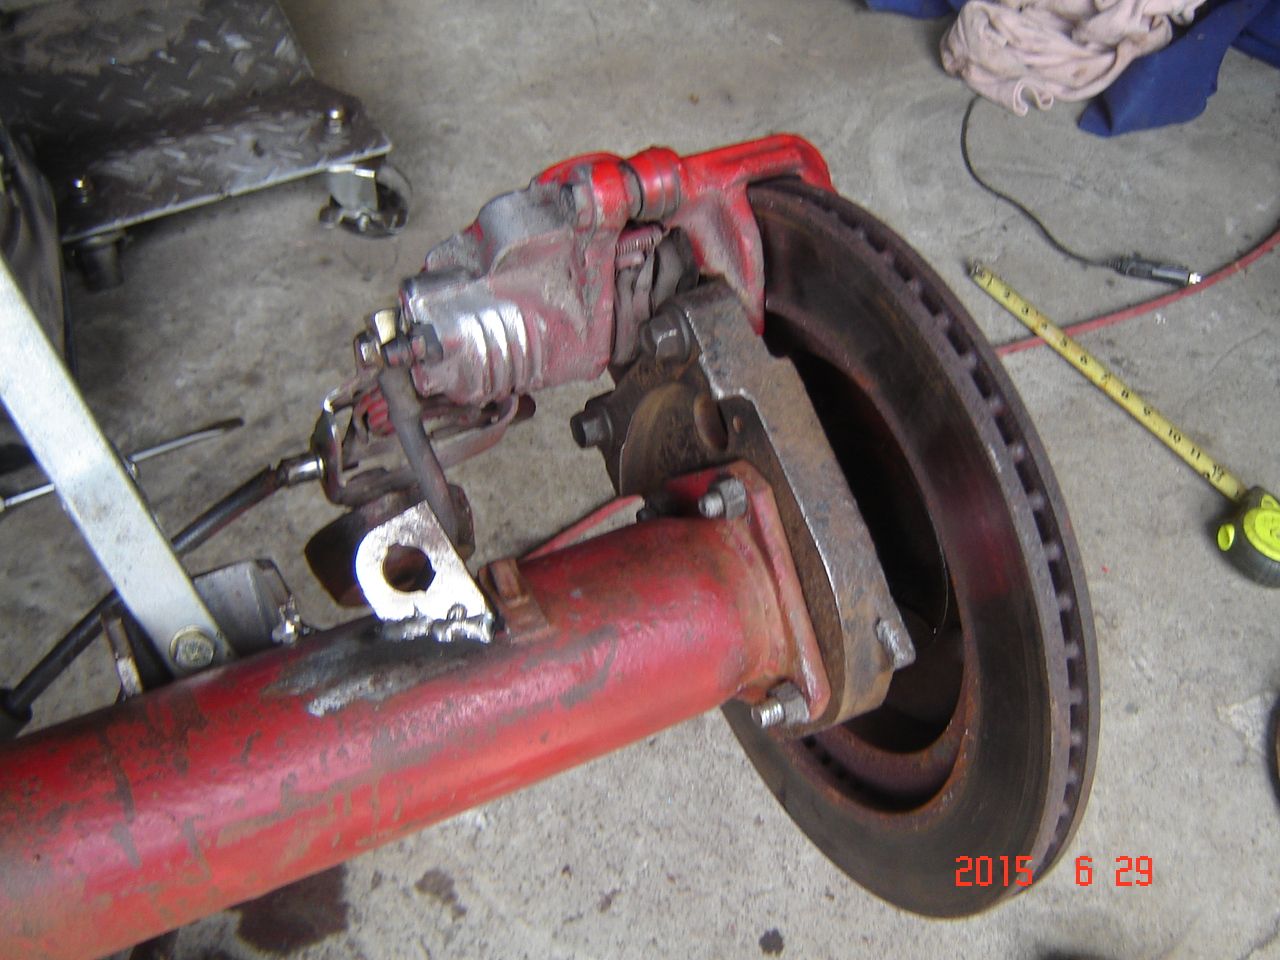
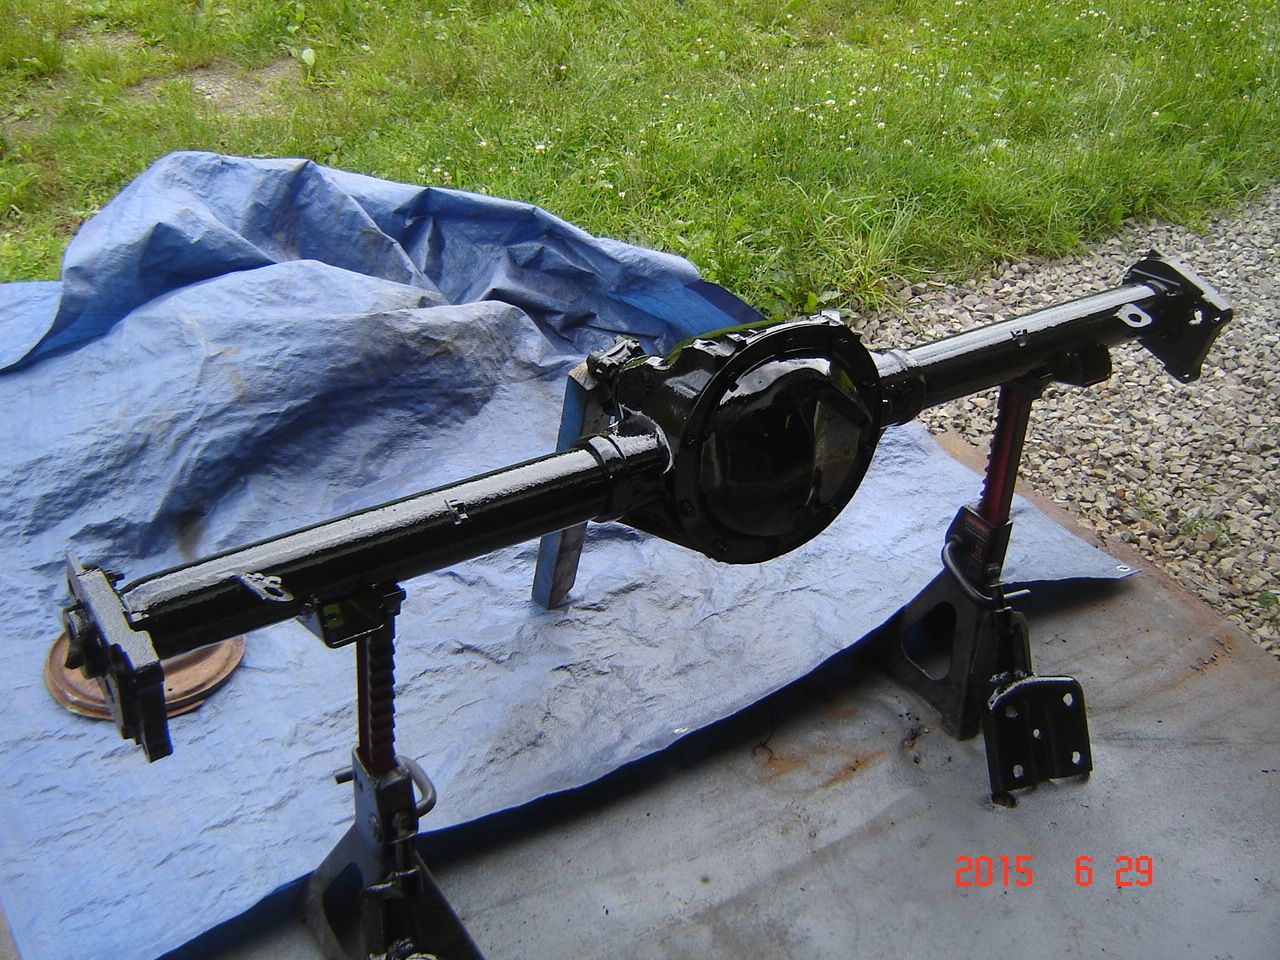
Mocked up the rear discs to make sure everything looked ok, gotta hand it to chevy for making things easy as far as not reinventing the wheel every year. This is a 1971 rear and the 1995 Z28 disc brakes bolted on like they belonged there.
All painted up
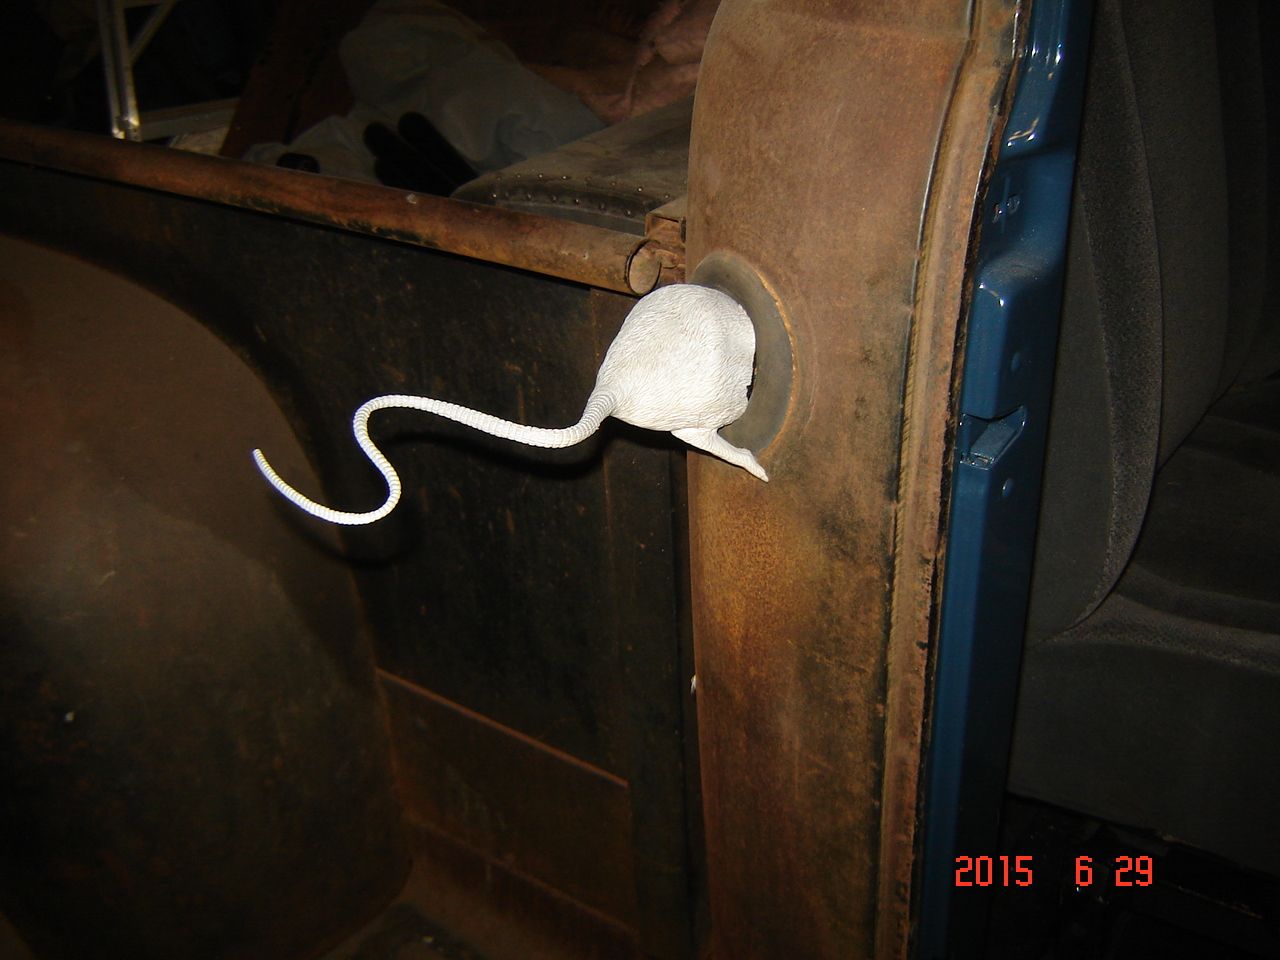
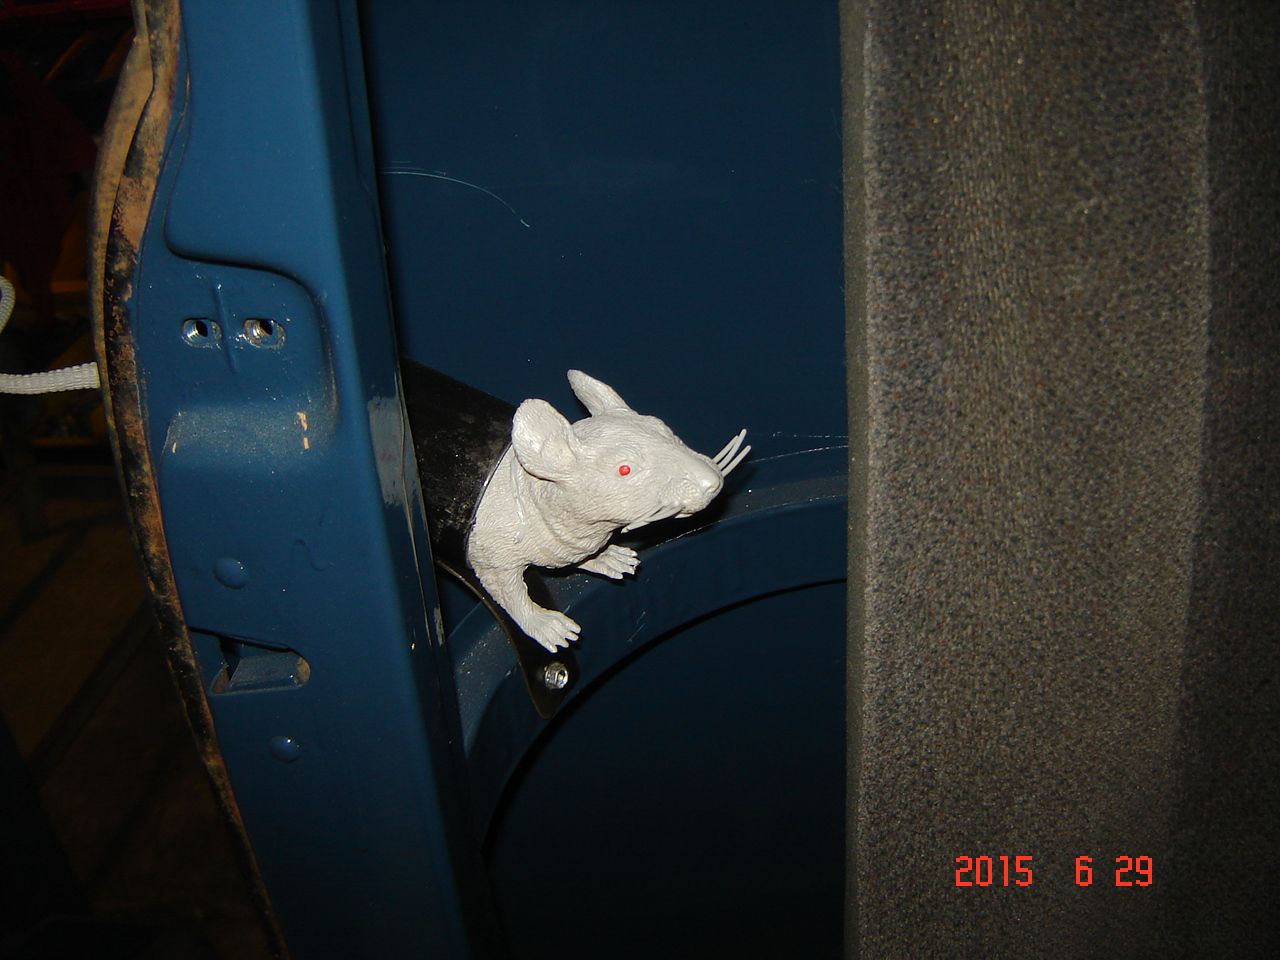
For those who hate rat rods I installed this guy while the paint was drying on the rear
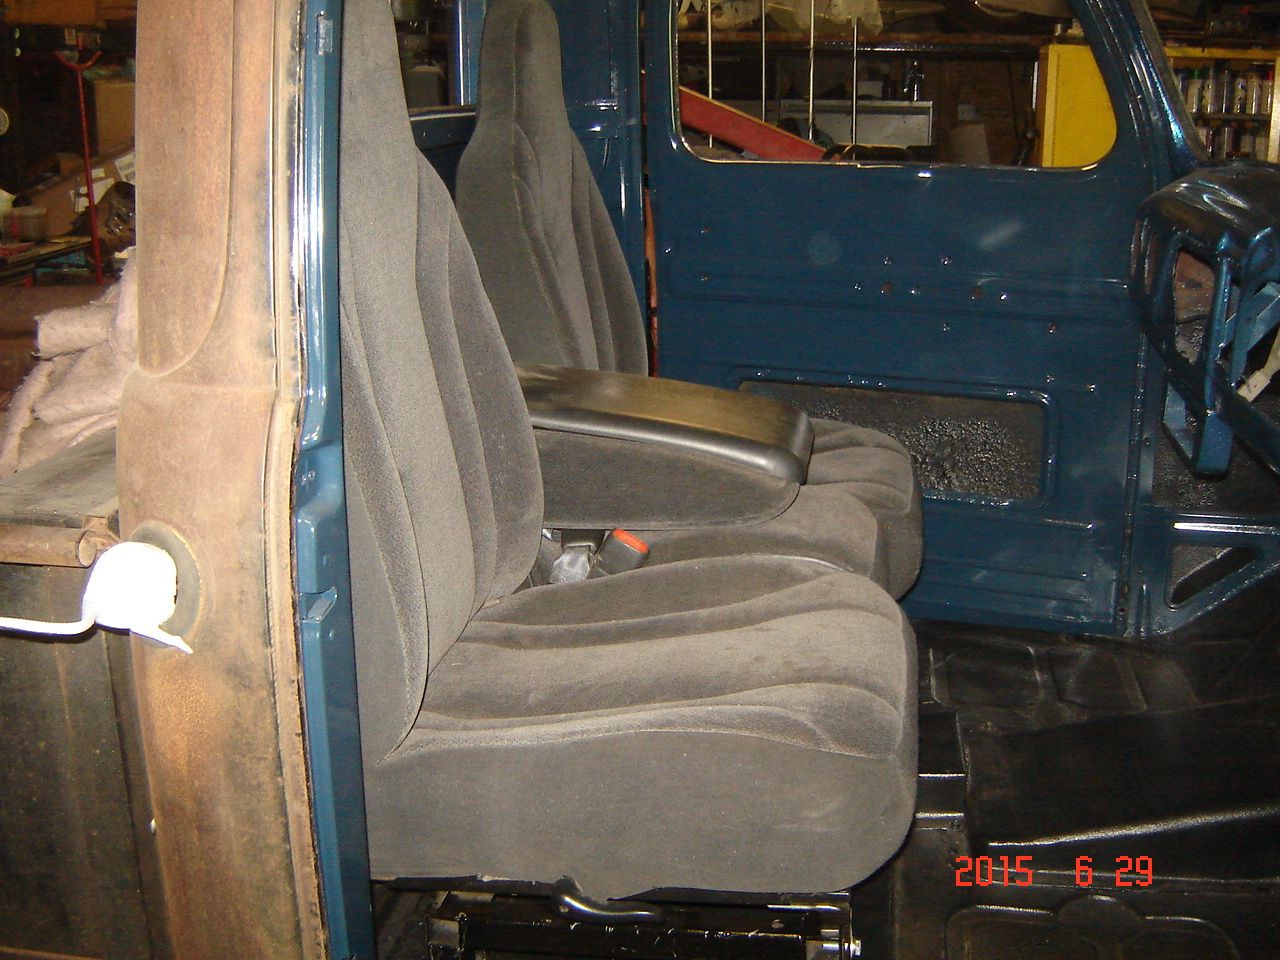
Put the bench seat back in too. now if I can only find where I put the mounting bolts!
Thats it for now, maybe the rear will go in tomorrow, maybe not!
Mocked up the rear discs to make sure everything looked ok, gotta hand it to chevy for making things easy as far as not reinventing the wheel every year. This is a 1971 rear and the 1995 Z28 disc brakes bolted on like they belonged there.

All painted up

For those who hate rat rods I installed this guy while the paint was drying on the rear


Put the bench seat back in too. now if I can only find where I put the mounting bolts!

Thats it for now, maybe the rear will go in tomorrow, maybe not!
