
HID Projector Retrofit - HID's The RIGHT Way


#34
 04-01-2015, 03:12 PM

Love it!!!!
On to the Install:
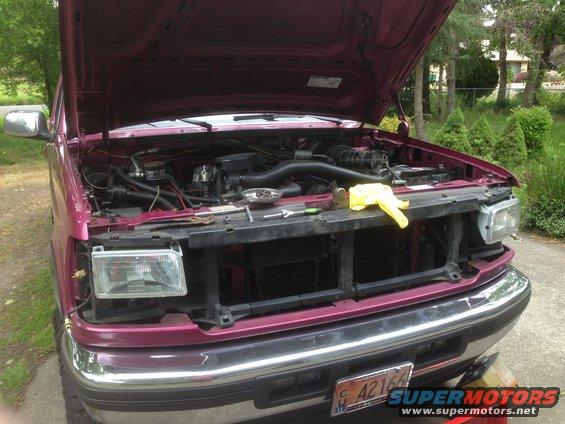
Here is where I started.

First step was removing the grill. It is held on by 5 screws. $ across the top and one in the middle lower opening.

Ideally this will all be phillips head but one of mine was replaced with a TORX at some point.

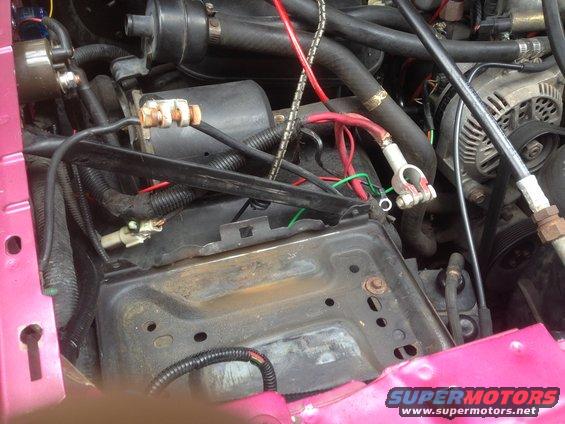
Next I completely removed the battery.
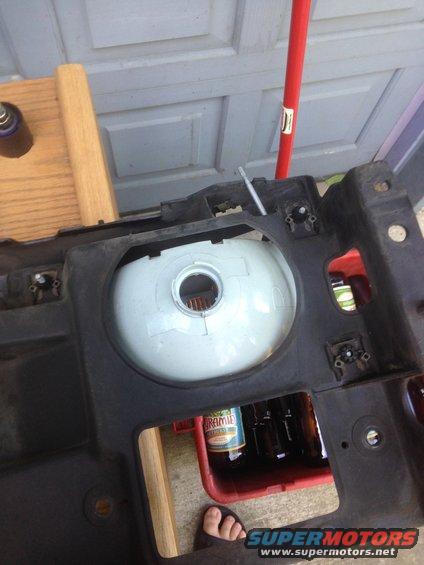
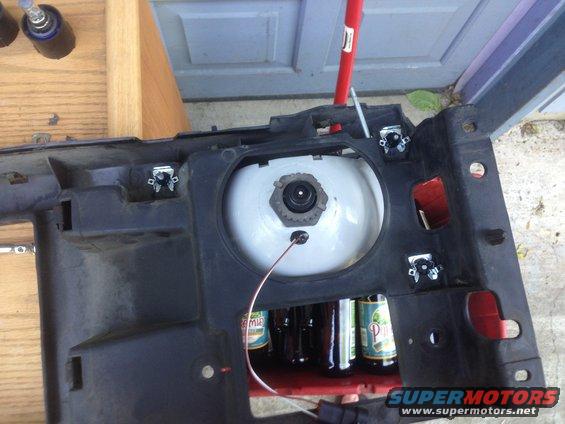
Then I went to the other side and removed the washer fluid reservoir.

Then I removed the halogen bulbs. Last time they will be in the truck.

This pic shows where the the two nuts for the headlight surrounds are. The two holes in the core support are openings to the bolts.

I removed the cruise vacuum canister to make more room to work.

With those nuts removed and the 2 phillips screws removed the surround can be removed from the truck.

I then went back to the other side and removed the batteyr tray to give myself more room.
Then you removed the 2 nuts and 2 screws and the surround of off on that side.
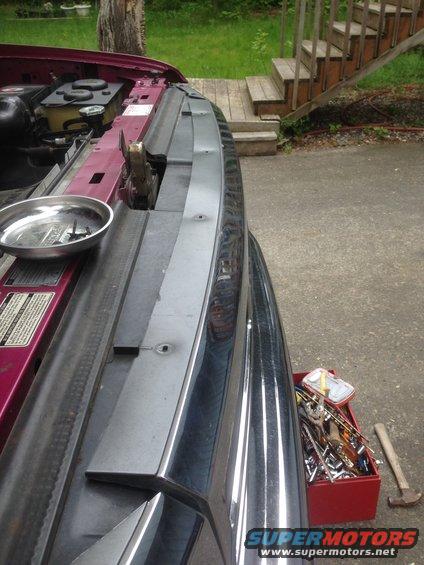
Then I removed the rubber strips from the header panel.
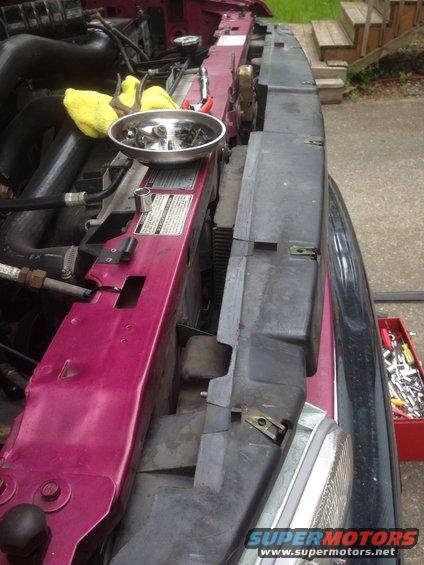
There are 11 bolts holding the header panel to the core support. I believe they are 5/16. With those removed you can pull the whole assembly from the truck.


Now you have plenty of room to start running the harness and mounting everything.
I opted to put the relay control box on the core support on the passenger side.
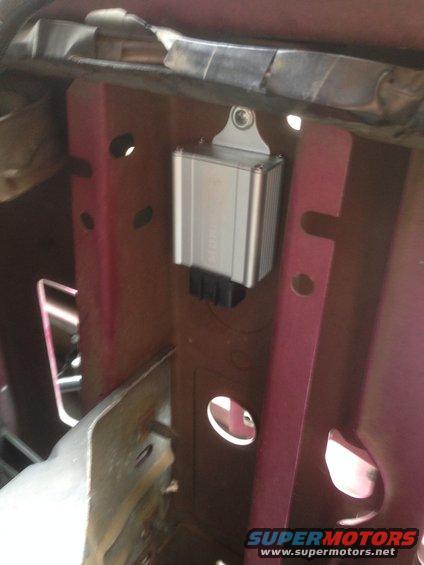
An important note here is that this box needs to be mounted vertically like shown as per the instructions.
Next I mounted the passenger side ballast. I chose to mount it to the inner fender liner right behind the battery tray.
I then plugged the harness in and checked to see if everything would reach. All was good.
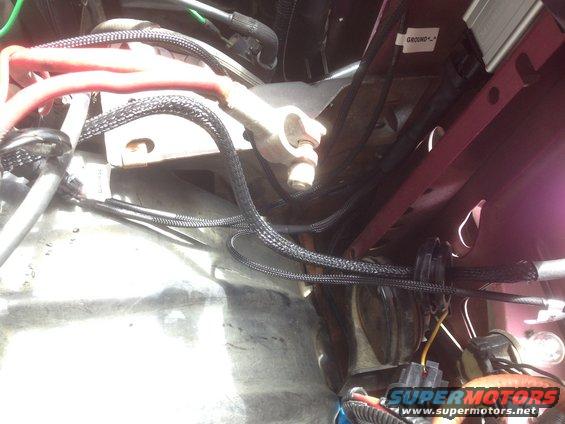
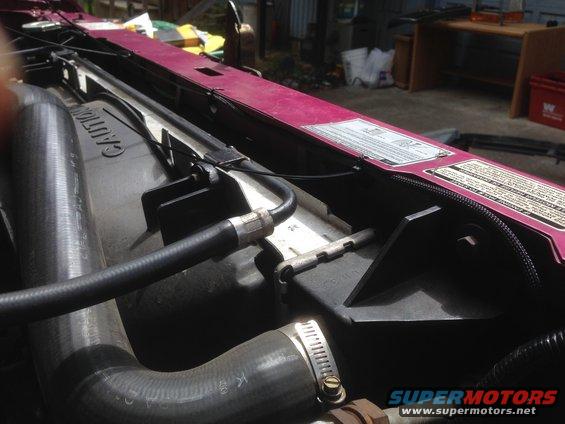
I then ran the harness to the other side of the truck. I zip-tied it up above the radiator.
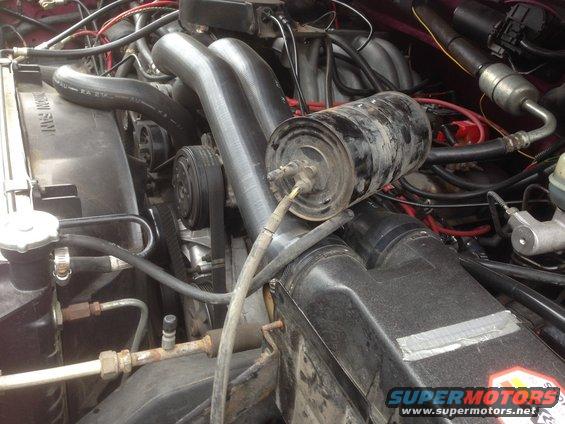
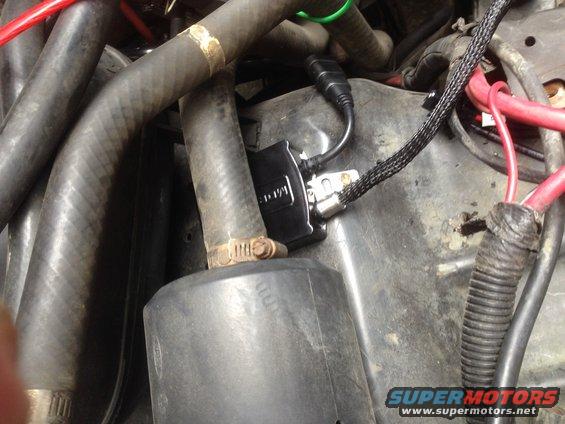
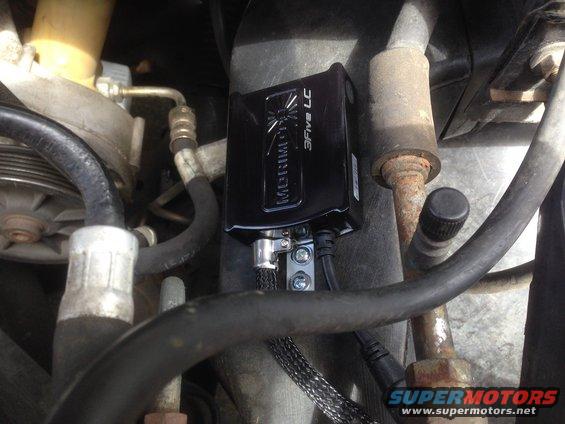
I know I am gonna get flamed for this, but this was the only practical place to mount the ballast on this side. Yes that is the inlet hose for the intake. I didn't want to mount it under the fluid reservoir as I didn't want to risk things leaking on it.
With everything ran you just need to plug the ballasts in and hook up the power and grounds. Everything is well labelled so it should be strait forward.
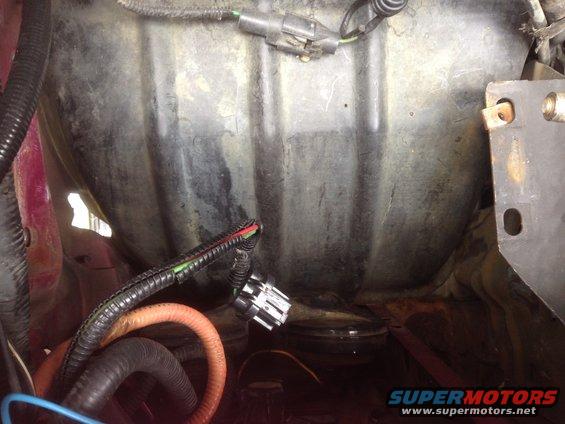
Back to the header panel.
This is why I chose to remove it completely. I can get to those clips with ease now.
Then I put the new housings in and put new clips in to hold it in.
From here I put the header panel on and started the aiming process.
I didn't bother with pics as I spent about 4 hours aligning everything.
The basic method I used was to move the truck close to the garage door to make sure the lights were aimed strait out and not cross-eyed. Then I adjusted the lights so they would sit flush with the headlight surrounds. Then I backed the truck up, removed the surround and made the fine tuning. I spent 2 hours doing this. Basically You want the light to be level with each other and the steps of the cutoff's spaced apart as far as the separation between the projectors. The height is not final though as it isn't dark yet but I think they will be right on. My truck is lifted so they are aimed lower than normal so I don't blind people.
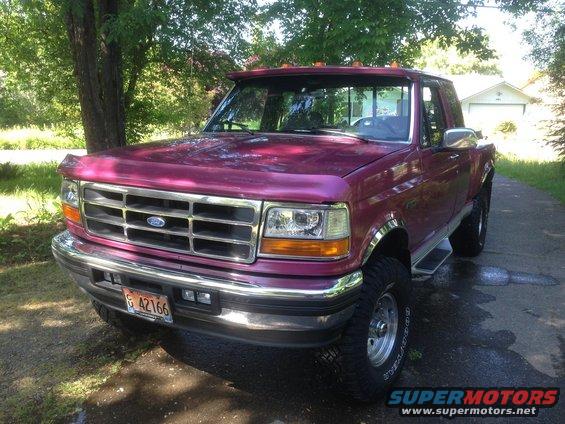
Once You have the alignment where you want it, put everything back together and admire your handy work.

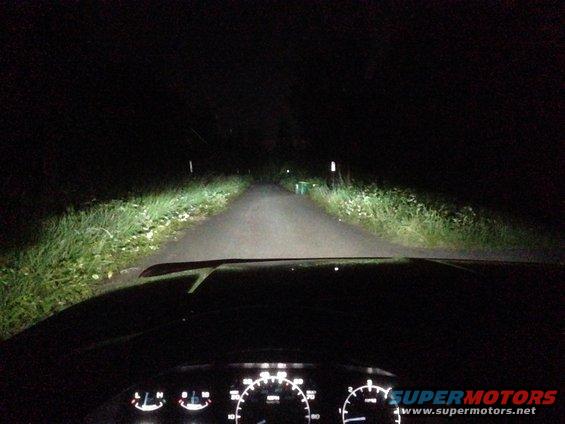
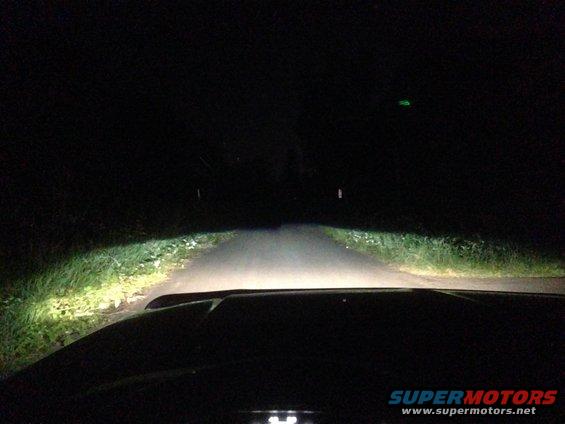
Output shots:
Stock headlights AND fog lights:

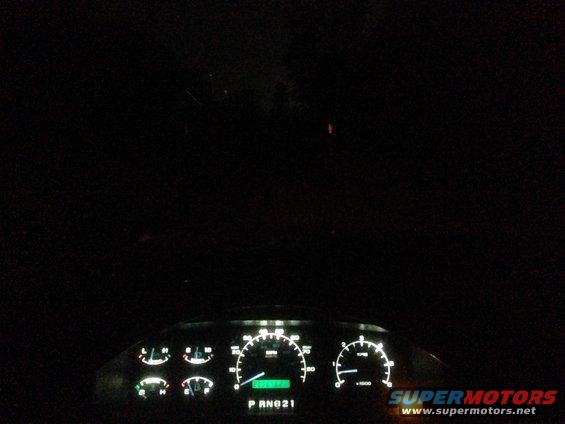
Reference for how dark the road was:
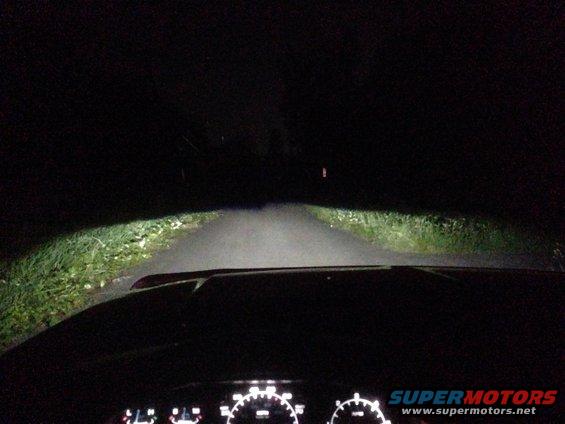
HID Low Beams:
HID High Beams:
HID Low Beams + Hella 550 Halogen Fog's:
HID High Beams + Hella 550 Halogen Fog's:

Again, I want to send a thanks to The Retrofit Source for an awesome product, will for sure buy from them again.
Here is where I started.
First step was removing the grill. It is held on by 5 screws. $ across the top and one in the middle lower opening.
Ideally this will all be phillips head but one of mine was replaced with a TORX at some point.
Next I completely removed the battery.
Then I went to the other side and removed the washer fluid reservoir.
Then I removed the halogen bulbs. Last time they will be in the truck.
This pic shows where the the two nuts for the headlight surrounds are. The two holes in the core support are openings to the bolts.
I removed the cruise vacuum canister to make more room to work.
With those nuts removed and the 2 phillips screws removed the surround can be removed from the truck.
I then went back to the other side and removed the batteyr tray to give myself more room.
Then you removed the 2 nuts and 2 screws and the surround of off on that side.
Then I removed the rubber strips from the header panel.
There are 11 bolts holding the header panel to the core support. I believe they are 5/16. With those removed you can pull the whole assembly from the truck.
Now you have plenty of room to start running the harness and mounting everything.
I opted to put the relay control box on the core support on the passenger side.
An important note here is that this box needs to be mounted vertically like shown as per the instructions.
Next I mounted the passenger side ballast. I chose to mount it to the inner fender liner right behind the battery tray.
I then plugged the harness in and checked to see if everything would reach. All was good.
I then ran the harness to the other side of the truck. I zip-tied it up above the radiator.
I know I am gonna get flamed for this, but this was the only practical place to mount the ballast on this side. Yes that is the inlet hose for the intake. I didn't want to mount it under the fluid reservoir as I didn't want to risk things leaking on it.
With everything ran you just need to plug the ballasts in and hook up the power and grounds. Everything is well labelled so it should be strait forward.
Back to the header panel.
This is why I chose to remove it completely. I can get to those clips with ease now.
Then I put the new housings in and put new clips in to hold it in.
From here I put the header panel on and started the aiming process.
I didn't bother with pics as I spent about 4 hours aligning everything.
The basic method I used was to move the truck close to the garage door to make sure the lights were aimed strait out and not cross-eyed. Then I adjusted the lights so they would sit flush with the headlight surrounds. Then I backed the truck up, removed the surround and made the fine tuning. I spent 2 hours doing this. Basically You want the light to be level with each other and the steps of the cutoff's spaced apart as far as the separation between the projectors. The height is not final though as it isn't dark yet but I think they will be right on. My truck is lifted so they are aimed lower than normal so I don't blind people.
Once You have the alignment where you want it, put everything back together and admire your handy work.
Output shots:
Stock headlights AND fog lights:
Reference for how dark the road was:
HID Low Beams:
HID High Beams:
HID Low Beams + Hella 550 Halogen Fog's:
HID High Beams + Hella 550 Halogen Fog's:
Again, I want to send a thanks to The Retrofit Source for an awesome product, will for sure buy from them again.
#35
04-01-2015, 04:50 PM
Actually they have been in there a little less than a year. But as an update, they are still on the truck and I still love them as much as I did day one. I haven't had a single issue with them. If you do a lot of driving in the dark, I HIGHLY recommend them. I am actually planning to make a set for my Ranger I just picked up.
#36
04-02-2015, 06:28 AM
Actually they have been in there a little less than a year. But as an update, they are still on the truck and I still love them as much as I did day one. I haven't had a single issue with them. If you do a lot of driving in the dark, I HIGHLY recommend them. I am actually planning to make a set for my Ranger I just picked up.
#37
04-02-2015, 11:36 AM
Fleet Owner
I signed up to the forum just so I could ask you if the lights are still working for you? I've been doing alot of research on this and yours is are by far the best I've seen and exactly the look I want. I would like to do halos as well but I'd be really happy if mine turn out as good as yours look. I know this is a few years old by now. Have you done anymore lately?
1st thing to learn, when quoting someone, delete the pics from the quote, it takes up ENTIRELY too much space
#38
04-02-2015, 12:17 PM
#39
04-02-2015, 12:26 PM
Laughing Gas

#42
04-02-2015, 02:56 PM
Post Fiend
Join Date: Mar 2011
Location: Backwoods of Snowflake AZ
Posts: 10,080
Likes: 0
Received 2 Likes
on
2 Posts
I know me and Evan were talking about it but I personally don't have the time or money to do it yet. Notice how I said yet. LOL
Trav
#43
04-02-2015, 03:17 PM
1992 Ford F-150 Old Instrument Cluster Work pictures, videos, and sounds | SuperMotors.net
Teaser....87-91 headlights - FSB Forums
Hes gonna be charging ~$650 for a set due to the lenses as he is having them made for him. I will probably try to make a set this summer, but we will have to see....