When you click on links to various merchants on this site and make a purchase, this can result in this site earning a commission. Affiliate programs and affiliations include, but are not limited to, the eBay Partner Network.
I was wondering why nobody had posted in this thread, but I see you put it under general projects and not in the 94-97 diesel section. Totally fine!
I am glad you posted in the other guys thread though because your pictures will help me greatly when I do my D60 rebuild.
My inner seals are leaking and I am sure my balljoints could be improved with new ones (warranty out my moogs). lol
Today's plan was to replace the premium Warn hubs on the truck with the non-premium or factory hubs so the premiums will be on the D60 when it goes in. The other plan was to swap in the 4" F350 blocks in the rear; one less thing to do on swap day.
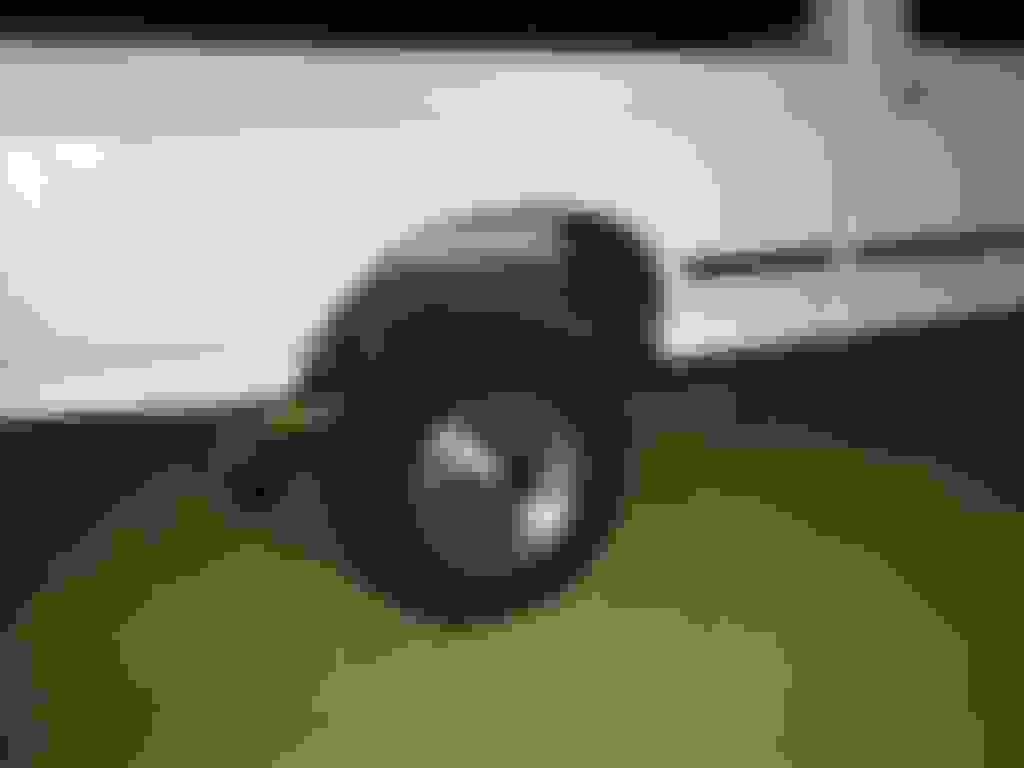
The hub swap went as expected. Jack a front wheel barely off the ground, allen wrench 6 screws out and remove the shiny visible end piece. A small phillips screw releases the innards. There were 2 circle clips on the truck, only the big one on the D60. Methinks the D60 should of also had the small one and they got lost along the way. But, I much prefer the typical non-premium or factory big C clip rather than the thin one on the premium. I had to reform one of the locating pins on the first nut that came from the D60. This was also on the same side the spindle was abused and the bearings look like they took a nap in a mud bog. First hub took 30 minutes to collect tools, jack and move my sun shade in place. Second hub took 10. Once you have seen how this all goes together, flattening a locating pin is not understandable.
Jacked up the rear end of the truck with the floor jack under the center section and placed a 6 ton jack stand under each of the rear spring's front hanger. The 6 ton stands were at full extension. I had already compared the new U bolts to the existing and felt confident they were correct. Let the floor jack down and as the rear leaf springs uncompressed the wheels lowered to within an inch of the ground. Dammit, my 12 ton stands were supporting the D60 in the garage so I couldn't quickly put them into action. The sun was high and I needed to get out of it soon so I lowered the truck and put this effort on my 'to do' list for later.
Now, how to make today productive while staying out of the sun....
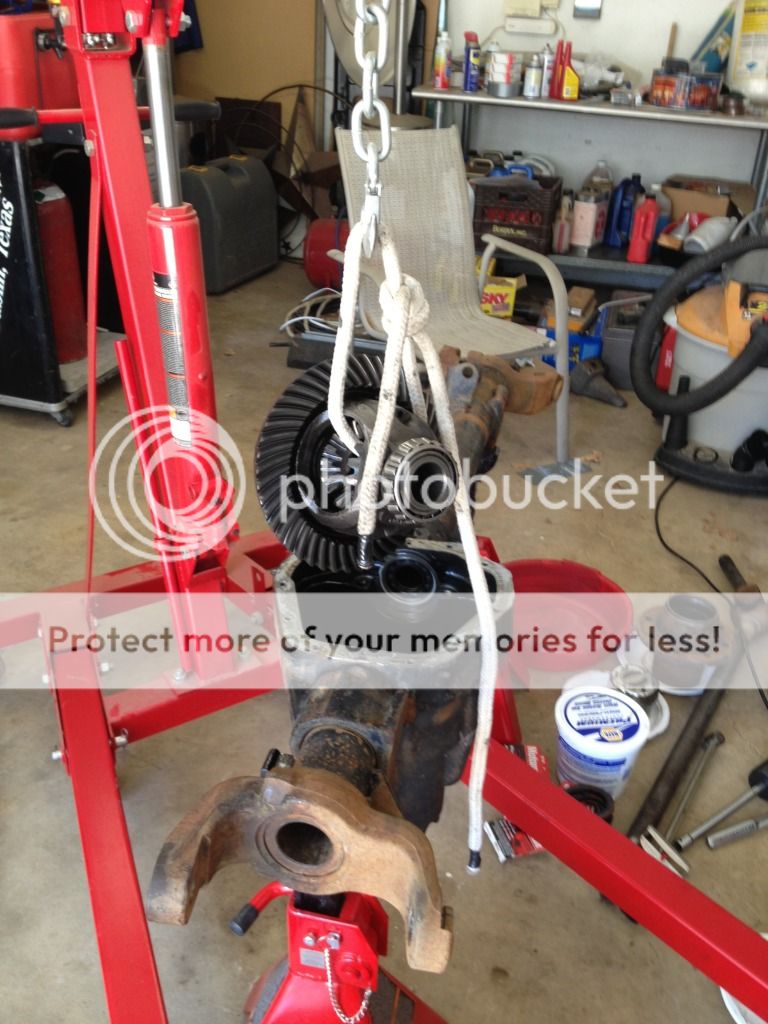
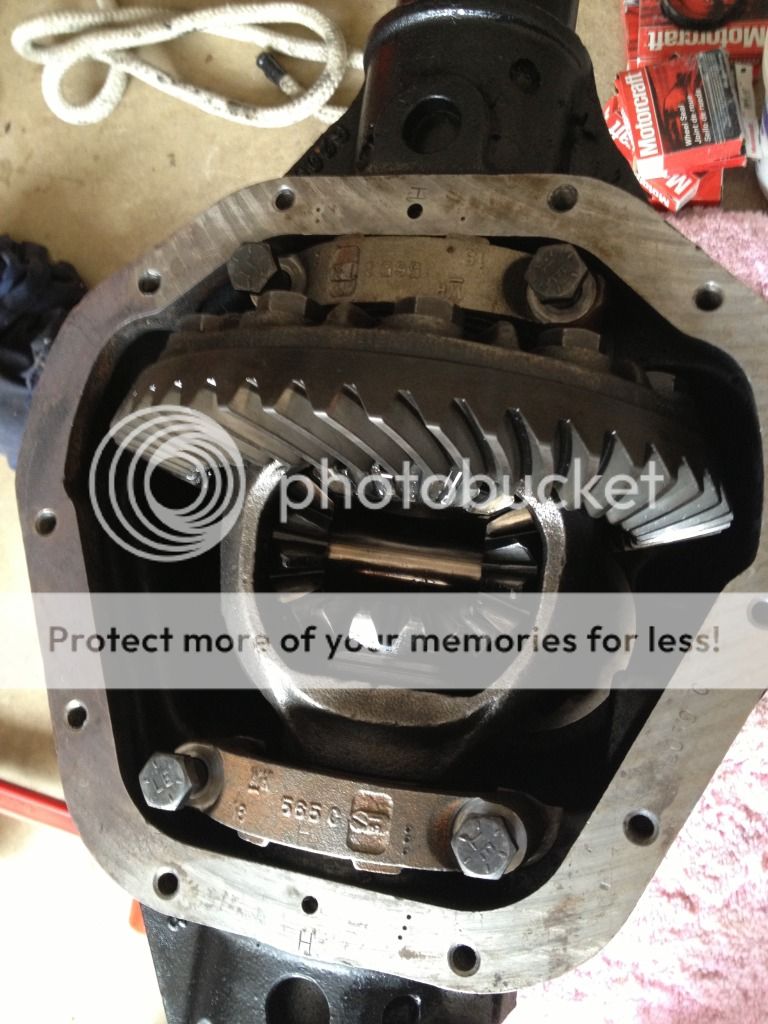
I used the engine hoist to pull the center section from the axle assembly. I put some tension on the carrier, then used a dead blow hammer on the housing to separate them. A chain would have not absorbed some of the hammer hits like the rope did, but it came out.
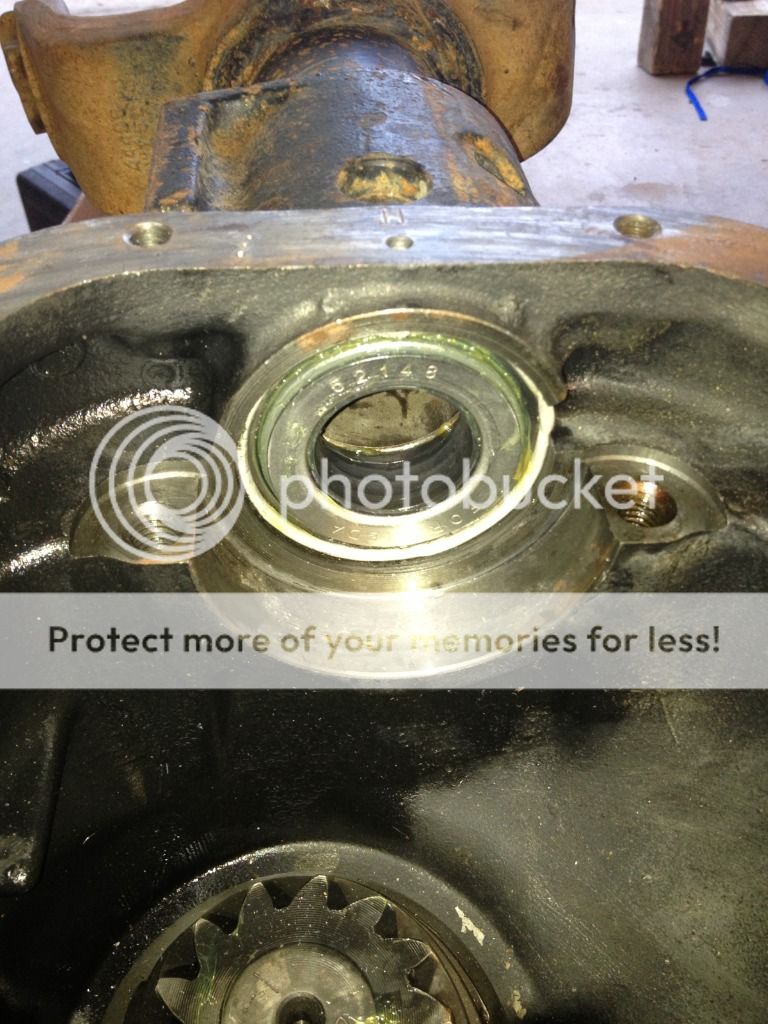
I had already used a center punch to mark both bearing caps differently so they would go back in their original location. The bearing races I marked with a sharpie as each became free and I washed them up.
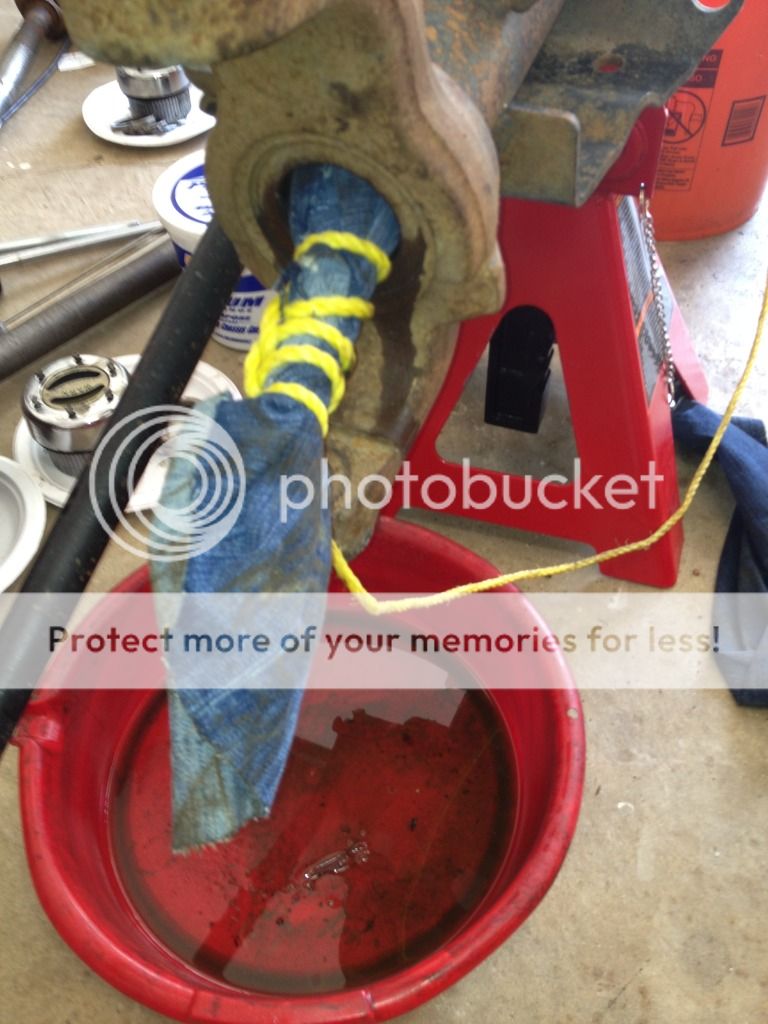
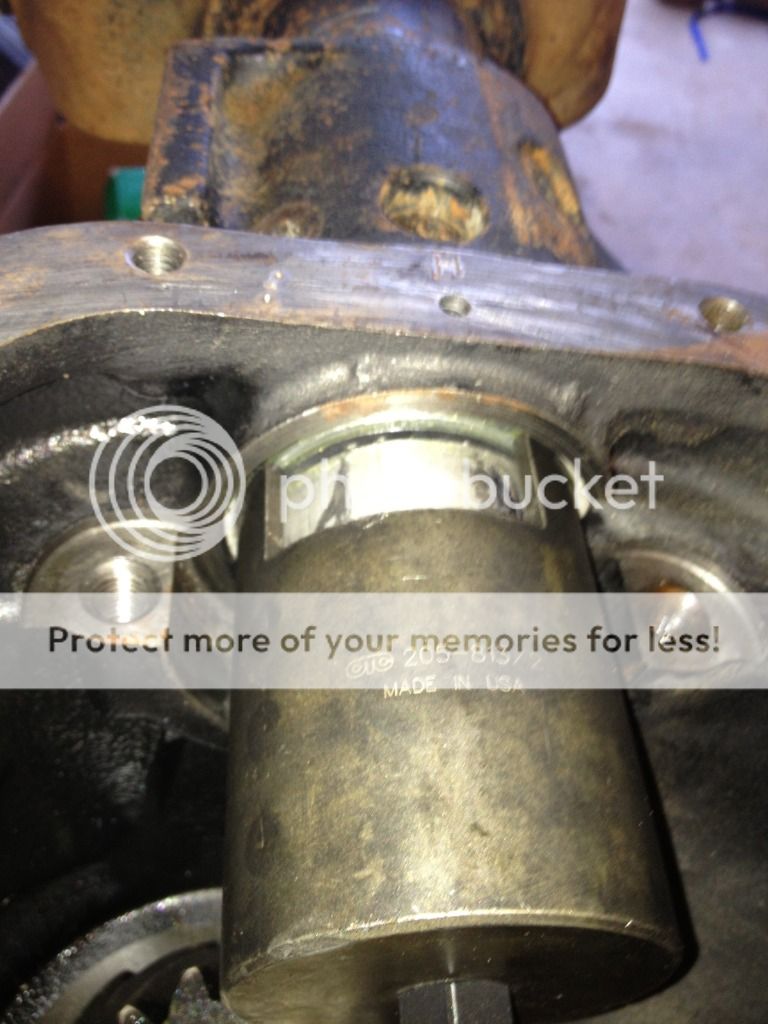
A long chisel knocked out the short side inner seal. A 5' pieces of 5/8" threaded rod knocked out the long side.
I tied a small rope to a heavy rag (any jeans, shirts, sheets that are not donatable get cut into rags) and pulled it from the inside to the end side. I stuck a shop vac at the outside end to help pull the rope through the first time. After the second time I figured out to tie the ends of the rope together forming a loop so i could spray degreaser in, then pull it through multiple times. I only needed three times, there was just not that much in there.
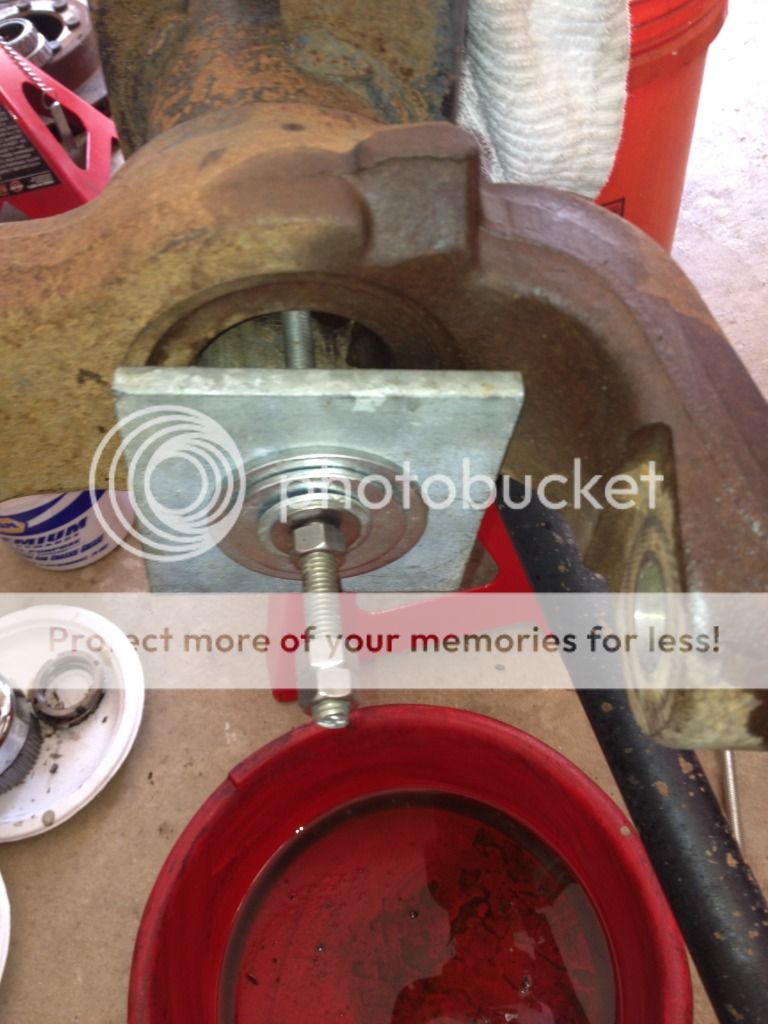
I used a 3' long piece of threaded rod with the washers I collected for my body bushing puller tool.
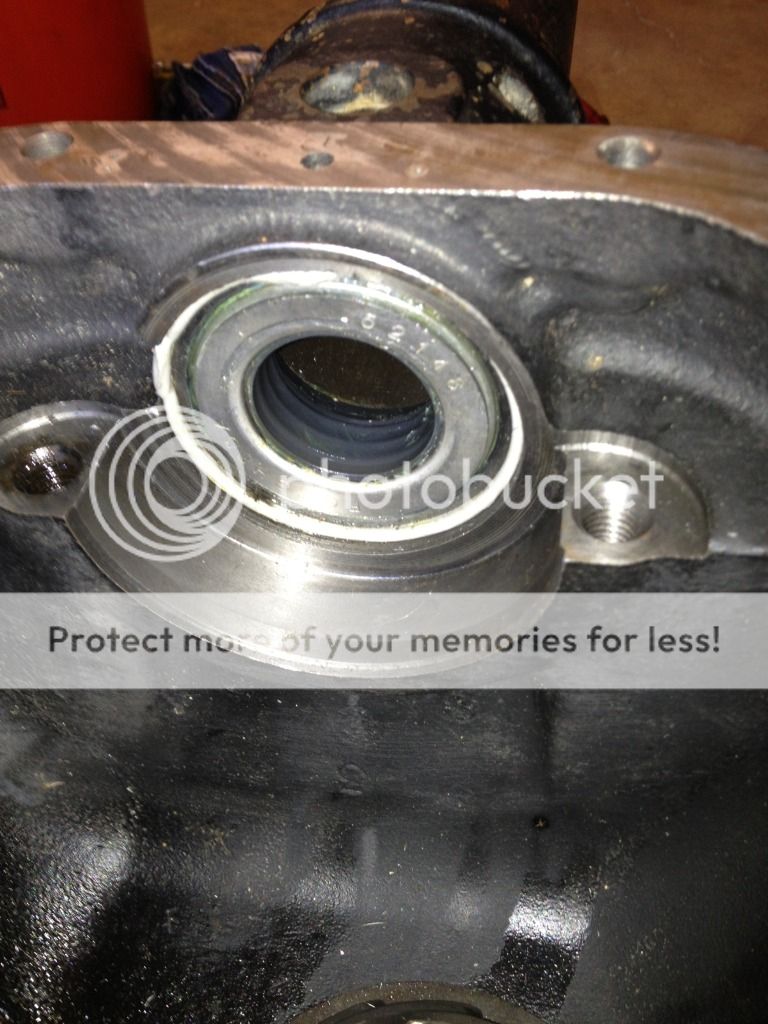
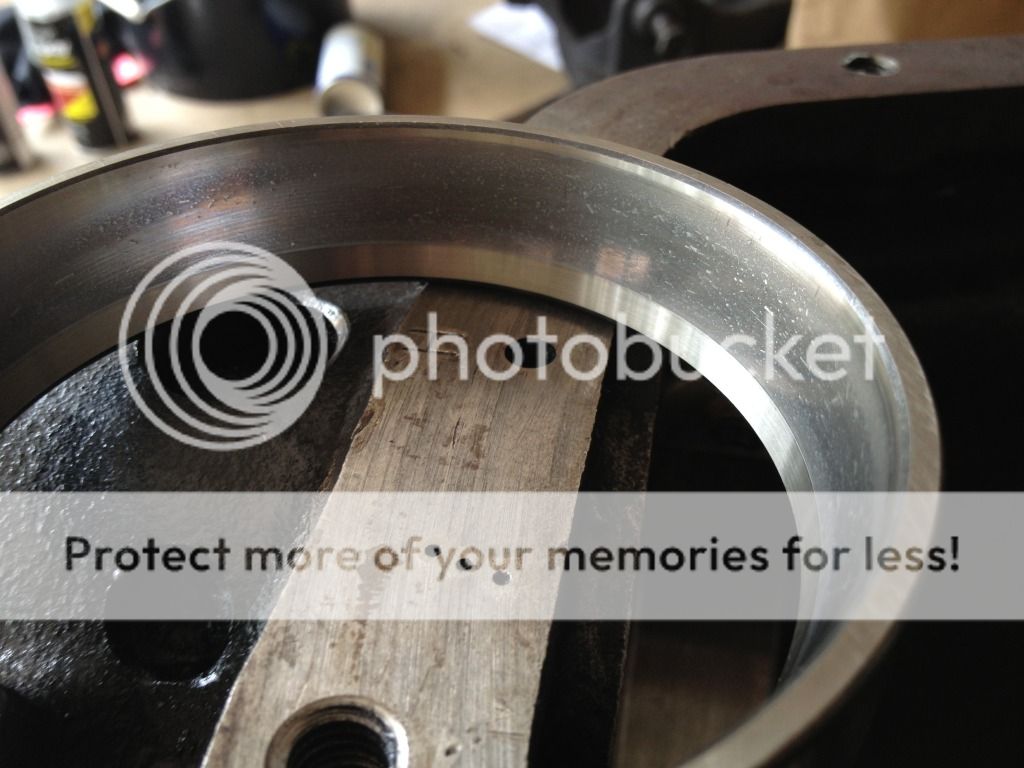
I used a grinder and removed the lip off the spicer two pieces inner seals. Plenty of pics can be found about this. The first one I may have moved to confidently and rushed it. The second one I took my sweet azz time. No joy. I can't seem to keep the assembly un-crooked before the tension of the inner sleeve starts to deform the outer. This makes sense if you have looked at one. I put the second one in the freezer for a few minutes, maybe not long enough. I'll do some more research on this but I only have one good seal left. Either way, I'm buy another seal and whatever it takes to install these, or I'm buying two original style seals.
This morning I took the two axle shafts down to the Inland Truck Parts shop to have them replace the U joints. For about $20 in labor each I'm glad to let them install them. They should be ready next week...today is a Saturday. I'm not in a hurry for the axles yet as i haven't solved the inner seal installation challenge yet. More on this later.
Still in a holding pattern for parts to make progress on the D60, after supper I decided to get the rear F350 blocks in as I'd rather drive around with the rear of the truck higher than the front rather than the front higher in case I couldn't get the blocks swapped pin on the same weekend as the D60 swap. I had tried this block swap before but my 6 ton jack stands were not tall enough and at the time, my D60 was setting on the bigger ones. Now that the D60 is stripped of the axles, the ring and carrier section, etc is is relatively light and I could lift each end up, slide my 12 ton jack stands out and lower it to the little 3 tons. Might need the 6 tons with half the truck in the air.
Truck setting solidly on jack stands under the front of both rear springs, the floor jack softly supporting the axle on the first side, the U bolts are loosened and then dropped. The shock was the travel limiter so the axle wanted to rotate to the rear. With the floor jack dropped to give some working room, I used full length 2x4 to pry the axle just another inch to get the F350 4" block close to where it needed to be. The two new U bolts and nuts were slid into place, and ran the nuts down a little, until everything was not flopping around. I thought that the difference between the block i was putting in and the F250 still in the other side was fighting me. So I moved to the second side and did the same.
I used a ratchet strap on both sides to help get the two locating pins and the one locating nut in there place. A floor jack helped get everything aligned. As the nuts were brought taught everything was watched for alignment. A hammer helped keep things in the correct place.
When I first bought the truck the previous owner said that the shudder felt win pulling away from a stop was there since day one and that the dealer said it was normal. A friend of mine sold me three 3/8" shims he cut to my needed dimensions. Installing one of them completely eliminated the shudder.
Now that the rear has been lifted, I again had more than a shudder, it was a vibration felt up to about 45 mph. I put in the other two (so now three) 3/8" shims which helped reduce about %90 of it. I'll try more shims to see if that helps. I'll also get out the angle measuring tool and check to see if I need to use an angle shim to change the pinion angle.
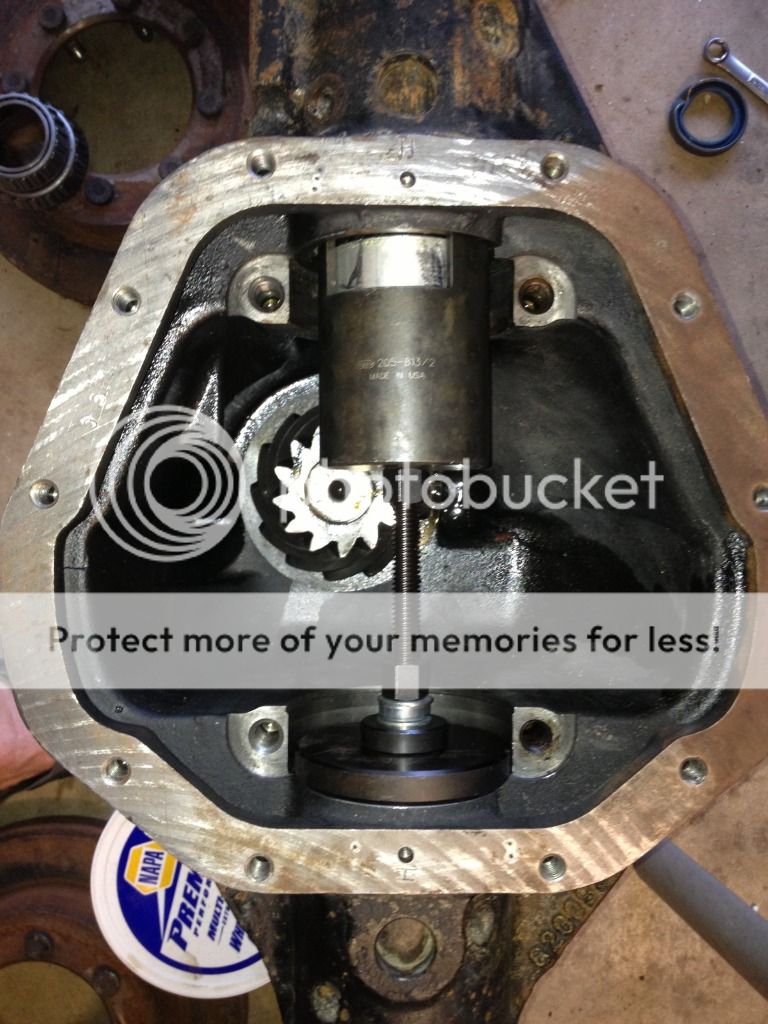
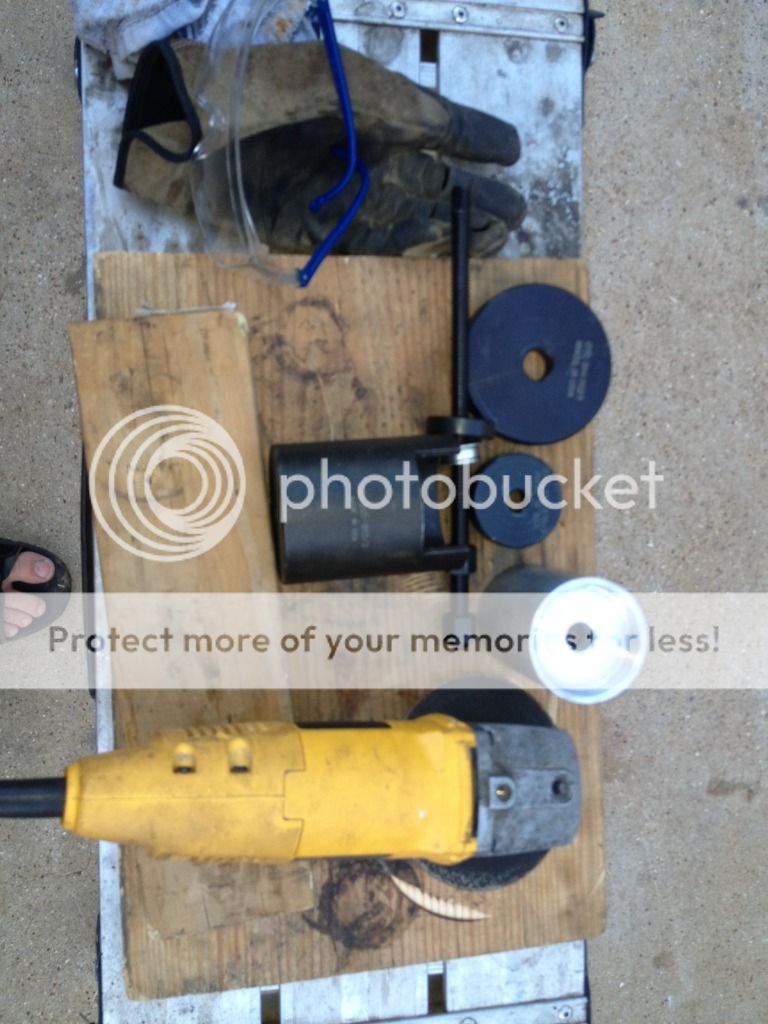
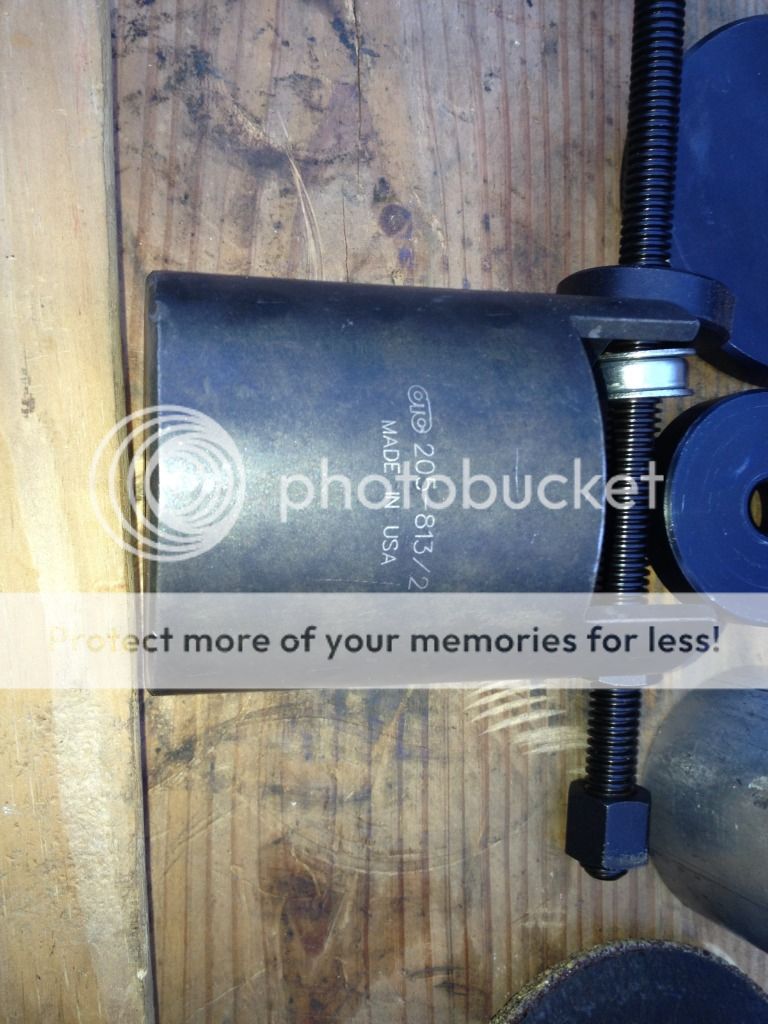
A member on another board that lives close to me had the right combination of tools and was kind enough to let me borrow them. The threaded rod set up is meant to push the seal from the inside, rather than pull it like like I was doing. I don't think that where the force is coming from makes any difference, but this set up has a bearing making turning the nut smooth.
Also, the tools I've seen used the center plug only. This still doesn't solve my problem, which is if the seal gets crooked the inside slips into the outside. The big outer cup catches the outside piece. Instead of making the cup I sketched, my friend turned a piece of alum stock that effectively kept the center plug concentric with the outer cup.
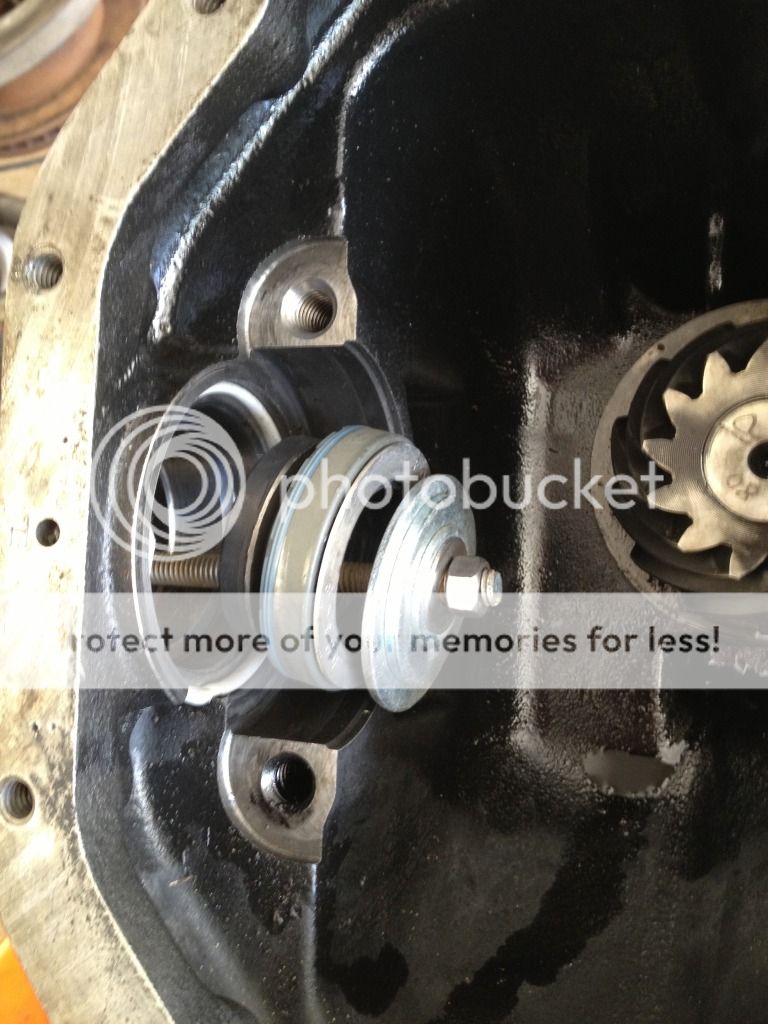
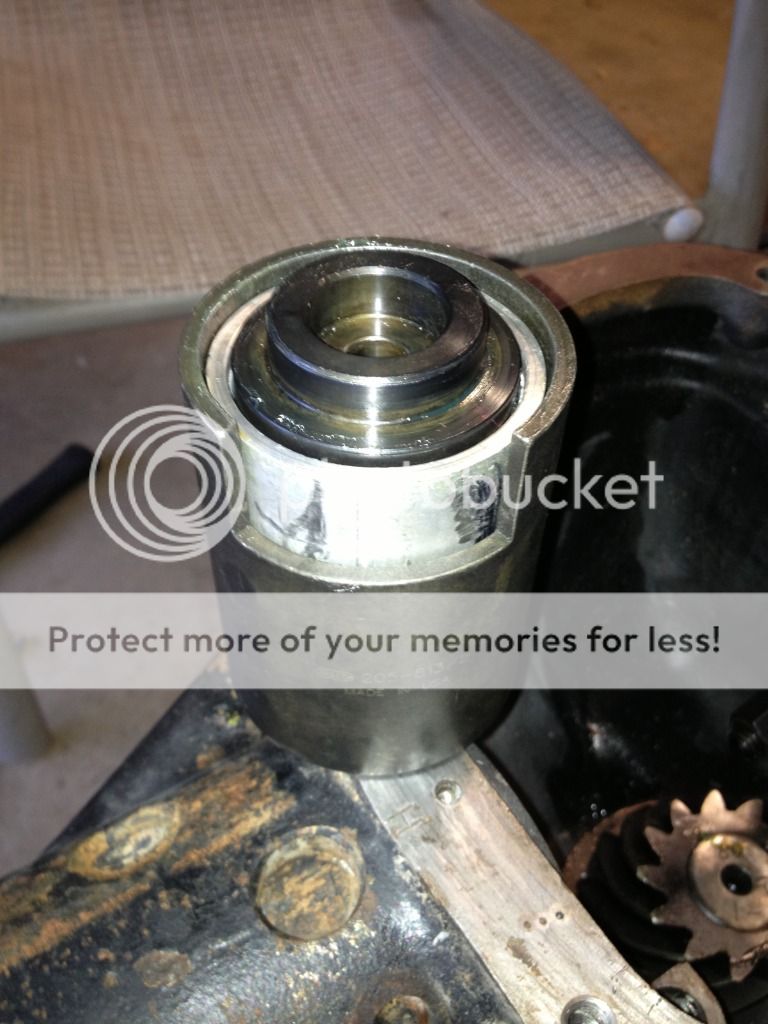
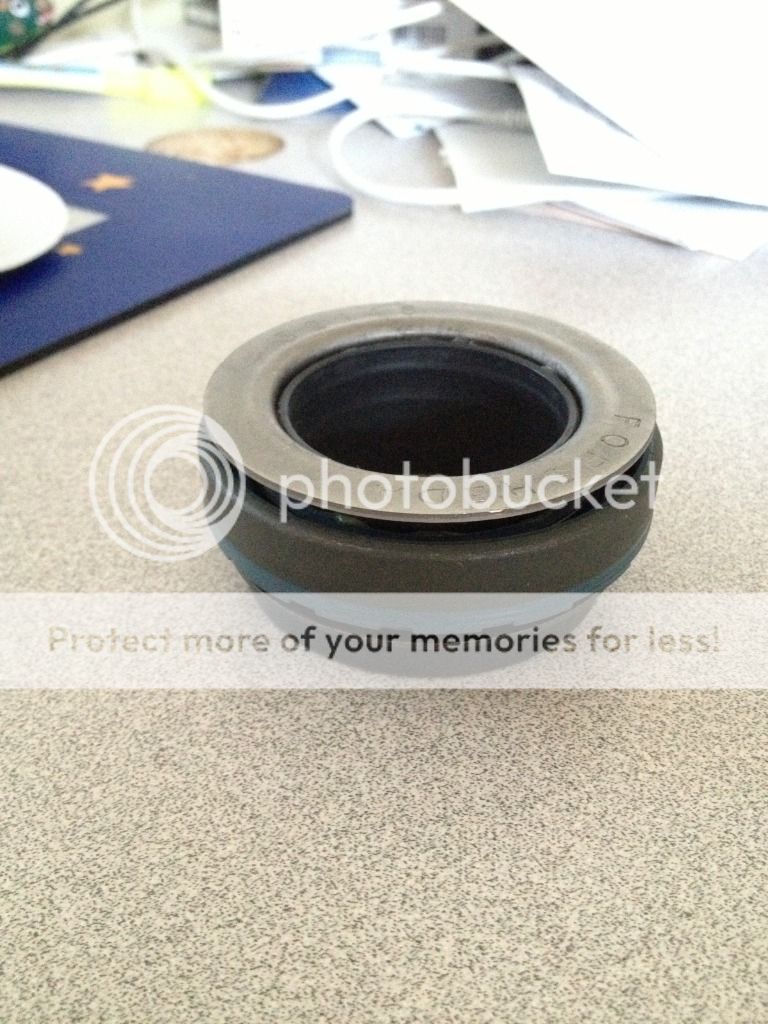
The process is made difficult as the blue rubber is at the leading edge and is the first thing that needs to be pressed into place. If it was more of an O-ring design the metal would be the first to be inserted and would sort of self-align everything. This seal does not yet have the metal ring ground away yet.
I lubed everything up with bearing grease. The process is to just get the blue part pressed in, then back off and inspect. Press it in some more, than back off and inspect. This lets you make adjustments to keep everything aligned. You can also tap the big cup if the seal starts to ****, straightening it. The first seal took 15 minutes. The second took 5. The outer part of the seal doesn't seat flush. You will feel it hit the bottom.
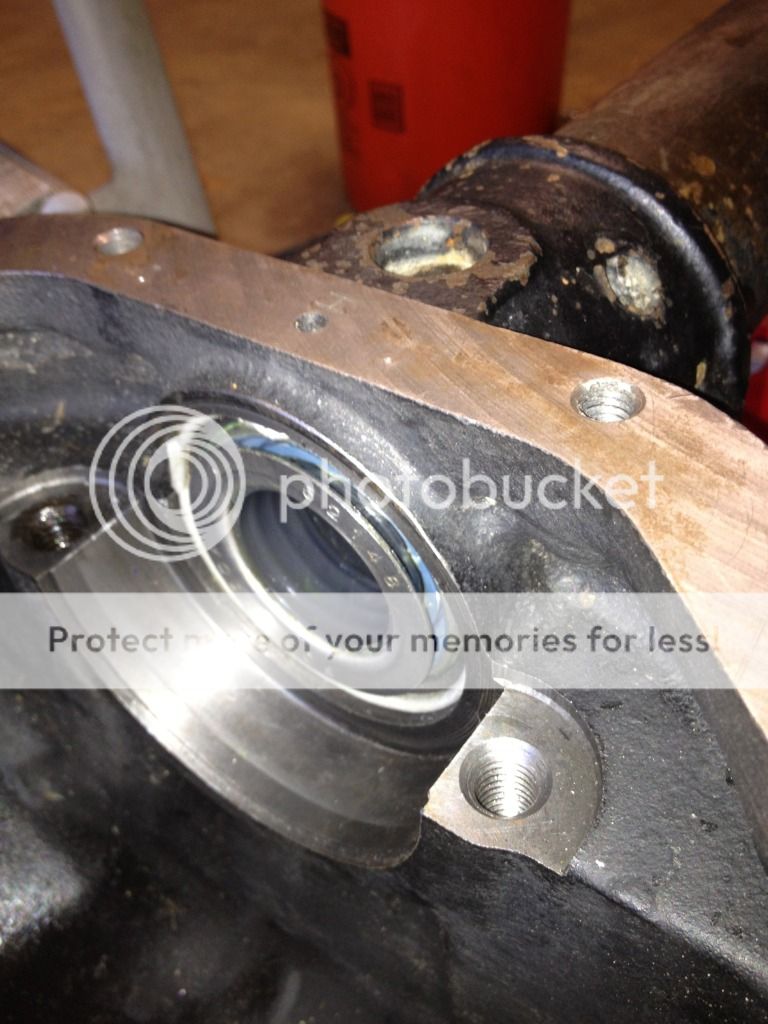
The inner part of the seal will get pushed against the carrier bearing as the axle is slide through it. This pic shows about where the inner will be located after everything is fully installed.
Tools required:
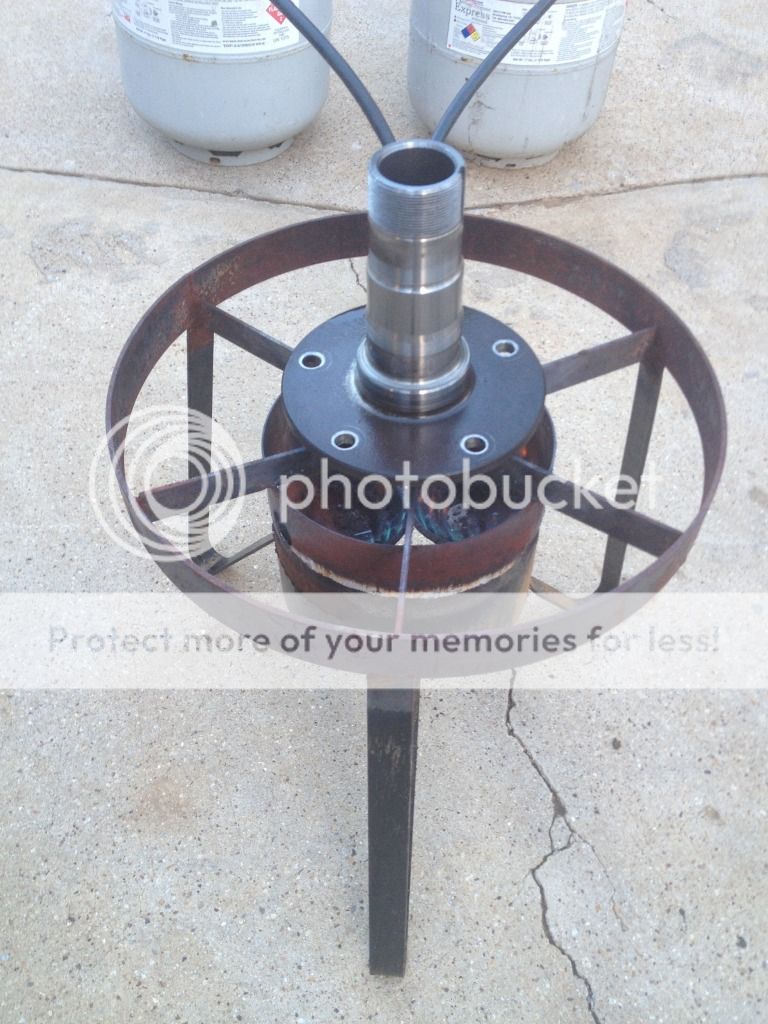
Self-modified double barrel mudbug burner
Big channel locks or some other way to handle really hot parts
Brass or soft drifts for driving in bearing seals
Properly sized drifts for driving in the spindle needle bearings
BFH, used with prudence
New bearing races
New spindle bearings
Micrometer to make sure the spindle bearings are set deep enough for the seals to be set afterwards
I heated the hub, and had previously put the bearing races in a sandwich zip lock bag, one of each size, into the deep freeze. I told the Wife that the bag was out of consideration of her, blah blah blah. My reason is that it lets all the humidity gather on the bag after you retrieve it from the freezer and move it to your workspace. Extra air in the bag also acts are sort of an insulator to keep it cool for a few more moments as you are pulling the receiving part from the flames and move the receiving part onto your workspace. If you open (or rip) the bag and quickly move your seal or bearing into place you will have near zero frost buildup.
Driving a race into its seat is sort of an art and also requires the proper tools. I don't plan to add too much color to these steps, as they are better taught first hand. But I will help you if you are close by.
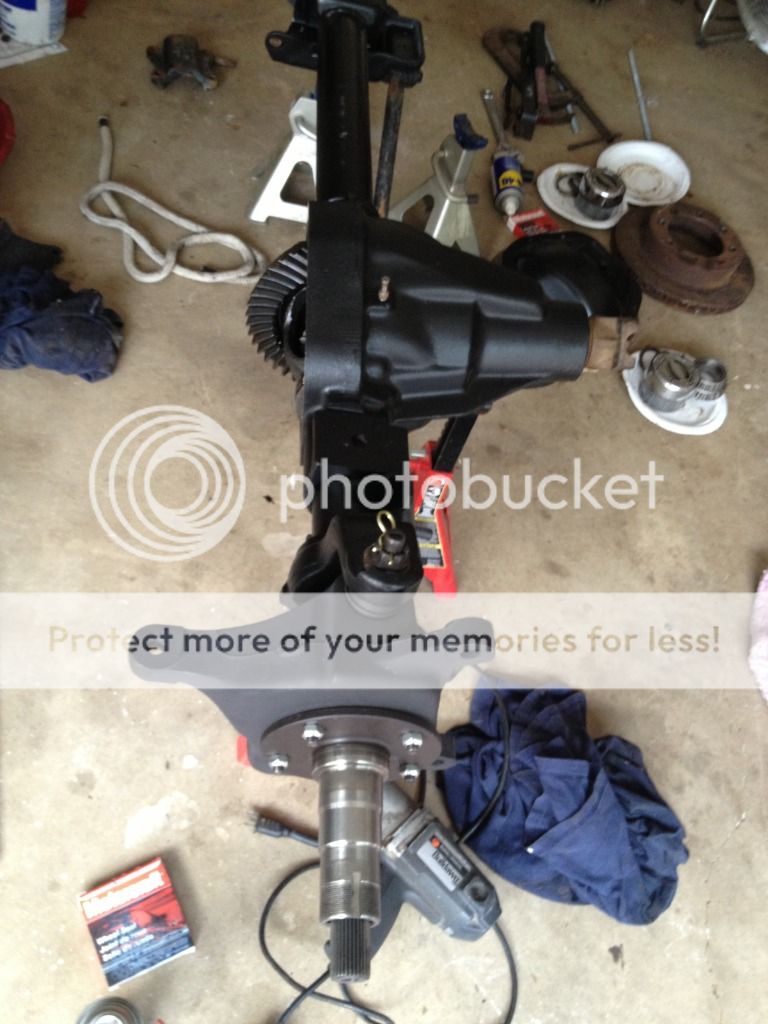
This weekend was a huge success! Inner axle seals in place, inner and outer hub races are in place, and the spindle bearings are in place. I still need to solve the removing and re torquing of the spindle nut so I can replace its seal, and also to get my axle shafts (with new greasable U-joints) from the shop.
Thanks to my 5 minute neighbor for the seal driving tools! Thanks Dad for teaching me how to seat bearing races. (And all the general
knowledge to create a double barrel mudbug burner.)
I wrestled with putting it in the other place but the one is titled "Projects" so I thought I'd follow the rules�
That is why I put the link to in in my signature�thanks for following it!
Your D60 is leaking out the axle tube ends? I'm replacing those inner seals too before it goes under the truck.
Yep leaking out the axle tube ends which means the inners and outters are leaking!
Looks good though! You got a lot done!
I've never had to press fit like you did. I have heard about friends putting it in the freezer before, but like I said I haven't done it.
I need to do an entire D60 front end rebuild. Keep it up! Cant wait for the swap.
And those blocks look like a lot more than 2" difference!
And those blocks look like a lot more than 2" difference!
Mine didn't have outers, and I was surprised at how little stuff had accumulated. I could tell that the inner on one side (the short side) had leaked as its 'stuff' was a little gooier, but the long side had nothing but dried dirt no more than about 6" to 10" in. I think I said it earlier, the amount of crud from both axle tubes wouldn't fill a shot glass.
And yes, they definitely look more than 2". But the F350 are always referred to a 4" and the F250 2". In the interest of plausible deniability I didn't measure them so I could tell the Wife with clear conscience: "Yes Wife, I only raised it 2 inches."
I may take an actual measurement and post it later.
Edited to add: The F250 blocks measure 2". The installed F350 blocks measure 4-1/4". The camera angle certainly makes the difference look like more than that!
Last edited by LeoJr; 06-10-2014 at 08:21 PM.
Reason: Added F350 blocker measurement comment.
No progress today but I retrieved some parts. I had Inland Truck Parts replace the two axle shaft U joints. They were very pricey though I didn't price shop them. But, for $25 each side I let them install them too. I know I could have knocked them out and back in (I've done a few) but these guys have the tools to do it easy.
When I went to pick them up last week, the had installed non-greasable U joints, I asked for greasable, and the counter guy even confirmed that was what he was ordering in. I've heard all the "sealed for life" is better, better grease, better seals, etc. Even the argument that non-greasable are stronger. And I'd consider non-greasable for a constant use item that gets up to temperature regularly and spins constantly to shed gunk. But a U joint that spends %95 of its time not spinning, not getting warmed, being splashed, dunked and drug through rain, mud, snow, etc, I want to be able to purge its innards with fresh grease. A stronger but dried out, rusty and locked up U joint has no place under the front of my truck.
And these look exactly like the non-greasable one, just that they have a zerk.
I did find one C clip that seemed to be pressed off center. Hard to describe, and makes sense when you look at one close, but both ends of the C rest close to some of the casting. One was pressed on a bit off center and the last 1/8" was wedged out of its grove in the trunnion cap. Though it would likely stay put for many bazillion miles but I asked the counter guy to pull it and reset it.
What I really liked about this whole experience is that these guys know parts inside and out and on trucks and axles that use my little sized truck to wipe with when they take a dump. And though they had to eat the price of the first installation and the price of the first shipped parts (I knew I'd pay freight to get them in quicker than their normal transfer) they gave me some soft input as to the benefits of non versus greasable, but then diligently called Dana and got the two I asked for.
Got a satisfying amount of progress made today. Put in a new pinion seal, put the carrier back in and torqued, installed the steering knuckles with new ball joints per the 3-step torque process, slide the drive axles (with new greasable U-joints) and torqued the spindles.
D60 pinion seal change is easy. If it is set up correctly to begin with, then remove the nut, pull the yoke, pull the old seal and replace with new, push the yoke on enough so a new pinion nut will catch the threads, and torque it tight, really tight. If it ain't set up right, changing the pinion seal or tightening the nut more won't fix things unless it simply loosened for some strange reason.
Did the 3 step torque process. The instructions come with the ball joints and are in the shop manual. I had to apply some upward pressure to the bottom ball joint so the tapered stud would have enough gription so it wouldn't just spin while getting the friction lock nut tightened enough to put enough torque wrench on it.
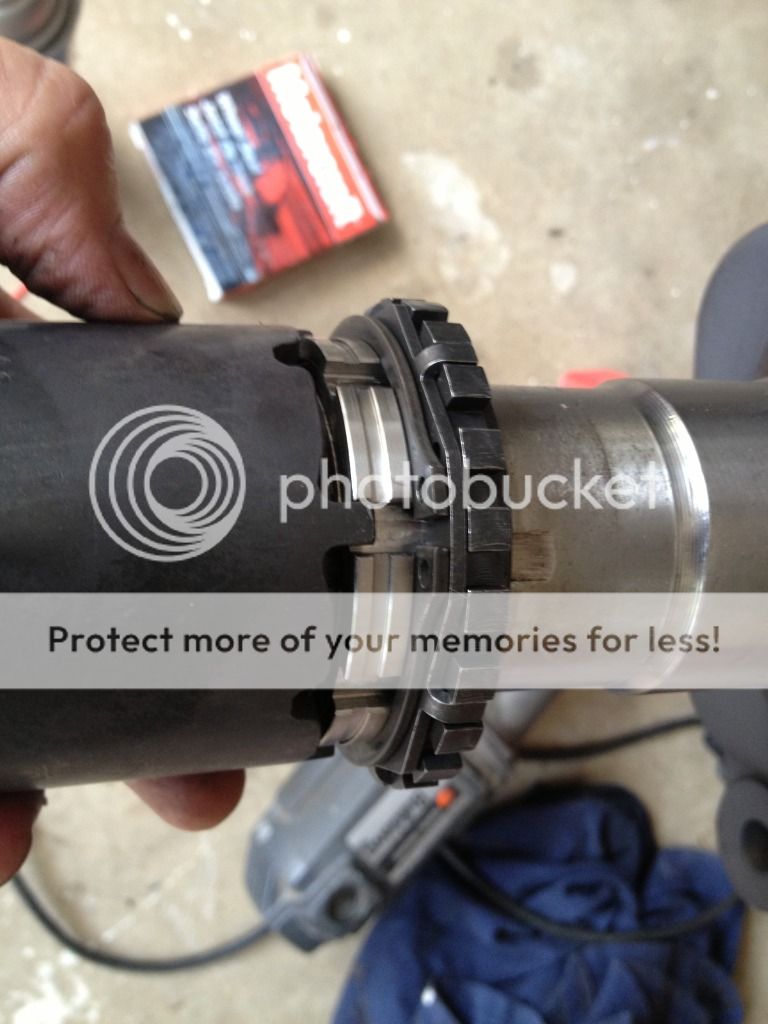
No pictures but the needle bearings in the spindle come with a anti-moisture goo on them, not grease, you need to clean them ( i used a bunch of aerosol brake cleaner) and repack them with a quality grease. There is a thinish plastic seal that get pressed into the inboard end of the spindle. There is also a goofy seal on the drive axle shaft that just sorta pushes against the back of the spindle. (Look back at the earlier pictures) I suspect this is part of the vacuum or pressure operated "automatic" hubs. It looks like an after thought and the old one was mostly unrecognizable. It just gets smooshed in there and doesn't look like a long life design.
I had ordered new spindle nuts and applied antisieze where the spindle pulls into the steering knuckles.
A friend on another forum suggested Stage 8 nut and retainer set up. These are nice. The design is low stress as it simply locks in place the first nut that the wheel bearing torque is adjusted with. No 200 foot pounds of torque applied to a backer/lock nut.
Nice progress man! I keep saying it, but man do I need to rebuild my front axle. Replacing springs wouldnt hurt either!
I always thought that was funny too. "Get tougher harder springs...itll ride better!"
Any idea what the rating are on those?
Post #14 gives some specific numbers that I don't know how tor translate fully. My knowledge of coil springs the rating is pounds per inch per inch, meaning that a 50 pound rated coil spring takes 50 pounds to compress the first inch, then 100 the second inch, 150 the third....
But my summary thought is that the B code is soft at the beginning and the load rate goes up faster to a higher overall load rating. Softer ride, better load handling, in a leaf spring...I'm still skeptical.
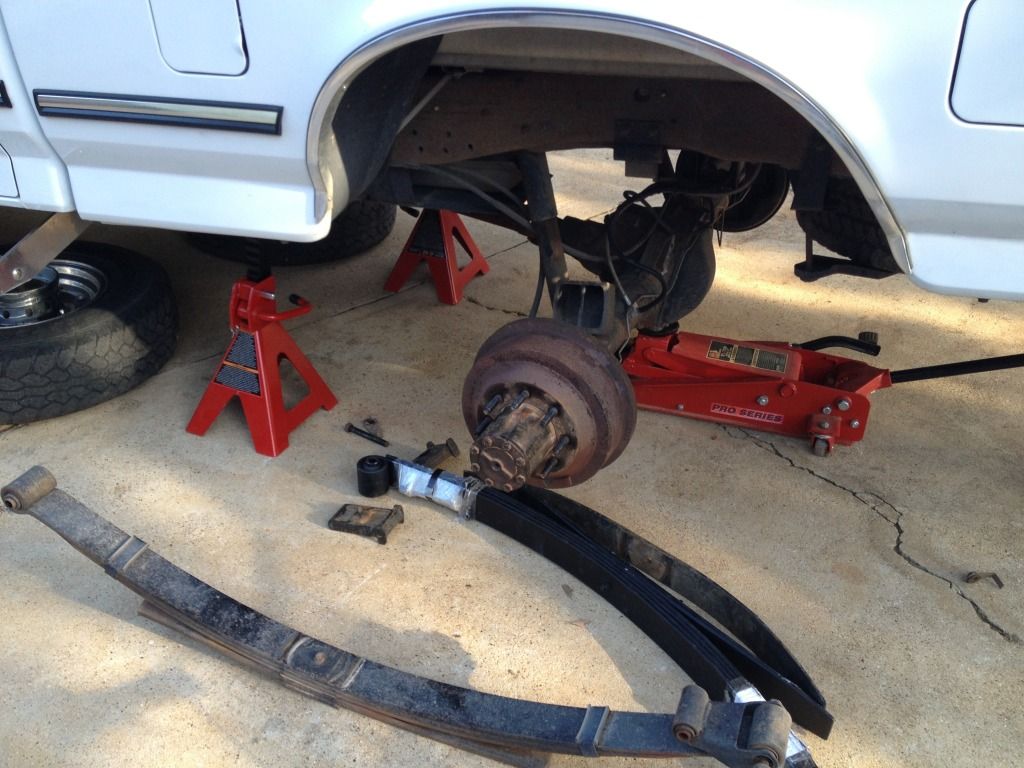
I installed a set of overload springs I procured a while ago and I had selected my u-bolts to include them. They had enough thread to tighten the F250 spring pack with the F350 4-1/4" block, and are now near perfect length for the Super Duty (SD) spring pack, the overload spacer and the overload spring. *N803770*S436 is the part number on my invoice from Ford. They hate it when you don't have a VIN but we muddled through all the questions, the biggest uncertainty was what wheelbase to use, but the other answers were "1995", "F350", "7.3", "4x4", "with overload spring". I have the overload tabs that mount to the frame if I decide I need them.
I didn't take too many pictures as most of the needed steps have been detailed by others. I used a 3/4" drill bit for the front shackle and applied a few layers of blue painter's tape to the lip of the body panel so the drill wouldn't muck it up too bad. I used an 11/16" to open the holes in the shackles. The springs from ATS (Leaf Springs and Suspension Parts by Auto and Truck Springs 1-888-943-8287 ask for Junior) come with a new front bolt sized for a SD truck, it measures .700", so the 3/4" bit is a little big but I already had it. I used the old front bolt in the rear shackle in the freshly opened 11/16" holes. I did remove the metal finger thing from the nut that holds the nut from turning during assembly line installation. The bolt is too long to go inwards and I installed it from the inside poking outwards, thus needing to torque the nut without the finger. The rear holes in the new SD springs require a bigger bolt and this seemed to work perfectly. I used the original bolt in the rubber bushing end of the shackle. I think others open these holes too and use a bigger bolt, I am not convinced this is necessary. My truck didn't get any stronger because I have different springs in it.
Mounting the shackles "backwards" give a lot more clearance for the new bigger springs but still not enough. I deepened the opening about a 1/4" with a grinder and dressed it with a file. It looks tight but I think it is enough. I'll watch for binding and open it up more if necessary. In retrospect this is the one area I wish I spent more time. 3/8" would have been sufficient, 1/2" not necessary. This is a 2 bolt item to remove so not too much rework if needed.
Someone had given me some Energy Suspension polyurethane bushings for the rear so I decided to use them. I used a piece of threaded rod (TR) ran through a a 6" piece of pipe and then through the shackle bushing. I double nutted the end at the bushing to put a 12 point socket on them, single nut on the other end, appropriately sized flat washers at each end. Tighten everything up and mine was the molded in rubber so it wouldn't budge. Apply propane torch heat to the outside, the rubber softens and keep wrenching the nuts. Installing the bushings is done with the same threaded rod, nuts and washers, no need for the pipe. This basic set up was used when I replaced my front bushings too.
Here's the first side all assembled but not torqued yet. When both sides were done, I lifted %90 of the weight my the axle and off of the jack stands and then torqued everything, front spring bolt, rear shackle bolts and the U-bolts.
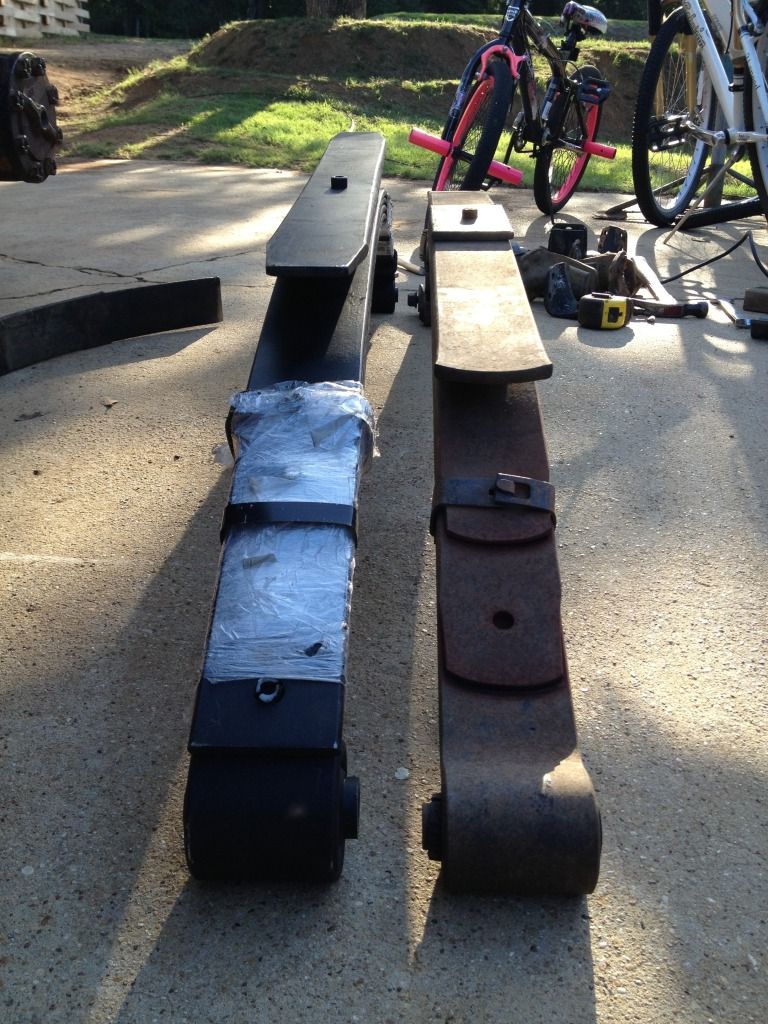
Here's a view of the new SD springs on the left and the originals on the right. The left shock is disconnected to get everything in place, the right side hadn't been yet. When I put in the F350 4-1/4" block under the stock springs it wasn't necessary to disconnect the the shock. The arch of the new SD springs required the shock to be disconnected to get everything in place. I did this one side at a time as the axle is heavy and I wanted the other side to be held for me. I did have to loosen the other side's U-bolts to get some movement though. But the other side's U-bolts and shock being in place keeps the axle from falling to the ground snapping the brake lines and crushing a toe.
Wrestling the old springs out and new springs in was a chore. With the axle on a short jack stand I dropped the bolts out of the old and let it set onto the axle, then slide it out the back. New spring went in the same way, I snaked it over the axle balancing it while I wrestled the bushing end of the shackle into place and stabbed the bolt. I used a floor jack to raise the front of the sprint into place. Raised the axle with the floor jack and stacked my block, springs, overload spacer and overload spring all into place and captured it all with the U-bolts.
 05-27-2014, 11:40 AM