4.6 DOHC Swap into 96 Ranger
#16
 06-10-2014, 07:49 PM

Join Date: May 2014
Posts: 44
Likes: 0
Received 0 Likes
on
0 Posts
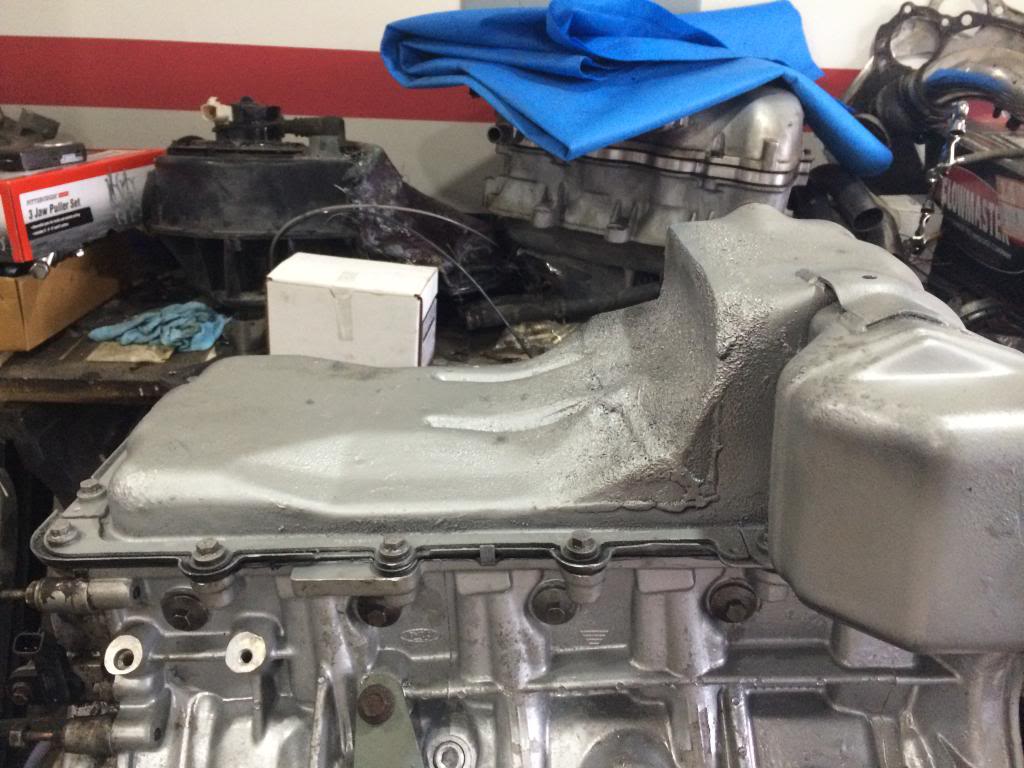
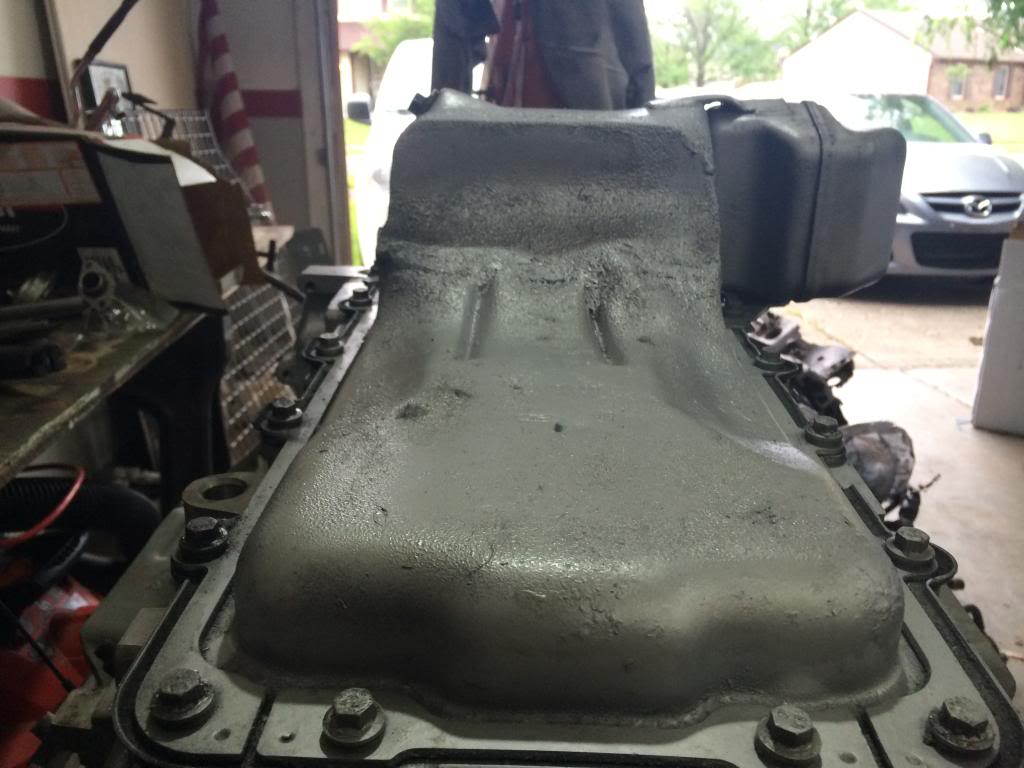
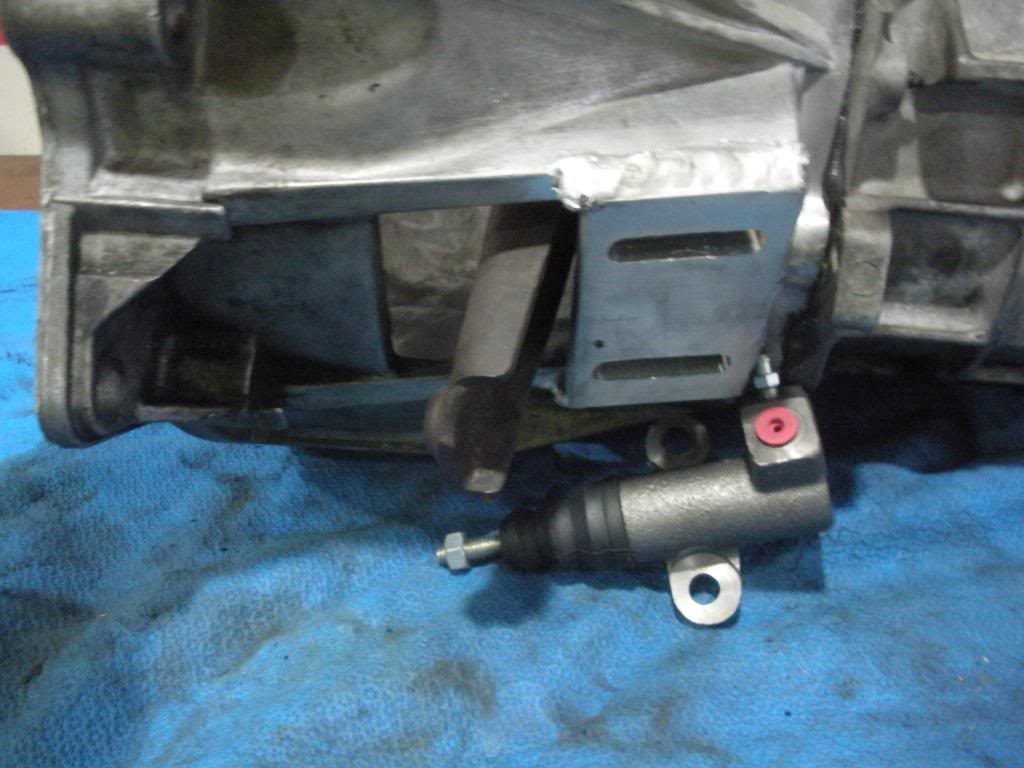
Finally got around to taking a picture of the finished modded oil pan. It looks kinda rough, but it doesn't leak.

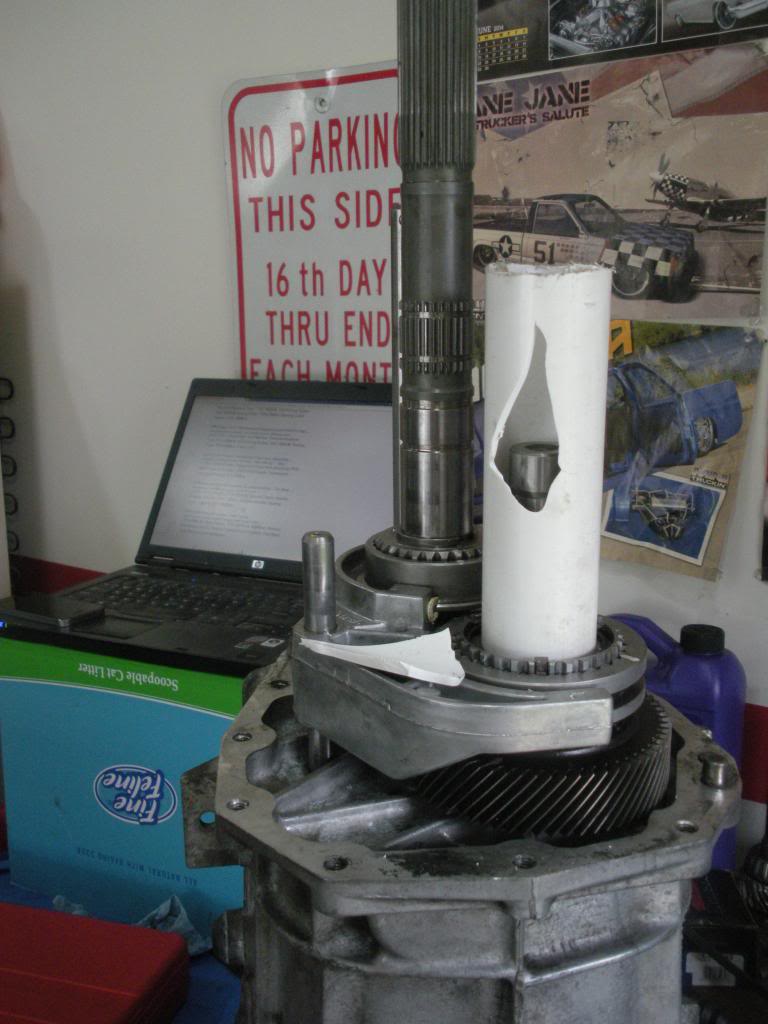
Also finished rebuilding the transmission. Don't really have any pics of the rebuild, other than my home made bearing driver. Glade I bought 4 feet of it.
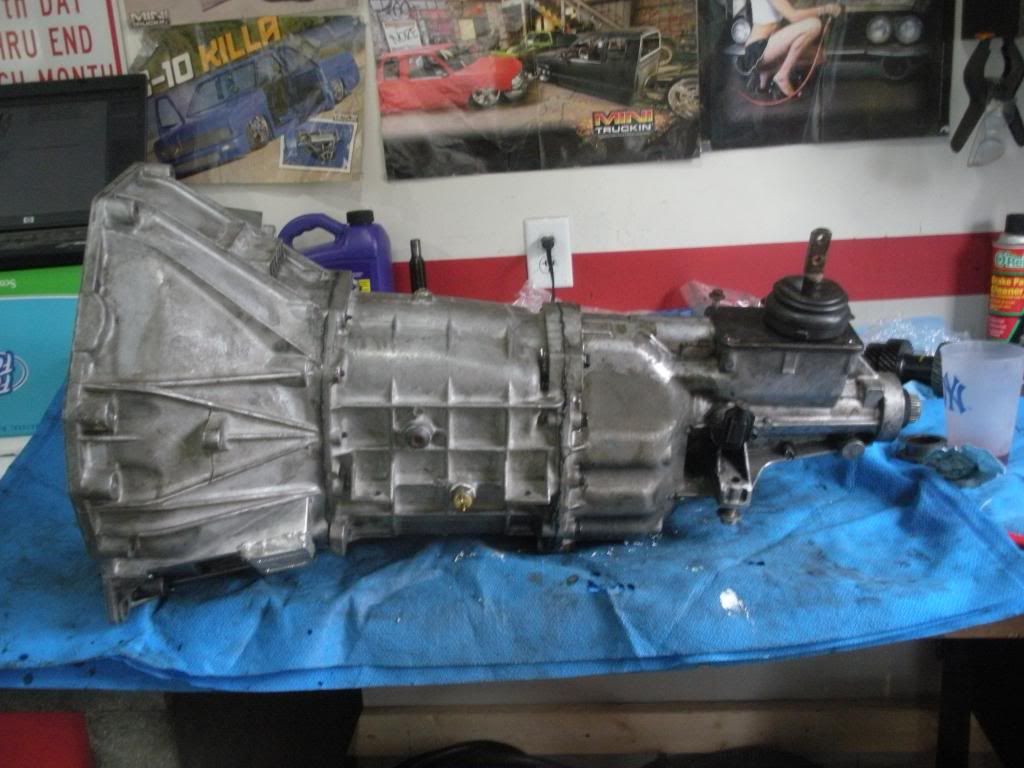
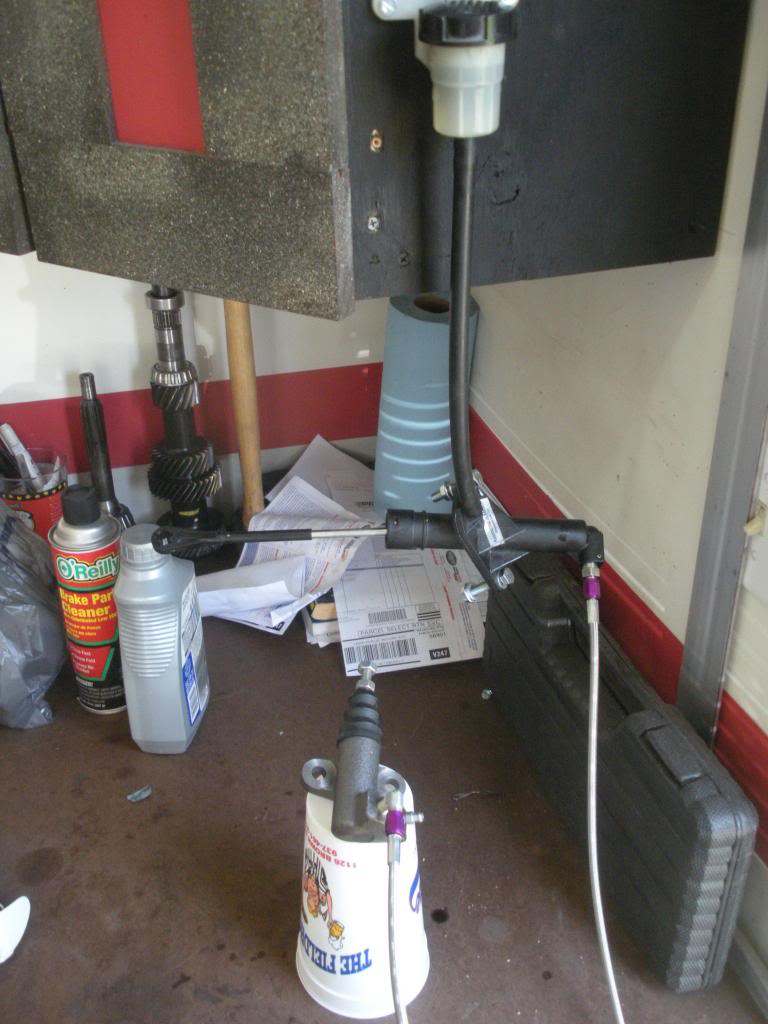
And this is what I came up with for the hydraulic slave cylinder. I did a ton of research on placement, and it seems that my set up shouldn't be to far forward (toward the engine), guess we will eventually find out. My friends dad welded up the aluminum plate. I am using a 78 Nissan 280Z slave cylinder and a late 80s Ranger Master Cylinder.
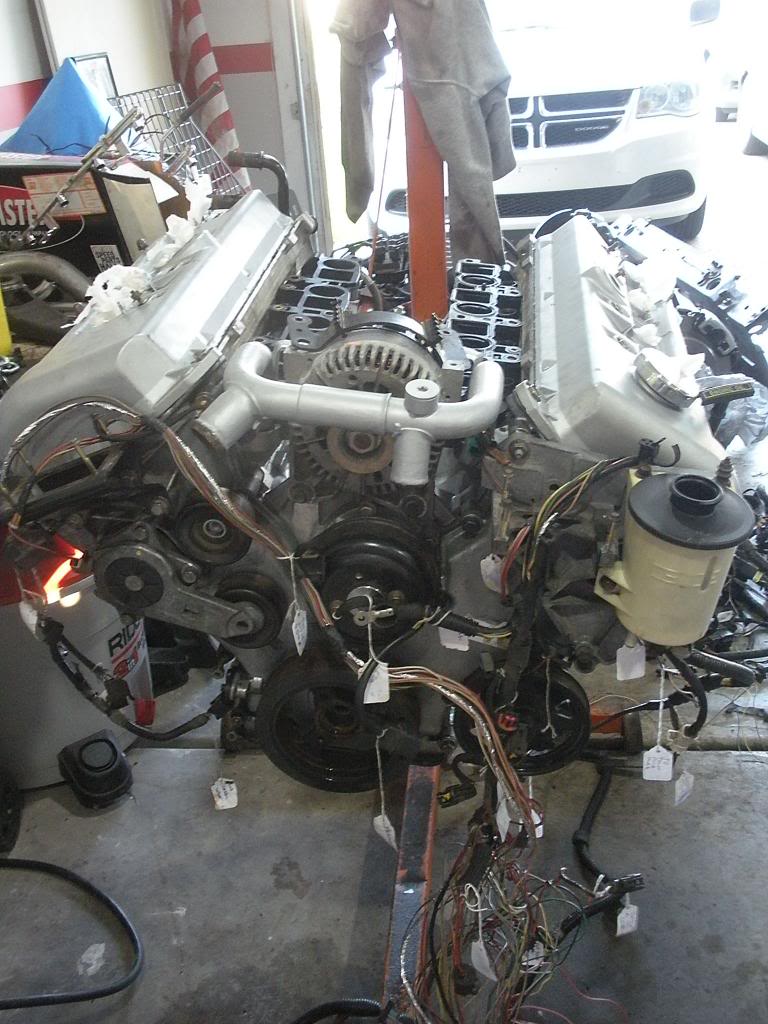
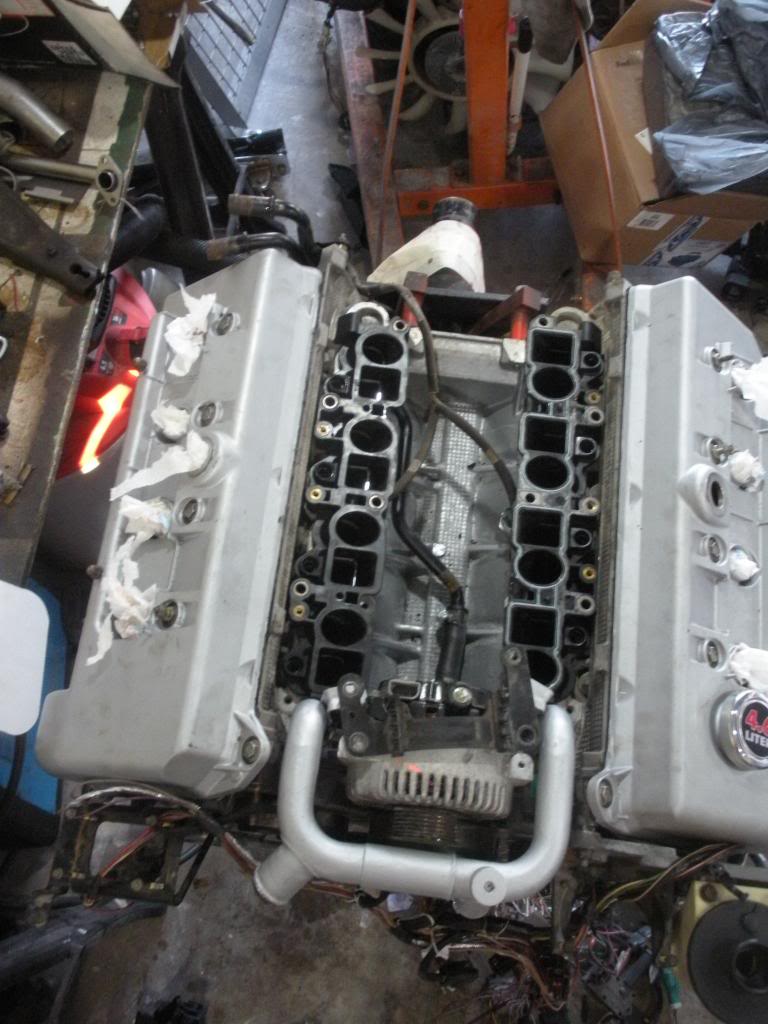
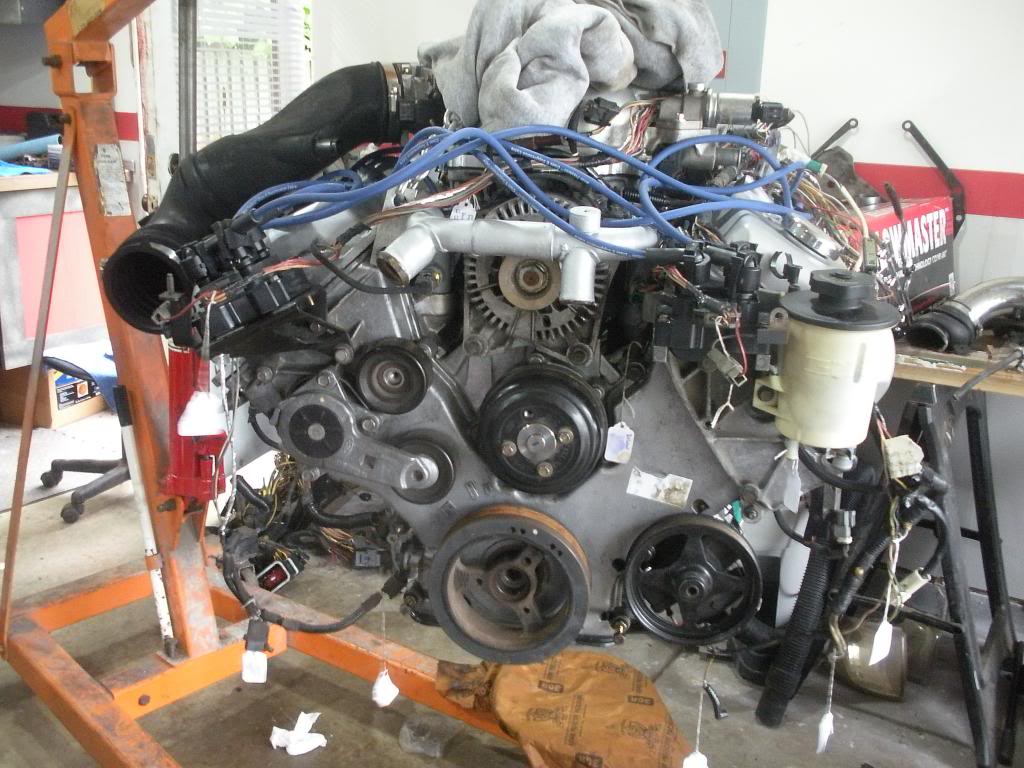
Went ahead and finished assembling the engine. Just waiting on FedEX for the pressure plate bolts, and then the engine and tranny will be in for good. It will then be onto tackling the steering situation!!


Also finished rebuilding the transmission. Don't really have any pics of the rebuild, other than my home made bearing driver. Glade I bought 4 feet of it.


And this is what I came up with for the hydraulic slave cylinder. I did a ton of research on placement, and it seems that my set up shouldn't be to far forward (toward the engine), guess we will eventually find out. My friends dad welded up the aluminum plate. I am using a 78 Nissan 280Z slave cylinder and a late 80s Ranger Master Cylinder.

Went ahead and finished assembling the engine. Just waiting on FedEX for the pressure plate bolts, and then the engine and tranny will be in for good. It will then be onto tackling the steering situation!!


#17
06-11-2014, 09:10 PM
Join Date: May 2014
Posts: 44
Likes: 0
Received 0 Likes
on
0 Posts


#19
06-20-2014, 05:12 PM
Join Date: May 2014
Posts: 44
Likes: 0
Received 0 Likes
on
0 Posts
Been slowly hacking away at things.
I started working on the radiator/fan and core support.
I ended up going with a Summit Brand (Northern) radiator, sized to fit the Mark VIII electric fan. Funny enough, it fit right in-between the frame rails. The setup however led me to some clearance issues, so I ended up trimming back the fan shroud, and opened up the inside of the core support a little bit, allowing me to recess the radiator/fan inside the core support.
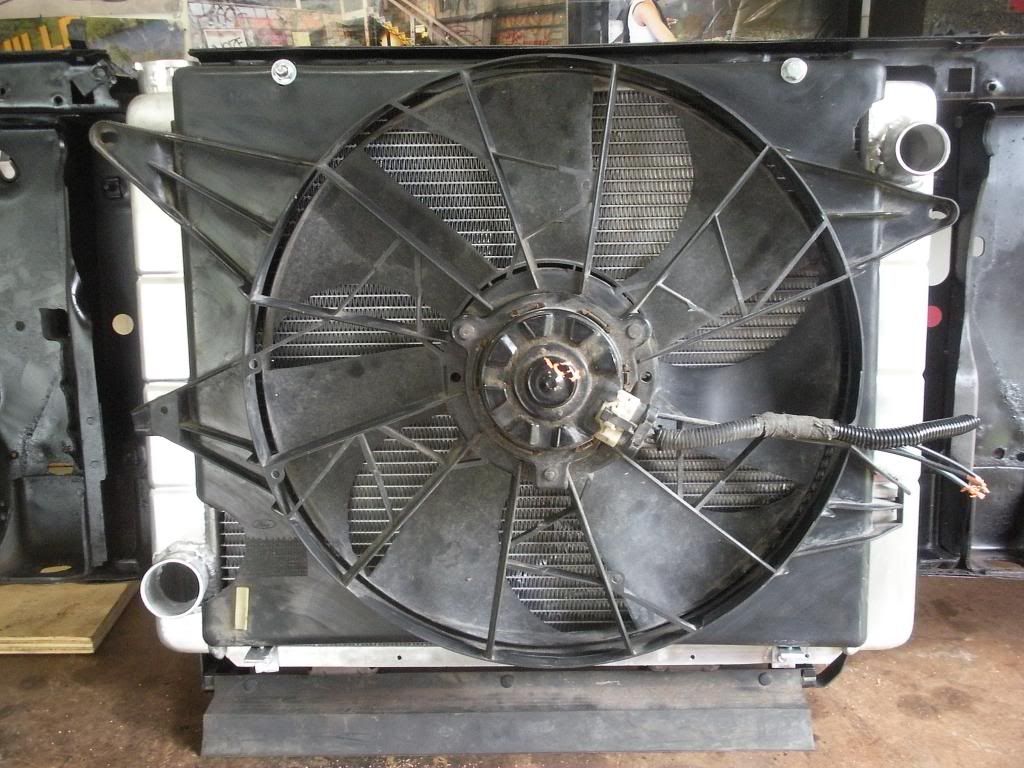

I ended up reusing the factory lower radiator mounts, and just rewelded them to the lower cross member.
The are just acting as a lower support.

Don't mind the crappy opening around the radiator cap, that will eventually be cleaned up and not so rough looking.
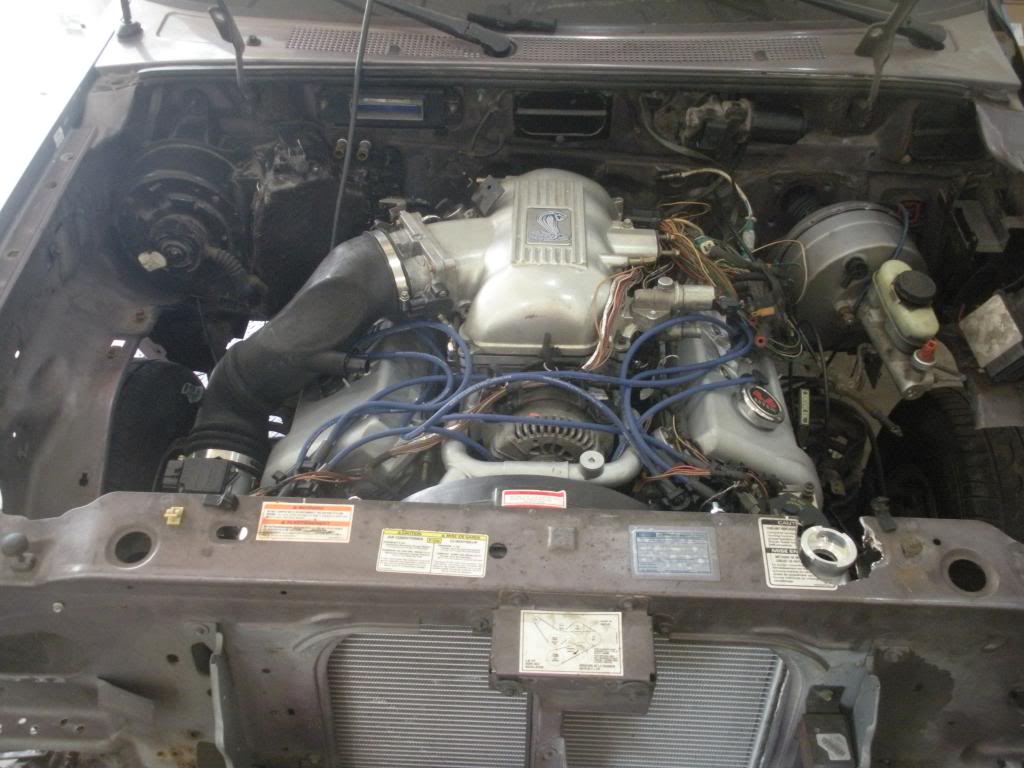
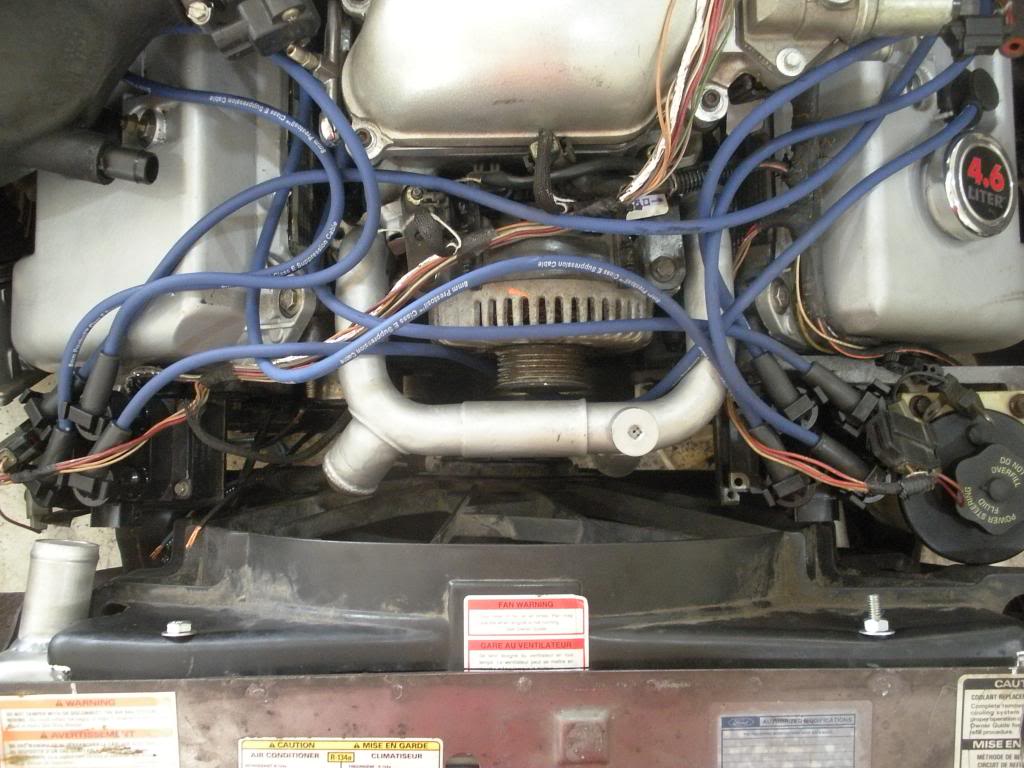
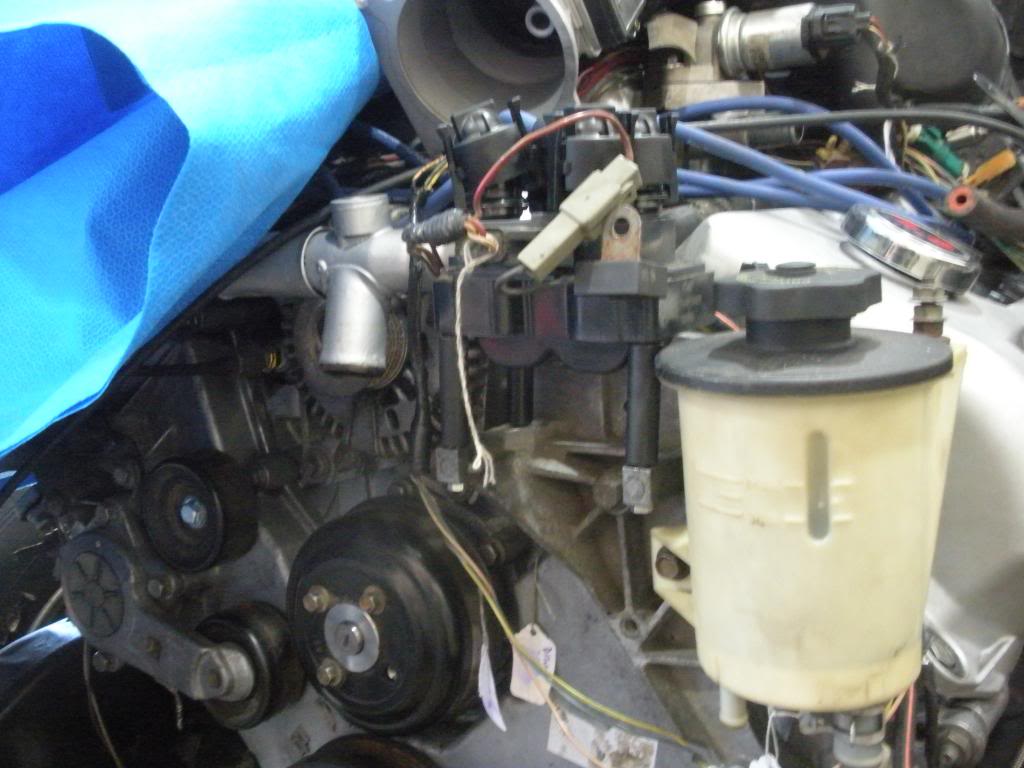
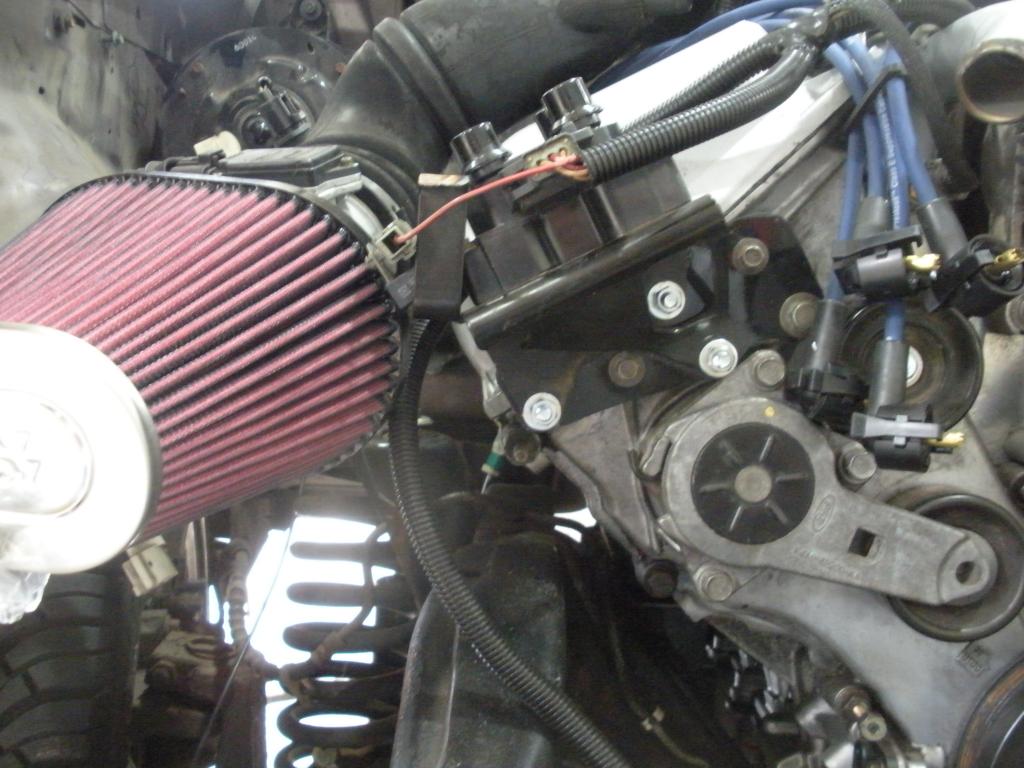
I did run into another clearance issue with the driver side coil pack, but by elevating it about 2"; it will clear the fan shroud.
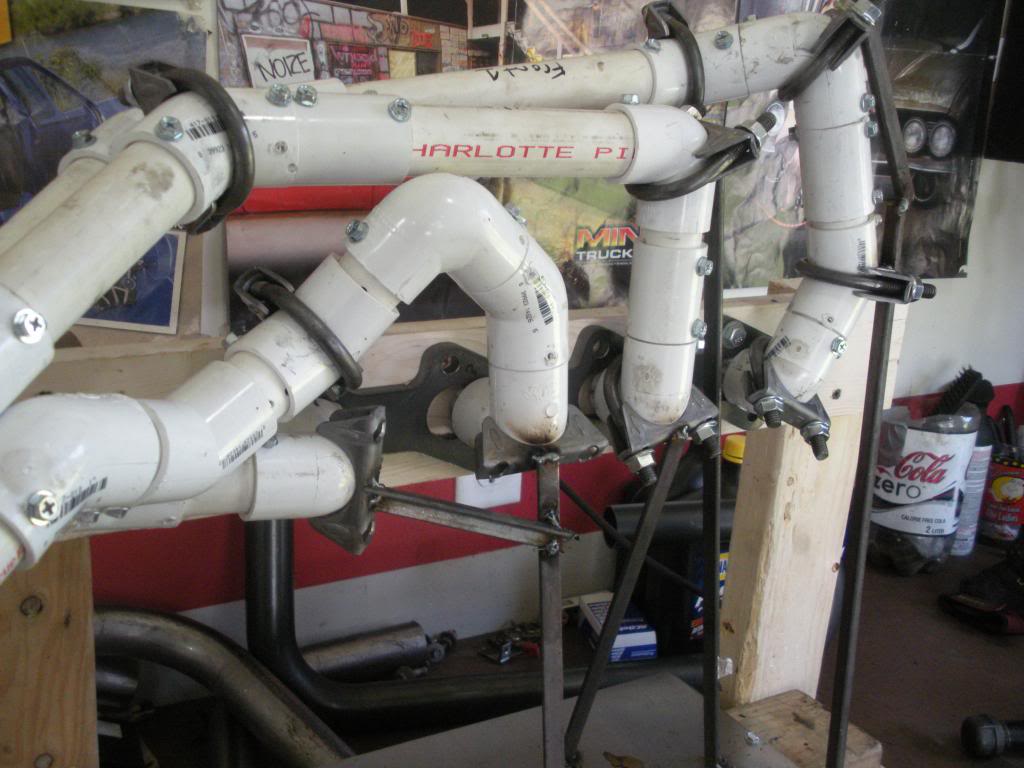
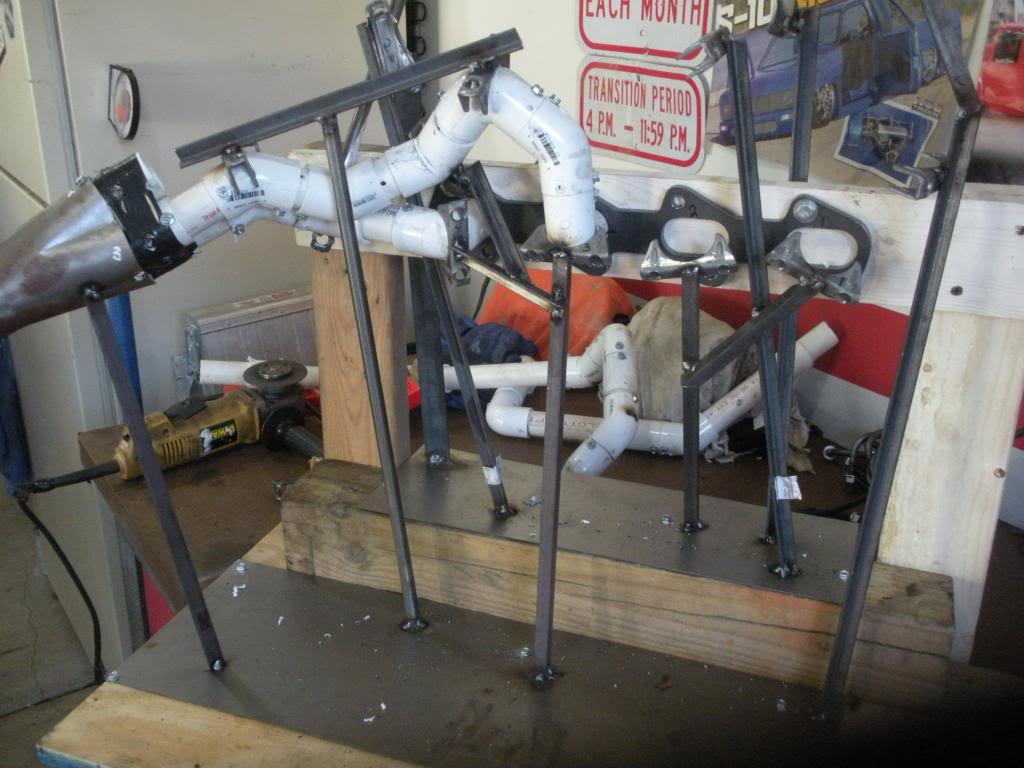
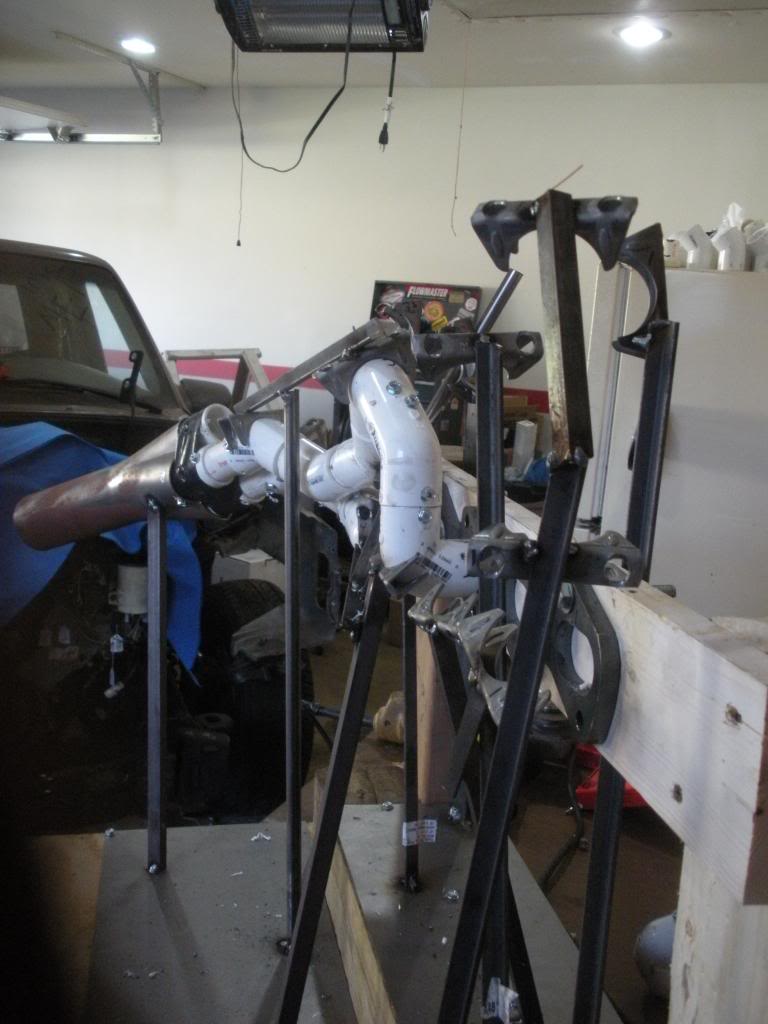
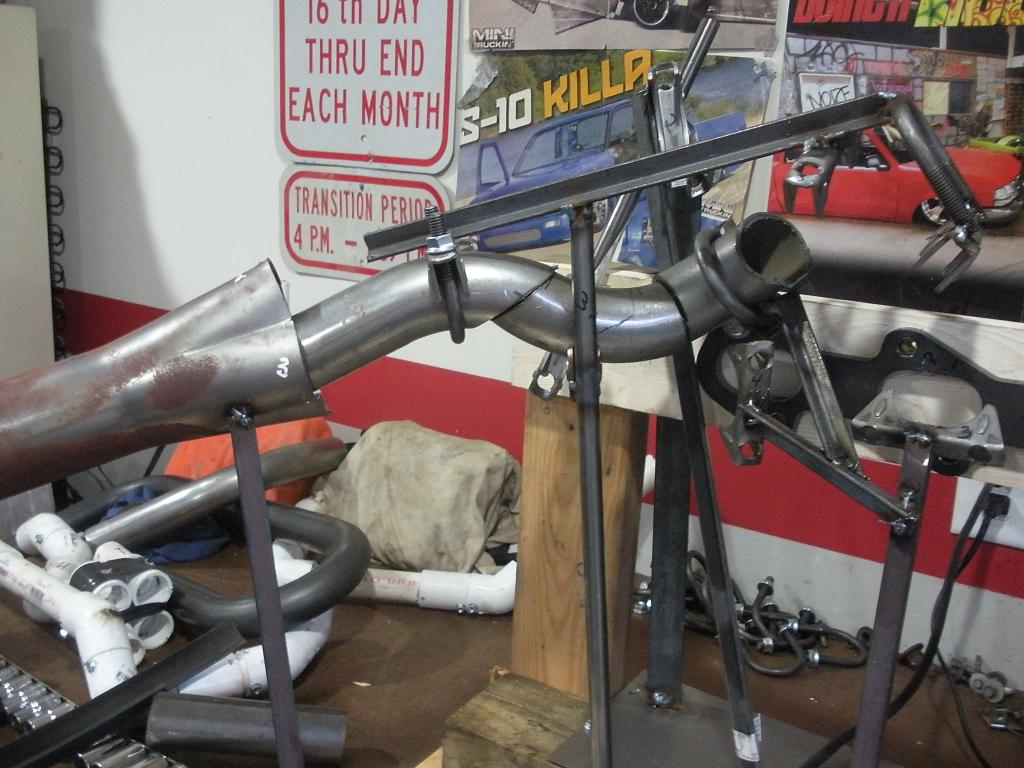
Also started to mock up my passenger side header. I did the entire mock up with 1" PVC. The OD of the bends and couplers are almost 1 5/8", which is what I will be using.
Here is the clearance I am working with.
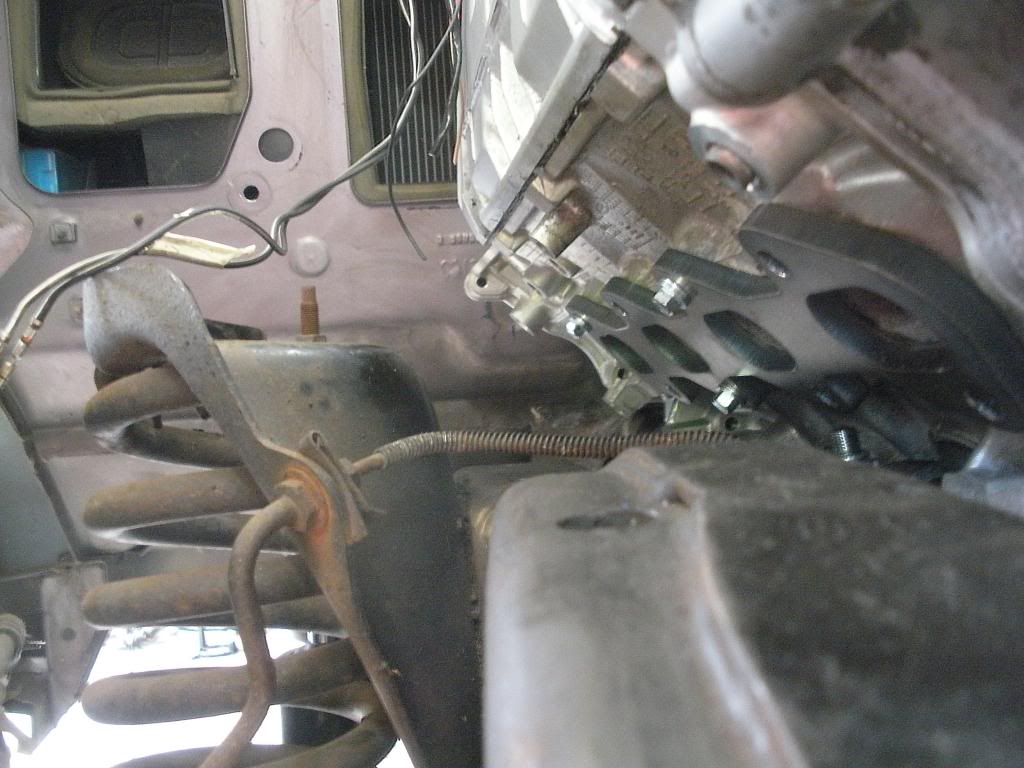
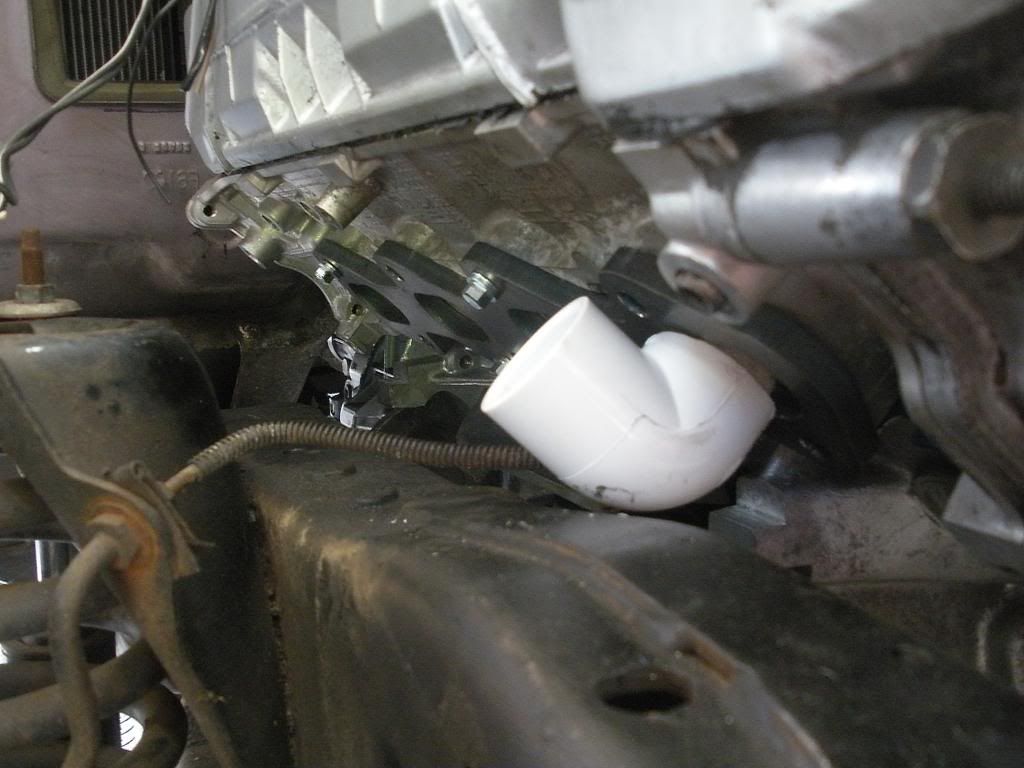

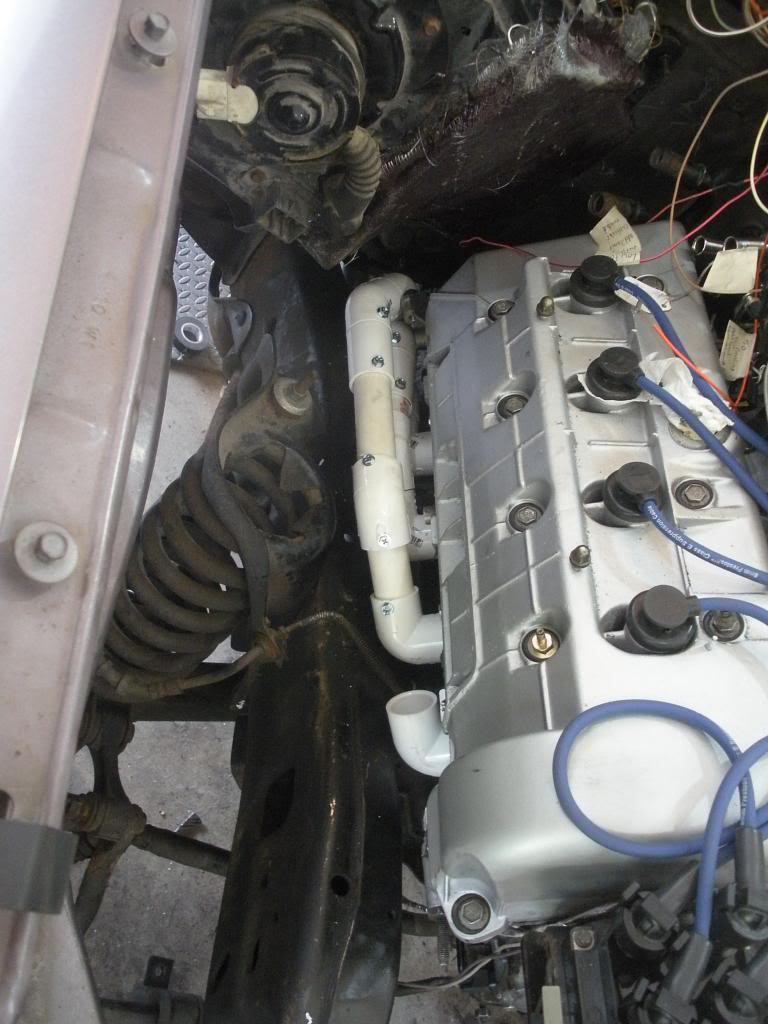
The goal was to stay inside the frame rail. After I had it all mocked up, I couldn't pull it back out. :fryingpan
So I scraped that idea, and went the only other way.
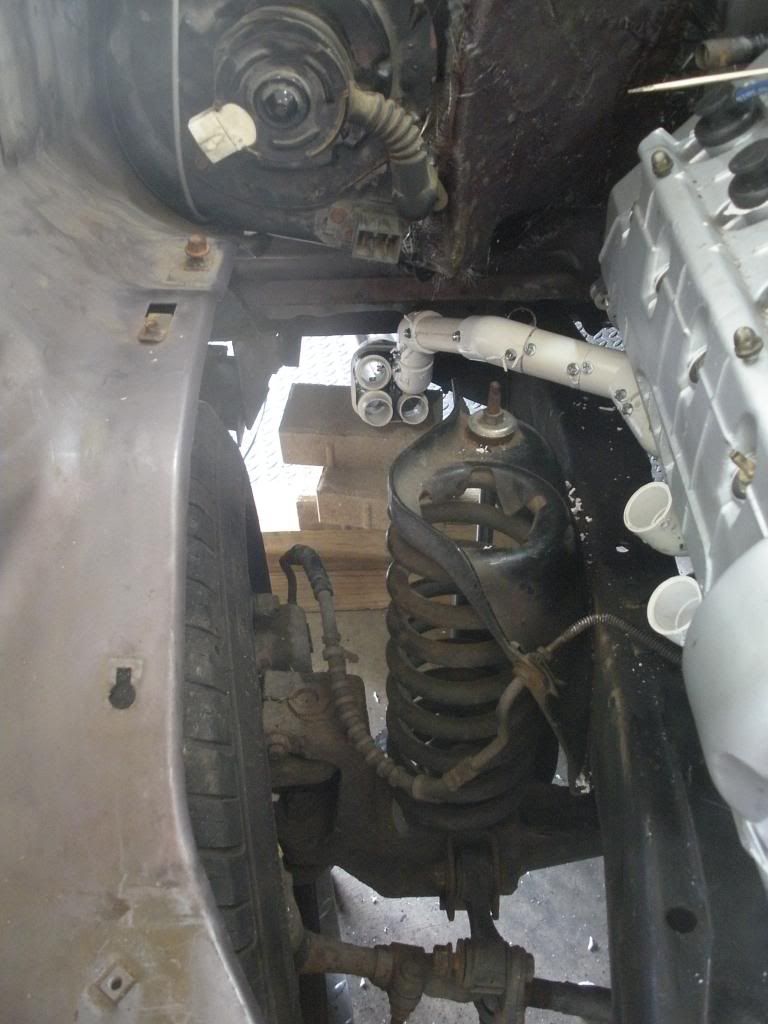

The finally routing is a little different than above, but will still have the same affect.
I am just waiting on my exhaust clamps to come in, so I can start working on the rest of the jig.
I started working on the radiator/fan and core support.
I ended up going with a Summit Brand (Northern) radiator, sized to fit the Mark VIII electric fan. Funny enough, it fit right in-between the frame rails. The setup however led me to some clearance issues, so I ended up trimming back the fan shroud, and opened up the inside of the core support a little bit, allowing me to recess the radiator/fan inside the core support.


I ended up reusing the factory lower radiator mounts, and just rewelded them to the lower cross member.
The are just acting as a lower support.

Don't mind the crappy opening around the radiator cap, that will eventually be cleaned up and not so rough looking.

I did run into another clearance issue with the driver side coil pack, but by elevating it about 2"; it will clear the fan shroud.


Also started to mock up my passenger side header. I did the entire mock up with 1" PVC. The OD of the bends and couplers are almost 1 5/8", which is what I will be using.
Here is the clearance I am working with.


The goal was to stay inside the frame rail. After I had it all mocked up, I couldn't pull it back out. :fryingpan
So I scraped that idea, and went the only other way.


The finally routing is a little different than above, but will still have the same affect.
I am just waiting on my exhaust clamps to come in, so I can start working on the rest of the jig.


#20
06-21-2014, 06:42 PM
Join Date: May 2014
Posts: 44
Likes: 0
Received 0 Likes
on
0 Posts
Made a little more progress today.
Made the 2" spacers to raise the driver side coil pack. Looks a tad goofy now, but it serves a purpose.
Also got the rest of the items for the hydraulic clutch. Got it all plumbed and then bench bled it.
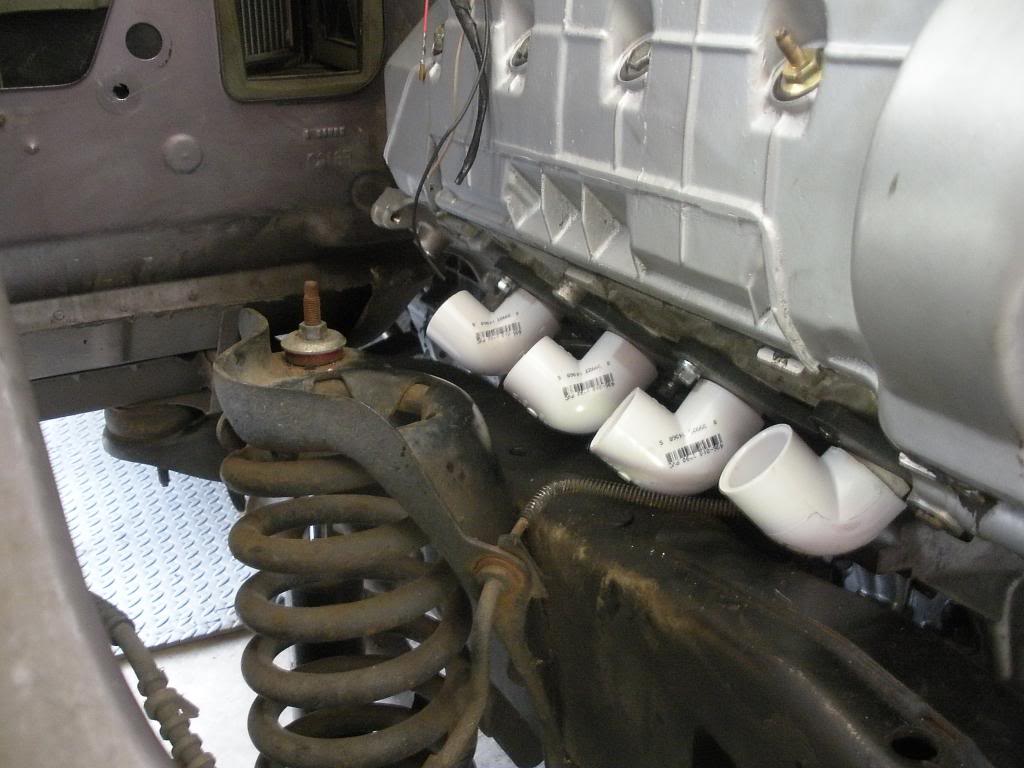
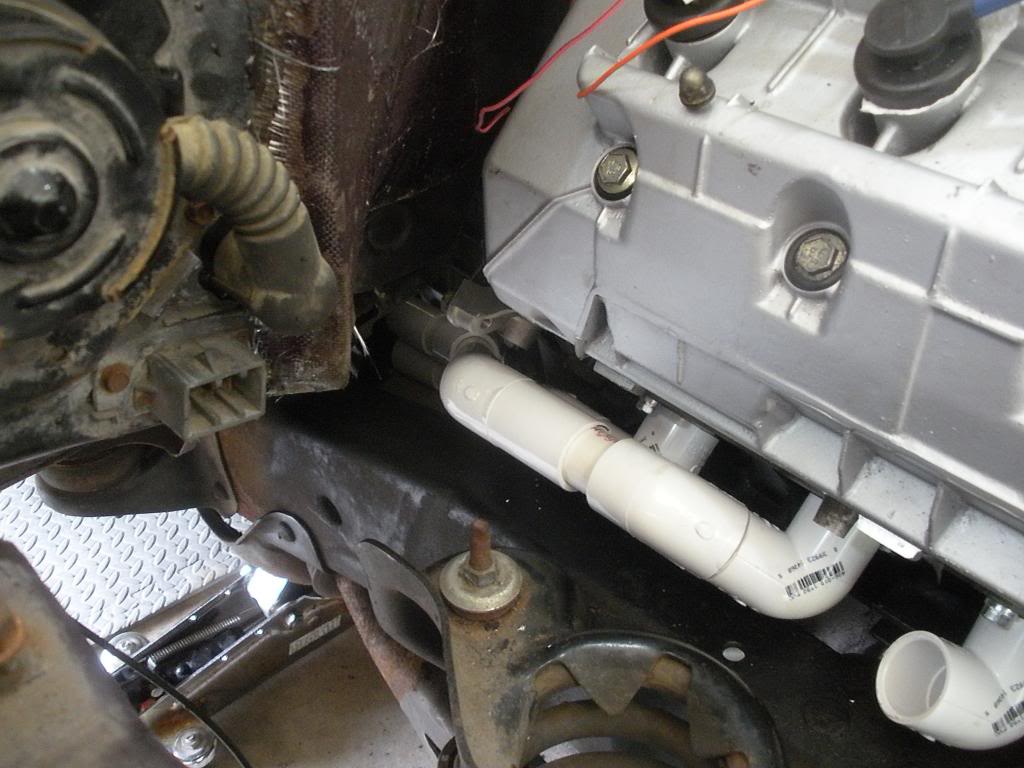
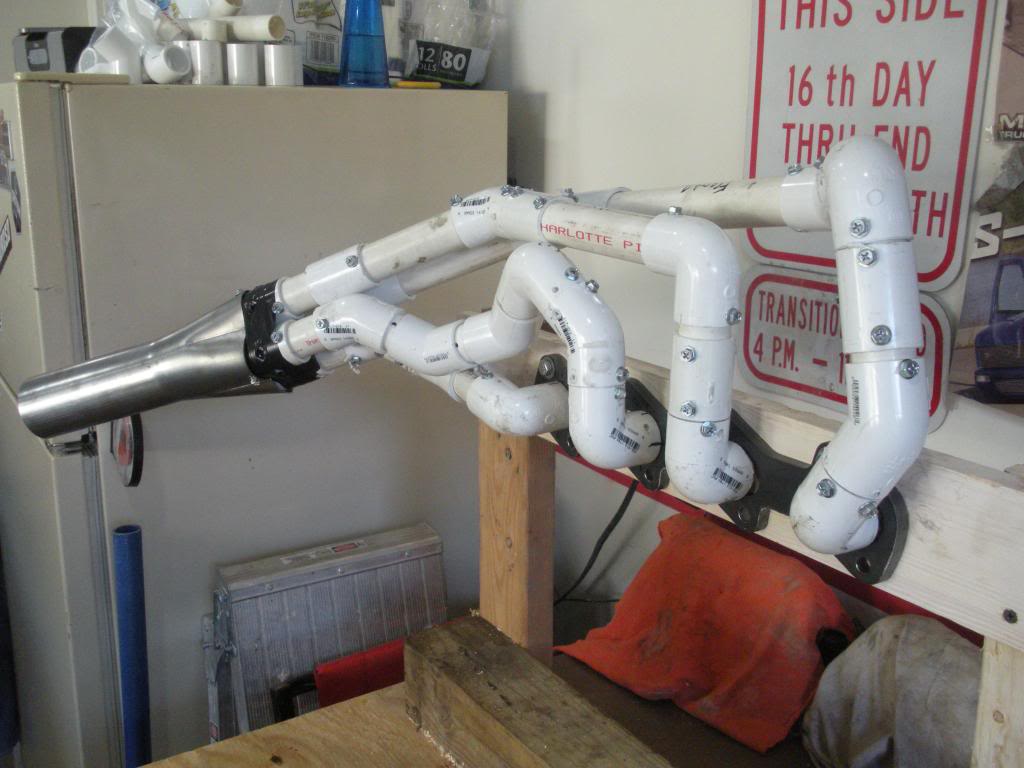
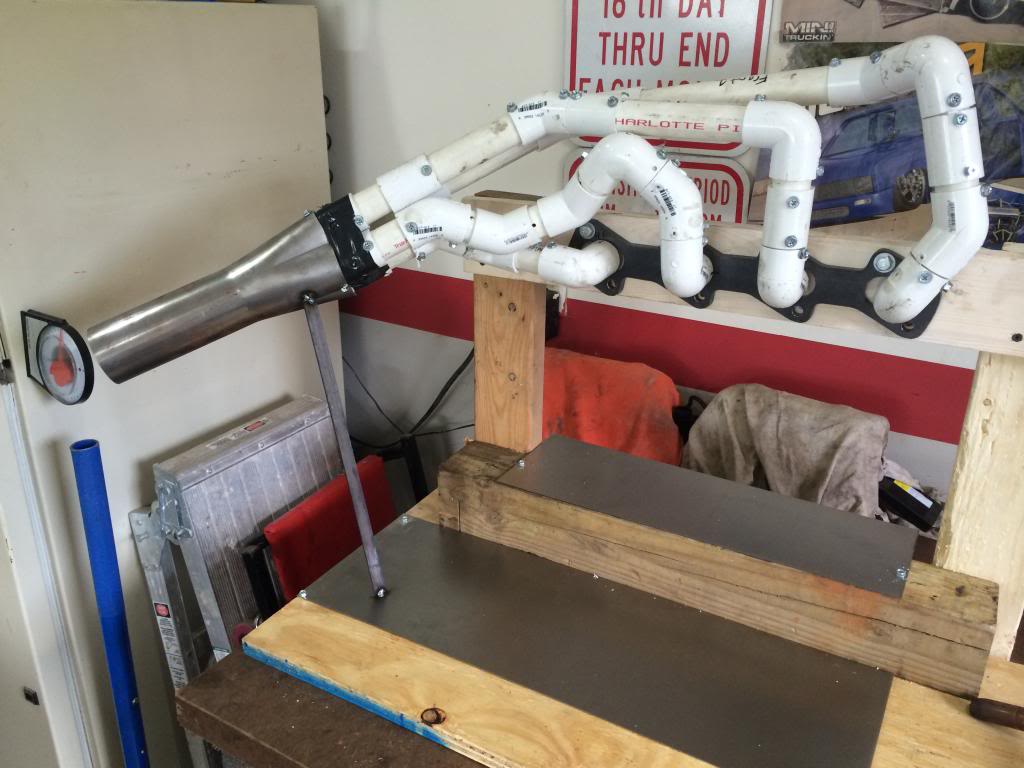
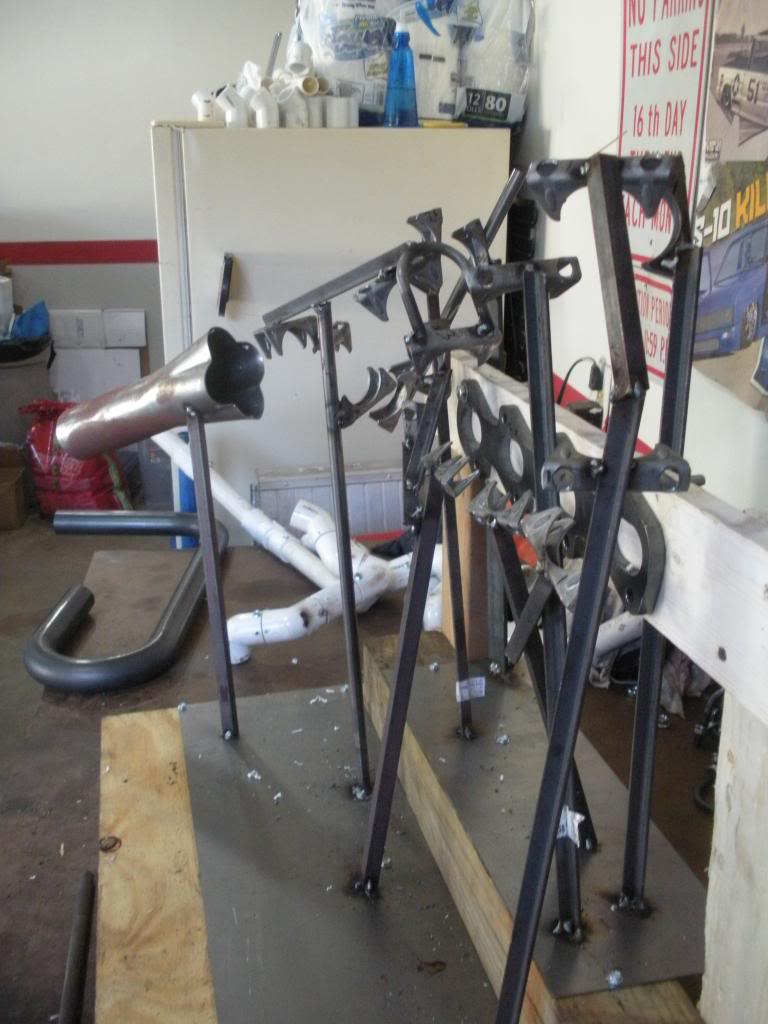
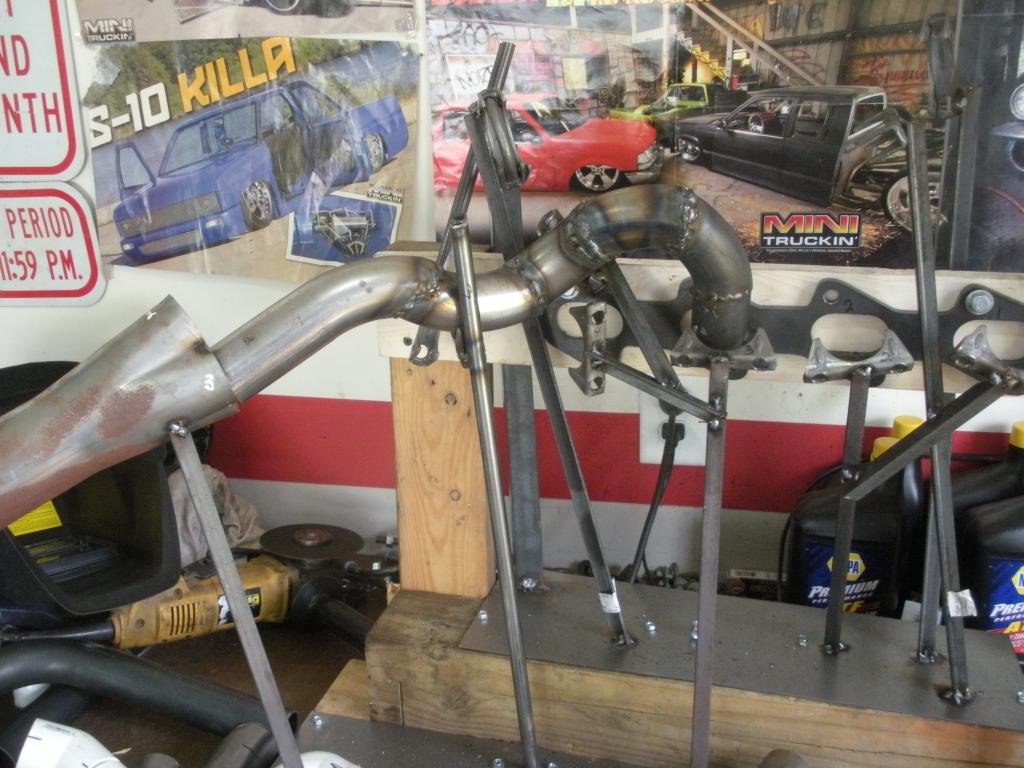
Lastly I finished the jig for my passenger side headers.
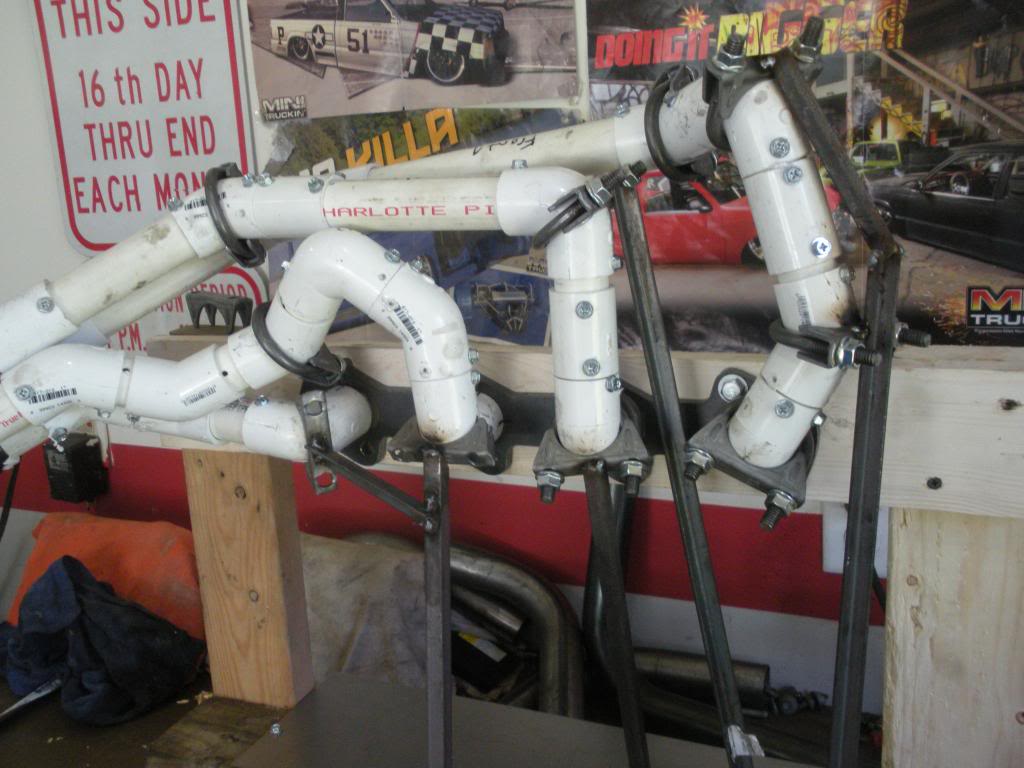
I made sure to label which clamp goes to which primary tube, cause just looking at it makes my head hurt. Haha.

Made the 2" spacers to raise the driver side coil pack. Looks a tad goofy now, but it serves a purpose.

Also got the rest of the items for the hydraulic clutch. Got it all plumbed and then bench bled it.

Lastly I finished the jig for my passenger side headers.


I made sure to label which clamp goes to which primary tube, cause just looking at it makes my head hurt. Haha.


#22
06-23-2014, 08:24 AM
Join Date: May 2014
Posts: 44
Likes: 0
Received 0 Likes
on
0 Posts
#23
06-30-2014, 08:55 PM
Join Date: May 2014
Posts: 44
Likes: 0
Received 0 Likes
on
0 Posts
Finished the steering box mount, and actually ended up coming together easier than I thought it would.
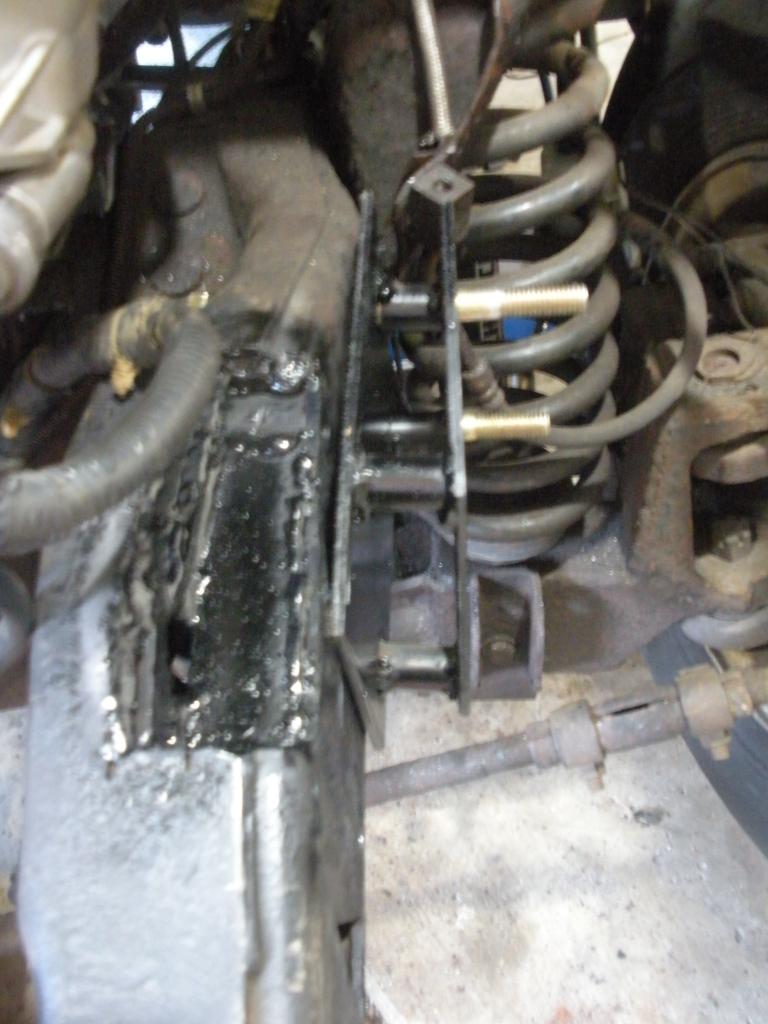
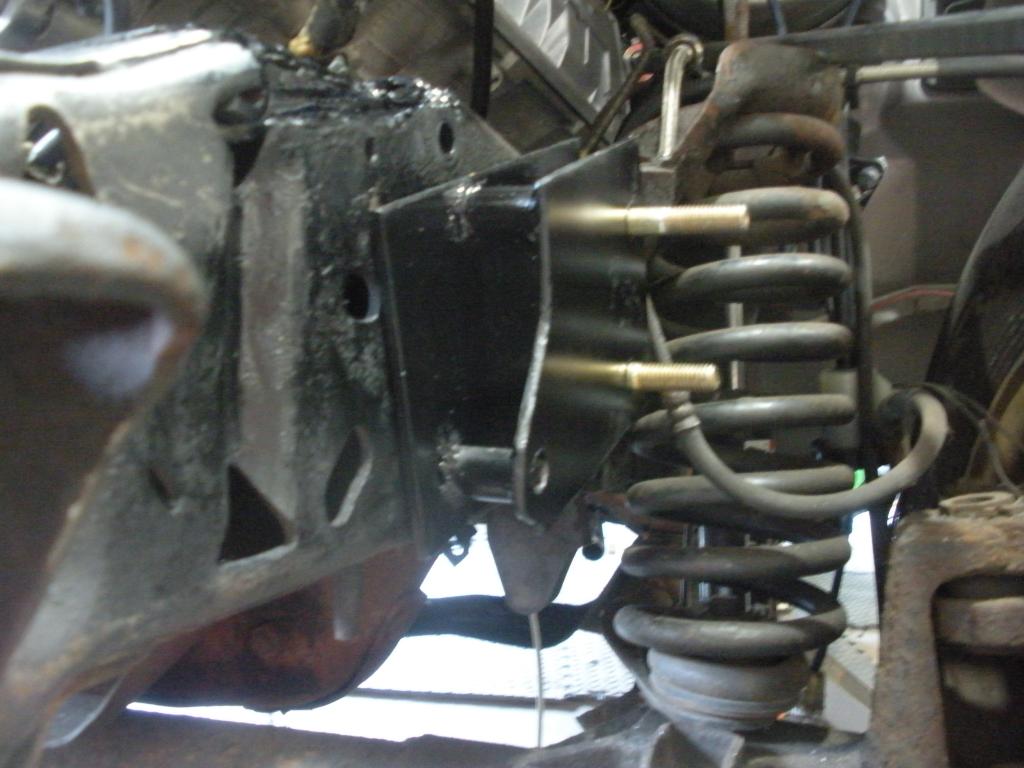
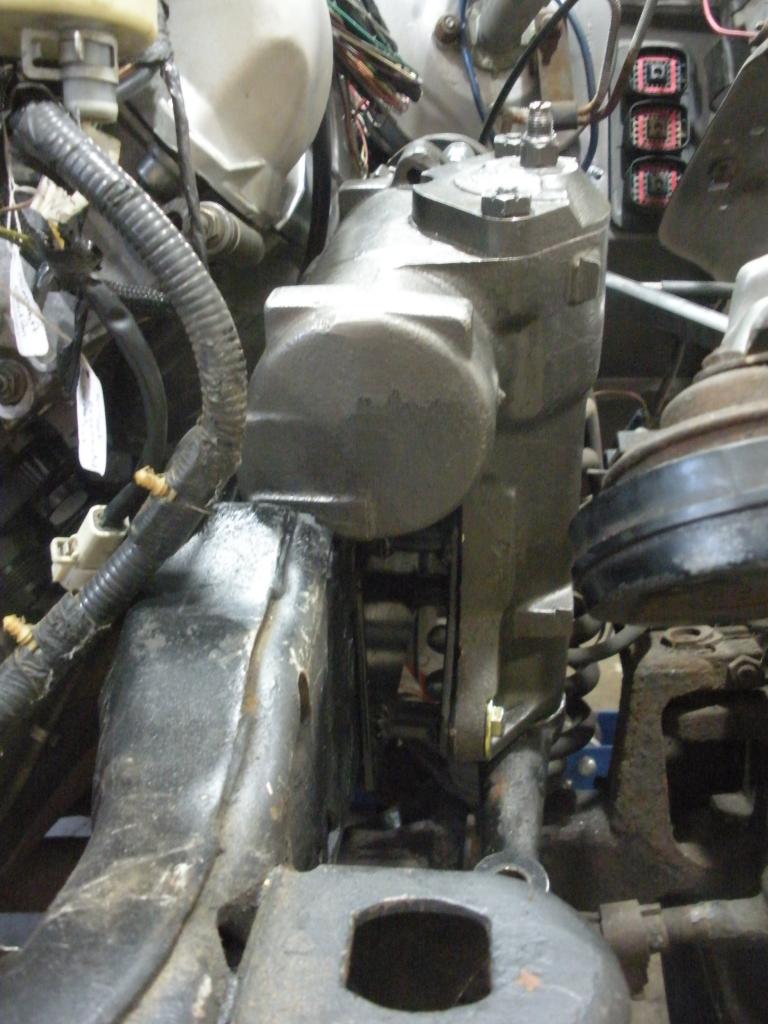
The input shaft of the box ended up being alittle too far offset from aligning with the steering shaft, so I am going to have to add another u joint. The shaft is just moved over really far, it actually sits about 2" off the valve cover.

Next I went ahead and hacked off the factory pitman arm tie rod end, to get ready for the extension of it.
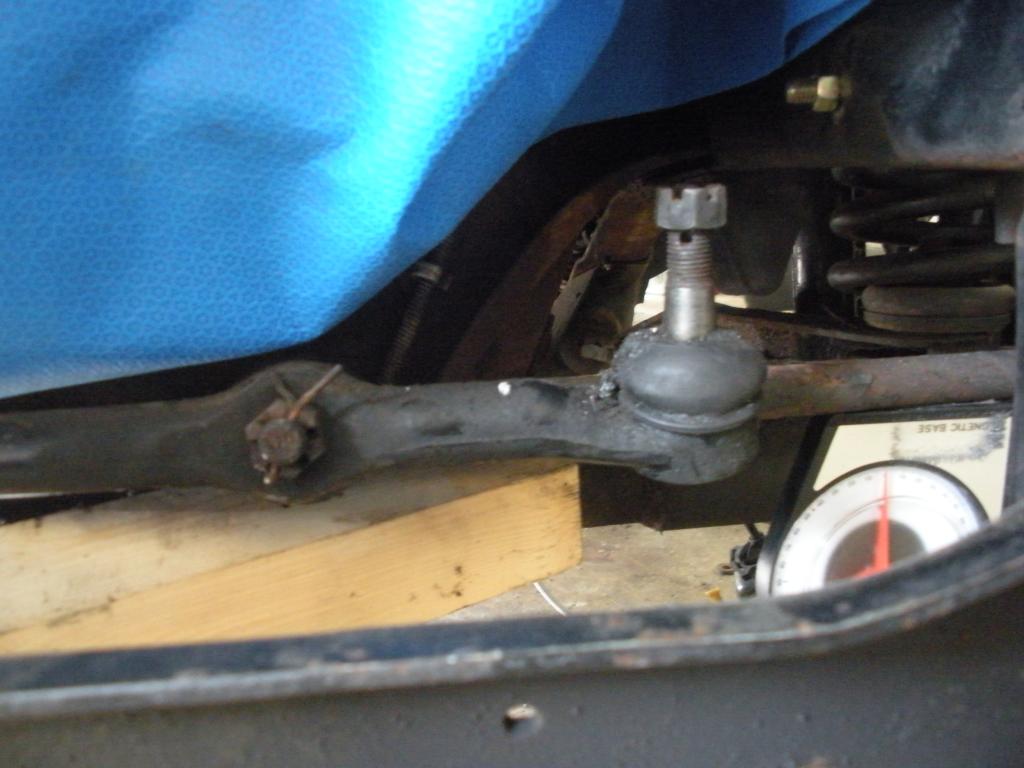
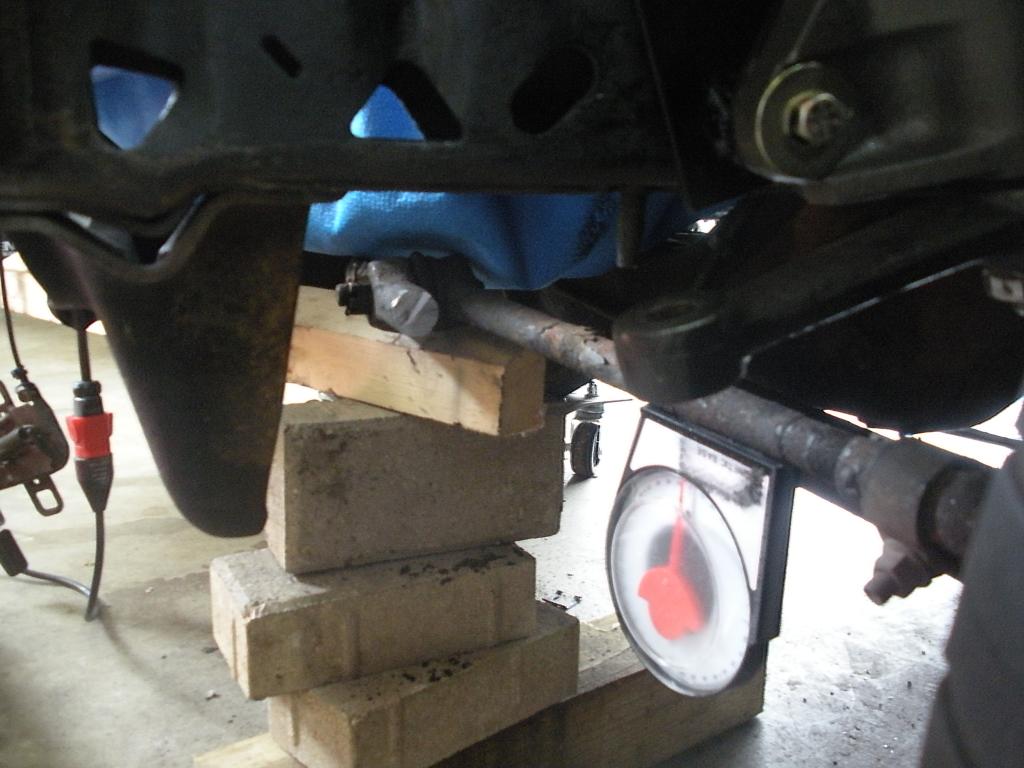
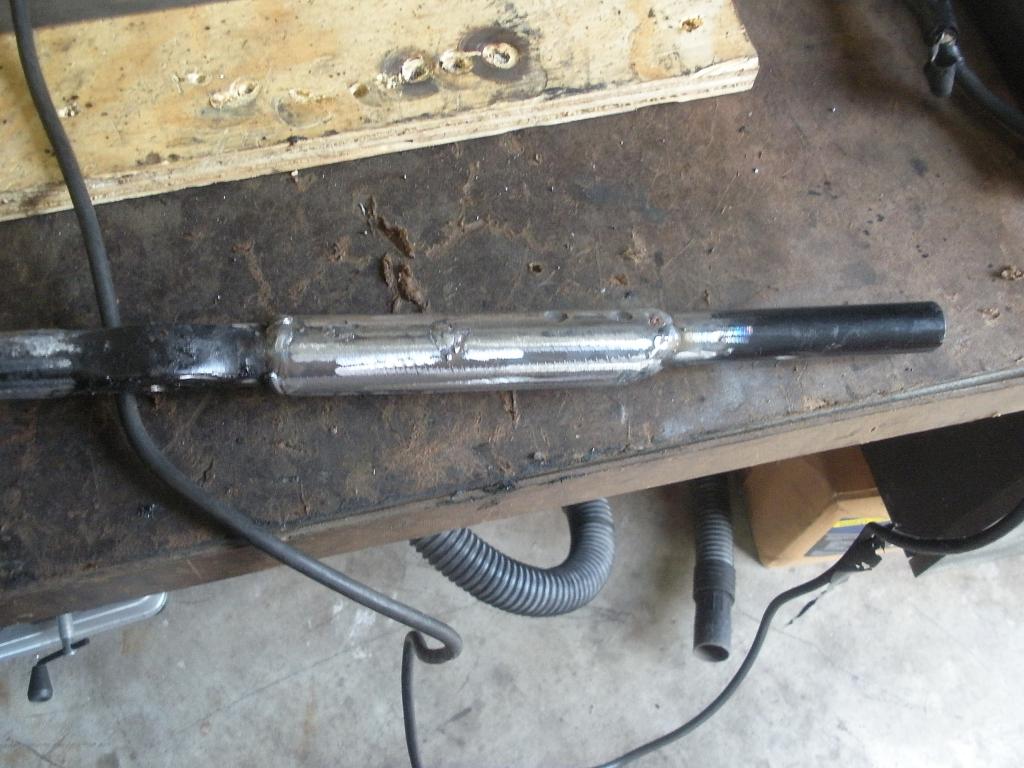
And then the new section set into place. I used 1" tie rod extension tubing from speedway motors, and then just threaded in the proper tie rod end.
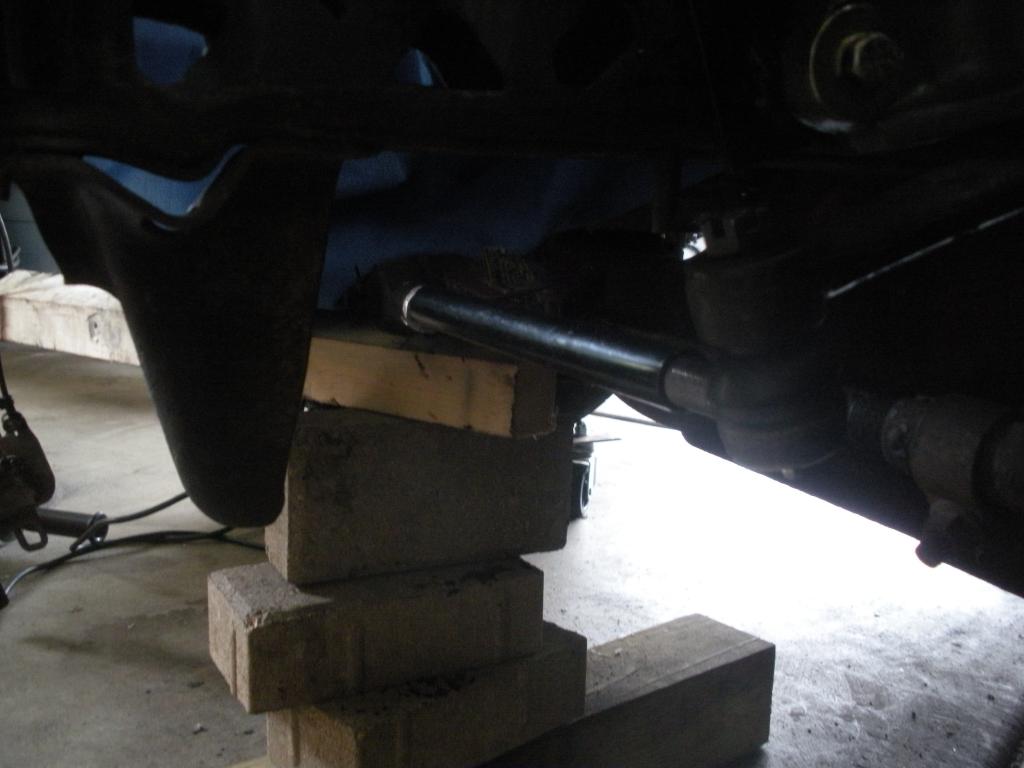
After it was tacked into place, I removed the steering linkage and finished the extension off by sleeving it with some DOM.
I am just waiting on a new inner tie rod to come in, and then the linkage will be set back into place.
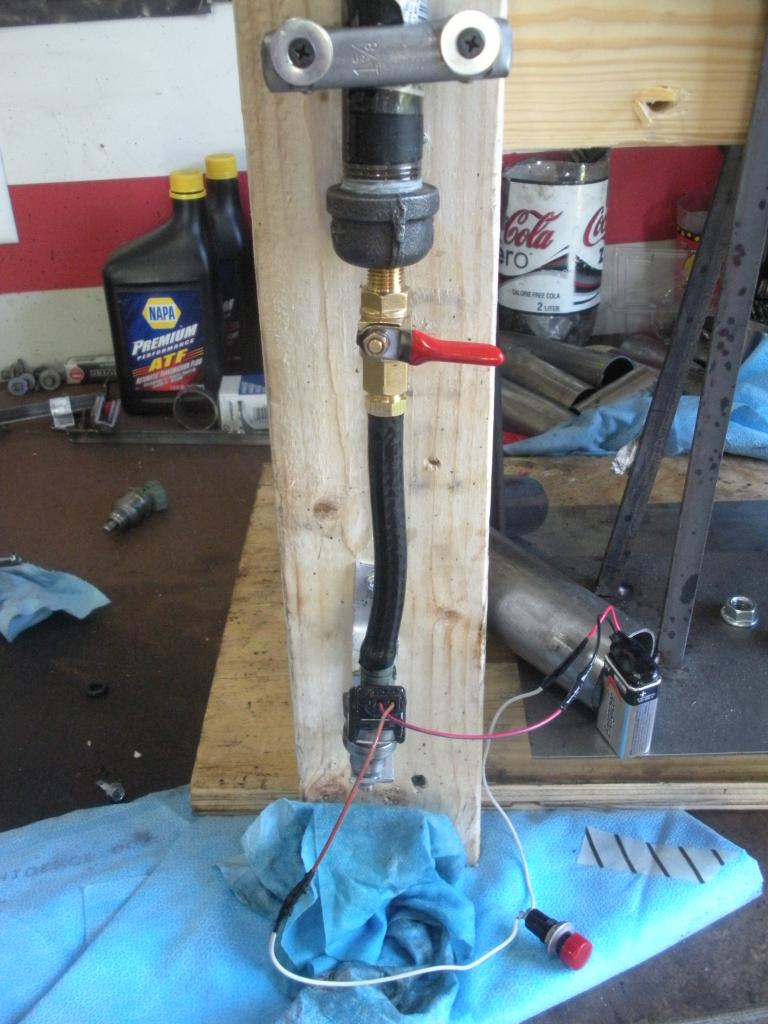
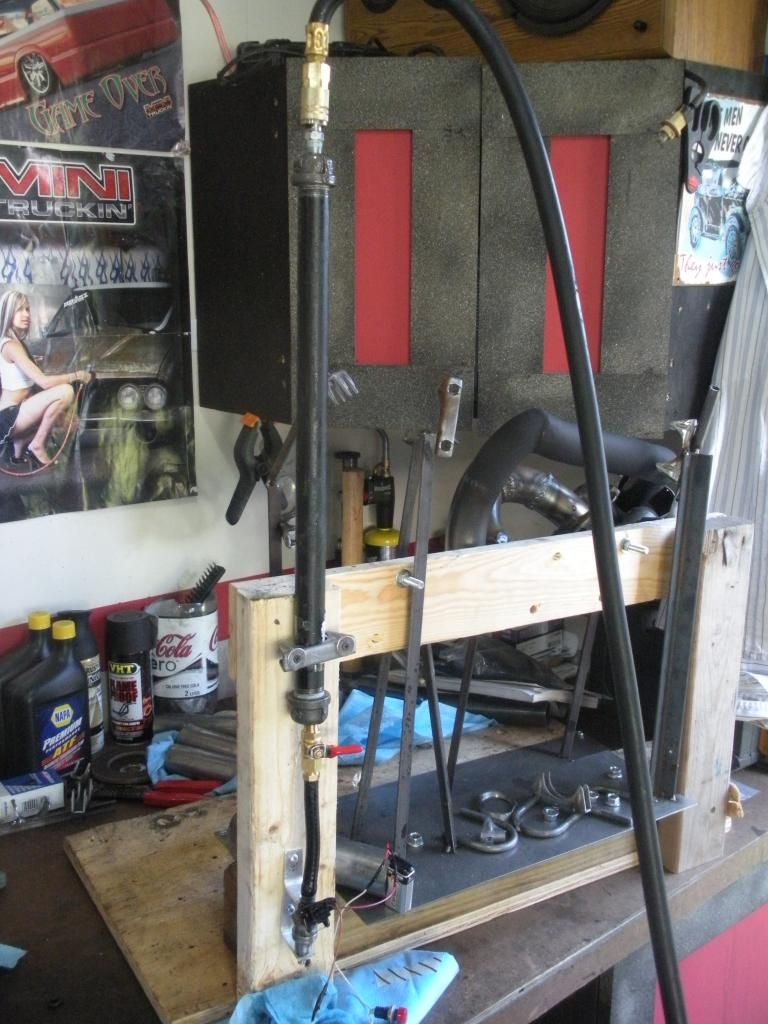
I also went to town on cleaning up the old fuel injectors, rather than buying new.
The idea came from a you tube video, and consists of pressurizing your favorite fuel injector cleaner and shooting it through the injector.
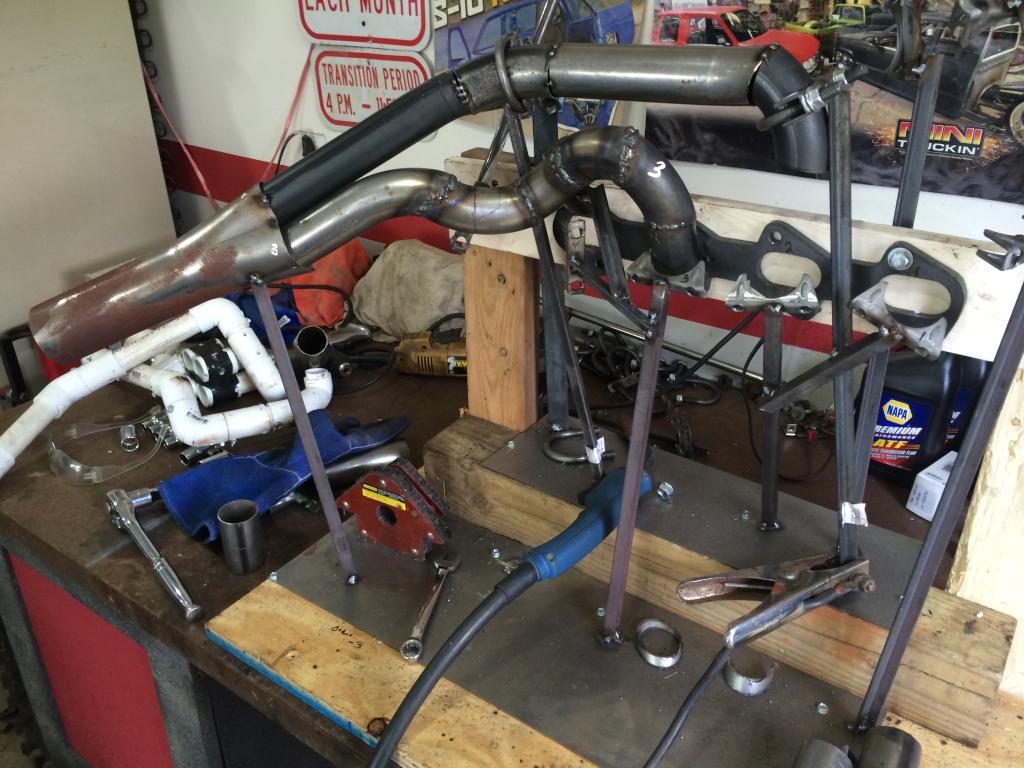
Lastly I made some progress on the passenger side headers. Just waiting on some more bends to arrive, then I should have this one finished off.


The input shaft of the box ended up being alittle too far offset from aligning with the steering shaft, so I am going to have to add another u joint. The shaft is just moved over really far, it actually sits about 2" off the valve cover.

Next I went ahead and hacked off the factory pitman arm tie rod end, to get ready for the extension of it.


And then the new section set into place. I used 1" tie rod extension tubing from speedway motors, and then just threaded in the proper tie rod end.

After it was tacked into place, I removed the steering linkage and finished the extension off by sleeving it with some DOM.

I am just waiting on a new inner tie rod to come in, and then the linkage will be set back into place.
I also went to town on cleaning up the old fuel injectors, rather than buying new.
The idea came from a you tube video, and consists of pressurizing your favorite fuel injector cleaner and shooting it through the injector.


Lastly I made some progress on the passenger side headers. Just waiting on some more bends to arrive, then I should have this one finished off.


#26
07-15-2014, 08:36 PM
Join Date: May 2014
Posts: 44
Likes: 0
Received 0 Likes
on
0 Posts
I actually didn't think to look at the Continental oil pan. The Mark VIII pan I am using has about 3/4" clearance over the engine crossmember, so I don't know if the front sump pan would work.
For the harness I repinned the Mark VIII engine harness to a 97 Cobra ECU and to the Ranger harness. Ford pretty much uses the same circuit numbers and wire coloring, so it hasn't been too difficult. But I guess I will find out once I go to turn the key.

#28
07-16-2014, 08:36 PM
Join Date: May 2014
Posts: 44
Likes: 0
Received 0 Likes
on
0 Posts
#29
07-16-2014, 08:38 PM
Join Date: May 2014
Posts: 44
Likes: 0
Received 0 Likes
on
0 Posts
So I think my biggest headache is starting to go away.
After using the jig to weld up the passenger side headers, I went to mount them and of course they didnt clear the frame rail or the valve cover.
So after some modification, I was finally able to get them to fit but ran out of gas for the welder.
Kinda the reason the welds look like crap, cause I didnt realize I had ran out.
But before I had fixed the passenger side, I went ahead and tackled the driver side.
I found it actually a lot eaiser to forgo the PVC pipe mock up, and just go straight to cutting and welding.
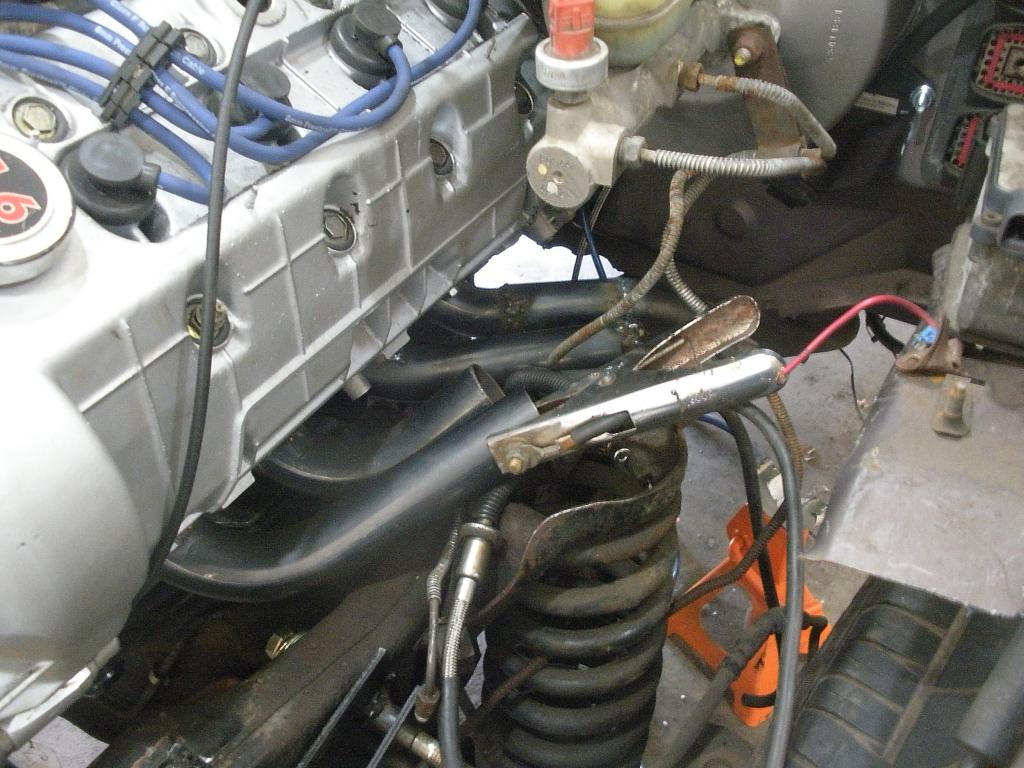
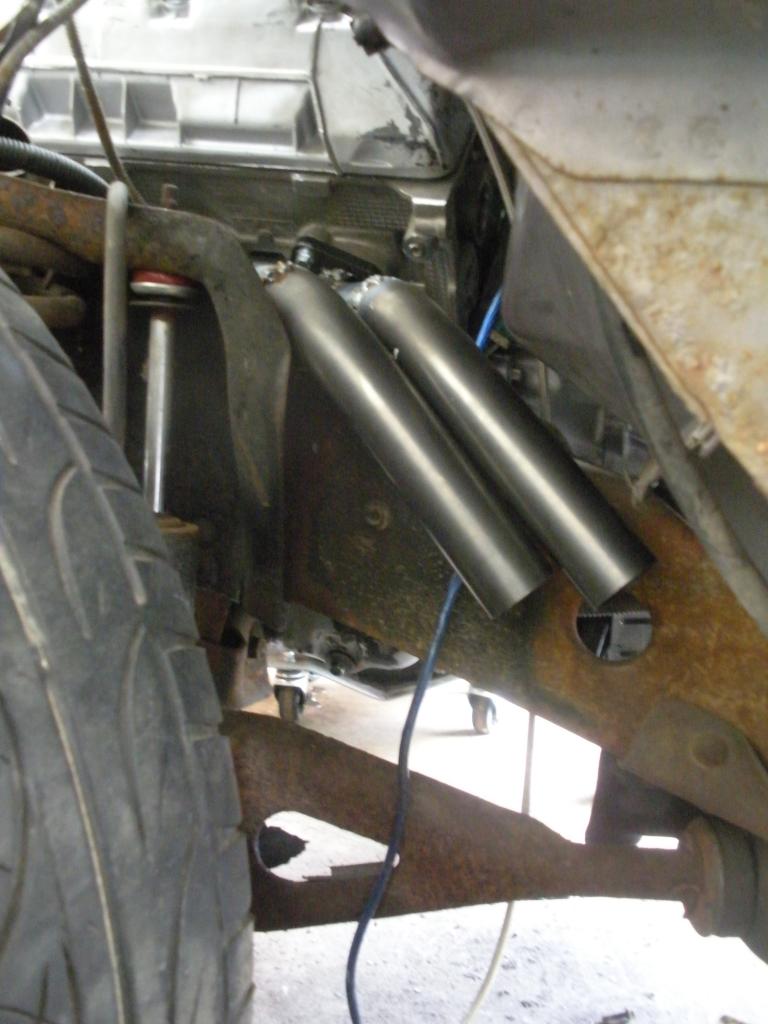
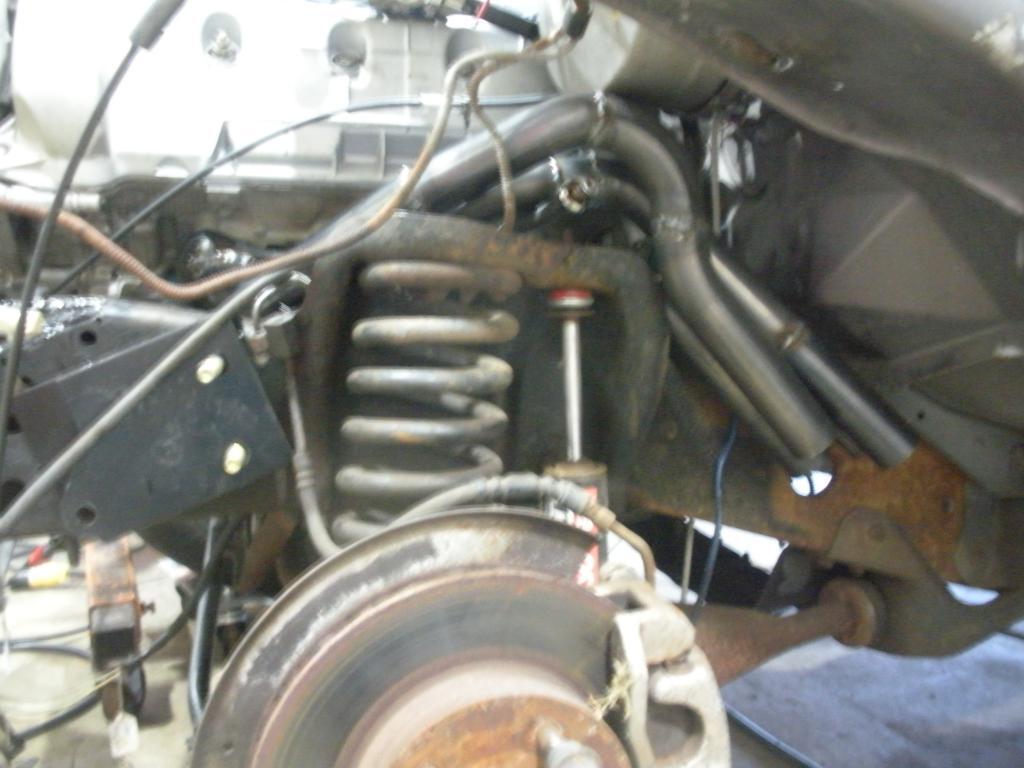
The steering shaft will clear the the top of front most primary tube, and the steering box input spline will be just above it too. I will post up the clearance pictures once I get to that point.
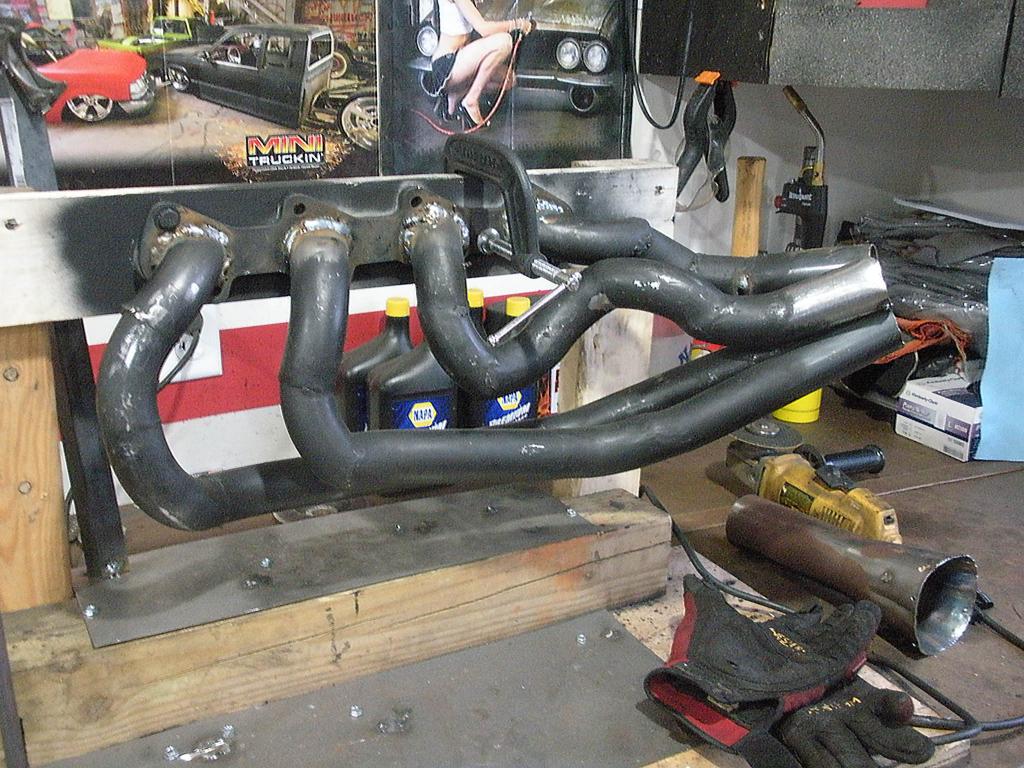
I still need to weld in my O2 sensor bungs, mounting flanges, and finish them off with header wrap.
After using the jig to weld up the passenger side headers, I went to mount them and of course they didnt clear the frame rail or the valve cover.
So after some modification, I was finally able to get them to fit but ran out of gas for the welder.
Kinda the reason the welds look like crap, cause I didnt realize I had ran out.

But before I had fixed the passenger side, I went ahead and tackled the driver side.
I found it actually a lot eaiser to forgo the PVC pipe mock up, and just go straight to cutting and welding.


The steering shaft will clear the the top of front most primary tube, and the steering box input spline will be just above it too. I will post up the clearance pictures once I get to that point.

I still need to weld in my O2 sensor bungs, mounting flanges, and finish them off with header wrap.
#30
07-23-2014, 07:09 PM
Join Date: May 2014
Posts: 44
Likes: 0
Received 0 Likes
on
0 Posts
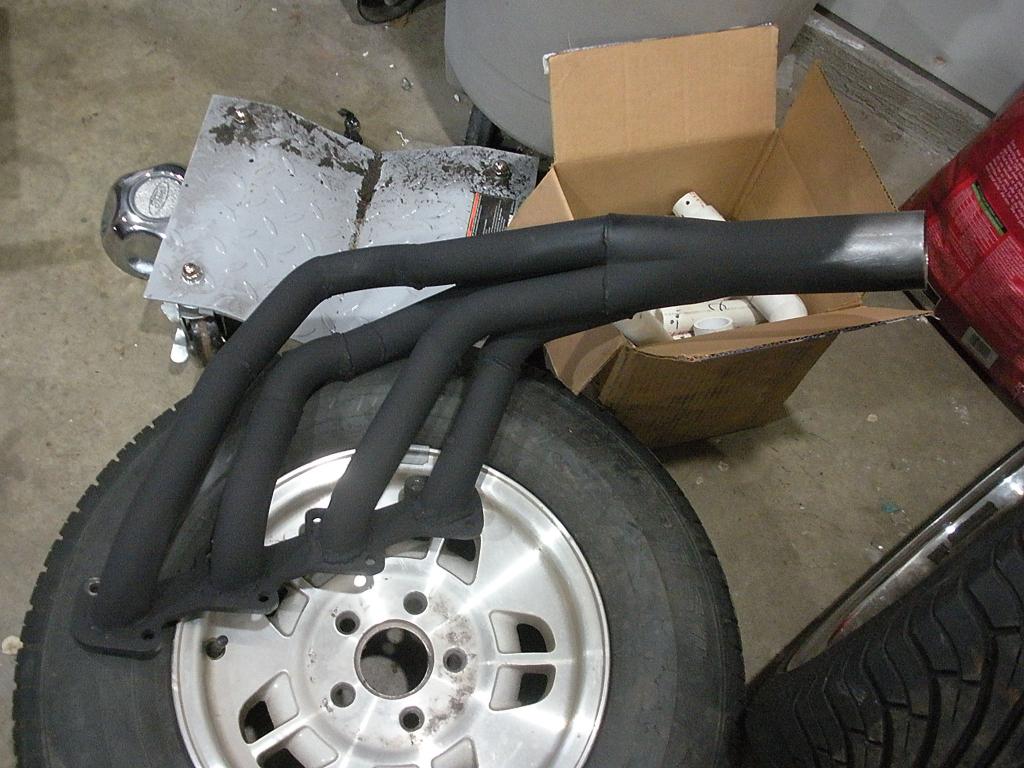
Headers are finally done!! I am just waiting on some more wrap to arrive and then I can bolt them up.
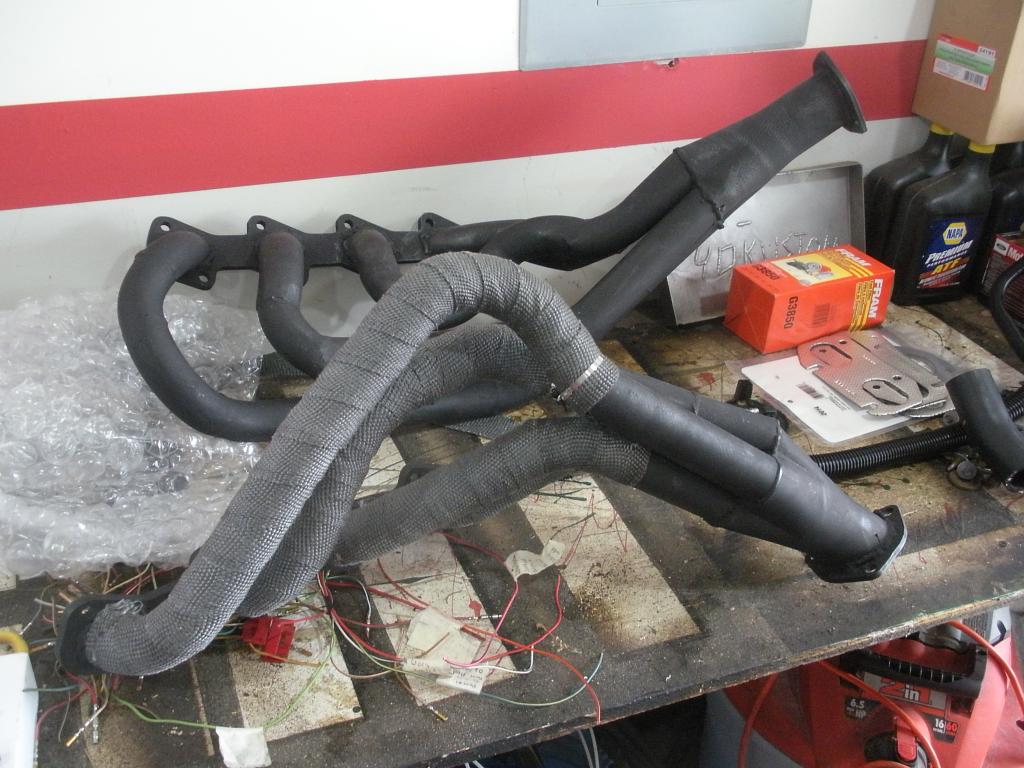
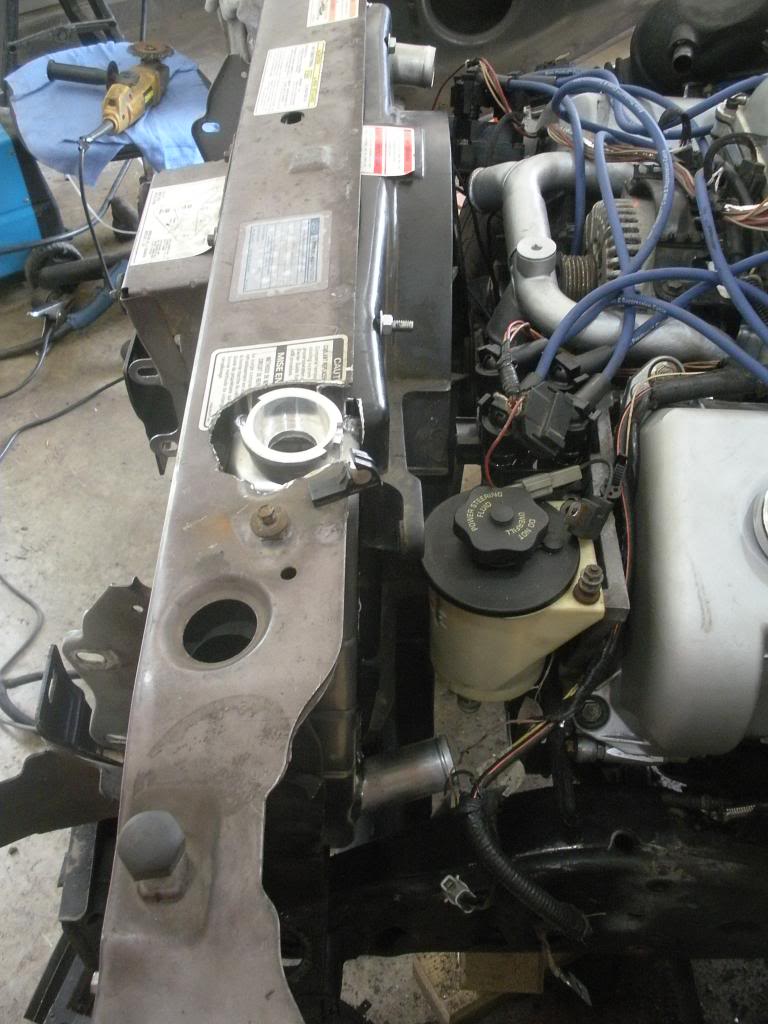
So while waiting on the rest of my header wrap, I decided to throw the core support back on just to double check clearances again. Turns out the up upper radiator hose was going to hit the coil pack, thus I ended up fabbing up a bracket to move it over 2".
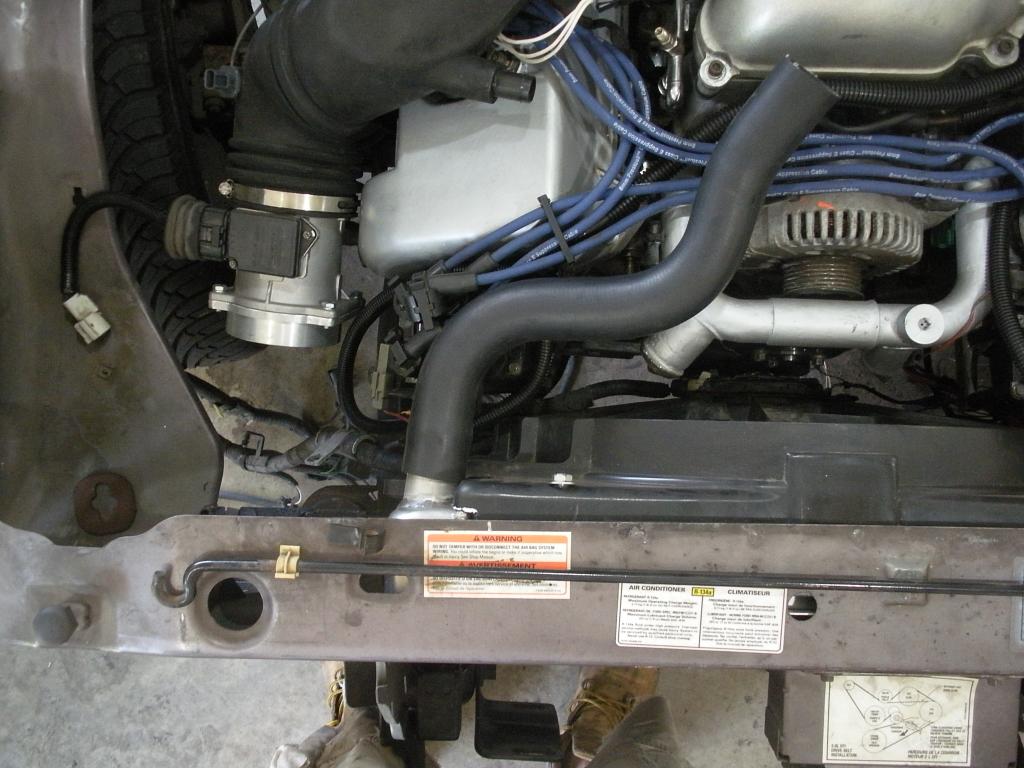
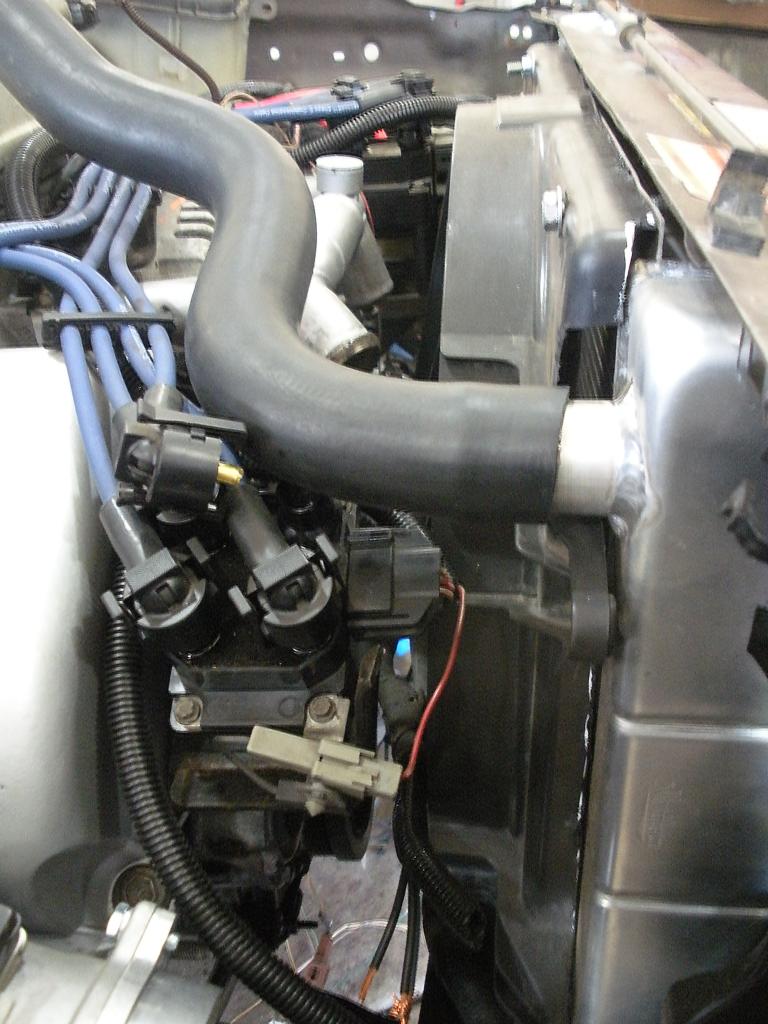
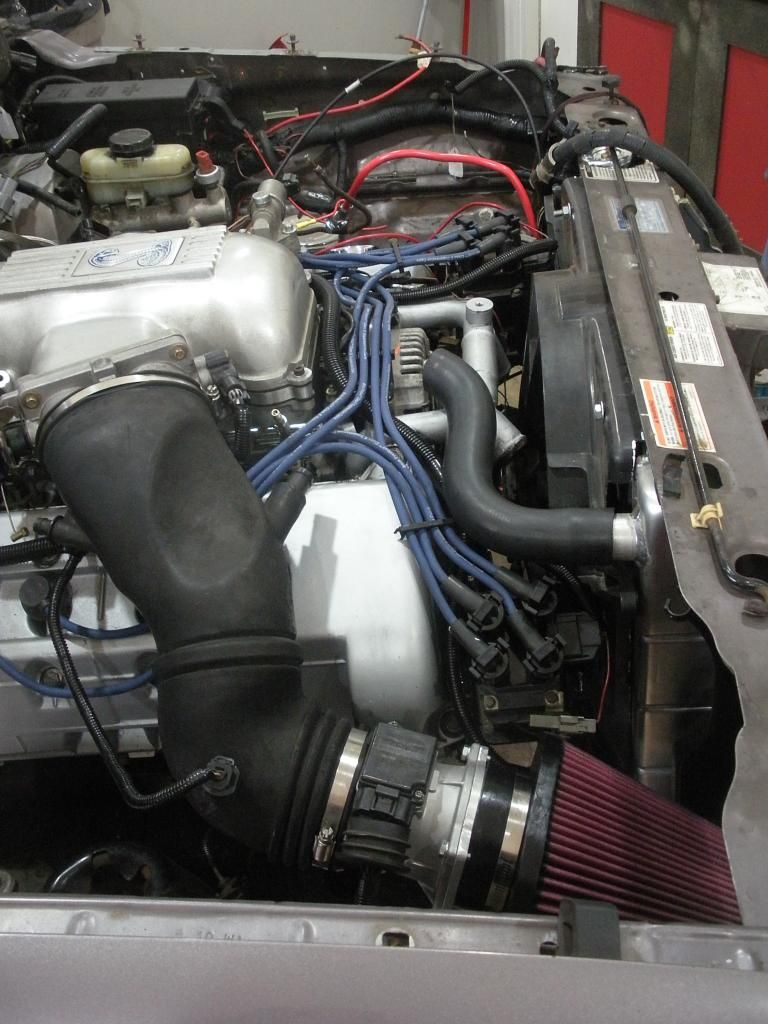
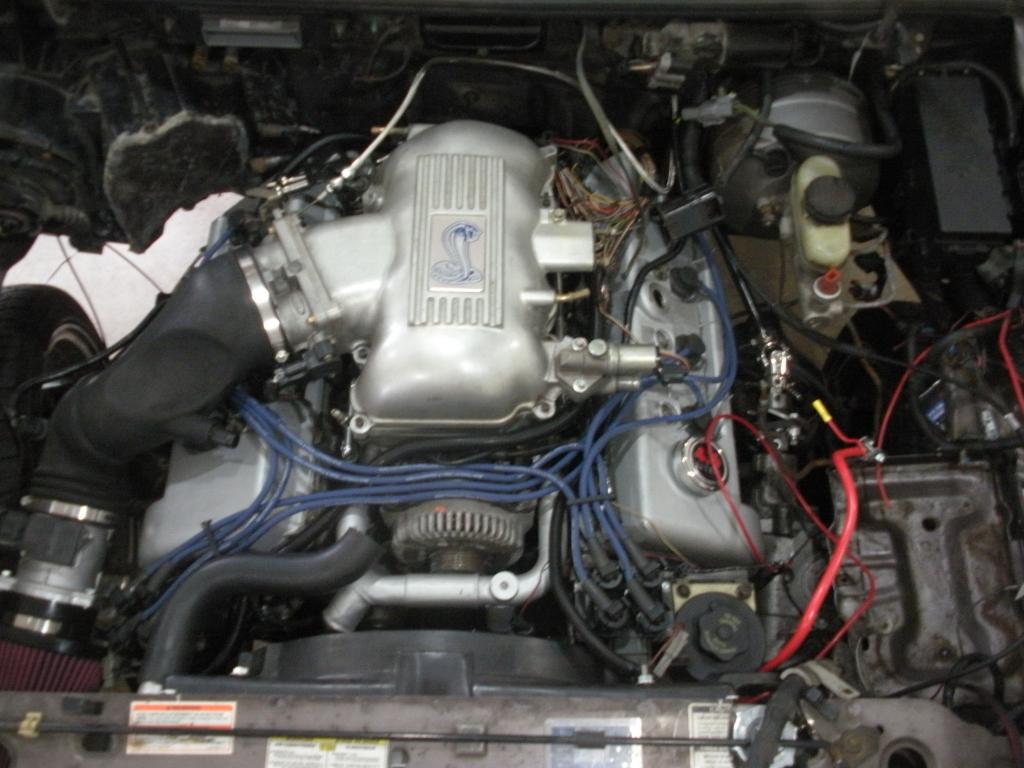
After throwing the core support back on, the hose is going to hit the fan shroud just a bit; but I should be able to trim the shroud, cut back the hose where it goes into the radiator and be good to go.
Basically I am just waiting to wrap the headers. Once those are back on, I can bolt the engine back down, along with the A/C delete pulley and power steering pump. Route my coolant and oil re-locator lines, connect my 2 42 pin harnesses, slap in a battery and fire her up!!

So while waiting on the rest of my header wrap, I decided to throw the core support back on just to double check clearances again. Turns out the up upper radiator hose was going to hit the coil pack, thus I ended up fabbing up a bracket to move it over 2".


After throwing the core support back on, the hose is going to hit the fan shroud just a bit; but I should be able to trim the shroud, cut back the hose where it goes into the radiator and be good to go.
Basically I am just waiting to wrap the headers. Once those are back on, I can bolt the engine back down, along with the A/C delete pulley and power steering pump. Route my coolant and oil re-locator lines, connect my 2 42 pin harnesses, slap in a battery and fire her up!!