52 F5 239 only turns 270 degrees
#16
 11-30-2013, 04:15 PM


Join Date: Oct 2013
Posts: 13
Likes: 0
Received 0 Likes
on
0 Posts
Hey thanks everybody! I hope everyone had some turkey. I had to wear the loose pants that day.
This is kind of a weekly drama as I can't get up to the barn except once a week for now. But thanks GB, 49'r, and the rest of you guys. I will definitely pull the intake manifold to begin with a have a poke next Saturday. 49'r I wonder if you could turn the engine when you had that problem?
Anyway I'll keep y'all posted. My bargain is looking less so, but hey, it's a process. I don't forget when I learn the hard way. I'll have to post a pic when I get the problem uncovered.
Last edited by Seattle50; 11-30-2013 at 04:17 PM. Reason: comma
#17
11-30-2013, 07:52 PM

Welcome to FTE
I don't think anyone told Seattle50 welcome. Including me.
Hey, Seattle50..Welcome to FTE
If it's a stuck valve, you may be able to pull the spark plugs and use a flashlight to see which one is stuck. The spark plug is right over the edge of the exhaust valve, but you can usually see over to the intake valve as well.
Hey, Seattle50..Welcome to FTE
If it's a stuck valve, you may be able to pull the spark plugs and use a flashlight to see which one is stuck. The spark plug is right over the edge of the exhaust valve, but you can usually see over to the intake valve as well.
#18
11-30-2013, 08:35 PM
Freshman User
Join Date: Dec 2011
Location: Midland, Ontario
Posts: 38
Likes: 0
Received 0 Likes
on
0 Posts
Hope you find the problem.
Hi Seattle50. Yes my engine would still turn about 350 degrees back and forth but would not make a complete revolution. There was a definite metal-on-metal end feel at the end of the available range of movement. Surprisingly the lower 1/2 of the piston would still move up and down in the cylinder but the broken cap was preventing a full stroke. I had a stuck valve as well but it was stuck in the open position so was not preventing full revolution of the cam. Once I had the head off I was able to soak the valve stem with a mixture of ATF and kerosine and began tapping it back down using a block of wood to help loosen it up. It continued to stick open with each revolution but I kept tapping it back down and eventually it loosened up and began to open and close on its own. Good luck with yours and let us know what you find when you get it apart.
#19
12-07-2013, 12:44 PM
Join Date: Oct 2013
Posts: 13
Likes: 0
Received 0 Likes
on
0 Posts
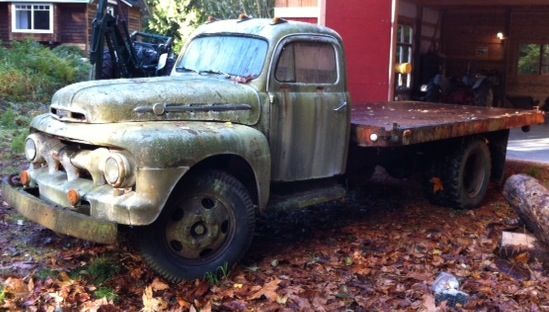
52' F5 flatbed dump pic
I know how everyone likes to see my junk! hee hee!  Hopefully this will pull down a pic from photobucket. If not, well it's supposed to be a picture of the truck. From here is has been pressure washed and pushed back into the barn, where as, shall we say, the archeological dig has started. In addition to piles of rust and a stuck engine, there was an old metric socket set, some odd screw drivers, a victrola arm with turntable mechanism and 8 horse shoes under the seat. I believe I may need the luck!
Hopefully this will pull down a pic from photobucket. If not, well it's supposed to be a picture of the truck. From here is has been pressure washed and pushed back into the barn, where as, shall we say, the archeological dig has started. In addition to piles of rust and a stuck engine, there was an old metric socket set, some odd screw drivers, a victrola arm with turntable mechanism and 8 horse shoes under the seat. I believe I may need the luck! 
#20
12-07-2013, 12:53 PM

#22
12-07-2013, 09:43 PM

Hey Seattle,
I love those running lights. We almost put those on our '50 F1 but I really think they look best on the larger trucks like yours. Is that actual green moss on the exterior of your truck? Looks great... Look forward to seeing more as you begin the excavation.
Ben in Austin
1950 F1
I love those running lights. We almost put those on our '50 F1 but I really think they look best on the larger trucks like yours. Is that actual green moss on the exterior of your truck? Looks great... Look forward to seeing more as you begin the excavation.
Ben in Austin
1950 F1
#23
12-08-2013, 08:35 AM
I know how everyone likes to see my junk! hee hee! Hopefully this will pull down a pic from photobucket. If not, well it's supposed to be a picture of the truck. From here is has been pressure washed and pushed back into the barn, where as, shall we say, the archeological dig has started. In addition to piles of rust and a stuck engine, there was an old metric socket set, some odd screw drivers, a victrola arm with turntable mechanism and 8 horse shoes under the seat. I believe I may need the luck!
Hopefully this will pull down a pic from photobucket. If not, well it's supposed to be a picture of the truck. From here is has been pressure washed and pushed back into the barn, where as, shall we say, the archeological dig has started. In addition to piles of rust and a stuck engine, there was an old metric socket set, some odd screw drivers, a victrola arm with turntable mechanism and 8 horse shoes under the seat. I believe I may need the luck! 
#24
12-08-2013, 11:47 AM
Join Date: Oct 2013
Posts: 13
Likes: 0
Received 0 Likes
on
0 Posts
Hey There
Albuq-1
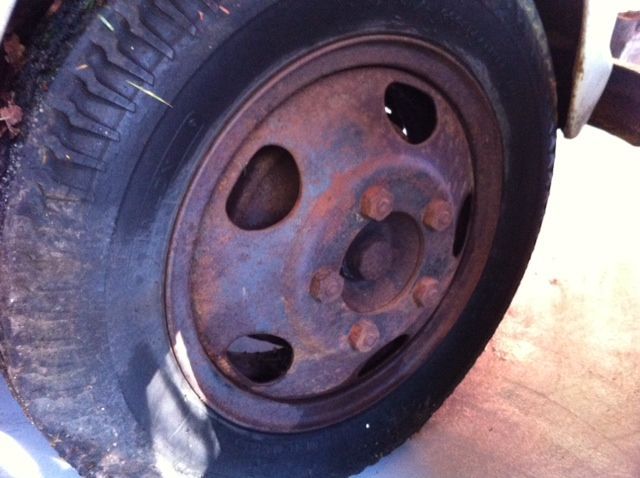
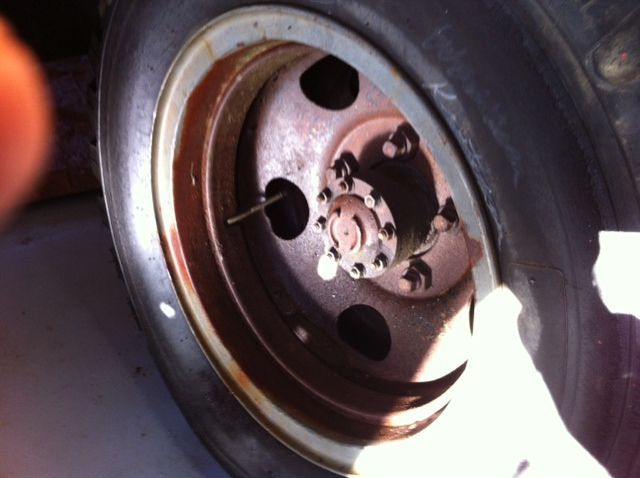
Um here's pics of the wheels. I know next to nothing, and even less about WMs. How can you tell which is locking etc? Thanks!
Ben73058
Now that you mention it I haven't thought about those lights. I also removed the big 4 point mounted mirrors for now. Think I'll keep all of it on. Plus put a faded ranch or lumber mill logo on the doors.
Under the moss the paint turned out to be a light blue. That's going to change though.
Albuq-1
Um here's pics of the wheels. I know next to nothing, and even less about WMs. How can you tell which is locking etc? Thanks!
Ben73058
Now that you mention it I haven't thought about those lights. I also removed the big 4 point mounted mirrors for now. Think I'll keep all of it on. Plus put a faded ranch or lumber mill logo on the doors.
Under the moss the paint turned out to be a light blue. That's going to change though.


#25
12-08-2013, 11:50 AM
Fleet Owner
Sadly, those are WM's. I would suggest you read up on them, be very careful (especially inflating them!). How you replace them will determine a lot on your resto, and absorb a fair amount of cash, so I'd start planning right away.
https://www.ford-trucks.com/forums/9...5-f-350-a.html
(although that is about a somewhat different truck/wheel, there's a ton of good info there)
https://www.ford-trucks.com/forums/9...5-f-350-a.html
(although that is about a somewhat different truck/wheel, there's a ton of good info there)
#26
12-15-2013, 03:58 PM
Join Date: Oct 2013
Posts: 13
Likes: 0
Received 0 Likes
on
0 Posts
And the winner is... Stuck valve. Pulled the intake and both heads and found 3 stuck exhaust valves. The crank turns full revolutions now and the pistons/clyinders look good. One valve will not free up but I can move it down with a couple firm taps of the hammer. I think I can remove it in one piece and clean it up a little. I think I might lap all of them since I'm in there anyway. Thanks for all the great advice! Looks like this one might live.
Looks like this one might live.
#27
12-15-2013, 04:21 PM
#28
12-15-2013, 05:26 PM
Fleet Owner
Good advice. On a flathead, the whole valve assembly (incl. guide) comes out together. But if the valve is sticking in the guide, I wouldn't expect the guide is going to be an easy pull...
#29
12-15-2013, 07:27 PM
Join Date: Oct 2013
Posts: 13
Likes: 0
Received 0 Likes
on
0 Posts
Good tip on removing the burrs. Looking through the forum I can see getting the valves out could be a challenge. I did try for a few minutes to get one out yesterday. I can say the hamstrings and discs are getting a good stretch though. I'm thinking of making a vise grip spring clamp tool like I saw in another thread before moving ahead.