1966 F250 Deluxe Camper Special Ranger
#151
 07-19-2015, 01:21 AM


G' day Sodly...
G' day Sodly,
Thank You for the message and pics.,,, I truly appreciate it,,, do You know if this Truck is Available-For Sale ???, or if You're not sure would it be possible to get the owners details so as I can call and or e-mail them ???, I would be keen to chat with them to find out if it might be available as I want A '66 F250 Truck to drive around over there in the USA when I visit a couple of time per Year e.g. for Work and also for Bonneville ( I'm planning on driving with The Rolling Bones Crew from New York to Bonneville and Back and this would be absolutely PERFECT for this roadtrip !!!, Cheers and Best Regards Graeme Raper, 3 Kitchen Road, Dandenong, Victoria, 3175, Australia,,, ceo@exfoliators.com.au
Thank You for the message and pics.,,, I truly appreciate it,,, do You know if this Truck is Available-For Sale ???, or if You're not sure would it be possible to get the owners details so as I can call and or e-mail them ???, I would be keen to chat with them to find out if it might be available as I want A '66 F250 Truck to drive around over there in the USA when I visit a couple of time per Year e.g. for Work and also for Bonneville ( I'm planning on driving with The Rolling Bones Crew from New York to Bonneville and Back and this would be absolutely PERFECT for this roadtrip !!!, Cheers and Best Regards Graeme Raper, 3 Kitchen Road, Dandenong, Victoria, 3175, Australia,,, ceo@exfoliators.com.au
#152
07-19-2015, 09:52 AM

My guess is that there may have been more F250 Rangers produced than F100's. Pickups at that time were usually ordered rather than "off the lot" at least in my area. Slide in campers were becoming popular automatic transmissions and seats that allowed occupants of different stature to swap driving positions comfortably would be desireable. The Ranger I bought last year is a F250, AT and has a aftermarket fuel tank under the bed along with mirrors that would indicate it was used for a slide in camper.
The Ranger I bought in 1966 was a F100 with a V8 and 3speed overdrive that would indicate it was ordered by someone for highway travel rather than farm or logging use (he-she? was a no-show).
I am not particularly enamoured by Rangers. It was cheap, rust is minimal and I have the parts to replace the damaged grille, bumper and left fender.
The Ranger in the photo above is in pretty darn nice condition
#153
08-03-2015, 09:08 PM

That's a very clean looking truck. The canopy seems to have really preserved the bed. It's got the optional console, too. Nice truck!
I've picked up a few more items lately. If anyone comes across the right hand door panel I'd be interested. Either NOS or a real nice original in white or a light color.
**** and Element - Cigar Lighter - C1TZ-15052-A

Socket and Retainer Assembly - Cigar Lighter - C1TZ-15055-A

Lamp Assembly - Cigar Lighter - C3TZ-15072-A

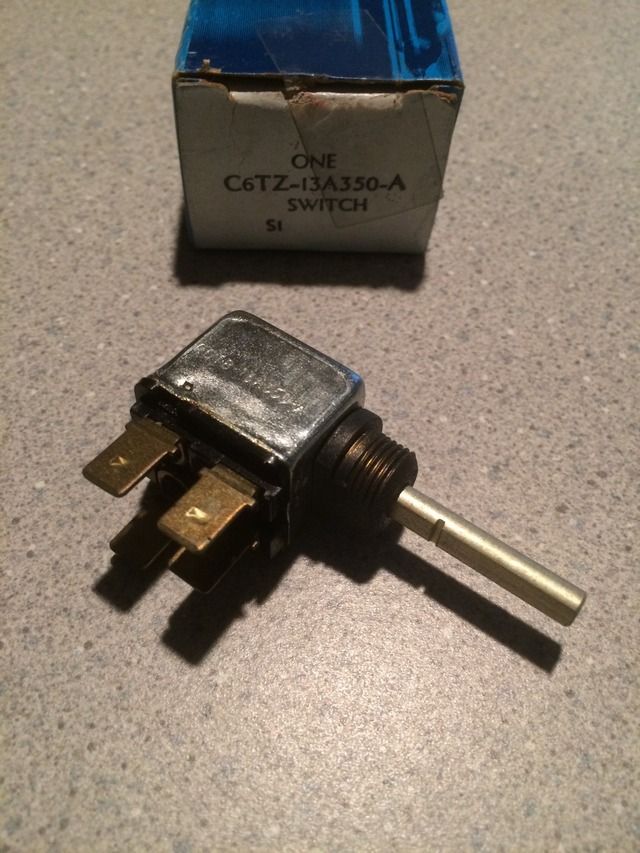
Switch Assembly - Emergency Warning - C6TZ-13A350-A
Lens - Rear Lamp
C4TZ-13450-D - R.H.
C4TZ-13451-D - L.H.

Door - Rear Lamp
C4TZ-13489-E - R.H.
C4TZ-13489-F - L.H.

Lamp Assembly - Parking
C6TZ-13200-C - R.H.
C6TZ-13201-C - L.H.


Panel - Front Door Trim
C5TZ-8123943-BAB

I also had the radiator re-cored and they did a great job. The ID is C6TA-AC and dated 66 06 (June, 1966)


.
I've picked up a few more items lately. If anyone comes across the right hand door panel I'd be interested. Either NOS or a real nice original in white or a light color.
**** and Element - Cigar Lighter - C1TZ-15052-A

Socket and Retainer Assembly - Cigar Lighter - C1TZ-15055-A

Lamp Assembly - Cigar Lighter - C3TZ-15072-A

Switch Assembly - Emergency Warning - C6TZ-13A350-A

Lens - Rear Lamp
C4TZ-13450-D - R.H.
C4TZ-13451-D - L.H.

Door - Rear Lamp
C4TZ-13489-E - R.H.
C4TZ-13489-F - L.H.

Lamp Assembly - Parking
C6TZ-13200-C - R.H.
C6TZ-13201-C - L.H.


Panel - Front Door Trim
C5TZ-8123943-BAB

I also had the radiator re-cored and they did a great job. The ID is C6TA-AC and dated 66 06 (June, 1966)


.
#154
10-05-2015, 11:25 PM
Doing a bit of welding. If you look back at the very first pic of Max you can see the bed had some large holes bored in it for gas tank fill tubes and some general holes for camper/canopy mounting and what-not.
First I made a patch and used some contour gauges to get the shape as close as I could.

Tack welded it with a magnet on the inside and outside.

And filled in with a bunch more welds. A little grinding and it should be good to go.

Here's a random hole

And a random hole (not the same hole in this pic) showing the result. This is after grinding with 36 grit on the IR disk grinder. It sure ices up after some use. All welds backed with copper. I smash a copper tube flat and use it as a handle and backer in one. You can see the copper behind the hole in the shot above
I liked the reflection

.
#156
10-30-2015, 12:56 PM
After looking it over carefully and comparing it to the original I wasn't completely satisfied with the DC bezel. I figured I could make some changes and get it closer but that's no fun. So I went to my local Ford dealer and just ordered one of the NOS bezels. Much happier with this one. The reproductions do look overall very similar but the details were just not quite right.
C5TZ-10838-A - Instrument Cluster Housing


.
C5TZ-10838-A - Instrument Cluster Housing


.

#158
11-21-2015, 02:10 PM
I told him to order two more, just in case. Lol
Here's some pictures I took this morning. Most of the sheetmetal looks pretty good in the usual areas.
Drivers hinge and lower cab pillar area

Passengers side - both sides did have a plate screwed onto the sill to protect the paint and that's the 4 holes you see in this picture. They are some older looking pieces but I'm not sure if I'll put them back on or not yet. Sorta thinking probably not.

Drivers side rear cab corner. There are a couple of holes on the flange that I'll weld up - probably from the spare gas tank.

Passengers side cab corner - I assume that is a factory run in the paint job there. Nice job...lol

Drivers side front cab mount

Passengers side cab mount - A little blow-by from the old 390 there, too.

Drivers side lower cowl drain area - the old undercoating is attached quite well still.

Passengers side - really no issues that I can detect

Here's where the passengers side toolbox sits - gaping hole with it removed.

I started to peel up the carpets - they were glued down REALLY FRICKIN well. Took a few hours to get them all up without completely destroying them.
First the passengers side under where the seats would go. They didn't use any foam padding underneath the seats. Only in the foot wells and under the front half of the console area between the foot wells. No foam padding between the seats where the back half of the console sits.

Then the passengers foot well. The foam on this side is in pretty good shape.

Then I went around and started working on the drivers side under the seats. The glue here was NOT giving up easy. It's good old stuff, whatever they used. Large hole and two smaller holes immediately above it were for the spare tank fuel switch.

Drivers foot well was a different story. The air conditioning head unit leaked into this area some and the rust that formed broke the glue loose so it came out fairly easy except around where the high beam switch is on the floor and back toward the seat area. I don't *think* the floor will need to be replaced but we shall see after a thorough blasting.

You can see the rubber plug there that Dan mentioned isn't accounted for in the reproduction floors.

Here's the front and rear console brackets. Rears use a couple of retainers for the screws that come down through the console box. Fronts just screw straight in to the sheetmetal bracket itself.


The foam looks exactly like the stuff used under house carpets with a bunch of small pieces formed together to make the whole.

The carpets have a vinyl welting around the edge of much of it - wherever the edge is exposed. I took a lot of pictures of the carpets in various areas but I won't put you completely to sleep with all those. It's all flat carpet so nothing molded thankfully. I need to get back with SMS and see if they have a gold loop like this carpet. I can't imagine they wouldn't.


And my buddy took a scan of the old Garner Ford license plate insert and cleaned it up so I can print a newer copy and leave the original in the drawer - or one for front and back plates. I still have to show him the insert in person so he can get the shade of orange and I'm going to have him remove the two white holes where the bolts for the license plate goes through. He uses Illustrator and says that's just a layer that he can remove real easy. He even went so far as to make each "R" and "E", for example, different than the other like it was originally - it keeps that hand-drawn appearance, even though he started with a fixed type of font. I think he did a great job. This is just a picture of my computer screen for now.
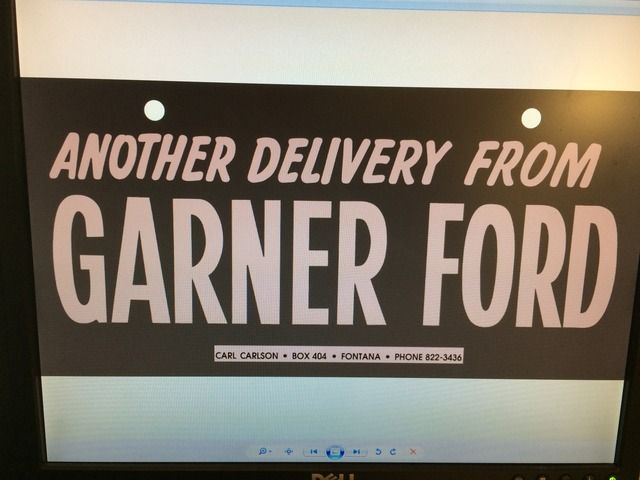
Now, don't go trying to dial Mr. Carl Carlson - I'm sure it's not a good phone number any longer anyway......
.
#159
11-26-2015, 01:21 PM
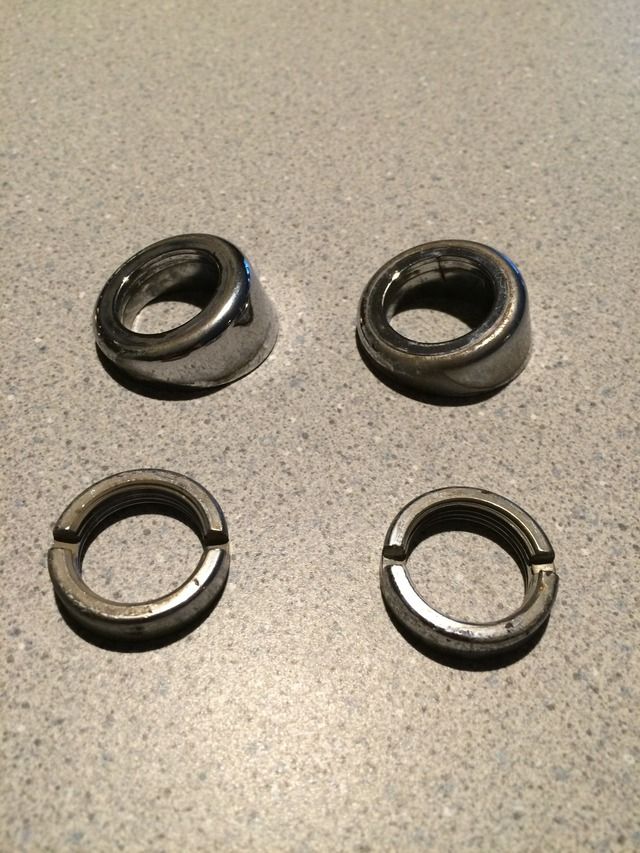
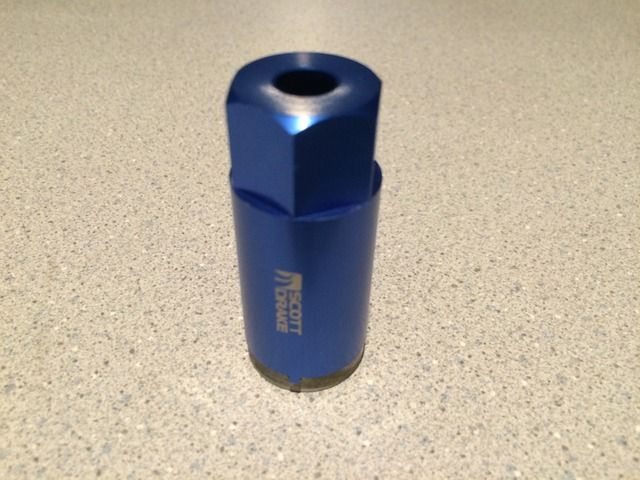
I was removing the windshield wiper motor and everything related, but I couldn't get one of the two nuts freed on the top of the cowl. I could tell that 64-65 mustang used the same or similar hardware so I got one of the tools to remove the nut and it worked great. I probably should have used vice grips and bought new nuts, but I like to experiment. It's a nice tool and fits the top of the nut very nicely. But, probably overkill. It will be nice to use it when I put it back together, though, so I'll keep it now that I have it.
These are the spacers and nuts.
And a picture of the tool sitting on the nut. It's a well made chunk of metal that is nicely blue anodized.
I got the passengers side foam pad out of the footwell in one major piece. The footwell looks pretty good but I'm going to used some adhesive remover everywhere to get rid of the old glue and see what I'm really dealing with. There's the two large holes near the front of the hump that they poked the air conditioning drain tubes down through that I'll have to weld up.

And the little cover plate that 6t6Merc said is used to access the band adjuster on the automatic tranny. You can see the plate goes in the low spot on the passengers side of the hump. Very form fitted little cover and 4 screws. Does not appear to have ever been removed, especially considering it was underneath the old foam and carpeting which didn't seem to have been disturbed until I came along. Hahaha

.
These are the spacers and nuts.

And a picture of the tool sitting on the nut. It's a well made chunk of metal that is nicely blue anodized.

I got the passengers side foam pad out of the footwell in one major piece. The footwell looks pretty good but I'm going to used some adhesive remover everywhere to get rid of the old glue and see what I'm really dealing with. There's the two large holes near the front of the hump that they poked the air conditioning drain tubes down through that I'll have to weld up.

And the little cover plate that 6t6Merc said is used to access the band adjuster on the automatic tranny. You can see the plate goes in the low spot on the passengers side of the hump. Very form fitted little cover and 4 screws. Does not appear to have ever been removed, especially considering it was underneath the old foam and carpeting which didn't seem to have been disturbed until I came along. Hahaha

.
#160
12-01-2015, 10:33 AM
I was just doing a little looking for Garner Ford and found this obituary for Jack Garner.
Obituary: Jack Garner ? Idyllwild Town Crier
Here's some snippets from the article.
Jack Garner, 89, died Sunday, Jan. 25, 2009. He was born Feb. 4, 1919 in San Bernardino to Robert F. Garner Jr. and Cosette Steiner Garner. He was the great-grandson of one of the pioneer families of San Bernardino.
...
During his high school and college years, he played football and polo, and was active in ROTC, pledged SAE Fraternity, drove a cattle truck for the family ranches and learned mechanics at Garner Ford in San Bernardino.
...
Jack reported for duty with the U.S. Army in Oakland. On July 22, 1942, Lt. Jack Garner arrived in the British Isles where he began his three-and-a-half years of duty in the European Theater. WWII took Jack to England, France and North Africa.
Capt. Jack Garner’s father died one month before his return home from the war. Jack aggressively took over all the family enterprises. Garner Ford became the number one truck dealership in the state. At one time, there were as many as three Ford tractor dealerships. Cattle ranching continued to grow for Jack’s family.
...
Jack never severed his family ties with San Bernardino. Even now after his death, his daughter Meg still travels to San Bernardino on behalf of her father.
His final resting place will be at the ranch he loved so dearly.
.
#161
01-14-2016, 07:02 PM
Had something very cool happen yesterday. Back over in post #101 there was a picture of the NOS tool storage compartment that I had bought. Over here...
https://www.ford-trucks.com/forums/1...l#post14104693
I was documenting all of the hardware that came with the tool compartment and some of that hardware was in a small brown bag. All the screws, nuts, long carriage bolts, etc. to install the new toolbox. Even the check cable that keeps the door from opening too far.
That small bag had a C5TZ-814xxxx-A part number on it that wasn't in the Master Parts Catalog so I added it to a list of part numbers I've been keeping and moved on. Just on a whim I decided last week to see if there was any of that part number out in the universe. Lo and behold, there was one to be had. For $45. Well, I thought that was a decent price for the bag of hardware so I ordered it.
Then, yesterday it arrived in a bigger box with some other stuff from the same place. I didn't even realize what this inner box was at first. I'd forgot what it was supposed to be and the inner box was far too big to remind me it should just be a paper bag of hardware bits. I opened it and was faced with a bunch of wadded up paper that I figured was just packing paper. But as I pulled that out I realized it was the same installation instructions as I had shown earlier, only in better shape.
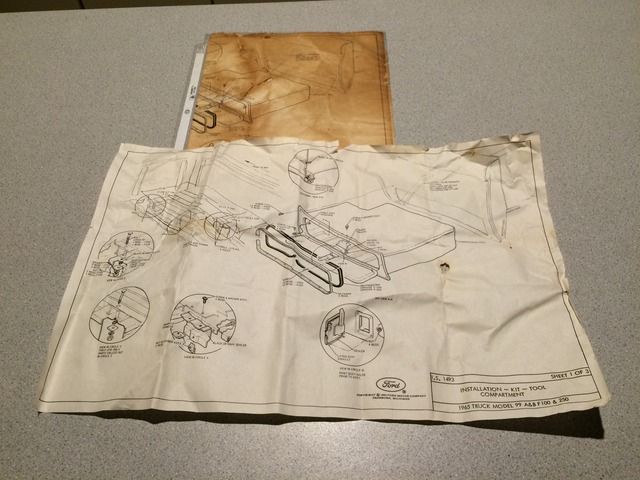
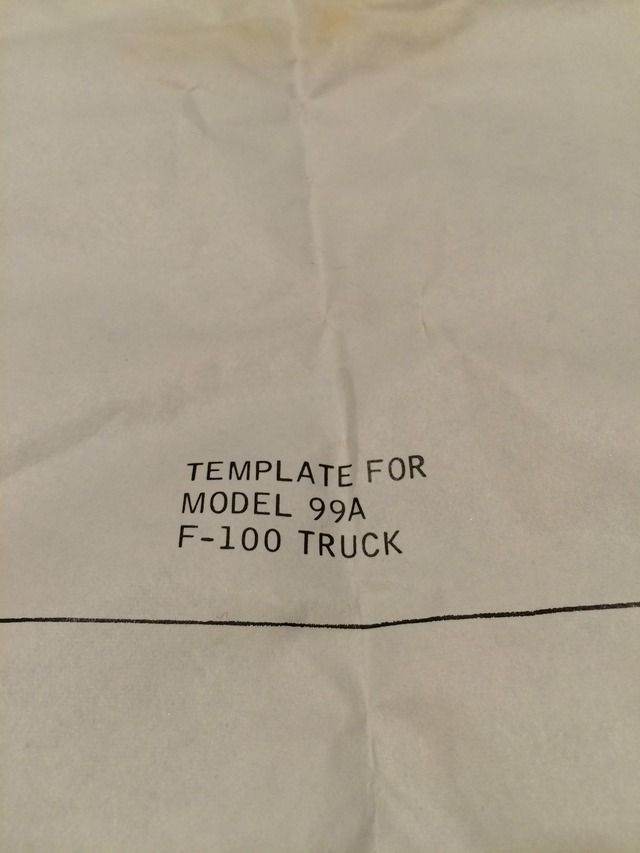
But, all I had was always just this Page 1 of 3 and I didn't have Pages 2 and 3...until now. And they are the templates of where to cut the bedside when adding a toolbox to a truck that was not previously equipped with one.
Page 2 is for the short bed, or as it says right on it - the template for the F100...!?!

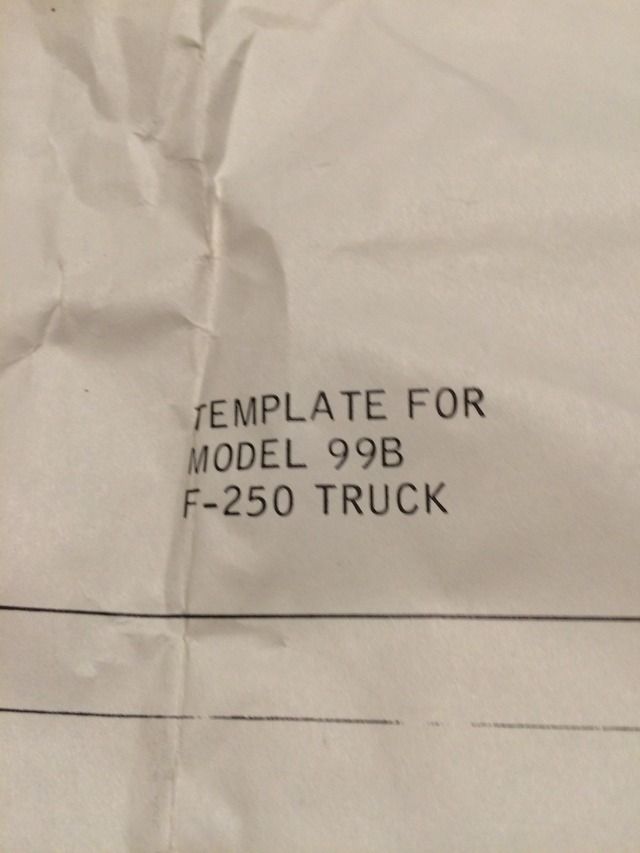
And Page 3 is the template for the longbed, or as it says - the template for the F250...!?!

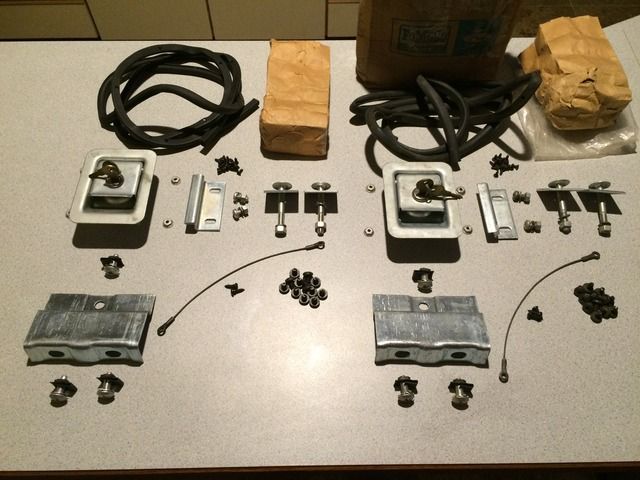
The next thing in the box after the paperwork was the seal - another seal. Cool. Can always use another one of those. And despite being kinked a bit it was still in very pliable condition. Looked just like the one sitting on the NOS toolbox in the other pics.
I looked down into the box to see what was remaining. The larger support bracket and smaller latch bracket were there, and something else wrapped in a plastic bag. As I pulled each of those out I realized what was in the plastic bag.
Another LATCH! And as I turned it over - there were the keys, too! It was everything except the toolbox itself and the long flimsy metal retainers for the seal. I was amazed that I'd gotten all this for $45.
Here's both sets next to each other. No photoshop involved...
Some other goodies were in the bigger box. I thought I was getting two right hand rear lamp bodies and judging from the part numbers that what I was expecting - figured I'd save one or trade for the other side.

But, when I pulled them out of the box they were opposing sides which was awesome. Got these for cheap.
RH/LH Rear Lamp Body Assembly - rectangular
C4TZ-13434-B
C4TZ-13435-B


Other good find was these. One in the box, the other loose. Surprisingly the loose one was in slightly better shape as far as the paint on the metal portion.
RH/LH Cowl Side Vent
C5TZ-8102104-A
C5TZ-8102105-A

I'll touch them up a bit and make them look better.
.
https://www.ford-trucks.com/forums/1...l#post14104693
I was documenting all of the hardware that came with the tool compartment and some of that hardware was in a small brown bag. All the screws, nuts, long carriage bolts, etc. to install the new toolbox. Even the check cable that keeps the door from opening too far.
That small bag had a C5TZ-814xxxx-A part number on it that wasn't in the Master Parts Catalog so I added it to a list of part numbers I've been keeping and moved on. Just on a whim I decided last week to see if there was any of that part number out in the universe. Lo and behold, there was one to be had. For $45. Well, I thought that was a decent price for the bag of hardware so I ordered it.
Then, yesterday it arrived in a bigger box with some other stuff from the same place. I didn't even realize what this inner box was at first. I'd forgot what it was supposed to be and the inner box was far too big to remind me it should just be a paper bag of hardware bits. I opened it and was faced with a bunch of wadded up paper that I figured was just packing paper. But as I pulled that out I realized it was the same installation instructions as I had shown earlier, only in better shape.

But, all I had was always just this Page 1 of 3 and I didn't have Pages 2 and 3...until now. And they are the templates of where to cut the bedside when adding a toolbox to a truck that was not previously equipped with one.
Page 2 is for the short bed, or as it says right on it - the template for the F100...!?!


And Page 3 is the template for the longbed, or as it says - the template for the F250...!?!


The next thing in the box after the paperwork was the seal - another seal. Cool. Can always use another one of those. And despite being kinked a bit it was still in very pliable condition. Looked just like the one sitting on the NOS toolbox in the other pics.
I looked down into the box to see what was remaining. The larger support bracket and smaller latch bracket were there, and something else wrapped in a plastic bag. As I pulled each of those out I realized what was in the plastic bag.
Another LATCH! And as I turned it over - there were the keys, too! It was everything except the toolbox itself and the long flimsy metal retainers for the seal. I was amazed that I'd gotten all this for $45.
Here's both sets next to each other. No photoshop involved...

Some other goodies were in the bigger box. I thought I was getting two right hand rear lamp bodies and judging from the part numbers that what I was expecting - figured I'd save one or trade for the other side.

But, when I pulled them out of the box they were opposing sides which was awesome. Got these for cheap.
RH/LH Rear Lamp Body Assembly - rectangular
C4TZ-13434-B
C4TZ-13435-B


Other good find was these. One in the box, the other loose. Surprisingly the loose one was in slightly better shape as far as the paint on the metal portion.
RH/LH Cowl Side Vent
C5TZ-8102104-A
C5TZ-8102105-A

I'll touch them up a bit and make them look better.
.
#162
01-15-2016, 10:03 AM
#163
01-15-2016, 10:17 AM
Tool Storage Compartment Door Weatherstrip
C4TZ-9946102-A
Michael at Obsolete Reliable has one left in stock.
Good luck!
.
#164
01-17-2016, 11:08 AM
Eric, did you get hold of Obsolete Reliable? I was reading what they had listed and while that is the part number they show, the description leaves me wondering.
TOOL STORAGE COMPARTMENT DOOR LATCH STRIKER
The striker is a slightly different part number
Tool Storage Compartment Door Latch Striker
C4TZ-9946106-A
Hopefully they didn't get the wrong number in the system.
.
TOOL STORAGE COMPARTMENT DOOR LATCH STRIKER
The striker is a slightly different part number
Tool Storage Compartment Door Latch Striker
C4TZ-9946106-A
Hopefully they didn't get the wrong number in the system.
.
#165
01-22-2016, 10:55 AM
TA, I didn't look because I don't have the box on the current truck. The previous truck needed one and I couldn't find one in a dozen years of searching the web including on this site and the other one. I strongly urge anyone restoring a toolbox to score the gasket because the box is pretty useless without it.
Thanks for looking for me, TA.
Eric
Thanks for looking for me, TA.
Eric