Cat's 1956 F250 Build (a bit of both S&R)

#17
 07-03-2013, 03:23 PM
Join Date: Mar 2013
Location: Upper Peninsula
Posts: 131
Likes: 0
Received 0 Likes
on
0 Posts
We're almost there! I'm kind of at an impasse today as I am waiting for the engineer to get home from work and help me finish the truck- I was hoping we could get it on the road tonight, but that's not realistic. So, I figured if I was stuck, I might as well post some pics for you all!
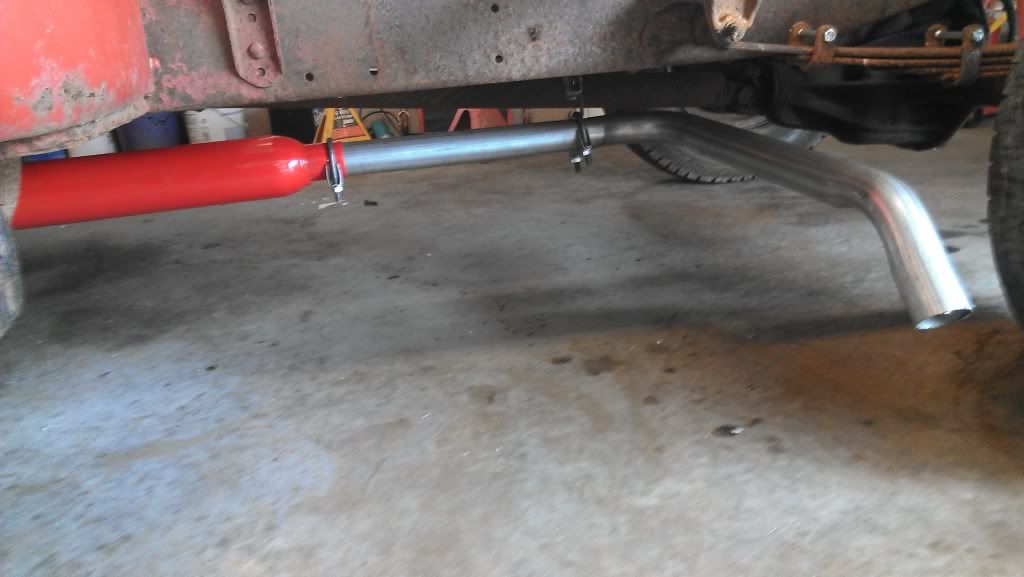
CherryBomb
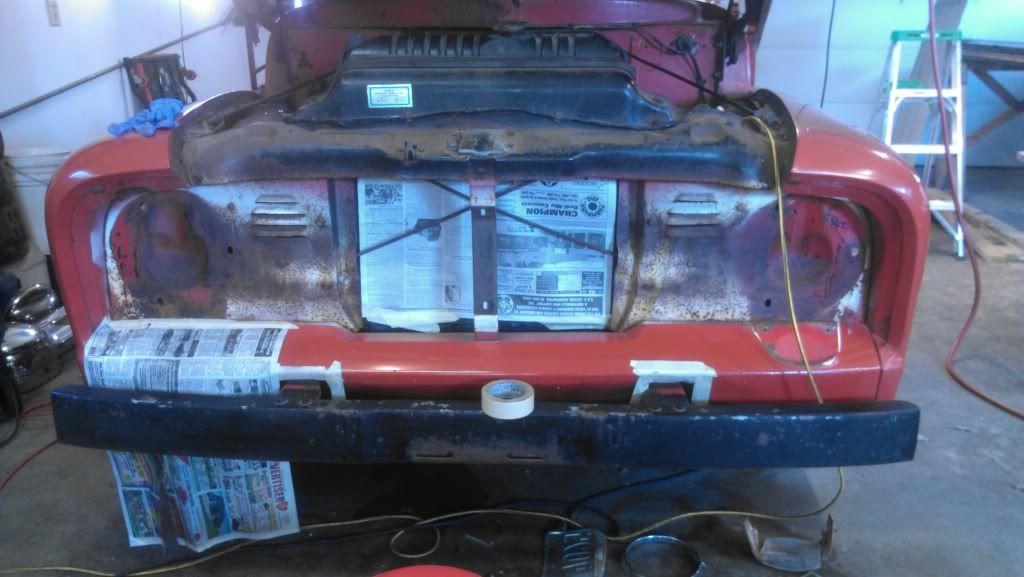
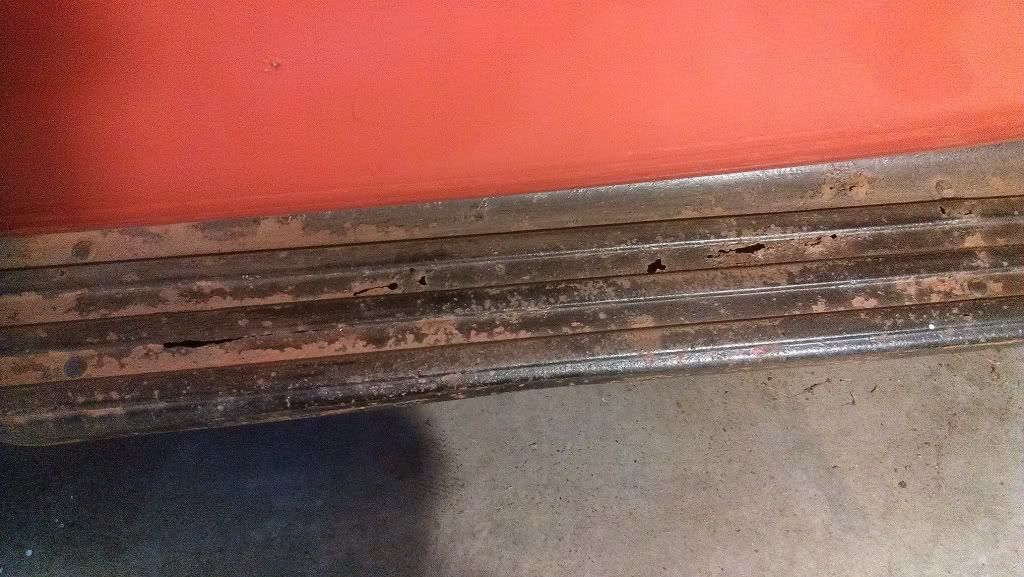
Who takes pictures just before you start? Getting ready to paint the bumper and whatever the thingy behind the grill is called (I'm sure you're staggered by my mastery of technical terms, right? ).
).
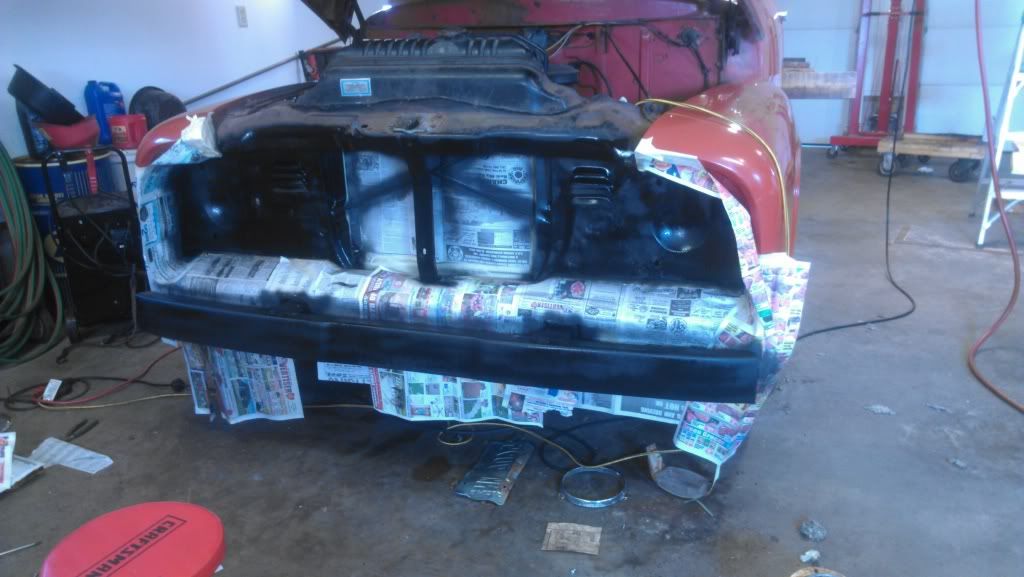
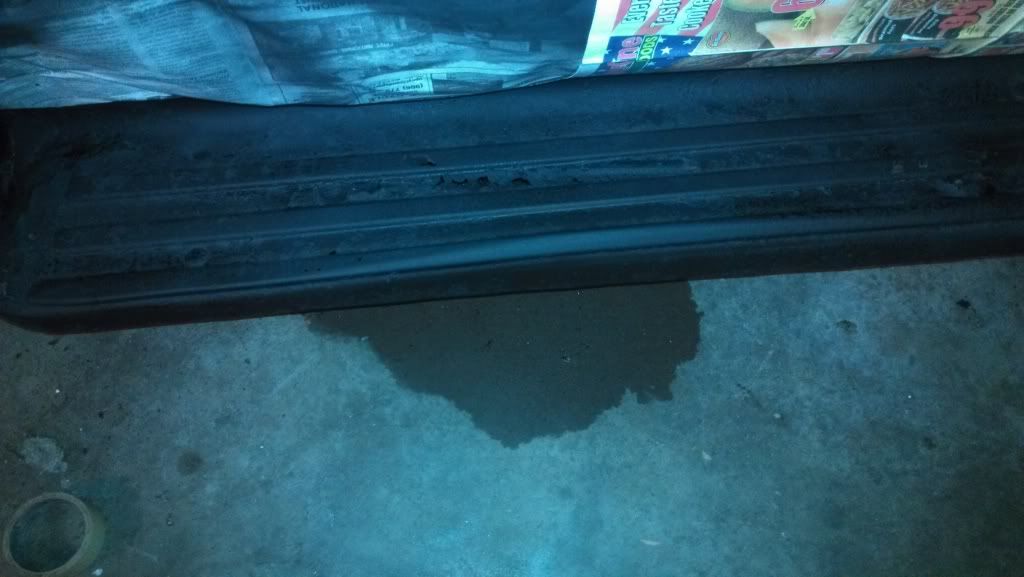
Drying
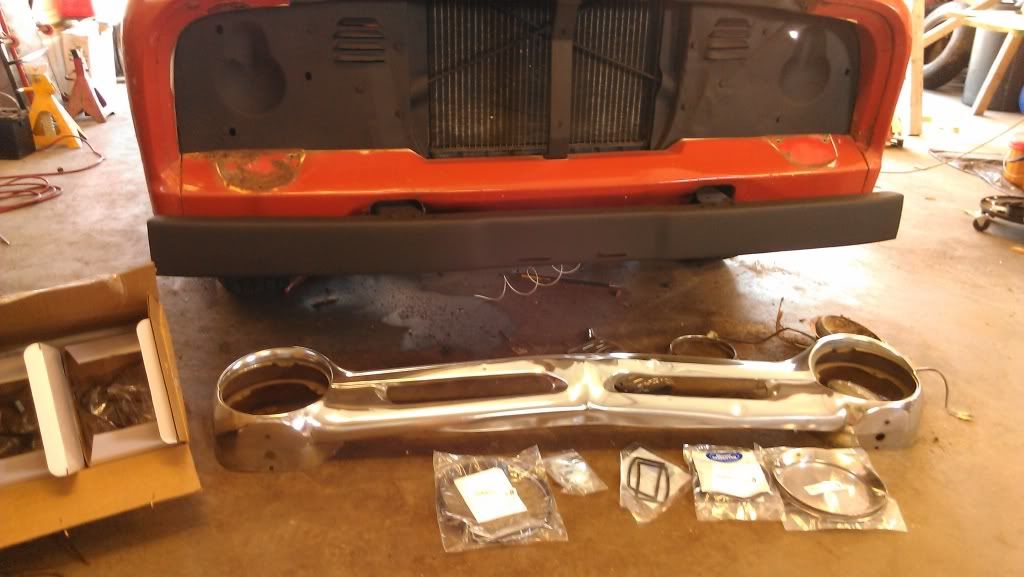
Fully dry. New parts came in for the headlamps. We got the chrome grill from the PO, but it must have been from a V8, as there are holes in there from the V8 thingy (emblem?).
These got the same treatment as the bumper/ area behind the grill. The tires did, as well, but I didn't take a pic.
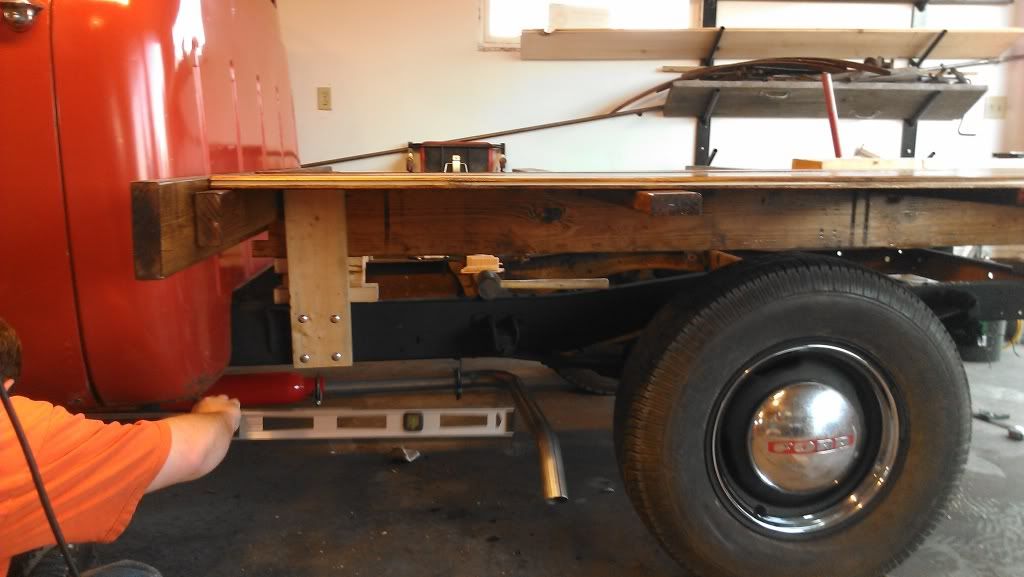
Getting the frame for the flatbed angled correctly
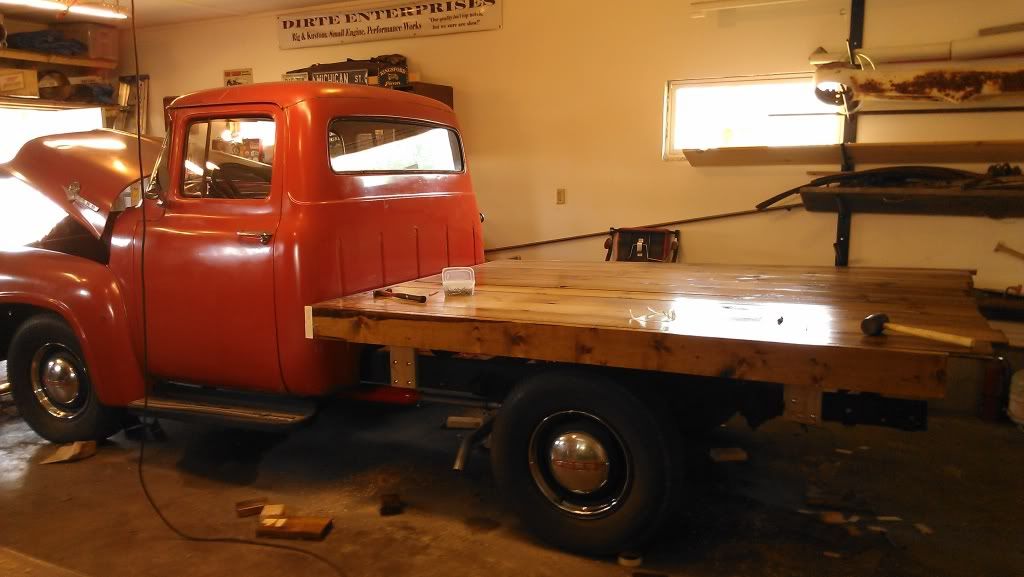
Almost there!
Another View
CherryBomb
Who takes pictures just before you start? Getting ready to paint the bumper and whatever the thingy behind the grill is called (I'm sure you're staggered by my mastery of technical terms, right?
). Drying
Fully dry. New parts came in for the headlamps. We got the chrome grill from the PO, but it must have been from a V8, as there are holes in there from the V8 thingy (emblem?).
These got the same treatment as the bumper/ area behind the grill. The tires did, as well, but I didn't take a pic.
Getting the frame for the flatbed angled correctly
Almost there!
Another View
#18
07-03-2013, 04:03 PM
Tuned
#20
07-04-2013, 09:45 AM

Lead Driver
You are making awesome progress and I appreciate your proper use of technical terms.
Keep those pictures coming. Those of us that are moving at a crippled snails pace love seeing good progress.
Love the flatbed too. I plan on doing a wood flatbed too. Could you post some more pictures of of how you are attaching the bed to the frame?
#21
07-05-2013, 02:43 PM
Join Date: Mar 2013
Location: Upper Peninsula
Posts: 131
Likes: 0
Received 0 Likes
on
0 Posts
SO yesterday we hit it hard and finished the flatbed, got the grill attached, and taillights and headlights working! A little finagling of wiring was necessary and adapters were modified to suit our needs, but in the end, we won the wiring battle!
I took her for her maiden voyage to the gas station and home again with no major incidences! Or minor ones, for that matter, too!
Since that drive went so well, we packed our stuff and headed to the lake to do some fishing. We had it randomly stall when we were turning, and it did it again on the way home in the middle of the road. So we think it could have been a choke issue or perhaps the points need some attention.
We also need to inspect the u-joints and get new shocks. Other than that, she did great!
We are heading out to go fishing again, but I will try to get pics of the underside of the bed and post those for you within the next day or two. If you want a technical description of what Dan did to get everything level, I'll have him go through the steps.
#22
07-05-2013, 03:36 PM
Tuned
So glad to hear that you guys got the ole girl on the road again.
A quick suggestion on your wiring connections if you haven't already done so.
Since you've already made your connections I'll leave the whole shrink tube suggestion on the back burner but, it makes for a good tight weather seal for your future wire connections. The other would be to coat your new connections with Liquid Neoprene a.k.a. Liquid Tape. Use several coatings to insure both a waterproof and weather proof seal to all of your connections in order to inhibit corrosion. It can be had at any parts house or DIY store. The last thing ya wanna do is go back to your wiring to try and find a faulty connection. Have Fun and enjoy your ride.

#24
07-05-2013, 04:28 PM

Posting Guru
Join Date: Feb 2011
Location: Central, IL
Posts: 1,212
Likes: 0
Received 0 Likes
on
0 Posts
Great progress! The truck looks great with the flatbed.
Since I see you've got at least one request for another picture let me get in line and get my request in for some video of the truck running/driving. I'd love to hear what that Cherry Bomb sounds like! Can't get much better than getting the truck back on the road and heading to the 'ol fishin' hole.
Since I see you've got at least one request for another picture let me get in line and get my request in for some video of the truck running/driving. I'd love to hear what that Cherry Bomb sounds like! Can't get much better than getting the truck back on the road and heading to the 'ol fishin' hole.
#25
07-05-2013, 06:18 PM
#26
07-07-2013, 11:51 AM
Fleet Mechanic
#27
07-09-2013, 07:48 PM
Join Date: Mar 2013
Location: Upper Peninsula
Posts: 131
Likes: 0
Received 0 Likes
on
0 Posts
Harrier,
It took longer than expected, but I was finally able to get out to the garage to get some pics for you. I'll post pics from start to finish for you. Hope you get some good ideas!

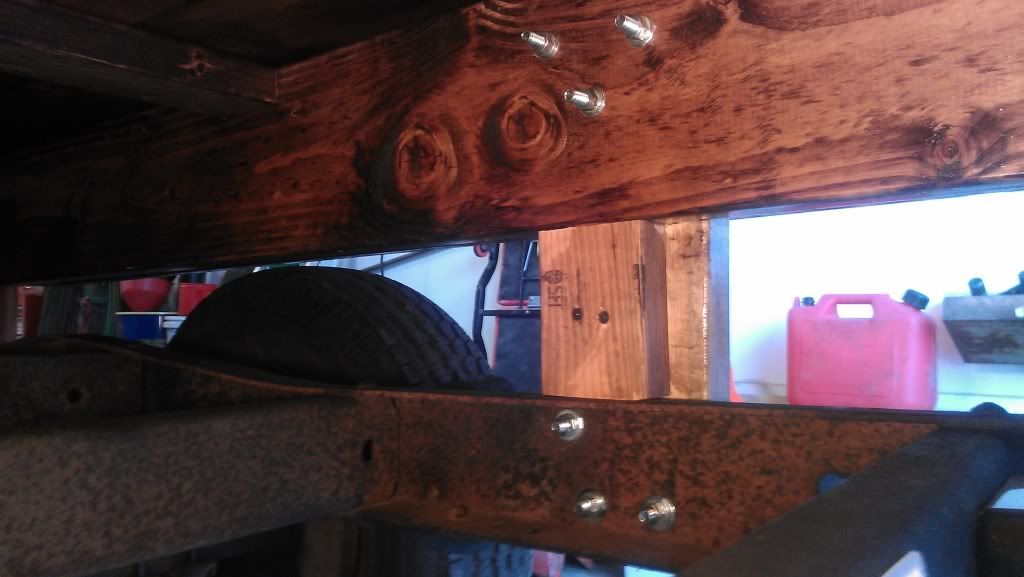
The boards at the top of the pic correlate with the front of the bed and were notched to accommodate the 2x4 and 2x6 which were screwed together. The 2x6s running the length of the bed were notched to accommodate the 2x4s running perpendicular.
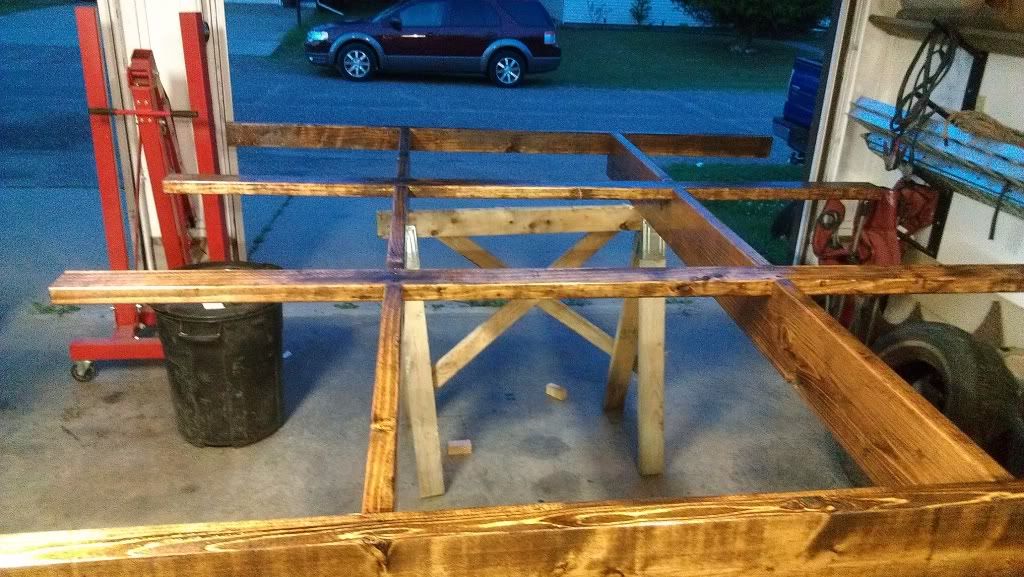
Different view of the frame
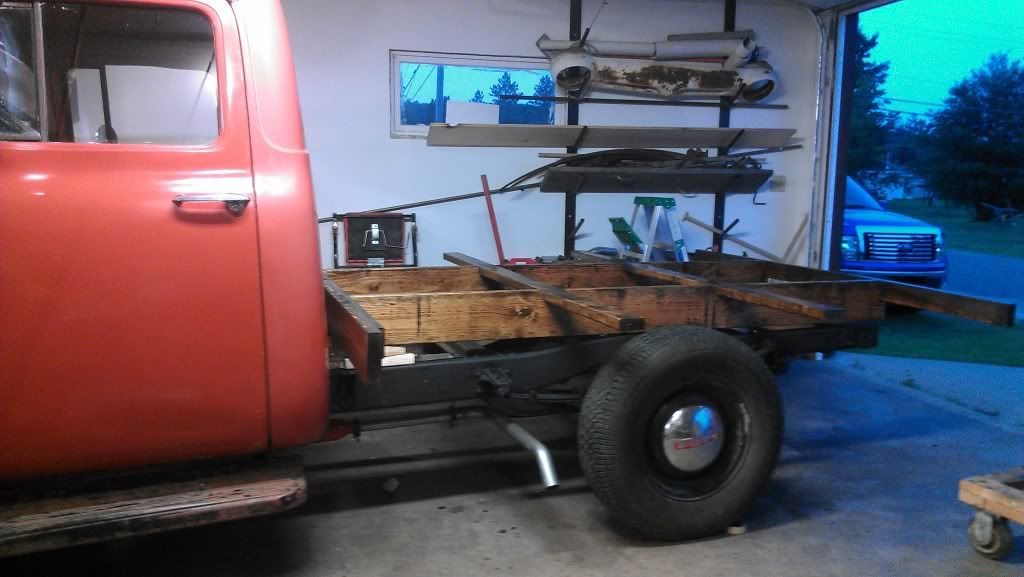
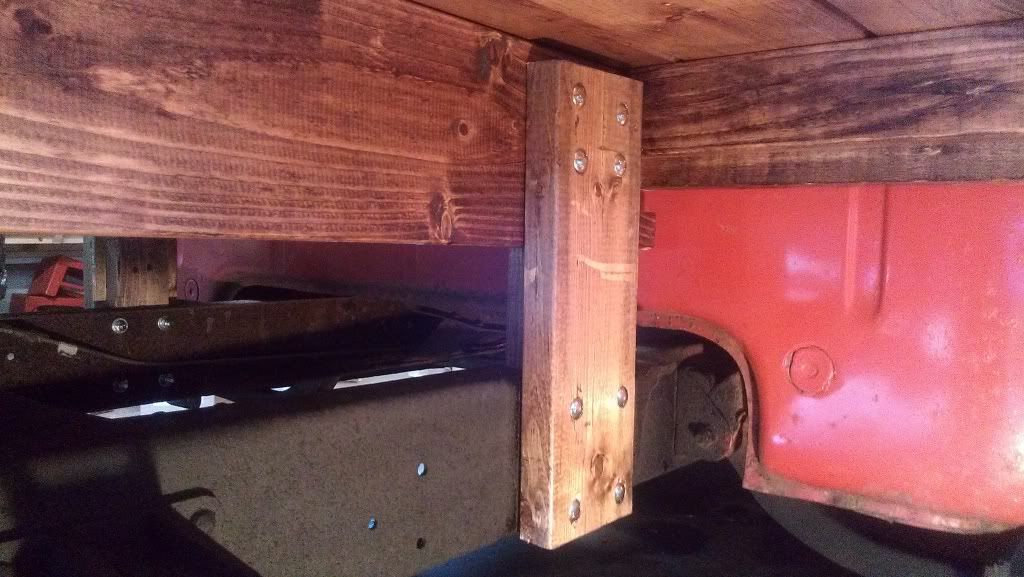
We set the bed frame on the truck frame on blocks and got a feel for the height it would be, then shimmed it up to where we wanted it.
We then used the existing holes in the frame to attach the support member to the frame, then drilled holes in the bed frame and put the bolts through, and moved around the truck repeating the process. (Note the supporting member just behind the cab)
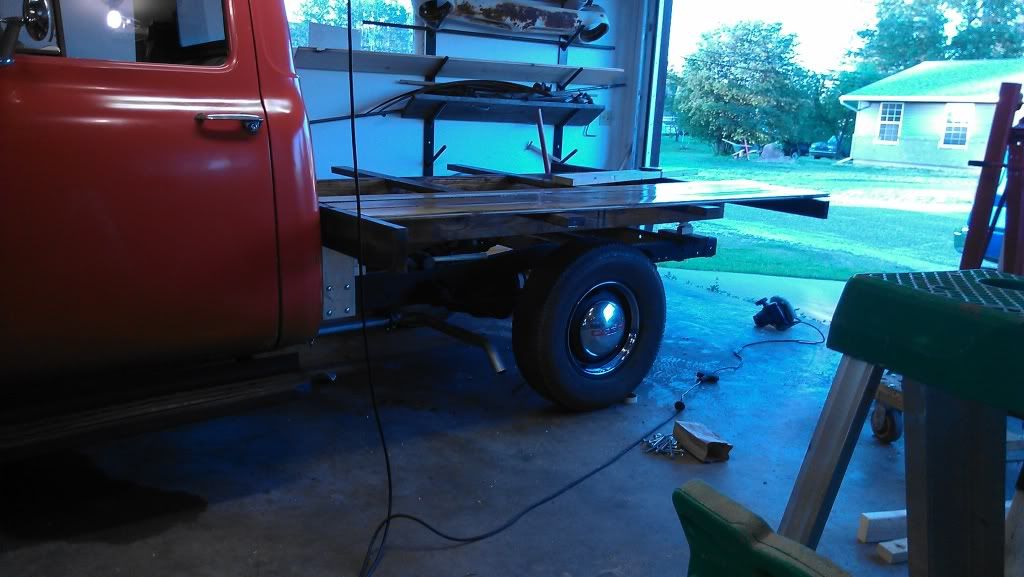
Better view...
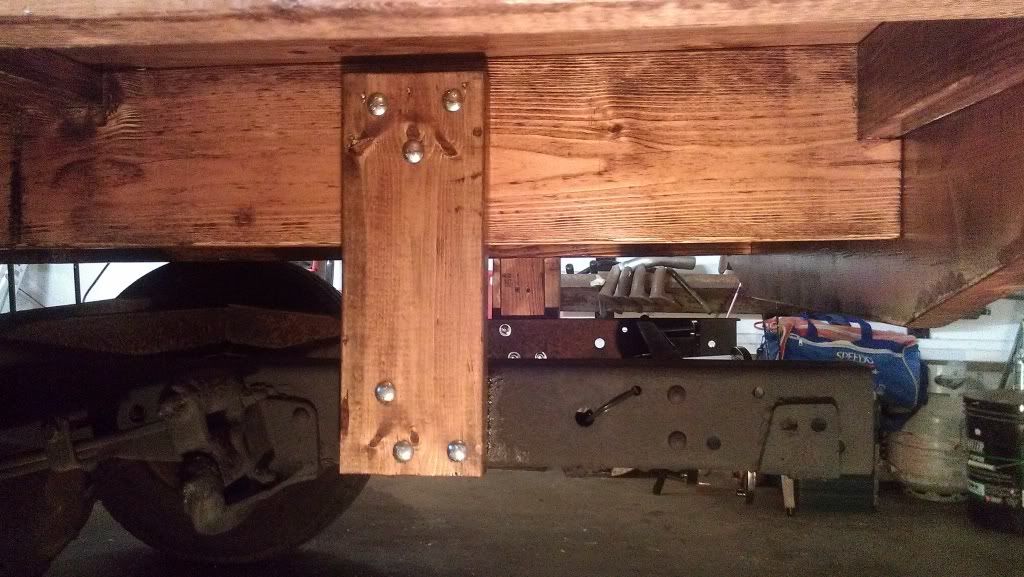
Back view of the supporting members- blocks are to reduce the load carried by the lag bolts.
Hope the pics help!
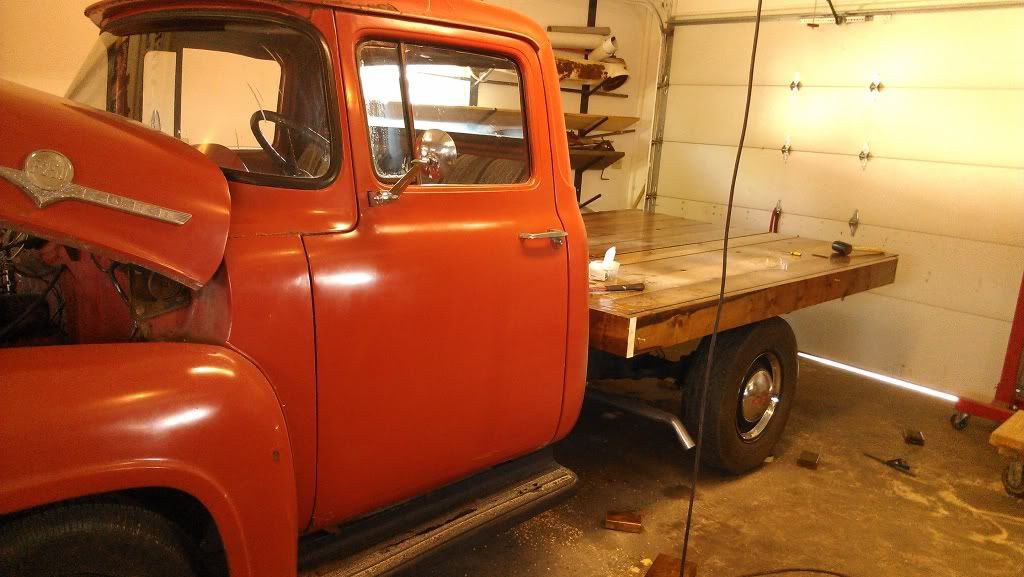
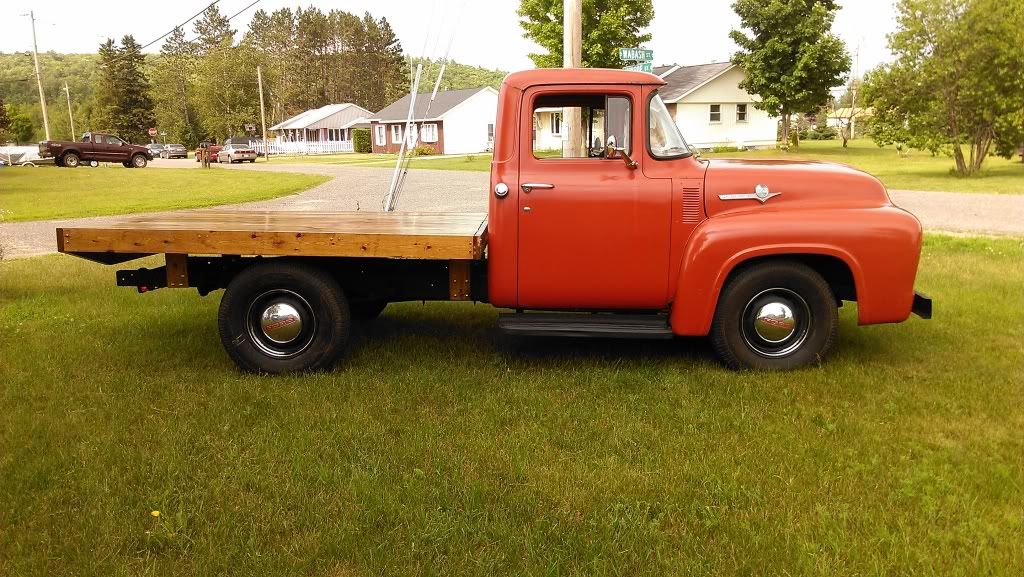
And one more, just because she's pretty!
It took longer than expected, but I was finally able to get out to the garage to get some pics for you. I'll post pics from start to finish for you. Hope you get some good ideas!
The boards at the top of the pic correlate with the front of the bed and were notched to accommodate the 2x4 and 2x6 which were screwed together. The 2x6s running the length of the bed were notched to accommodate the 2x4s running perpendicular.
Different view of the frame
We set the bed frame on the truck frame on blocks and got a feel for the height it would be, then shimmed it up to where we wanted it.
We then used the existing holes in the frame to attach the support member to the frame, then drilled holes in the bed frame and put the bolts through, and moved around the truck repeating the process. (Note the supporting member just behind the cab)
Better view...
Back view of the supporting members- blocks are to reduce the load carried by the lag bolts.
Hope the pics help!
And one more, just because she's pretty!
#28
07-10-2013, 05:56 AM
Lead Driver
Darn right she is pretty. Thanks for posting all of those. That will help with my planning when the time comes.
With the bed having so little contact with the frame, are you concerned with any sagging over time, or being able to handle any loads? (If you are ever going to load it.)
What are your plans for tail lights? Oh, I think I might see one on the frame.
There are a couple of eye hooks on the bed in one picture, but not the last one. What were the plans for those?
Do you ever think you might try side boards on the bed?
I'm full of questions this morning aren't I. Pretty cool stuff.
With the bed having so little contact with the frame, are you concerned with any sagging over time, or being able to handle any loads? (If you are ever going to load it.)
What are your plans for tail lights? Oh, I think I might see one on the frame.
There are a couple of eye hooks on the bed in one picture, but not the last one. What were the plans for those?
Do you ever think you might try side boards on the bed?
I'm full of questions this morning aren't I.
Pretty cool stuff.
#29
07-10-2013, 11:17 AM
Join Date: Mar 2013
Location: Upper Peninsula
Posts: 131
Likes: 0
Received 0 Likes
on
0 Posts
Dan and I aren't really planning on doing any heavy hauling, so he didn't engineer it for heavy loads. Also, we were planning on redoing the bed when we get the truck painted a few years down the road, so we didn't really design for long-term, either. BUT, if it holds up, we'll think about keeping it after it's painted. It really turned out much nicer than we had actually planned on. So we're going to play it by ear when the time comes.
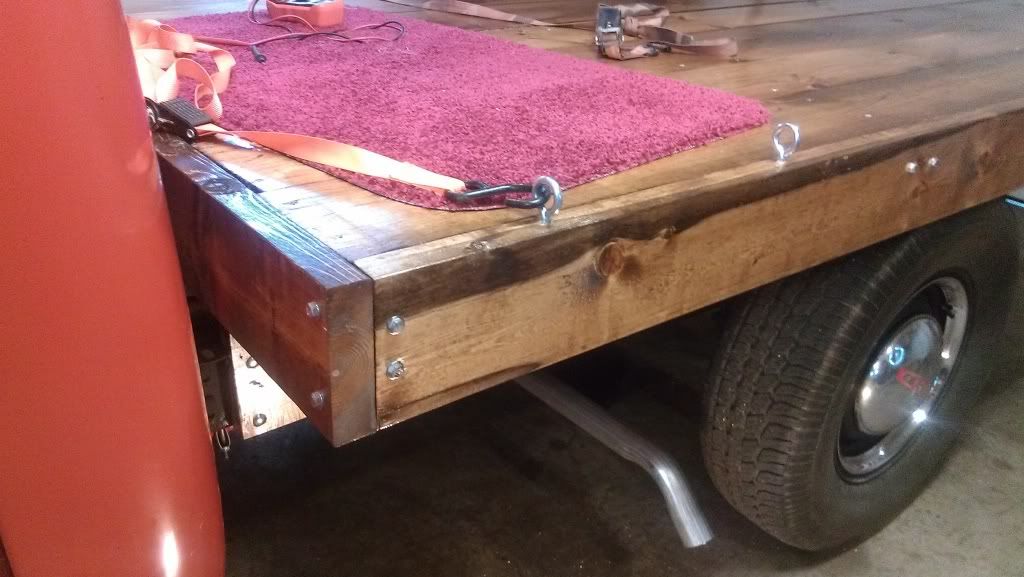
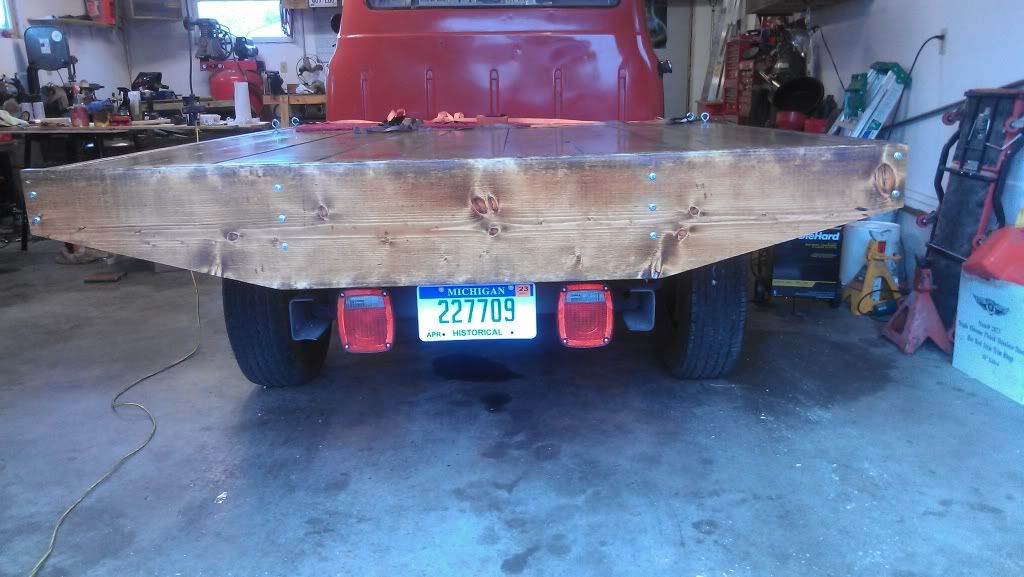
Here's a pic of the back with the tail lights:
The eye hooks we put there to strap things down to the bed. In the pic you mentioned, you can see straps on the carpet- those connected to eye hooks on the other side and that's how we transported the tackle box and cooler. The carpet was used to avoid scratches on the bed! (I put pics a little out of the order in which I took them so it would be more logical and chronological for you, which is why you see them in one pic, but not a later one)
And we will be putting side boards on the bed, as time allows. I gave us a July 4th deadline, and that kept us limited in what we could feasibly do in that time frame. But I am envisioning a three-high side board that steps down, if that makes sense. At that time, the eye hooks will be replaced with brackets/upright supports for the sides.
And don't worry about questions- Dan quite frequently accuses me of being the most curious person on the planet as I am constantly peppering him with questions! (I don't see that as a bad thing, but I can see how it may be distracting to him)