
92 F150 coolant leaks, oil leaks & other fixs
#16
 05-27-2013, 11:19 AM


Join Date: Mar 2013
Location: Lynnwood, WA
Posts: 33
Likes: 0
Received 0 Likes
on
0 Posts

#17
05-27-2013, 11:23 AM
Join Date: Mar 2013
Location: Lynnwood, WA
Posts: 33
Likes: 0
Received 0 Likes
on
0 Posts
#18
05-27-2013, 11:53 AM
Join Date: Mar 2013
Location: Lynnwood, WA
Posts: 33
Likes: 0
Received 0 Likes
on
0 Posts
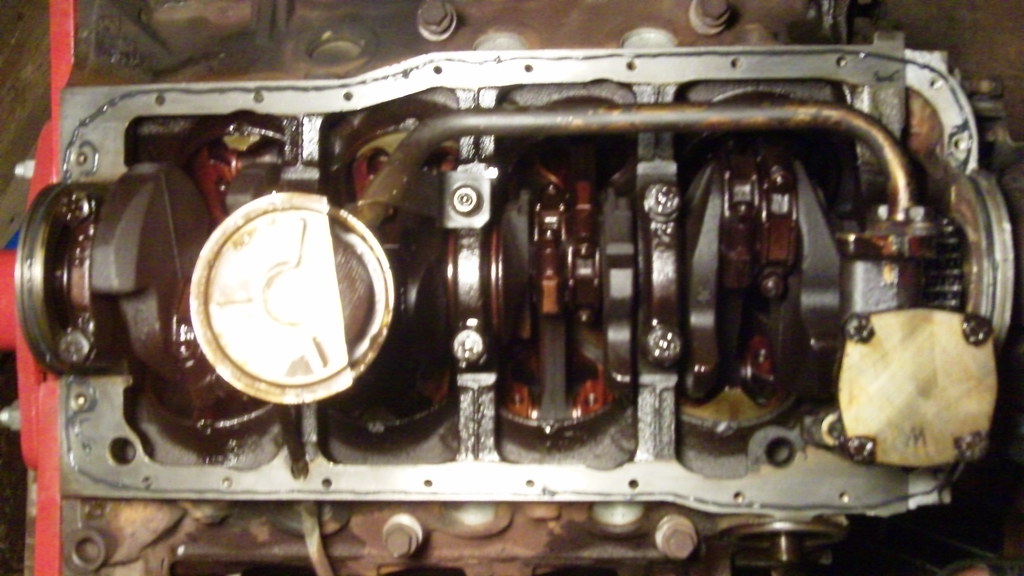
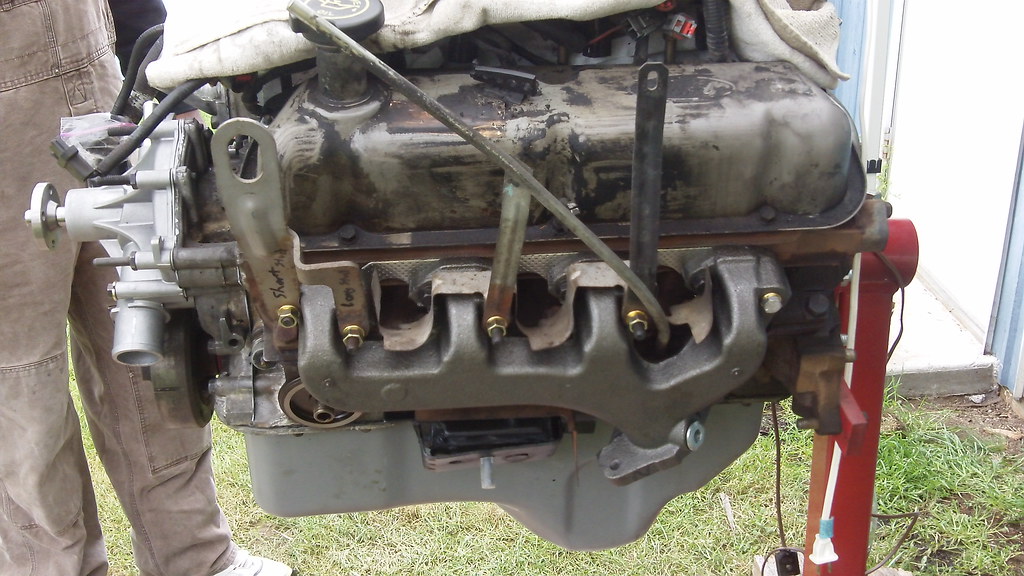
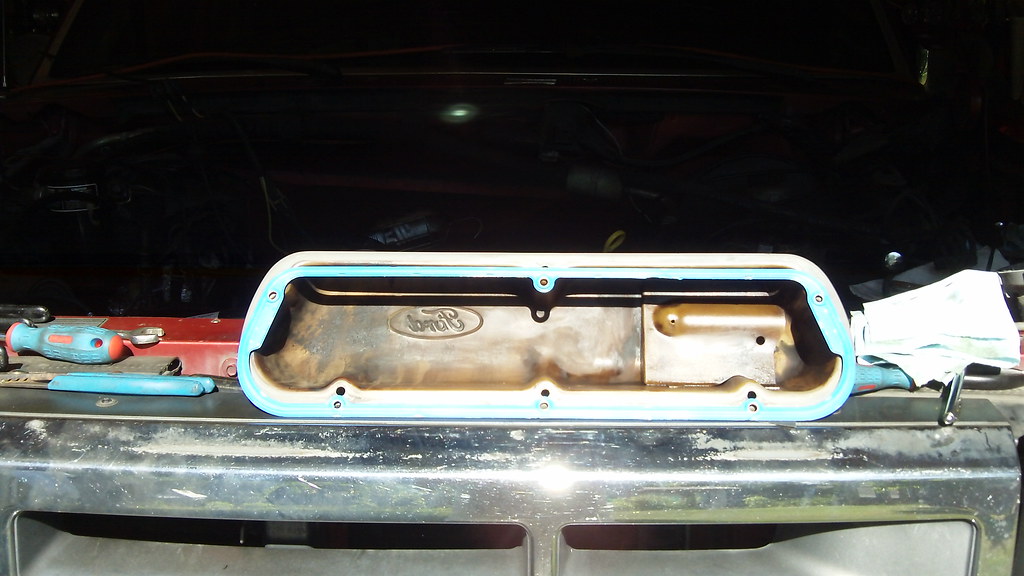
I complimented the timing cover gasket with Mega Grey.
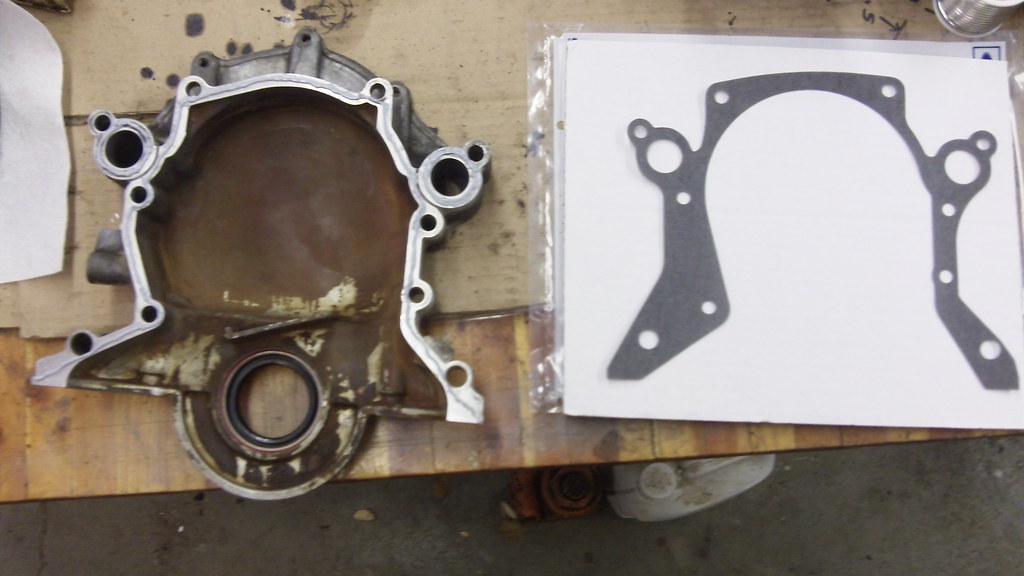
What had me stumped for a while was remembering which bolt held the lower left corner of the timing cover. As I was installing the bolts, I noticed the bold I had in that position only had a few threads into the engine block when its head met the surface of the timing cover. I thought "that's not right". so I started rereading an article I've been referencing https://www.ford-trucks.com/forums/1239450-waterpump-timing-cover-job.html
which is when I finally noticed, in the second picture, the bolt hole I couldn't fill, at the moment, had one of the bolts with the nut in the middle. That sent me back to my workbench where I found just such a bolt so I could finish this part of the timing cover. Thanks TheGageinator
I visited each bolt, starting at the newly placed one, going clockwise tightening to what felt like a similar tension then starting over again. Watching the Blue Grey gasket squeezing out just a bit more and a bit more as I went.
I find it entertaining that we are supposed to wrench the bolts to their spec'd torque settings but can't get a torque wrench on the top two due to space constraints so get to *feel* its right.
Now that that's done, I spooged more Mega Grey on other side of the timing cover.
hmm, yup it was probably unnecessary to put it on the upper section between the two channel holes.
While that was skinning did the same thing to the thermostat housing.
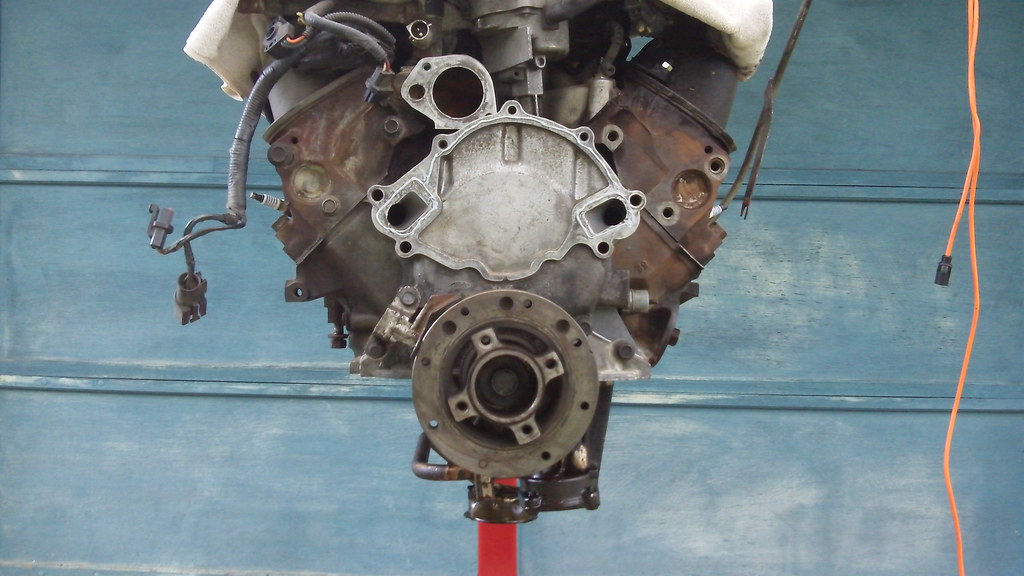
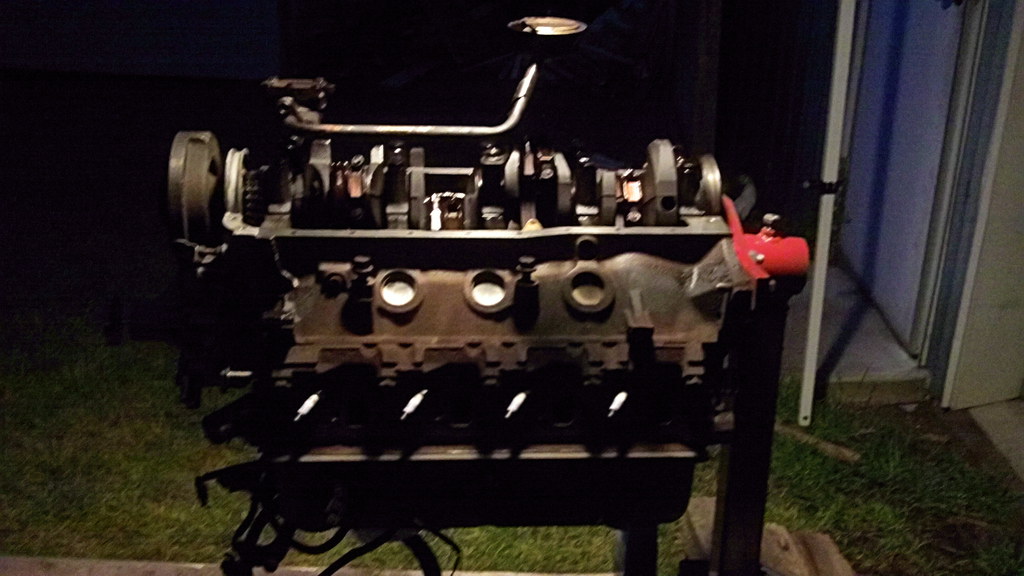
Yay, Timing Cover and Water pump are in place.
Not sure I'll ever get used to seeing an engine upside down
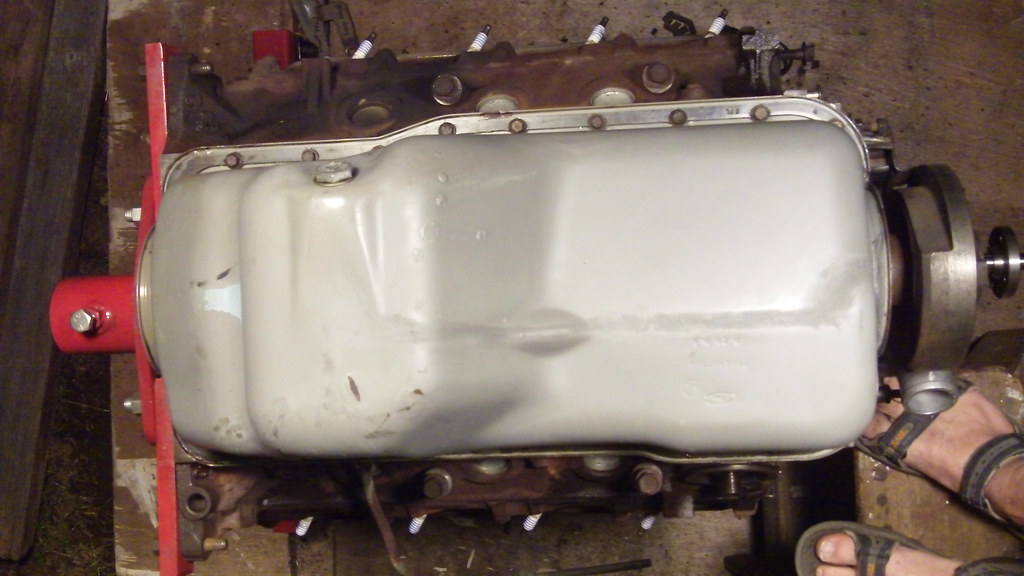
Ran a bead of Mega Black along the bottom of the block where it meets up with the oil pan because I'd read that that was an update to the official Ford oil pan gasket replacement procedure.
Turns out, I misremembered that technical bulletin. Their recommendation puts a liquid silicone sealer on both sides of the gasket in the four corners surrounding where the larger bolts are located. oh well, next times cleanup could be a bit more challenging.
After that had skinned put the oil pan gasket in place and ran another bead on top of the oil pan gasket

Carefully put the oil pan in place. Hand tightened the larger bolts in the 4 corners. Then hand tightened every other one going around clockwise. Once around, continued around again filling in all the holes. Used the same methodology with socket getting a bit tighter each circuit. Finished final two circuits using torque wrench.
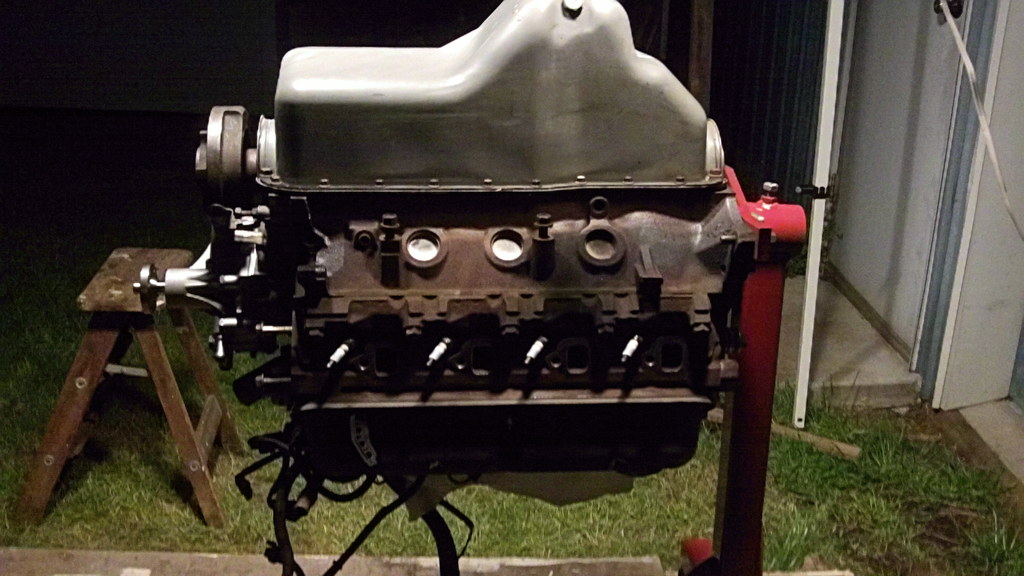
Finished that early this morning. Now I get to visit parts store again cause they gave me the wrong exhaust manifold hardware kits.
What had me stumped for a while was remembering which bolt held the lower left corner of the timing cover. As I was installing the bolts, I noticed the bold I had in that position only had a few threads into the engine block when its head met the surface of the timing cover. I thought "that's not right". so I started rereading an article I've been referencing https://www.ford-trucks.com/forums/1239450-waterpump-timing-cover-job.html
which is when I finally noticed, in the second picture, the bolt hole I couldn't fill, at the moment, had one of the bolts with the nut in the middle. That sent me back to my workbench where I found just such a bolt so I could finish this part of the timing cover. Thanks TheGageinator
I visited each bolt, starting at the newly placed one, going clockwise tightening to what felt like a similar tension then starting over again. Watching the Blue Grey gasket squeezing out just a bit more and a bit more as I went.
I find it entertaining that we are supposed to wrench the bolts to their spec'd torque settings but can't get a torque wrench on the top two due to space constraints so get to *feel* its right.
Now that that's done, I spooged more Mega Grey on other side of the timing cover.
hmm, yup it was probably unnecessary to put it on the upper section between the two channel holes.
While that was skinning did the same thing to the thermostat housing.
Yay, Timing Cover and Water pump are in place.
Not sure I'll ever get used to seeing an engine upside down
Ran a bead of Mega Black along the bottom of the block where it meets up with the oil pan because I'd read that that was an update to the official Ford oil pan gasket replacement procedure.
Turns out, I misremembered that technical bulletin. Their recommendation puts a liquid silicone sealer on both sides of the gasket in the four corners surrounding where the larger bolts are located. oh well, next times cleanup could be a bit more challenging.
After that had skinned put the oil pan gasket in place and ran another bead on top of the oil pan gasket
Carefully put the oil pan in place. Hand tightened the larger bolts in the 4 corners. Then hand tightened every other one going around clockwise. Once around, continued around again filling in all the holes. Used the same methodology with socket getting a bit tighter each circuit. Finished final two circuits using torque wrench.
Finished that early this morning. Now I get to visit parts store again cause they gave me the wrong exhaust manifold hardware kits.
#19
05-28-2013, 01:15 AM
Join Date: Mar 2013
Location: Lynnwood, WA
Posts: 33
Likes: 0
Received 0 Likes
on
0 Posts
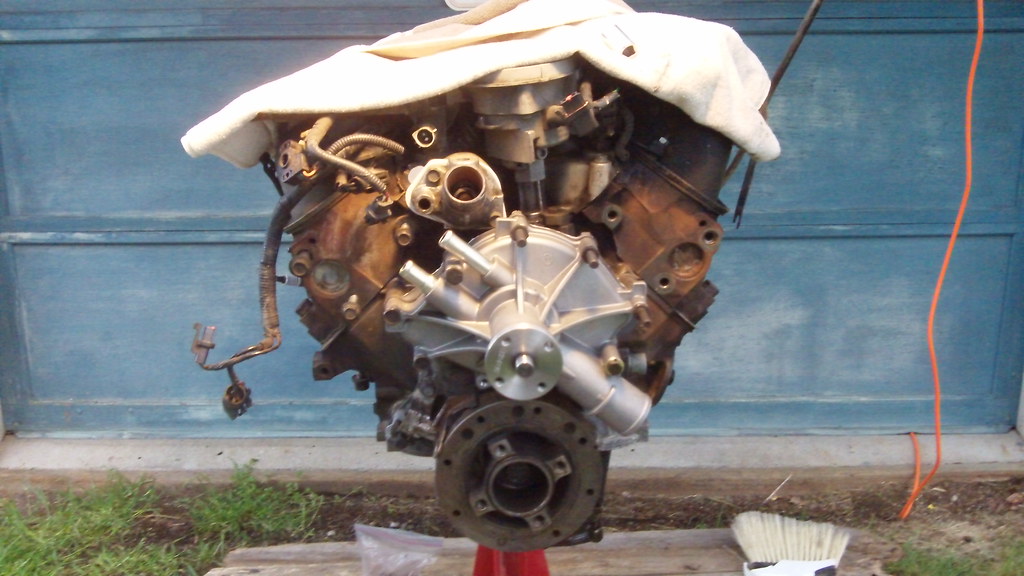
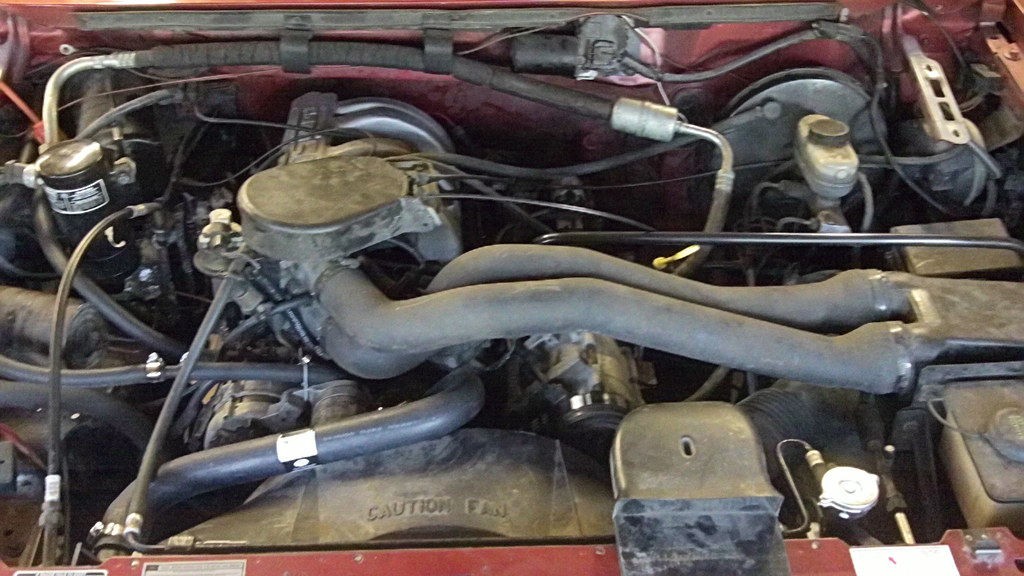
The Dorman exhaust replacement kit for my truck isn't stocked in my state [at least by the closest auto parts store to my house]. They want a week and 50% more for shipping. I decided to make due with a couple off the shelf bolts they had in stock. You can see one of them in the rear most position of the exhaust manifold below.
My truck's engine now has:
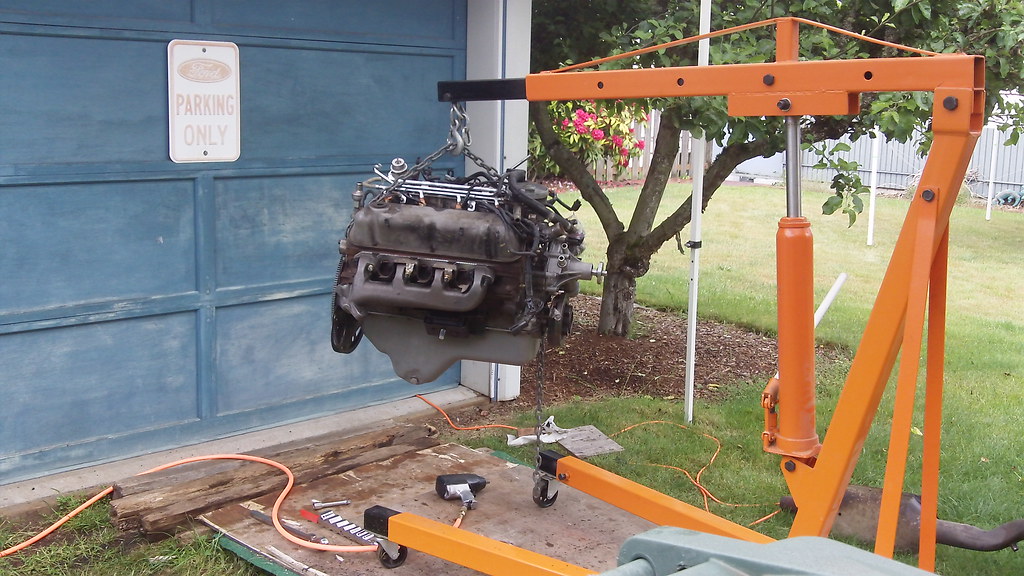
And its engine has been put back in.
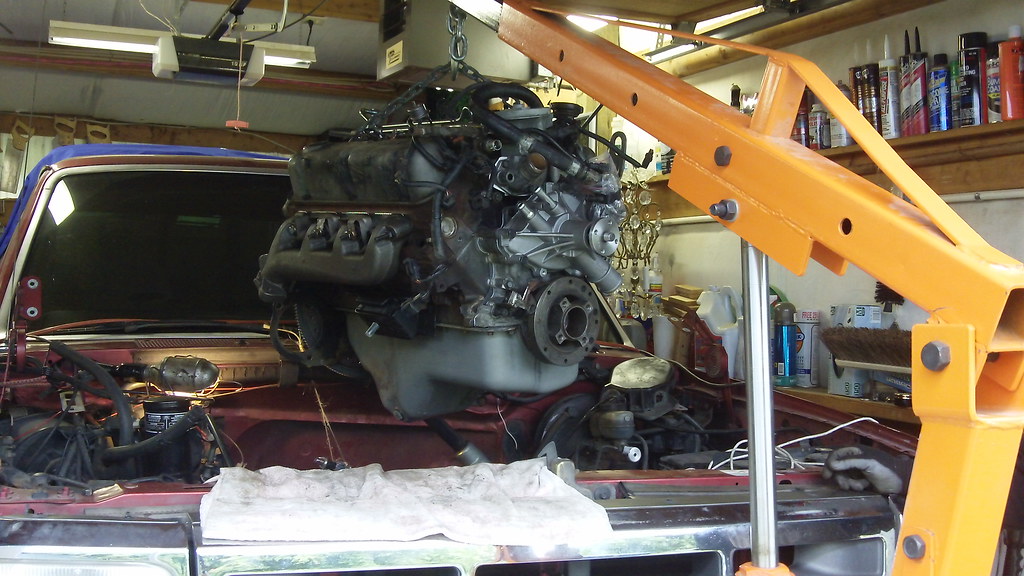

Tomorrow, begins the install of all the bits around the engine.
My truck's engine now has:
- its exhaust manifolds in place;
- its fuel injector connectors replaced,
- its fuel injectors and fuel rail in place
And its engine has been put back in.
Tomorrow, begins the install of all the bits around the engine.
#20
05-28-2013, 04:47 AM
Posting Guru
#23
05-28-2013, 09:58 AM

#24
05-28-2013, 11:54 AM
Posting Guru
#26
05-29-2013, 07:55 PM
Join Date: Mar 2013
Location: Lynnwood, WA
Posts: 33
Likes: 0
Received 0 Likes
on
0 Posts
teehee, Yah Encho, I would too, ifn these were upgrades. This is repair. Yup, my repair, your upgrade... Glad to entertain 
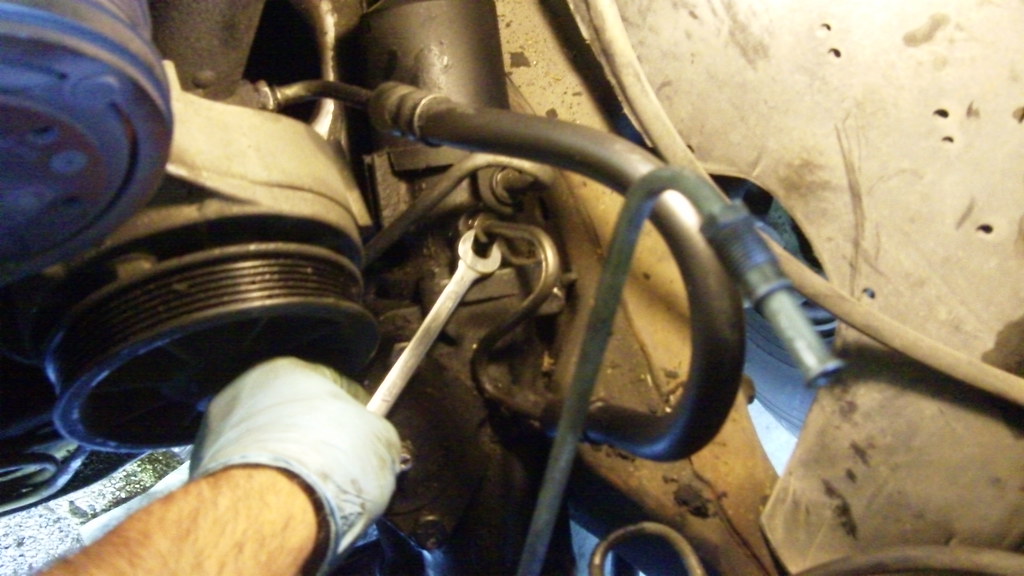
Now for today's question. When I started, I did not plan to take engine out so did lots-o-stuff while it was in place attempting to gain enough room to lift it far enough to remove oil pan... Turned out, I wasn't creative enough to do that.
Yah, I know, back to the question already Part of oil pan removal without engine removal takes the first section of exhaust piping out of vehicle. To do that, I had too destroy the pipe that supplies exhaust fumes to the EGR valve. Yes, I have a replacement pipe but am concerned about how to install it. Due to it having been crimped in place on both ends.
This shows the exhaust pipe connector spot and the end of the pipe that slips over it.
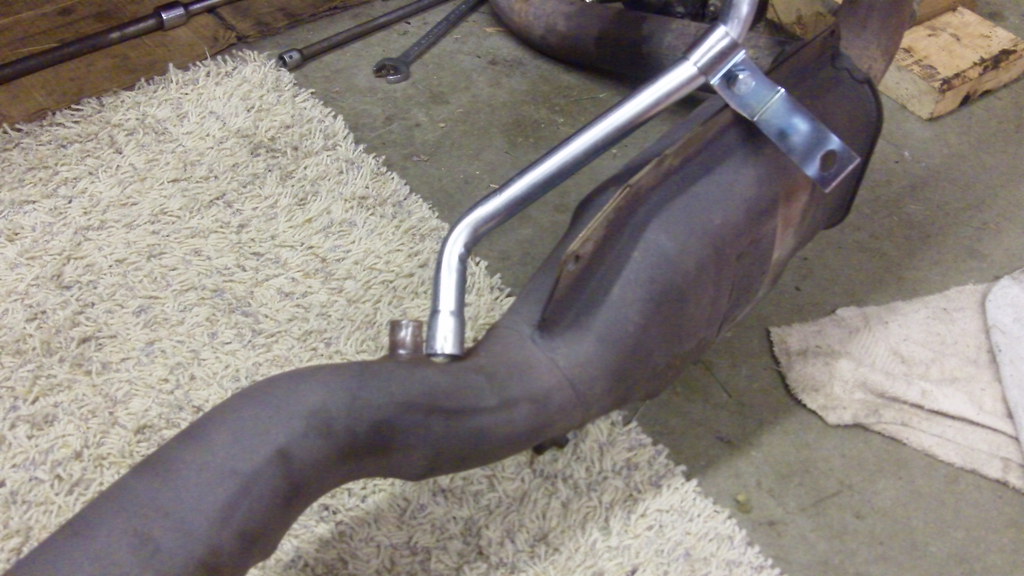
here's the other end.
See the clamp on the end?
 }
}
So, how do I make these connections?
Now for today's question. When I started, I did not plan to take engine out so did lots-o-stuff while it was in place attempting to gain enough room to lift it far enough to remove oil pan... Turned out, I wasn't creative enough to do that.
Yah, I know, back to the question already
Part of oil pan removal without engine removal takes the first section of exhaust piping out of vehicle. To do that, I had too destroy the pipe that supplies exhaust fumes to the EGR valve. Yes, I have a replacement pipe but am concerned about how to install it. Due to it having been crimped in place on both ends. This shows the exhaust pipe connector spot and the end of the pipe that slips over it.
here's the other end.
See the clamp on the end?
- First, that clamp and its counterpart were welded to the pipe.
- Second, I had to destroy its mate on the other end to get the little pipe off the exhaust pipe so I could then get the exhaust pipe out of my truck
- Third, those clamps were so tight they crimped the pipe in place
}So, how do I make these connections?
#27
06-11-2013, 05:32 PM
Posting Guru
Aw man, just saw this now. If you haven't figured out already, you can buy those small muffler-looking clamps new. I'm pretty sure it's going to be part of the "HELP!" line of parts. Most stores should stock, or be able to get them fairly easily. They'd most likely be called air tube or emissions tube clamps.
#28
06-23-2013, 01:37 PM
Join Date: Mar 2013
Location: Lynnwood, WA
Posts: 33
Likes: 0
Received 0 Likes
on
0 Posts
oh boy, does time pass!!!
thanks Bob, I'll remember that when I visit parts store again.
In the mean time, my story continues with putting the exhaust pipe back in [by just pushing the emission tube onto the exhaust pipe so far the bracket seems to hold it in place] and everything else back on.
That assembly was assisted by my nephews 7 & 9 who visited one Saturday afternoon. It was most enjoyable describing and demonstrating torque to them. The older even figured out how to find the *right* wrench for the bolt or nut I would hand him...
That Saturday's finishing touches were also assisted by Radiator dot com's delivery of my new radiator in under 90 minutes.
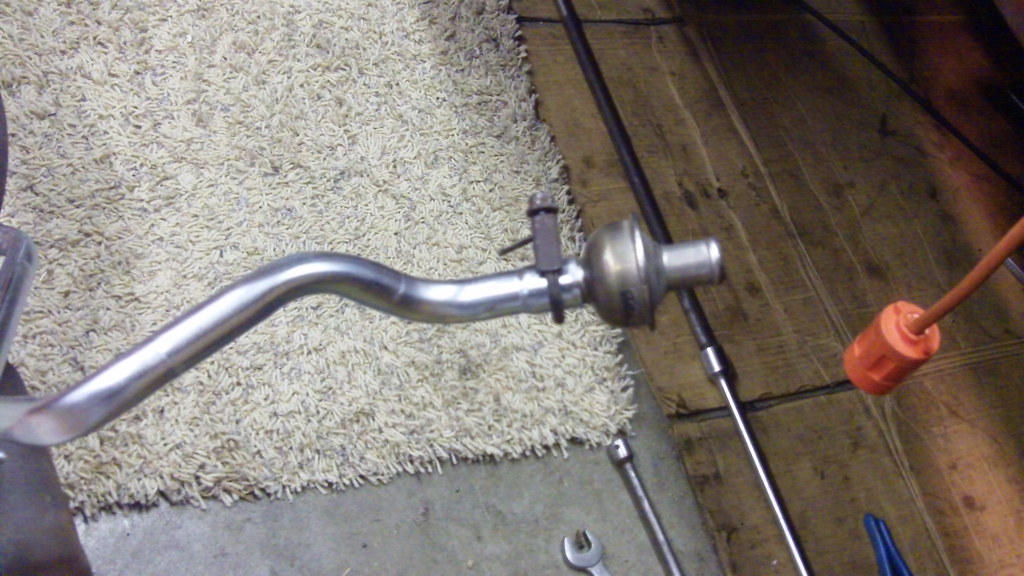
Yup, assembly included a power steering hose replacement due to it having unusual wear
so on 02Jun, it started on its first try just as if I'd done nothing... wow, what a feeling!!!!
During its first minutes of running it was just fine. Then the smoke started pouring out of the engine compartment... Not knowing where the smoke came from made me nervous so I turned it off. Let it rest and tried it again. Once again the smoke poured out of engine compartment... oh crap what did I do wrong... looking up from underneath, I saw lots of oil above the passenger exhaust manifold towards the back of the engine and a little at same place on drivers side.
After several more starts and runs of ~10 minutes the smoke out of the engine compartment reduced to nothing convincing me that it was the oil on the new exhaust manifolds going away. During one or more runs, I used the accelerator to more than idle it a bit... That caused smoke to come out of the tail pipe... that made me nervous until a friend reminded me that I'd had the engine upside down giving oil the ability to make its way into places it really wasn't supposed to be so having it burn out wasn't exactly unexpected.
What to do about the oil I see ... hmm, I decided to replace the valve cover gaskets so removed most of what I'd just put back on... Yes, it isn't a requirement to remove fan & fan shroud but having that space to stand in sure made the valve cover gasket replacement a lot easier. No leaning into and stretching to the back of the engine compartment from outside vehicle. Yup, I'm about midway between 5 & 6 feet so don't have the height to easily stretch to the back of the engine compartment...
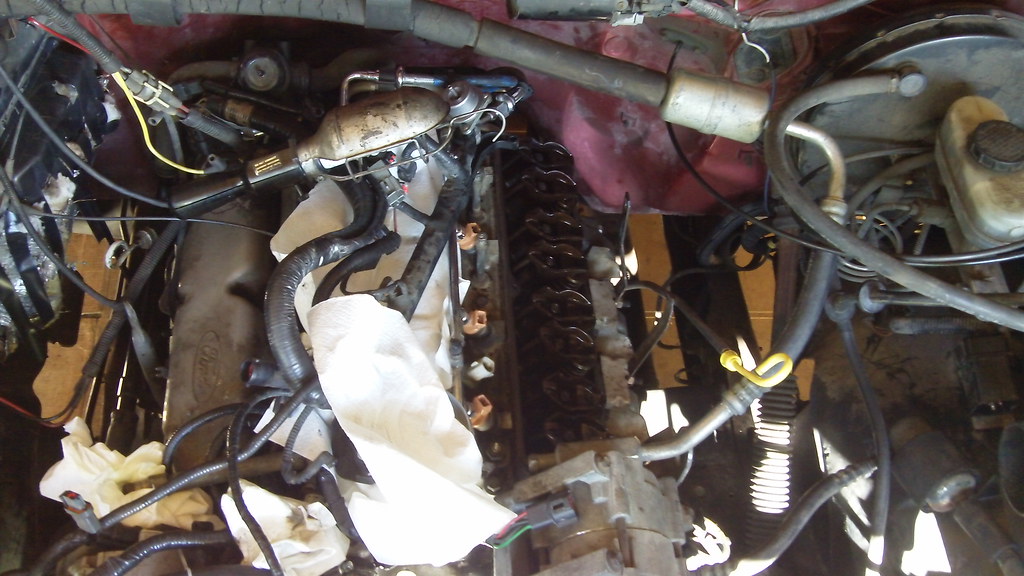
During the reinstall of the components above the valve covers, I realized, the first time I put them back together, I'd not connected the hose that connects the top rear of the passenger side valve cover and the upper intake manifold... explaining where much of the oil I'd seen came from.
Oh well, turns out I needed to uninstall the upper intake manifold cause during the joining of engine and transmission, I'd neglected to install the fuel line bracket held in place by the upper two transmission bolts... installing that bracket with upper intake manifold in place would have been a major pain in the neck.
That brings us to a couple weekends ago where it once again fired on the first try as if I'd done nothing to it.
When I drove it out of the shop it steered as if it had manual steering. I put at least a quart of power steering fluid in it before I noticed the new hose I put on came with a hole in it as well as a plug for the hole. Once I plugged that hole it started steering like it was supposed to.
A couple friends visited yesterday so the hood went back on. Its kinda annoying that it had rained the night before so several things got rusty spots [exhaust manifolds, the harmonic balancer and the frame for the thing the center distributor wire plugs into]
It went for its first drive in three months yesterday. So far so good. no leaks Though, after having come off the interstate it had a few hesitations [pretty much felt like it was going to die] while idling at a signal light.
How come there's almost always something else to figure out. I must have tweaked the temperature sensor wire in the wiring harness when I replaced the drivers side valve cover gasket cause my temperature gauge reads nothing above cold, cold, cold. I read a thread that said if temperature gauge was all the way one direction and grounding the sensor wire doesn't move it all the way to the other, the wire is suspect...
Not only that, when left overnight, when I turn the key to the on position the gauge moves down by a couple needle widths.
Based on what I started to do:
replacing:
Isn't too bad I guess.
Aw man, just saw this now. If you haven't figured out already, you can buy those small muffler-looking clamps new. I'm pretty sure it's going to be part of the "HELP!" line of parts. Most stores should stock, or be able to get them fairly easily. They'd most likely be called air tube or emissions tube clamps.
In the mean time, my story continues with putting the exhaust pipe back in [by just pushing the emission tube onto the exhaust pipe so far the bracket seems to hold it in place] and everything else back on.
That assembly was assisted by my nephews 7 & 9 who visited one Saturday afternoon. It was most enjoyable describing and demonstrating torque to them. The older even figured out how to find the *right* wrench for the bolt or nut I would hand him...
That Saturday's finishing touches were also assisted by Radiator dot com's delivery of my new radiator in under 90 minutes.
Yup, assembly included a power steering hose replacement due to it having unusual wear
so on 02Jun, it started on its first try just as if I'd done nothing...
wow, what a feeling!!!! During its first minutes of running it was just fine. Then the smoke started pouring out of the engine compartment... Not knowing where the smoke came from made me nervous so I turned it off. Let it rest and tried it again. Once again the smoke poured out of engine compartment... oh crap what did I do wrong... looking up from underneath, I saw lots of oil above the passenger exhaust manifold towards the back of the engine and a little at same place on drivers side.
After several more starts and runs of ~10 minutes the smoke out of the engine compartment reduced to nothing convincing me that it was the oil on the new exhaust manifolds going away. During one or more runs, I used the accelerator to more than idle it a bit... That caused smoke to come out of the tail pipe... that made me nervous until a friend reminded me that I'd had the engine upside down giving oil the ability to make its way into places it really wasn't supposed to be so having it burn out wasn't exactly unexpected.
What to do about the oil I see ... hmm, I decided to replace the valve cover gaskets so removed most of what I'd just put back on... Yes, it isn't a requirement to remove fan & fan shroud but having that space to stand in sure made the valve cover gasket replacement a lot easier. No leaning into and stretching to the back of the engine compartment from outside vehicle. Yup, I'm about midway between 5 & 6 feet so don't have the height to easily stretch to the back of the engine compartment...
During the reinstall of the components above the valve covers, I realized, the first time I put them back together, I'd not connected the hose that connects the top rear of the passenger side valve cover and the upper intake manifold... explaining where much of the oil I'd seen came from.
Oh well, turns out I needed to uninstall the upper intake manifold cause during the joining of engine and transmission, I'd neglected to install the fuel line bracket held in place by the upper two transmission bolts... installing that bracket with upper intake manifold in place would have been a major pain in the neck.
That brings us to a couple weekends ago where it once again fired on the first try as if I'd done nothing to it.
When I drove it out of the shop it steered as if it had manual steering. I put at least a quart of power steering fluid in it before I noticed the new hose I put on came with a hole in it as well as a plug for the hole. Once I plugged that hole it started steering like it was supposed to.
A couple friends visited yesterday so the hood went back on.
Its kinda annoying that it had rained the night before so several things got rusty spots [exhaust manifolds, the harmonic balancer and the frame for the thing the center distributor wire plugs into]It went for its first drive in three months yesterday. So far so good. no leaks
Though, after having come off the interstate it had a few hesitations [pretty much felt like it was going to die] while idling at a signal light.How come there's almost always something else to figure out.
I must have tweaked the temperature sensor wire in the wiring harness when I replaced the drivers side valve cover gasket cause my temperature gauge reads nothing above cold, cold, cold. I read a thread that said if temperature gauge was all the way one direction and grounding the sensor wire doesn't move it all the way to the other, the wire is suspect...Not only that, when left overnight, when I turn the key to the on position the gauge moves down by a couple needle widths.
Based on what I started to do:
- fix coolant leaks
replacing:
- timing chain cover gasket
- water pump gasket
- water pump
- oil pan gasket
- passenger exhaust manifold
- drivers exhaust manifold
- thermostat
- thermostat gasket
- passenger valve cover gasket
- drivers valve cover gasket
- fuel injector cleaning/rehab [thanks Doctor Injector]
- dirt/grime removed from intake galleys
- dirt/grime removed from oil pan
- dirt/grime removed from passenger valve cover
- dirt/grime removed from drivers valve cover
Isn't too bad I guess.
#29
06-23-2013, 03:31 PM
Posting Guru
#30
03-17-2017, 08:24 AM
Join Date: Mar 2013
Location: Lynnwood, WA
Posts: 33
Likes: 0
Received 0 Likes
on
0 Posts
Due to my wife's comment about it taking a really long time to get heat from the heater {I'm used to getting heat within a mile of starting without warm-up}, my brother replaced the thermostat a few days ago. When he got it apart he asked about the grey stuff. I showed him this thread. He chose to put it back together without the Mega Grey compliment to the fiber gasket.
What surprised me yesterday: the temperature gauge worked like its supposed too for the first time since doing the work documented by this thread
I guess some of the Mega Grey dried the thermostat open. Seems there's value to using just the fiber gasket to seal the thermostat housing...