Jon's 1950 f-1
#76
 03-29-2013, 08:51 AM

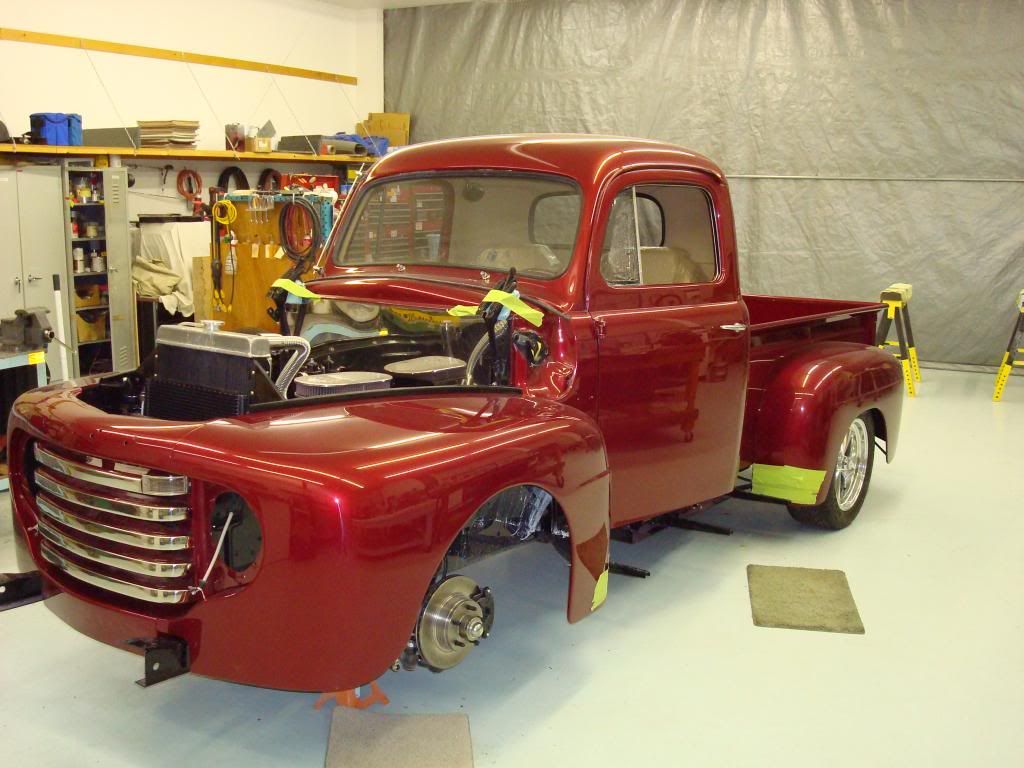
Jon's truck is almost finished,,,,,yeaaaaa.
The last of the chrome and badges are bolted on. The final buff has been completed and Cal has given it his blessing at long last.
Von the pinstriper came in yesterday and added some very subtle details and I love the differance it makes,,, it's hard to explain but the pinstriping makes the truck look complete.
I will sneek it down the street this morning to get the front end aligned then I can finally torque the steering wheel down.
Rick the interior guy will be back on monday to install the final interior trim pieces so that will be done.
Then all I will have left to do is charge the AC and the spedo calibration.
#77
03-29-2013, 11:18 AM

Elder User
Join Date: Sep 2007
Location: webster wi
Posts: 968
Likes: 0
Received 0 Likes
on
0 Posts
#78
03-29-2013, 02:10 PM

Senior User
Join Date: Sep 2012
Location: Jacksonville
Posts: 222
Likes: 0
Received 0 Likes
on
0 Posts
#79
03-29-2013, 04:51 PM
When he decided to replace the flatty he went with a 350 chevy because he has a lot of experiance with them and has confidence in them. I built the truck for him and not me, so I installed what he wants and will enjoy.
#80
03-29-2013, 04:55 PM
Gary
#81
03-29-2013, 06:38 PM


#83
02-09-2014, 06:12 AM

OK, I have survived another season of xmas tree harvest and am back in Idaho again, enjoying my grandkids again.
Went in this am and took some pic's of the truck which has sat alone for a month now, waiting for us to finish the job.
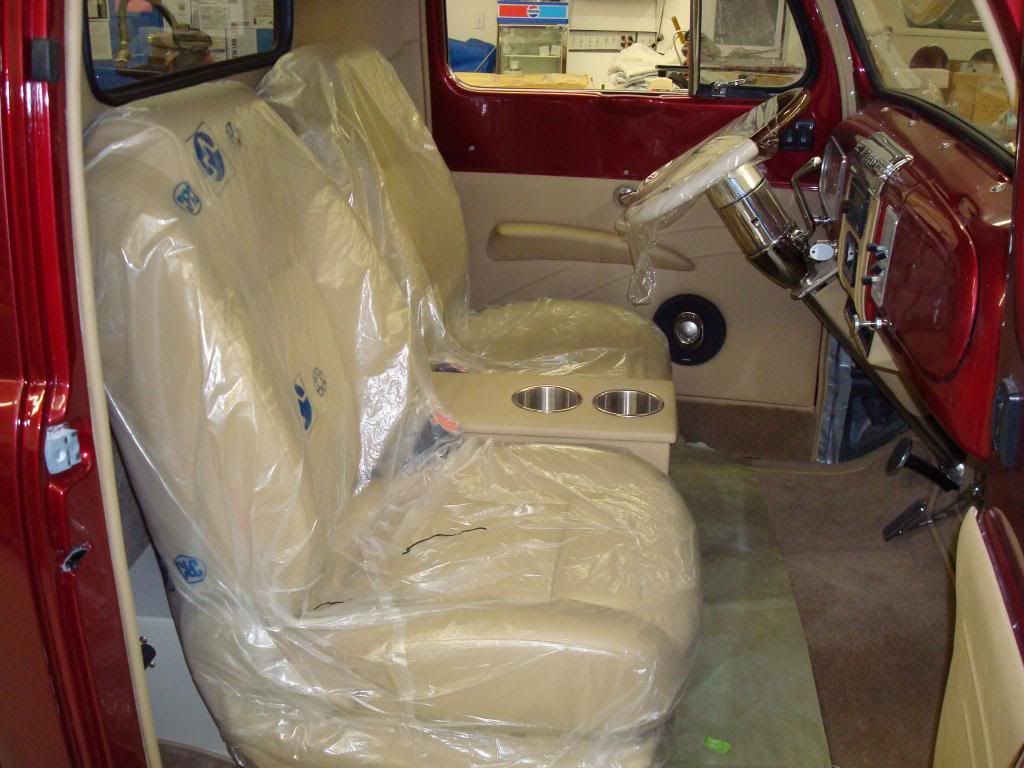
The interior is nearly complete but there are still some minor things to finish up.
I have left the plastic over everything because I don't want to be thr first to mare the leather,,,thats Jon's job.

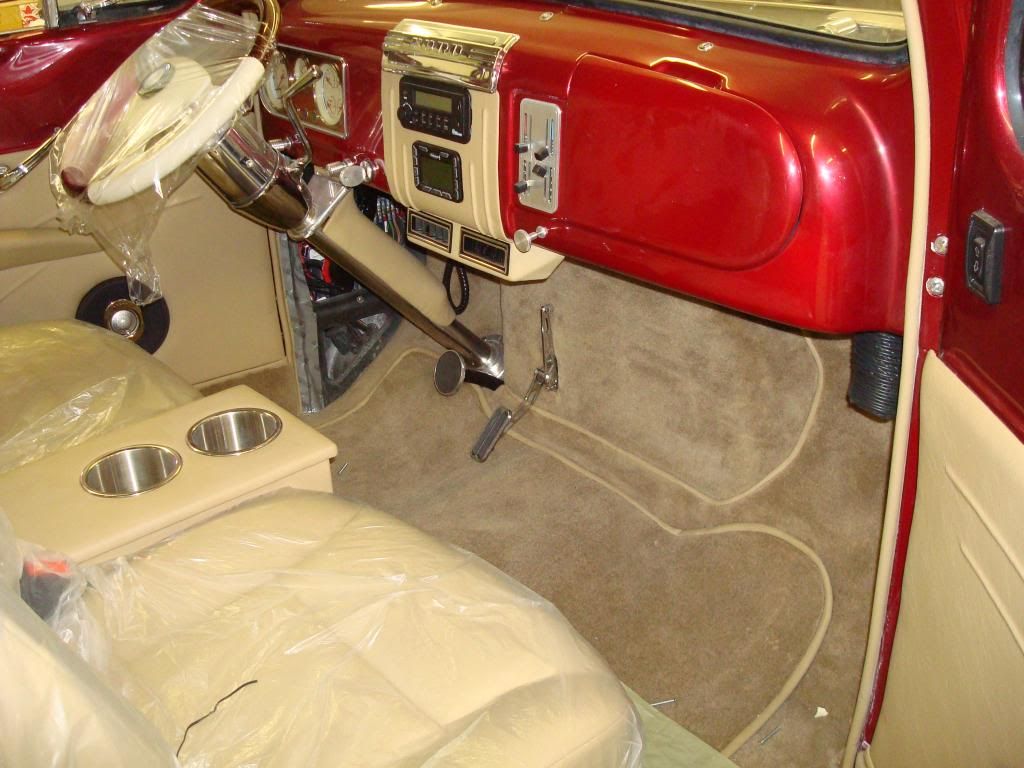
The door panels turned out better than I thought they would from the uphoustery guy Rick's discription.

And he went above and beyond on the headliner.
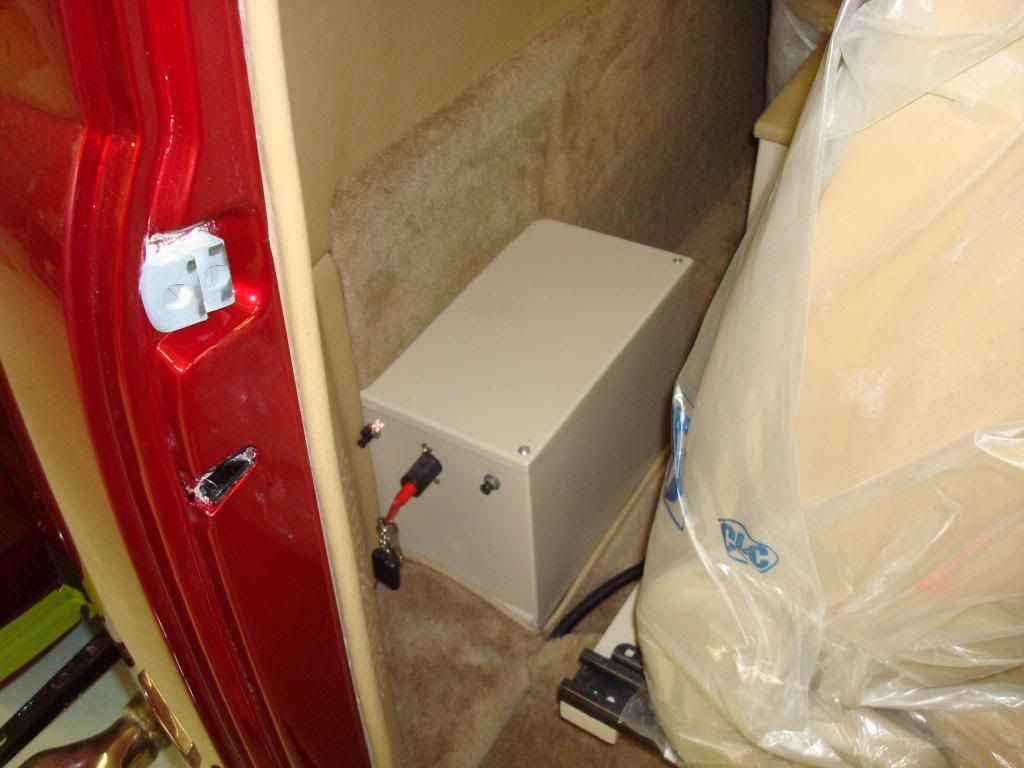
Here's the battery box, neatly tucked in behind the passenger seat.
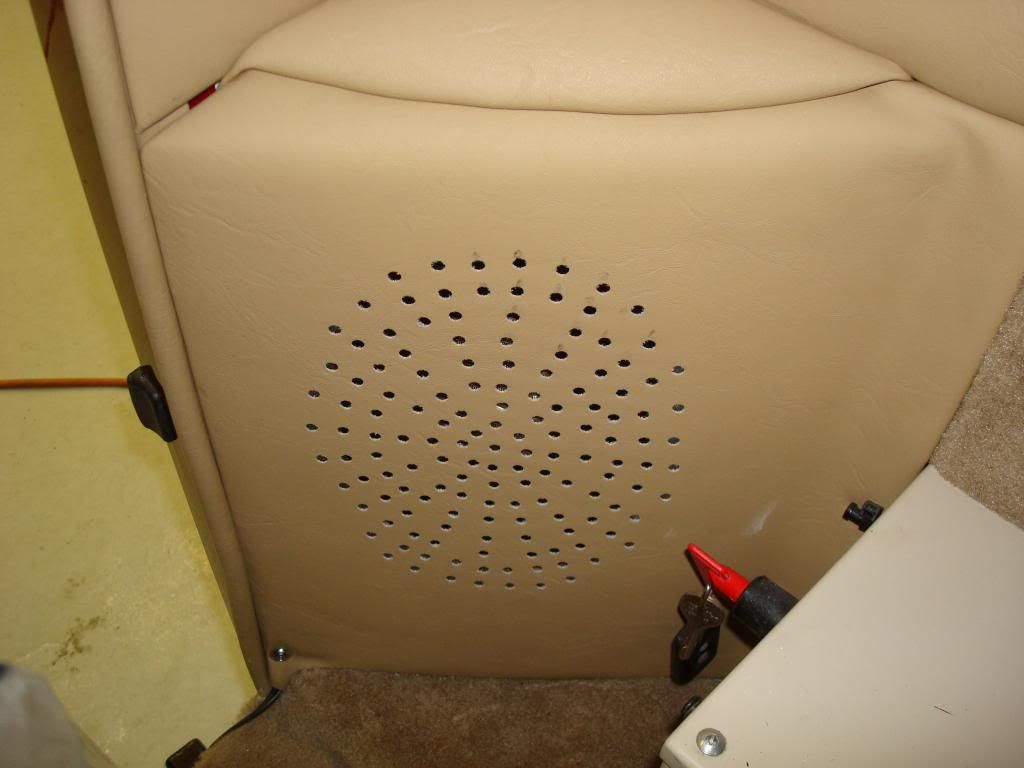
And the rear speaker grills were awesome too.
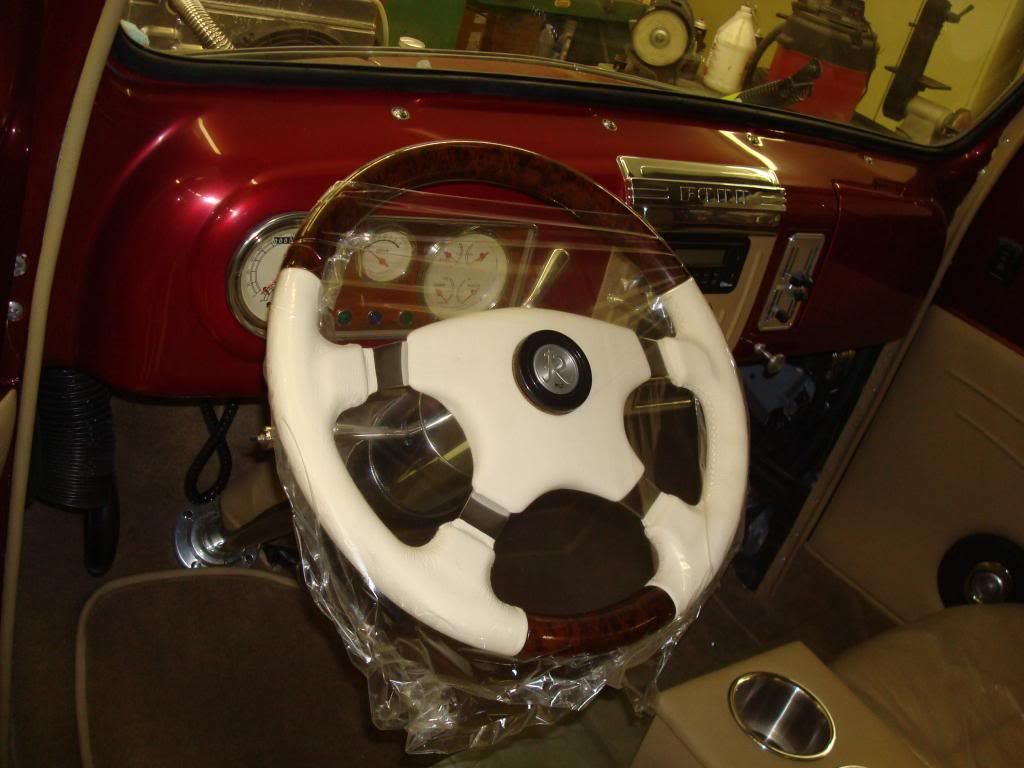
The flaming river wheel is beautiful but I'm afraid to touch it so I wraped it too.

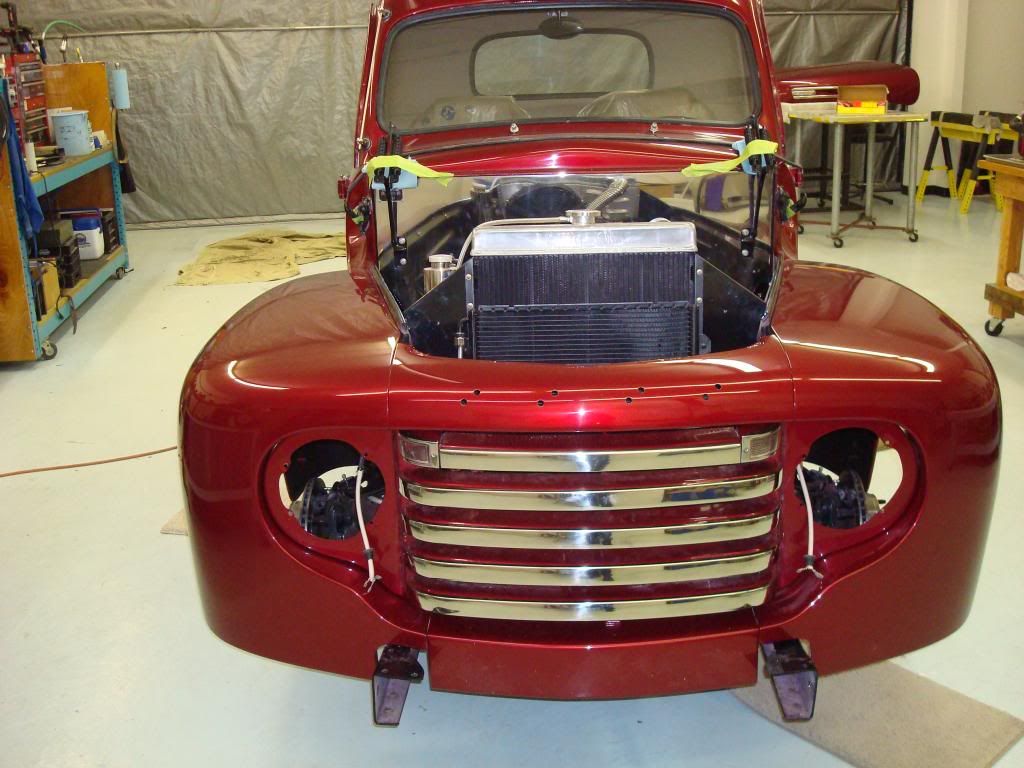
The last items are the running boards which Cal is custom fitting to match the fender profiles exactly.

Cal fitted the fenders to the inner fender panels so perfectly that no welting of any kind is needed.
I hope to get the hood back on tommorrow and begin mounting up the bumper, headlights etc.
I can't wait to see it completed.
Went in this am and took some pic's of the truck which has sat alone for a month now, waiting for us to finish the job.
The interior is nearly complete but there are still some minor things to finish up.
I have left the plastic over everything because I don't want to be thr first to mare the leather,,,thats Jon's job.
The door panels turned out better than I thought they would from the uphoustery guy Rick's discription.
And he went above and beyond on the headliner.
Here's the battery box, neatly tucked in behind the passenger seat.
And the rear speaker grills were awesome too.
The flaming river wheel is beautiful but I'm afraid to touch it so I wraped it too.
The last items are the running boards which Cal is custom fitting to match the fender profiles exactly.
Cal fitted the fenders to the inner fender panels so perfectly that no welting of any kind is needed.
I hope to get the hood back on tommorrow and begin mounting up the bumper, headlights etc.
I can't wait to see it completed.
I am at the point of doing my own interior (which is something new for me) and like the basic door panels on Jon's truck. I realize that someone else did the interior, however looking at the 3rd picture above, do you know what the upholsterer did for a panel under the tan fabric? The reason that I ask is that I like how the interior panel came up and overlapped the horizontal raised portion of the steel of the door and then body color shows just above that . That raised part of the original bonus built door is about 1/4 "proud" of the edge of the door. I can't tell from the photo however either the fabric covered panel is a bit curved, i.e. not flat, to compensate for the raised level or the covered panel is extra thick at the front and rear vertical edges to step it out to keep the covered panel flat. Do you know or have pictures of how the upholsterer did it or have a picture of the edge of the panel?
#84
02-09-2014, 08:30 PM
I am at the point of doing my own interior (which is something new for me) and like the basic door panels on Jon's truck. I realize that someone else did the interior, however looking at the 3rd picture above, do you know what the upholsterer did for a panel under the tan fabric? The reason that I ask is that I like how the interior panel came up and overlapped the horizontal raised portion of the steel of the door and then body color shows just above that . That raised part of the original bonus built door is about 1/4 "proud" of the edge of the door. I can't tell from the photo however either the fabric covered panel is a bit curved, i.e. not flat, to compensate for the raised level or the covered panel is extra thick at the front and rear vertical edges to step it out to keep the covered panel flat. Do you know or have pictures of how the upholsterer did it or have a picture of the edge of the panel?
When I formed them the doors were still off the truck so I just laid them on sawhorses, laid the ABS sheets over them and used 2 heat guns to form the sheets (actually I heated them until they almost flowed over the door).
After they cooled I drilled the door handle holes and gave them to Rick and let him trim them down to size and do the finish work.
Gary
Rick bought a one piece ABS plastic headliner somewhere then covered and beaded it.
#85
02-09-2014, 09:19 PM
Gary,
Thanks for the reply. I should not have assumed that the upholsterer made the panels, I did not realize that you had made the panels. I have been making my panels out of Sentra. It can be formed with a heat gun much like ABS although I would not say it would flow. I am surprised that even though the panel was formed to the shape of the door, the panel as upholstered looks flat in the photo. Perhaps the upholsterer did not pad the raised area as much as below the raised area. Is the edge of the upholstered panel a bit thicker below the raised area?
I purchased the headliner panel from a vendor that purchased the molds/rights to make the panels after Rod Doors went out of business. I did make and have upholstered the panel at the rear of the cab and have installed the headliner material on the "Rod Doors" panel. The cab is in paint but not the doors. I am currently working the doors to paint them in final color so it is a good time for me to heat shape panels to the doors.
#86
02-10-2014, 01:35 PM
Gary,
Thanks for the reply. I should not have assumed that the upholsterer made the panels, I did not realize that you had made the panels. I have been making my panels out of Sentra. It can be formed with a heat gun much like ABS although I would not say it would flow. I am surprised that even though the panel was formed to the shape of the door, the panel as upholstered looks flat in the photo. Perhaps the upholsterer did not pad the raised area as much as below the raised area. Is the edge of the upholstered panel a bit thicker below the raised area?
I purchased the headliner panel from a vendor that purchased the molds/rights to make the panels after Rod Doors went out of business. I did make and have upholstered the panel at the rear of the cab and have installed the headliner material on the "Rod Doors" panel. The cab is in paint but not the doors. I am currently working the doors to paint them in final color so it is a good time for me to heat shape panels to the doors.
Thanks for the reply. I should not have assumed that the upholsterer made the panels, I did not realize that you had made the panels. I have been making my panels out of Sentra. It can be formed with a heat gun much like ABS although I would not say it would flow. I am surprised that even though the panel was formed to the shape of the door, the panel as upholstered looks flat in the photo. Perhaps the upholsterer did not pad the raised area as much as below the raised area. Is the edge of the upholstered panel a bit thicker below the raised area?
I purchased the headliner panel from a vendor that purchased the molds/rights to make the panels after Rod Doors went out of business. I did make and have upholstered the panel at the rear of the cab and have installed the headliner material on the "Rod Doors" panel. The cab is in paint but not the doors. I am currently working the doors to paint them in final color so it is a good time for me to heat shape panels to the doors.
Rick did vary the thickness of the door padding to give the door that flat smooth look.
I am actually thinking about making fiberglass door panels for my truck to see if they are less pliable than the ABS ones. I think that I can do a two ply overlay, then when that is cured I can drill and install the door buttons and add another two plies over that. That way the door poppies wil be locked in the panel for perfect alignment. It should end up about the same thickness as the 3/16 ABS but should be stiffer and less flexible. At least I would think so.
Gary
#87
02-10-2014, 02:06 PM
Gary, thanks for the reply and info. I like your idea of sandwiching the blind fasteners ( I assume that is what you mean by door buttons) in between 2 layers to "fix" them in place. The only disadvantage that I can envision is if you do bend/break one of the clips , replacing the clip would require more "surgery" to replace it. I did have to replace one clip which brought that to mind, however if the clips had been perfectly aligned it probably would not have happened. With the door being a flat panel it is much more unlikely to have a problem. I damaged the clip putting the rear panel in one time. That panel is one piece as I made it with the 2 curved corners plus the flat back., a much more challenging job to spring it in place.
I do not see a much on the forum with guys/gals doing their own upholstery. I don't sew but I am doing all the rest. When I need something sewn, I have a friend that does canvas work normally. I have gotten some good tips on a hot rod forum. That forum has a sub forum for interiors.
I do not see a much on the forum with guys/gals doing their own upholstery. I don't sew but I am doing all the rest. When I need something sewn, I have a friend that does canvas work normally. I have gotten some good tips on a hot rod forum. That forum has a sub forum for interiors.
#88
02-16-2014, 01:04 PM
Gary, thanks for the reply and info. I like your idea of sandwiching the blind fasteners ( I assume that is what you mean by door buttons) in between 2 layers to "fix" them in place. The only disadvantage that I can envision is if you do bend/break one of the clips , replacing the clip would require more "surgery" to replace it. I did have to replace one clip which brought that to mind, however if the clips had been perfectly aligned it probably would not have happened. With the door being a flat panel it is much more unlikely to have a problem. I damaged the clip putting the rear panel in one time. That panel is one piece as I made it with the 2 curved corners plus the flat back., a much more challenging job to spring it in place.
I do not see a much on the forum with guys/gals doing their own upholstery. I don't sew but I am doing all the rest. When I need something sewn, I have a friend that does canvas work normally. I have gotten some good tips on a hot rod forum. That forum has a sub forum for interiors.
I do not see a much on the forum with guys/gals doing their own upholstery. I don't sew but I am doing all the rest. When I need something sewn, I have a friend that does canvas work normally. I have gotten some good tips on a hot rod forum. That forum has a sub forum for interiors.
I really enjoy doing all the fabrication and such but I don't have much talent in the areas of interior work or body and paint. But I have some pretty good friends who are skilled in those areas so we do a bit of bartering of skills, I do their fab work and they help me out. My buddy Rick is a master at interior work and he did a superb job on the seats for my 55 and I have him on line to do the rest of my interior when I finally get to that point.
Gary
