Effii gets rebuilt
#121
 10-16-2013, 07:55 PM

Join Date: Mar 2007
Location: Australia
Posts: 238
Likes: 0
Received 0 Likes
on
0 Posts
Week begining Monday 7th October 2013
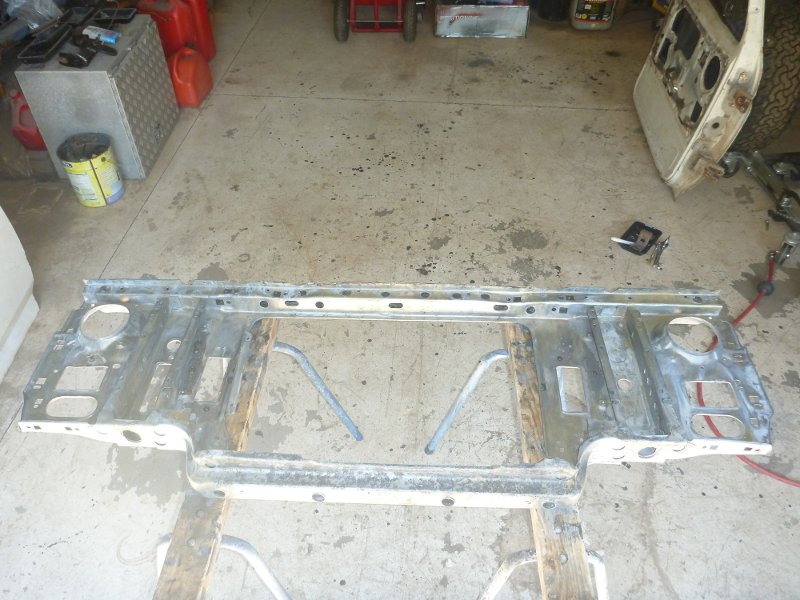
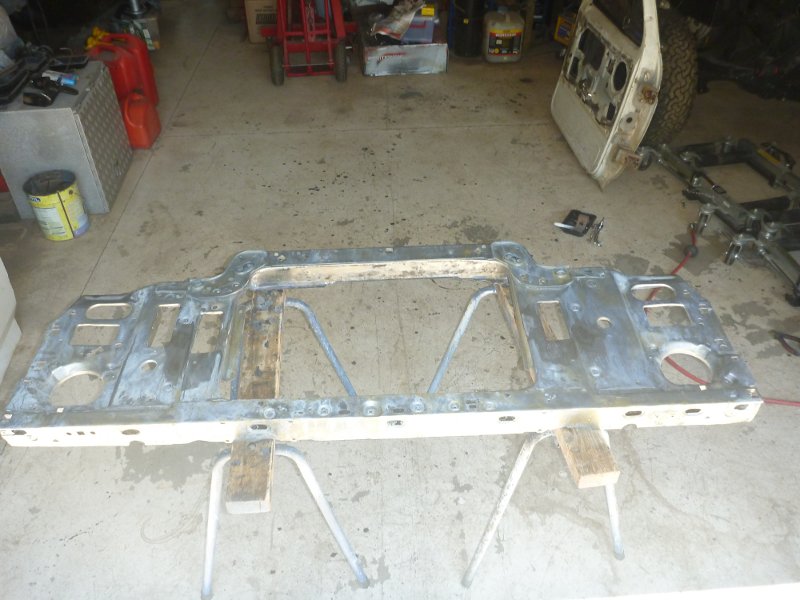
Finished stripping and painting the radiator support.
Coated with Metal Ready, now for paint.
Installed radiator support and radiator.
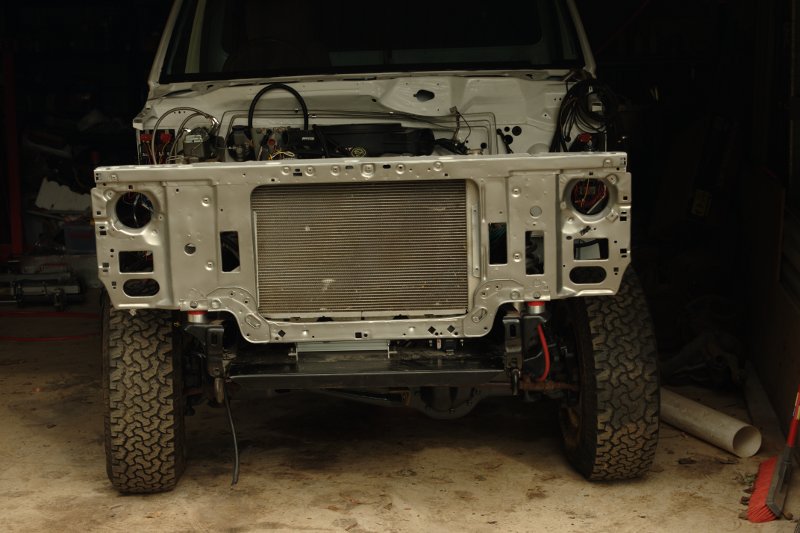
The idea I had for the radiator hoses is not going to work for the bottom hose so I'm going to try with a standard one for this engine with the wide radiator from a 1993 truck. Have to wait till it arrives to see how it goes.
Removed everything from the doors (hinges, locks, window), started stripping and cleaning the doors.
Coated with Metal Ready, now for paint.
Installed radiator support and radiator.
The idea I had for the radiator hoses is not going to work for the bottom hose so I'm going to try with a standard one for this engine with the wide radiator from a 1993 truck. Have to wait till it arrives to see how it goes.
Removed everything from the doors (hinges, locks, window), started stripping and cleaning the doors.

#123
10-30-2013, 05:06 PM
Join Date: Mar 2007
Location: Australia
Posts: 238
Likes: 0
Received 0 Likes
on
0 Posts
Week begining Monday 14th October.
Finally got some time to write up these two weeks.
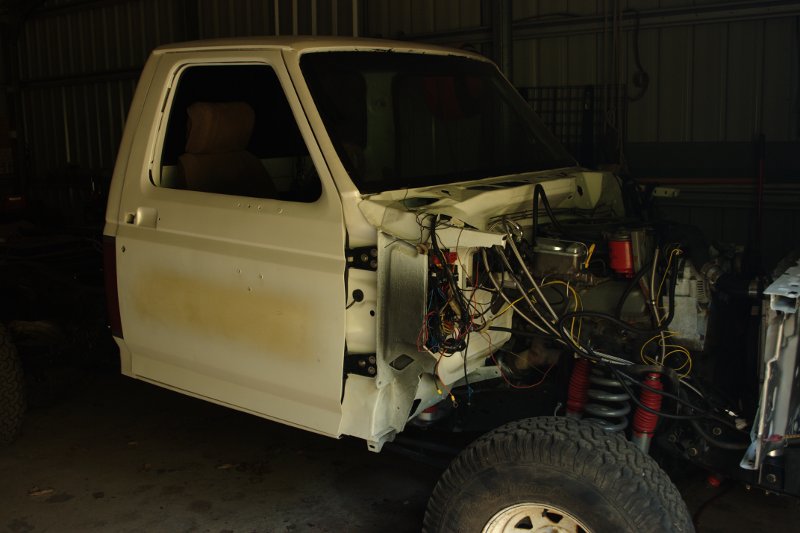
Finished and installed the drivers door, final colour (Silver Fox and Candy Red flake) will be painted when the guard is on. Still need to install the window, inner trim, etc but that will be when painting is complete.
Installed the radiator hoses, connected the electric fans, now have a complete cooling system. However still need to install the heaterbox and hoses for it. It can't be seen in this photo but the e-fan thermo switch is in the joiner in the top radiator hose. It turns on at 105C (221F) and off at 100C (212F) so should work nicely with the diesel, it's actually from a Ford Laser. I also have a manual switch installed, so can turn them on at anytime.
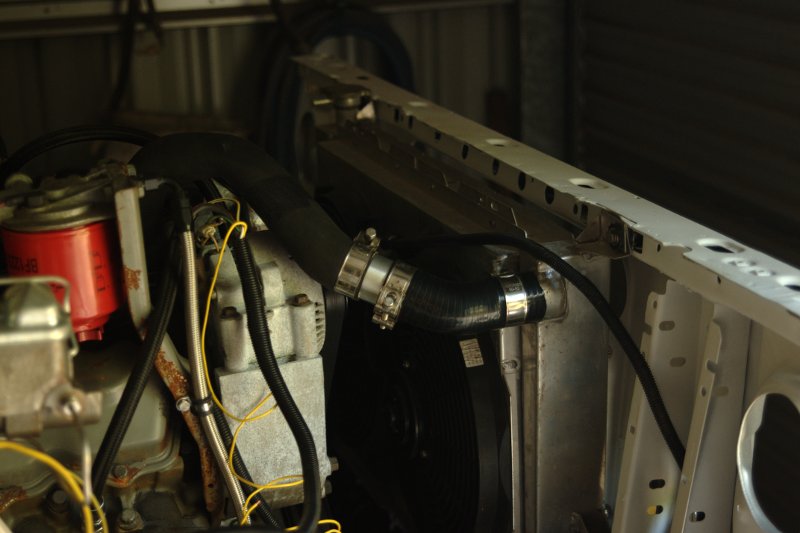
The radiator hoses are from a 1993 7.3 idi with couplers to 45 deg silicon hose bends at the radiator end. The radiator is an Aussie Desert Cooler 4 row, triple flow with twin e-fans. The cooling system holds 23 litres without the heater so will be near 25 litres once that's connected. Looking at the service manual for the 1993 it shows 27 litres for the cooling system with the original radiator so I confident that this radiator will do the job. It kept the cleveland at 87-92 (off on temps for the efans) on a 38C day sitting at idle without any problems.
Finished and installed the drivers door, final colour (Silver Fox and Candy Red flake) will be painted when the guard is on. Still need to install the window, inner trim, etc but that will be when painting is complete.
Installed the radiator hoses, connected the electric fans, now have a complete cooling system. However still need to install the heaterbox and hoses for it. It can't be seen in this photo but the e-fan thermo switch is in the joiner in the top radiator hose. It turns on at 105C (221F) and off at 100C (212F) so should work nicely with the diesel, it's actually from a Ford Laser. I also have a manual switch installed, so can turn them on at anytime.
The radiator hoses are from a 1993 7.3 idi with couplers to 45 deg silicon hose bends at the radiator end. The radiator is an Aussie Desert Cooler 4 row, triple flow with twin e-fans. The cooling system holds 23 litres without the heater so will be near 25 litres once that's connected. Looking at the service manual for the 1993 it shows 27 litres for the cooling system with the original radiator so I confident that this radiator will do the job. It kept the cleveland at 87-92 (off on temps for the efans) on a 38C day sitting at idle without any problems.
#124
10-30-2013, 05:17 PM
Join Date: Mar 2007
Location: Australia
Posts: 238
Likes: 0
Received 0 Likes
on
0 Posts
Week begining Monday 21st October.
Started working on the right guard.
Needs some panel beating, one dent has about 6mm of bog (from previous owners bodgy repairs) filling it so needed to clean that off, then beat the dent out some and then put a thin coat (<1mm) of finishing filler over it.
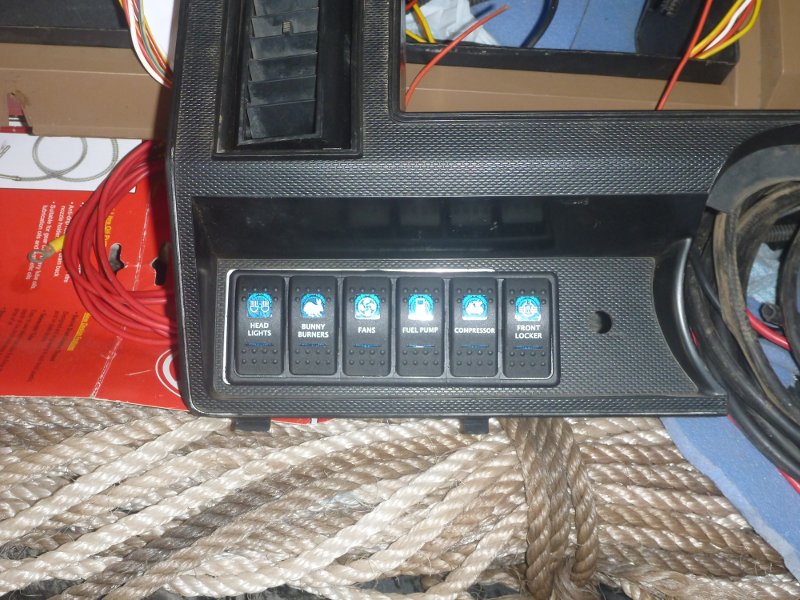
Finished installing the new switches, in the dash facia and connected up the wiring.
Needs some panel beating, one dent has about 6mm of bog (from previous owners bodgy repairs) filling it so needed to clean that off, then beat the dent out some and then put a thin coat (<1mm) of finishing filler over it.
Finished installing the new switches, in the dash facia and connected up the wiring.
#125
10-30-2013, 07:41 PM
 very nice
#126
10-30-2013, 09:45 PM
Join Date: Mar 2007
Location: Australia
Posts: 238
Likes: 0
Received 0 Likes
on
0 Posts
They are a standard carling switch.
Search on ebay.
They can be had for $10.99 each plus postage at the moment.
Carling Switches
Cheers
Ross
#127
10-31-2013, 06:06 AM
Man there are some crazy labelled switches out there!
100 w HID, didn't know you could get them that big, I've seen 70w. I ended up going with the FYRLYT 150w halogens on my fourby, very powerful and don't fatigue the eyes. I'll put them on the f100 as well one day, need to make a front bar and upgrade the electrics first.
100 w HID, didn't know you could get them that big, I've seen 70w. I ended up going with the FYRLYT 150w halogens on my fourby, very powerful and don't fatigue the eyes. I'll put them on the f100 as well one day, need to make a front bar and upgrade the electrics first.
#128
10-31-2013, 05:57 PM
Join Date: Mar 2007
Location: Australia
Posts: 238
Likes: 0
Received 0 Likes
on
0 Posts
#129
11-02-2013, 06:27 AM

Freshman User
Join Date: Dec 2009
Location: Bundaberg Queensland, Aus
Posts: 36
Likes: 0
Received 0 Likes
on
0 Posts
#130
11-08-2013, 06:17 PM
Join Date: Mar 2007
Location: Australia
Posts: 238
Likes: 0
Received 0 Likes
on
0 Posts
Week begining Monday 28th October 2013
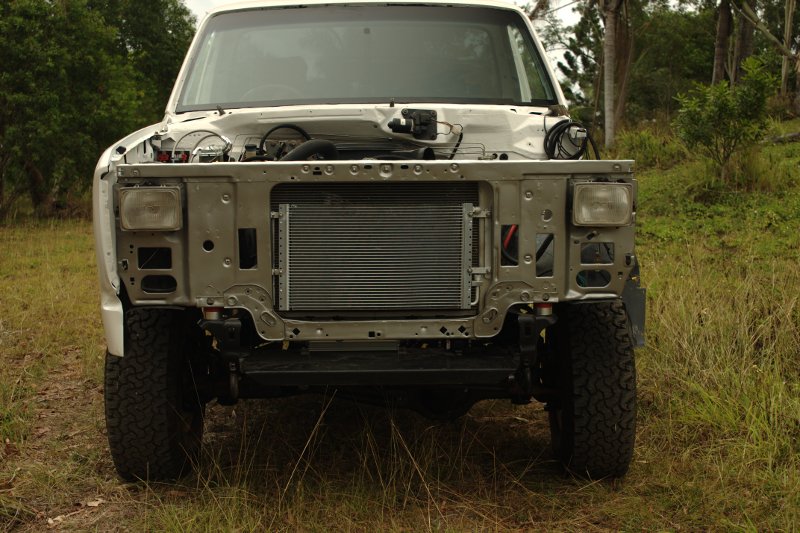
Finished and fitted the right guard. I'm going to wait til both doors and guards are on before putting the rest of the colour on. That way I only have to mask everything once.

Started on the left door and guard. Door is in primer ready for the white. Left guard is from a Bronco originally so has all the trim mounting holes in it. I'm going to braze weld all of these up once I've removed all the paint. Plus it needs a rust repair on the bottom rear.
Working on the aircon evaporator, cleaning all the gunge out of the housing, making sure the controls work etc. I'm probably going to have to replace the evaporator coil as the connecting tube nuts are badly rusted. These are steel nuts on copper pipe to -an flare, should be o-ring fitting as all the TX valves I can find are o-ring and this will need replacing. I'll need to find an evaporator of similar size to fit in the dash.
Won't be much for the next week or so, as I've put my back out, again , moving the left guard. So need to have a week off then do just light things for the next week, I'll look at putting bits and pieces in the interior, headlights, finish of some wiring, clean of brackets and hinges, etc. Plenty of things to do with out lifting heavy items.
Started on the left door and guard. Door is in primer ready for the white. Left guard is from a Bronco originally so has all the trim mounting holes in it. I'm going to braze weld all of these up once I've removed all the paint. Plus it needs a rust repair on the bottom rear.
Working on the aircon evaporator, cleaning all the gunge out of the housing, making sure the controls work etc. I'm probably going to have to replace the evaporator coil as the connecting tube nuts are badly rusted. These are steel nuts on copper pipe to -an flare, should be o-ring fitting as all the TX valves I can find are o-ring and this will need replacing. I'll need to find an evaporator of similar size to fit in the dash.
Won't be much for the next week or so, as I've put my back out, again
, moving the left guard. So need to have a week off then do just light things for the next week, I'll look at putting bits and pieces in the interior, headlights, finish of some wiring, clean of brackets and hinges, etc. Plenty of things to do with out lifting heavy items.


#132
11-11-2013, 04:39 PM
Join Date: Mar 2007
Location: Australia
Posts: 238
Likes: 0
Received 0 Likes
on
0 Posts
Thanks. Just take's time, usually about 2 weeks. Doctor says relax and do nothing but after 3 days sitting around doing nothing it get's a little frustrating.
Yep. Looks real good in the flesh, although the latest photo shows up the white/silver pearl nicely.
Yep. Looks real good in the flesh, although the latest photo shows up the white/silver pearl nicely.
#133
11-16-2013, 05:29 AM
Senior User
Join Date: May 2013
Location: Cairns,Far Nth Queensland
Posts: 184
Likes: 0
Received 0 Likes
on
0 Posts
Finished and fitted the right guard. I'm going to wait til both doors and guards are on before putting the rest of the colour on. That way I only have to mask everything once.
Started on the left door and guard. Door is in primer ready for the white. Left guard is from a Bronco originally so has all the trim mounting holes in it. I'm going to braze weld all of these up once I've removed all the paint. Plus it needs a rust repair on the bottom rear.
Working on the aircon evaporator, cleaning all the gunge out of the housing, making sure the controls work etc. I'm probably going to have to replace the evaporator coil as the connecting tube nuts are badly rusted. These are steel nuts on copper pipe to -an flare, should be o-ring fitting as all the TX valves I can find are o-ring and this will need replacing. I'll need to find an evaporator of similar size to fit in the dash.
Won't be much for the next week or so, as I've put my back out, again, moving the left guard. So need to have a week off then do just light things for the next week, I'll look at putting bits and pieces in the interior, headlights, finish of some wiring, clean of brackets and hinges, etc. Plenty of things to do with out lifting heavy items.
Started on the left door and guard. Door is in primer ready for the white. Left guard is from a Bronco originally so has all the trim mounting holes in it. I'm going to braze weld all of these up once I've removed all the paint. Plus it needs a rust repair on the bottom rear.
Working on the aircon evaporator, cleaning all the gunge out of the housing, making sure the controls work etc. I'm probably going to have to replace the evaporator coil as the connecting tube nuts are badly rusted. These are steel nuts on copper pipe to -an flare, should be o-ring fitting as all the TX valves I can find are o-ring and this will need replacing. I'll need to find an evaporator of similar size to fit in the dash.
Won't be much for the next week or so, as I've put my back out, again
, moving the left guard. So need to have a week off then do just light things for the next week, I'll look at putting bits and pieces in the interior, headlights, finish of some wiring, clean of brackets and hinges, etc. Plenty of things to do with out lifting heavy items.
Hope evertything is fine
Cheers,
Patchy
#134
11-16-2013, 05:48 AM
Join Date: Mar 2007
Location: Australia
Posts: 238
Likes: 0
Received 0 Likes
on
0 Posts
#135
11-17-2013, 01:01 AM
Join Date: Mar 2007
Location: Australia
Posts: 238
Likes: 0
Received 0 Likes
on
0 Posts
Week begining Monday 11th November 2013
Had last week of so back into it this week with light things.
Plugged in the instrument cluster so make sure all the instruments work.
Charge indicator did not work. Alternator is definitely charging, had checked it previously. So check out the instrument cluster and found this:
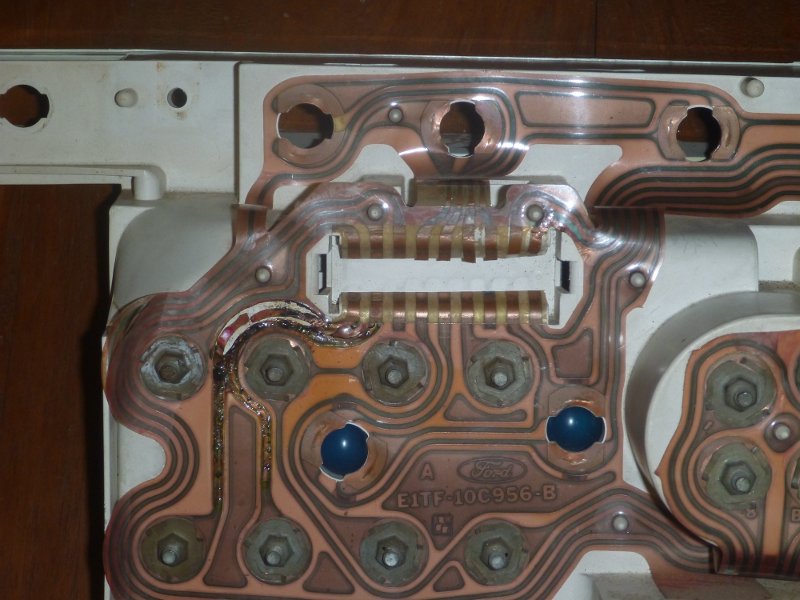
I'll look for a new cluster or circuit but in the mean time I've soldered the burnt up traces on the circuit together.
Installed the new aircon controls.
Installed the headlights and aircon condensor.
Cleaned the bonnett hinges and radiator support braces to be painted.
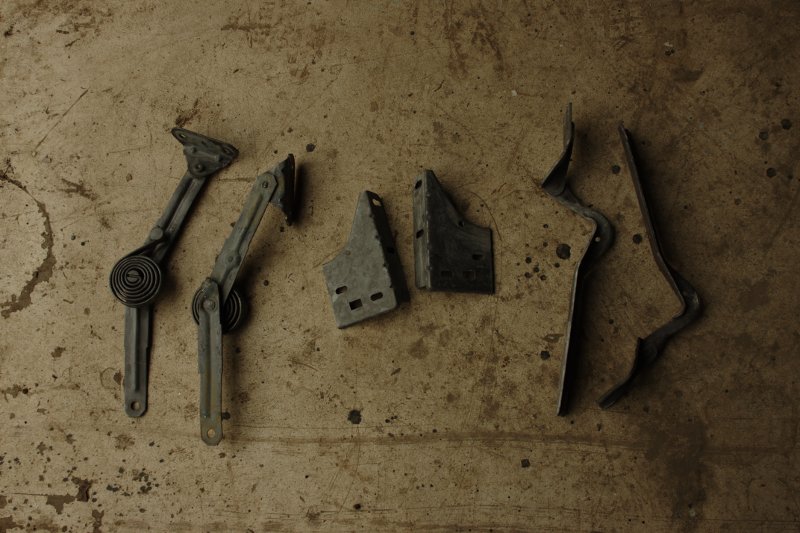
Painted and installed the left door hinges, with new hinge pins.
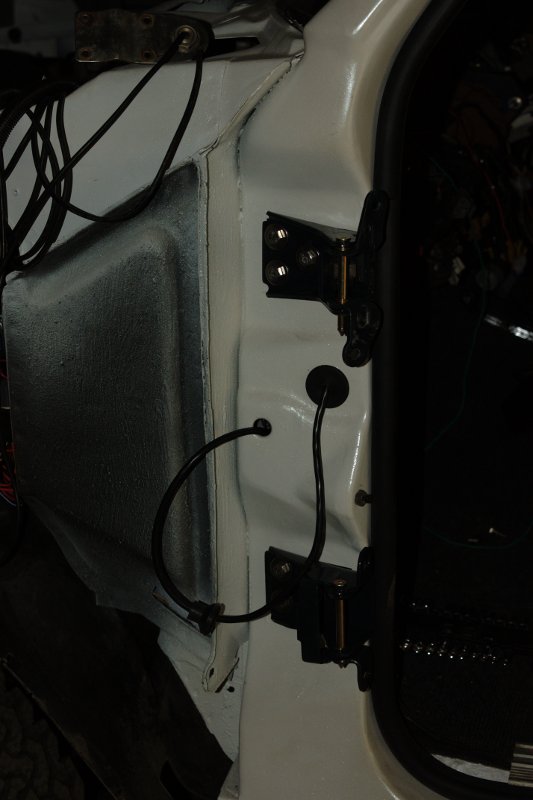
Did some more prep work on the left door, knocked out the big dent, tidied up the rest and painted with primer. Should have the white on next week.
Plugged in the instrument cluster so make sure all the instruments work.
Charge indicator did not work. Alternator is definitely charging, had checked it previously. So check out the instrument cluster and found this:
I'll look for a new cluster or circuit but in the mean time I've soldered the burnt up traces on the circuit together.
Installed the new aircon controls.
Installed the headlights and aircon condensor.
Cleaned the bonnett hinges and radiator support braces to be painted.
Painted and installed the left door hinges, with new hinge pins.
Did some more prep work on the left door, knocked out the big dent, tidied up the rest and painted with primer. Should have the white on next week.