1957 F100 build thread
#106
 01-20-2014, 08:20 PM

Progress?
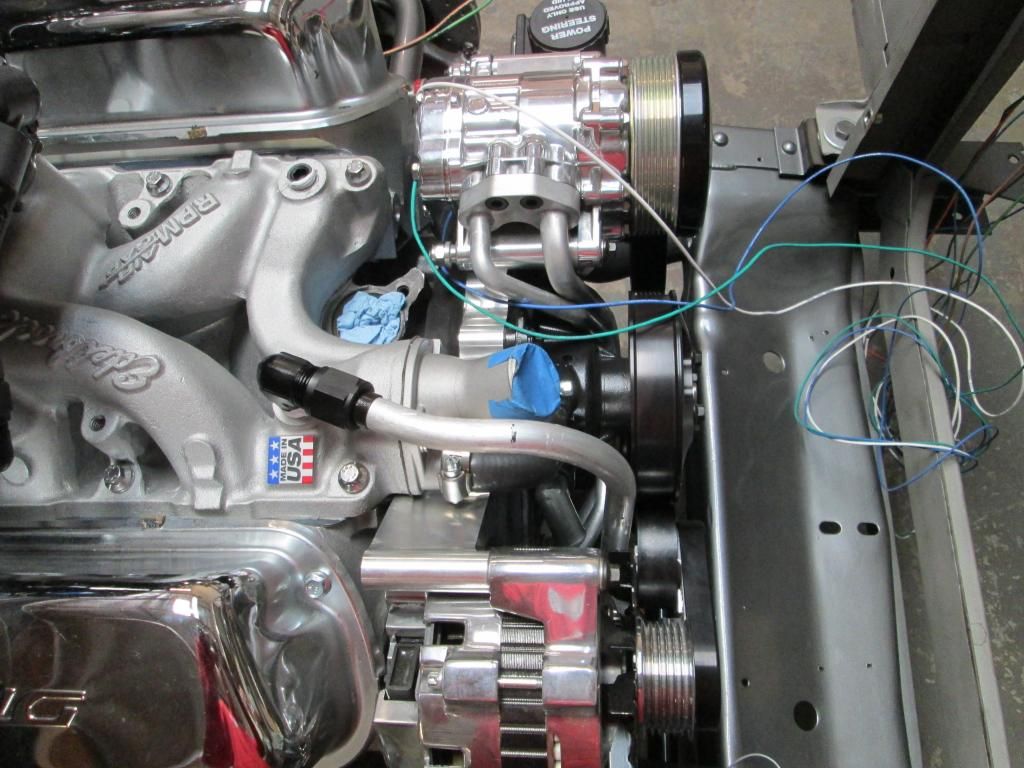
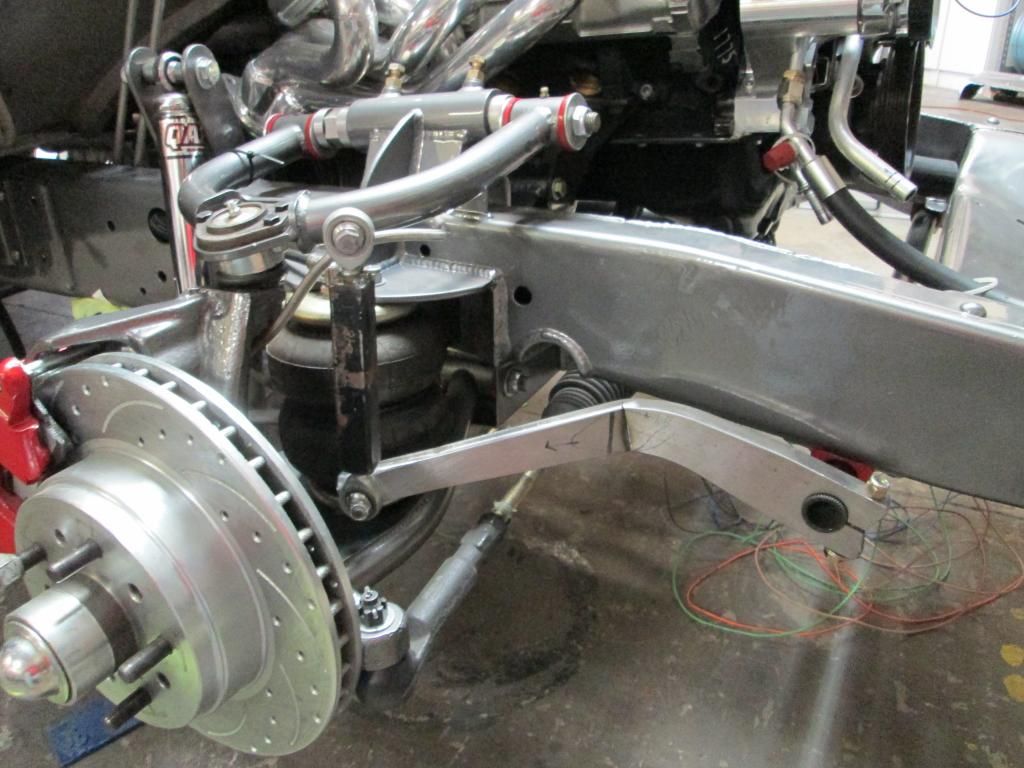
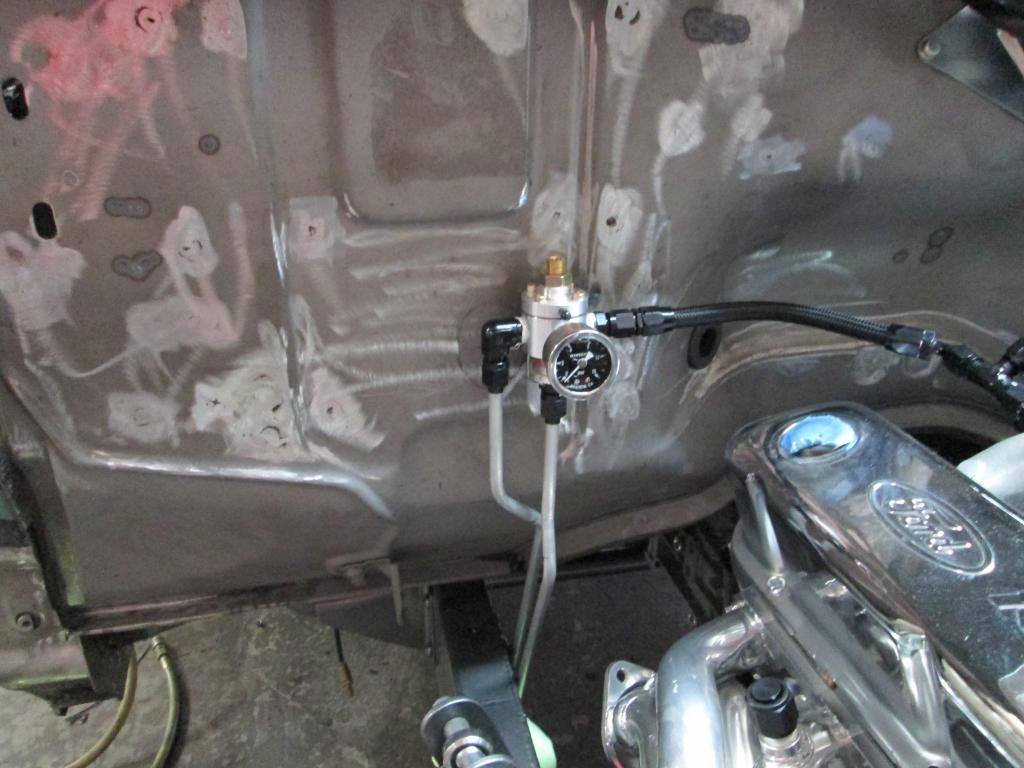
Well this being my first "custom" project, we are putting things together, taking things apart, making parts then changing them and so on and so on. It is fun compared to building a mustang or comet but sometimes frustrating. Ideas at the beginning are not such great ideas now, lol. Or just make some stuff more difficult, lol. Anyways we are mocking up as much stuff as we can now then it will all come apart and go to paint. Included in the last bit of mock up include the Vintage Air, which entails routing the lines in the front fender to keep it looking clean and some other custom routes (see pics). We are also running some hard lines for the heater to keep it all compact. Some fuel lines and fuel regulator ideas are also being formed. Here are some pics of the progress we have made over the last few days.
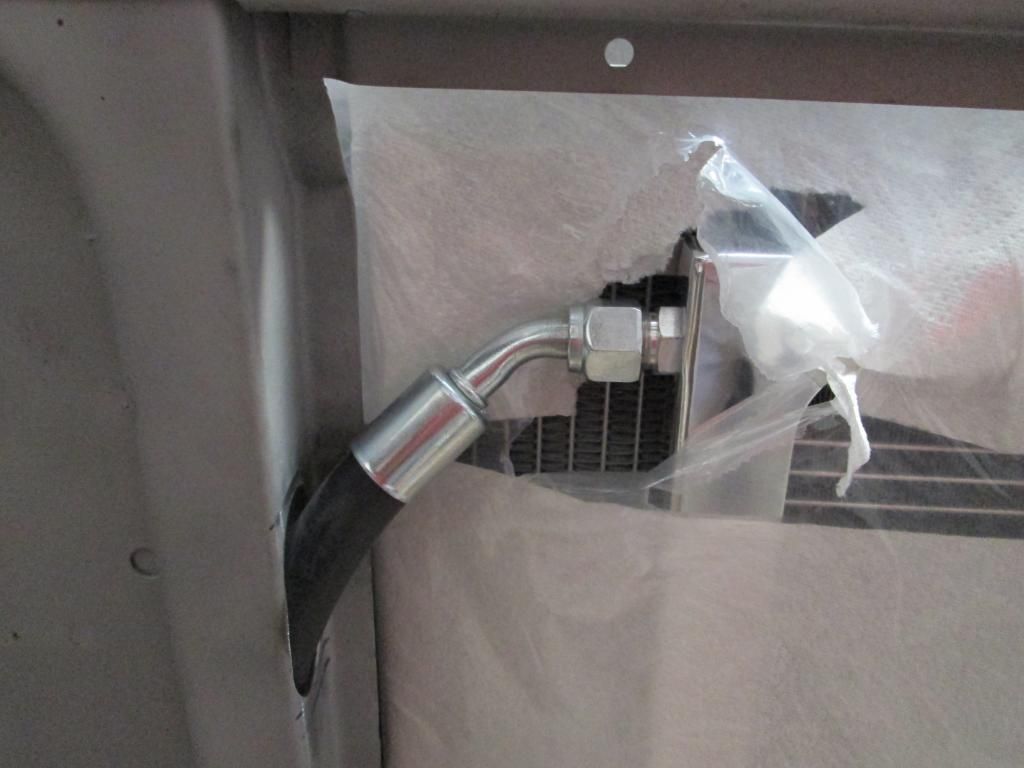
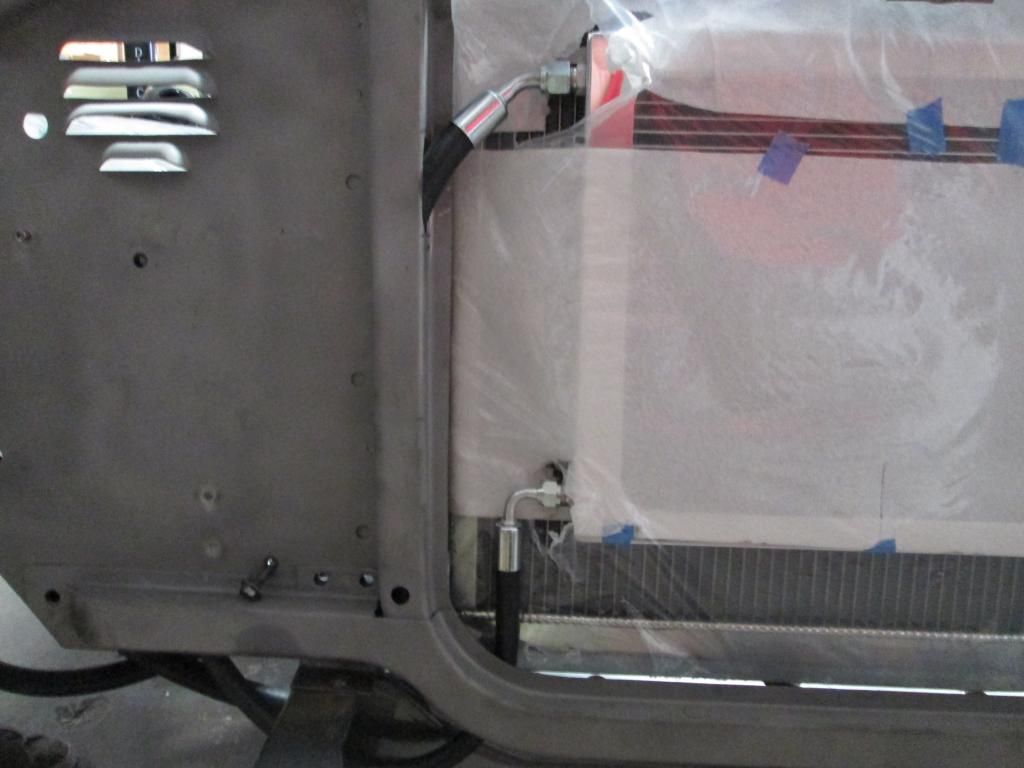
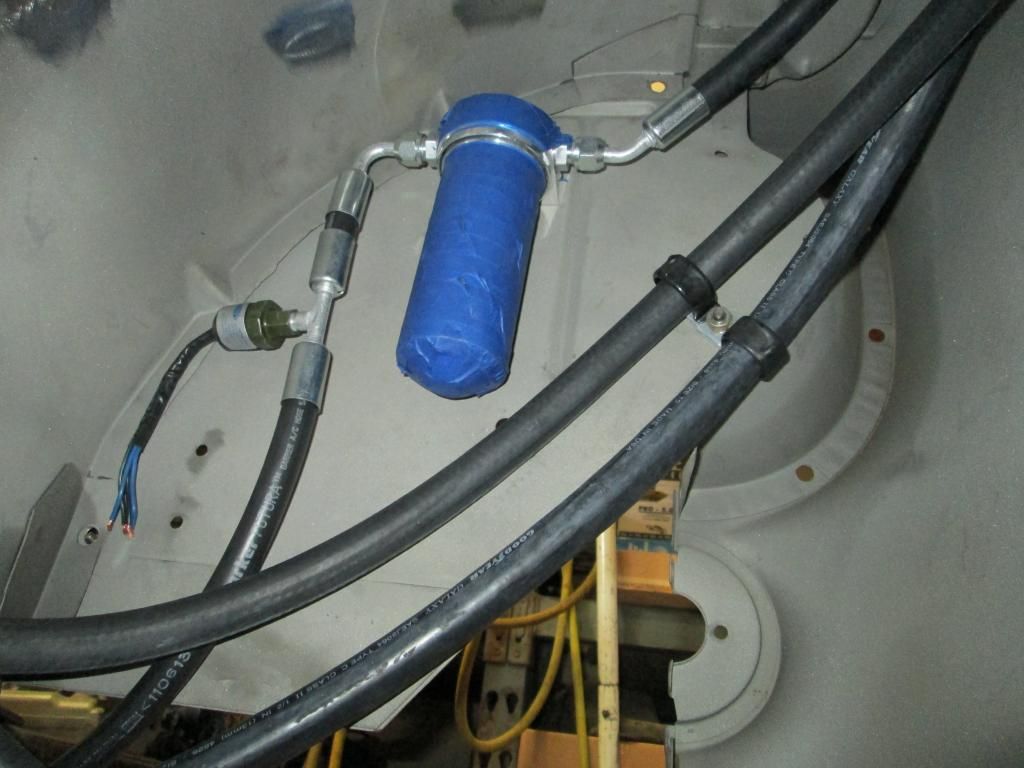
AC lines thru core support
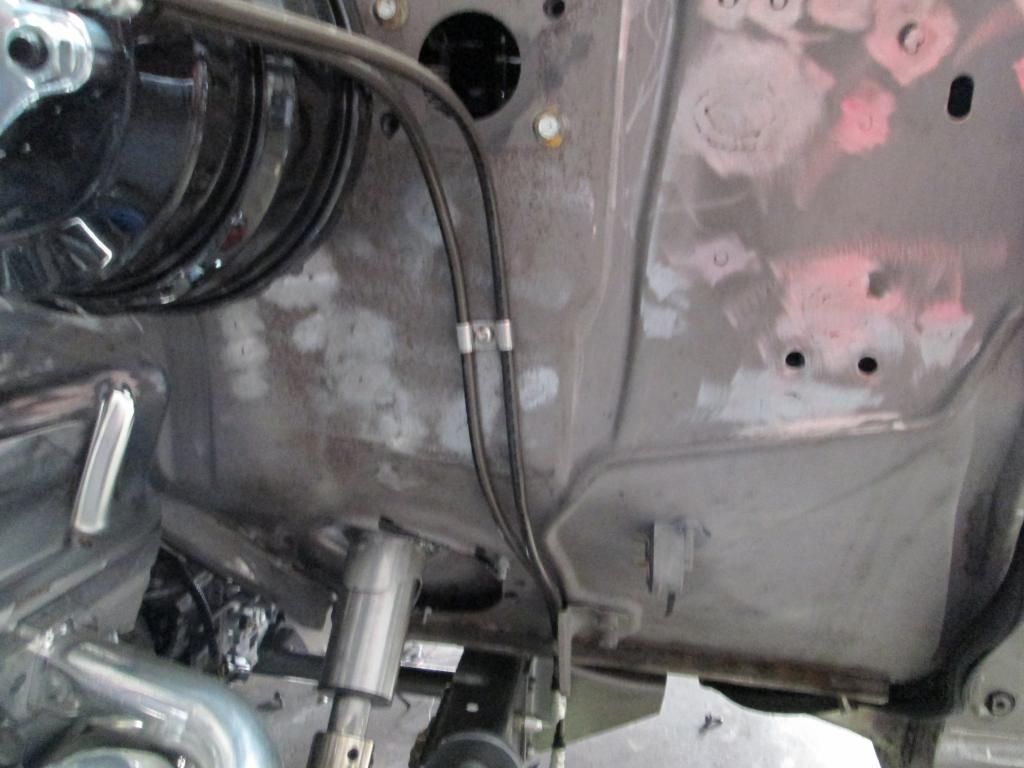
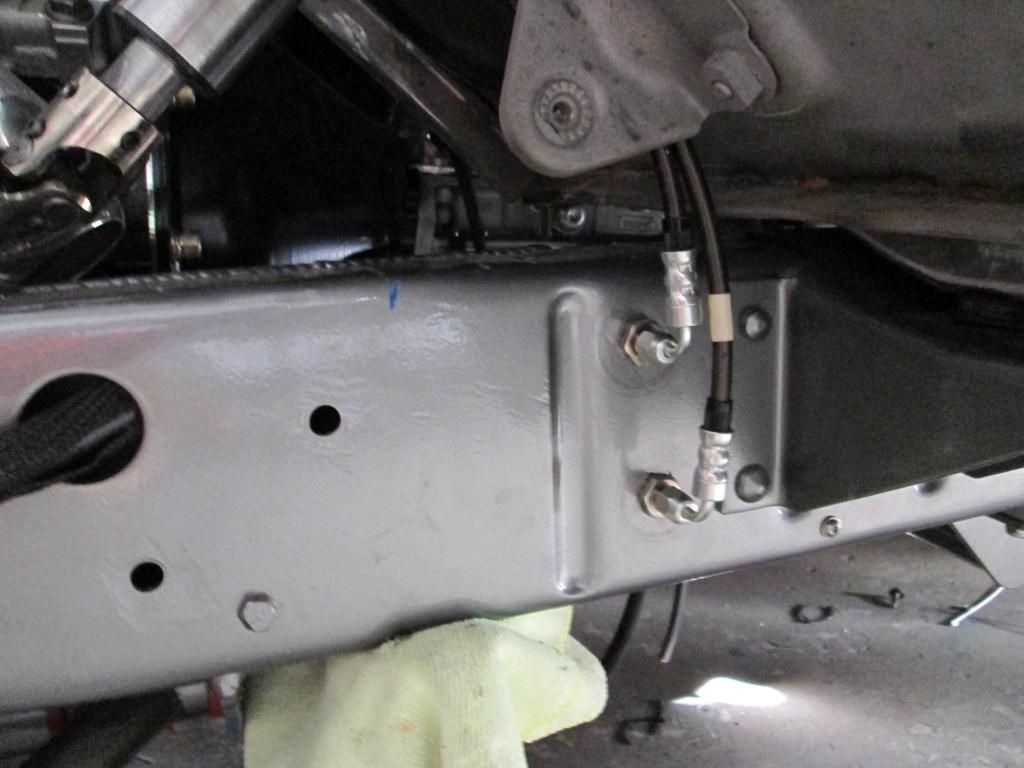
Stainless brake lines from master to thru fittings on frame
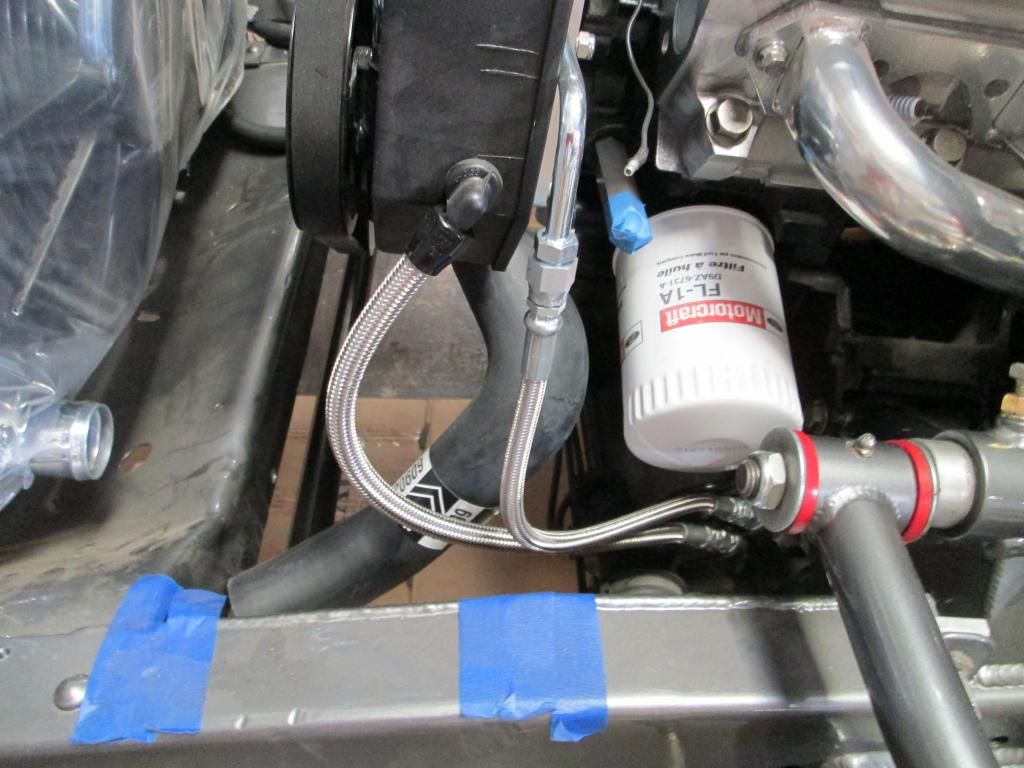
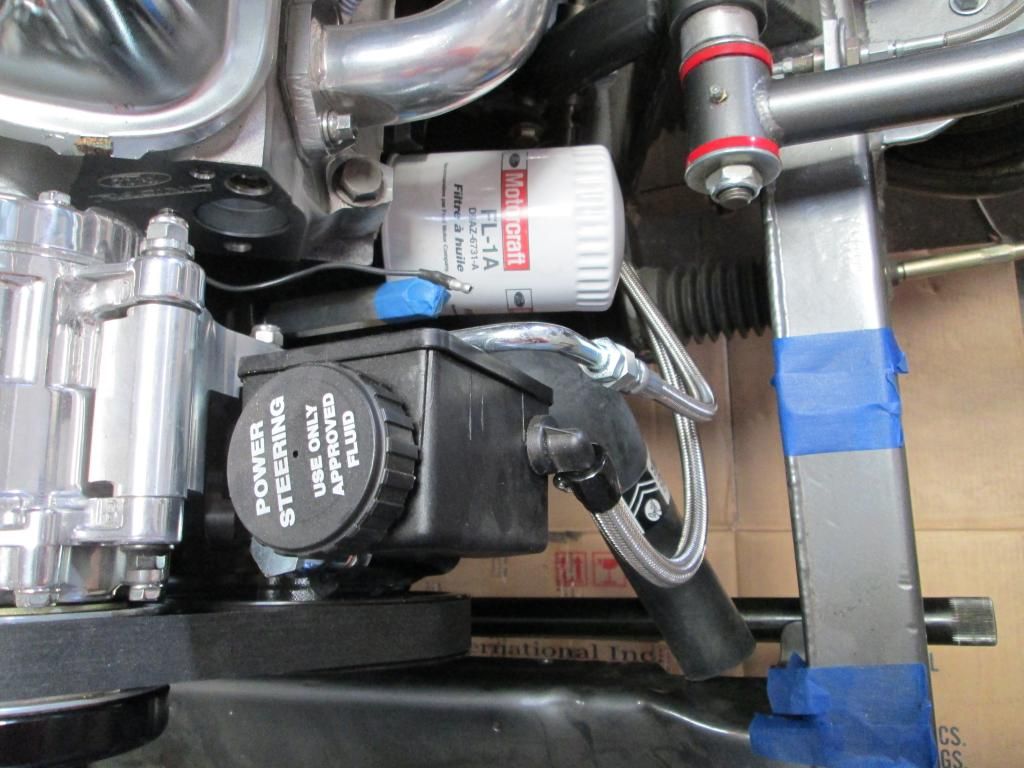
Power steering hoses
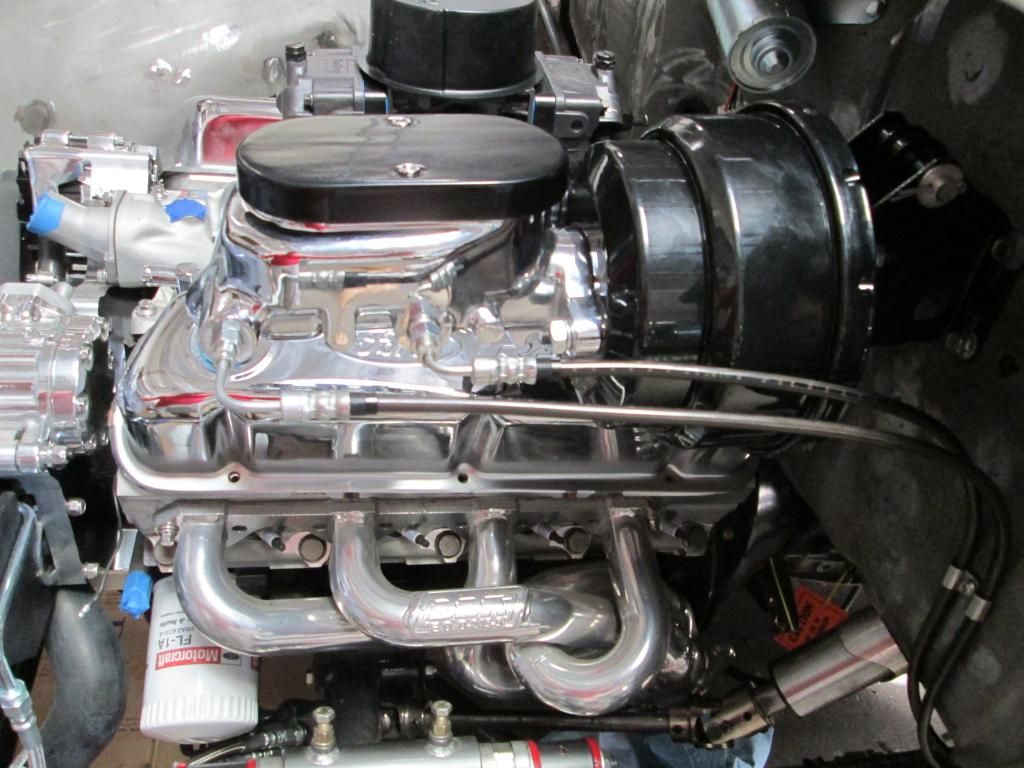
Trick little piece from vintage that brings the fitting around to the side (stainless steel)
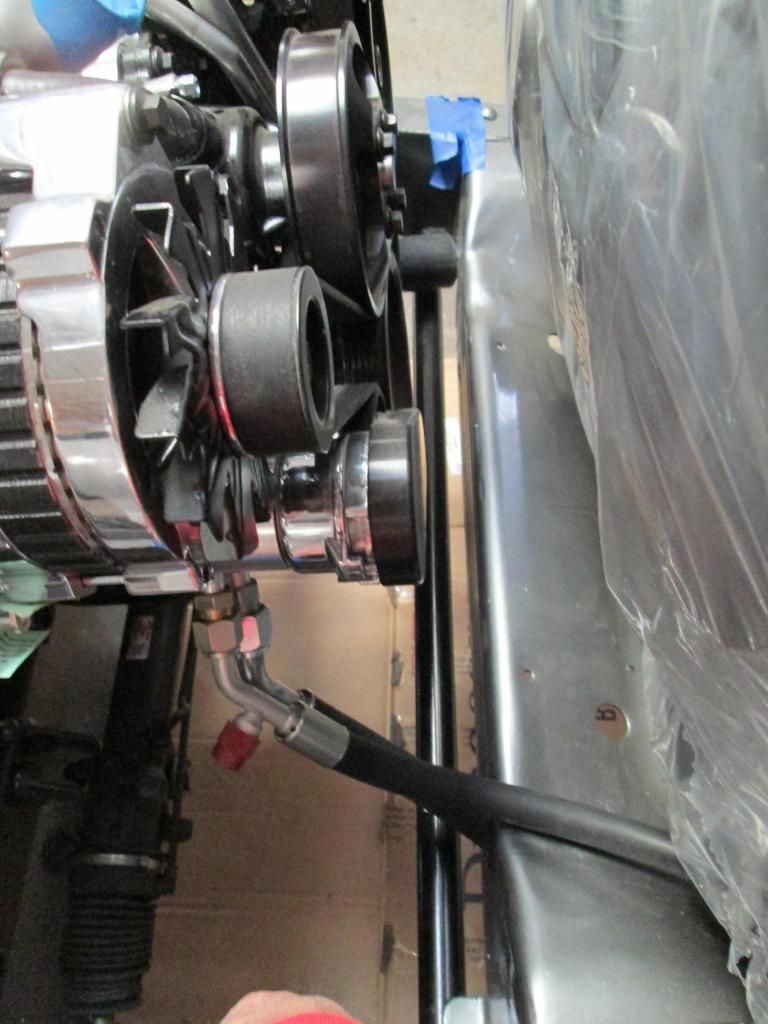
AC lines from compressor one will actually go thru the front cross brace and into and under the front fender
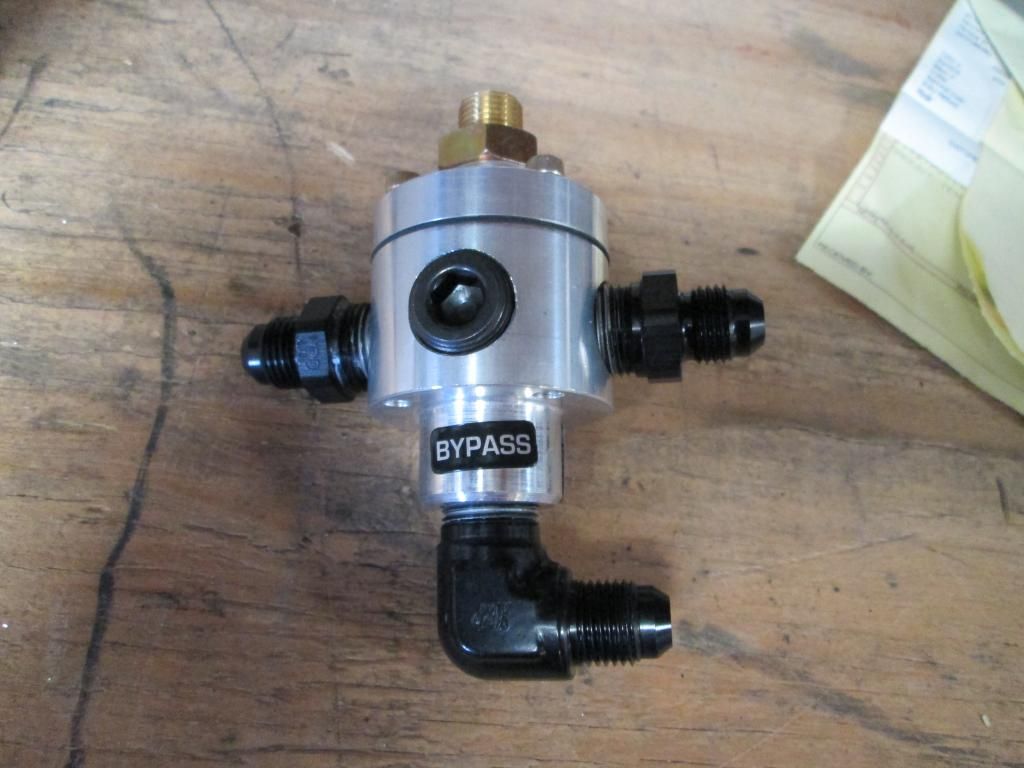
Pretty fuel regulator I bought and the trillion dollar fittings to go with it lol
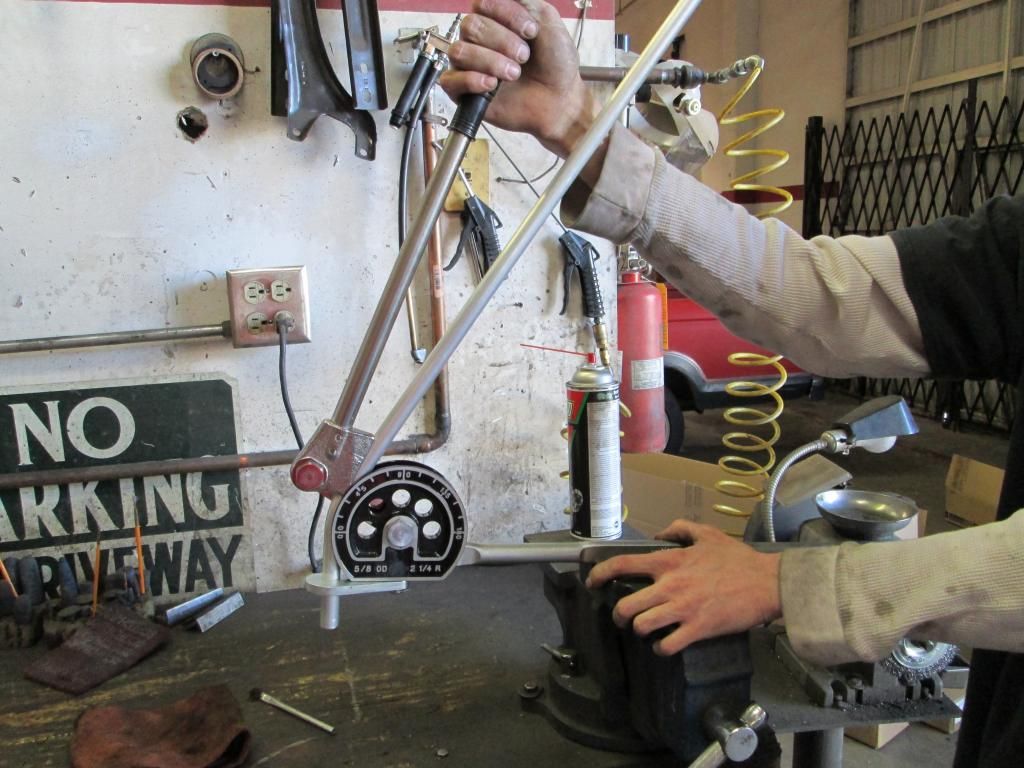
And the expensive a$$ tube bender for the heater hard lines
Hope to work on it again on Friday and hook up the fuel regulator as well as finish the sway bar etc etc etc, enjoy!
Ryan
AC lines thru core support


Stainless brake lines from master to thru fittings on frame


Power steering hoses

Trick little piece from vintage that brings the fitting around to the side (stainless steel)

AC lines from compressor one will actually go thru the front cross brace and into and under the front fender


Pretty fuel regulator I bought and the trillion dollar fittings to go with it lol

And the expensive a$$ tube bender for the heater hard lines

Hope to work on it again on Friday and hook up the fuel regulator as well as finish the sway bar etc etc etc, enjoy!
Ryan
#109
02-09-2014, 02:30 PM
progress?
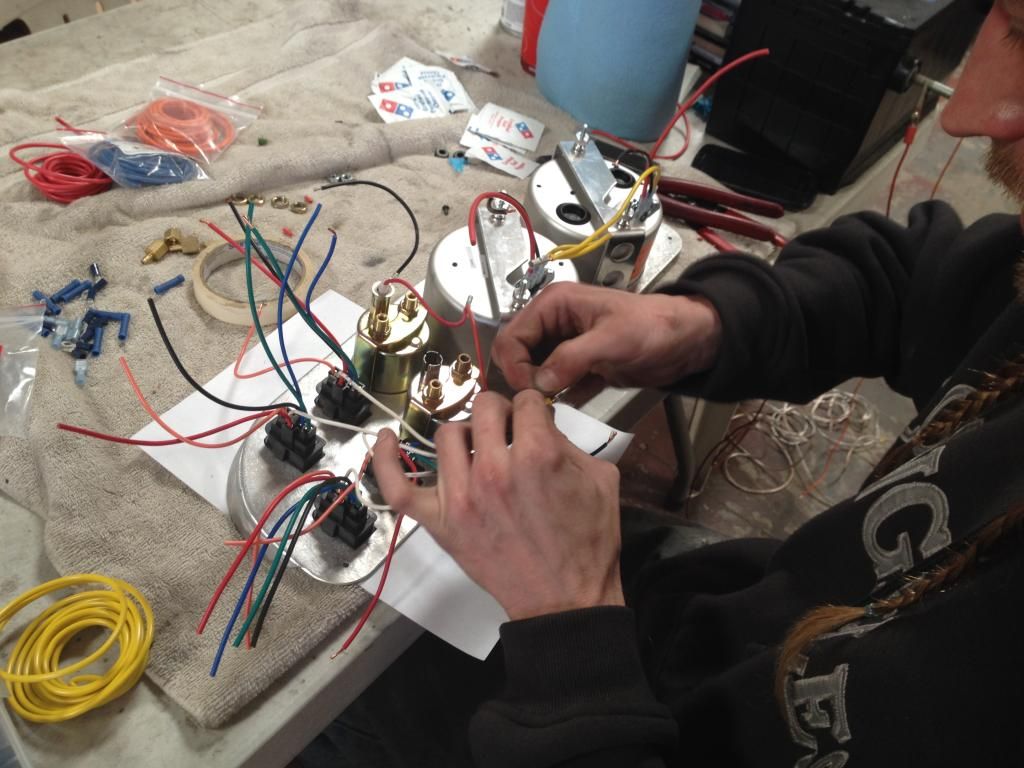
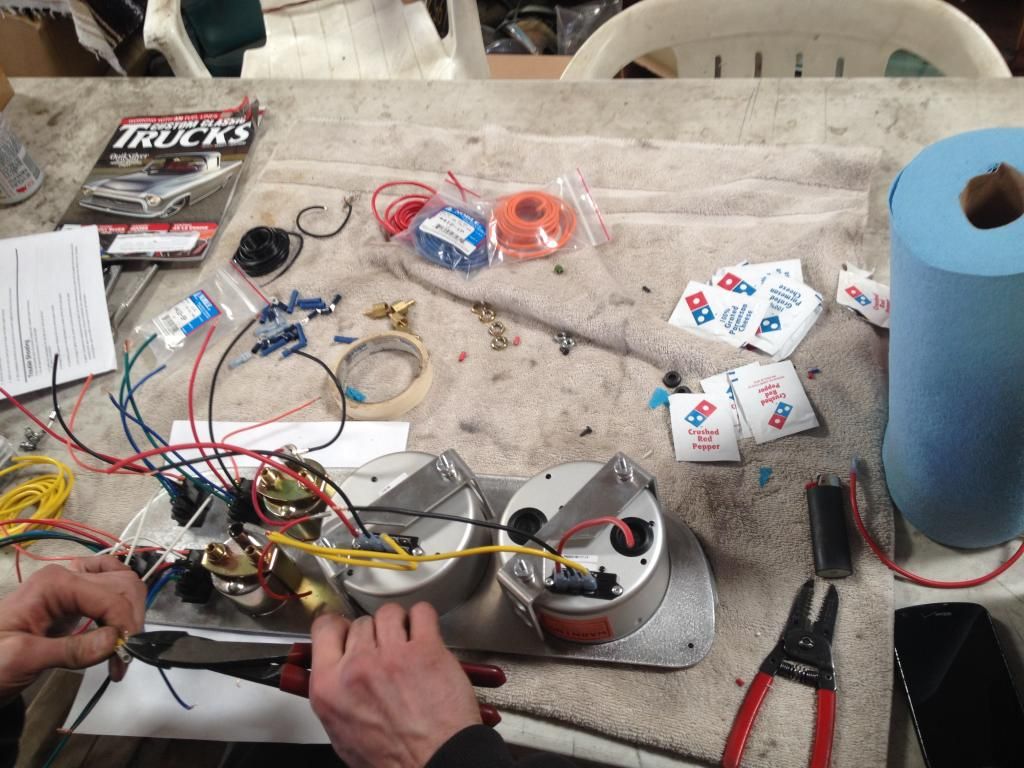
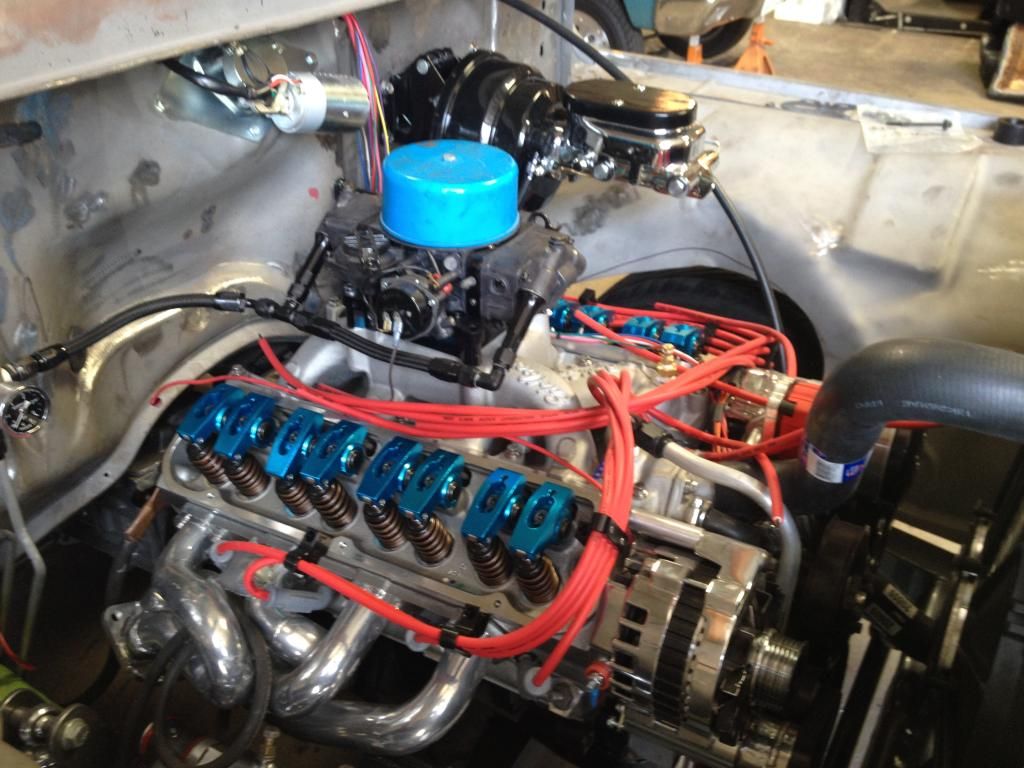
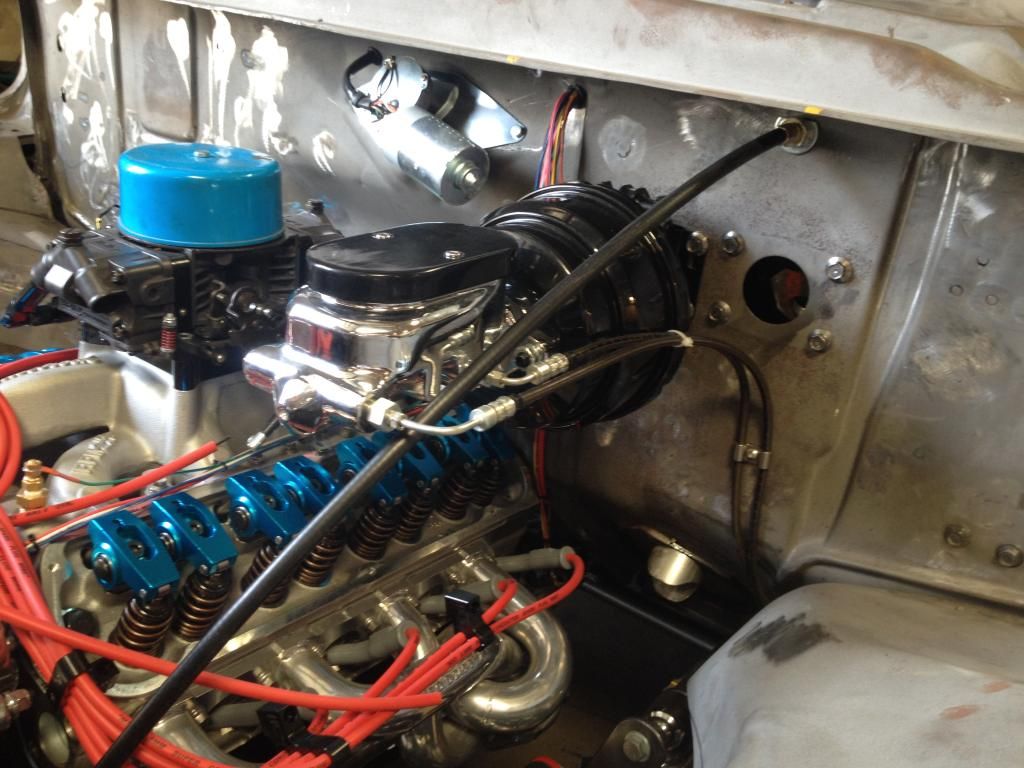
Well it seems like a lot of progress lately, thanks to Mike! Fabbed up almost the entire AC system under the hood and fenders at least. Most lines will go down along the passenger side of the motor and disappear towards the front of the truck and travel under the front fender. Mike is pretty handy with the tube bender and did a good job fabbing up a hard line for the heater hoses so we can route it all together. He did the same with the fuel lines into the fuel regulator (looks good) Also got the fuel log made and all the lines for the fuel and the brake system set up (Mike made a sweet brake switch set up underneath)
Got the wiring started and then realize all the things we need asap to get the wiring lengths correct etc etc. Like the starter and the starter solenoid. The wiring kit has an ugly big giant ignition switch as well as the headlight switch so an NOS switch for both will be integrated so we can use the factory holes, since those are the only ones we left open, lol
A lot of work has went into the sway bar as well, very soon the last fabricated pieces will come back from the machine shop. Thanks to Mike and speedway engineering and a few bends here and there on the 30 degree arms i hope it will all work out, I will keep you all posted
Gonna work on exhaust and cable for the clutch very soon, hope to get her started and runnin down the road soon, just to shake her out a bit then apart she will come for paint in strategic places
Here are a few pics and explanations to enjoy
wiring started
Hard lines for heater
30 degree arm and relief cut to bend away from the tire, the end link is only for mock up (length) the pretty pretty piece is coming,lol
Again Mike's handy work with the bender for the fuel lines including a bypass/return line in case we go up in horsepower later lol
Fuel log, yes I actually did something myself lol. All of the parts (black) are supplied by G and J in Ontario Ca, very good dudes and informative, helped me with all the AN and NPT threads and what i should use where!

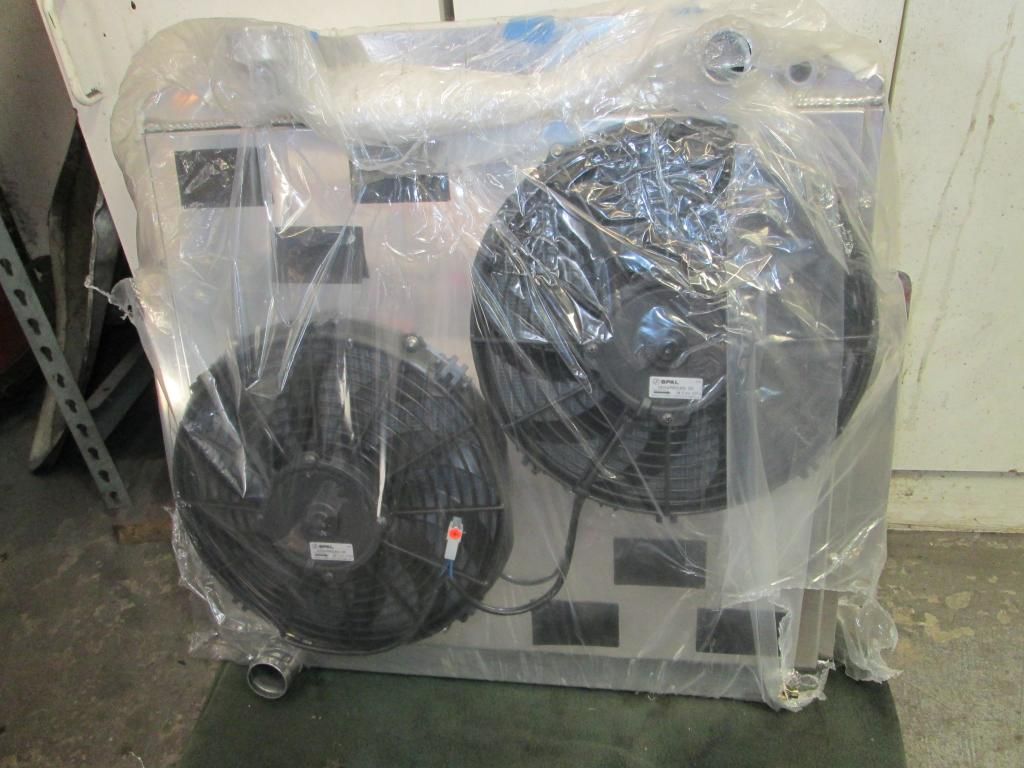
May have posted this already, here is the motor side of the radiator custom made by Mattson Radiator
Ryan
Got the wiring started and then realize all the things we need asap to get the wiring lengths correct etc etc. Like the starter and the starter solenoid. The wiring kit has an ugly big giant ignition switch as well as the headlight switch so an NOS switch for both will be integrated so we can use the factory holes, since those are the only ones we left open, lol
A lot of work has went into the sway bar as well, very soon the last fabricated pieces will come back from the machine shop. Thanks to Mike and speedway engineering and a few bends here and there on the 30 degree arms i hope it will all work out, I will keep you all posted
Gonna work on exhaust and cable for the clutch very soon, hope to get her started and runnin down the road soon, just to shake her out a bit then apart she will come for paint in strategic places
Here are a few pics and explanations to enjoy
wiring started

Hard lines for heater

30 degree arm and relief cut to bend away from the tire, the end link is only for mock up (length) the pretty pretty piece is coming,lol

Again Mike's handy work with the bender for the fuel lines including a bypass/return line in case we go up in horsepower later lol

Fuel log, yes I actually did something myself lol. All of the parts (black) are supplied by G and J in Ontario Ca, very good dudes and informative, helped me with all the AN and NPT threads and what i should use where!

May have posted this already, here is the motor side of the radiator custom made by Mattson Radiator

Ryan
The following users liked this post:
#110
02-10-2014, 11:41 AM

Senior User
Join Date: Oct 2013
Location: Sacramento, CA
Posts: 119
Likes: 0
Received 0 Likes
on
0 Posts
#111
02-20-2014, 06:25 PM
Tuned
WOW! I am really liking what you are doing to this truck. I wish I was able to do a frame off total redo of my 57. I did do an engine and trans swap. Put in a 318 (I know its a dodge engine, but it was free). I am hoping to get my truck rewired sometime soon. I look forward to seeing more progress.
#112
02-20-2014, 10:08 PM
tomorrow 2/21/14
Hope to get some more pics up tomorrow, not a Lot of visual progress, just wiring mostly but getting closer to starting her, lol. Installed starter and ready to run distributor, working on the cable measurement for the clutch, almost time to start think about exhaust ideas, and hope to get the gauges tomorrow so I can work on the gauge layout and lazer cut the back panel of the gauge cluster,....stay tuned
Ryan
Ryan
#113
02-21-2014, 07:16 PM

#114
05-12-2014, 09:32 PM
Lotta progress and not a lot of pics
Well it has been quite a while since I have posted, I have been working a lot and then on weekends were are doing a lot of car shows with our other toys!
Trying to remember where I left off but here are some of the highlight/low lights lol
All of the wiring is in, fan motors turning, windshield wiper motor rotating, blinkers working etc etc. So obviously the radiator is in as well, the sway bar for all intense and purposes is fabbed and welded and ready to be tested (what a job, but I think we have the answer for those struggling with the links from some of the aftermarket suspension companies)
The steering wheel is finally set/column i should say, linkage is pretty close to the BBK equal length headers but I think it will be OK! All fuel lines are ran, pugs and wires in, just need to tidy up the wire lengths. I found some nice black wire looms, I will post later with more pics!
Fuel pump is in the tank, just need to add a hose from filler neck to tank.
I am sure there is more but the truck is basically ready for first start. The pedal assembly is at Danny Bahn engineering in So Cal, he is engineering a much more efficient clutch pedal quadrant, as I am going to run a cable on my 5 speed.
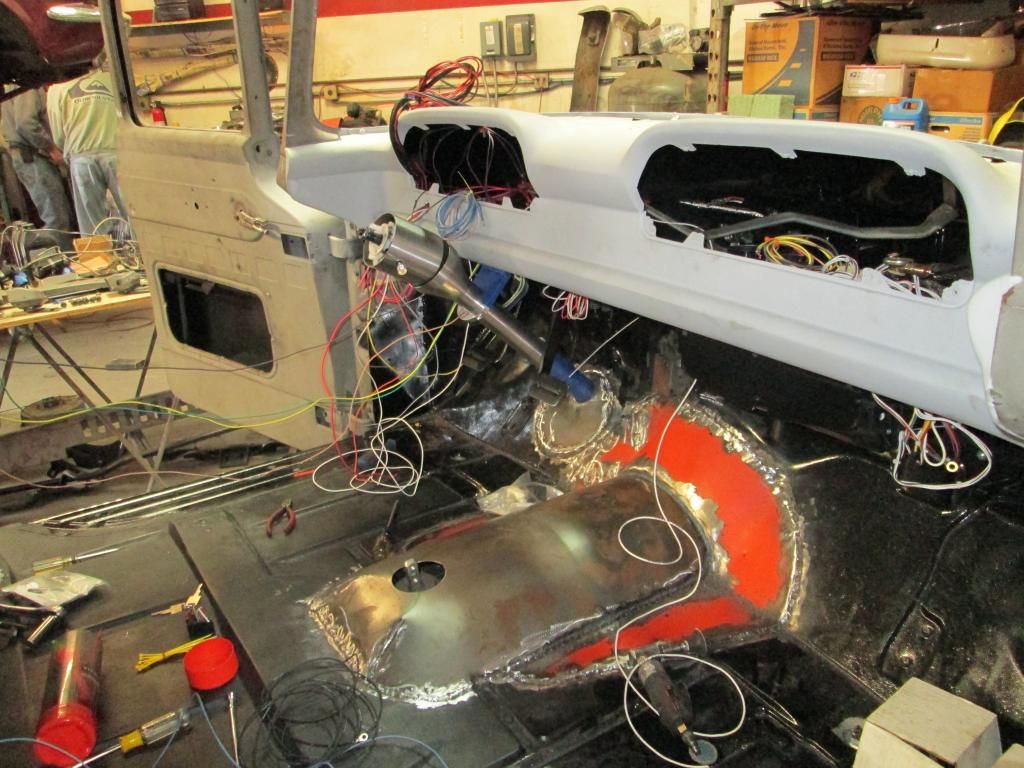
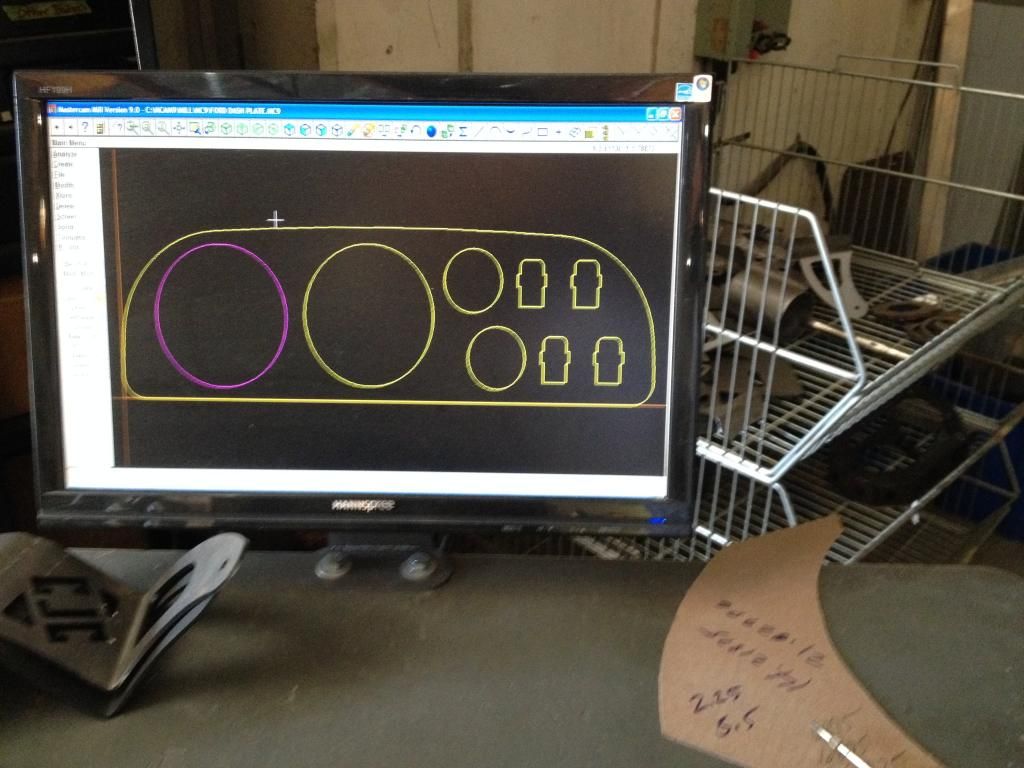
The truck is now at DCE in Riverside Ca having the new gauge clusters built as well as my vision of a center console. I wanted 5 inch gauges in the dash and the stock pod just wouldn't work so Jason is taking over! Jason at DCE does some pretty good work. I think that's about it, here are some pics
Ideas for the dash compared to original

Jason at work with laser cutter
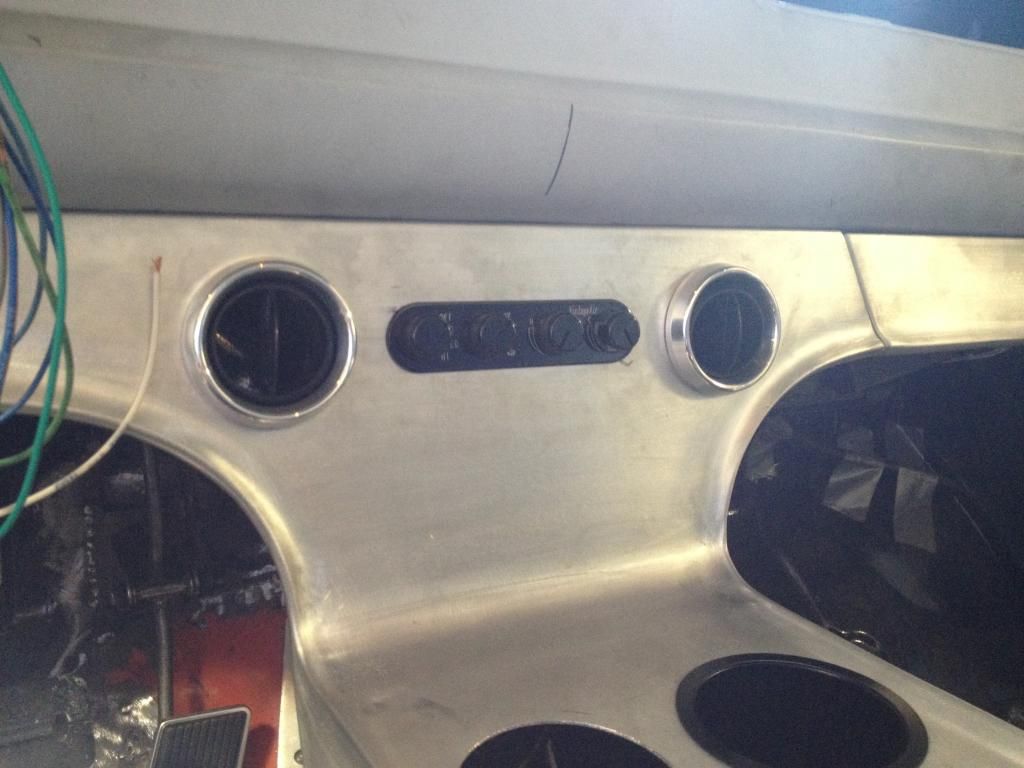
Some of jasons handy work, center console with cup holders installed, AC vents in stalled, the slit between the vents will house the vintage air controller, the stick shift is for mock up only, it wont be that big, lol
I will have some sort of 3D version of this on my custom Passenger side Gauge pod
Hope to have more pics on Friday or Saturday
Trying to remember where I left off but here are some of the highlight/low lights lol
All of the wiring is in, fan motors turning, windshield wiper motor rotating, blinkers working etc etc. So obviously the radiator is in as well, the sway bar for all intense and purposes is fabbed and welded and ready to be tested (what a job, but I think we have the answer for those struggling with the links from some of the aftermarket suspension companies)
The steering wheel is finally set/column i should say, linkage is pretty close to the BBK equal length headers but I think it will be OK! All fuel lines are ran, pugs and wires in, just need to tidy up the wire lengths. I found some nice black wire looms, I will post later with more pics!
Fuel pump is in the tank, just need to add a hose from filler neck to tank.
I am sure there is more but the truck is basically ready for first start. The pedal assembly is at Danny Bahn engineering in So Cal, he is engineering a much more efficient clutch pedal quadrant, as I am going to run a cable on my 5 speed.
The truck is now at DCE in Riverside Ca having the new gauge clusters built as well as my vision of a center console. I wanted 5 inch gauges in the dash and the stock pod just wouldn't work so Jason is taking over! Jason at DCE does some pretty good work. I think that's about it, here are some pics
Ideas for the dash compared to original

Jason at work with laser cutter

Some of jasons handy work, center console with cup holders installed, AC vents in stalled, the slit between the vents will house the vintage air controller, the stick shift is for mock up only, it wont be that big, lol


I will have some sort of 3D version of this on my custom Passenger side Gauge pod


Hope to have more pics on Friday or Saturday
#116
05-13-2014, 12:13 PM
#117
05-13-2014, 05:23 PM

Cross-Country
Join Date: Dec 2007
Location: so cal
Posts: 95
Likes: 0
Received 0 Likes
on
0 Posts
#118
05-17-2014, 04:05 PM


#120
05-24-2014, 09:52 AM
Slow n steady
Well it is slow going as the meticulous parts of the build and the "little" things need to be remembered as well as tidied up, and of course all of the things you come across that you had not anticipated!!
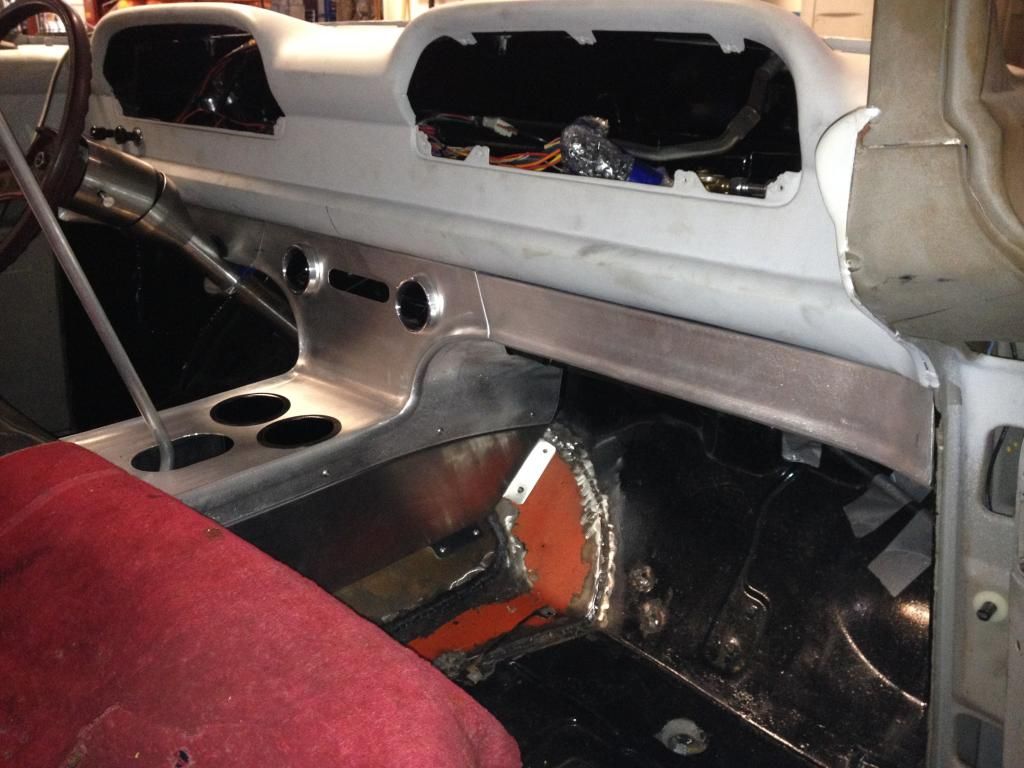
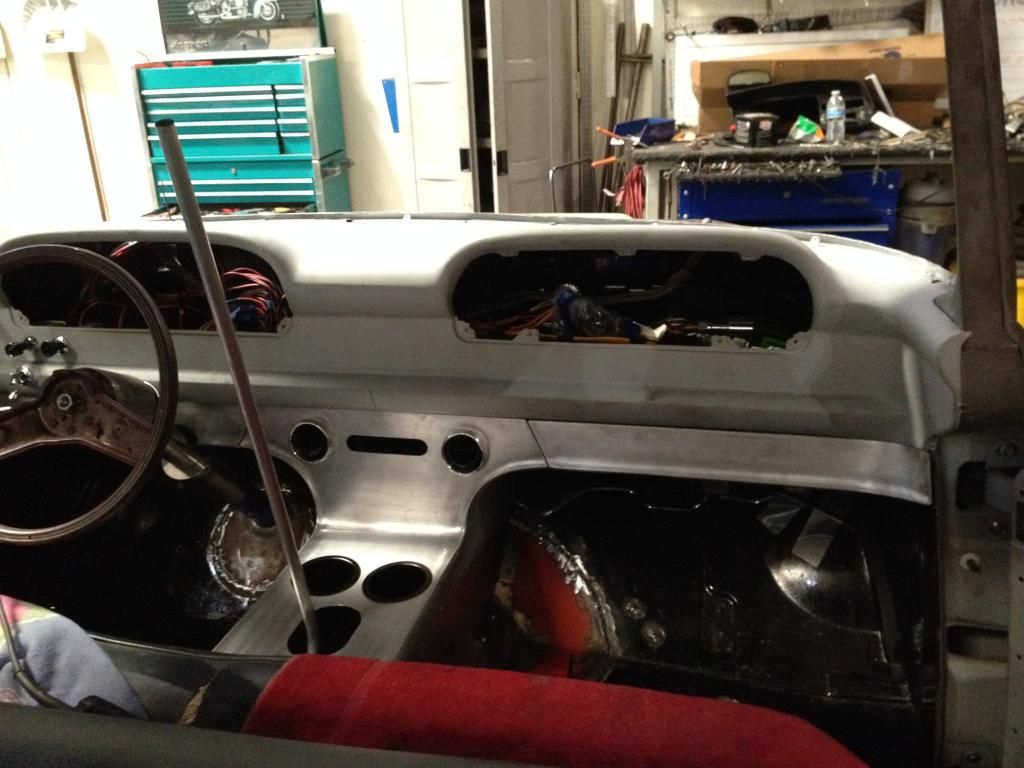
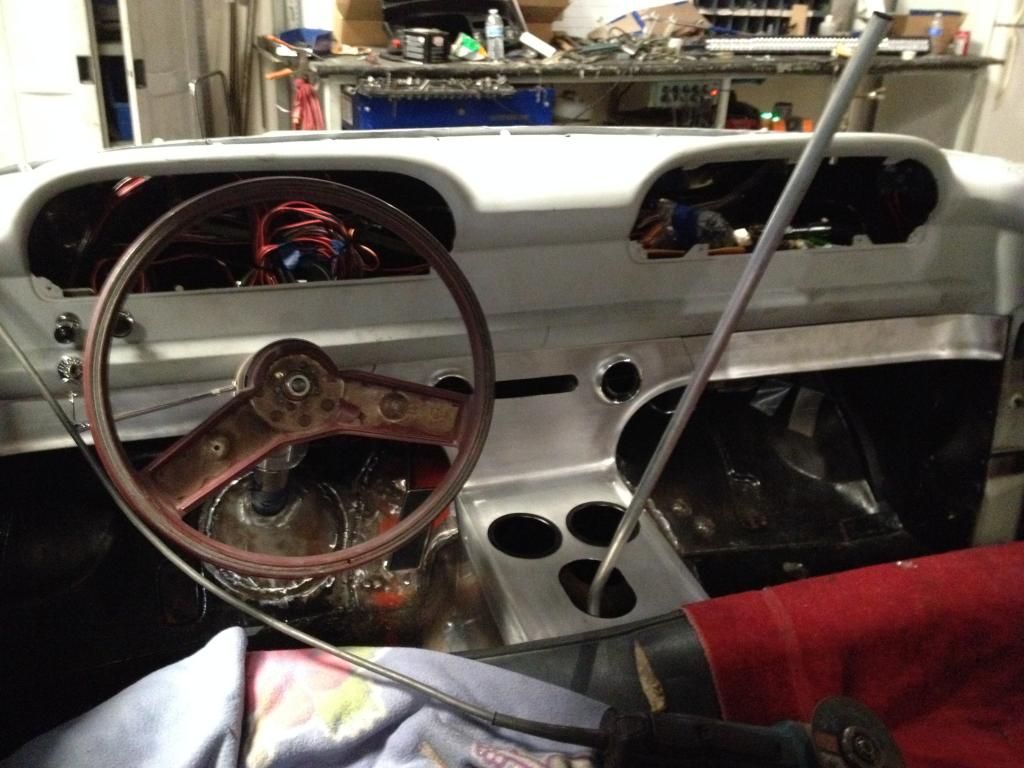
Now that we have the gauges and the custom made panels back, the wiring is now getting buttoned up as is the running of the air lines for the gauges. The pedal box is back as is the custom made cable for the clutch (not a hydraulic fan). Also we are retro fitting an older e-brake handle which involves some trimming of the custom dash extension/console.
Trying not to get too far ahead without remembering what was mocked up and what was actually finalized before we go for the first fire, valve cover gaskets and gaskets for the carb base were put on today as was the final install of the brake booster. Everything will come off one more time after we get her started and shake her down for a week or two. Here are some un-exciting pics from this Fridays work.
Hope to get her to the exhaust shop sooner than later!! Then we can give her a try!!
Enjoy
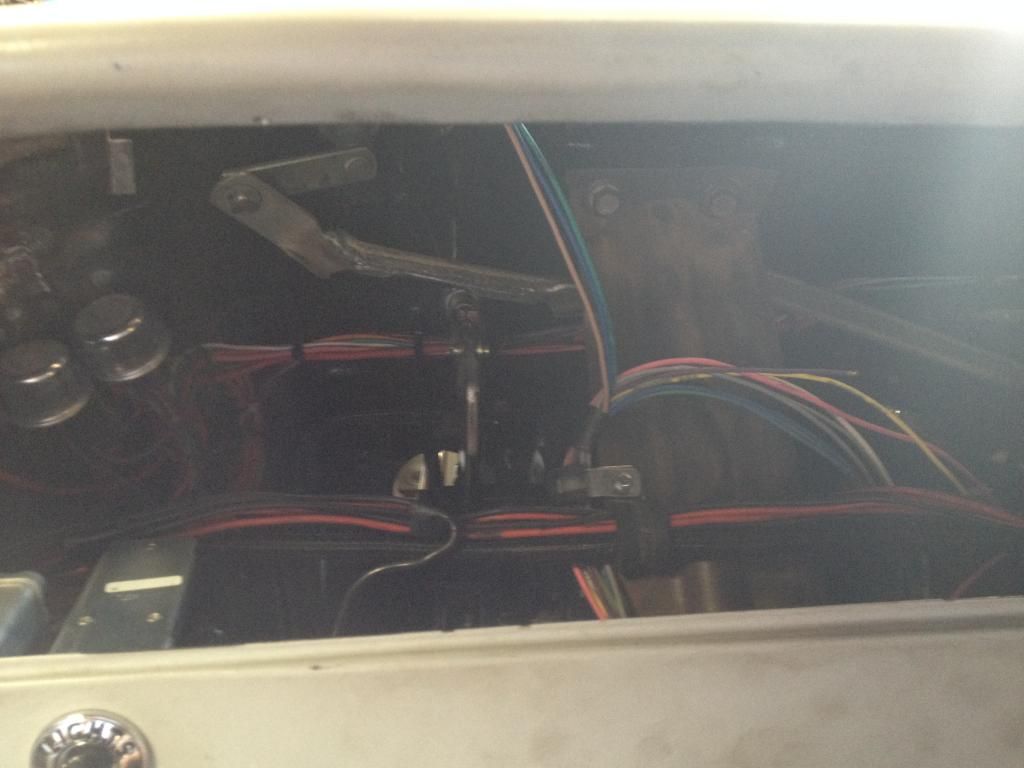
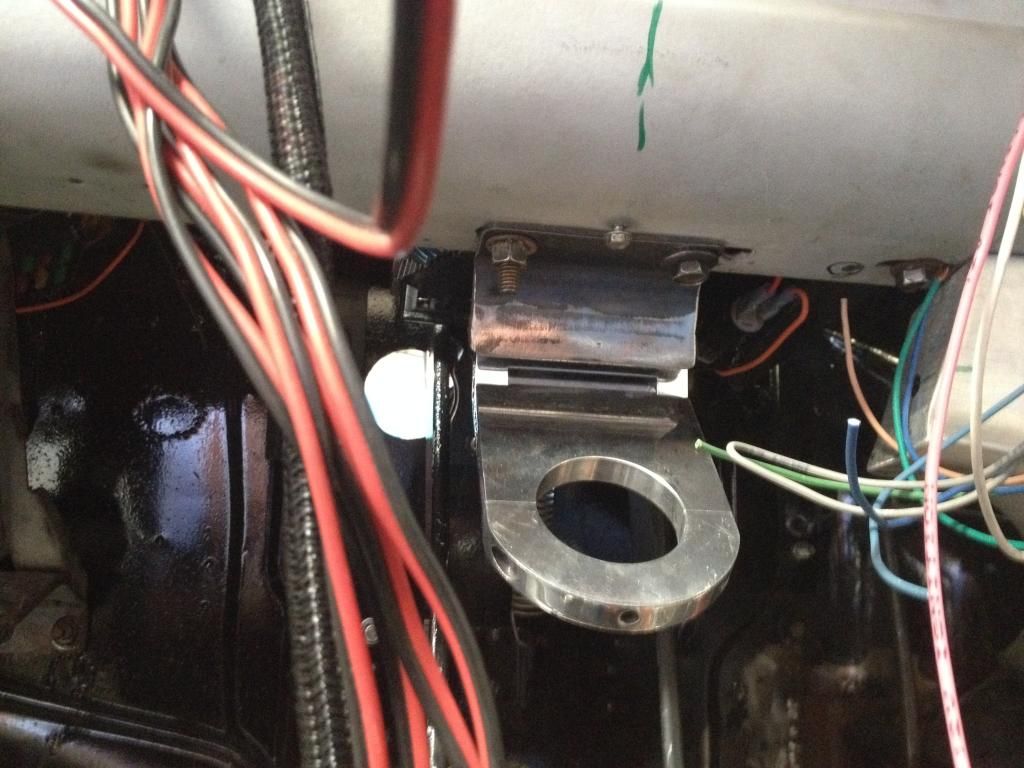
DASH getting wired
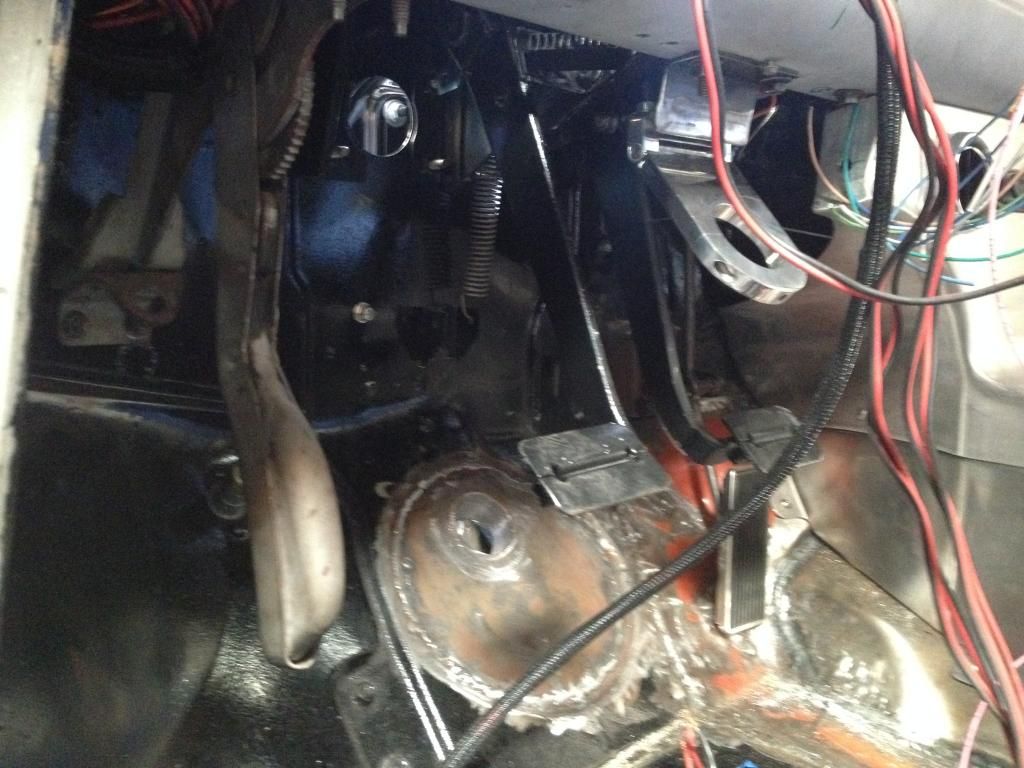
A little hard to see but the factory pedal assembly, now running a cable.....Note the slightly modified wiper arm, lol
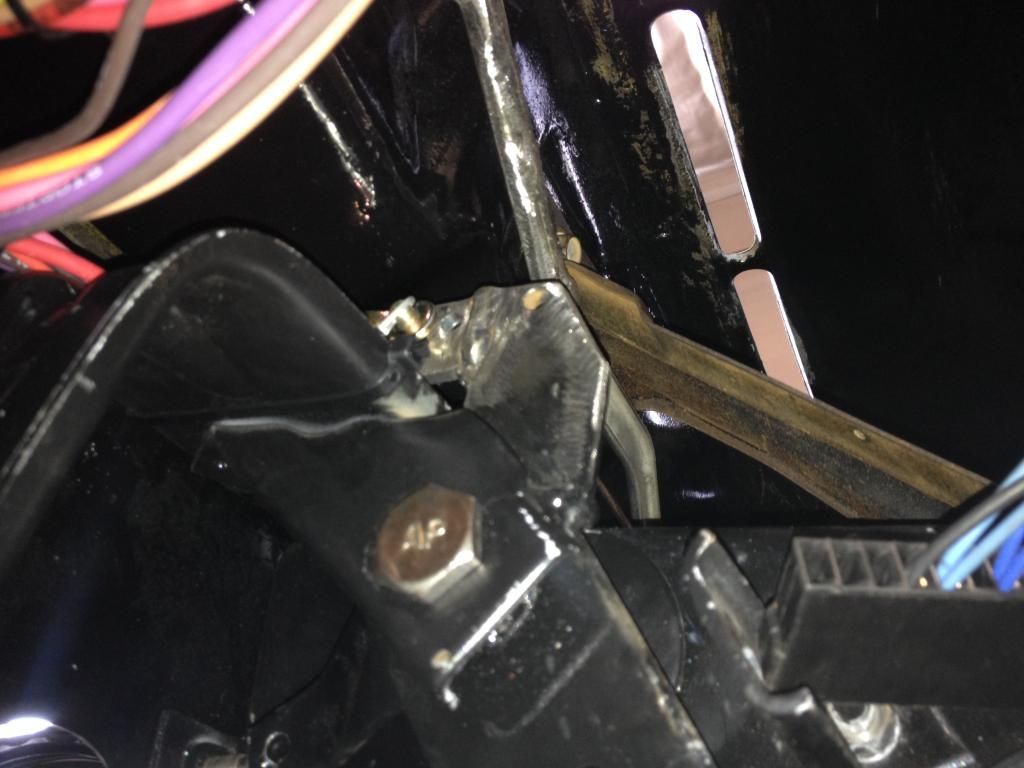
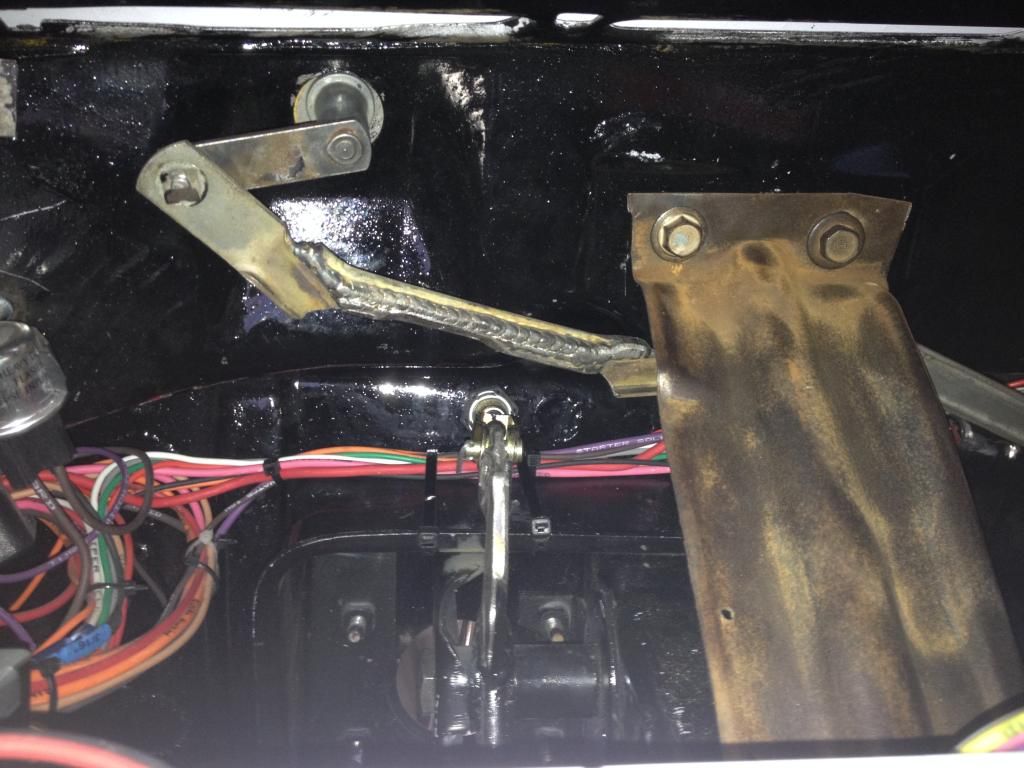
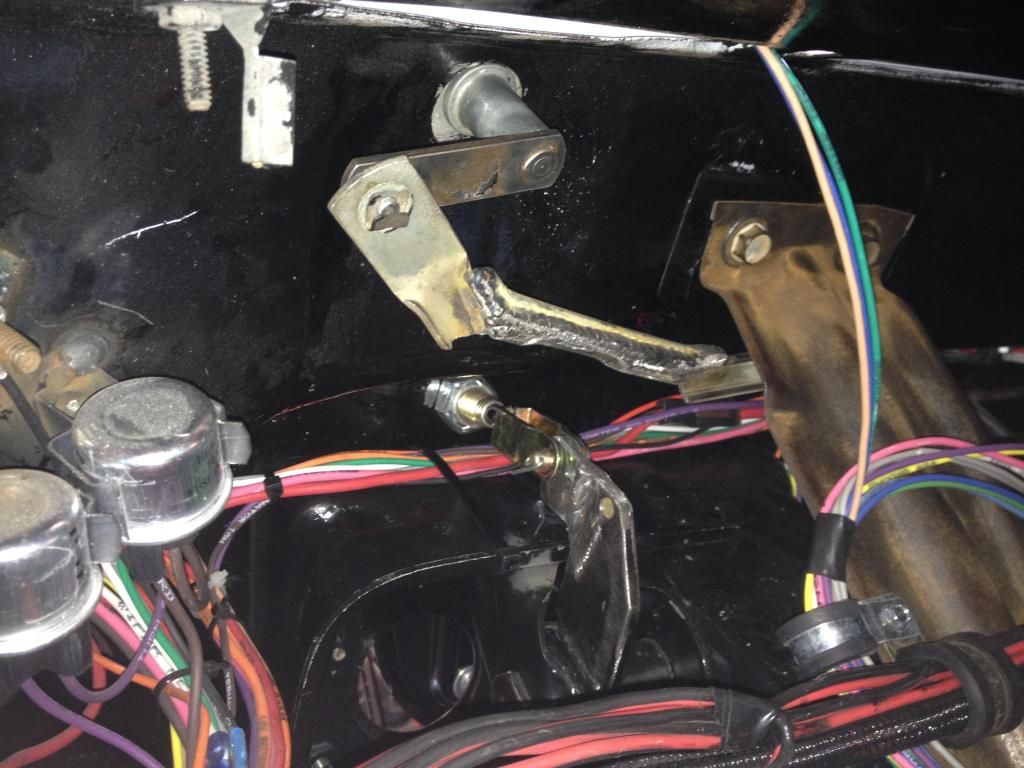
And the retro e brake handle in place
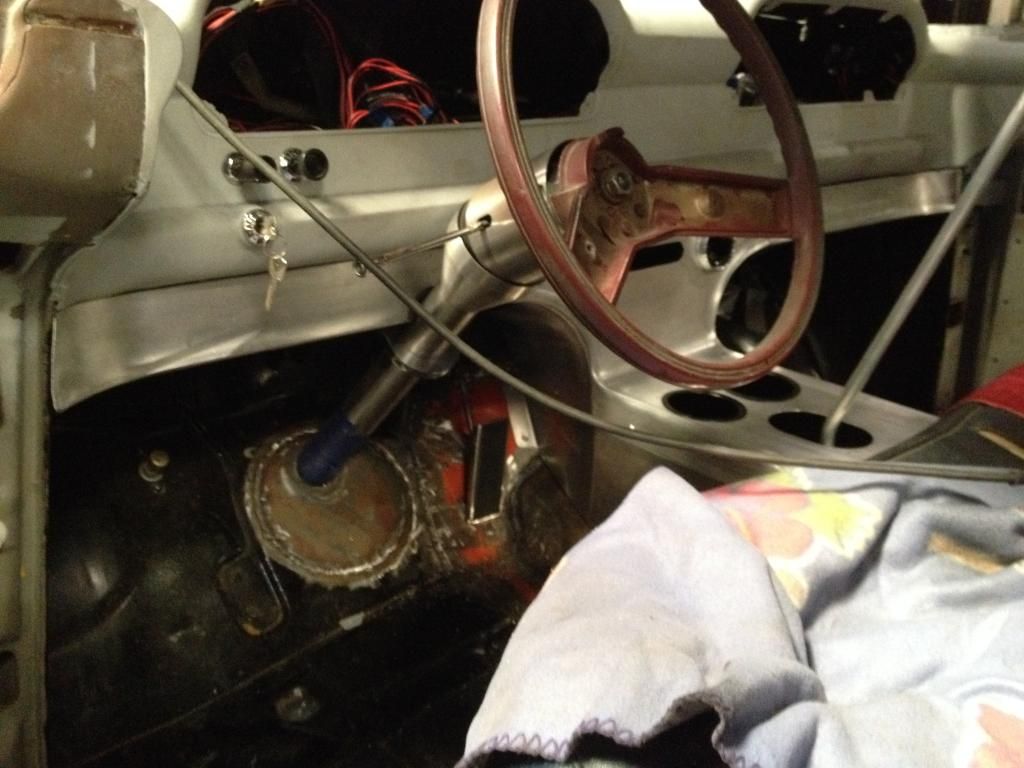
The steering drop was modified to get it down and away from the custom dash extension, very nice piece mocked up by Mike! (and jason, lol)
Ac controllers are now in as well
And the valve covers off hopefully for the last time to install the thick corp gaskets
Now that we have the gauges and the custom made panels back, the wiring is now getting buttoned up as is the running of the air lines for the gauges. The pedal box is back as is the custom made cable for the clutch (not a hydraulic fan). Also we are retro fitting an older e-brake handle which involves some trimming of the custom dash extension/console.
Trying not to get too far ahead without remembering what was mocked up and what was actually finalized before we go for the first fire, valve cover gaskets and gaskets for the carb base were put on today as was the final install of the brake booster. Everything will come off one more time after we get her started and shake her down for a week or two. Here are some un-exciting pics from this Fridays work.
Hope to get her to the exhaust shop sooner than later!! Then we can give her a try!!
Enjoy
DASH getting wired


A little hard to see but the factory pedal assembly, now running a cable.....Note the slightly modified wiper arm, lol


And the retro e brake handle in place

The steering drop was modified to get it down and away from the custom dash extension, very nice piece mocked up by Mike! (and jason, lol)


Ac controllers are now in as well

And the valve covers off hopefully for the last time to install the thick corp gaskets

