My 52 Ford F1 Project - NKY
#16
 08-28-2012, 09:31 PM

Lead Driver
You are moving right along, and you got some suckers to help you with the dirty work, congratulations.
You mentioned a full blown motor swap, what are you looking to put in it?
I would vote to keep the current engine though, I tend to like the smaller engines. Now a days the original engines add uniqueness.
I look forward to watching your progress.
You mentioned a full blown motor swap, what are you looking to put in it?
I would vote to keep the current engine though, I tend to like the smaller engines. Now a days the original engines add uniqueness.
I look forward to watching your progress.
#17
08-28-2012, 09:45 PM


#18
08-30-2012, 06:16 PM
I bought this for the engine (good timing). It is a 351 Windsor bored out a bit, with a mild cam. I had a little bit of buyers remorse after buying it, only because I do not have the experience to get it mated up to a transmission and bolted in to go. (I bought it for $750)
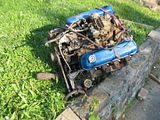
^ Of course I bought the motor before a motor stand or cherry picker... that was after I backed up a truck and threw it out of there... (HEAVY)
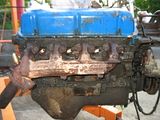
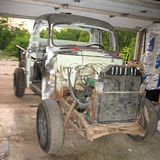
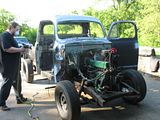
Went and bought a cherry picker to get a better look...
Before I got it all cleaned up.


That was before I got her the ring... since she is too busy planning the wedding and how to spend my money on other things than my truck...
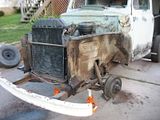
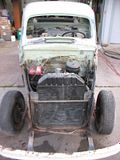
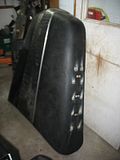
To leave off with a lil more... pics after front fenders removed.

^ Of course I bought the motor before a motor stand or cherry picker... that was after I backed up a truck and threw it out of there... (HEAVY)
Went and bought a cherry picker to get a better look...
Before I got it all cleaned up.


That was before I got her the ring... since she is too busy planning the wedding and how to spend my money on other things than my truck...
To leave off with a lil more... pics after front fenders removed.


#19
08-31-2012, 12:39 PM
Senior User
Join Date: Sep 2010
Location: Texas
Posts: 100
Likes: 0
Received 0 Likes
on
0 Posts
It's the beginning of an irreversible trend, ask me how I know.

Nice work & progress so far, good luck
btw, good looking Doby there....
#20
08-31-2012, 05:23 PM
Here is a better image of the doberman

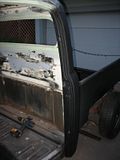
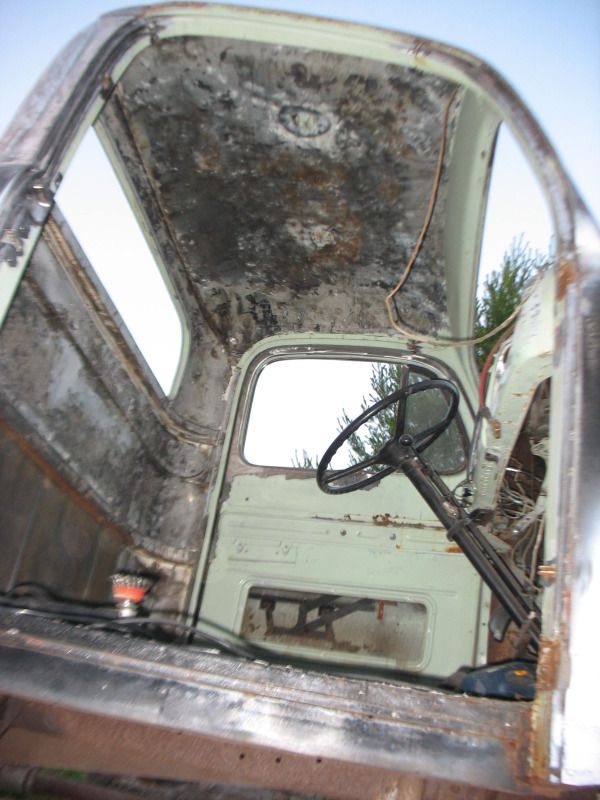
Back to Progress....
More stripping of the cab and coating with some rust reformer in the interim.


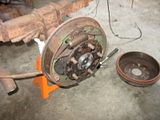
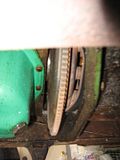
With the fenders away I got a chance to look at the brakes, and wheel bearings


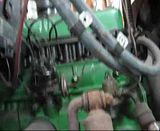
Took a video of the engine running before removing the rest of the needed life system... Hope the link works.
Antenna hole

Traditional Purists look away...
Seam
Front bumper removed
Draining coolant to get the radiator torn down

Back to Progress....
More stripping of the cab and coating with some rust reformer in the interim.


With the fenders away I got a chance to look at the brakes, and wheel bearings


Took a video of the engine running before removing the rest of the needed life system... Hope the link works.
Antenna hole


Traditional Purists look away...
Seam


Front bumper removed

Draining coolant to get the radiator torn down


Last edited by 52 Ford F1; 08-31-2012 at 09:11 PM. Reason: Thanks 51 PanelMan
#21
08-31-2012, 06:34 PM
Post Fiend
#22
09-01-2012, 12:48 PM
Darn weather.... Rain expected all weekend.
To give you a better idea how far I actually am now, I took a trip to the paint store this morning. They had a sale going on a "paint kit" so I fell for it and bought the supplies.
I went with DuPont Nason Finishes... Speak now or forever hold your peace, it will remain unopened until after truck stock.
Nason SelectPrime 421-17/19 2k Urethane Primer gallon
Nason 491-17 Etch Primer quart
Base coat blend is also Nason products, their hot rod black kit gallon
Misc Supplies - file, filters, mixer, undercoat, masking supplies, etc
$200
I have both Bondo and Fiberglass filler, will be using much less than the PO but much more than I would dream about... (all steel = wet dream, just not practical when you have only a hammer and dolly)
Back to the work I have done so far -
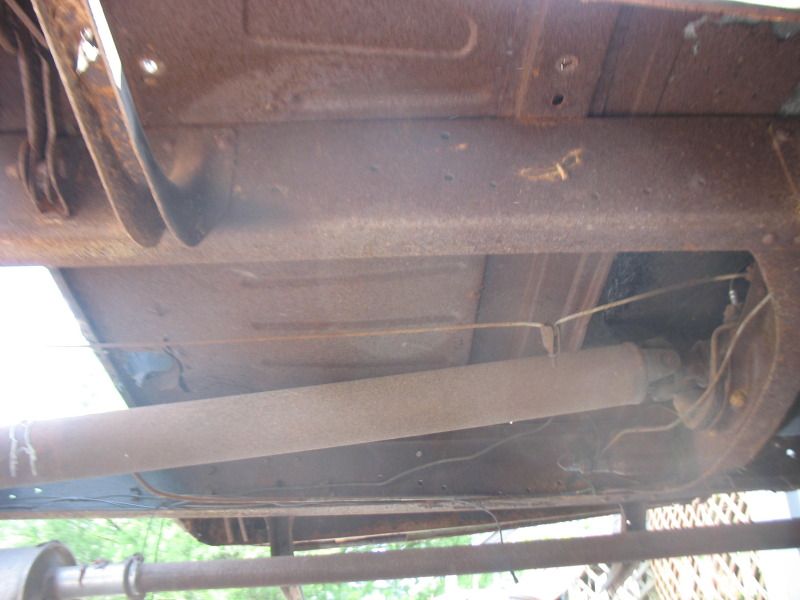
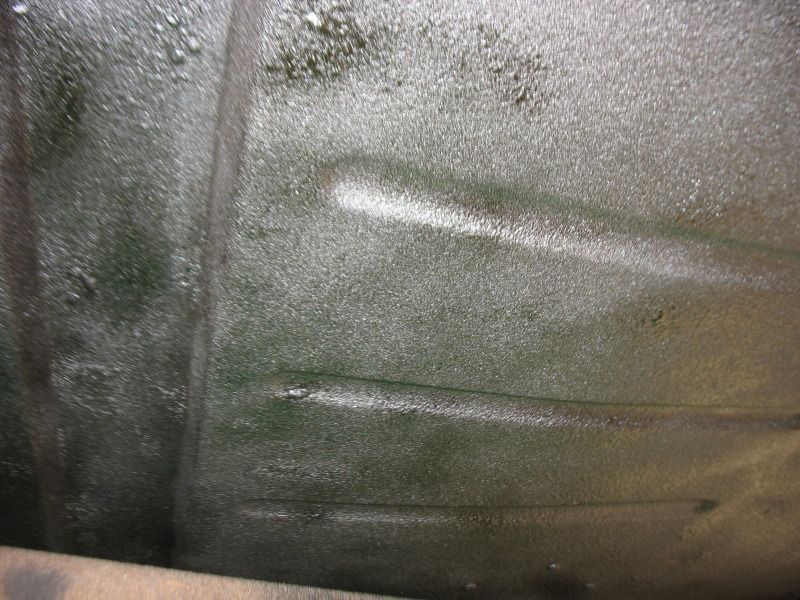
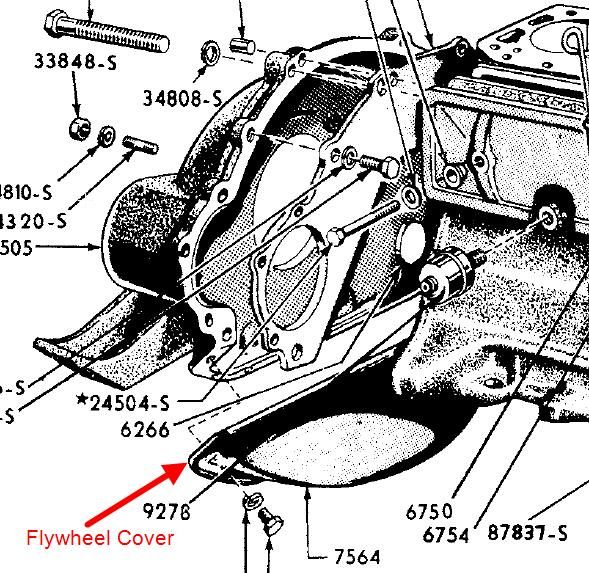
The bottom of the stock motor.... Is there supposed to be a cover over the flywheel? I fully admit old motors are not my deal, hopefully not too stupid of a question.
Radiator and battery off

^My cousin helped out with some of the welding work while I stripped the under-body... Would have much rather been welding than laying on my back breathing rust dust. Once the dust was loose I used rust reformer than under-body coating
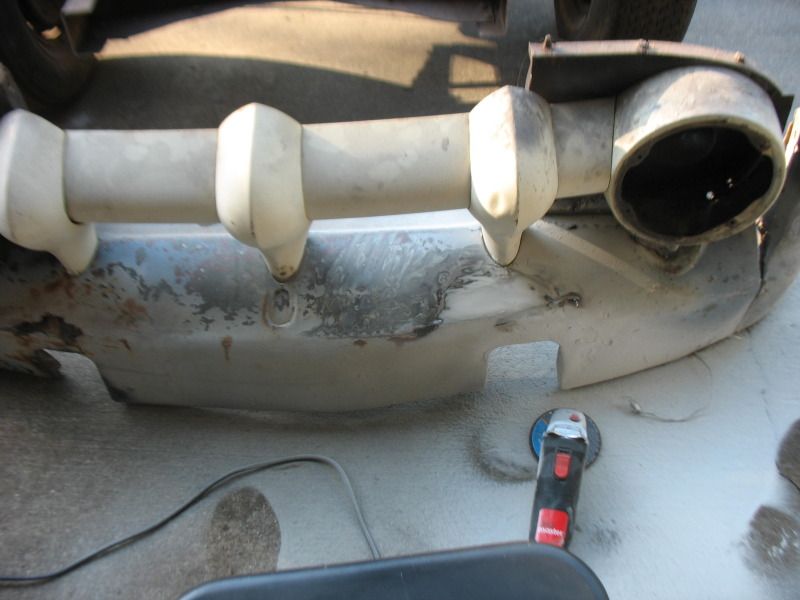
Stock front lower valance was in rough shape to start with... Pictures on what I did to it will follow in a few more posts.
Under tank rusted out around hole...
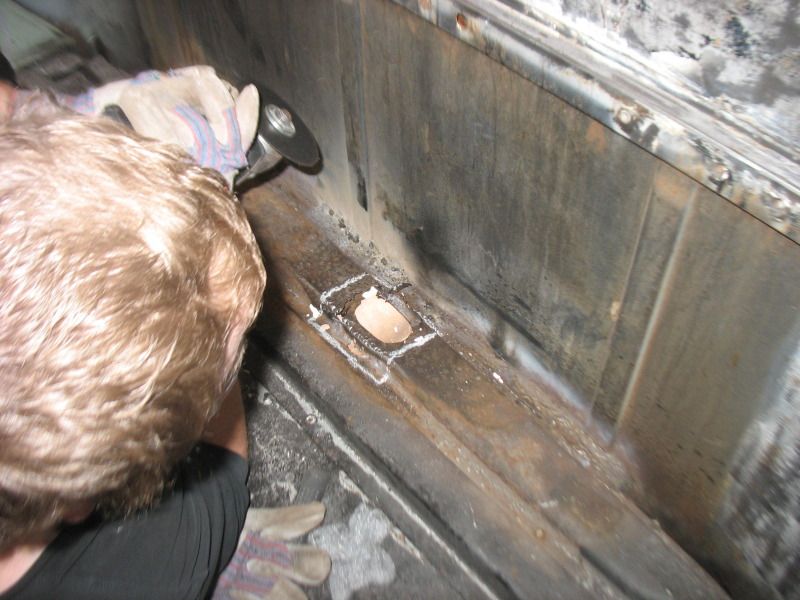


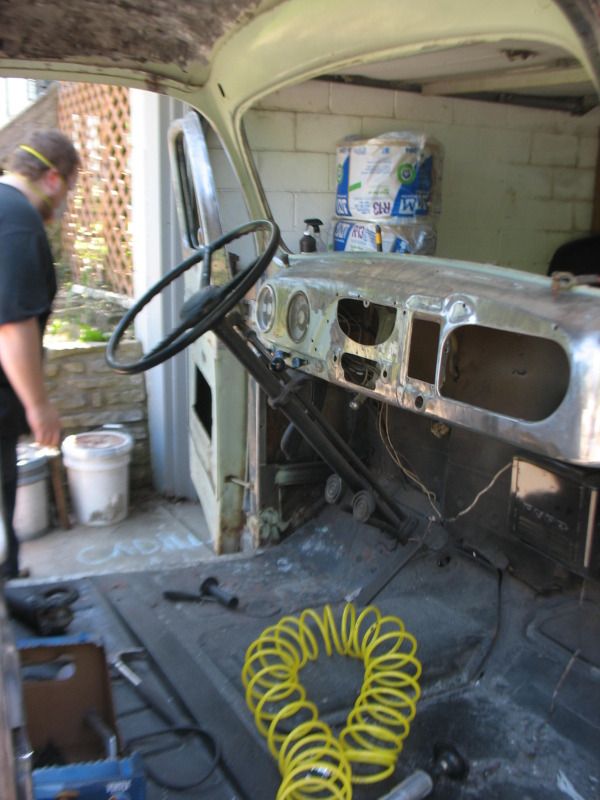
After my cousin welded that up, I got him to help strip the interior while I finished up the cleaning of the frame and under-body. (That is sarcastic enthusiasm)
What did I do to get his help???
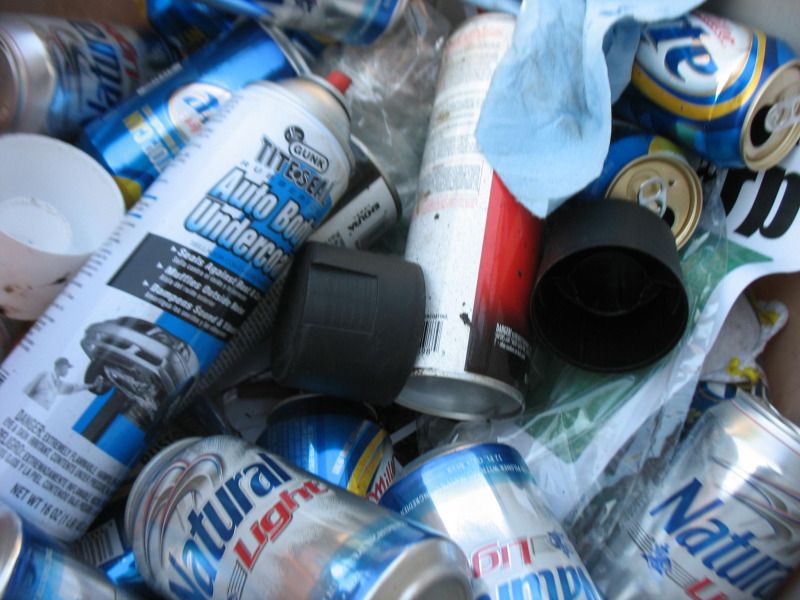
^ That is an entire garbage can full of empties... ^
Going back to the comment about the previous owner not doing to much unorthodox...


^That is a plastic garbage can, cut to fit as the glove box.. Actually worked pretty well and looked alright if you did not know better.
Anyways... with the rain I hope to get some work done this weekend, will not be posting during the week coming up, will be traveling.
To give you a better idea how far I actually am now, I took a trip to the paint store this morning. They had a sale going on a "paint kit" so I fell for it and bought the supplies.
I went with DuPont Nason Finishes... Speak now or forever hold your peace, it will remain unopened until after truck stock.
Nason SelectPrime 421-17/19 2k Urethane Primer gallon
Nason 491-17 Etch Primer quart
Base coat blend is also Nason products, their hot rod black kit gallon
Misc Supplies - file, filters, mixer, undercoat, masking supplies, etc
$200
I have both Bondo and Fiberglass filler, will be using much less than the PO but much more than I would dream about... (all steel = wet dream, just not practical when you have only a hammer and dolly)
Back to the work I have done so far -
The bottom of the stock motor.... Is there supposed to be a cover over the flywheel? I fully admit old motors are not my deal, hopefully not too stupid of a question.

Radiator and battery off


^My cousin helped out with some of the welding work while I stripped the under-body... Would have much rather been welding than laying on my back breathing rust dust. Once the dust was loose I used rust reformer than under-body coating
Stock front lower valance was in rough shape to start with... Pictures on what I did to it will follow in a few more posts.
Under tank rusted out around hole...
After my cousin welded that up, I got him to help strip the interior while I finished up the cleaning of the frame and under-body. (That is sarcastic enthusiasm)
What did I do to get his help???
^ That is an entire garbage can full of empties... ^
Going back to the comment about the previous owner not doing to much unorthodox...
^That is a plastic garbage can, cut to fit as the glove box.. Actually worked pretty well and looked alright if you did not know better.
Anyways... with the rain I hope to get some work done this weekend, will not be posting during the week coming up, will be traveling.

#25
09-01-2012, 10:11 PM
#26
09-02-2012, 05:10 AM

#27
09-02-2012, 07:53 AM
Lead Driver
Yes there is a cover for it. Here is a picture from the parts manual.
Oh, if you don't have one, I highly recommend it:
1948-56 Ford Truck Master Parts Catalog CD - HiPo Parts Garage

#29
09-02-2012, 11:49 AM
Thanks for the help on the flywheel, posted a separate thread looking for a used or new one. I could find them for the v-8 but not for the 215.
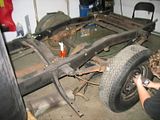
Stripped the front of the frame and coated with under-body spray.
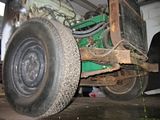
Kept focusing on the front end, changing out all of the shocks and cleaning up the suspension. I think it was overdue.

^ with both of the shocks replaced, and the frame cleaned up and the suspension appearing stout, the front end was done. I am leaving the drum brakes for now, going to worry about getting the new motor in before the brakes.
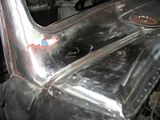
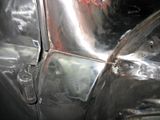
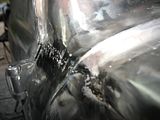
Got some rot on all 4 cab corners...
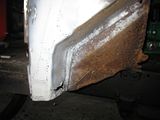
Not the prettiest repair, but it will work.

Patched in the holes for the old upper and lower hood moldings... I am only going to run the middle strip to show off the louvers.
Running boards are all stripped, not perfect, but solid. Lots of hammer work needed...

Stripped the front of the frame and coated with under-body spray.

Kept focusing on the front end, changing out all of the shocks and cleaning up the suspension. I think it was overdue.


^ with both of the shocks replaced, and the frame cleaned up and the suspension appearing stout, the front end was done. I am leaving the drum brakes for now, going to worry about getting the new motor in before the brakes.
Got some rot on all 4 cab corners...

Not the prettiest repair, but it will work.

Patched in the holes for the old upper and lower hood moldings... I am only going to run the middle strip to show off the louvers.

Running boards are all stripped, not perfect, but solid. Lots of hammer work needed...

#30
09-07-2012, 06:40 PM
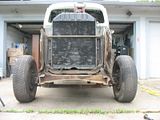
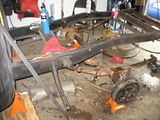
Now comes the hardest thing I had to do for the truck so far...
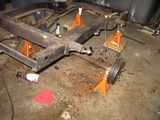
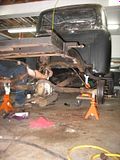
I knew I wanted to get a small drop on the rear, and I figured now was the time with the bed off. While I did this, why not rebuild the rear suspension, should be easy enough... Yea right.
Got the rear end all jacked up... Did not realize it then, but the roof of the truck was jacked up into a cross beam in the garage... Earning myself likely a few hours to straighten out....
Rear looked pretty simple, just remove the holding pin and grease fittings to slide out the bearing should fall out of the bushing...

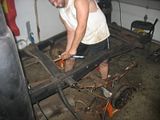
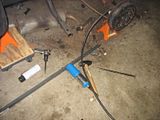
Ok, that was not easy, maybe if I dropped the weight of the axle entirely... I clamped the spring tack tight and tried to isolate the weight and cut the U-bolts with a grinder (that is me - for once a helper who helped document the build instead of telling me I was wasting my time)


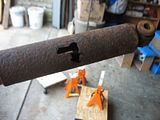
One side done... I found out the secret about drilling a hole in the front cross member to be able to punch out the bearing from this forum...

After getting the passenger done, I turned to the driver and as par for the course got out the hammer...
About 20 minutes later I was worn out and the bearing was not budging...
More spray lube to soak in over night.
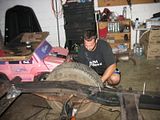
Next day I gave it a bunch more wacks and got it to budge with the help of the torch... Finally got it out after about 30 minutes straight of trading off with my cousin... I do not consider us to be small or weak people...
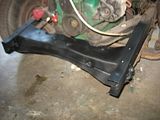
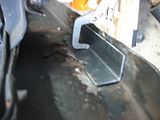
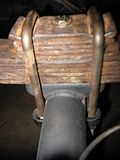
Here is what was left after cleaning up that spring mount on the front drivers side with a wire brush....
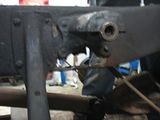
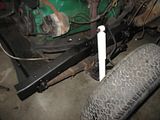
Angle on each side welded in took care of the issue. (overkill I know)
Re-Built the springs, removing a few of the lower leafs (some had cracked already) and added sections to the top to retain the overall leaf size
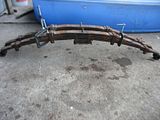
Installed a new bolt to hold everything together in addition to the new U-Bolts.

Re doing the rear suspension took an entire weekend, expected it to take the better part of 1 day.... in the end, I used about every tool I could think of... Not pictured with the lube, hammers, pry bars, torch, etc. is the air hammer, blood, sweat, and tears... this was a Bitch!
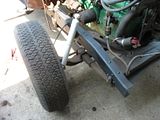
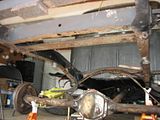
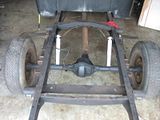
Getting the rear tires back on, Did not take pics of the rear frame all cleaned up nor after I sprayed it with under-body coating.
Of course I did the job that started it all, replacing the rear shocks at the same time
I did not paint the leaf springs, probably should have, but then again not a show truck..
I knew I wanted to get a small drop on the rear, and I figured now was the time with the bed off. While I did this, why not rebuild the rear suspension, should be easy enough... Yea right.
Got the rear end all jacked up... Did not realize it then, but the roof of the truck was jacked up into a cross beam in the garage... Earning myself likely a few hours to straighten out....

Rear looked pretty simple, just remove the holding pin and grease fittings to slide out the bearing should fall out of the bushing...

Ok, that was not easy, maybe if I dropped the weight of the axle entirely... I clamped the spring tack tight and tried to isolate the weight and cut the U-bolts with a grinder (that is me - for once a helper who helped document the build instead of telling me I was wasting my time)


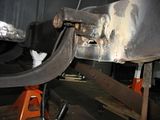
One side done... I found out the secret about drilling a hole in the front cross member to be able to punch out the bearing from this forum...


After getting the passenger done, I turned to the driver and as par for the course got out the hammer...

About 20 minutes later I was worn out and the bearing was not budging...
More spray lube to soak in over night.
Next day I gave it a bunch more wacks and got it to budge with the help of the torch... Finally got it out after about 30 minutes straight of trading off with my cousin... I do not consider us to be small or weak people...
Here is what was left after cleaning up that spring mount on the front drivers side with a wire brush....

Angle on each side welded in took care of the issue. (overkill I know)


Re-Built the springs, removing a few of the lower leafs (some had cracked already) and added sections to the top to retain the overall leaf size

Installed a new bolt to hold everything together in addition to the new U-Bolts.


Re doing the rear suspension took an entire weekend, expected it to take the better part of 1 day.... in the end, I used about every tool I could think of... Not pictured with the lube, hammers, pry bars, torch, etc. is the air hammer, blood, sweat, and tears... this was a Bitch!

Getting the rear tires back on, Did not take pics of the rear frame all cleaned up nor after I sprayed it with under-body coating.

Of course I did the job that started it all, replacing the rear shocks at the same time

I did not paint the leaf springs, probably should have, but then again not a show truck..