
Betty turns oil burner
#901
 04-14-2014, 05:12 PM


Mirrors
Nice job on the mirrors. What kind of hardware did you use for mounting them to the door? Sheet metal screws? Nut and bolt? I was thinking of doing a nut rivet insert. Clean, and you don't have to worry too much about stripping a sheet metal screw, or getting on the back side for a nut.
-Kyle
-Kyle
#902
04-14-2014, 08:46 PM
Nice job on the mirrors. What kind of hardware did you use for mounting them to the door? Sheet metal screws? Nut and bolt? I was thinking of doing a nut rivet insert. Clean, and you don't have to worry too much about stripping a sheet metal screw, or getting on the back side for a nut.
-Kyle
-Kyle
And....I used the stock rivnuts for the bottom bracket and the rest...
I used button head allen's, and acorn nuts for everything. 1/4"-20 x 1/2" for the door brackets, and 3/8"-16 x 3/4" for everything else. I know the left and top door brackets originally used T bolts I am unaware of anything other then the acorn headed bolts used from the factory for the rest of the hardware.
#903
04-15-2014, 12:19 AM
I spent a good chunk of my day shooting my bow. Bow season for turkey is coming up in a few weeks. I did make a little progress today. First I swapped out the stock airdog plug for a weatherpack like the rest of my truck. And now the airdog is 12ga wire all the way!
Next item I tackled was a small bracket for my clutch master cylinder resevior. It took a little figuring because of the angles. The plastic mounting point has a slight angle as well making the cap sit crooked. I had to work in a level cap as well.
After figuring it out and sanding. I bent this piece out of some flat 5052 aluminum.

A little semi gloss.
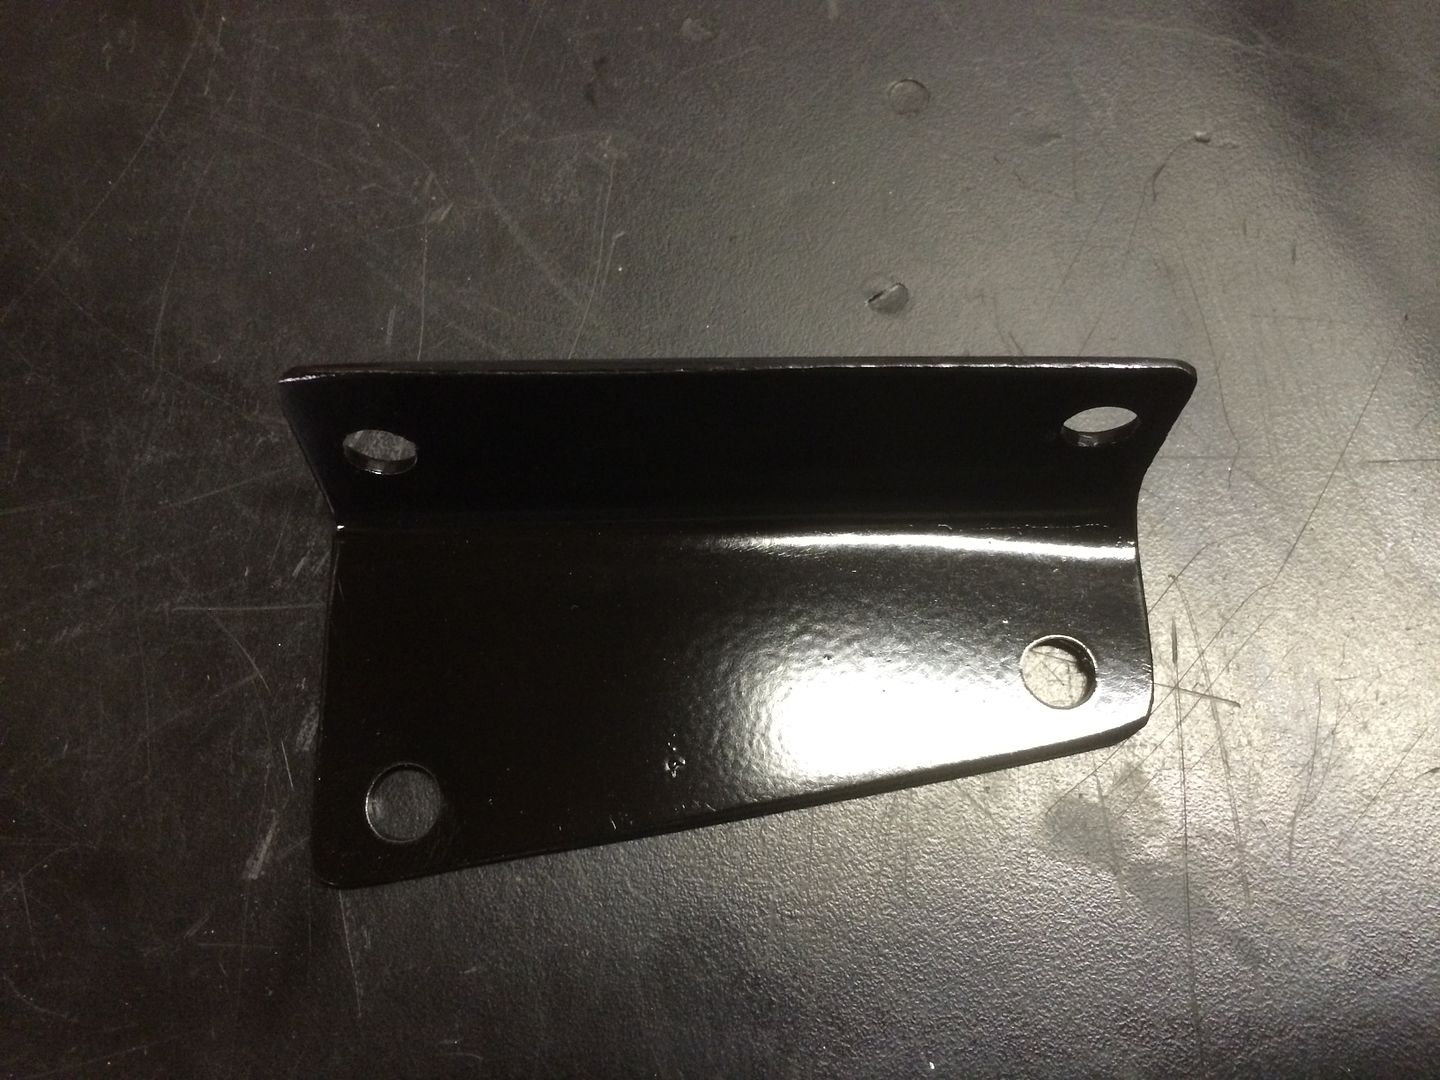
And mounted. This part was bugging me for ahwile. Glad it's done.

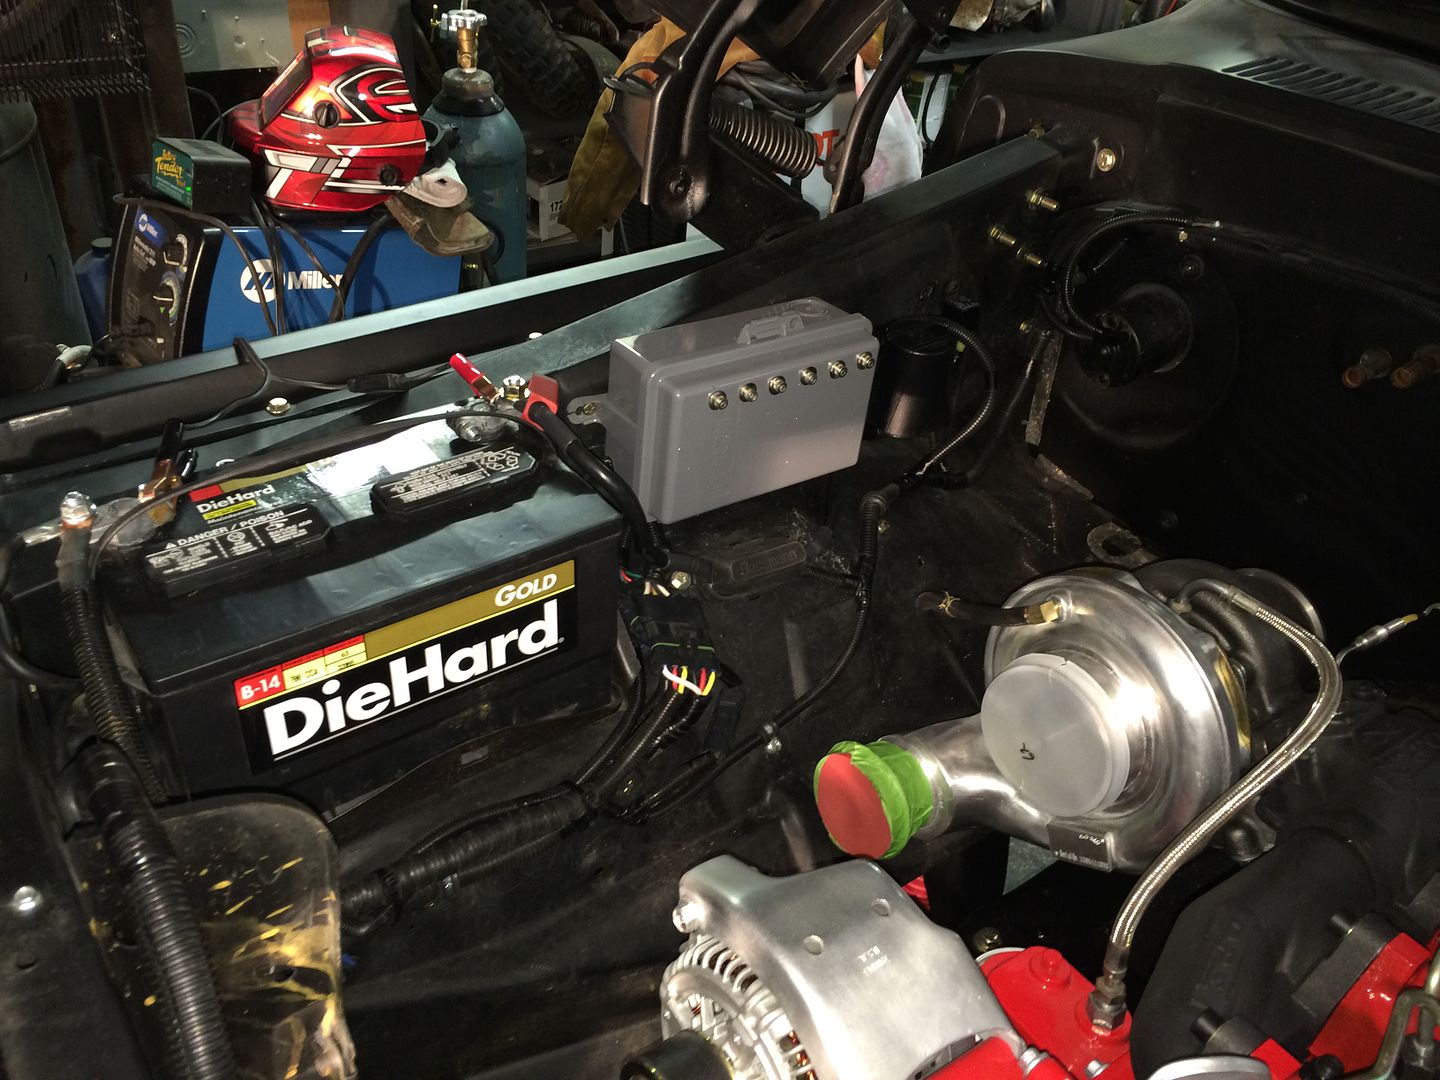
Next I finished up the passenger fender well wiring. All except the battery cables. That'll get done when I get my batteries.
That's it for today. Time to relax.
Next item I tackled was a small bracket for my clutch master cylinder resevior. It took a little figuring because of the angles. The plastic mounting point has a slight angle as well making the cap sit crooked. I had to work in a level cap as well.
After figuring it out and sanding. I bent this piece out of some flat 5052 aluminum.

A little semi gloss.

And mounted. This part was bugging me for ahwile. Glad it's done.

Next I finished up the passenger fender well wiring. All except the battery cables. That'll get done when I get my batteries.


That's it for today. Time to relax.
#904
04-15-2014, 05:27 AM
Elder User
All those diesel forums make Airdog out to be the best thing ever. At least, I think they do, as some of those posts are pretty damn hard to read. For a hideously priced fluid pump with a goofy name, I guess I tried and couldn't understand the hype, but I know they are pretty damn popular.
Anyhow, I'm a little disappointed in what you got. The wiring, and ESPECIALLY the splice(s) you mentioned sounds like something that should come on a set of Autozone add on fog lights.
I'm glad you fixed the issues. It makes you wonder though, if that's what they put where you could see it and assume that it's OK, I wonder what they hid inside the pump...
#905
04-15-2014, 01:38 PM
All those diesel forums make Airdog out to be the best thing ever. At least, I think they do, as some of those posts are pretty damn hard to read. For a hideously priced fluid pump with a goofy name, I guess I tried and couldn't understand the hype, but I know they are pretty damn popular.
Anyhow, I'm a little disappointed in what you got. The wiring, and ESPECIALLY the splice(s) you mentioned sounds like something that should come on a set of Autozone add on fog lights.
I'm glad you fixed the issues. It makes you wonder though, if that's what they put where you could see it and assume that it's OK, I wonder what they hid inside the pump...
Anyhow, I'm a little disappointed in what you got. The wiring, and ESPECIALLY the splice(s) you mentioned sounds like something that should come on a set of Autozone add on fog lights.
I'm glad you fixed the issues. It makes you wonder though, if that's what they put where you could see it and assume that it's OK, I wonder what they hid inside the pump...
Basically it's a higher filtration rate filter that also removes the air in the fuel.
For what it's worth the pump itself is nicely machined. I did not take the pump apart but did take the filters out and look inside. Everything is well machined with no swarf on the edge of the cuts or anything like that.
As far as the harness goes, I would not of found those 3 way splices unless I took the split loom off of the harness. If they correct that one issue with the harness I'd call it good. The wire, relay and plug in connectors are of excellent quality.
For the price I'd say it could be a little cheaper, but then again I bet they have a couple million dollar CNC machine making the pumps themselves.
#906
04-15-2014, 02:12 PM
#907
04-20-2014, 10:13 PM
Well, another small update! I am officially out of parts until Thursday. I have a new downpipe coming then and a handful of small things.
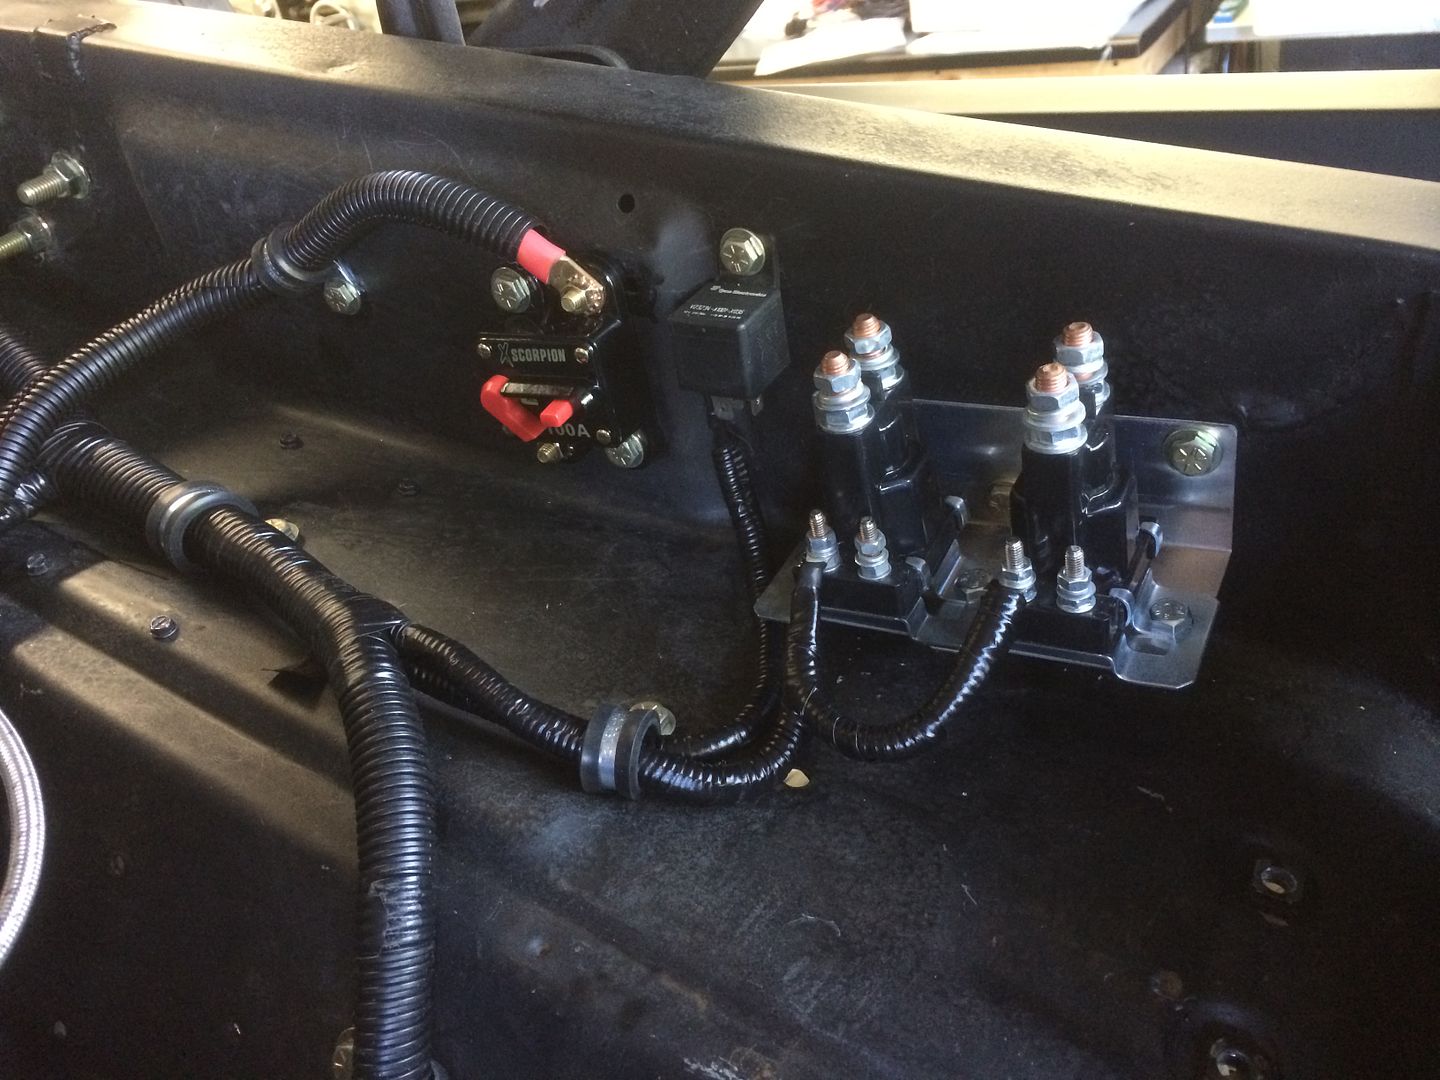
The under hood wiring is done barring the battery side of things. I have my grid heater relays in and the wires from the cab on. Same with the amp breaker.
Grid heater relays and amp breaker.
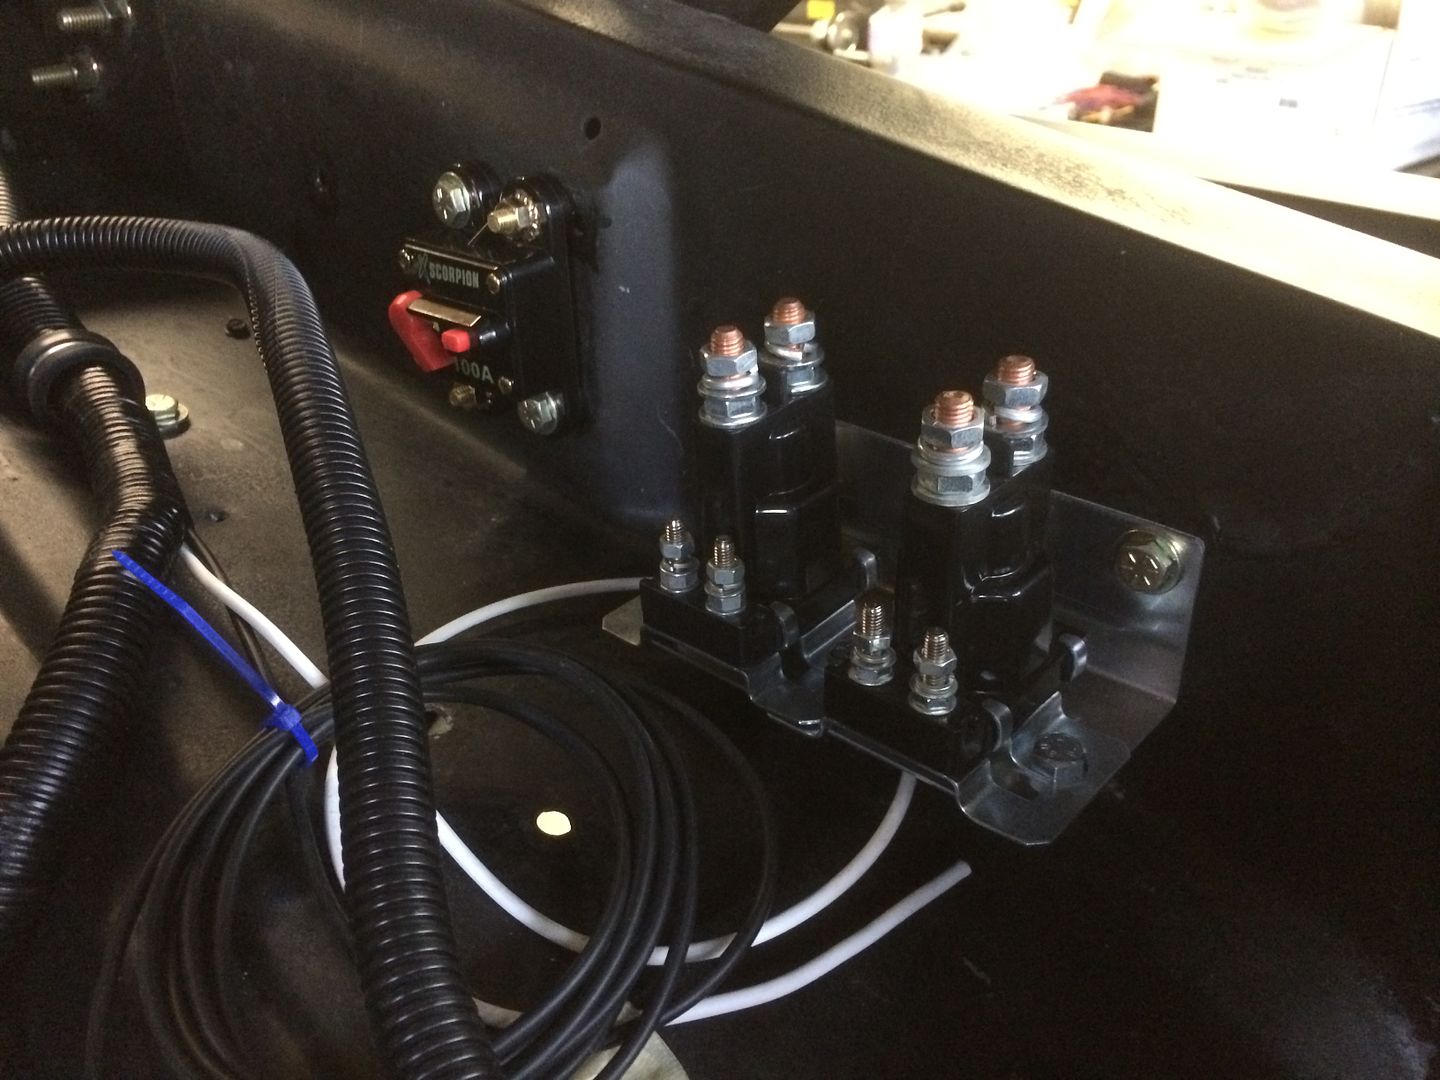
And wiring on from the cab. I still need some 6ga to run to the grid heaters and the batteries to run the fuseable links. The lone relay in between is for future off road lights.
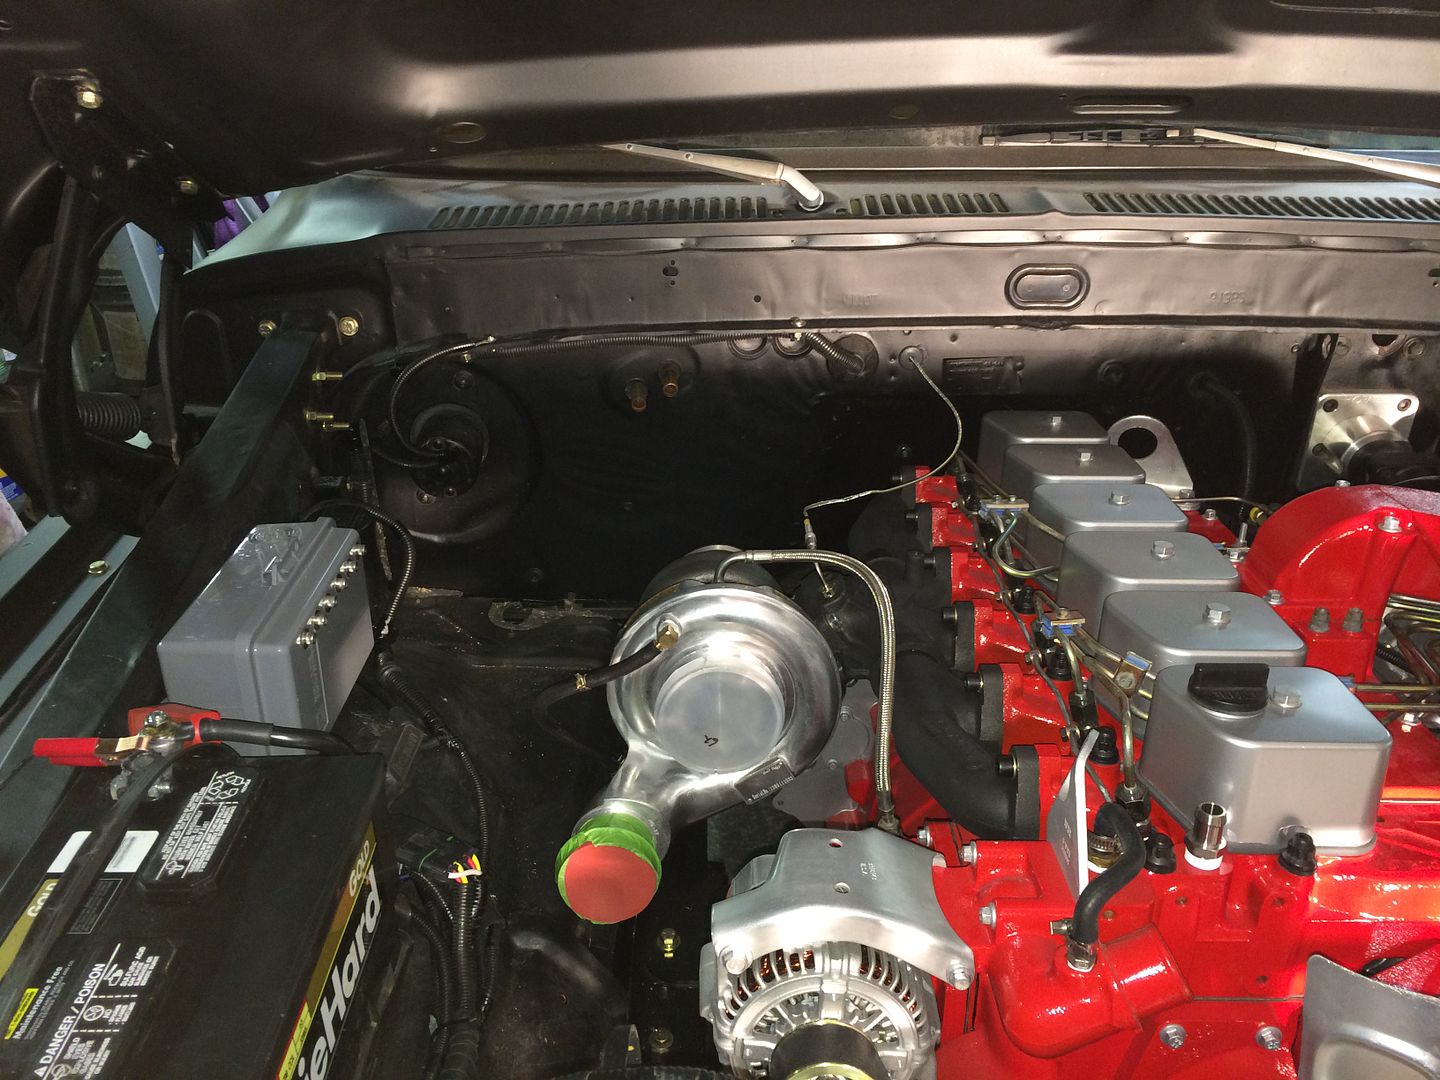
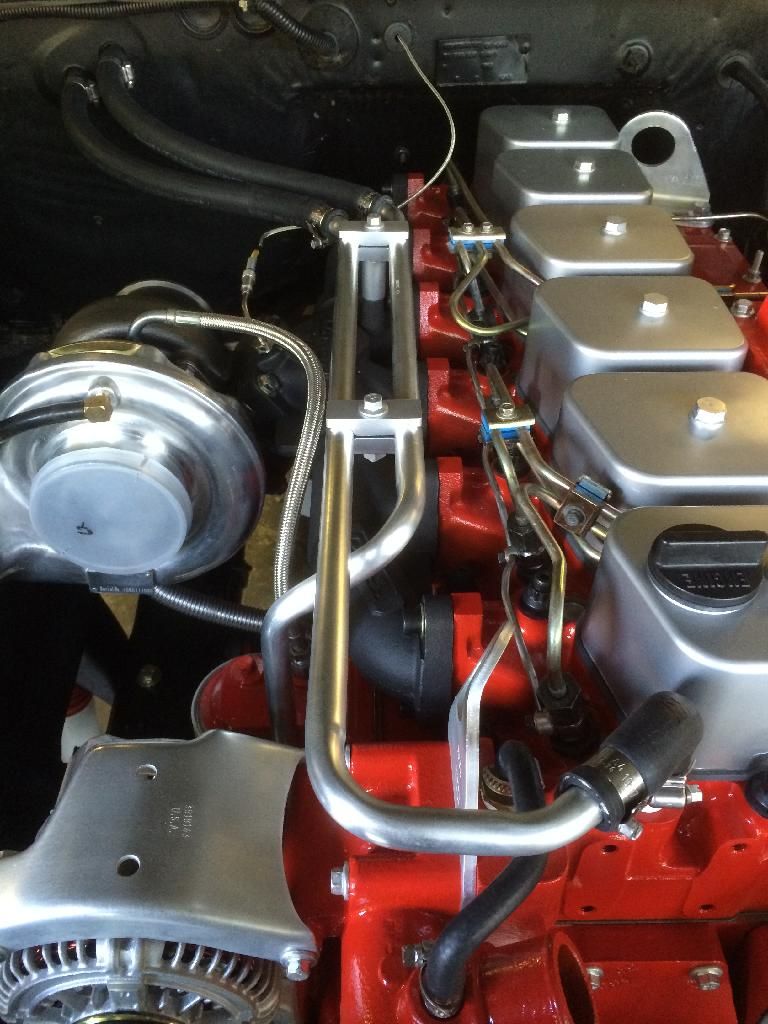
Next I finally got the flexible turbo drain pipe and have it installed. That thing was a major pain. I still had to crush down the tubing a little to clear the waste gate rod. You can just see it below the turbo.
I also mounted up the heater piping, all buttoned up with a handful of aba hose clamps. These are by far the best small hose clamps on the market. They don't have the slots cut in them that cut into your hoses and nice rolled edges. They also have an actual torque setting.
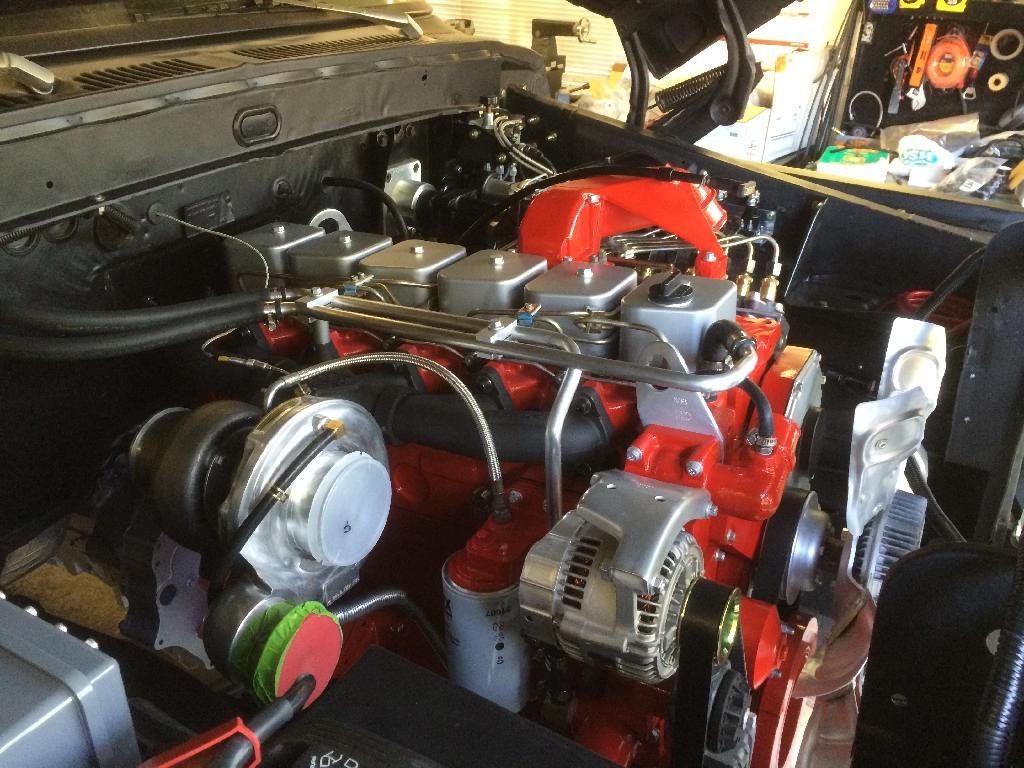
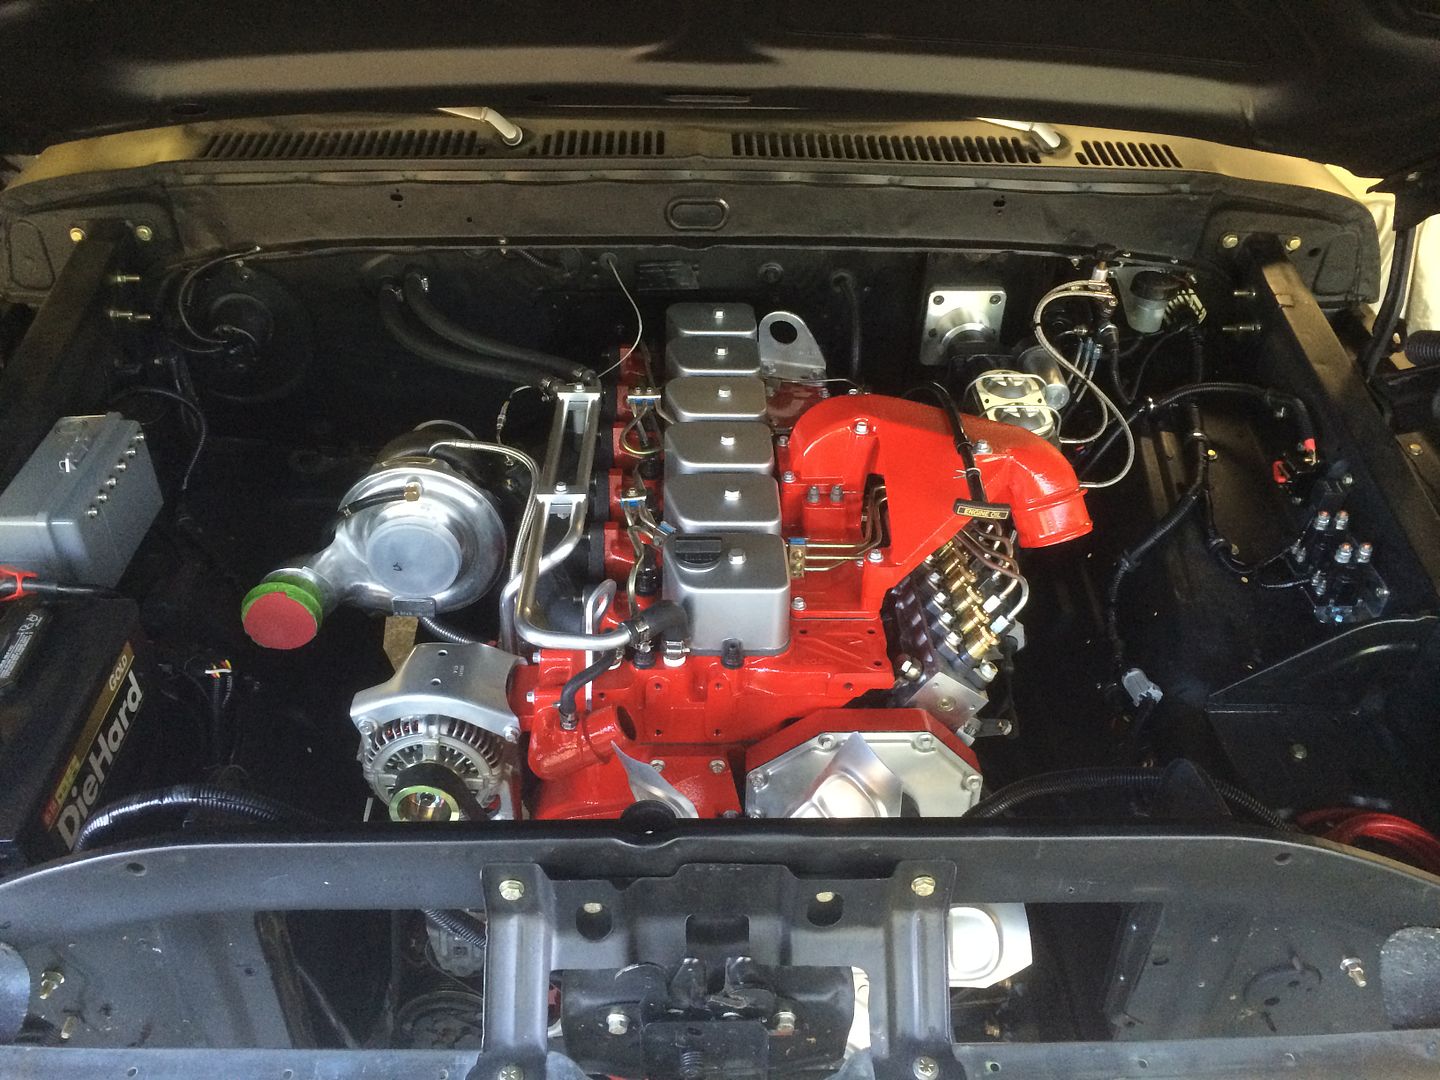
As soon as I get my radiator ordered up I can actually mount up the intercooler. I hope to have my radiator in hand by the end of next week.
I also have some major rear end construction planned soon. It's time to take the bed off, make some new crossmembers, move some shock mounts, and fab my fuel tank.
Until next update.
The under hood wiring is done barring the battery side of things. I have my grid heater relays in and the wires from the cab on. Same with the amp breaker.
Grid heater relays and amp breaker.

And wiring on from the cab. I still need some 6ga to run to the grid heaters and the batteries to run the fuseable links. The lone relay in between is for future off road lights.

Next I finally got the flexible turbo drain pipe and have it installed. That thing was a major pain. I still had to crush down the tubing a little to clear the waste gate rod. You can just see it below the turbo.
I also mounted up the heater piping, all buttoned up with a handful of aba hose clamps. These are by far the best small hose clamps on the market. They don't have the slots cut in them that cut into your hoses and nice rolled edges. They also have an actual torque setting.


As soon as I get my radiator ordered up I can actually mount up the intercooler. I hope to have my radiator in hand by the end of next week.
I also have some major rear end construction planned soon. It's time to take the bed off, make some new crossmembers, move some shock mounts, and fab my fuel tank.
Until next update.
#908
04-20-2014, 10:45 PM
#909
04-20-2014, 11:20 PM
Thank you.
One of these days I'll build a 4bt too! The big parts are the easy ones, it's all the small stuff that bites you in the rear.
#910
04-21-2014, 08:15 AM
You got that right!! Definitely not my first swap/build......my first 4BT though so it will all be a new ball game! Most of my previous builds were "pre internet" (giving away my age now!) The internet is a good tool to get ideas. Forums like this have made things much easier. It used to be all you had to go on was what youd seen in Hot Rod magazine, what youd seen on the street, or what youd envisioned in your little pea brain!!!
#912
04-21-2014, 02:39 PM
You got that right!! Definitely not my first swap/build......my first 4BT though so it will all be a new ball game! Most of my previous builds were "pre internet" (giving away my age now!) The internet is a good tool to get ideas. Forums like this have made things much easier. It used to be all you had to go on was what youd seen in Hot Rod magazine, what youd seen on the street, or what youd envisioned in your little pea brain!!!
Thank you.
#913
04-21-2014, 03:30 PM

Keep up the good work. BTW, I like the CAD plating, but I don't have the capability to blast it down myself. The cleaning up of the parts drives the cost up considerably at the plating company.
#914
04-21-2014, 04:18 PM
Looking so very good. I'm jealous of all of the fab skills for sure. It has all been done very well. I just got my CC to my house. its been out at my dad's farm for the last couple of years. I got distracted with a 4bt project. Anyway, I've got the hydroboost bracket off of the chip truck that I extracted my engine from. It is made on a 90 degree angel to the fire wall. I don't know if its going to interfere with my engine yet or not, but it may be a point of consideration for some.
Keep up the good work. BTW, I like the CAD plating, but I don't have the capability to blast it down myself. The cleaning up of the parts drives the cost up considerably at the plating company.
Time to pick up a used blasting cabinet. I've used mine so much it's paid for itself. You'll use it a ton restoring that crew, believe me!
