
1976 supercab body swap
#1
 04-17-2012, 06:32 PM

Join Date: Jan 2012
Location: Oregon Coast
Posts: 30
Likes: 0
Received 0 Likes
on
0 Posts
1976 supercab body swap
I'm building a 1976 F150. i have a 91 Supercab frame with a 460 4x4 auto transmission and an 8ft bed. The original 76 is a supercab long bed also, 390 2wd auto trans and typical cab rust. I have been working on it for about 6 months. the 91 originall was purchased for $200 to use as parts for my 87 bronco didnt really consider trying to fix it since it was totaled in wreck. the front passenger side was ruined but i got a crazy idea on day and just started fooling around with it and low and behold it runs even on the year and a half old gas. any how i will try to get some pictures on here this after noon some time.
Currently i have both trucks stripped and the cab re mounted on the new frame. and the engine running i will fill in the back story later.
Currently i have both trucks stripped and the cab re mounted on the new frame. and the engine running i will fill in the back story later.
#4
04-17-2012, 10:55 PM
Join Date: Jan 2012
Location: Oregon Coast
Posts: 30
Likes: 0
Received 0 Likes
on
0 Posts
 [/IMG]
#5
04-17-2012, 11:02 PM
Join Date: Jan 2012
Location: Oregon Coast
Posts: 30
Likes: 0
Received 0 Likes
on
0 Posts
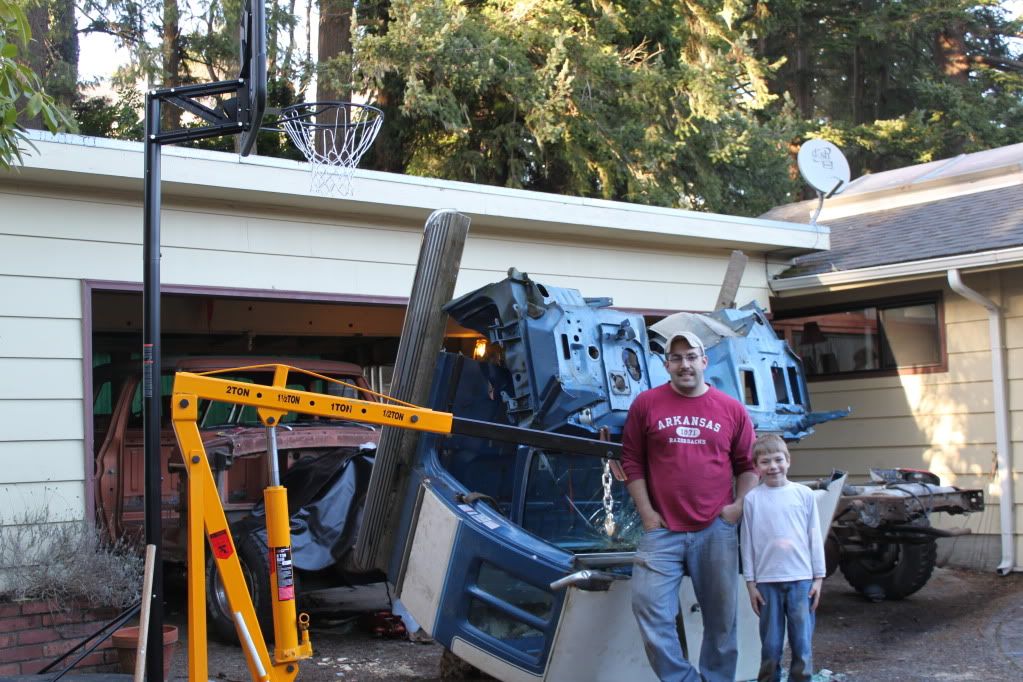
and then when we got it off we dropped it. I already had plans to scrap the cabfor $ so i had cut it in half, minus some flat sheet metal to make some patches on my 76 cab. also used the interor as a donor for my bronco. Any how i cut everything except the heatshields and some of the reinforcement for the floor pan was not cut all the way through. when we got it off the weight shifted and the cab folded in half and fell. Was exciting at the time.
 [/IMG]
[/IMG]
#6
04-17-2012, 11:16 PM
Join Date: Jan 2012
Location: Oregon Coast
Posts: 30
Likes: 0
Received 0 Likes
on
0 Posts
frame with cab on after a phosforic acid wash and a coat of enamel rustoleum. i know could of used rust bullet or por 15 but cheap is the name of the game here. i had to move the cab forward after this was taken i dont have a ton of pictures but i will take some as i go.
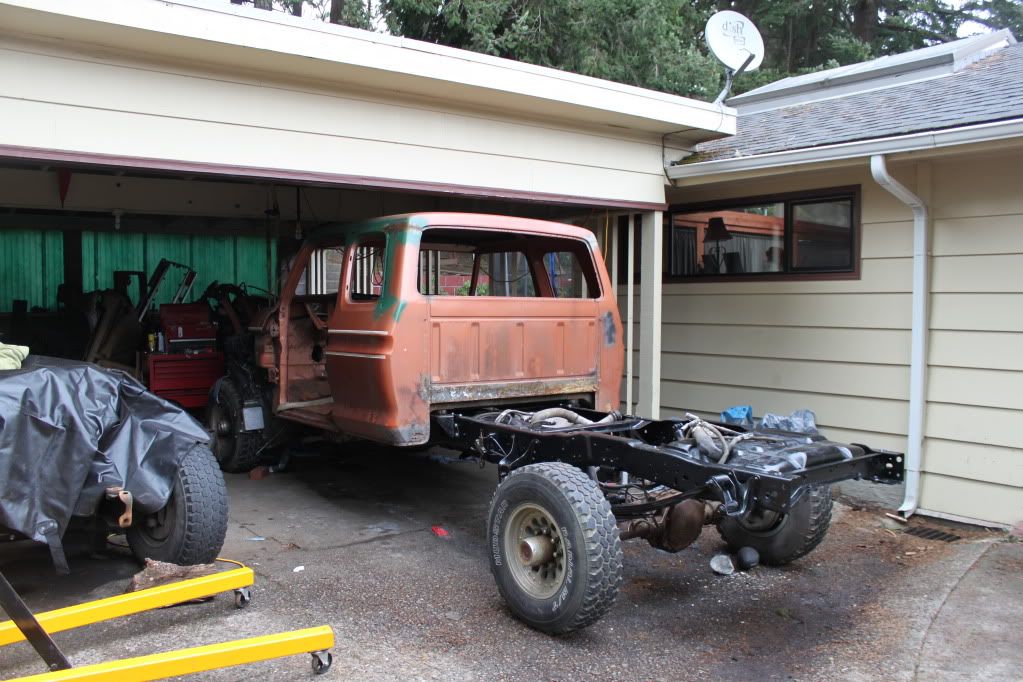
this one is a picture from the front dont know if you can tell there's alot of space between the engine and cab. the cab had to come forward 6in, more on that later.
 [/IMG]
i used the stock 91 front cab mounts so if you're planning on doing that, it wont work. or at least i didnt have the skill to make it work. i was just going to leave it and stretch the fender but then i would have to stretch the hood and as you can see from the pics my body work skills leave something to be desired. I'm getting help with that but, like daddy always said you learn by doin and you wont ever get it done if you dont get started. i'll take some more pictures tomorrow. i cut the drip rails off they were bad rusted and there was rust behind them dont plan on putting them back on either i found a truck without them and i like the look. long way to go before that though.
this one is a picture from the front dont know if you can tell there's alot of space between the engine and cab. the cab had to come forward 6in, more on that later.
[/IMG]i used the stock 91 front cab mounts so if you're planning on doing that, it wont work. or at least i didnt have the skill to make it work. i was just going to leave it and stretch the fender but then i would have to stretch the hood and as you can see from the pics my body work skills leave something to be desired. I'm getting help with that but, like daddy always said you learn by doin and you wont ever get it done if you dont get started. i'll take some more pictures tomorrow. i cut the drip rails off they were bad rusted and there was rust behind them dont plan on putting them back on either i found a truck without them and i like the look. long way to go before that though.
Last edited by dentside90; 04-17-2012 at 11:27 PM. Reason: picture didnt post
#7
04-17-2012, 11:25 PM
Join Date: Jan 2012
Location: Oregon Coast
Posts: 30
Likes: 0
Received 0 Likes
on
0 Posts
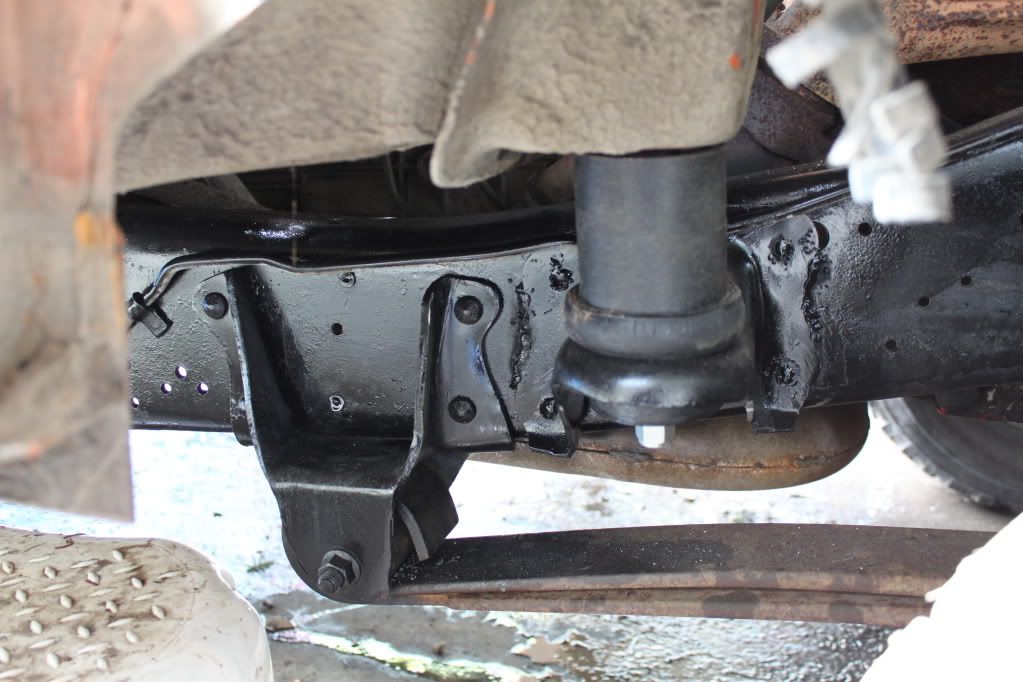
Also in that picture you can see i did not build new cab mounts i just put 3in lift blocks on the front mounts the rear mounts on the 76 are wider than the 91 so i used the rear mounts off of the 76. it all sits even when you get it mounted back up and i have enough lift blocks and hardware left to put a 3in body lift on my bronco. Score!!!!
If you're going to do something like this do some homework and measuring. wheel base is the most important thing the rest can be adjusted for. also be prepared to have nothing go as planned but plan anhow. and when you are tearing something down take it apart without tearing it up you'd be suprised how much can be reused and save some money. Last but most important be patient this stuff takes time and rushing will cost time and money down the road. Honestly though most of that crap is just my opinion so take it for what its worth.
If you're going to do something like this do some homework and measuring. wheel base is the most important thing the rest can be adjusted for. also be prepared to have nothing go as planned but plan anhow. and when you are tearing something down take it apart without tearing it up you'd be suprised how much can be reused and save some money. Last but most important be patient this stuff takes time and rushing will cost time and money down the road. Honestly though most of that crap is just my opinion so take it for what its worth.
Trending Topics
#8
04-18-2012, 11:02 AM
Posting Guru
Join Date: Feb 2011
Location: sacramento
Posts: 1,128
Likes: 0
Received 0 Likes
on
0 Posts
#10
04-18-2012, 07:00 PM
Join Date: Jan 2012
Location: Oregon Coast
Posts: 30
Likes: 0
Received 0 Likes
on
0 Posts
move the cab foward 6in. i figure its easier to cut holes in the firewall and then patch it up afterward especiall with my sheet metal skills or lack there of.
I worked on the smog pump delete today im going to try to do it cheap if it doesnt work no harm i was scrapping the egr stuff any how. most of it was crushed in the wreck. dont want to start a debat about why or why not to i've seen that get pretty hjeated in the 90's forum. Any how i gutted the smog pump basically just trying to keep the pully and pump without pumping air. if you take off the smog pump and remove the back there are three fins inside that rotate in and out similar to a rotary engine if your familiar with that. you can cut the fins and then remove them through the back. becareful not to booger up your bearings. i'll post pics in a min. once you get that reoved just greas the bearings good and put it back together and reinstall.shouldnt pump air and all of the inlets and outlets can be plugged to keep trash out. not sure if thats been done or how it will work but if it does i saved $80 on a delet bracked or a few dollars on a shorter belt. if it doesnt work then i'll do one of the forementioned options and oh well.
I worked on the smog pump delete today im going to try to do it cheap if it doesnt work no harm i was scrapping the egr stuff any how. most of it was crushed in the wreck. dont want to start a debat about why or why not to i've seen that get pretty hjeated in the 90's forum. Any how i gutted the smog pump basically just trying to keep the pully and pump without pumping air. if you take off the smog pump and remove the back there are three fins inside that rotate in and out similar to a rotary engine if your familiar with that. you can cut the fins and then remove them through the back. becareful not to booger up your bearings. i'll post pics in a min. once you get that reoved just greas the bearings good and put it back together and reinstall.shouldnt pump air and all of the inlets and outlets can be plugged to keep trash out. not sure if thats been done or how it will work but if it does i saved $80 on a delet bracked or a few dollars on a shorter belt. if it doesnt work then i'll do one of the forementioned options and oh well.
#11
04-18-2012, 07:12 PM
Join Date: Jan 2012
Location: Oregon Coast
Posts: 30
Likes: 0
Received 0 Likes
on
0 Posts
 [/IMG]
believe it or not it runs like that.
 [/IMG]
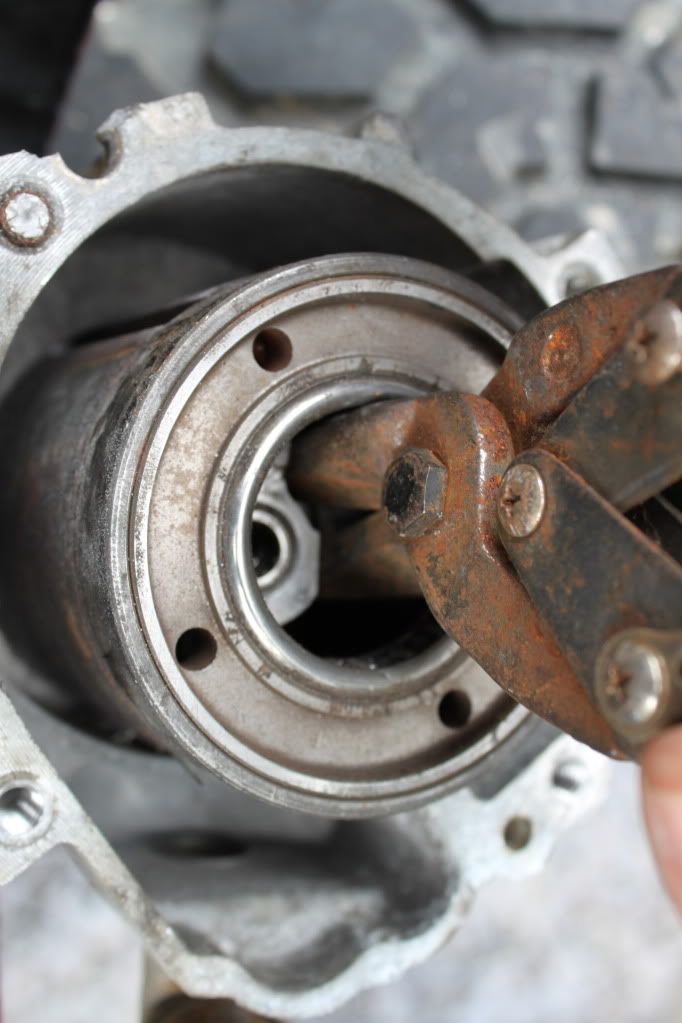
this is the inside of the smog pump you can see one of the fins toward the top i think theyre fiber glass i just cut them with a pair of tin snips and a hammer and chisel.
 [/IMG]
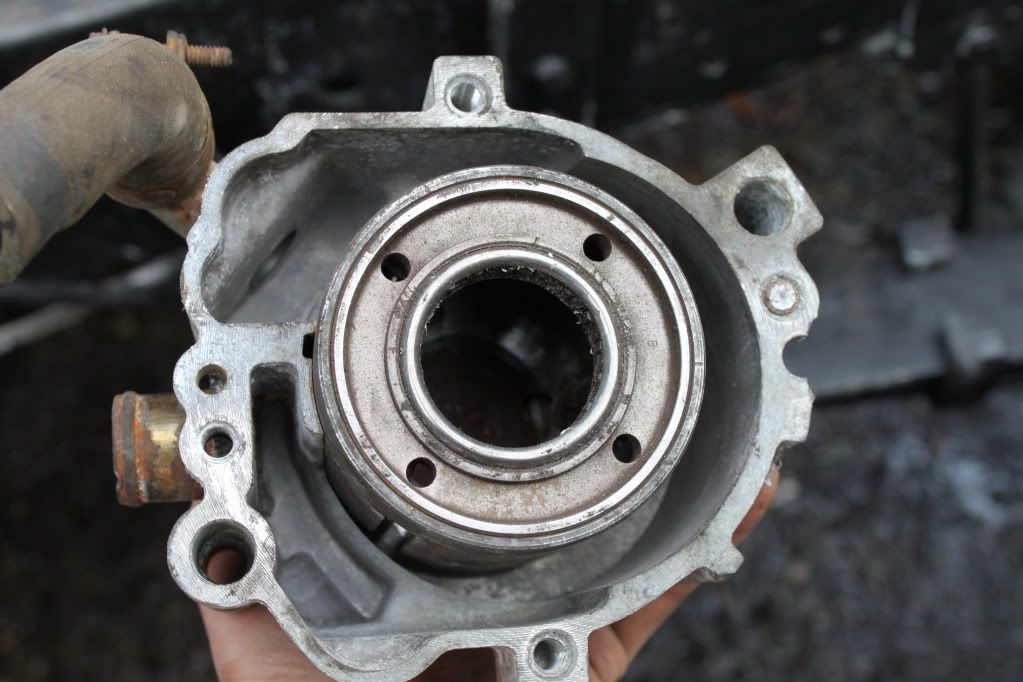
once i got the pins cut around the main drum part i had to cut some ore off them to fit the through the bearing in the rear. it makes sense when youre looking at it, i know it doesnt sound like it.
 [/IMG]
once everything is removed grease the bearing and replace the back cap all the outlets and inlets and it should work as a smog pump delete (pump).
what do you think. and no offense ment im not intrested in hearing why i shouldn't do this.
and im not worried about the check engine light im just going to pull the bulb

#12
04-18-2012, 07:19 PM
Lead Driver
Personally I'd just remove the pump & go to the shorter belt. I think of it as 1 less thing to go wrong. Good write-up/pics on how to gut it though.
As for the cab - that's a bit more cutting than I thought. Is that with the cab lifted like it would have a body lift in there - or semi set down on the frame like no body lift?
As for the cab - that's a bit more cutting than I thought. Is that with the cab lifted like it would have a body lift in there - or semi set down on the frame like no body lift?
#13
04-18-2012, 07:53 PM
Join Date: Jan 2012
Location: Oregon Coast
Posts: 30
Likes: 0
Received 0 Likes
on
0 Posts
#14
04-18-2012, 11:01 PM
Join Date: Jan 2012
Location: Oregon Coast
Posts: 30
Likes: 0
Received 0 Likes
on
0 Posts
Personally I'd just remove the pump & go to the shorter belt. I think of it as 1 less thing to go wrong. Good write-up/pics on how to gut it though.
As for the cab - that's a bit more cutting than I thought. Is that with the cab lifted like it would have a body lift in there - or semi set down on the frame like no body lift?
As for the cab - that's a bit more cutting than I thought. Is that with the cab lifted like it would have a body lift in there - or semi set down on the frame like no body lift?
 [/IMG]
here on the front cab mounts its3in between the cab and frame. the rear mounts only have one inch of clearance between the cab and frame. not sure how other frames are but the 76 is flat from bumper toabout half way through the super cab and it slopes up to the back of the cab. then it levels off again. the 91 is high up in the front and slopes down right after the engine and then starts up again toward the back of the cab and levels off again at the rear of the cab/front of the bed. also to note the 76 is something like 30in on the inside of the frame between the radiator support mounts. the 91 is like 36 i think i can measure if any one needs to know. It is definately a tight fit with the 460 and i know it looks like i just hacked it to pieces but i didnt cut any more than i had to. Should be easy to fix im going to cut the trans tunnel out of the piece of the 91 cab that i saved for parts and make a cap and just sheetmetal screw it for future access. sorry for being long winded.
#15
04-19-2012, 02:11 PM
Lead Driver

Looks like a lot more than I'd want to cut. hmmmm
And thanks for the description on where the frames raise up, etc. That is about what I thought but wasn't certain.