1970 F250 4x4 Cummins Conversion Build Thread - Lots of Pics!
#16
 04-15-2012, 11:05 PM

Join Date: Oct 2011
Location: Willard
Posts: 207
Likes: 0
Received 0 Likes
on
0 Posts
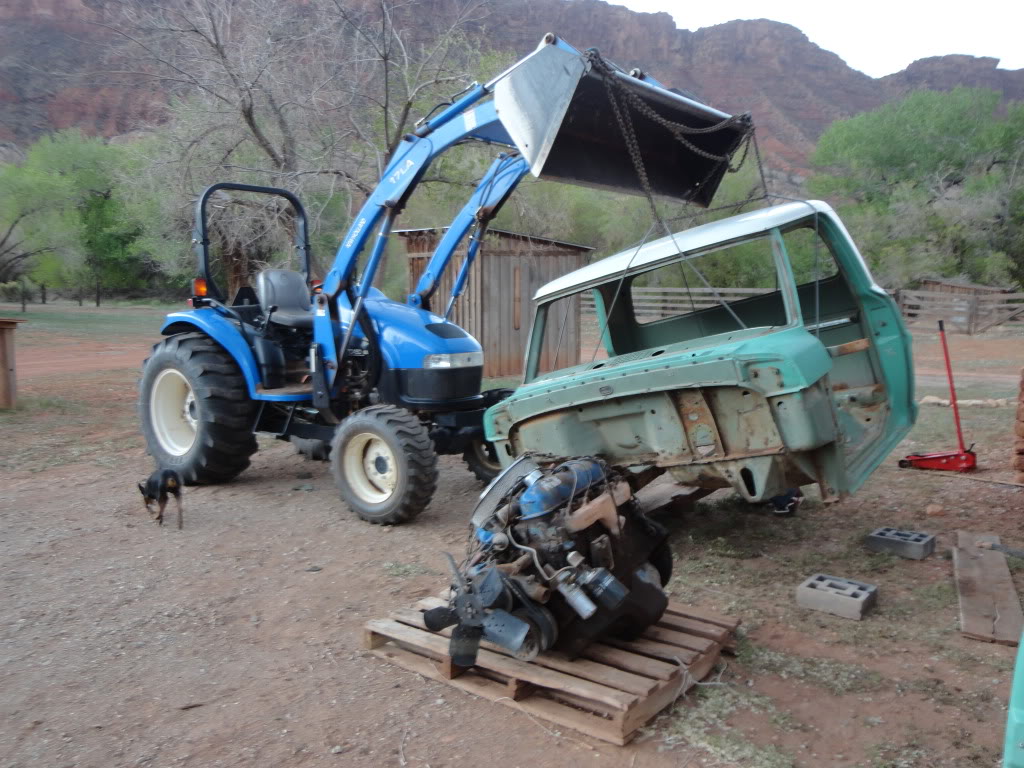
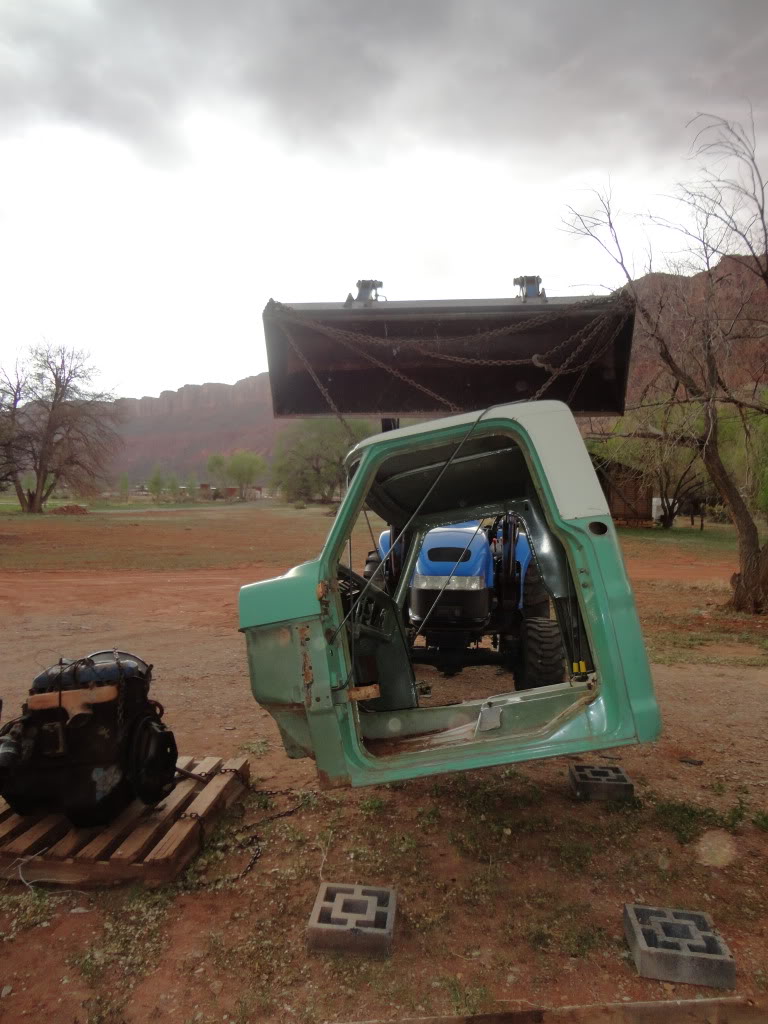
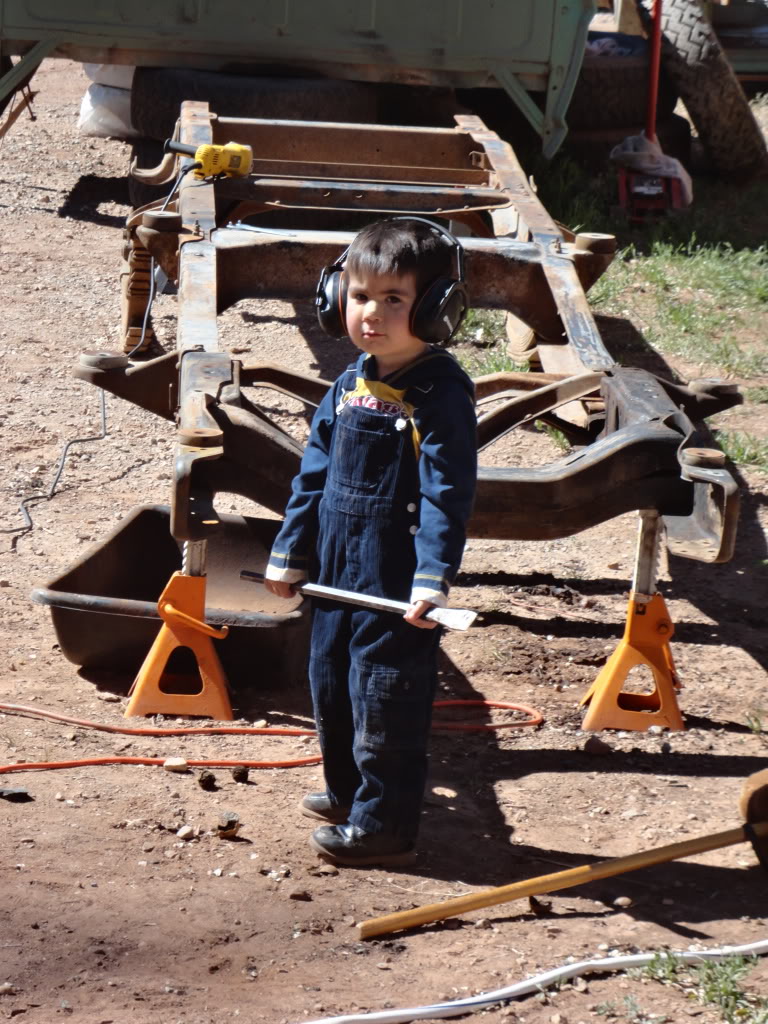
Did some heavy lifting today 
 Audios four speed!
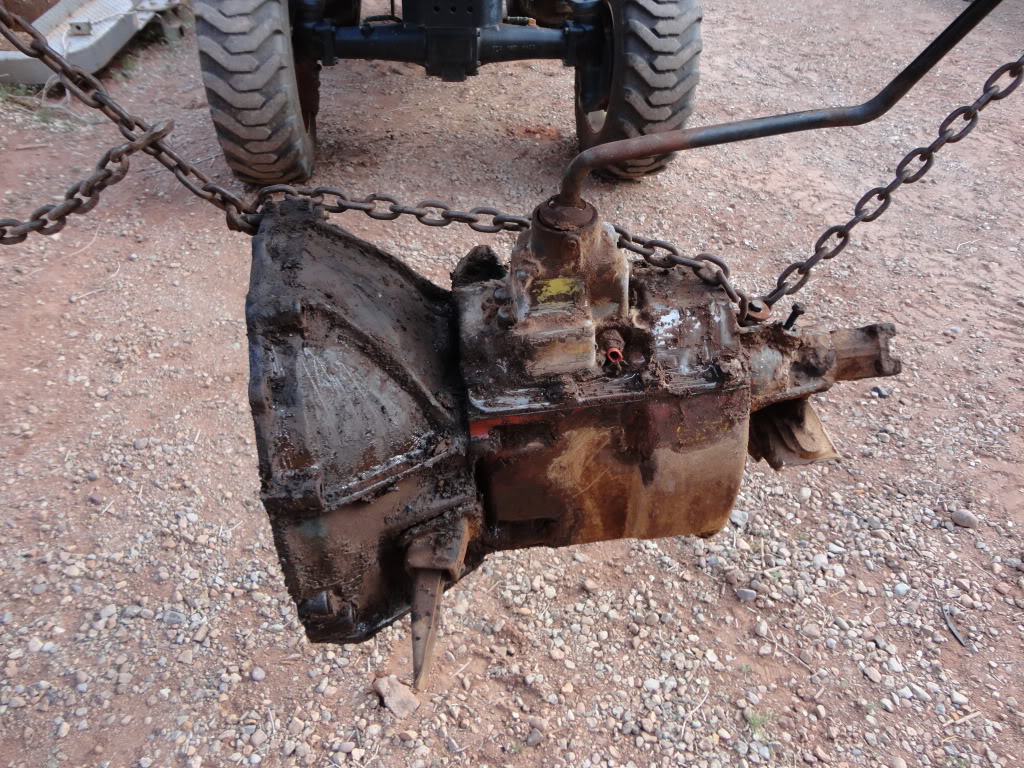
The Dana 24 transfer case isn't going to cut it. I will be picking up a divorced NP 205 from a 1973-1977 Ford in the next few months. Luckily the pick and pulls that I frequent don't have a shortage of these old Ford trucks. The divorced NP 205 should be easy to connect to the Dodge trans to keep things simple. It almost looks like the stock cross member from the Dana 24 will bolt right to the NP 205. I guess I will find out here shortly.
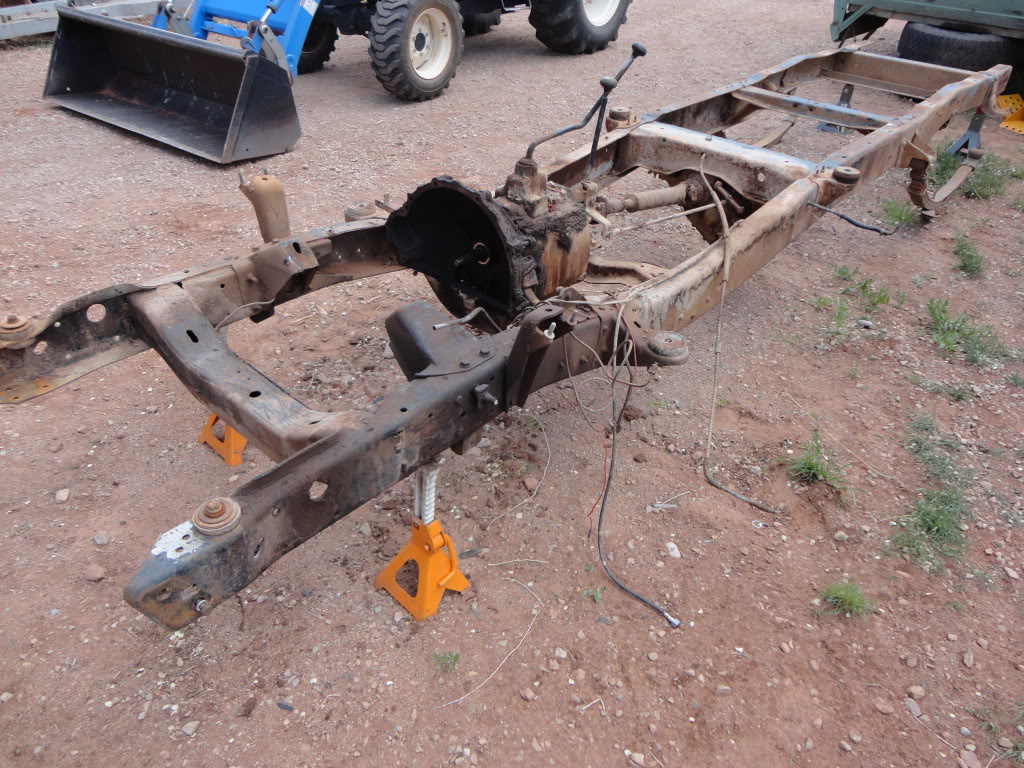
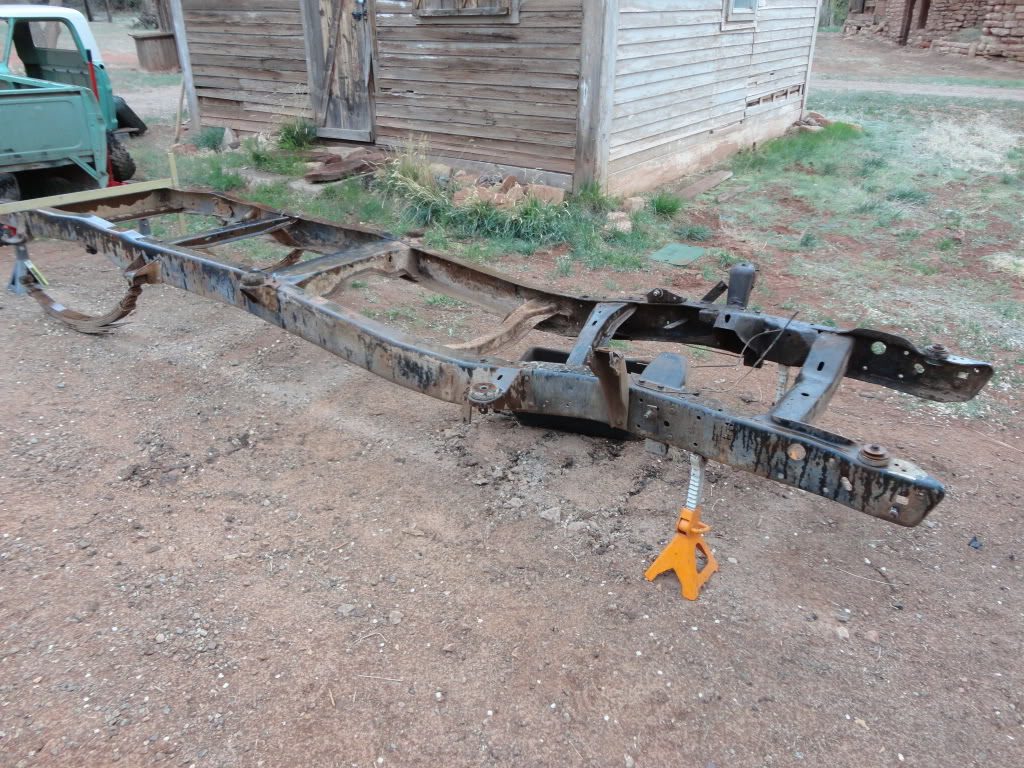
Frame is naked and ready to be scraped and blasted. I will probably blast it with a pressure steamer and coat it with some frame paint from eastwood.
I got a quote from the line-x guy to spray the interior of the truck (firewall, floor, halfway up the rear). He quoted me $400 to do the job. I also talked to the Rinoliner guy but he quoted me $600 for the same job. I guess I know where I am going.
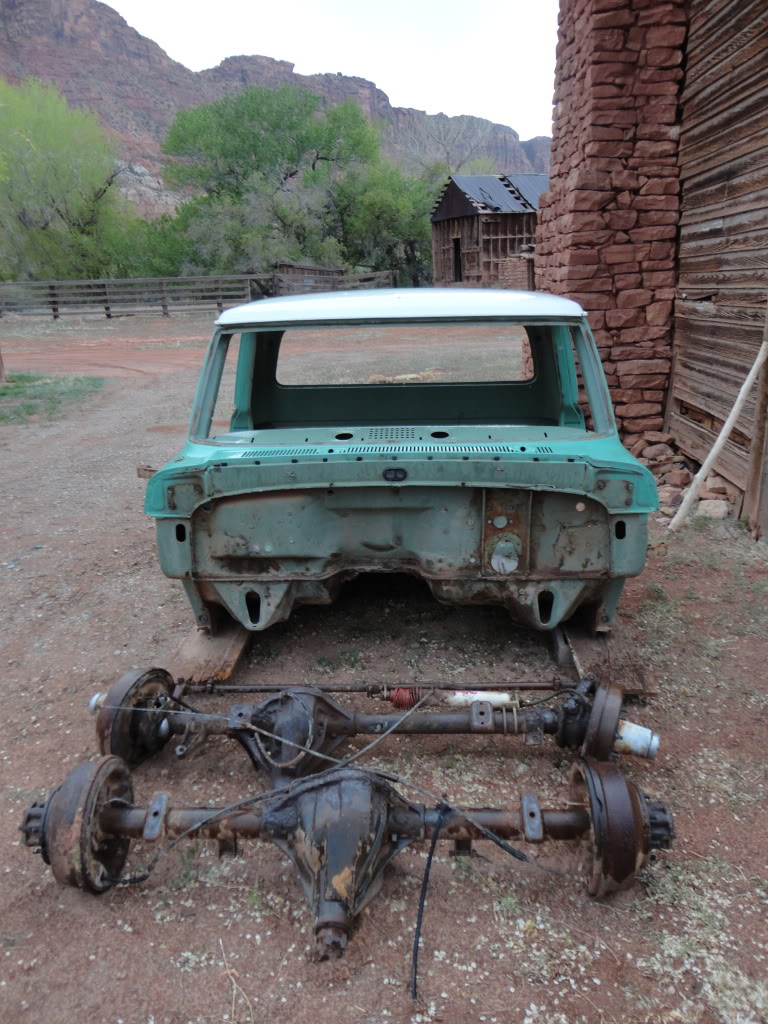
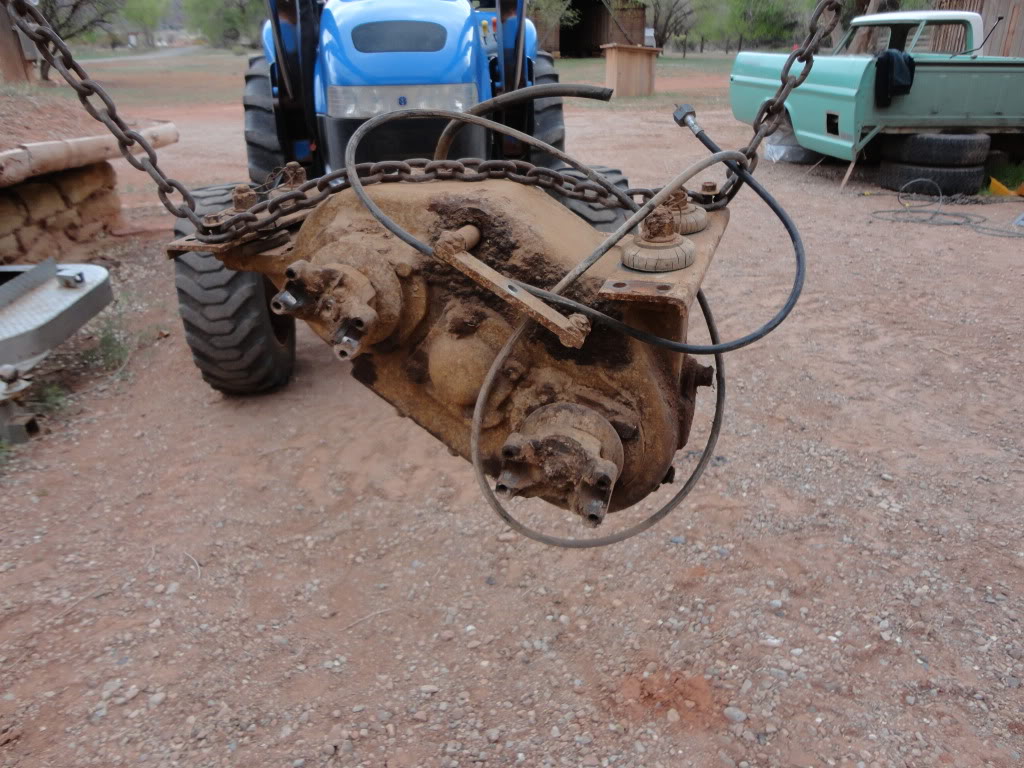
I also got the 14 bolt rear axle. I should be doing a tutorial on rebuilding the 14 bolt axle here shortly. A guy that lives down the street is a 4x4 axle specialist and is going to walk me through the process.
I am still working on a donner Dodge. I have my eyes on one, but we will see how that works out. I sold the 360 today for a $100. Audios you gutless gas hog!
Audios four speed! The Dana 24 transfer case isn't going to cut it. I will be picking up a divorced NP 205 from a 1973-1977 Ford in the next few months. Luckily the pick and pulls that I frequent don't have a shortage of these old Ford trucks. The divorced NP 205 should be easy to connect to the Dodge trans to keep things simple. It almost looks like the stock cross member from the Dana 24 will bolt right to the NP 205. I guess I will find out here shortly.
Frame is naked and ready to be scraped and blasted. I will probably blast it with a pressure steamer and coat it with some frame paint from eastwood.
I got a quote from the line-x guy to spray the interior of the truck (firewall, floor, halfway up the rear). He quoted me $400 to do the job. I also talked to the Rinoliner guy but he quoted me $600 for the same job. I guess I know where I am going.
I also got the 14 bolt rear axle. I should be doing a tutorial on rebuilding the 14 bolt axle here shortly. A guy that lives down the street is a 4x4 axle specialist and is going to walk me through the process.
I am still working on a donner Dodge. I have my eyes on one, but we will see how that works out. I sold the 360 today for a $100. Audios you gutless gas hog!
#17
04-15-2012, 11:27 PM
Logistics Pro
#18
04-20-2012, 11:20 PM
Join Date: Oct 2011
Location: Willard
Posts: 207
Likes: 0
Received 0 Likes
on
0 Posts
I decided to bring out the BIG guns to get this project moving forward 
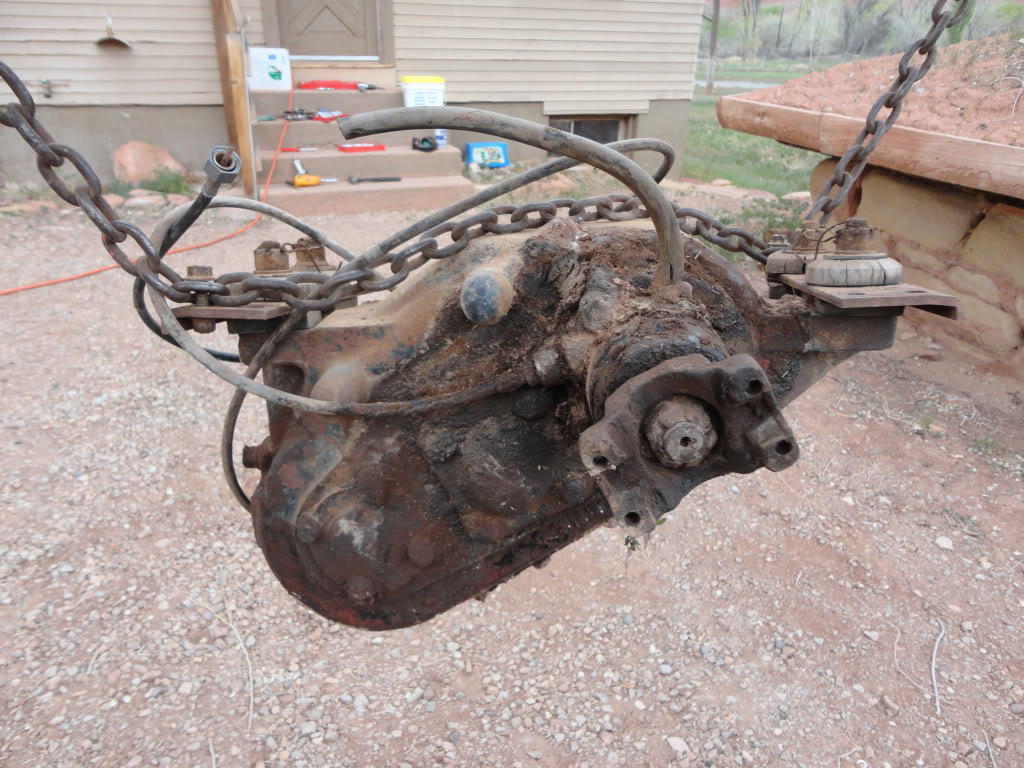
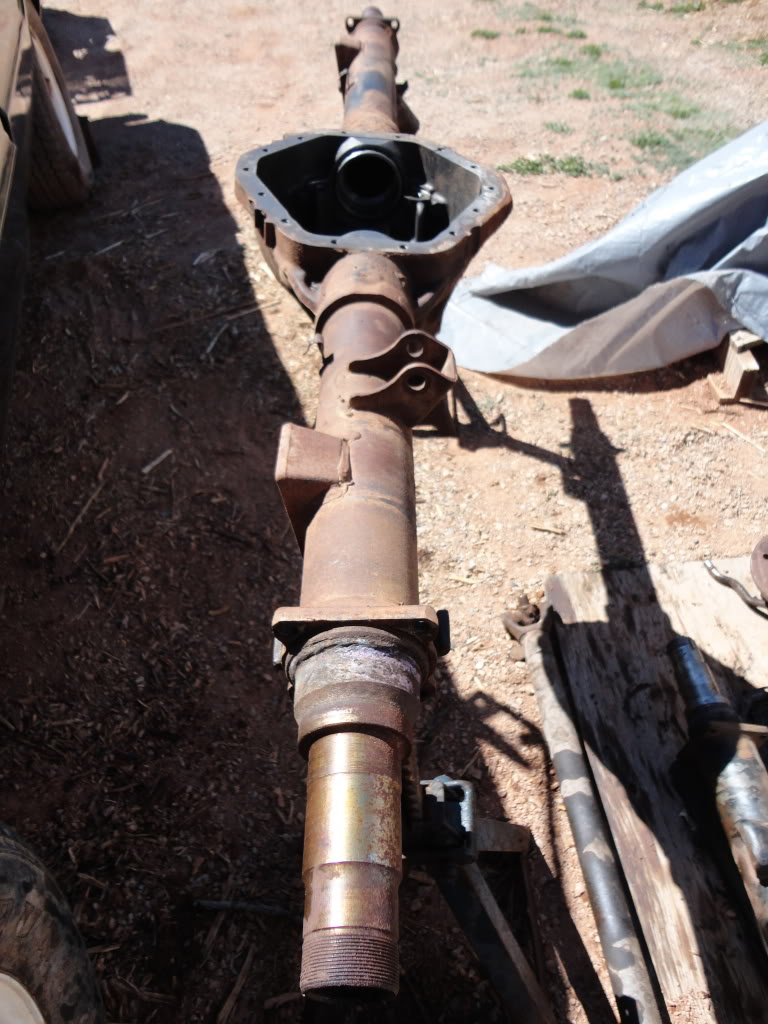
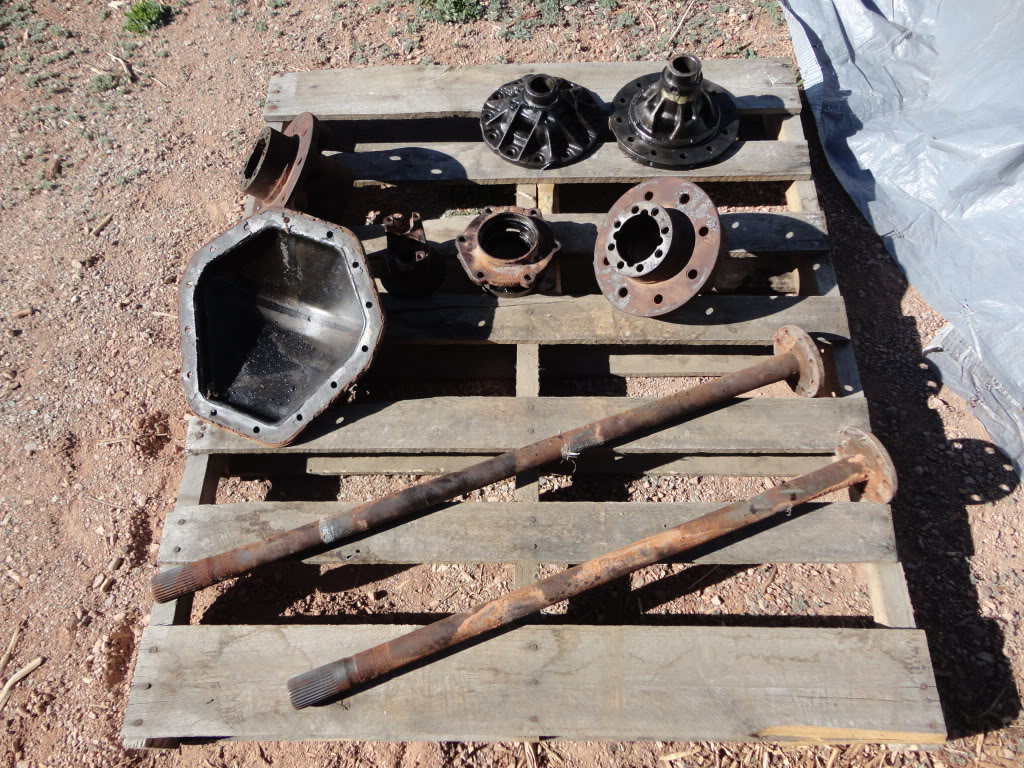
Picked up a 14 bolt axle for $100. Tore her down and documented some of the more critical steps in the process. If you are looking for detailed instructions on how to rebuild a 14 bolt axle, there is a great tutorial at:
http://www.pirate4x4.com/tech/billav...4b_Gear_Setup/
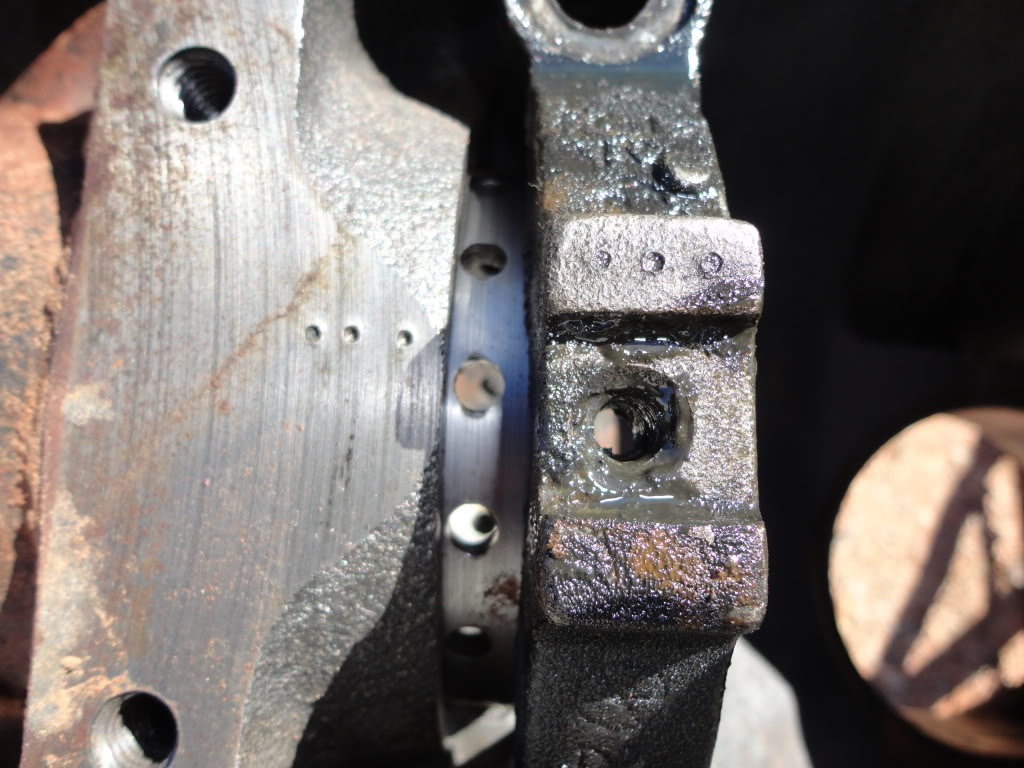
Make sure and mark the caps before you pull them off. I punch two punches on one cap and then the case, and repeat with three on the other side to differentiate between the two. Very important that they don't get switched.
Carrier assembly removed.

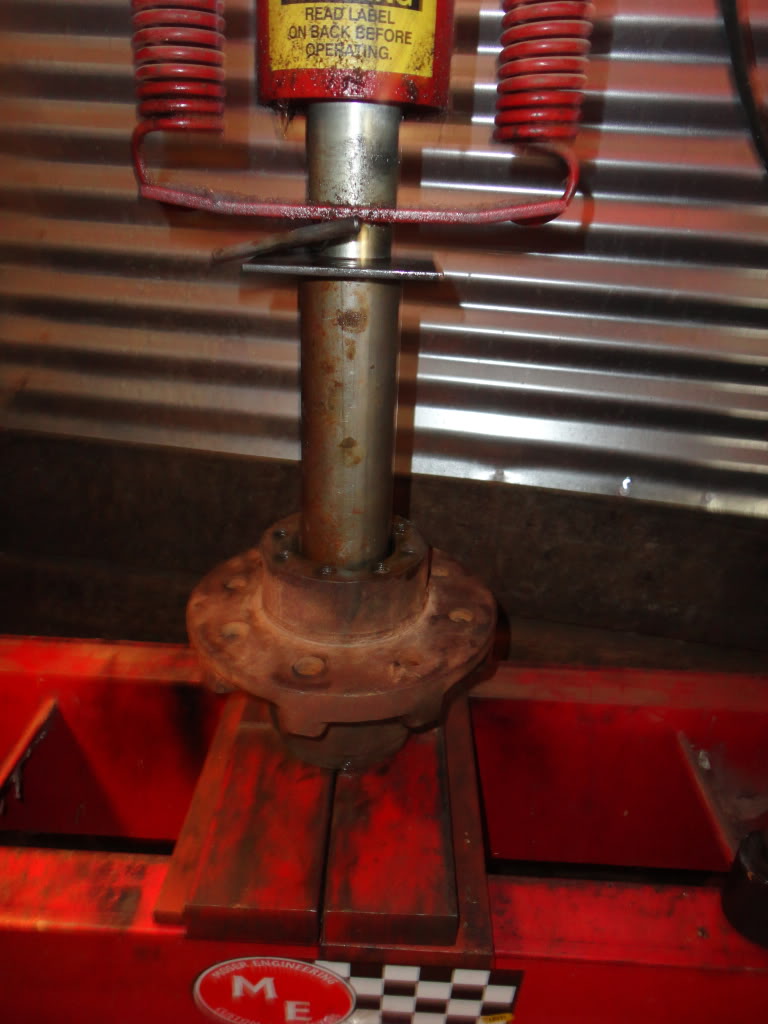
With hubs, axles, and carrier removed - it is time to press out the bearings and get everything cleaned up. It is best to use a long pry bar with the hubs in a vice to get the seals out - they are nasty. Remove the snap ring retainer on the bearings and press them out. You can nock the races out with a mini sledge and a long striking tube. I like to save the bearings and races until I am done building the axle in case I need the numbers off of them.
Use a puller to remove the bearings on the carrier assembly. I cut off the outer section of the bearing so that my puller could more easily mount to the remaining section. These bearings can be tough to pull off. If you put a good load on the puller and the bearing isn't moving, add a little heat to the bearing and it will be persuaded to give.
Before removing the ring gear, make sure to mark the original location so that everything goes back together the same way.
Use a mini sledge and a long striking tube to knock the ring gear loose. After this I pried the remaining section of the carrier assembly apart and removed the spider gears.
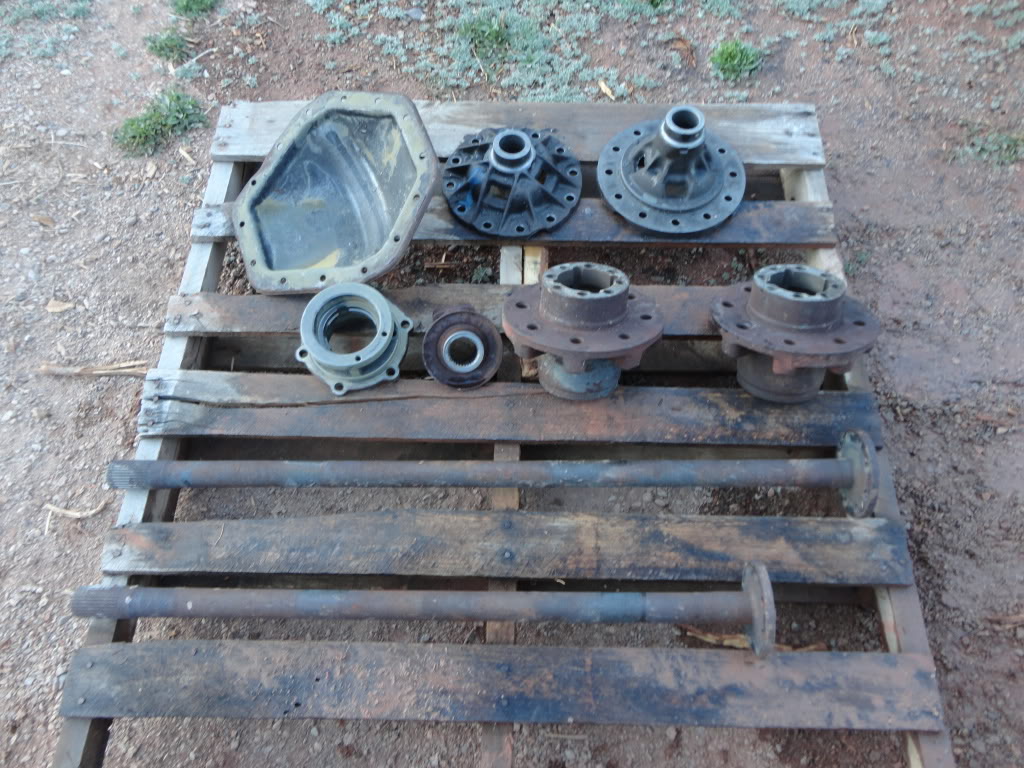
Everything is now disassembled and ready to get steamed.
Before steaming
After steaming
Now it is time to decide what gear ratio to go with. There are several factors that will determine this. Since I am going to be running a cummins, my cruising RPM will be lower than a standard gas engine. I read in some other forums and guys were saying that ideally they try to run 1500 RPM at 65 MPH. My target Tire size is 40". I want to be able to bump things up to a 42" or down to a 38" tire if need be in the future.
Any suggestions on gear ratio for my application? Does anyone know of a spot where there is a good gear ratio tire size chart for the cummins? I want to be able to cruz 75 MPH comfortably without compromising the trucks off road capability. I know, I know... everyone wants the best of both worlds
Picked up a 14 bolt axle for $100. Tore her down and documented some of the more critical steps in the process. If you are looking for detailed instructions on how to rebuild a 14 bolt axle, there is a great tutorial at:
http://www.pirate4x4.com/tech/billav...4b_Gear_Setup/
Make sure and mark the caps before you pull them off. I punch two punches on one cap and then the case, and repeat with three on the other side to differentiate between the two. Very important that they don't get switched.
Carrier assembly removed.
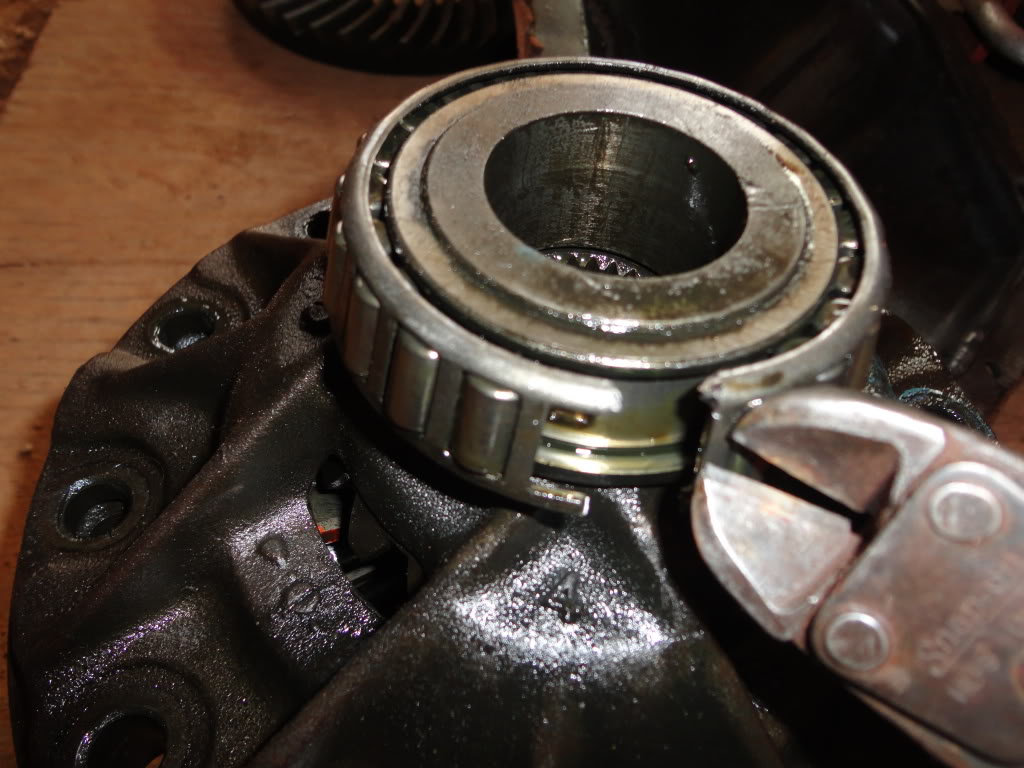
With hubs, axles, and carrier removed - it is time to press out the bearings and get everything cleaned up. It is best to use a long pry bar with the hubs in a vice to get the seals out - they are nasty. Remove the snap ring retainer on the bearings and press them out. You can nock the races out with a mini sledge and a long striking tube. I like to save the bearings and races until I am done building the axle in case I need the numbers off of them.
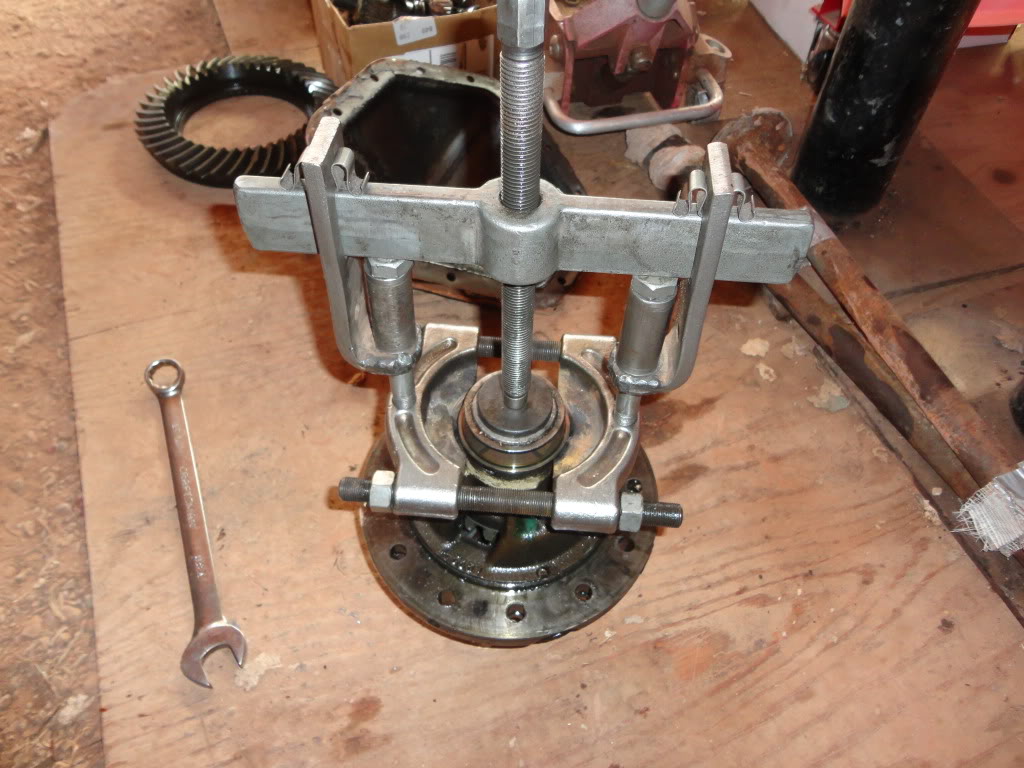
Use a puller to remove the bearings on the carrier assembly. I cut off the outer section of the bearing so that my puller could more easily mount to the remaining section. These bearings can be tough to pull off. If you put a good load on the puller and the bearing isn't moving, add a little heat to the bearing and it will be persuaded to give.
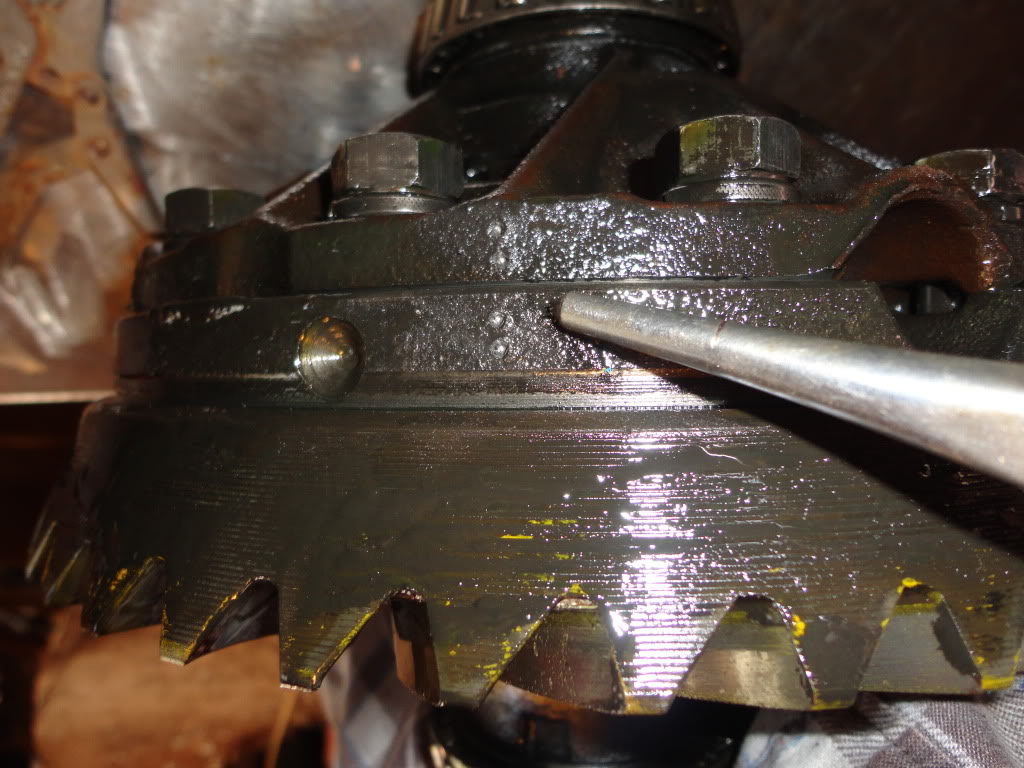
Before removing the ring gear, make sure to mark the original location so that everything goes back together the same way.
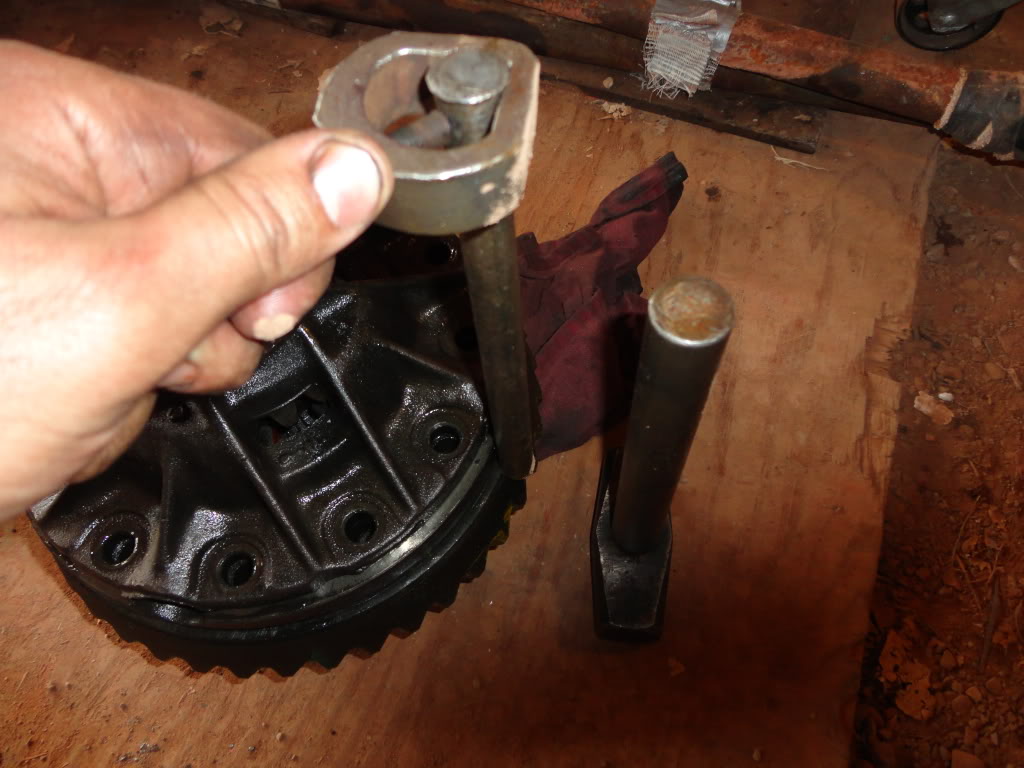
Use a mini sledge and a long striking tube to knock the ring gear loose. After this I pried the remaining section of the carrier assembly apart and removed the spider gears.
Everything is now disassembled and ready to get steamed.
Before steaming
After steaming
Now it is time to decide what gear ratio to go with. There are several factors that will determine this. Since I am going to be running a cummins, my cruising RPM will be lower than a standard gas engine. I read in some other forums and guys were saying that ideally they try to run 1500 RPM at 65 MPH. My target Tire size is 40". I want to be able to bump things up to a 42" or down to a 38" tire if need be in the future.
Any suggestions on gear ratio for my application? Does anyone know of a spot where there is a good gear ratio tire size chart for the cummins? I want to be able to cruz 75 MPH comfortably without compromising the trucks off road capability. I know, I know... everyone wants the best of both worlds

#20
04-21-2012, 10:40 PM
Join Date: Oct 2011
Location: Willard
Posts: 207
Likes: 0
Received 0 Likes
on
0 Posts
I like this one: RPM / Speed / Gear Ratio Visual Calc
Gear Ratio Calculator
Good Stuff! This calculator lets you input the exact transmission and transferase separately so you get all the specific info you need for your application at any RPM or MPH.
Looks like 4.88 is going to be the ticket. I plugged in my info and then matched it up to a couple of stock cummins RPM cycles on youtube.
#21
04-22-2012, 03:39 PM
Join Date: Oct 2011
Location: Willard
Posts: 207
Likes: 0
Received 0 Likes
on
0 Posts
A saw zaw makes quick work of the body mounts 

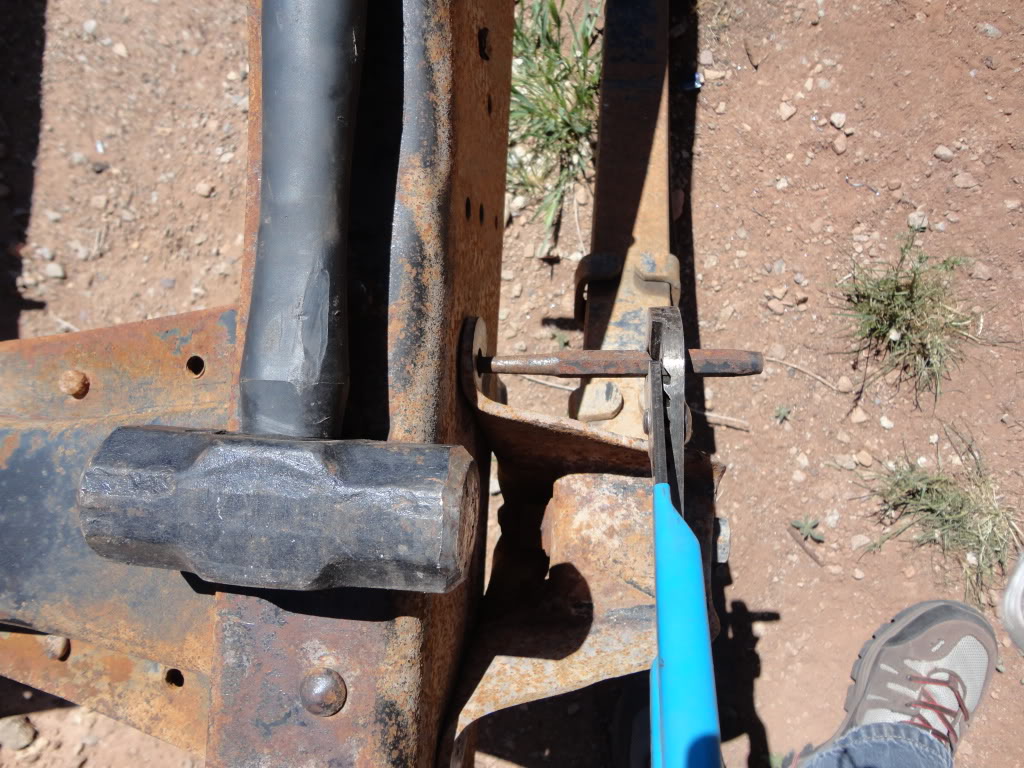
I HATE RIVETS! Who doesn't though?
I removed the rivets by grinding off the head, then drilling the center so that I could get a punch to line up nicely. I have used a air hammer in the past and it worked well, but it broke, so back to the old fashioned way. Most came out relatively easy, but a couple were pretty stubborn. Lesson learned: don't use a sledge hammer (mini sledge is better) because it can actually start pushing in the metal on the frame with the rivet if it is being stubborn. Oh well, I will just have to brace it and make it stronger

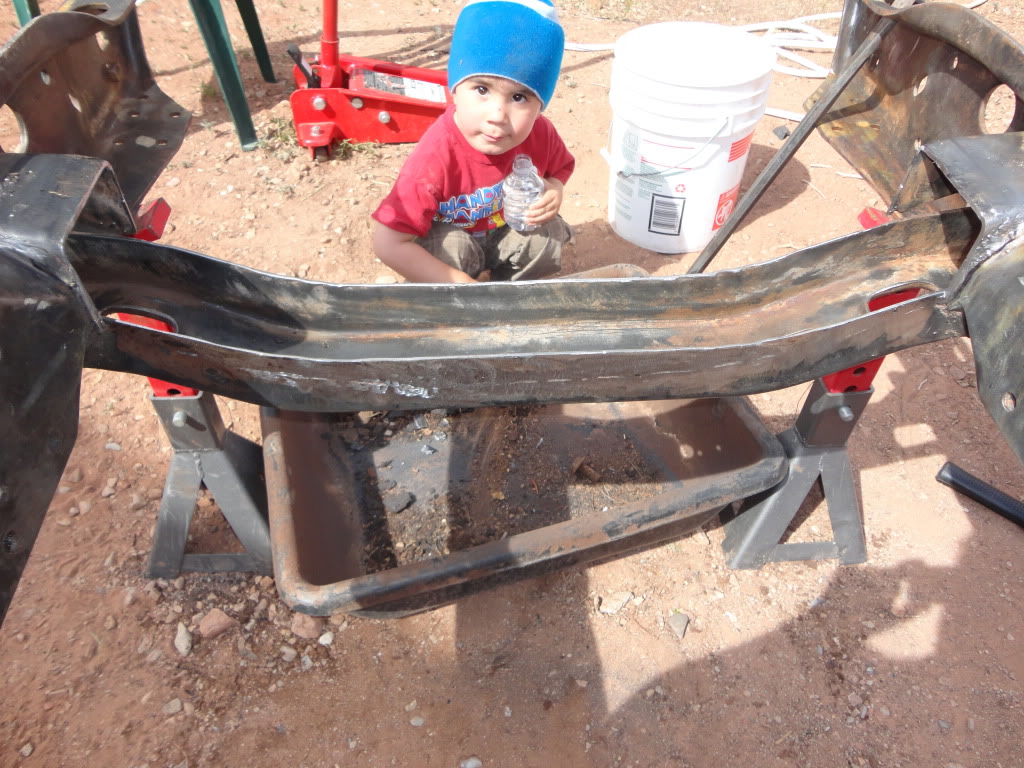
Found some more help
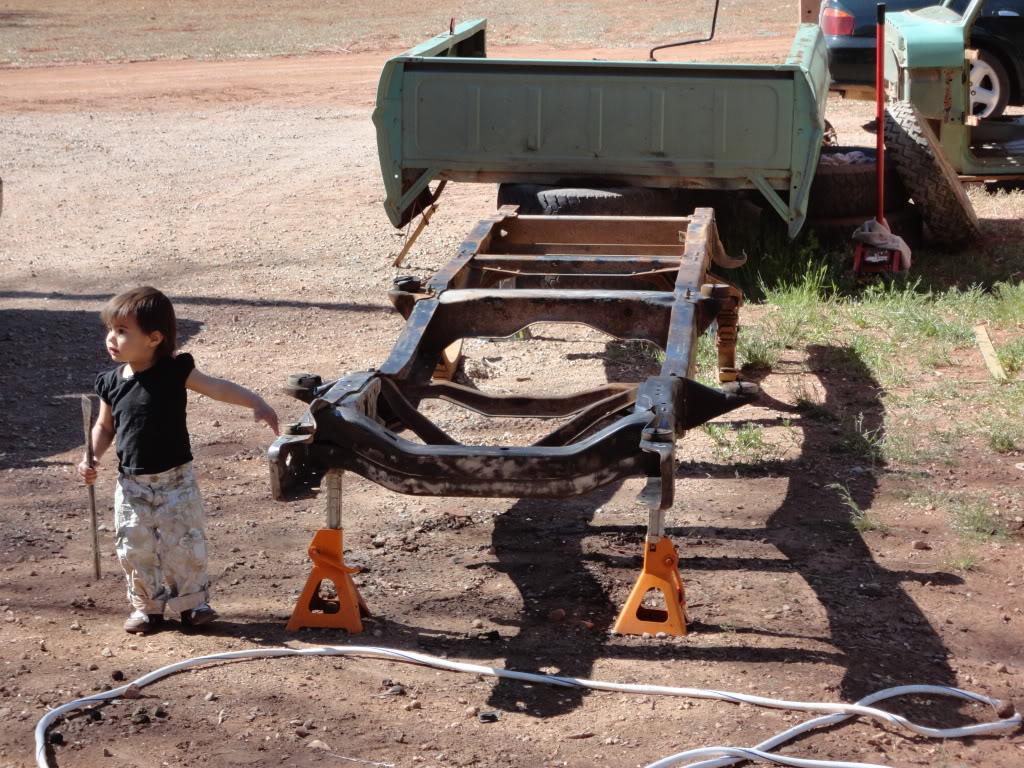
Spent the rest of the day cleaning up the frame with a wire wheel attached to a die grinder. Almost time for the fun stuff.
I HATE RIVETS! Who doesn't though?
I removed the rivets by grinding off the head, then drilling the center so that I could get a punch to line up nicely. I have used a air hammer in the past and it worked well, but it broke, so back to the old fashioned way. Most came out relatively easy, but a couple were pretty stubborn. Lesson learned: don't use a sledge hammer (mini sledge is better) because it can actually start pushing in the metal on the frame with the rivet if it is being stubborn.
Oh well, I will just have to brace it and make it stronger Found some more help
Spent the rest of the day cleaning up the frame with a wire wheel attached to a die grinder. Almost time for the fun stuff.
#23
04-30-2012, 05:50 PM
Join Date: Oct 2011
Location: Willard
Posts: 207
Likes: 0
Received 0 Likes
on
0 Posts
I decided to cut into the front crossmember the other day to make way for the cummins oil pan. I have seen two ways of making clearance for the cummins oil pan by other FTE users.
1) The first way would be to completely relocate the front cross member toward the rear. This would allow ample space for the stock dodge AC compressor.
2) The second way would be to shorten the front cross member so that the cummins oil pan can slide over the top. This will cause clearance issues with the AC compressor.
I opted for option #2 to keep a it simple and maintain a "stock" look. I may run a AC compressor, but I am thinking that relocating the compressor on the front of the engine may be possible. I guess I will find out
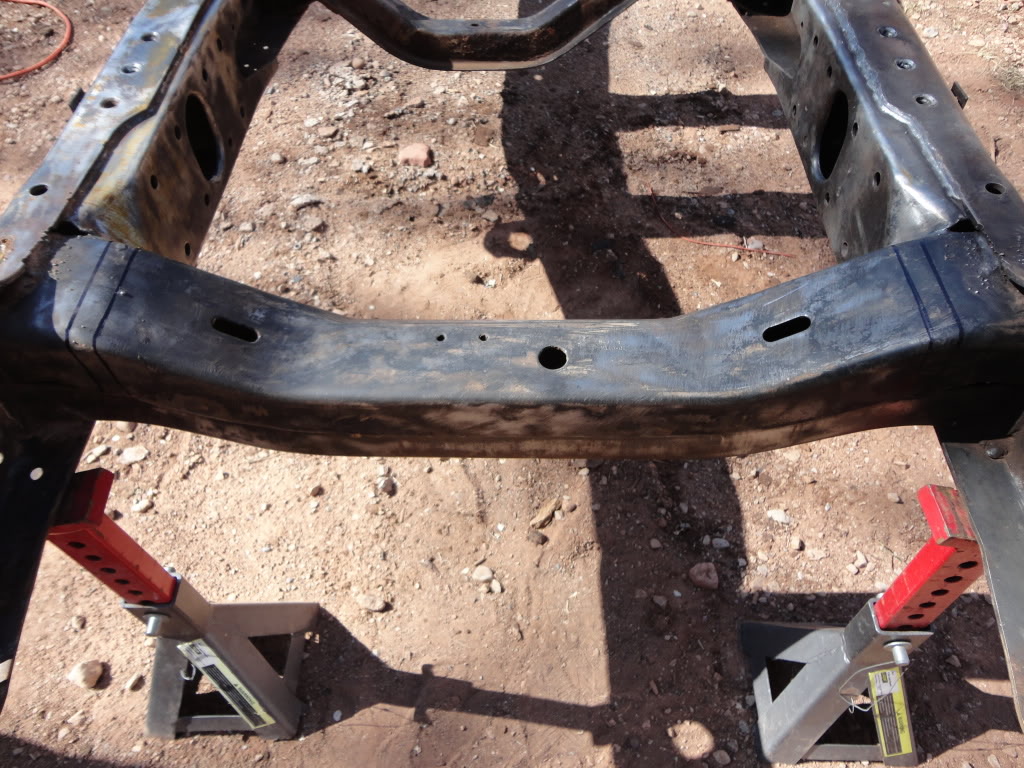
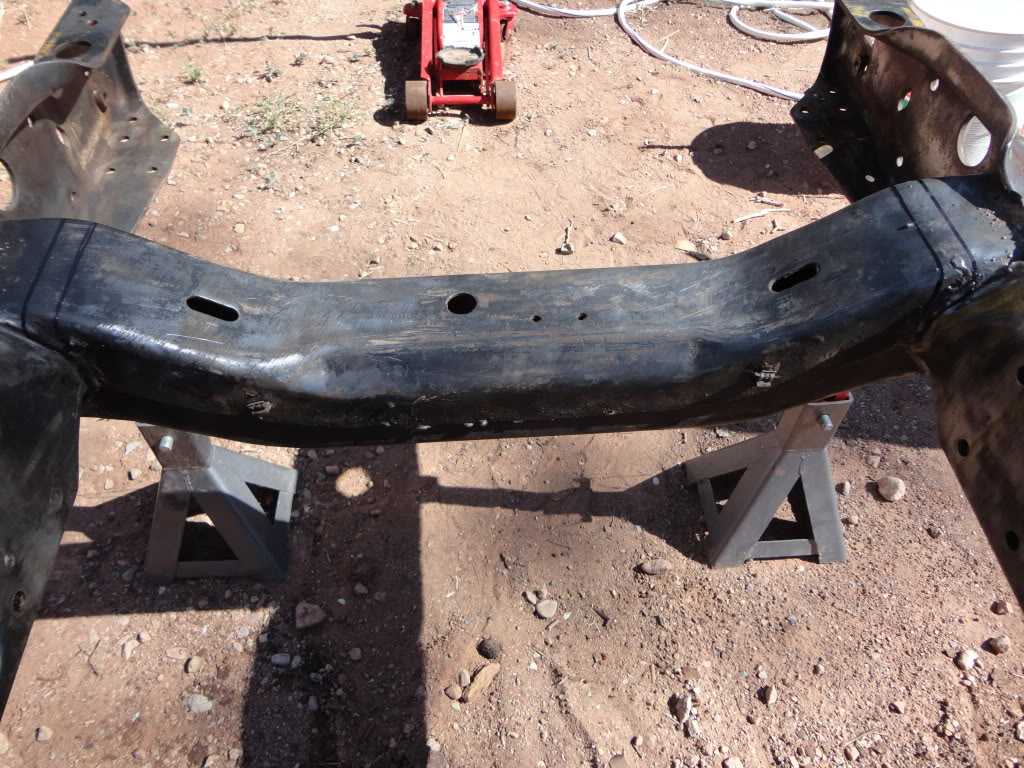
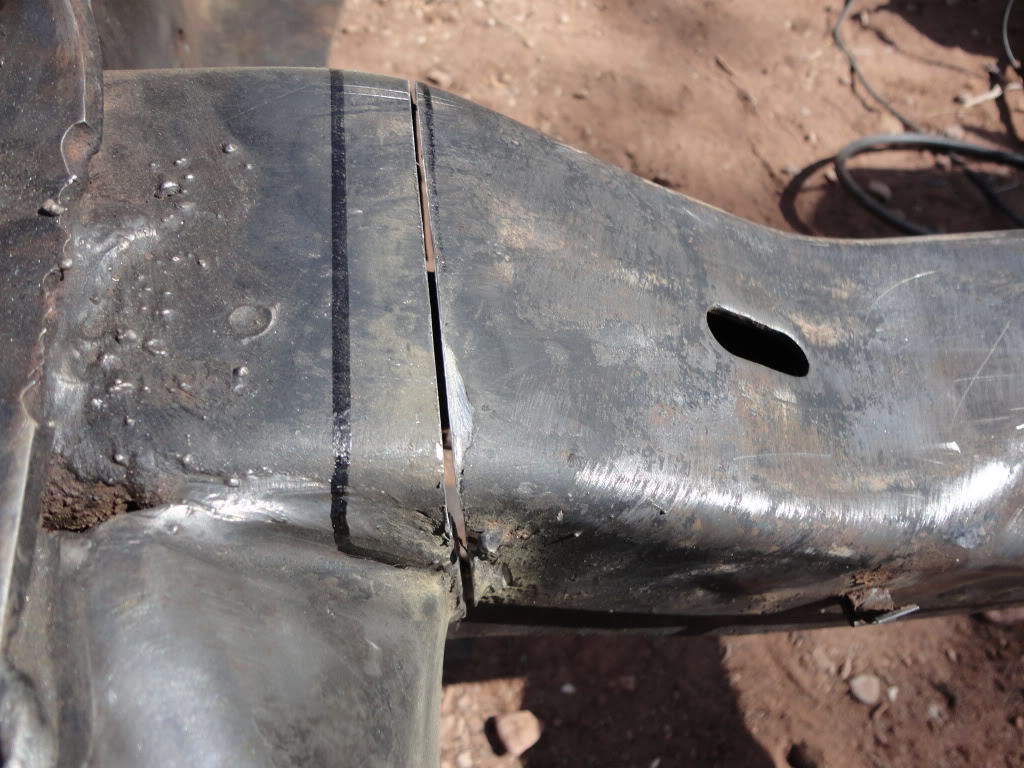
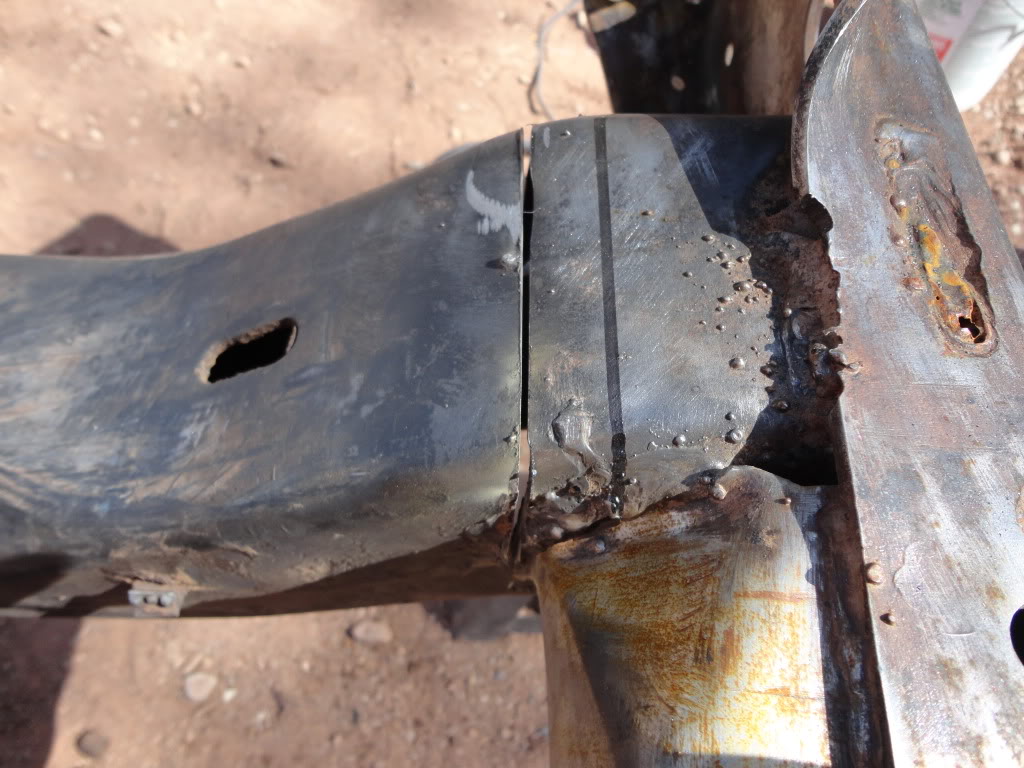
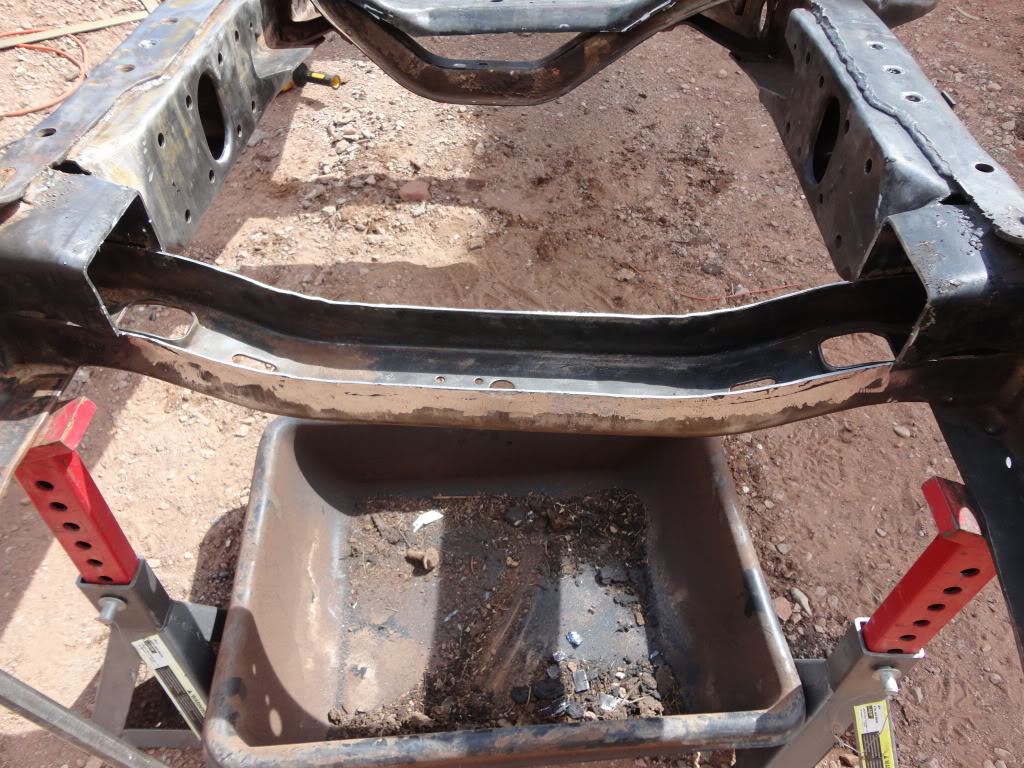
I am going to leave the top piece that was cut off alone until the cummins arrives for a test fit. I should be scoring a donner dodge in a couple of weeks, but we will have to see how that works out.

1) The first way would be to completely relocate the front cross member toward the rear. This would allow ample space for the stock dodge AC compressor.
2) The second way would be to shorten the front cross member so that the cummins oil pan can slide over the top. This will cause clearance issues with the AC compressor.
I opted for option #2 to keep a it simple and maintain a "stock" look. I may run a AC compressor, but I am thinking that relocating the compressor on the front of the engine may be possible. I guess I will find out
I am going to leave the top piece that was cut off alone until the cummins arrives for a test fit. I should be scoring a donner dodge in a couple of weeks, but we will have to see how that works out.
#24
05-01-2012, 05:58 AM
Logistics Pro
I'll be watching how you end up doing your cross member for the cummins I cut about a foot out of the top piece on mine in the center and the cummins slid right in the A/C comp may need relocated if the cummins can't be raised enough to clear the top of the cross member right now its touching I haven't decided how I want to do mine make up a new one or possibly cut the top half off and replate it it looks like it will work if you replate it just need to buy a welder and I can start welding the mounts I'll be updating my long due build thread soon it will have pics of how the cummins sits in it now and show some clearance issues with it
#25
05-01-2012, 06:01 AM
Logistics Pro
#26
05-01-2012, 11:30 AM
Join Date: Oct 2011
Location: Willard
Posts: 207
Likes: 0
Received 0 Likes
on
0 Posts
The divorced NP205 is probably one of the most popular off road transferases in use today. As a result of it's popularity, it is heavily supported by the aftermarket and parts are cheap. If I ever break something and need to replace or want to upgrade, I know that I will have a lot of options.
This is the same reason that I went with the 14 bolt rear axle over a Dana 60 or 70. I can build a fully capable rear axle with top of the line everything for about $1000 by using the 14 bolt. If I ever want to find replacement parts for the 14 bolt, I know that they will be much cheaper than the dana 60 or 70 because of the overwhelming aftermarket support.
This is the same reason that I went with the 14 bolt rear axle over a Dana 60 or 70. I can build a fully capable rear axle with top of the line everything for about $1000 by using the 14 bolt. If I ever want to find replacement parts for the 14 bolt, I know that they will be much cheaper than the dana 60 or 70 because of the overwhelming aftermarket support.
#27
05-01-2012, 11:43 AM
Join Date: Oct 2011
Location: Willard
Posts: 207
Likes: 0
Received 0 Likes
on
0 Posts
I'll be watching how you end up doing your cross member for the cummins I cut about a foot out of the top piece on mine in the center and the cummins slid right in the A/C comp may need relocated if the cummins can't be raised enough to clear the top of the cross member right now its touching I haven't decided how I want to do mine make up a new one or possibly cut the top half off and replate it it looks like it will work if you replate it just need to buy a welder and I can start welding the mounts I'll be updating my long due build thread soon it will have pics of how the cummins sits in it now and show some clearance issues with it
Option #1 - Build a new cross member and relocate it:
https://www.ford-trucks.com/forums/6...onversion.html
Option #2 - Modify the stock cross member and deal with AC compressor clearance issues.
https://www.ford-trucks.com/forums/7...rew-cab-3.html
I am hoping to move forward aggressively on this project over the next few months. Hopefully I will have the axles installed and engine transplanted shortly. It all depended on how things come together.
#28
05-04-2012, 09:34 PM
Join Date: Oct 2011
Location: Willard
Posts: 207
Likes: 0
Received 0 Likes
on
0 Posts
Ok. Time to talk rear springs. I decided to go with some 64" springs out of a 1999-2010 Chevy pickup. As you can see, they dwarf the stock Ford springs. I was planning on going for the 3 leaf spring pack from the 1/2 ton pickup, but the wrecking yard ended up only having a 5 leaf spring pack from a 3/4 ton. I may decided to pull a couple of leafs out to get things more flexy.
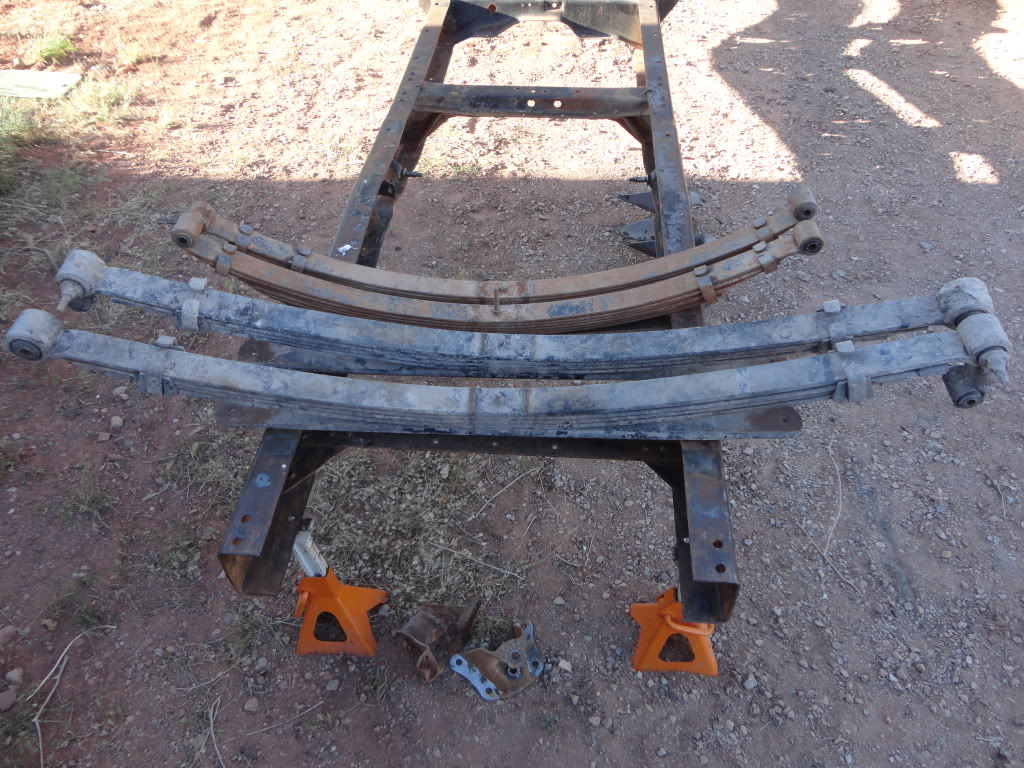
While I was at the wrecking yard I snagged a set of front (front of the rear spring) leaf spring hangers. These came out of a 80's Chevy pickup. They will automatically add a couple of inches of lift and are way more heavy duty than the stock hangers. They bolt to both the side and bottom of the frame.
1999-2010 Chevy Leaf Springs: $45 each
80's Chevy Hanger: $35 each
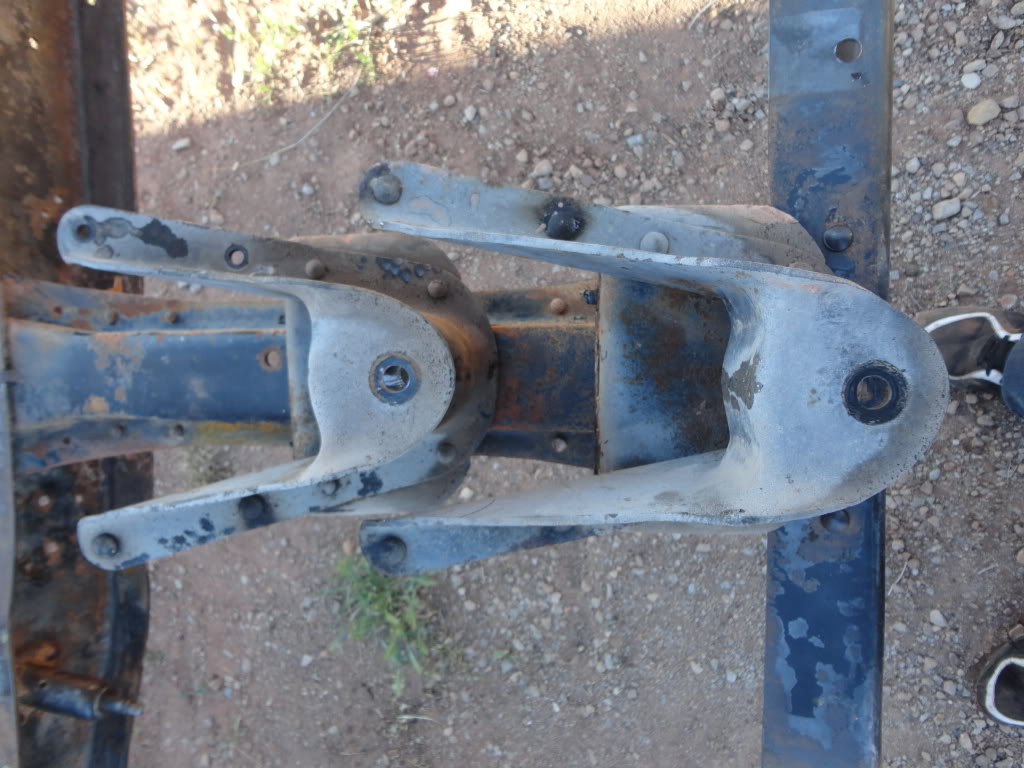
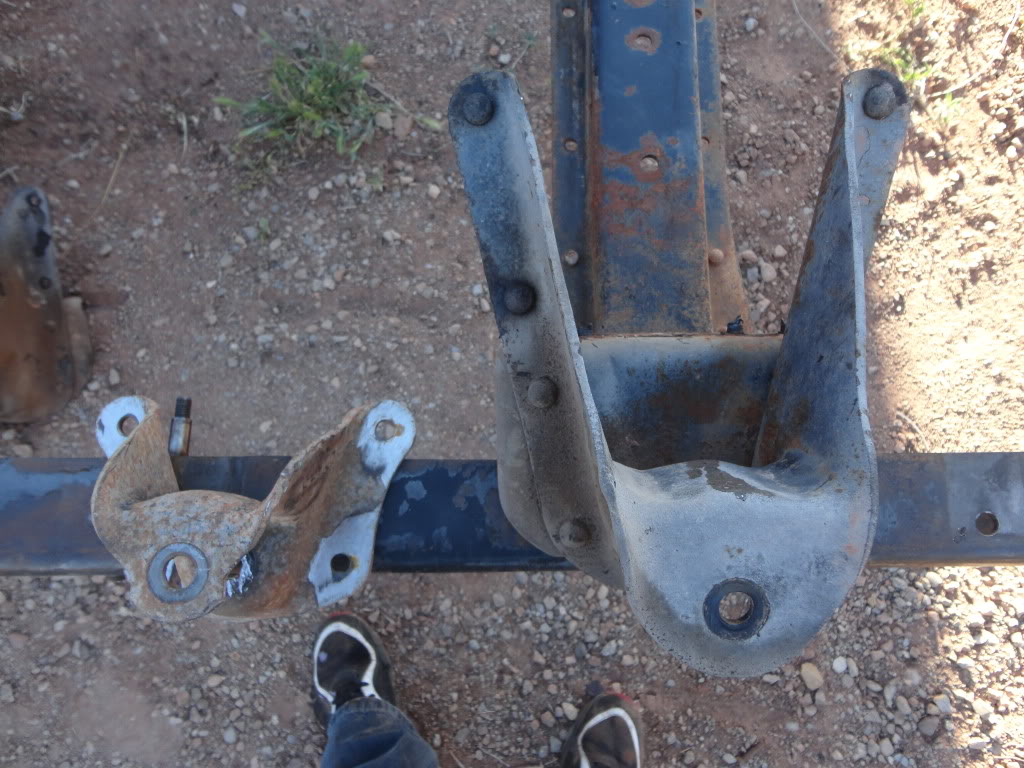
After comparing the 80's Chevy hanger to the stock Ford hanger, I realized that the Chevy hanger hangs a little farther out than the Ford. I was planing on using the stock front of rear spring Ford hanger to do a shackle flip on the rear of the spring, but plans have changed since they don't match correctly with the Chevy hangers.
Solution: Pick up another set of 80's Chevy front of rear spring hangers and use them in the rear along with a shackle flip (using the Chevy shackles). This will compensate for the dip in the frame on the Ford, because I will be using the same exact hanger front and rear, but the rear will have the shackle dropping down another couple of inches that will compensate for the drop in the frame. The spring should sit nice and level. I will be gaining a ton of lift by doing this set up and may be able to ditch the stock axle block. I guess we will find out
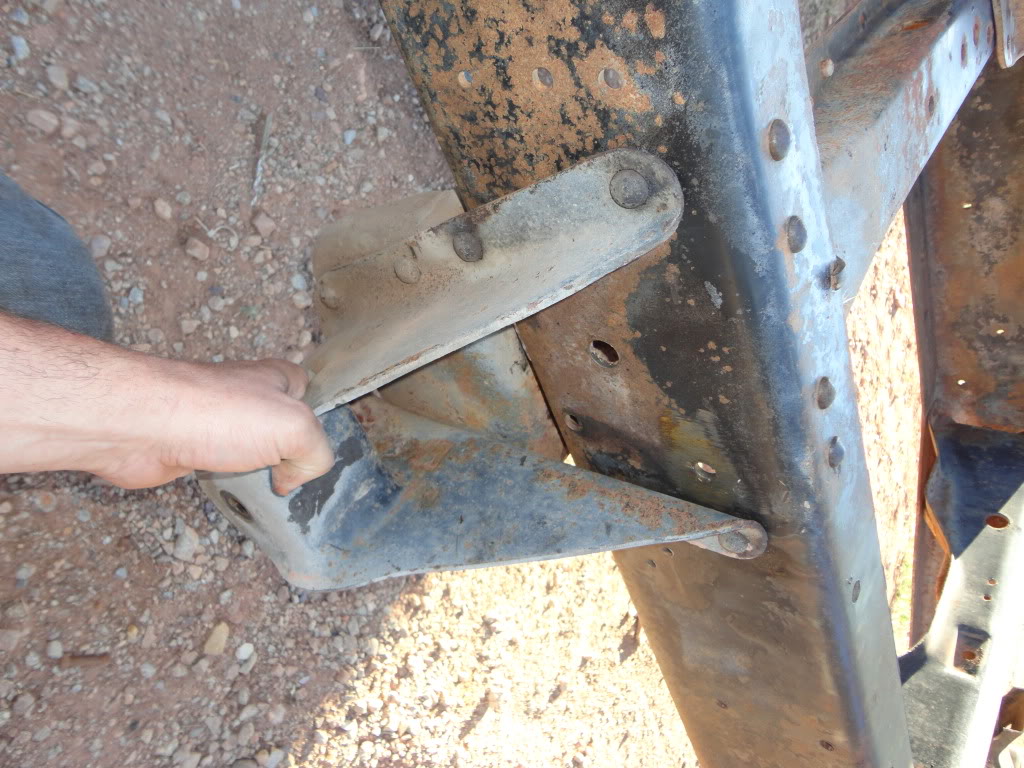
Look at the itsy bitsy Ford hanger next to the massive 80's Chevy hanger!
I will pick up another set of hangers next week, steam everything, and start bolting things up.
While I was at the wrecking yard I snagged a set of front (front of the rear spring) leaf spring hangers. These came out of a 80's Chevy pickup. They will automatically add a couple of inches of lift and are way more heavy duty than the stock hangers. They bolt to both the side and bottom of the frame.
1999-2010 Chevy Leaf Springs: $45 each
80's Chevy Hanger: $35 each
After comparing the 80's Chevy hanger to the stock Ford hanger, I realized that the Chevy hanger hangs a little farther out than the Ford. I was planing on using the stock front of rear spring Ford hanger to do a shackle flip on the rear of the spring, but plans have changed since they don't match correctly with the Chevy hangers.
Solution: Pick up another set of 80's Chevy front of rear spring hangers and use them in the rear along with a shackle flip (using the Chevy shackles). This will compensate for the dip in the frame on the Ford, because I will be using the same exact hanger front and rear, but the rear will have the shackle dropping down another couple of inches that will compensate for the drop in the frame. The spring should sit nice and level. I will be gaining a ton of lift by doing this set up and may be able to ditch the stock axle block. I guess we will find out
Look at the itsy bitsy Ford hanger next to the massive 80's Chevy hanger!
I will pick up another set of hangers next week, steam everything, and start bolting things up.
#29
05-11-2012, 11:21 AM
Join Date: Oct 2011
Location: Willard
Posts: 207
Likes: 0
Received 0 Likes
on
0 Posts
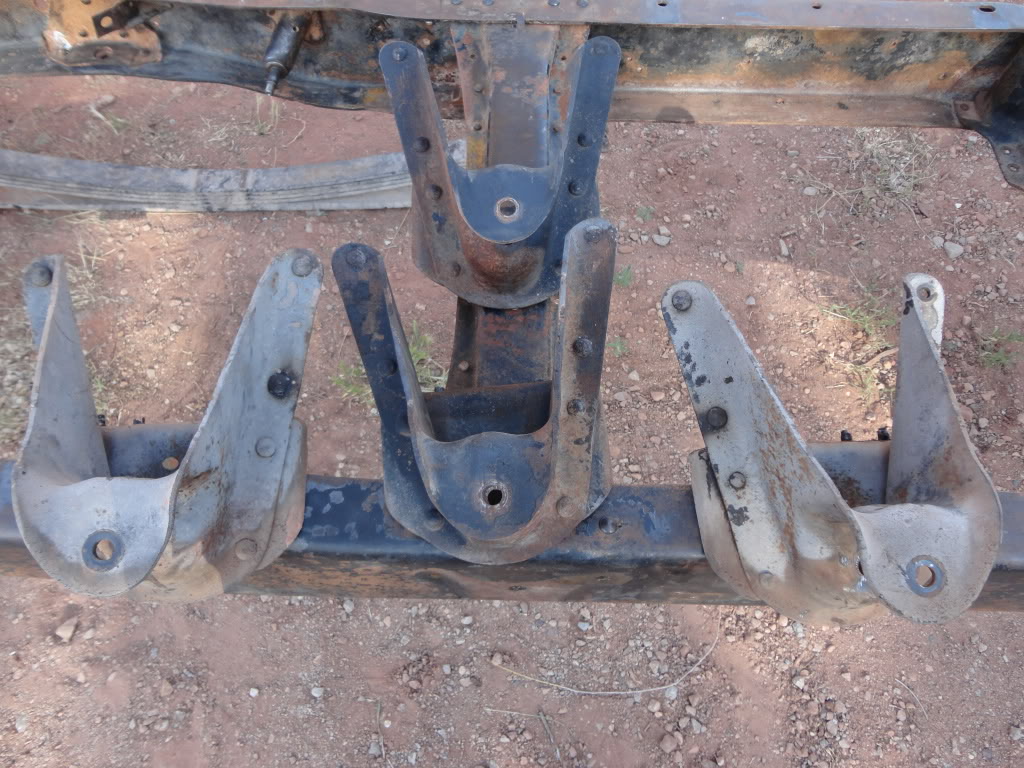
Picked up another set of rear spring front hangers off of a mid 80's Chevy truck. The first wrecking yard I went to didn't want to take the time to pull another set off for me, so I went to another wrecking yard down the street from them. The other wrecking yard pulled a cleaner set for $20 less. I know where I am going from now on.
Also decided to paint my grill inserts. The plastic was cracking (as usual on these grills) so I strengthened up everything from the backside with gorilla glue and painted them with some hammered finish plastic paint. I will probably clear coat them when I paint the truck.
Before
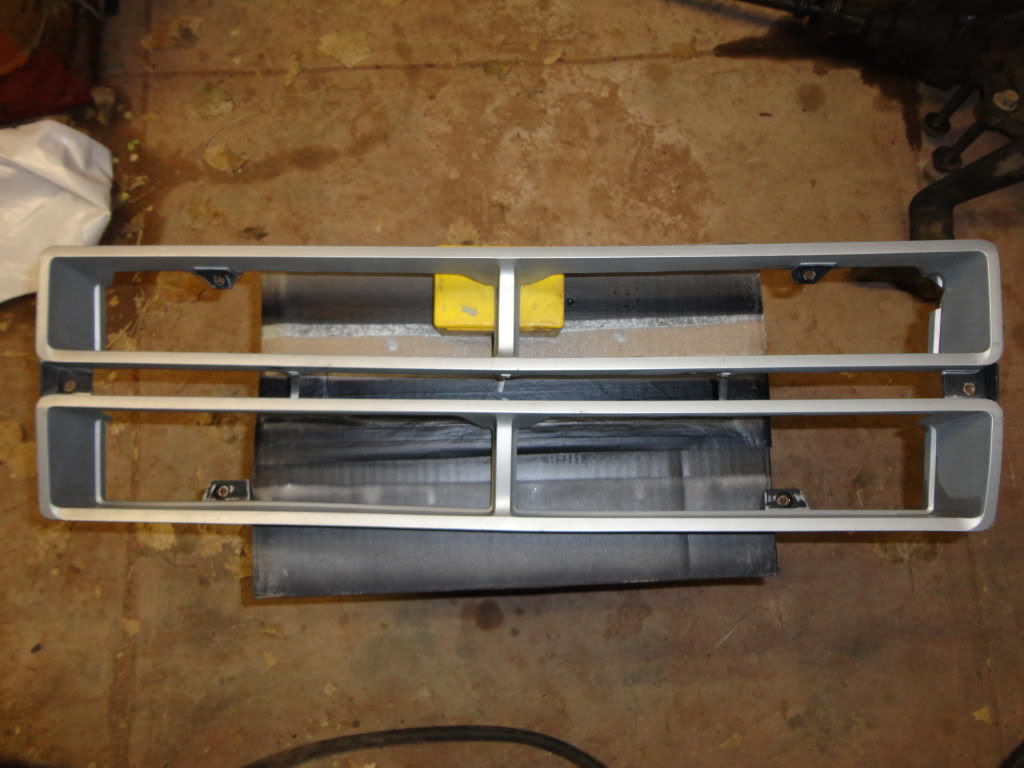
After

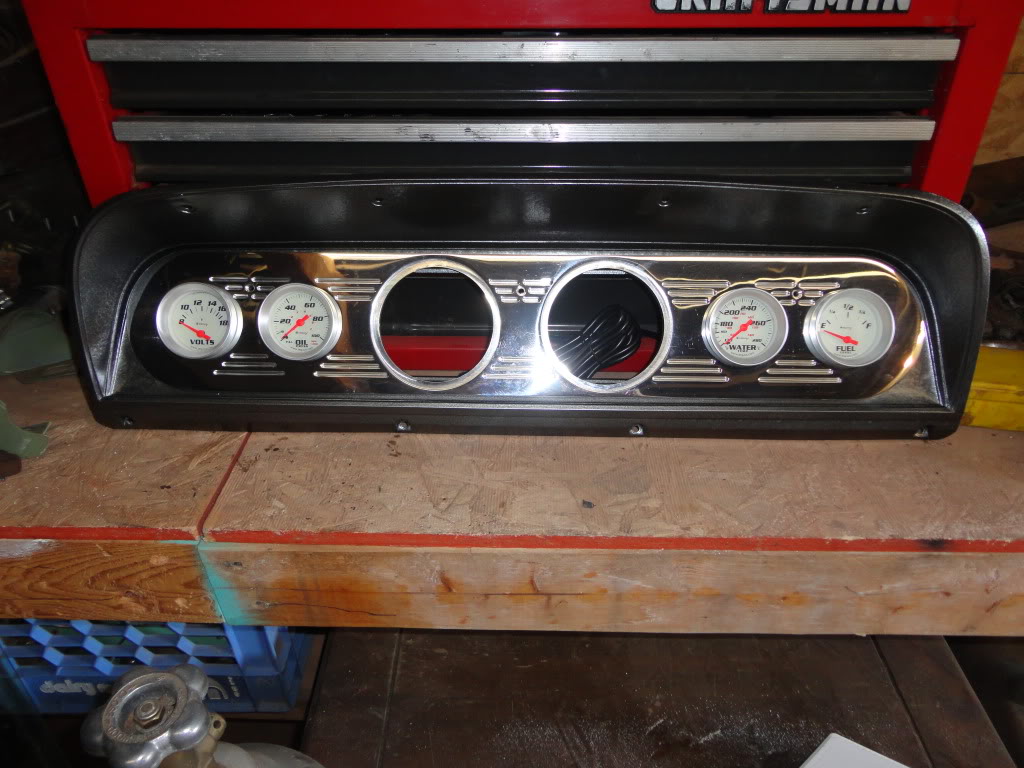
A little more eye candy for you all. I decided to paint the plastic parts (like the dash bezel) with the hammered finish plastic paint.
Every dash needs some bling
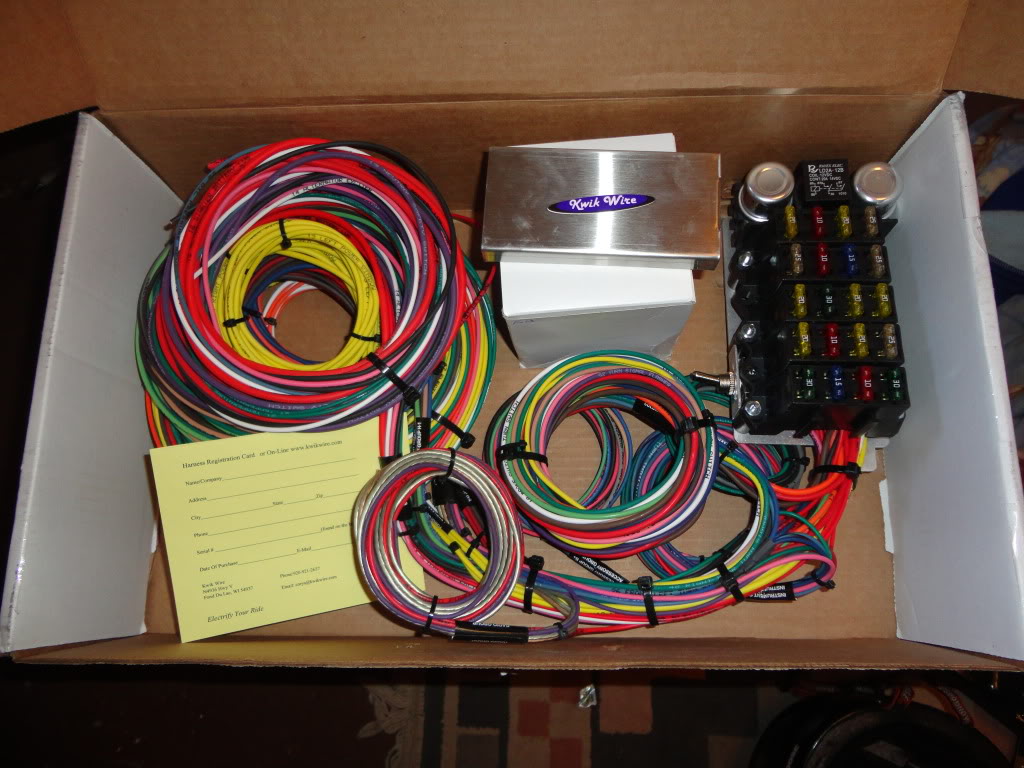
Here is the Kwik Wire kit
Also decided to paint my grill inserts. The plastic was cracking (as usual on these grills) so I strengthened up everything from the backside with gorilla glue and painted them with some hammered finish plastic paint. I will probably clear coat them when I paint the truck.
Before
After
A little more eye candy for you all. I decided to paint the plastic parts (like the dash bezel) with the hammered finish plastic paint.
Every dash needs some bling
Here is the Kwik Wire kit
#30
05-11-2012, 10:35 PM
Join Date: Oct 2011
Location: Willard
Posts: 207
Likes: 0
Received 0 Likes
on
0 Posts
After considering my options, I have decided to stick with the stock long bed wheel base. I was going to put a flat bed on the back (which would allow me to relocate the axle wherever I wanted), but I think I am going to stick with a stock bed. I don't want to be too red neck you know
The bed from my truck is pretty beat up, so I am going to try and find a nicer one and turn my old beat up one into a trailer using the dodge frame off of the donner truck. Hopefully the donner truck will be coming home with me next week.
I ordered the rear axle parts today and will be putting that together shortly.