55 239 Y-Block Restoration Thread
#16
 02-17-2012, 04:45 PM


#17
02-17-2012, 05:27 PM
The car has the inlet pipe at a 45 degree angle and truck has it straight like mine.
Both the tabs are broken off, but brazing might be the answer. The downside there is I don't know of anyone who does that type of work.
If Scott has one that will be the easiest, I can then keep my broken one and find someone to braze that sometime. You can never have too many parts.
Just reread my last post, when I said I think they are the same, I meant the 239 through 312. Where is our resident expert (I mean genius) on part numbers?
#18
02-17-2012, 08:28 PM


#19
02-18-2012, 07:17 AM
It looks like bolt to bolt is 3.5 inches.
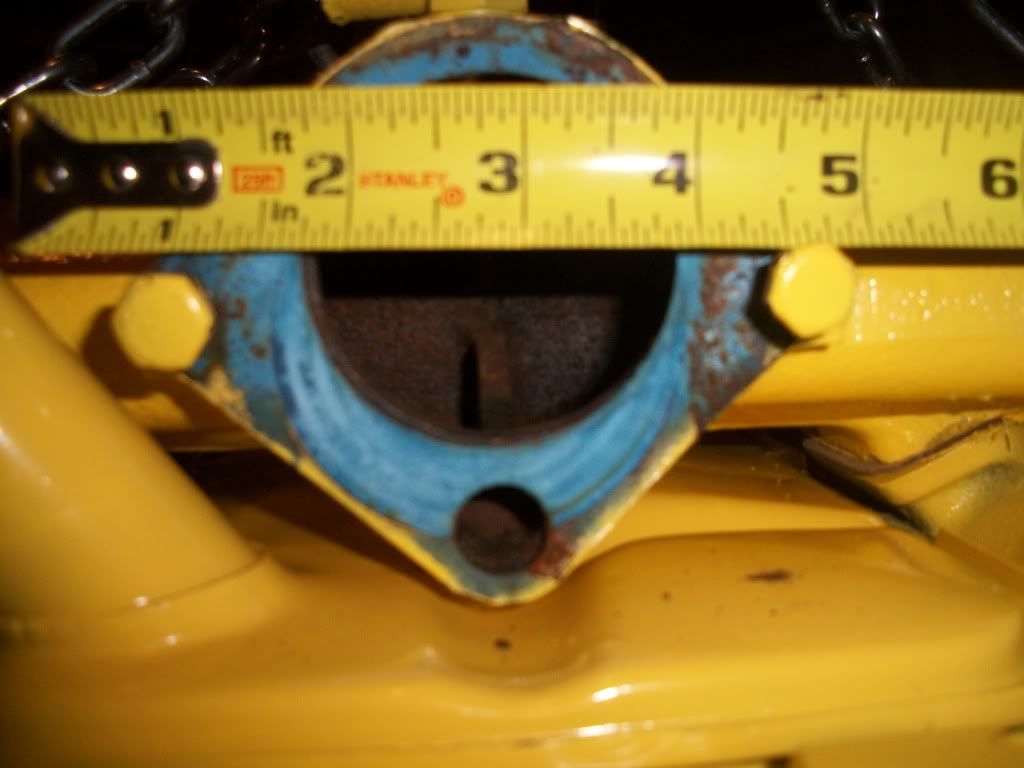
Here arethe broken pieces:

Someone also mentioned replacing the bypass tube since it is rusted, this one is all one piece it seems, so that would require my welder (once I find him) to weld that on as well, correct?
#20
02-18-2012, 07:22 AM
Ring Gear question
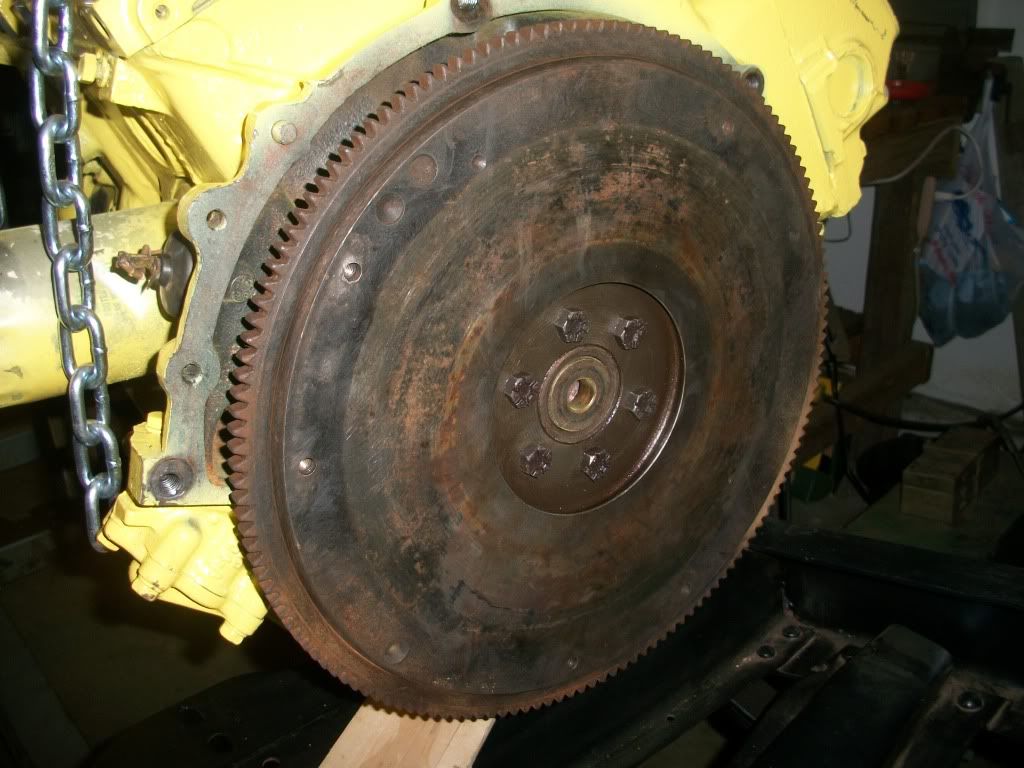
I'm putting the ring gear back on and I'm having some issues.
First, stupid question; Am I putting it on the right direction? Flat side toward transmission? I can't believe I don't have a picture of this before. I was sure I took some...
Second, I'm having a hard time getting the bolts to line up. Am I doing something wrong there as well? I might be able to get the bolts all in, but I would have thought they would have lined up better.
#21
02-18-2012, 08:04 AM
The flywheel will only go on in one position, bolt pattern specific. Rotate till it fits. The bolts should line up and go in with your fingers. No need to force or use a wrench. Chase threads in crankshaft. The direction is right. Bust that rust off the clutch surface and chase the clutch threads. Torque on the flywheel is 75-85 ft lbs. I use blue locktight. BTW, if you want to send me that broken housing I will attempt a repair job next time I fire the torch up.......No guarantees, though.
I went back and looked at the picture again, I believe it is on the right way, the clutch mounting bolt holes and wear marks are visible. Not sure, though.
I went back and looked at the picture again, I believe it is on the right way, the clutch mounting bolt holes and wear marks are visible. Not sure, though.
Last edited by raytasch; 02-18-2012 at 08:09 AM. Reason: Last comment.
#22
02-18-2012, 09:48 AM
Well the ring gear was on backwards.
I rotated it a couple of times and couldn't get the holes to line up.
I then flipped it (Then noticed where the clutch wore) and was able to get the holes to line up.
raytasch, PM sent on the thermostat housing.
PS. I like the new way pictures are displaying, smaller and then you can click on them to make them bigger, cool.
#23
02-18-2012, 10:00 AM
Well, I have the engine back on the frame. Exciting day for me so far.
It was not without scares though. I was lowering the engine and I turned the release just a smidgen too far and the engine lowered quickly to the ground, well part of the frame caught it. Once I changed my pants there didn't seem to be any damage except some scuffed paint.
This would have gone smoother if I had help, especially since I have never done this before. Wonderful learning experiences though.
Here she is on the frame. If all goes well, it's on for good, but it won't bother me to pull it again. More learning opportunities.
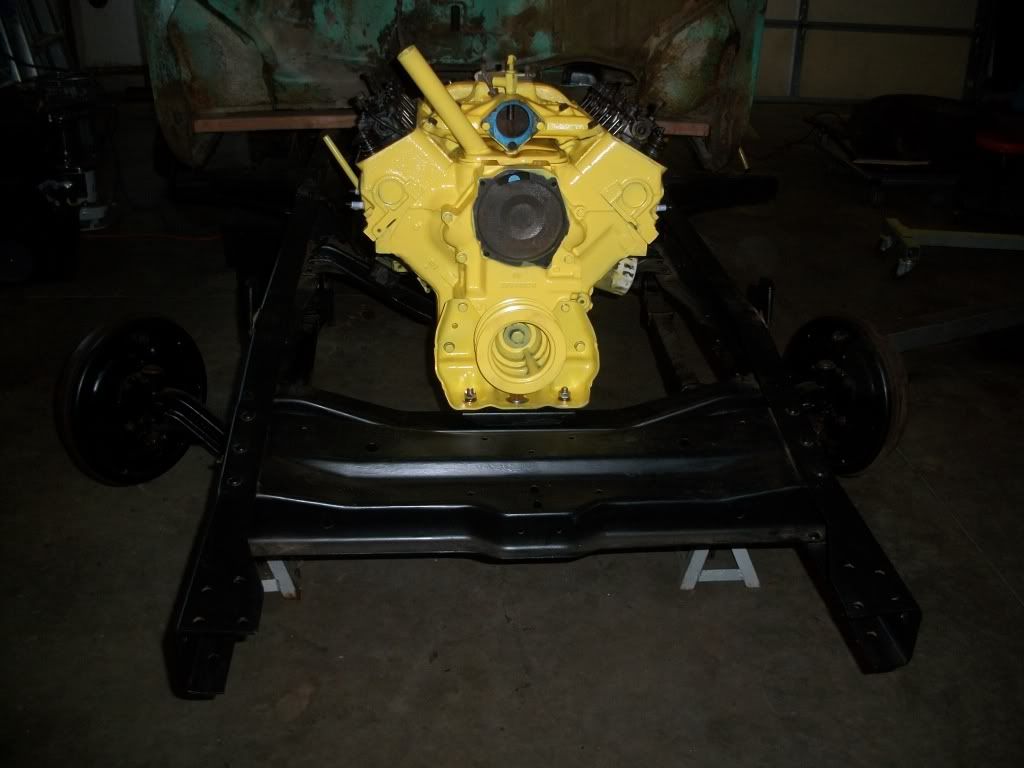
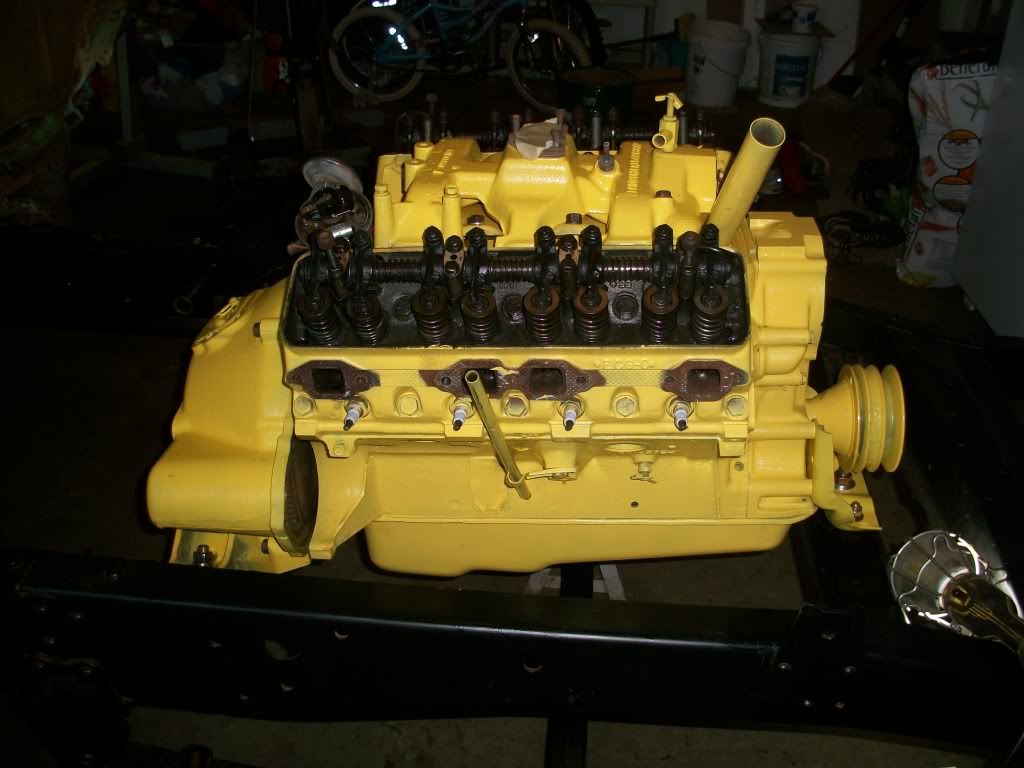

#25
02-18-2012, 03:13 PM
Thanks. My wife often says that she would like to be able to have this truck fixed up for me. Her heart is in the right place, but she doesn't quite understand what it is like to be able to say that I built it. So far this has been an amazing challenge for me, especially now that I'm beginning to see some good progress.
#26
02-18-2012, 04:26 PM
#28
02-18-2012, 08:03 PM
Thanks to raytasch and tinman52 I have lines on both a replacement and repair of my existing. Hopefully, I will have two before this is all over.
I would like to start hording parts, just in case and to help out others. If I start small my wife might not notice.

#29
02-18-2012, 08:23 PM
Well, I decided to look at the transmission too.
Here is the video of it. Everything looks pretty good. I will probably just clean and paint the outside, change the oil inside and put it back on. (after the engine gets running.) If you guys think it needs anything, just let me know.
Ford T-98 transmission - YouTube
Here are a couple of pics:

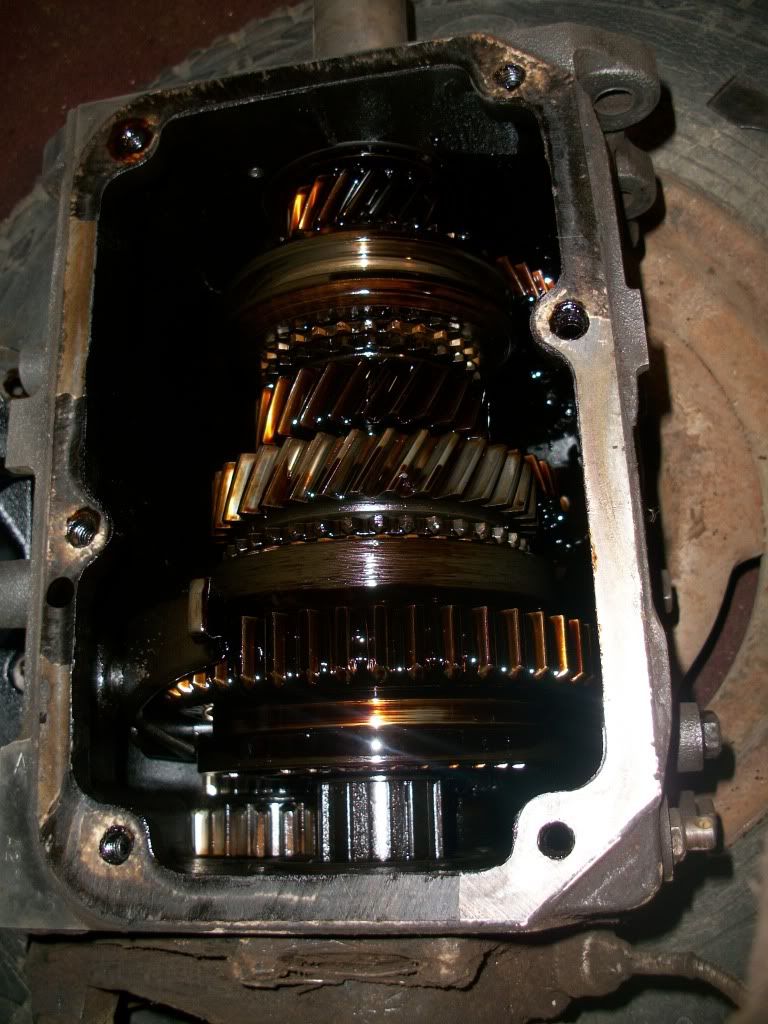
Here is the video of it. Everything looks pretty good. I will probably just clean and paint the outside, change the oil inside and put it back on. (after the engine gets running.) If you guys think it needs anything, just let me know.
Ford T-98 transmission - YouTube
Here are a couple of pics:
#30
02-20-2012, 08:03 PM
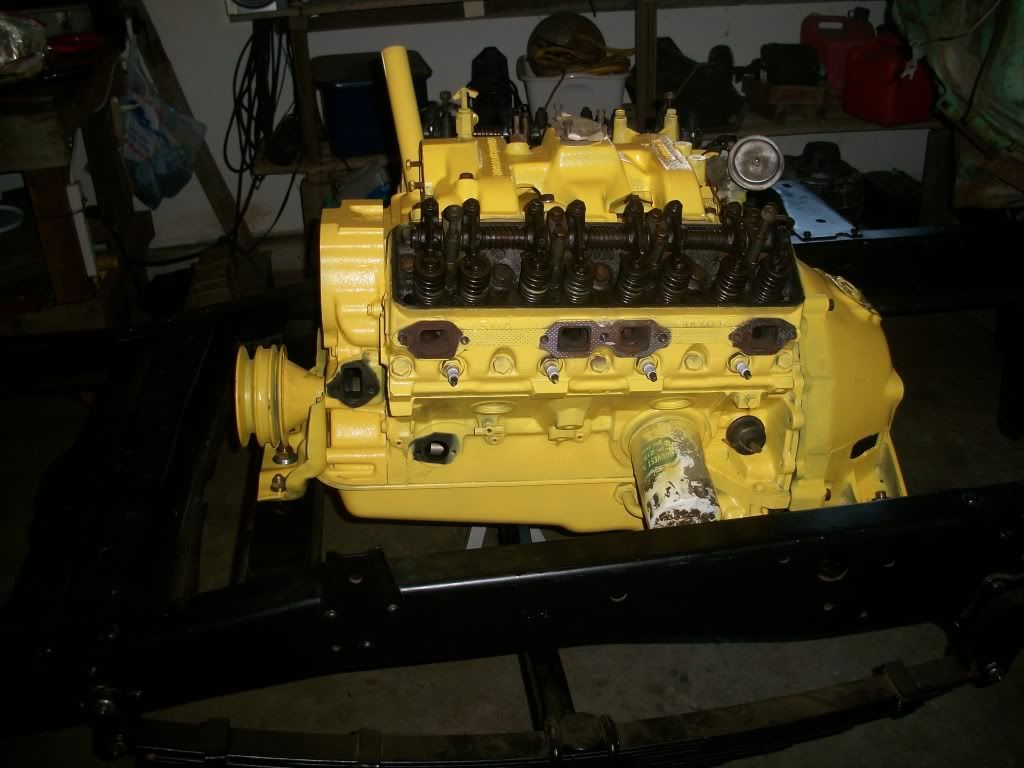
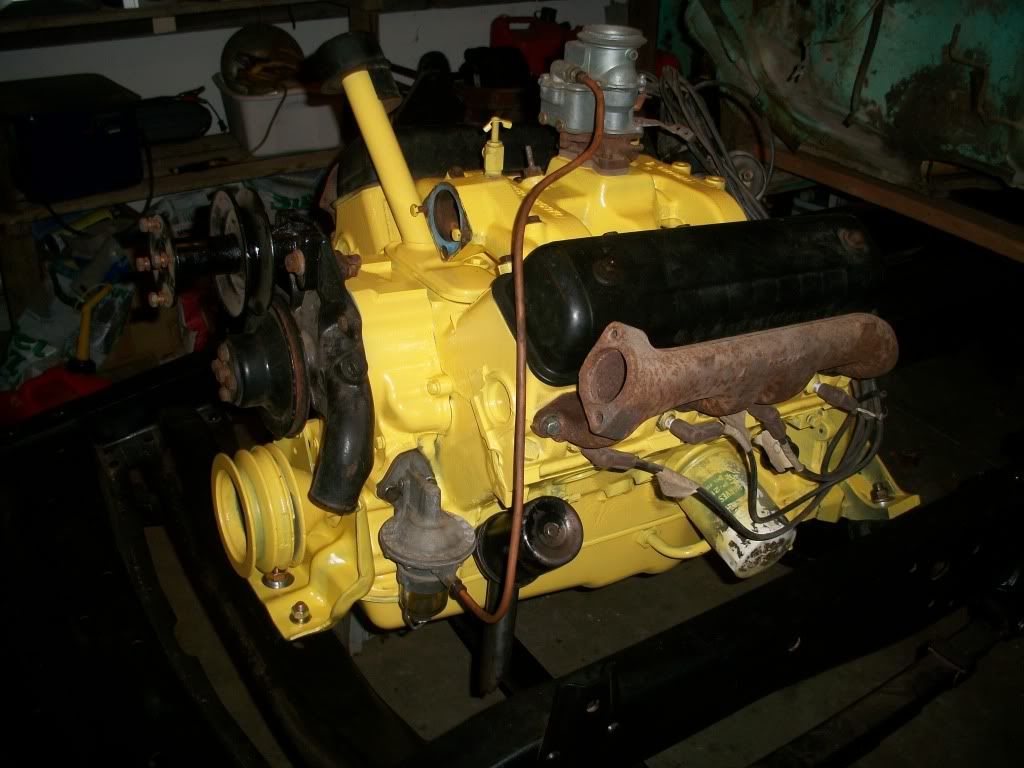
Well I started putting more parts back on today.
The exhaust manifolds will need to come back off for cleaning.
I will need to get new bolts for the crossover pipe. I think I need to get fully threaded bolts with no head and put nuts on them. I think that is how they were....Had to have them removed years back.
The vacuum advance was blocked; I got that cleared.
The flex line going to the fuel pump is broken, so I need to get a new one of those which you can't get locally. Easy to get through mid fifties though. I need to come up with a few other things to purchase to save on shipping.
I had the starter checked today and it is running fine.
If you guys have tips on things to do before trying to start it up, I would appreciate it. I'm sure I'm a week or two off. Should I try to feed fuel directly to the carb or should I get that fuel line and feed through the fuel pump?