1952 Ford F-3 Build
#136
 05-28-2013, 07:29 AM

Join Date: Jan 2012
Posts: 121
Likes: 0
Received 0 Likes
on
0 Posts
#137
05-30-2013, 07:04 PM
Join Date: Jan 2012
Posts: 121
Likes: 0
Received 0 Likes
on
0 Posts

#138
06-02-2013, 08:22 PM
Join Date: Jan 2012
Posts: 121
Likes: 0
Received 0 Likes
on
0 Posts
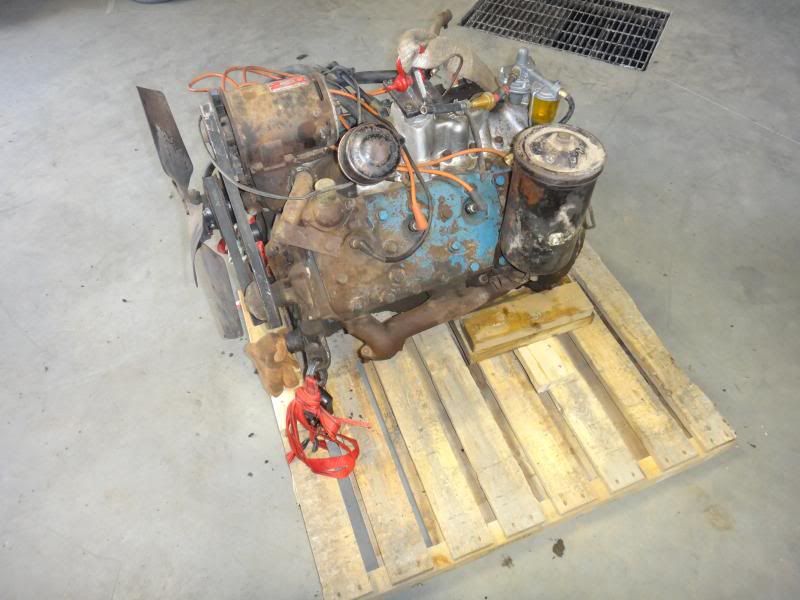
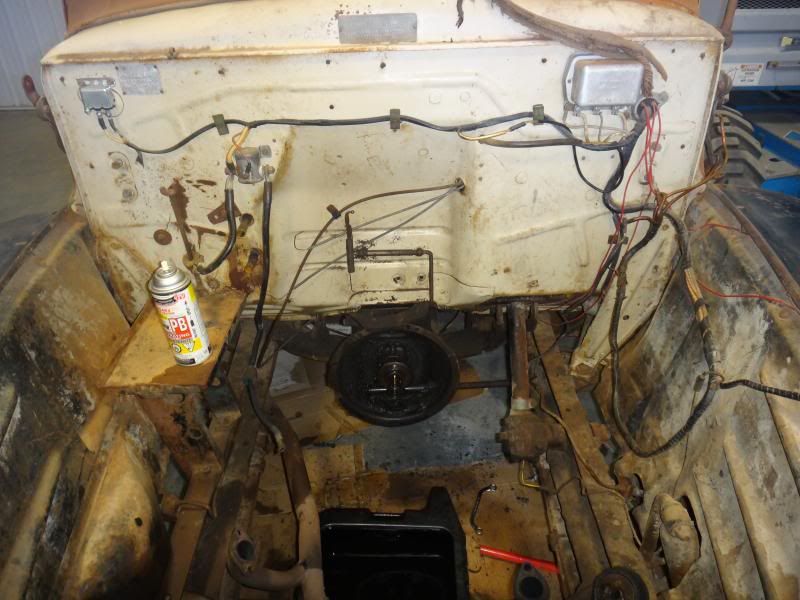
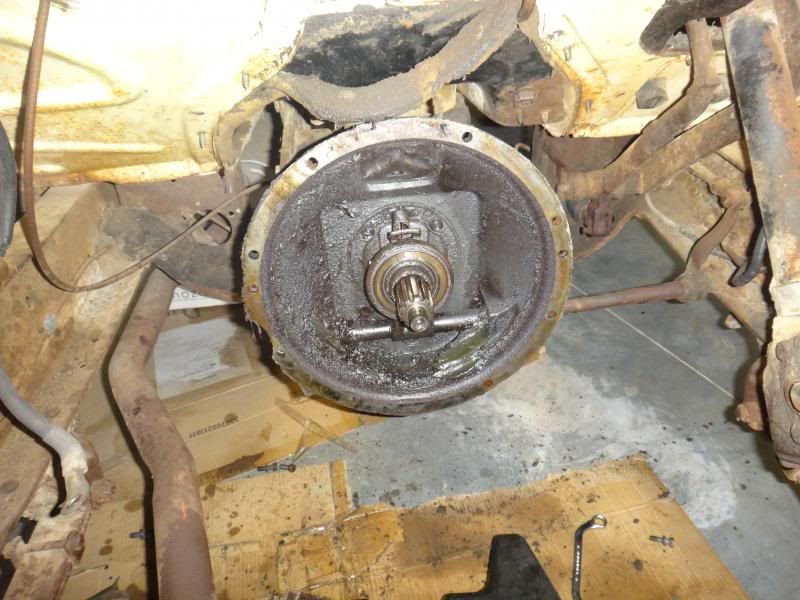
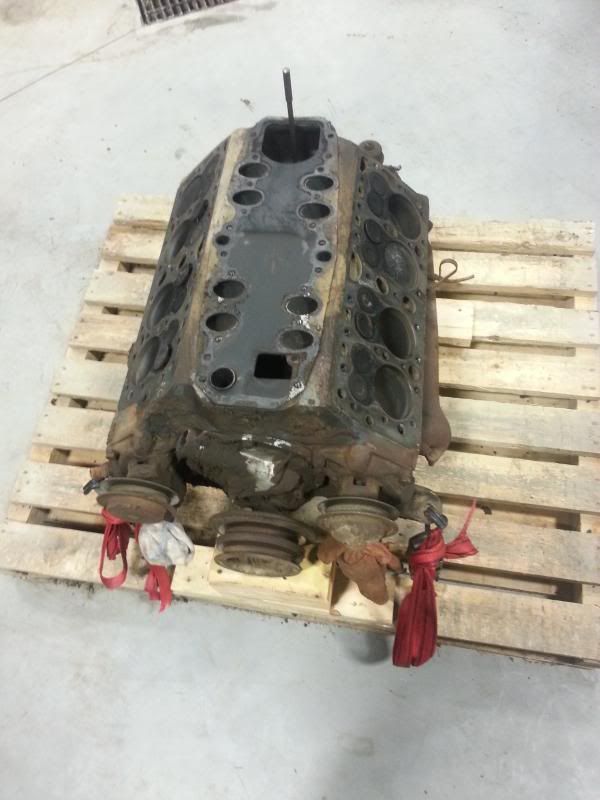
The Engine Is Removed.
Everything went just as planned..
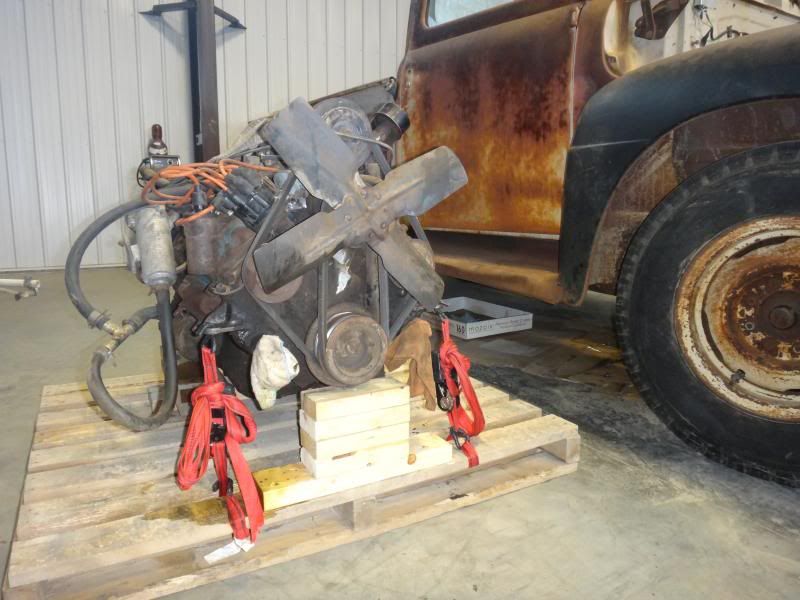
The Ford Flathead V8 has now departed the F3 body and is now ready to be hot rodded.

I first started by draining the engine of its oil, which proved to be quite the task since the drain plug bolt is oversized for what I had for sockets. Nothing that a hammer and a Ukrainian socket set couldn�t handle. Then I disconnected the exhaust from the exhaust manifold. The right side was easily accessed using an impact but the left side I had to use a socket with an extension and a rod attached to the handle to give leverage. Then I loosened the front engine bolts, followed by the tranny bolts. I removed the top two hard to get at transmission bolts and left all the others hand tight. I did one final check to make sure I didn�t miss anything and hooked up the sling system.
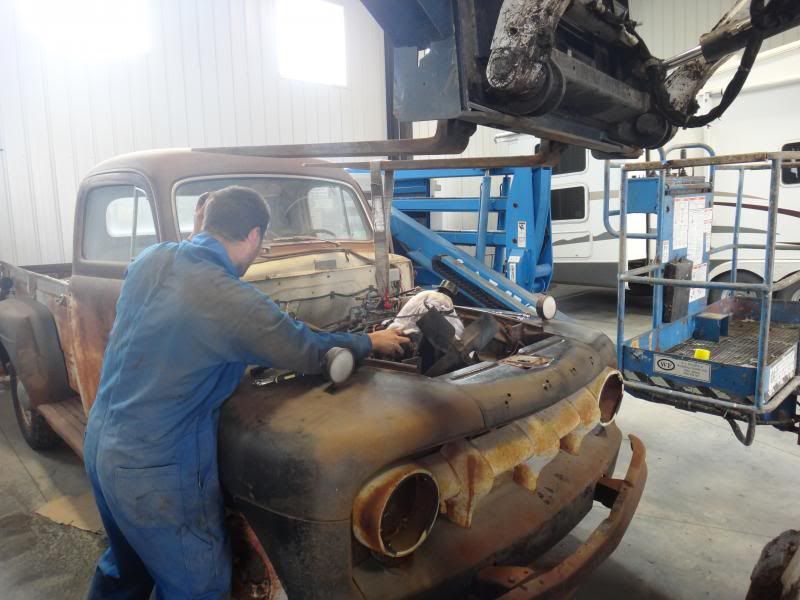
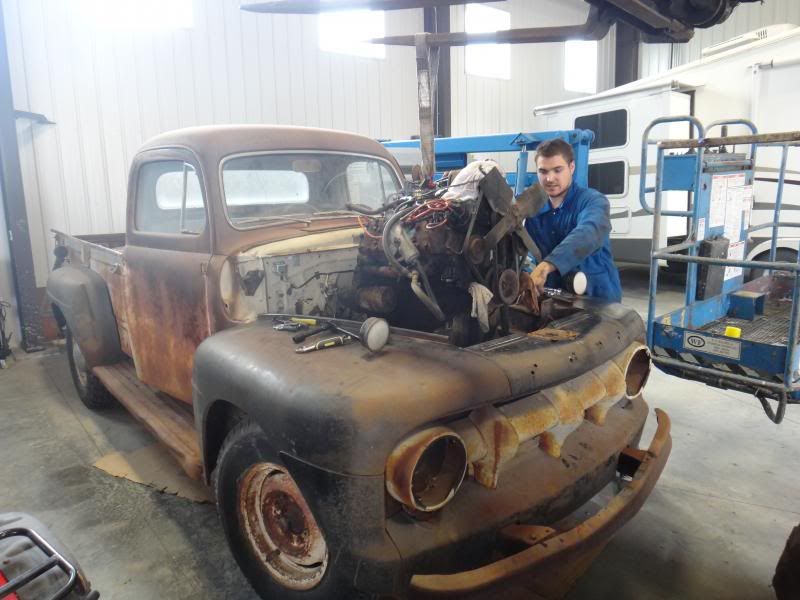
Lastly pulled the engine forward to the grill and then straight up. Came out really easy and the lifting position was perfectly centered. Then set it on a pallet and secured it down with ratchet straps ready to ship to the engine builders next month.


#139
06-03-2013, 09:03 AM
Join Date: Jan 2012
Posts: 121
Likes: 0
Received 0 Likes
on
0 Posts
Just To Confirm..
Good Morning Everyone;
I have been searching through all the forums and I beleive I have the answer to my question which is:
"Will 1952 F3 Front Inner Fender Supports work and be completly compatible with 1952 F1 Front Fenders"
What I have found is that yes the front supports are exactly the same from F1-F6. Is this correct?
Thanks
Mathew Chrystian
#140
06-04-2013, 07:50 AM

Lead Driver
Join Date: Apr 2002
Location: Littleton, New Hampshire
Posts: 8,808
Likes: 0
Received 4 Likes
on
3 Posts
Good Morning Everyone;
I have been searching through all the forums and I beleive I have the answer to my question which is:
"Will 1952 F3 Front Inner Fender Supports work and be completly compatible with 1952 F1 Front Fenders"
What I have found is that yes the front supports are exactly the same from F1-F6. Is this correct?
Thanks
Mathew Chrystian
I have been searching through all the forums and I beleive I have the answer to my question which is:
"Will 1952 F3 Front Inner Fender Supports work and be completly compatible with 1952 F1 Front Fenders"
What I have found is that yes the front supports are exactly the same from F1-F6. Is this correct?
Thanks
Mathew Chrystian

#141
06-04-2013, 11:35 AM
Join Date: Jan 2012
Posts: 121
Likes: 0
Received 0 Likes
on
0 Posts
You read my mind exactly I am as well ordering fiberglass F-1 replacements out of Ontario. So that makes me breath a little easier.
#142
06-04-2013, 11:53 AM

Mountain Pass
Mattie, does your engine builder want the engine complete? If not, I would strip it before you ship it and keep every possible part, nut, and bolt so they dont get lost by the builder. Just a little heads-up based on past personal experience. BTW, great thread and project, the pics are really good, too.
#143
06-04-2013, 12:16 PM
Join Date: Jan 2012
Posts: 121
Likes: 0
Received 0 Likes
on
0 Posts
Mattie, does your engine builder want the engine complete? If not, I would strip it before you ship it and keep every possible part, nut, and bolt so they dont get lost by the builder. Just a little heads-up based on past personal experience. BTW, great thread and project, the pics are really good, too.
The builder only wants the block and recommended to save some cash to take off everything on my own time. He insists to only install brand new parts to get the most out of a rebuild. Below is a taste of what I am shooting for, things to be all finalized once I meet with him next month.

Thanks it's kind of been an all over the place thread until now where I have the plan worked out but I guess thats how things go with these sorts of builds!
#144
08-08-2013, 01:47 PM
Join Date: Jan 2012
Posts: 121
Likes: 0
Received 0 Likes
on
0 Posts
Frame
Today was the day I decided it was time tospend some money after a year and a half of planning I made my first bigpurchase. I ordered a TCI frame from Watson’s Hot Rods. I got the followingoptions:
-disks on the front drums on the rear
-four link rear suspension
-coil overs on all four corners
-mustang || front end
-power rack
-3.73 rear end
-Ford Flathead V8 engine mounts andbrackets installed
-clutch master cylinder to fit the T5transmissions hydraulic clutch
-2 inch drop (equates to a 4 inch drop fromstock height)
Frame is being built as we speak shouldhave pictures up in 4-6 weeks. May not be as rewarding as doing everythingyourself but when time is a crunch it is always nice to purchase your way intoa rolling frame.
****Edit: Decided to change my mind and go without power steering.
Last edited by Mattie2294; 08-13-2013 at 02:46 PM. Reason: Revised
#145
08-08-2013, 01:50 PM
Join Date: Jan 2012
Posts: 121
Likes: 0
Received 0 Likes
on
0 Posts
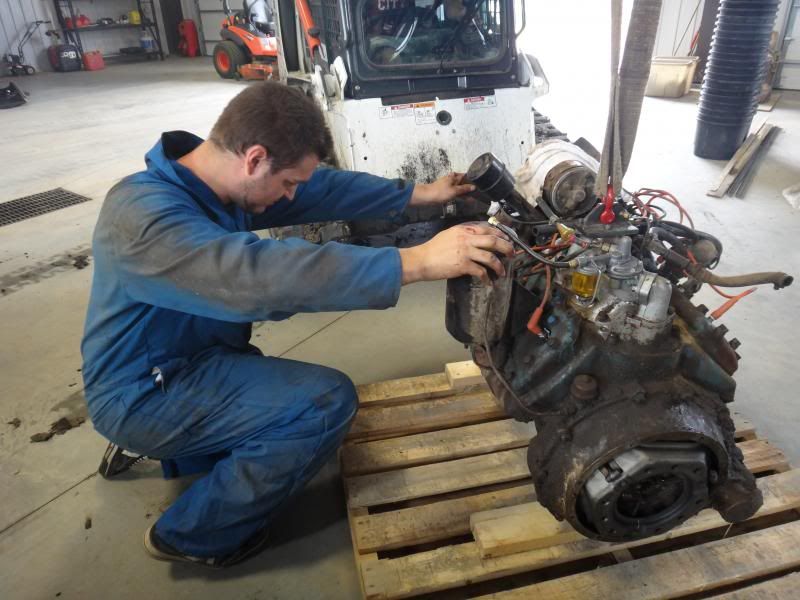
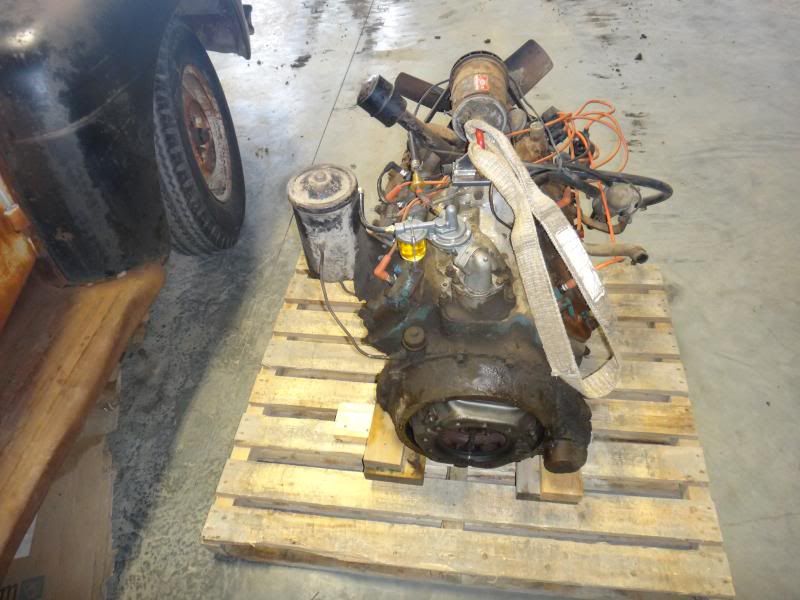
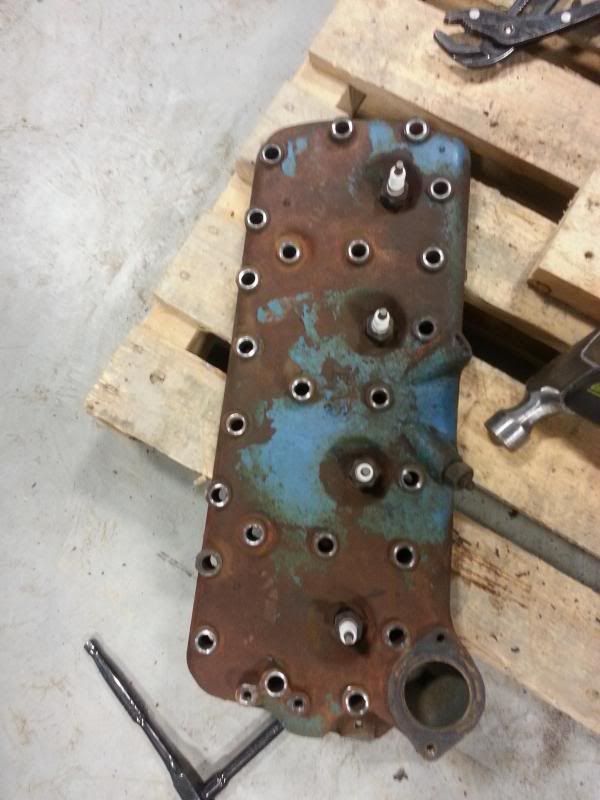
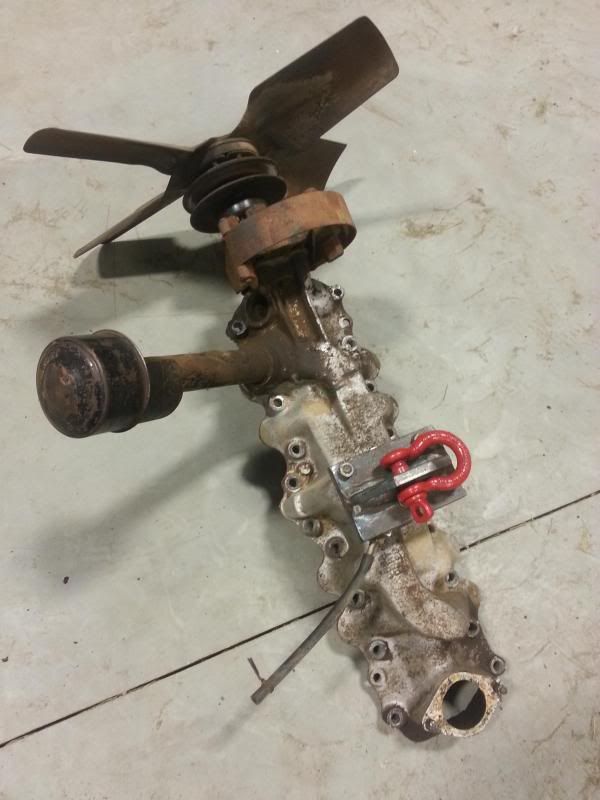
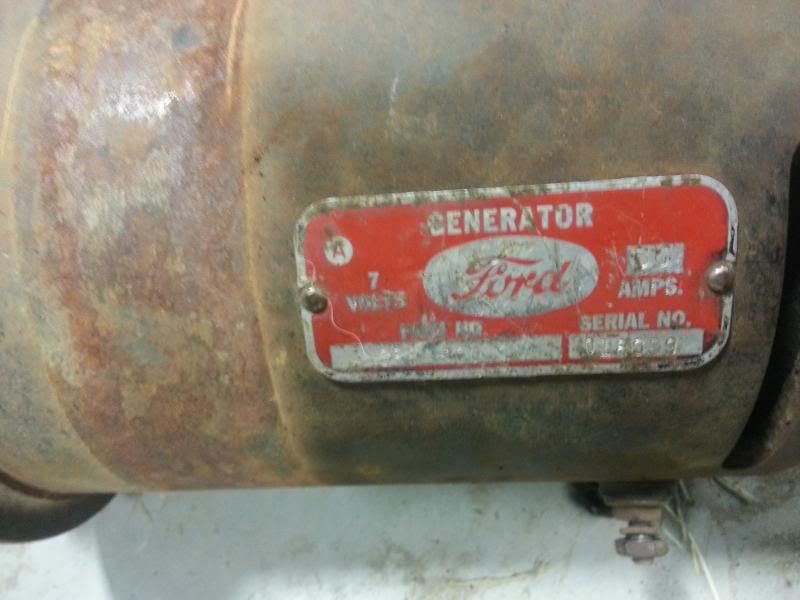
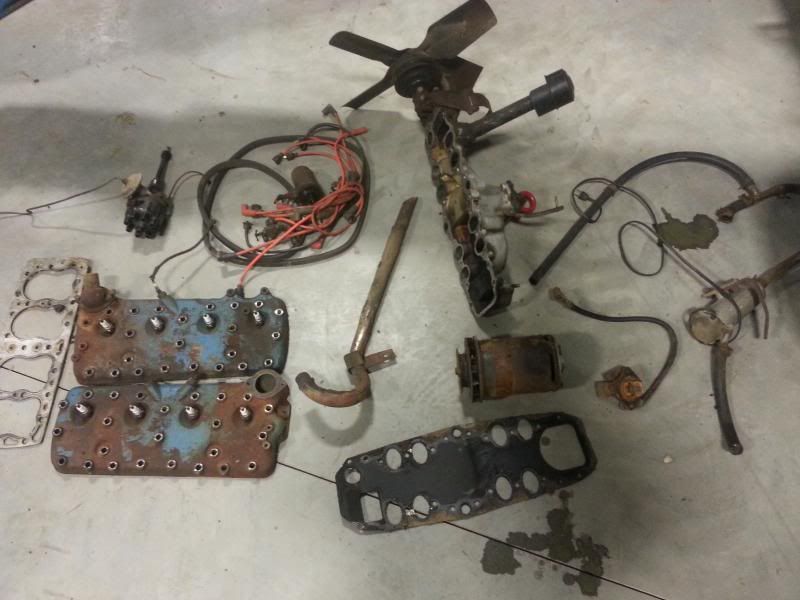
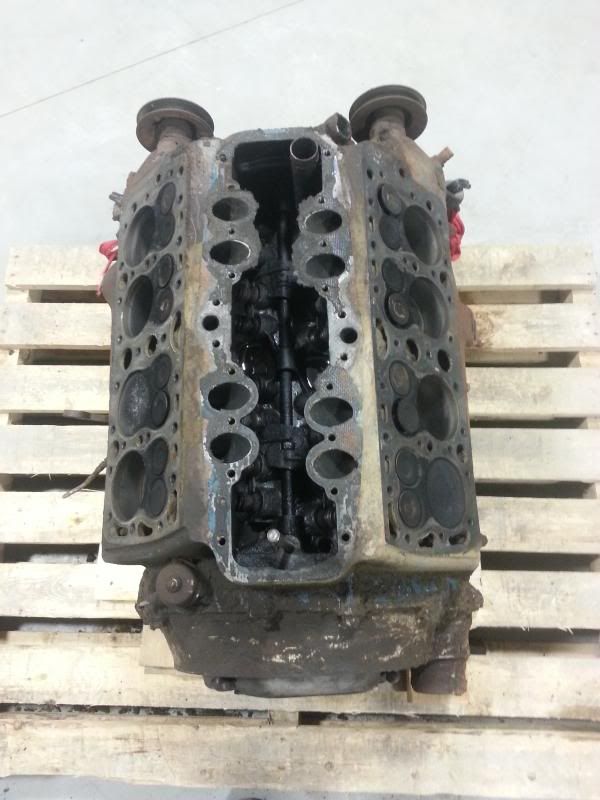
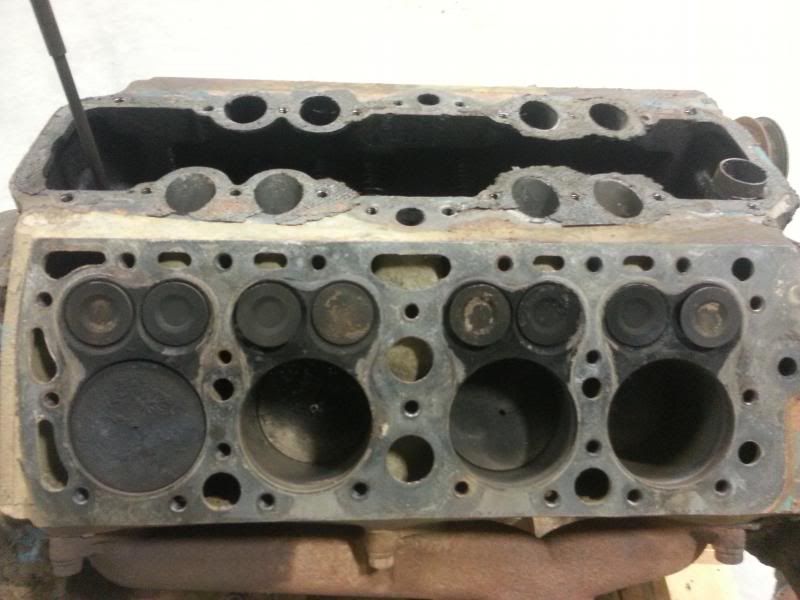
Engine
Tonight I finished the tear down of my 1952Flathead V8. I removed heads, intake manifold, exhaust manifold, and all otherparts in-between. It is now down to just the block on the pallet ready to beshipped.
The plan is to get it loaded and wrappedfor travel tonight. Heading out to Saskatoon, Sask. this weekend to Jitney AutoParts to get my engine rebuilt and performance upgraded. Full list of exactlywhat I want will be finalized when we meet this weekend. (Something similar towhat I have had previously posted budget depending is all.)


The plan is to get it loaded and wrappedfor travel tonight. Heading out to Saskatoon, Sask. this weekend to Jitney AutoParts to get my engine rebuilt and performance upgraded. Full list of exactlywhat I want will be finalized when we meet this weekend. (Something similar towhat I have had previously posted budget depending is all.)
#146
08-09-2013, 02:29 PM
Join Date: Jan 2012
Posts: 121
Likes: 0
Received 0 Likes
on
0 Posts
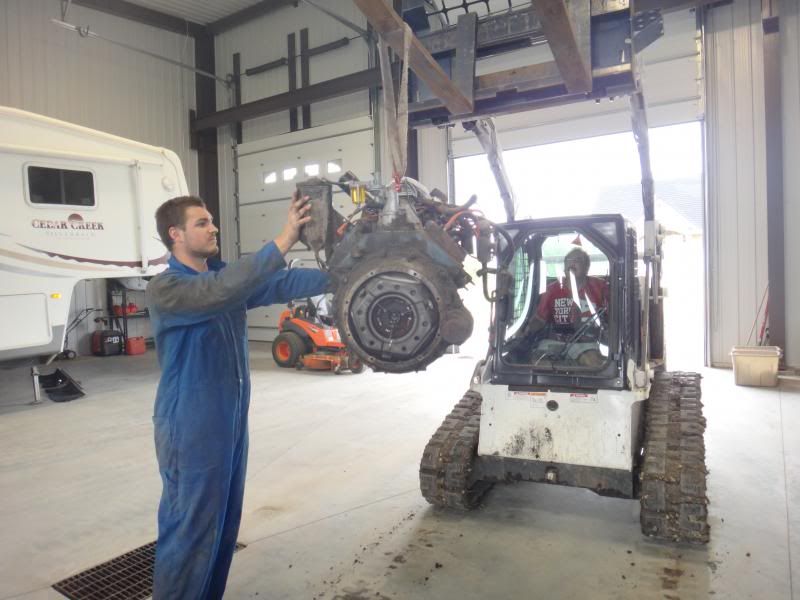
Transport
Finally got the issues with the Bobcatfigured out and got the engine loaded and shrink wrapped ready for transport.First thing I have ever put in the box of my truck which is sad to say but ohwell. Heading off tomorrow to hopefully not blow the budget sky high but itsold trucks and fun engines it will be hard to resist.


Probably did not need 5 pictures of nothingbut hey why not its Friday.
Probably did not need 5 pictures of nothingbut hey why not its Friday.
#147
08-09-2013, 04:41 PM
#148
08-09-2013, 04:51 PM
Join Date: Jan 2012
Posts: 121
Likes: 0
Received 0 Likes
on
0 Posts
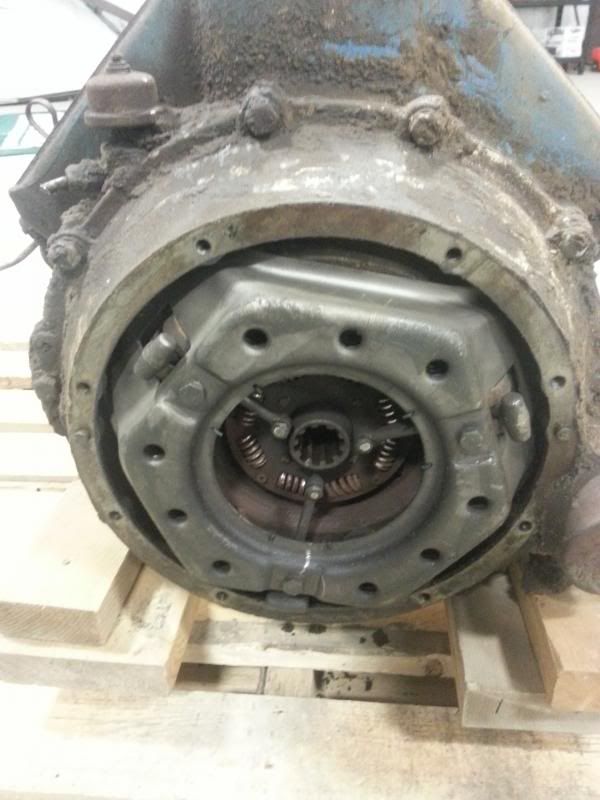
Pictures are easy to read. You're making great progress. Did you leave pulleys and flywheel on so that they could balance the rotating assembly? If not, be sure to remind them that you want your pulleys and crank bolt back. Personally, I think balancing has a good return on investment.
#149
08-09-2013, 04:56 PM
#150
08-12-2013, 07:00 PM
Join Date: Jan 2012
Posts: 121
Likes: 0
Received 0 Likes
on
0 Posts
Engine Build List Complete
Well over 1100 kilometers, 3 tanks of fuel, hotel room, 4.5 hour meeting with Jitney Autoparts in Saskatoon; A engine build list has been completed. Below is a list of the parts that will be going into my 1952 Flathead engine throughout this winter. I will be hearing it running and picking it up end of May 2014. I have finished my plan, ordered 2 substantial items so far this year. Hopefully finish my tear down, body fixes and odd ends yet this summer.
<O </O
</O
-Disassembly and Cleaning<O</O
-Basic Engine Build<O</O
-Upgrade to 276 CI / Merc Crank / 0.125 Bore Over
-Isky 400 JR Cam<O</O
-Porting and Relieving<O</O
-Painting<O</O
-Offenhauser Dual Intake<O</O
-Offenhauser Heads<O</O
-Polish Heads<O</O
-3 Stromberg '97' Carbs.<O</O
-Muroc Carb Stacks<O</O
-Ceramic Seal Water Pump<O</O
-Mallory Electrontic Distributor<O</O
-Mallory Coil<O</O
-Taylor 8MM Red Plug Wires<O</O
<O</O
-8MM Stainless Steel/Aluminum Wire Looms<O</O
-Polished Rear Breather<O</O
-PCV Setup<O</O
-Polished Center Mount Alternator <O</O
<O</O
-Polished Aluminum Thermostat Housing<O</O
<O</O
-Head Bolt Set (C/W Chrome Acorns and Nuts)<O</O
-Stainless Steel Braided Fuel Lines<O</O
-Holley Electric Fuel Pump<O</O
-Holley Fuel Pressure Regulator<O</O
-Optima Red Top Battery<O</O
-Fenton Cast Iron Headers<O</O
-Ceramic Coat Headers<O</O
-Stainless Steel Misc. Bolt Kit<O</O
-10" Clutch Disc and Pressure Plate<O</O
-Rebuilt T5 (5 Speed Tranny)<O</O
-T5 Adpater C/W Install Kit<O</O
-Powermaster 12V Starter (Stock Looking)<O</O
-Walker "Z" Core Radiator (Black Copper)<O</O
-Stainless Steel Radiator Pipe Kit and Hoses<O</O
-Labor to Dynamically Balance Setup, Install Transmission and Break in Run
<O</O
****Totaling hopefully if all goes as planned 250 horsepower.
<O</O
 <O></O>
 <O></O>
Above is a picture of a show engine he had for me to take a look at.
<O</O
 <O></O>
Above is a picture of some heads and misc. parts he has been collecting.
<O</O
 <O></O>
Engine is dropped off.<O</O
<O
</O-Disassembly and Cleaning<O
</O-Basic Engine Build<O
</O-Upgrade to 276 CI / Merc Crank / 0.125 Bore Over
-Isky 400 JR Cam<O
</O-Porting and Relieving<O
</O-Painting<O
</O-Offenhauser Dual Intake<O
</O-Offenhauser Heads<O
</O-Polish Heads<O
</O-3 Stromberg '97' Carbs.<O
</O-Muroc Carb Stacks<O
</O-Ceramic Seal Water Pump<O
</O-Mallory Electrontic Distributor<O
</O-Mallory Coil<O
</O-Taylor 8MM Red Plug Wires<O
</O<O
</O-8MM Stainless Steel/Aluminum Wire Looms<O
</O-Polished Rear Breather<O
</O-PCV Setup<O
</O-Polished Center Mount Alternator <O
</O<O
</O-Polished Aluminum Thermostat Housing<O
</O<O
</O-Head Bolt Set (C/W Chrome Acorns and Nuts)<O
</O-Stainless Steel Braided Fuel Lines<O
</O-Holley Electric Fuel Pump<O
</O-Holley Fuel Pressure Regulator<O
</O-Optima Red Top Battery<O
</O-Fenton Cast Iron Headers<O
</O-Ceramic Coat Headers<O
</O-Stainless Steel Misc. Bolt Kit<O
</O-10" Clutch Disc and Pressure Plate<O
</O-Rebuilt T5 (5 Speed Tranny)<O
</O-T5 Adpater C/W Install Kit<O
</O-Powermaster 12V Starter (Stock Looking)<O
</O-Walker "Z" Core Radiator (Black Copper)<O
</O-Stainless Steel Radiator Pipe Kit and Hoses<O
</O-Labor to Dynamically Balance Setup, Install Transmission and Break in Run
<O
</O****Totaling hopefully if all goes as planned 250 horsepower.
<O
</O<O></O><O></O>Above is a picture of a show engine he had for me to take a look at.
<O
</O<O></O>Above is a picture of some heads and misc. parts he has been collecting.
<O
</O<O></O>Engine is dropped off.<O
</O