George v4.0
#46
 12-06-2011, 06:06 PM

#48
12-14-2011, 08:32 PM
The 73-79 4wd truck trans crossmember basically sucks. Its heavy, its a pita to get in and out, it clogges up with mud very quickly and the rear trans pan bolts are somewhat tough to get to.
My remedy...
Years ago I bought something similar to this.
Jegster 40002 Jegster Ladder Bar Crossmembers
At the time it was (or possibly an option) 1.75 x .120 DOM.
After cutting to length I took a 3/4" hole saw and frenched in a piece of 3/4 x .063 tube.
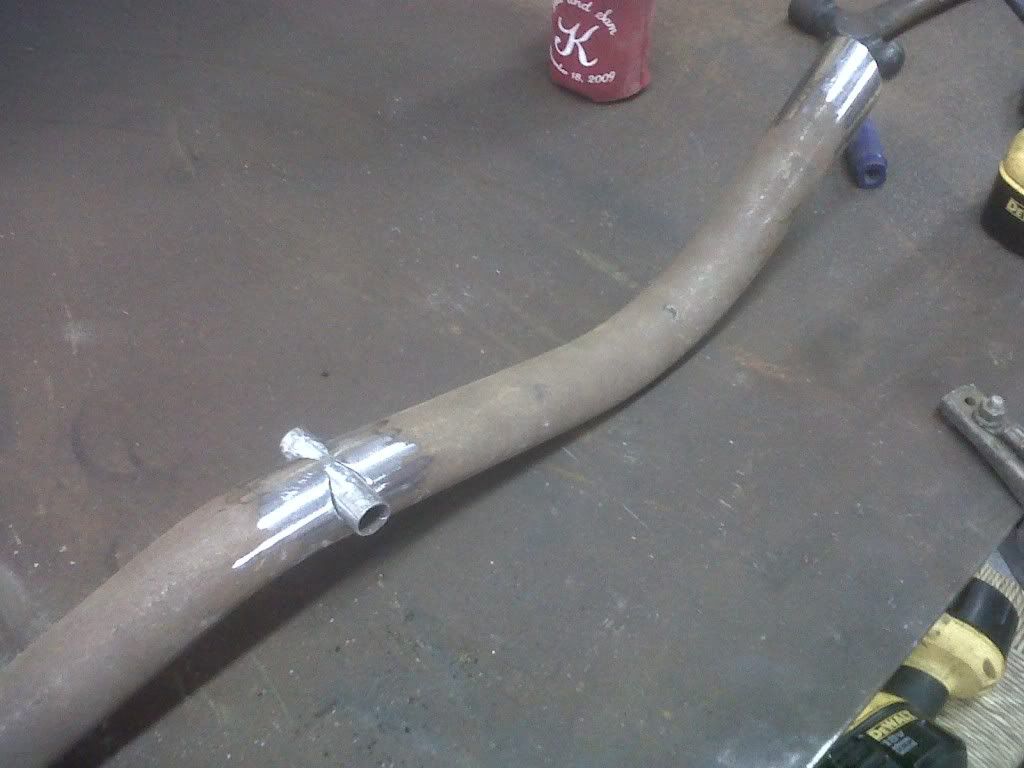
Then I welded it all to 2 pieces of 2.5 x 2.5 x .25 angle 6" long with some little gussets.
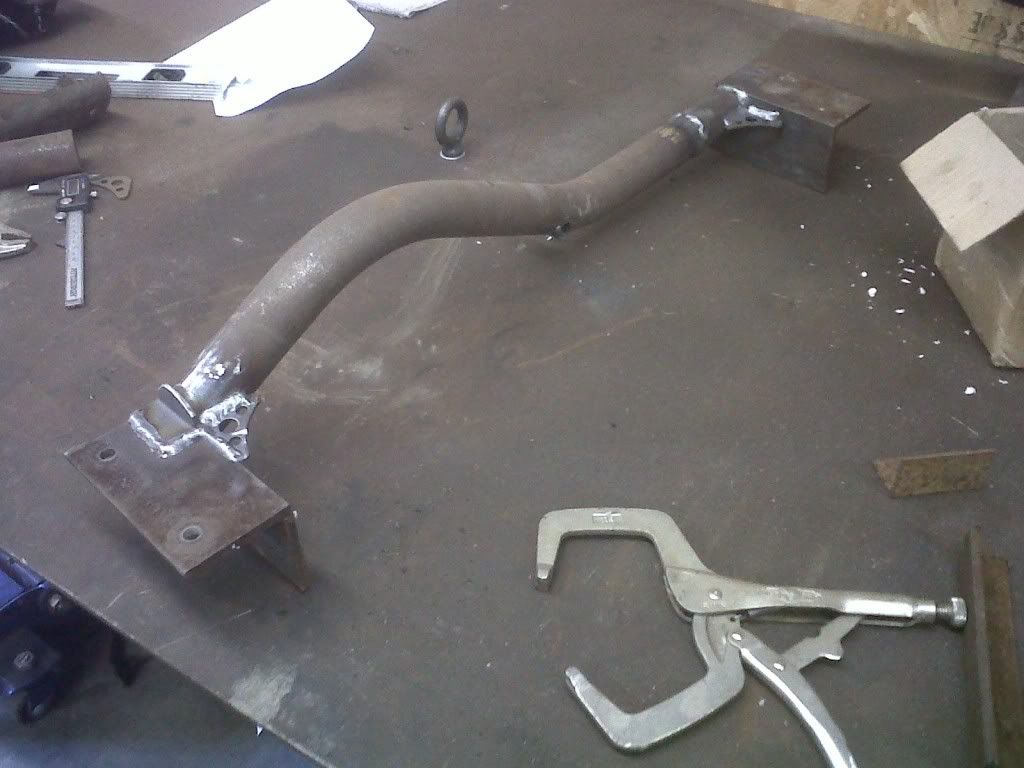
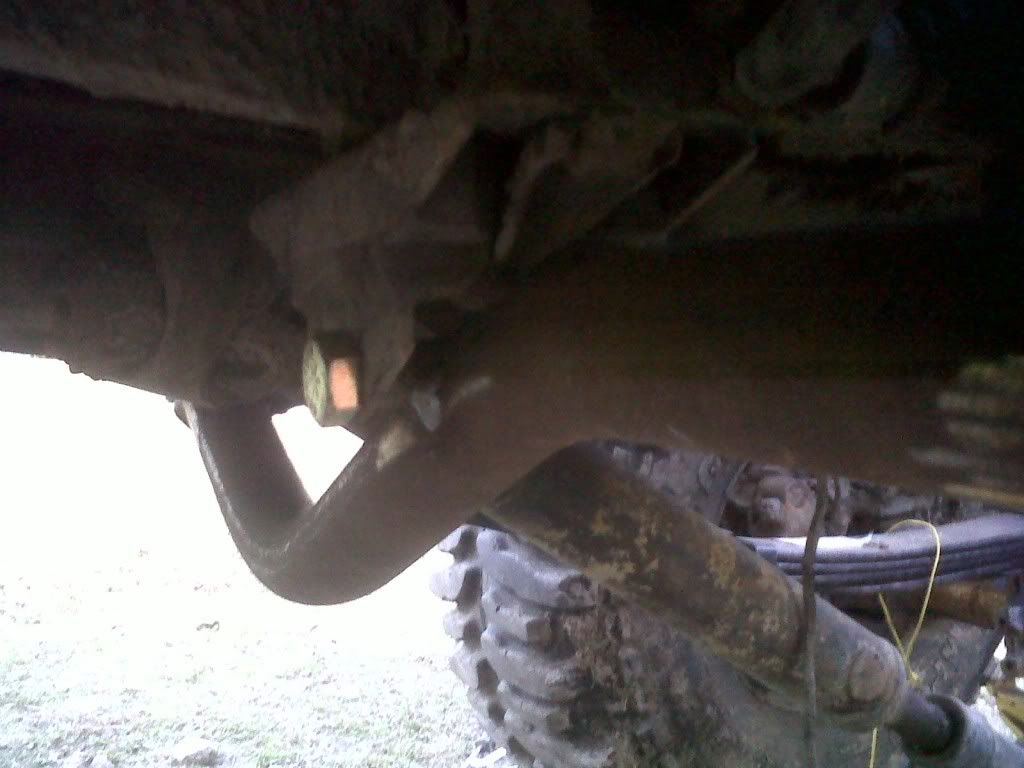
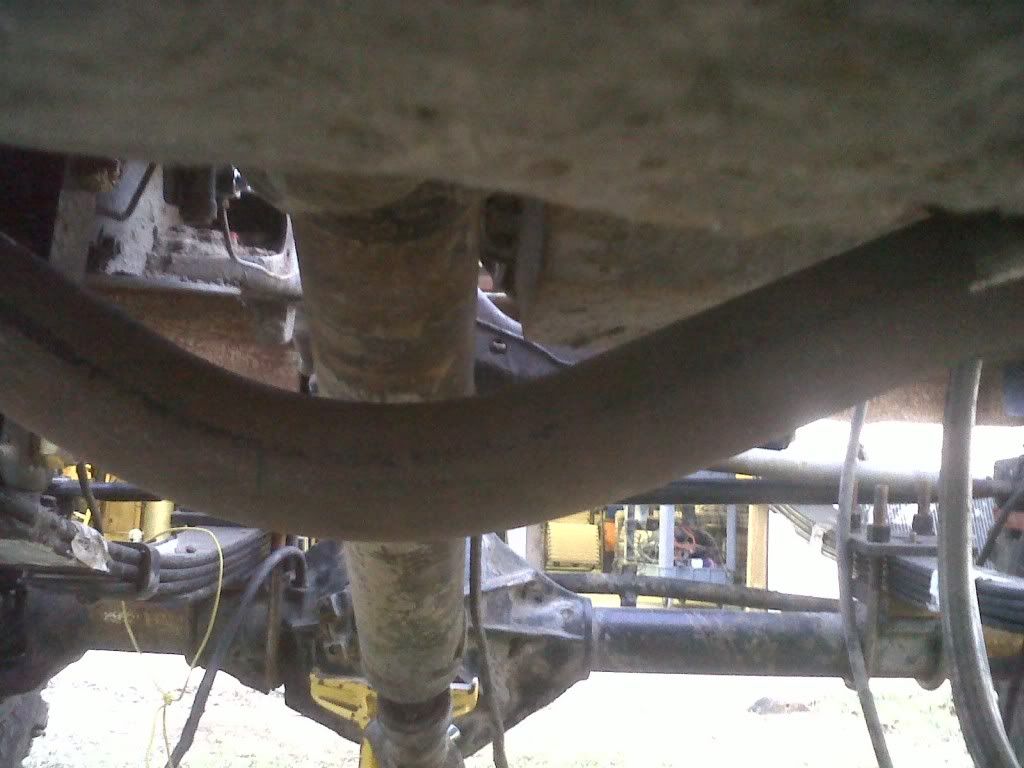
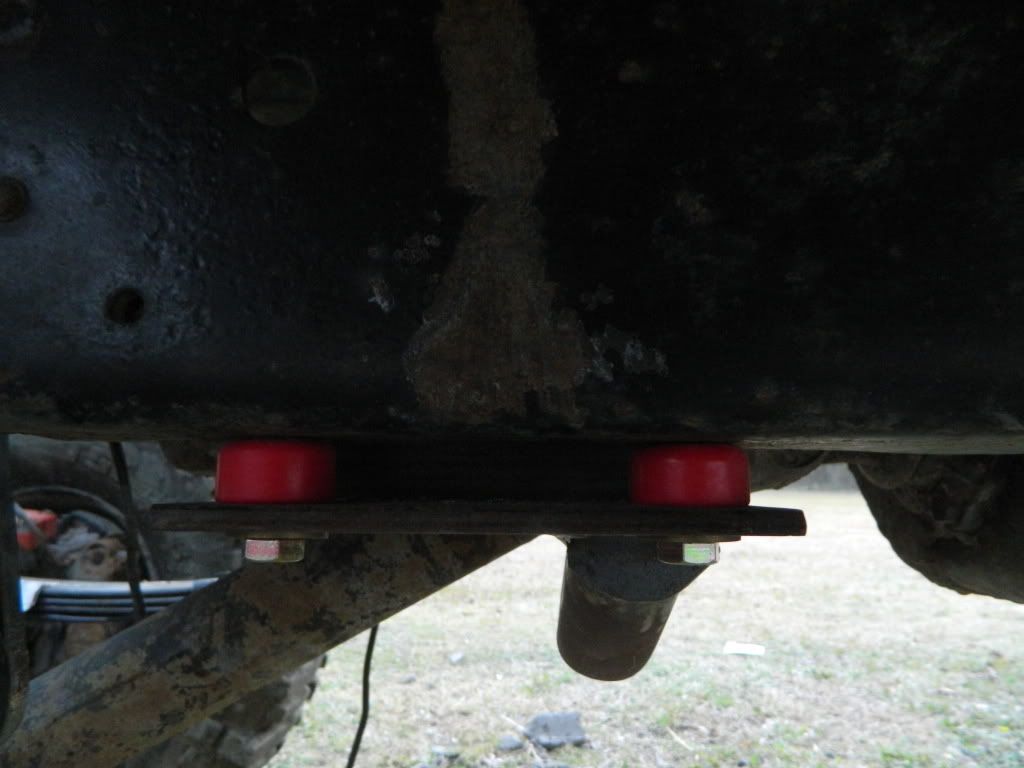
Here it is all bolted up. Since I am using motor plates, the crossmember will also be soft mounted to the frame with some poly bushings that look similar to shock or sway bar bushings except with a 1/2" ID. There will be one on top and bottom of the frame so it can flex with the frame a little better. The 3/4" nuts in the pics are for spacing while I wait on the bushing to come in.
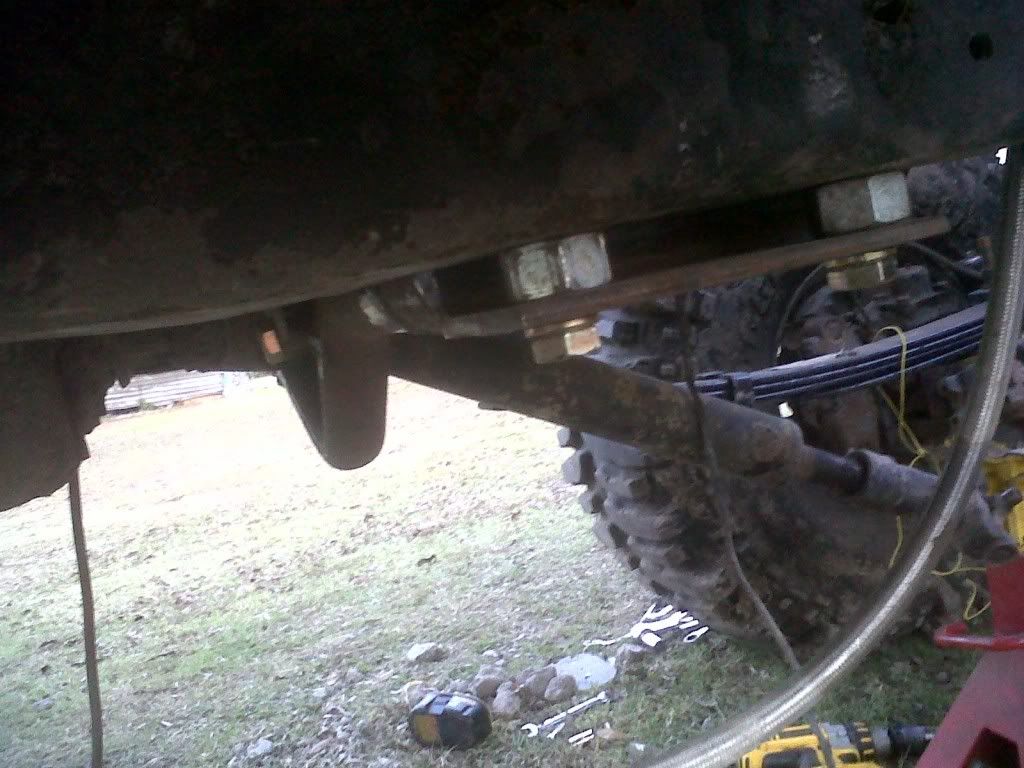
The new crossmember weighs 10lbs 4oz. The factory crossmember weighs 23lbs not including the trans mounts
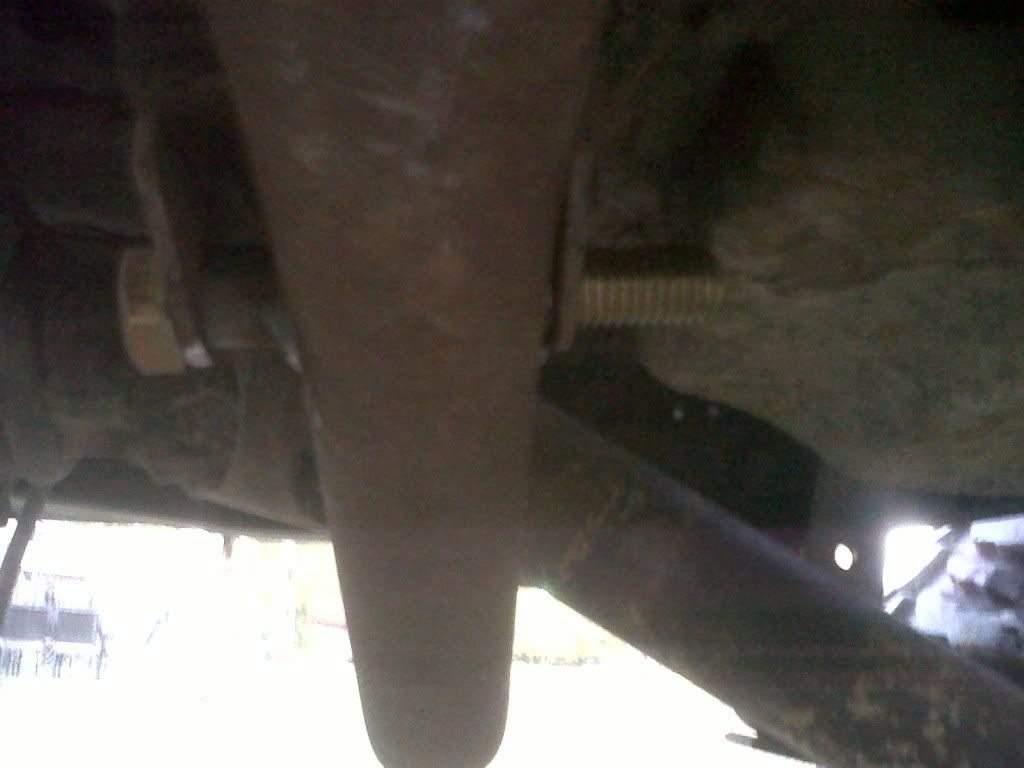
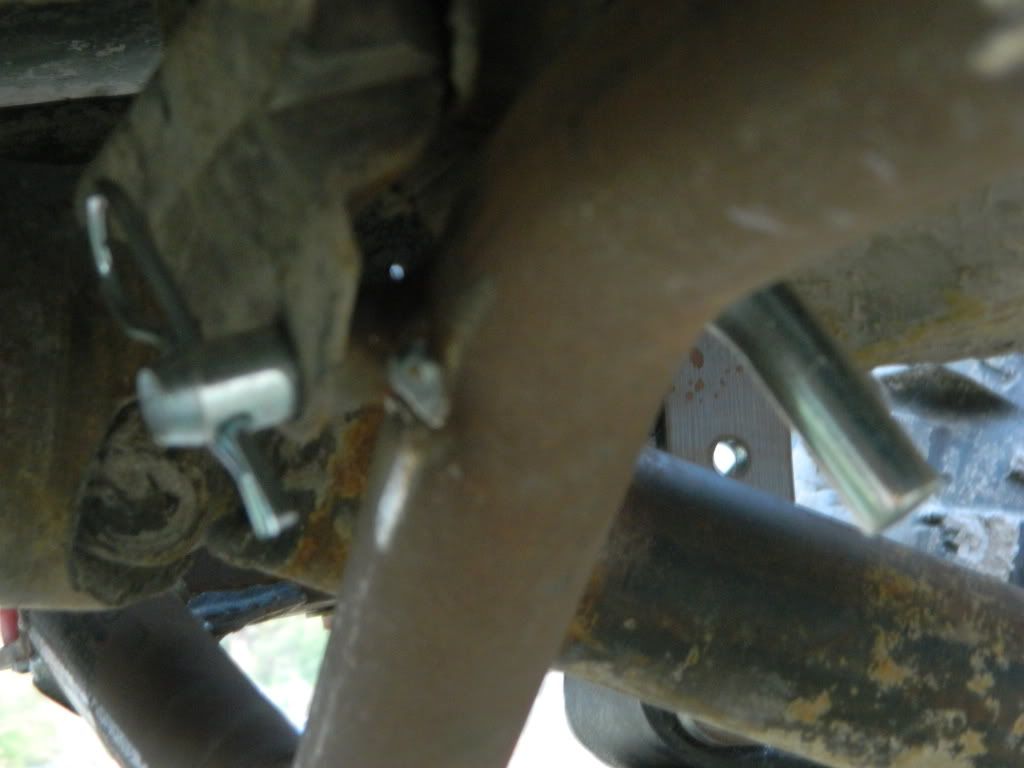
I think Im going to take this bolt out and replace it with a clevis pin.
My remedy...
Years ago I bought something similar to this.
Jegster 40002 Jegster Ladder Bar Crossmembers
At the time it was (or possibly an option) 1.75 x .120 DOM.
After cutting to length I took a 3/4" hole saw and frenched in a piece of 3/4 x .063 tube.
Then I welded it all to 2 pieces of 2.5 x 2.5 x .25 angle 6" long with some little gussets.
Here it is all bolted up. Since I am using motor plates, the crossmember will also be soft mounted to the frame with some poly bushings that look similar to shock or sway bar bushings except with a 1/2" ID. There will be one on top and bottom of the frame so it can flex with the frame a little better. The 3/4" nuts in the pics are for spacing while I wait on the bushing to come in.
The new crossmember weighs 10lbs 4oz. The factory crossmember weighs 23lbs not including the trans mounts
I think Im going to take this bolt out and replace it with a clevis pin.
#49
12-14-2011, 08:46 PM
Kris looks similar to mine, except mine is solid mounted to the frame like the factory was to brace my radius arms and the trans uses a factory style urethane mount. Why do you want frame flex? Look at Critter and some of the really fast guys and they reduced a bunch of frame flex to keep the truck straighter. Think drag car and not rock crawler 
Looks good though
Looks good though
#50
12-14-2011, 09:05 PM
Yeah Im aware that frame flex is a bad thing but remember my class rules dont have provisions for a roll cage suitable enough to tie the frame together and make it rigid. Im really painted into a corner with my rules or Id have a rear suspension like yours among many other things that are obviously holding me back.
BTW, it looks similar to yours IF yours were finished :flip:
BTW, it looks similar to yours IF yours were finished :flip:
#51
12-14-2011, 09:12 PM
My crossmember is done. It's the cutting of the body and bed I need to do when it's warmer.
On a side note of me stuff, the 4 bolt mod and block work should be done soon. Then on to the heads. Debating on a tr intake, but don't want a super huge scoop either. Also got the housing floater for the rear to do when I unwrap the truck
On a side note of me stuff, the 4 bolt mod and block work should be done soon. Then on to the heads. Debating on a tr intake, but don't want a super huge scoop either. Also got the housing floater for the rear to do when I unwrap the truck
#52
12-23-2011, 07:18 PM


#53
12-23-2011, 07:38 PM
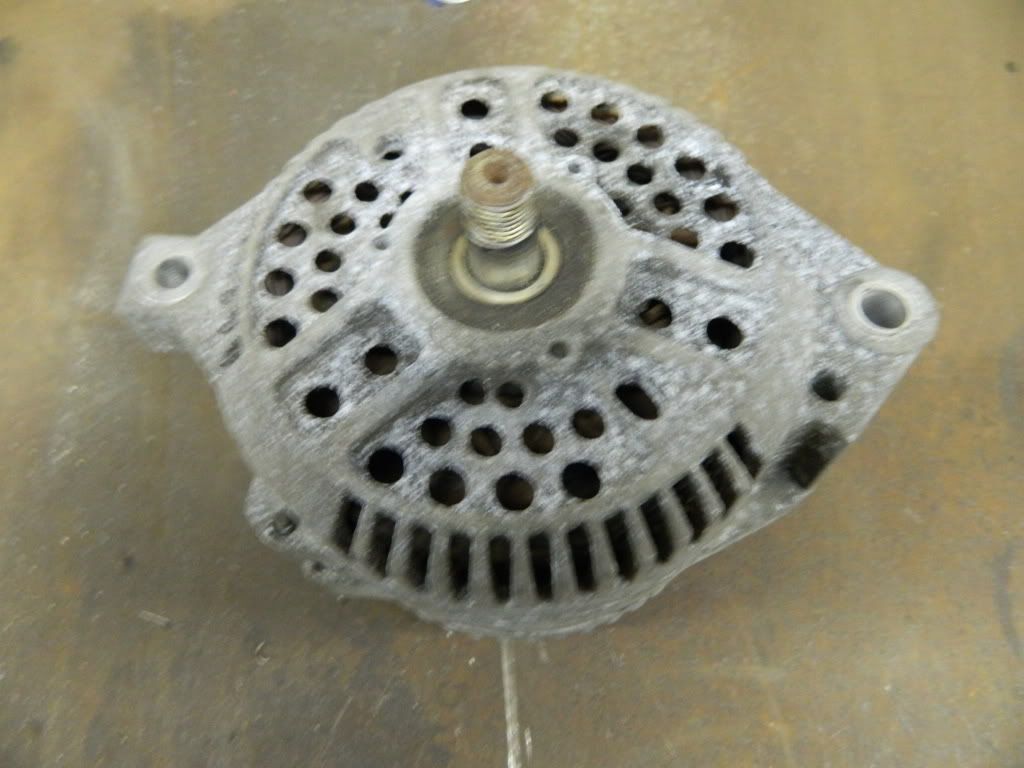
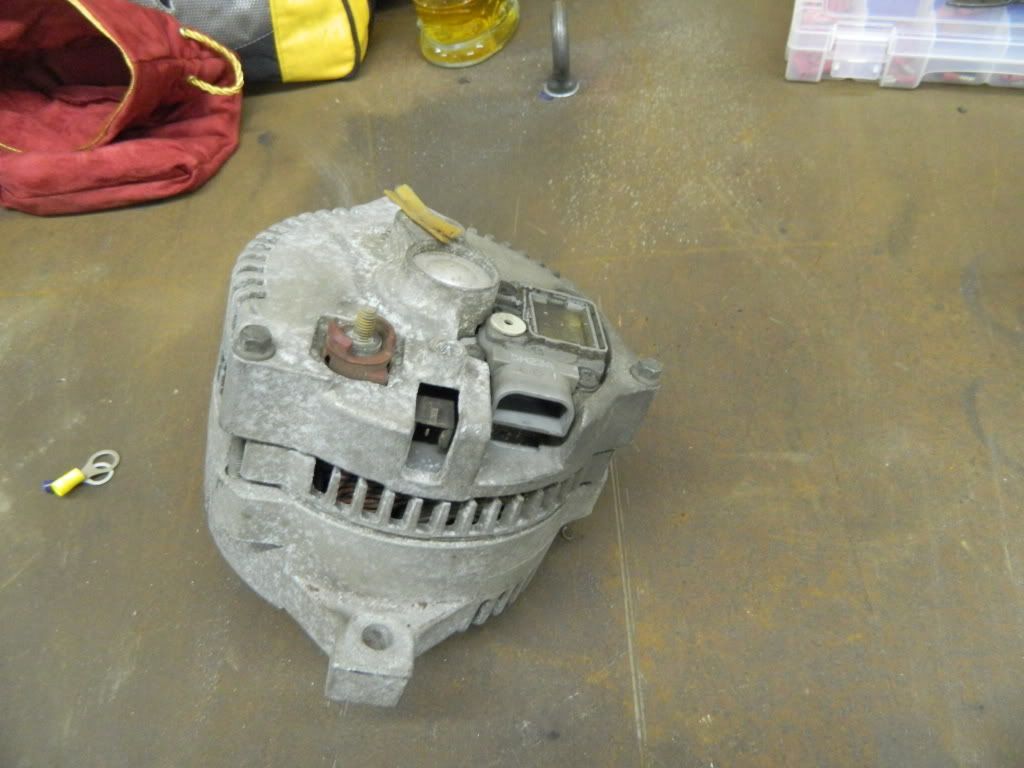
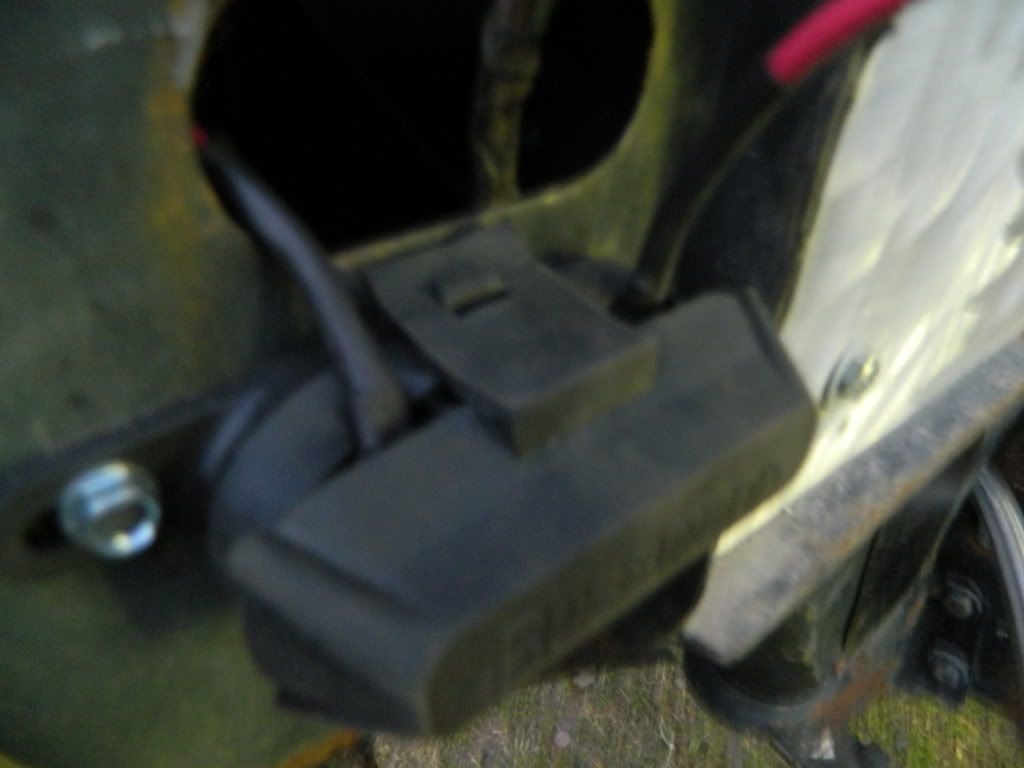
3g Alternator upgrade for dummies...
130amp 3g alternator from a 94 Mustang with a 3.8 v6.
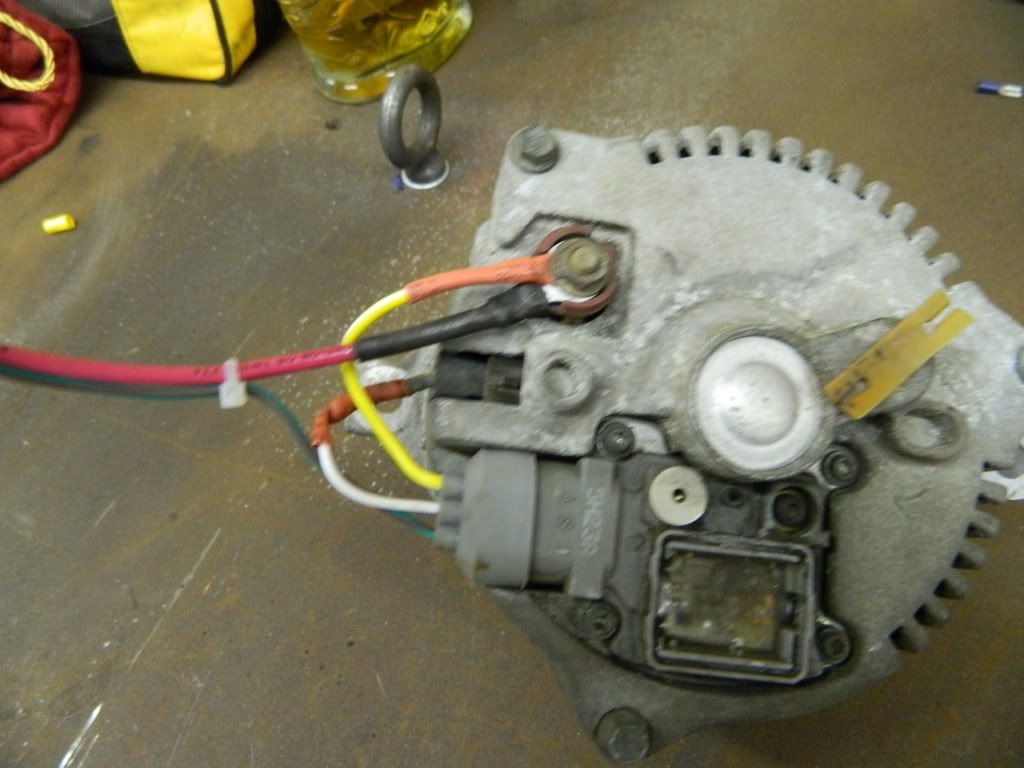
Factory alternator harness - $7 from the local parts store
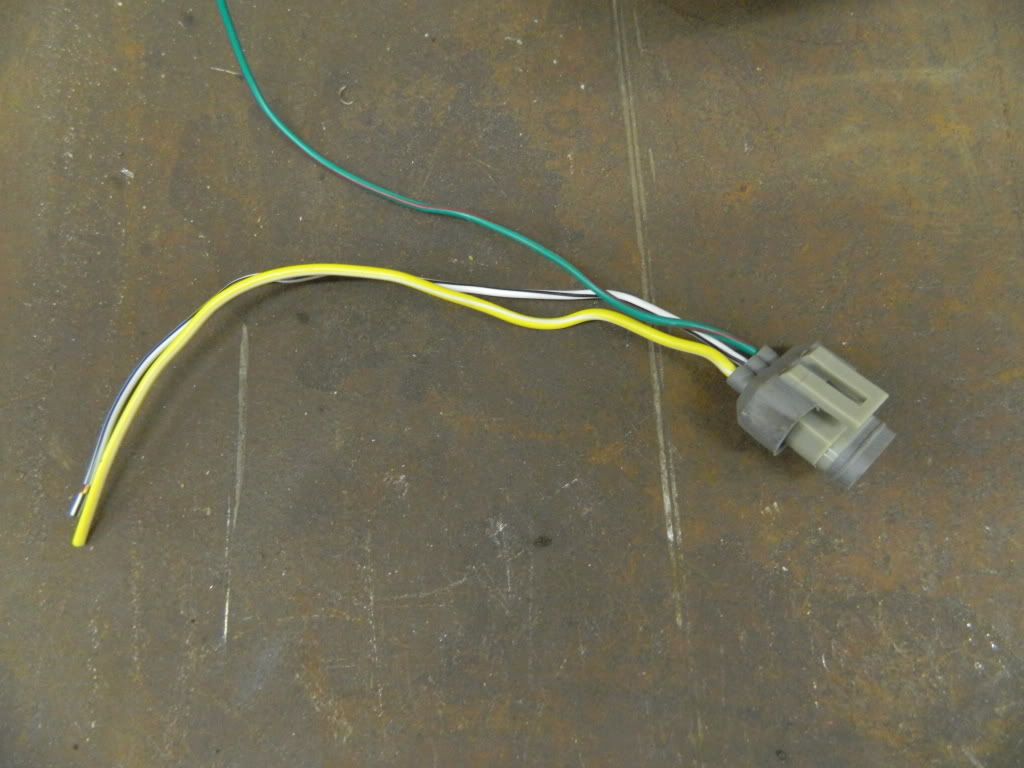
This is actually the factory horn wire. It fits the side terminal perfectly...go figure.
Here goes...
First, loop the yellow wire/white stripe back to the stud on the back of the alternator. Then, loop the white wire/black stripe to the side terminal with the horn wire shown or a spade terminal. Finally, the green wire/red stripe is your alternator excite wire. Your factory harness will have a wire the exact same color combo or you can use any 12v ignition hot source.
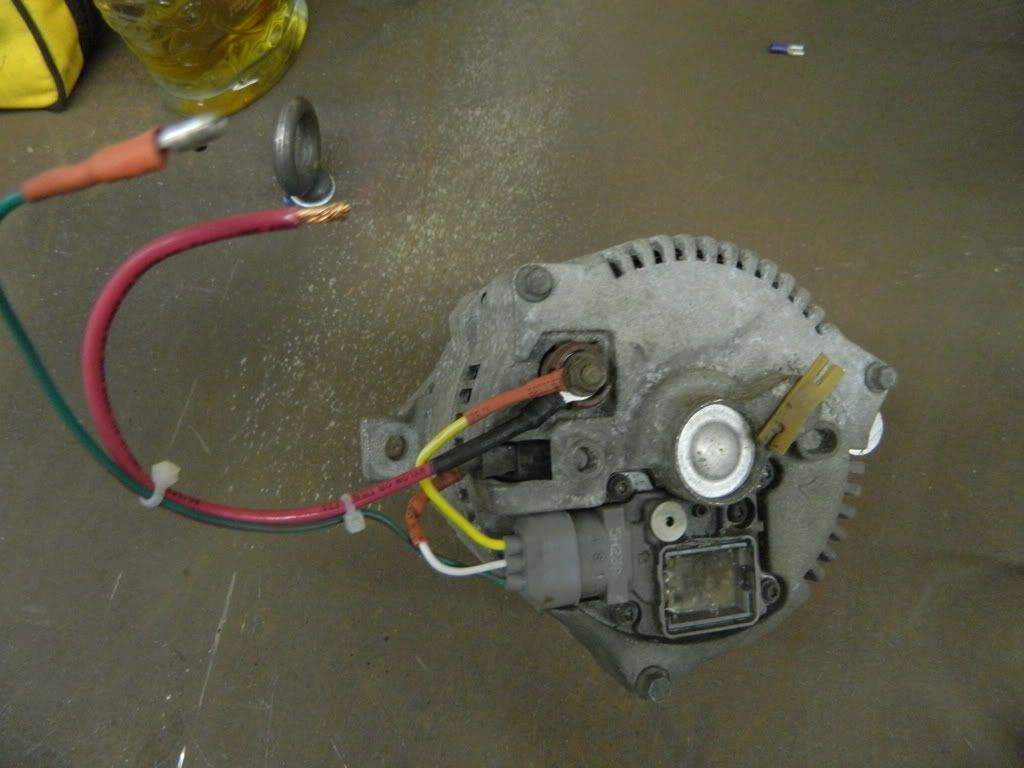
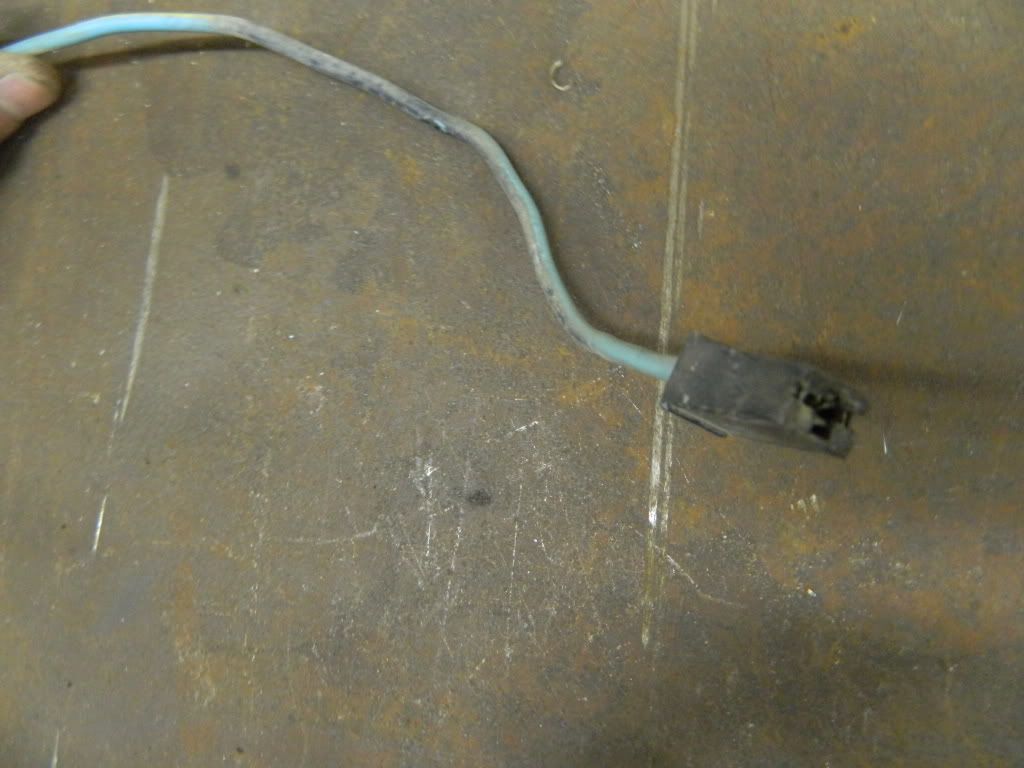
10ga wire and 175amp Maxi-fuse with holder between the battery and the stud on the back of the alternator.
130amp 3g alternator from a 94 Mustang with a 3.8 v6.
Factory alternator harness - $7 from the local parts store
This is actually the factory horn wire. It fits the side terminal perfectly...go figure.
Here goes...
First, loop the yellow wire/white stripe back to the stud on the back of the alternator. Then, loop the white wire/black stripe to the side terminal with the horn wire shown or a spade terminal. Finally, the green wire/red stripe is your alternator excite wire. Your factory harness will have a wire the exact same color combo or you can use any 12v ignition hot source.
10ga wire and 175amp Maxi-fuse with holder between the battery and the stud on the back of the alternator.
#54
12-24-2011, 06:12 PM

#55
12-24-2011, 08:14 PM
Well basically that's how I have it.
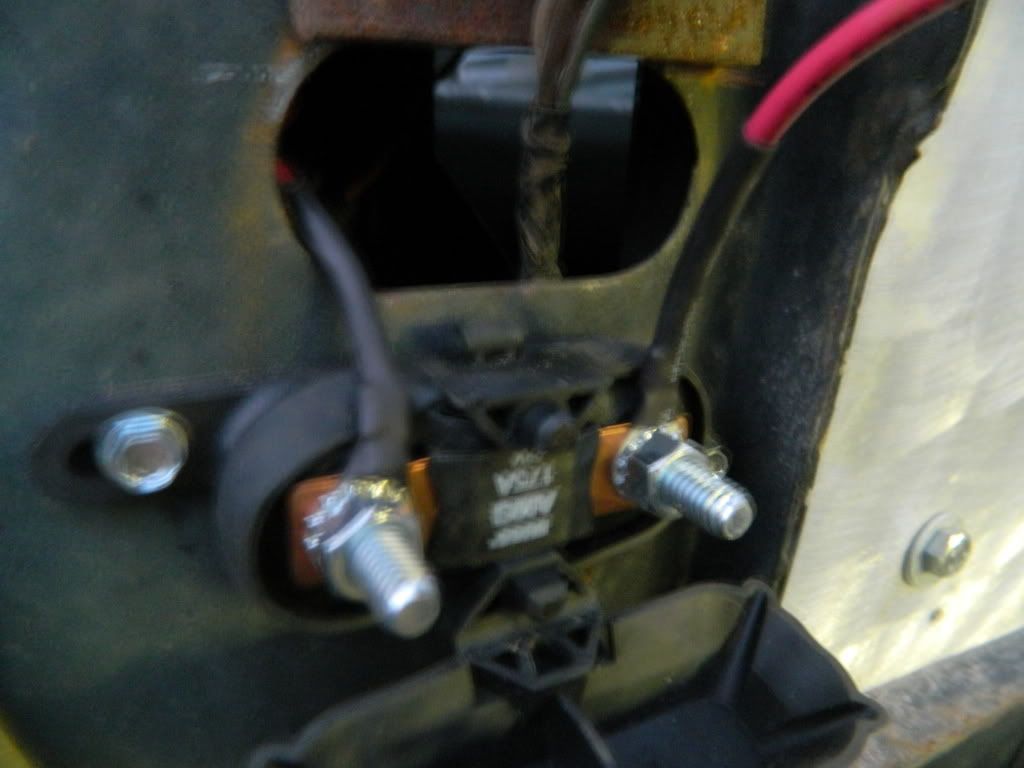
The yellow/white stripe doubles back to the red 10ga wire lug that goes back to the "battery in" lug on my firewall. Then the black/yellow stripe wire (main feed for the factory fuse block) is also connected the the "battery in" lug on the inside of the firewall.
The yellow/white stripe doubles back to the red 10ga wire lug that goes back to the "battery in" lug on my firewall. Then the black/yellow stripe wire (main feed for the factory fuse block) is also connected the the "battery in" lug on the inside of the firewall.
#56
12-24-2011, 08:57 PM
Not totally... The yellow wire senses the voltage for the regulator, if the alt puts out 14v there, and there is a large load on the fuse block, your voltage at the block could be down to 12.5 vs the 14 right at the back of the alternator.
But if the yellow wire is at the fuse block, it will sense the drop, and pump out more Volts right at the alt to get the fuse block to the 14 volts.
I did that with a GM style "one wire conversion" alt I had. When my fans and all would kick in, the voltage guage(getting power from the fuse block) would drop down to 12.5 when the voltage at the back of the alt was still 14. So extended the sensing wire to the fuse pannel, and than had a smaller voltage drop with all electrical running.
#57
12-24-2011, 11:31 PM
Just a little fyi for you on that main disconnect switch. I had been having intermittant electrical gremlins for the last couple of years. I was thinking it was the batteries, wiring/terminals, or starters going bad. Long drawn out story much shorter. Those cheapy switches can't handle the long term amperage draw that you will be running through it. Mine ended up filling my cab with smoke as it melted away behing the dash and left me having to do a Mexican hotwire job at the finish line to get me back to the trailer. I'm doing a total rewire to fix the high amp draw issues at the main switches by adding in some big solinoids to take the hit and putting in a real racing master disconnect switch!
#58
12-25-2011, 01:47 AM
Post Fiend
#59
12-25-2011, 08:18 AM
Dave, I think I'm with you now. You're saying "yellow wire direct to the fuse block main power?"
Karl, this one is rated for 175amps continuous 250amps peak. I don't think I will be drawing anywhere near that through this cutoff. MSD, fuel pump, electric fan and trans cooler fan. That's it. The fans and fuel pump use relays but I don't have one on the MSD.
Karl, this one is rated for 175amps continuous 250amps peak. I don't think I will be drawing anywhere near that through this cutoff. MSD, fuel pump, electric fan and trans cooler fan. That's it. The fans and fuel pump use relays but I don't have one on the MSD.
