
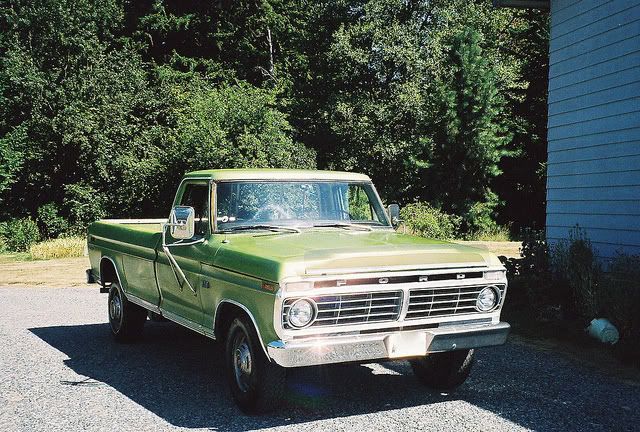
1973 F350 Ranger Restoration
#1
 08-14-2011, 09:10 PM


Join Date: Oct 2010
Posts: 69
Likes: 0
Received 0 Likes
on
0 Posts
1973 F350 Ranger Restoration
I have been working on restoring my 1973 F350 Ranger 2x4 for almost a year now. It is one of those projects that some how developed a life of it's own.
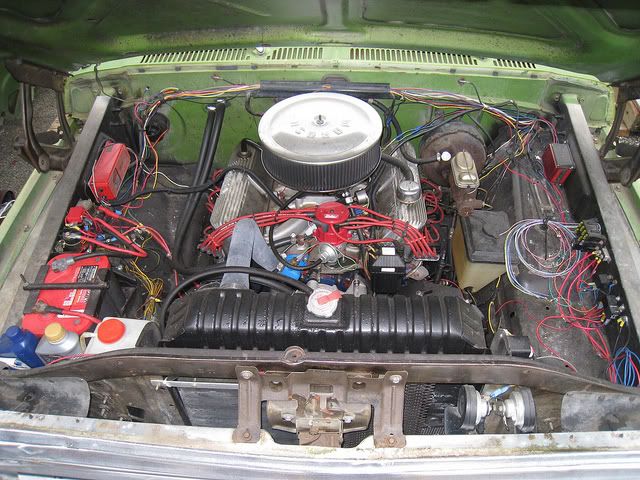
Originally I just wanted to fuel inject the FE, which I did.
The engine had so much throttle response that the engine torquing caused the mechanical linkage to further increase the throttle position. I found an accelerator assembly from a 74 F250 that had a cable throttle. I grabbed that but found due to clearance issues I needed to pull the engine to get it installed.
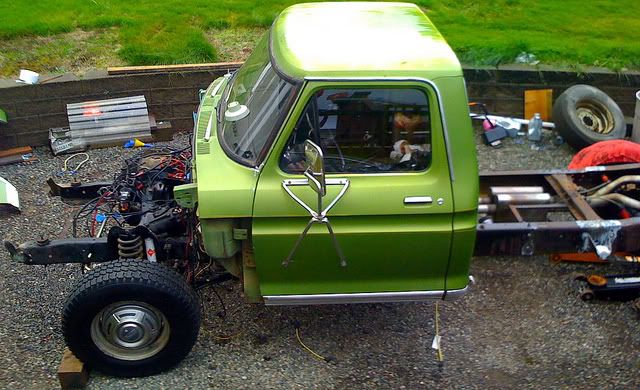
That started the beginning of this restore project. At first I just wanted to paint the engine compartment so that the engine bay looked nice like my engine... but one thing led to another...
I will have some picts up shortly.
Originally I just wanted to fuel inject the FE, which I did.
The engine had so much throttle response that the engine torquing caused the mechanical linkage to further increase the throttle position. I found an accelerator assembly from a 74 F250 that had a cable throttle. I grabbed that but found due to clearance issues I needed to pull the engine to get it installed.
That started the beginning of this restore project. At first I just wanted to paint the engine compartment so that the engine bay looked nice like my engine... but one thing led to another...
I will have some picts up shortly.

#5
08-20-2011, 04:21 AM
Join Date: Oct 2010
Posts: 69
Likes: 0
Received 0 Likes
on
0 Posts

#6
08-20-2011, 04:34 AM
Join Date: Oct 2010
Posts: 69
Likes: 0
Received 0 Likes
on
0 Posts
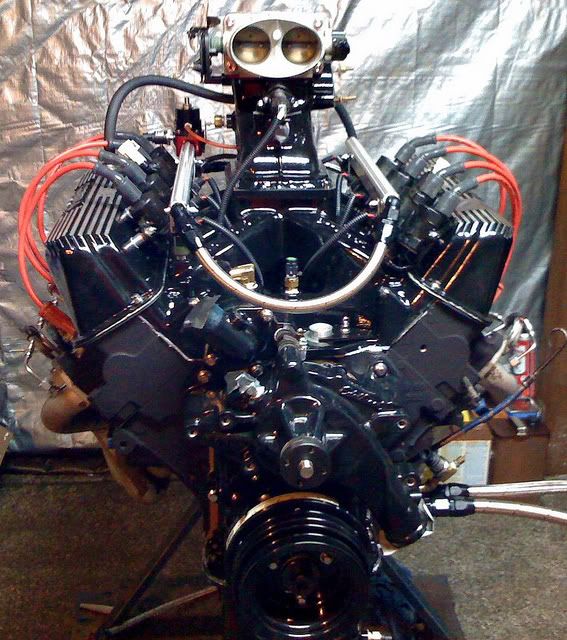
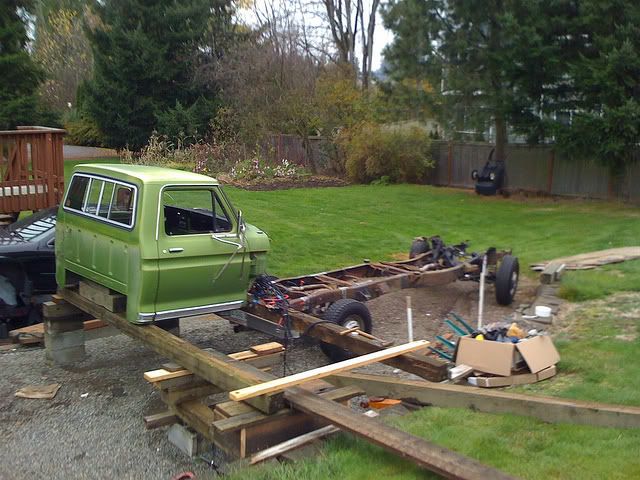
This is the engine after I pulled it out after driving around for a few weeks. The result was very impressive. It had such instant throttle response which caused the engine to torque enough to make the mechanical linkage pull the throttle plates in the throttle body enough to make the engine run faster. Very unnerving! So I decided to use a cable throttle assembly from a 74 F250. It would have bolted right in, but the engine was in the way. That was the beginning of my unplanned frame up restore. Basically I saw some rust and one thing let to another.
#7
08-20-2011, 04:43 AM
Join Date: Oct 2010
Posts: 69
Likes: 0
Received 0 Likes
on
0 Posts
Trending Topics
#8
08-20-2011, 04:47 AM
Join Date: Oct 2010
Posts: 69
Likes: 0
Received 0 Likes
on
0 Posts
#11
08-20-2011, 01:10 PM
Join Date: Oct 2010
Posts: 69
Likes: 0
Received 0 Likes
on
0 Posts

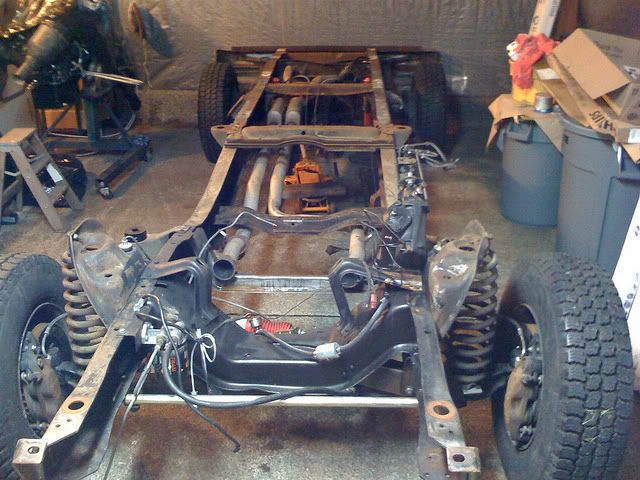
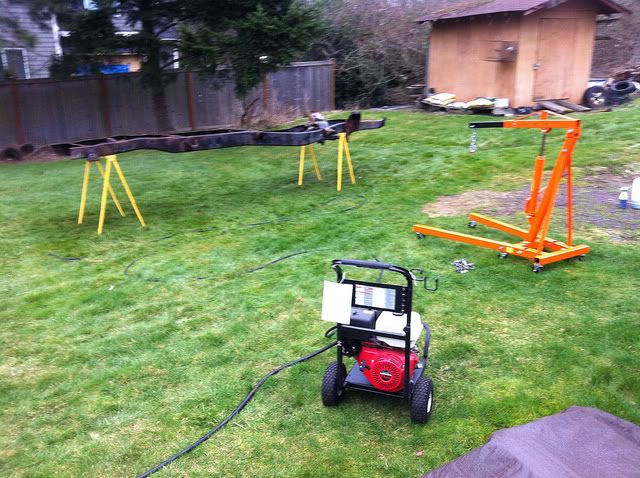
Sandblasting the frame was a bit of work. But it turned out nice. I used 500 lbs of aluminum oxide. Had to collect it three times to complete the job. So it took about 1500 lbs. The black plastic worked well, and I did not waste much. I rented a big blaster and compressor. I later invested in a Brut 150. I think I could have done the job with that and suffered less muscle soreness. The rented blaster was huge, hose was heavy, and it torqued my body each time I pulled the trigger. I also did all the frame manipulation myself. I was dead by the end of the day!
#12
08-20-2011, 01:22 PM

Join Date: Oct 2010
Location: Northern and Southern Cal
Posts: 4,656
Likes: 0
Received 0 Likes
on
0 Posts

#14
08-20-2011, 06:11 PM
Join Date: Oct 2010
Posts: 69
Likes: 0
Received 0 Likes
on
0 Posts
I was actually surprised to hear that someone has factory from sway bar on a 73 F-350. Did not know that came that way. If it matters this F-350 had 9000 GVW on the door sticker. I am the original owner.

The headers are from Hedman - Elite Headers. Originally they barely fit. Of course the flange was just at the crossmember for the tranny making connections a real pain. I extended the collectors about 6 inches. On the positive side, the set I have is heavy and well built.
As I recall, my 73 F350 Ranger did not have many header options for a FE.
Hope you can find something!
If I had time and money I think I would try to get an original cast iron set from a HP 390 out of a Mustang or something.
By the time a FE engine makes it up into the rpm range where an aftermarket header would outperform a high performance cast iron original, the valve train is likely floating all over the place, unless you have spent a huge amount of money with a roller set up.