Another Project
#31
 03-16-2011, 02:28 PM

The notch is actually almost as old as the truck. Turns out, that the guys grandpa, bought a slide in camper, a few years after the truck. The notch was put in for whatever reason, but it was for the camper. There was a color dealer brochure about the camper in the truck, it was really cool. As to the fuel tank, I'm ok with them being there. Fuel is rittled with myth, and hysteria. In order for fuel to be explosive, it has to be compressed (like in our engines). In order for it to ignite, it has to be lit, with an ignition source, that isn't drowned out by the liquid factor. You can extinguish a match in a can of gasoline. The actual only risk to any fuel tank being anywhere, is leakage after impact, and then ignition form some external source. A crash in itself, contacting the tank, and ultimately crushing it, cannot cause it to burst into flames. The issue of saddle tanks on some of the rigs that resulted in lawsuits, were ultimately caused by leakage after impact, and parts in the immediate vicinity causing an ignition source, the location and impact itself causes no issues. This is why, some places weld tanks, that still contain liquid fuel. I've done this myself, and have not had a fire.
#32
03-16-2011, 10:26 PM
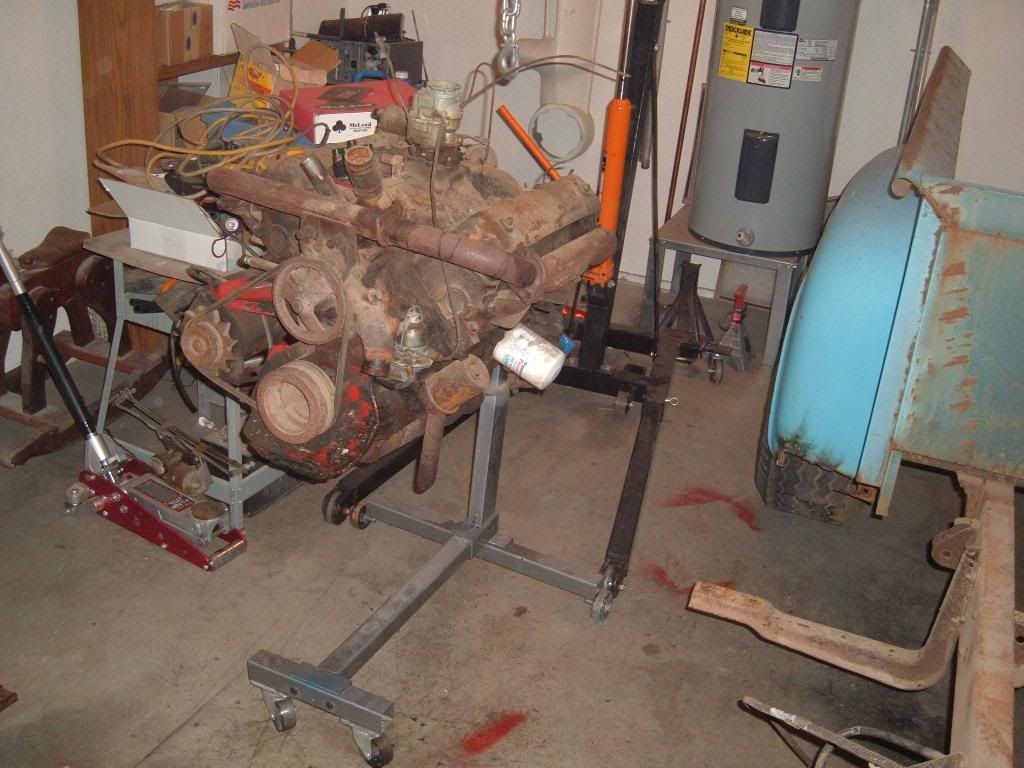
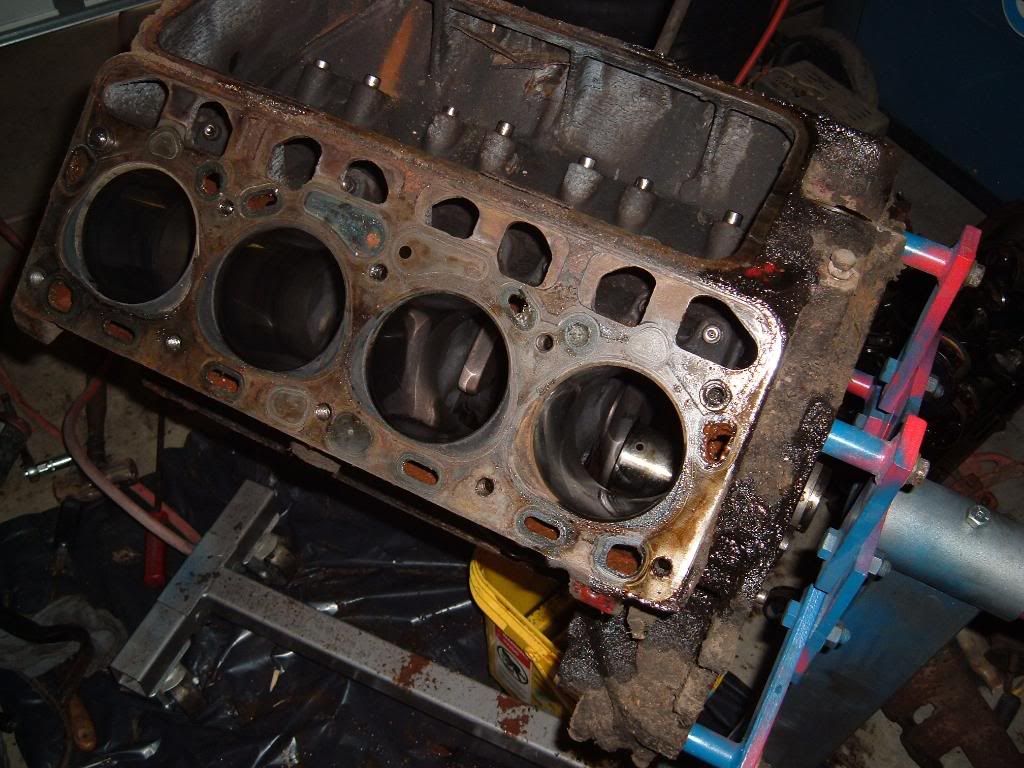
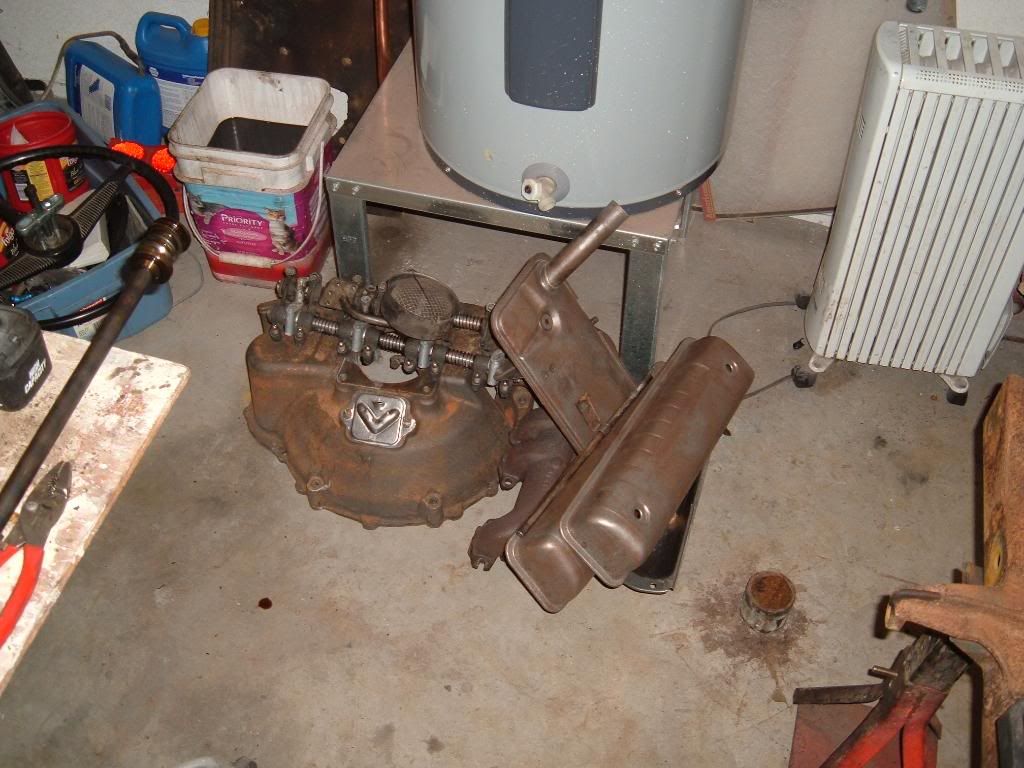
Engine is on the stand, tranny is on the floor, and the drive shaft is out. Clutch disk is toast, looks to be original, and is down to the rivets. Aotherwise, it actually looks pretty good for the age. I pulled the valve covers, and the top end wasn't too bad looking either. This one might be able to be done with a rings, bearings, and gaskets kit.
#33
03-17-2011, 10:48 PM
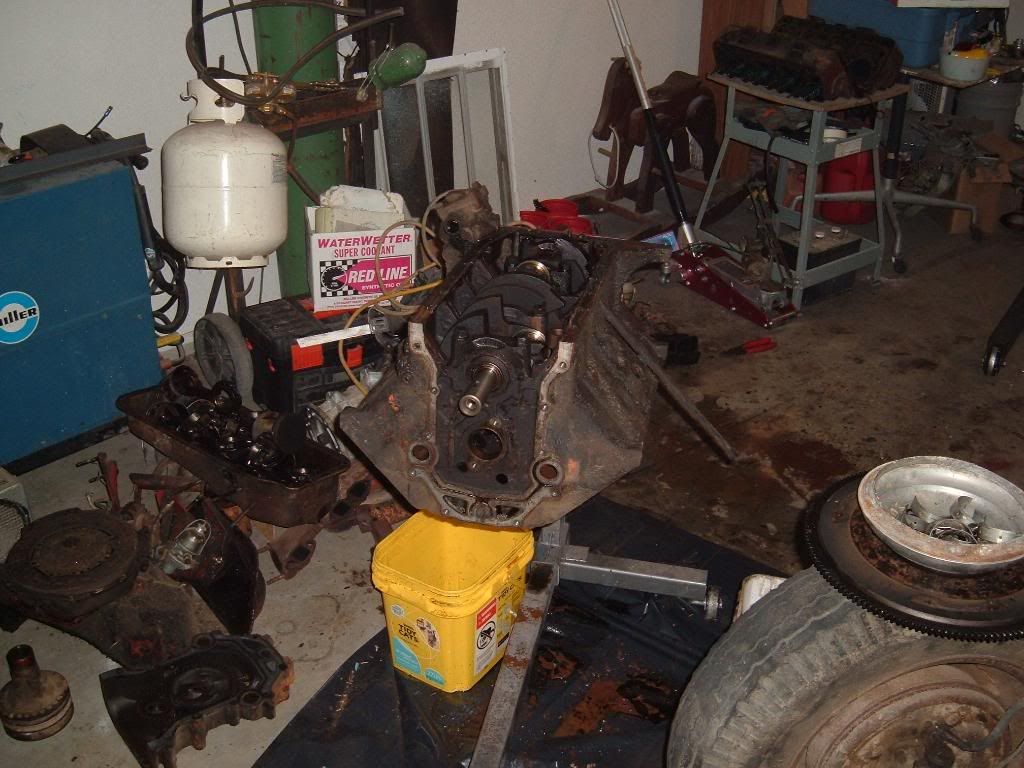
Engine's at the local machine shop. I pulled it apart, and it looked pretty good. We'll be able to just hone it, and do a ring, and bearing rebuild. There were some minor pits in the cam lobes, possible casting process, but not too bad. Local machine shop has a place to send it, and get it reworked to like new factory specs. Otherwise, it's going pretty darned well.
#34
03-19-2011, 01:36 PM

#36
03-19-2011, 03:08 PM
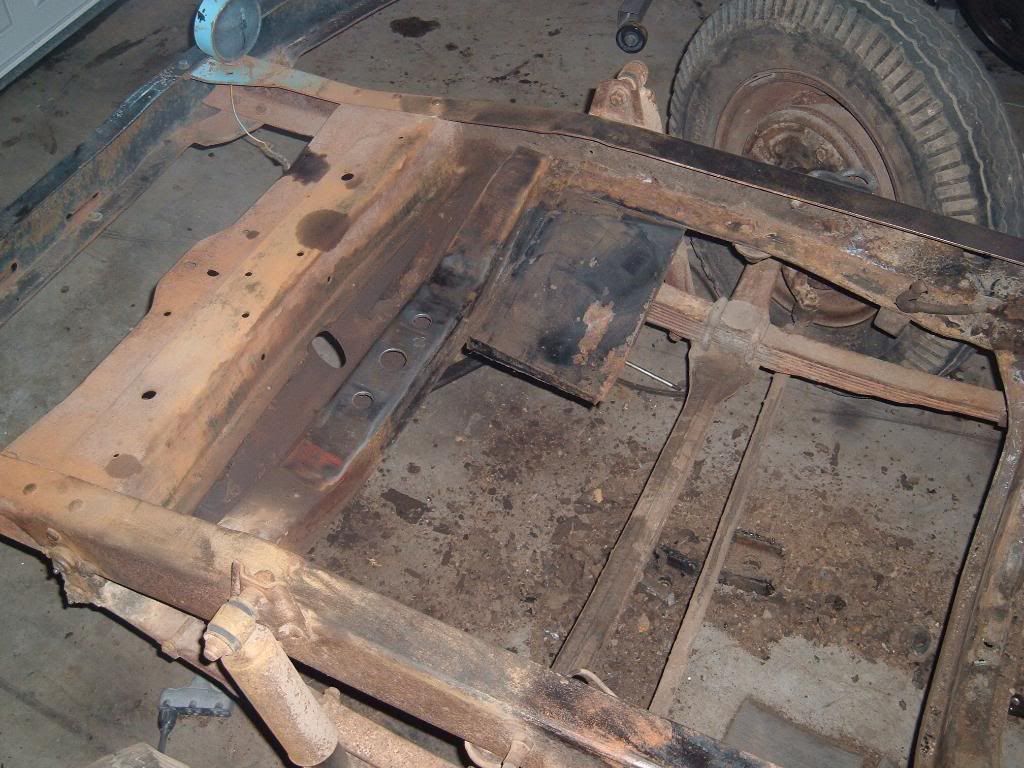
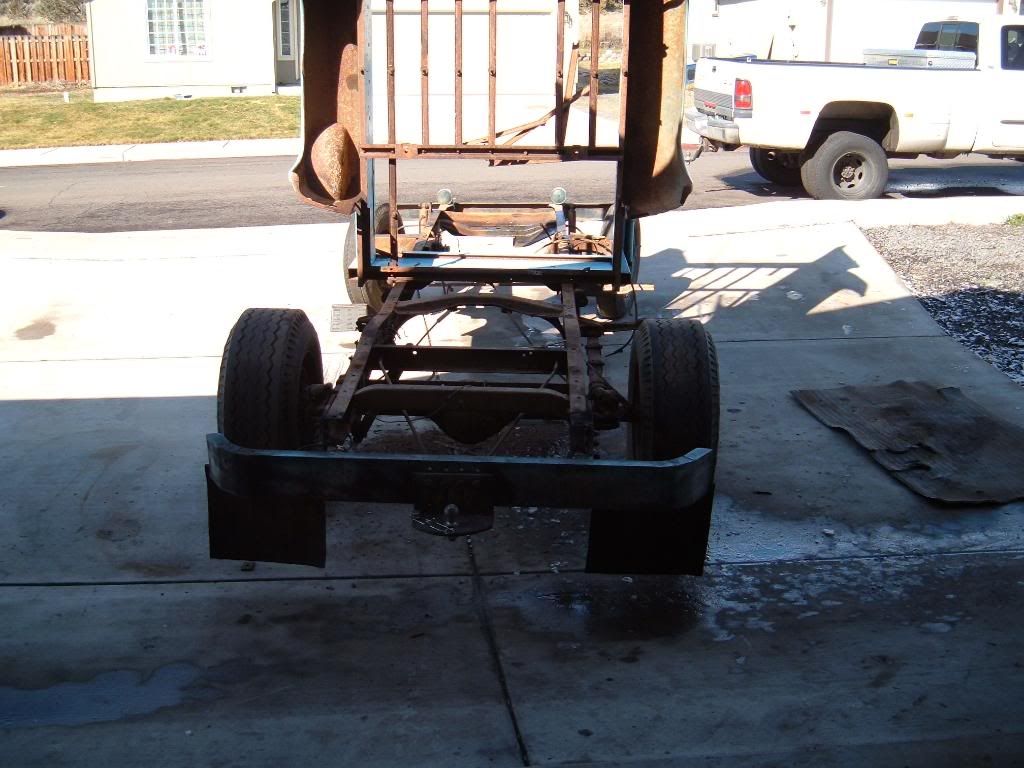
They're tension rods for a rear bumper/hitch. The stock bumper is MIA, and this REALLY ugly steel thing is on there. Apparantly, the grandpa liked his little F-100 to have the ability to tote the camper he had for it, and tow a little trailer. I didn't find any signs of a trailer plug, so I assume it may have been a small utility trailer. The current owner wants a stock bumper put back on it (thankfully).
#37
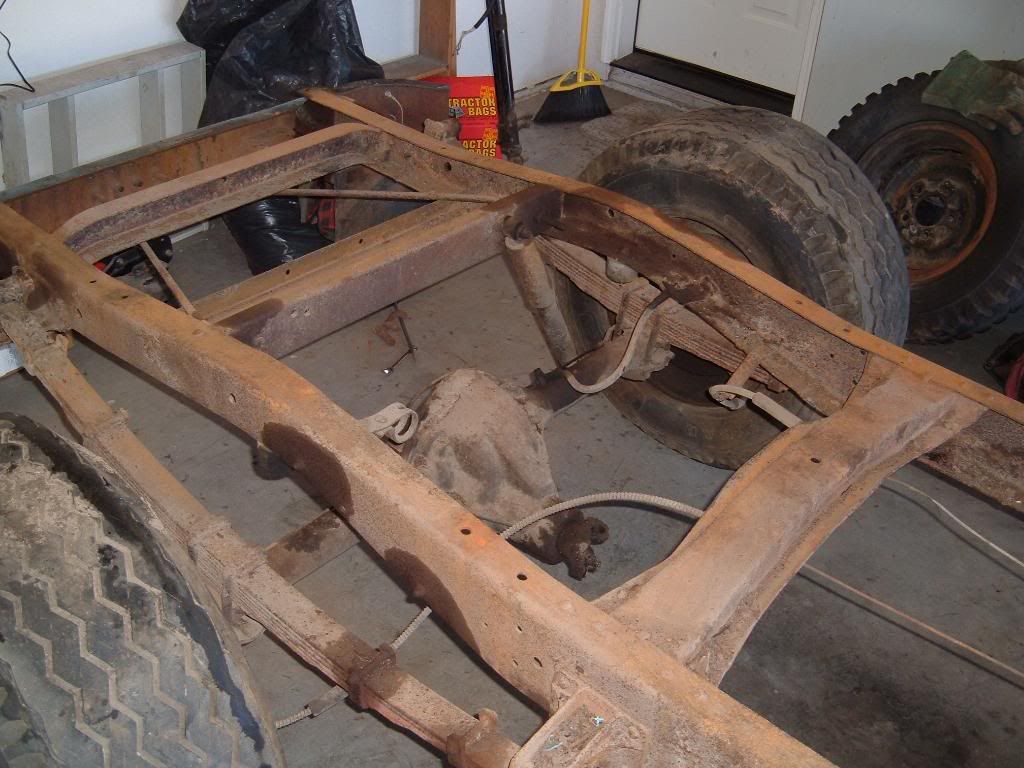
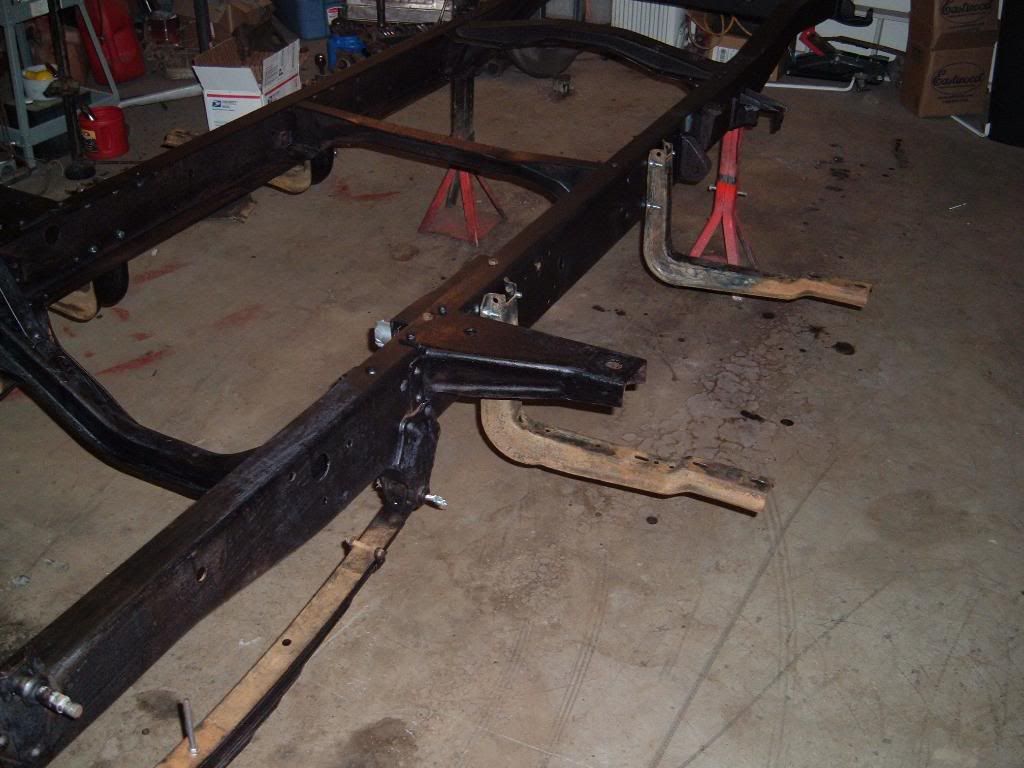
03-23-2011, 02:40 AM
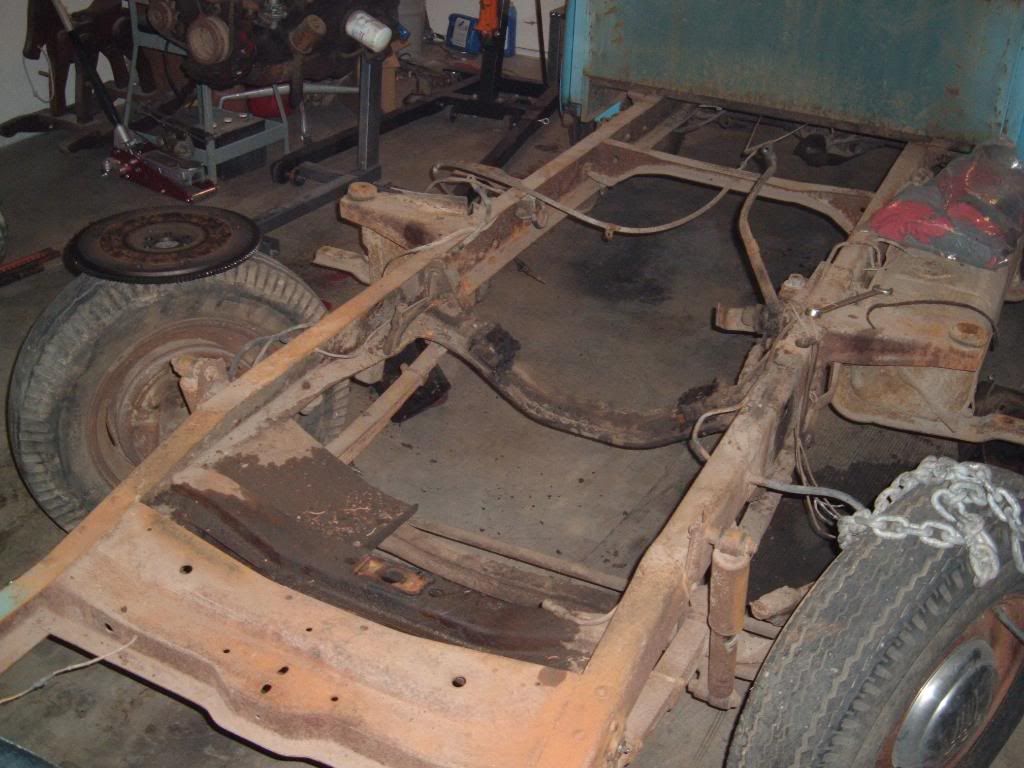
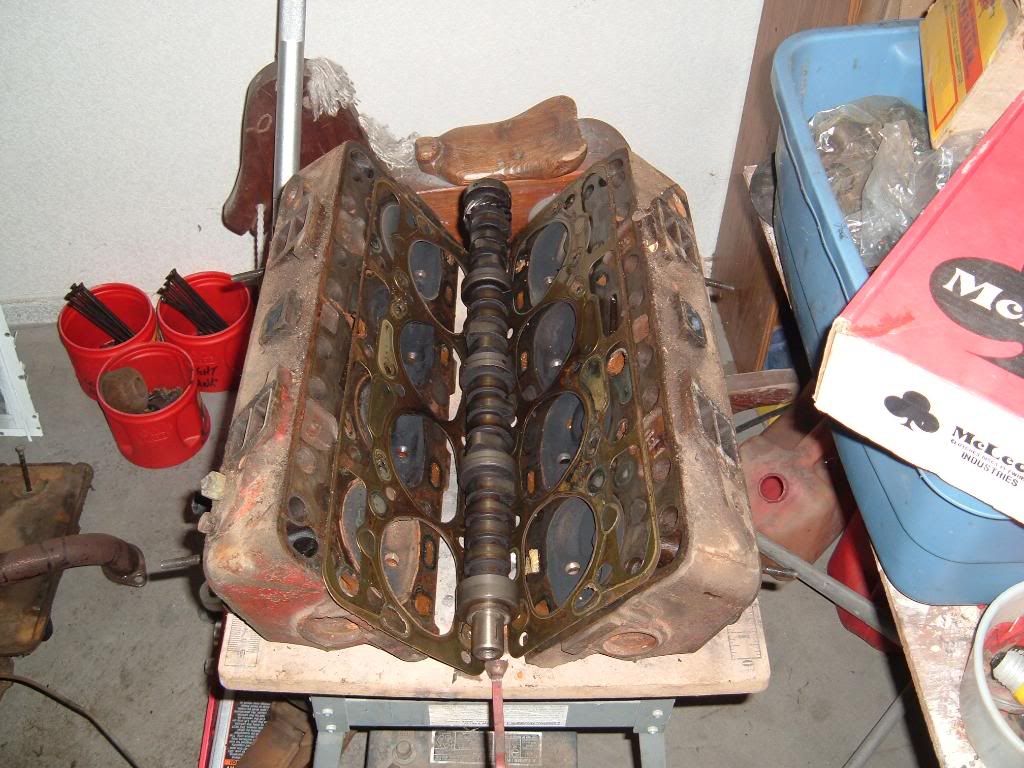
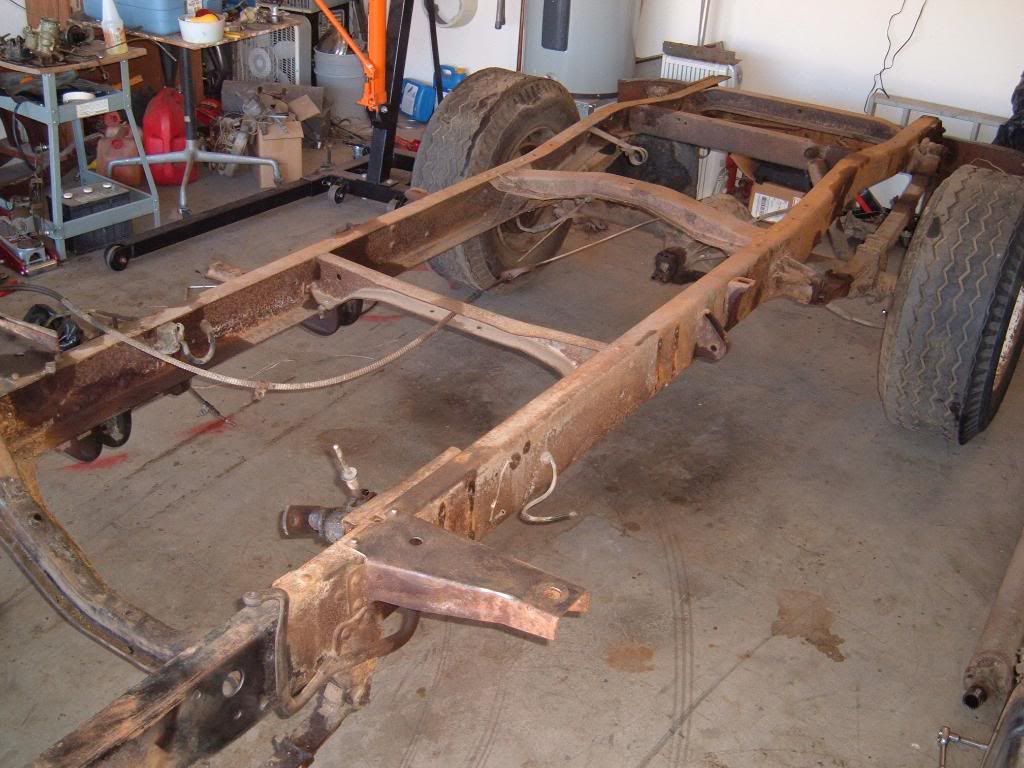
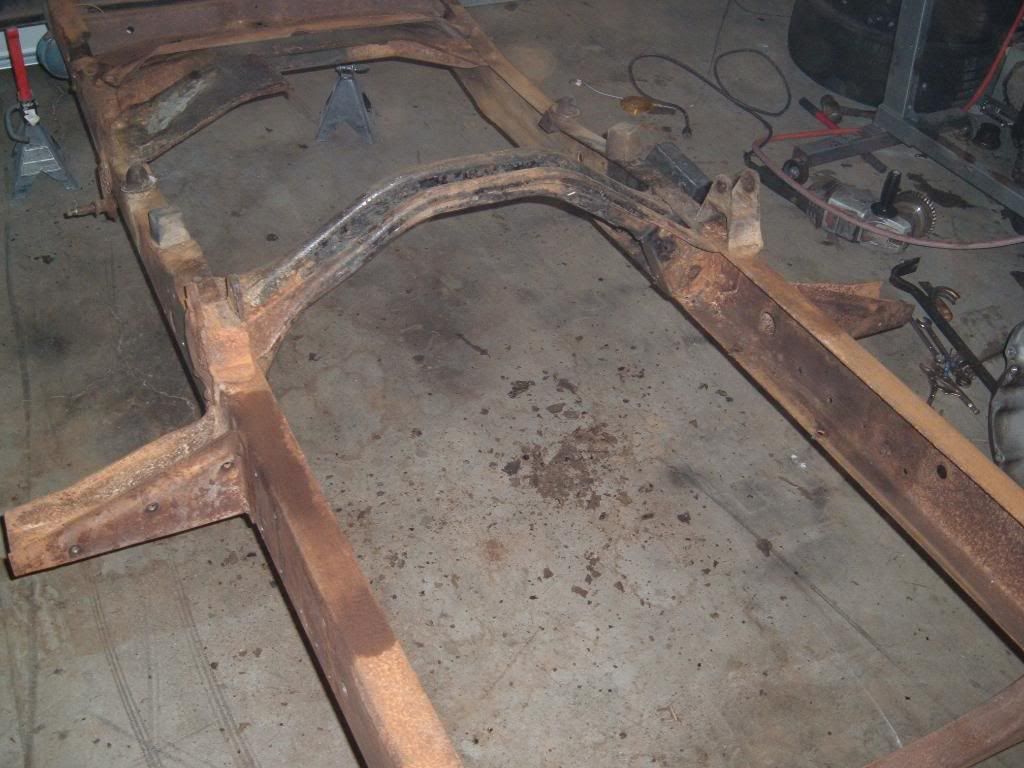
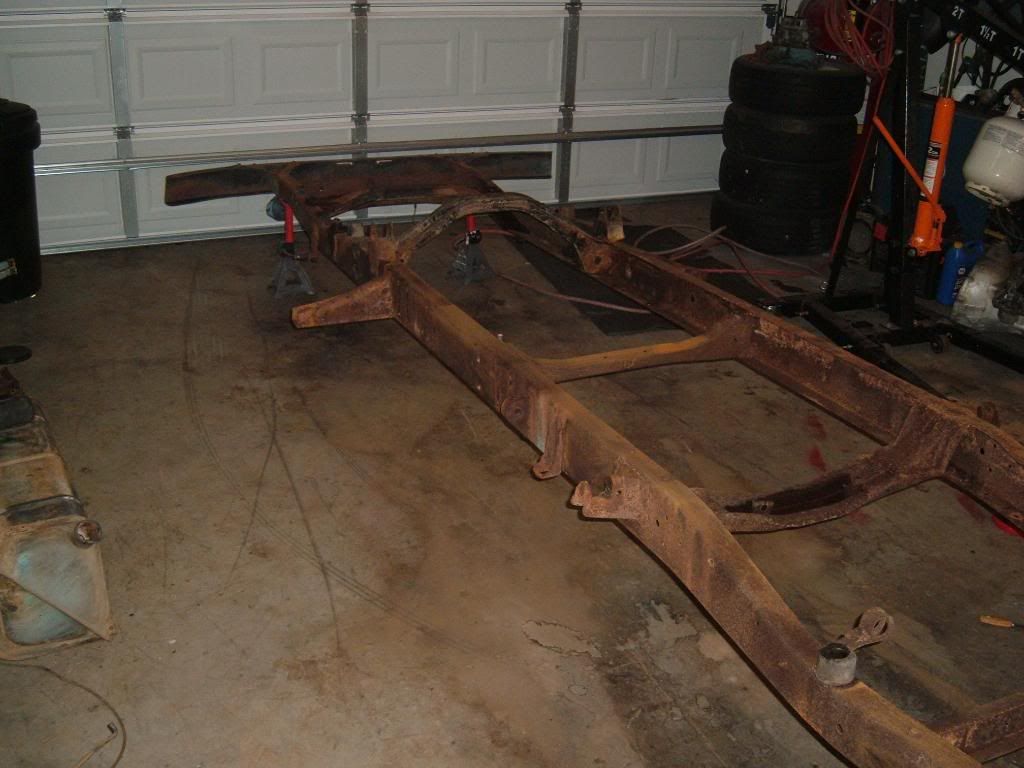
Well, got the chassis completely stripped. Got a few parts back from the cleaners, and sent the steering box, and tranny down there to get tanked. Steering worm gear has the typical tooth damage, but the rest of the guts were fabulous looking. The inside of the tranny wasn't very bad looking at all, so I will be able to just reseal, and detail it. Talked with the machine shop guy that has the motor, and he said he was shocked as to the great condition of the engine. We're getting the cam reground to factory spec, to eliminate a few pits, and honing the cylinders, and getting rings, and bearing. The guides were perfect, and the valves didn't need a grind, but are getting one for good measure. The head surface is straight, so it will just get a light surfacing for reassembly. Nothing needs anything major, and that is fantastic.
#38
03-25-2011, 10:27 PM
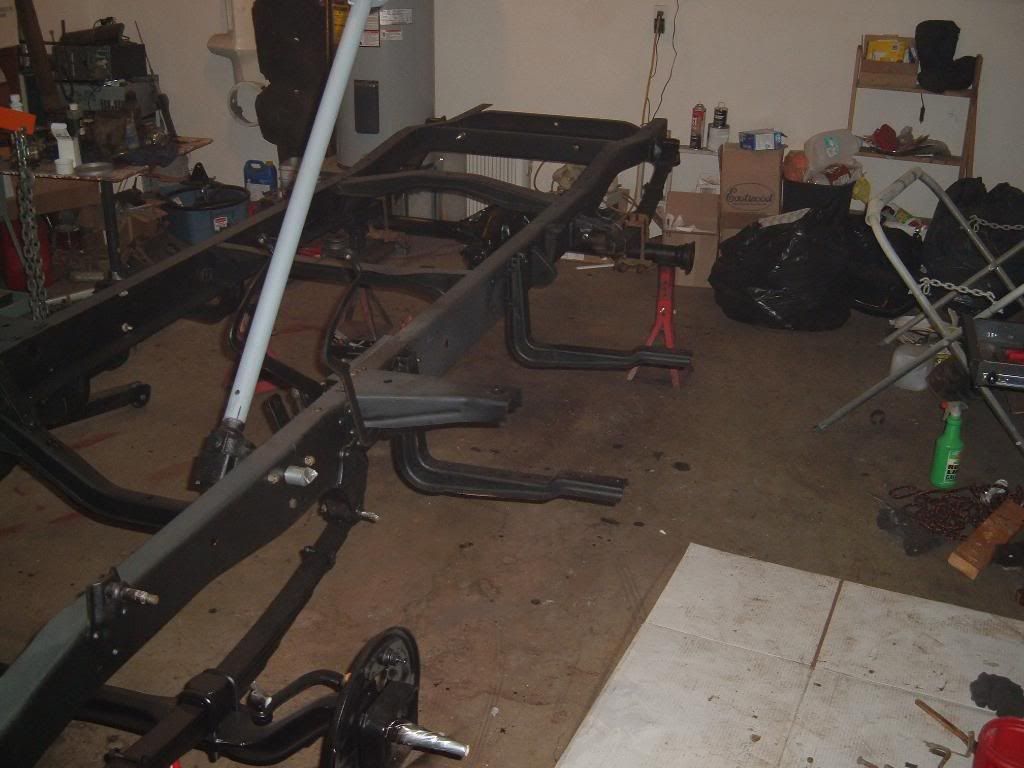
Got some more parts back from the cleaners. Engine should be ready for pick up by the end of next week. Placed my first couple of orders this weekend. Got my suspensions bushings coming, and the rust killer, and chassis paint coming. I went with Eastwood products for the chassis paint. I have some of there rust converter coming for the surface prep, rust encapsulator for the primer, and their ceramic chassis black paint for the top coat. The frame should be a roller by the end of next weekend. The tranny is cleaned up, and I am about ready to place another order for engine paint, tranny seals, and a steering shaft worm gear. The owner has decided to go with stock brakes all the way around, leaving the option for a bolt on disc kit later. I'll have all the brake components probably Monday, or Tuesday, since they are all available (and in stock I might add) at the local NAPA.
#39
03-25-2011, 11:27 PM
#40
03-27-2011, 08:30 PM
Well, no new photos, but I have been buying parts. Let's see:
spring bushings, axle seals, wheel cylinders, chassis paint, brake hoses, and lines, axle seals, pinion seal, tranny gaskets, and seals, engine stickers, engine paint, clutch, steering worm gear, steering box gaskets, and seals, master cylinder rebuild kit, fuel line (metal, and rubber), and a whole bunch of other stuff. Should all be here in the next few days, and hopefully, I will be ready for a rolling frame around next weekend. The engine should be done by the end of the week, and we should be smooth sailing after that.
spring bushings, axle seals, wheel cylinders, chassis paint, brake hoses, and lines, axle seals, pinion seal, tranny gaskets, and seals, engine stickers, engine paint, clutch, steering worm gear, steering box gaskets, and seals, master cylinder rebuild kit, fuel line (metal, and rubber), and a whole bunch of other stuff. Should all be here in the next few days, and hopefully, I will be ready for a rolling frame around next weekend. The engine should be done by the end of the week, and we should be smooth sailing after that.
#41
03-27-2011, 11:02 PM

Senior User
Join Date: Aug 2004
Location: Elk City, OK
Posts: 176
Likes: 0
Received 0 Likes
on
0 Posts
#42
04-02-2011, 09:12 PM
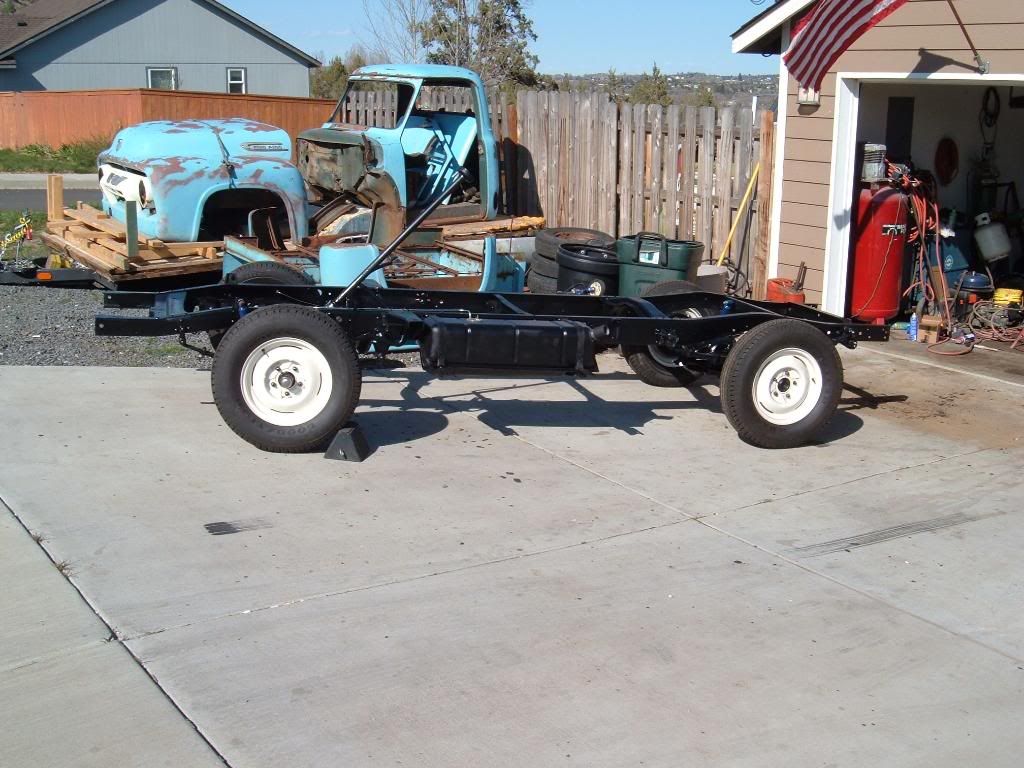
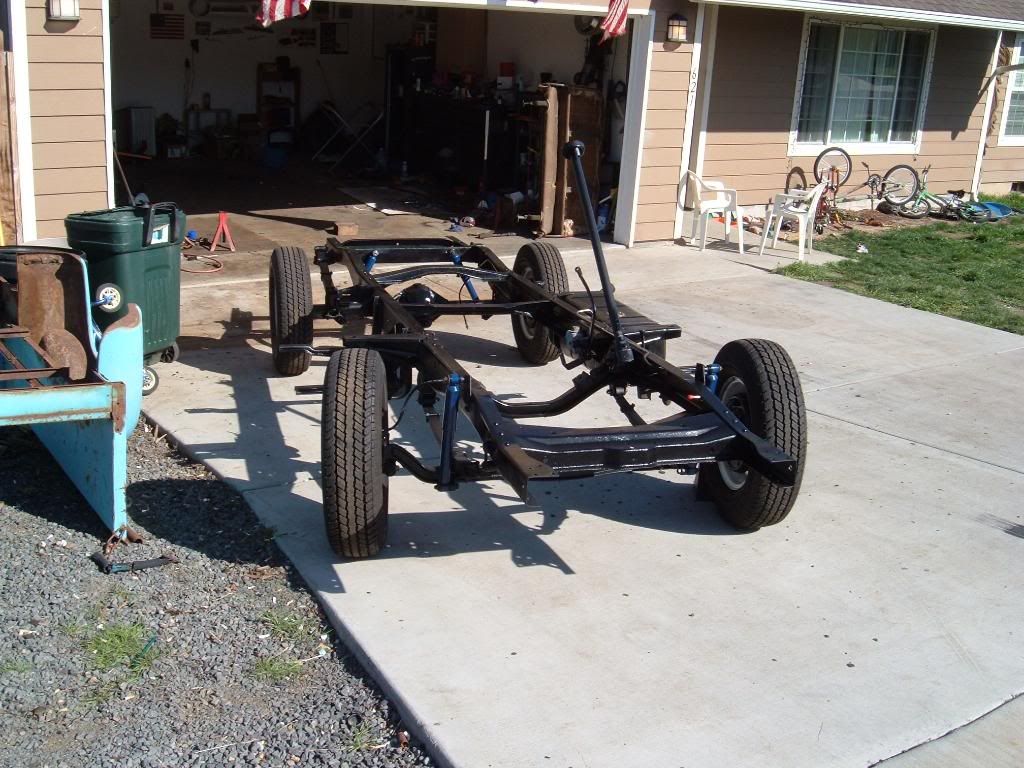
Well, got lots of stuff ordered, and the first batches have arrived. I finished cleaning up the frame, and started in with the Eastwood Rust Converter. This stuff is way cool. I have pics in the photobucket link. The engine is done, and I will hopefully be picking it up on Monday. It honed really well, and everything was kept at standard sizes for the rings, rods, and mains. The heads were in good shape, with only a little warpage. The guides, and seats were fantastic, so they just a nice valve grond, and all went back together without having to replace anything. The cam was sent in and reground, due to some minor pitting on the lobe surfaces, but cleaned up wonderfully. So, I should have a rolling frame, and drivetrain very soon sitting here. I got the front suspension put together, with new spring center bolts, and new bushings, and pins. All new fule lines, and brake lines arrived, along with a few other pieces. After this rust converter cures for 48 hours, I can coat it with the rust encapsulator, and then top coat with the ceramic gloss chassis paint.
BEFORE
DURING
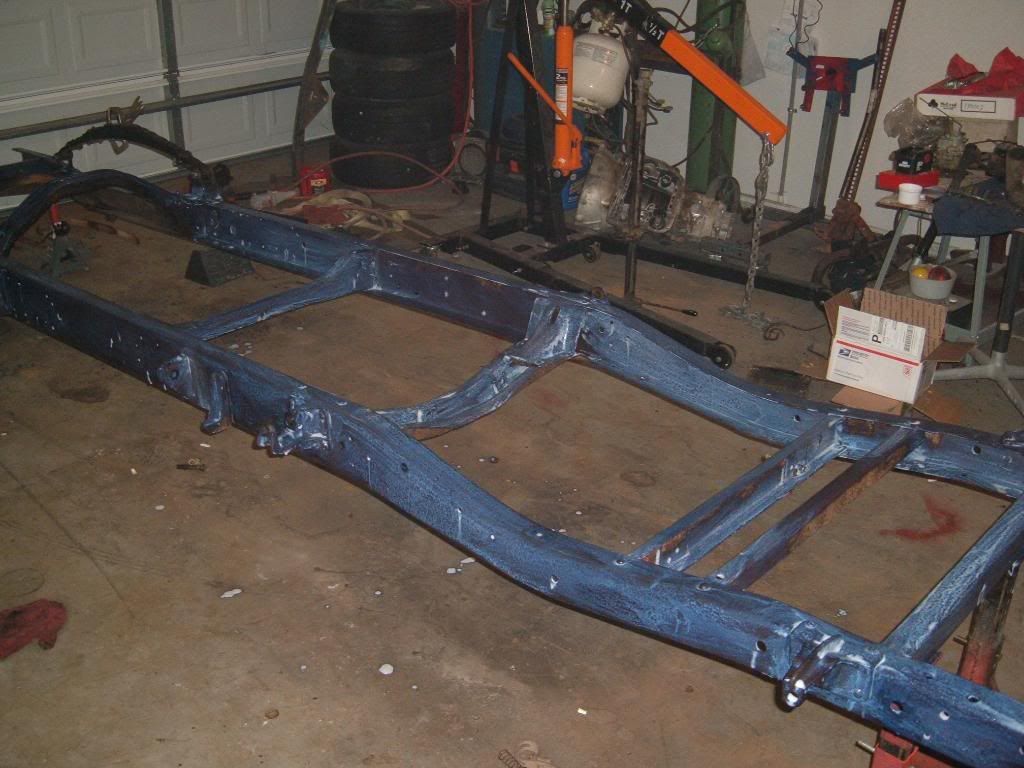
AFTER
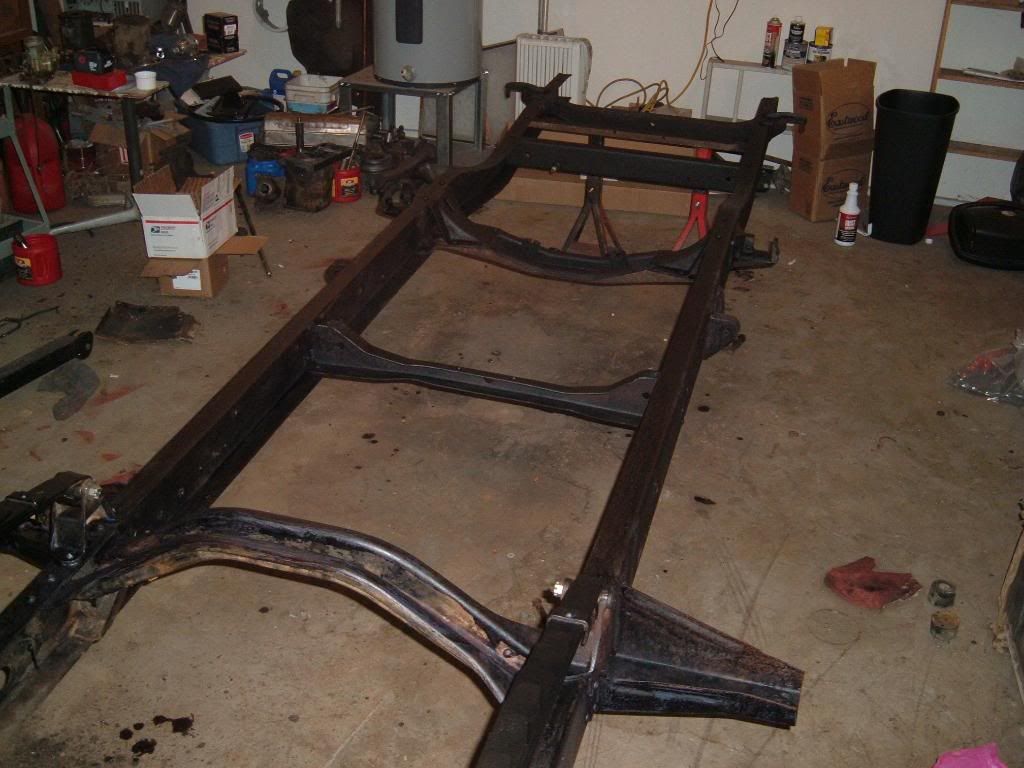
BEFORE
DURING
AFTER
#45
04-19-2011, 07:31 PM
Posting Guru