
cheap lifts?
#16
 11-23-2010, 03:51 PM

Elder User
Join Date: Aug 2003
Location: Bellingham, WA
Posts: 828
Likes: 0
Received 0 Likes
on
0 Posts
An 88 F250 4x4 is front leafs, so I wanted to make sure and head that one off at the pass. Additionally, I am not even a fan of rear blocks, even though I have them on my F250 for now, for some of the same reasons. While a stock motor/stock gear might never notice it. The axle wrap on mine is horrible with close to 500hp and 3.55 gears, forget about doing a launch from a stoplight. And with the 429 race motor (around 600hp) that used to be in it, if you let it do a full throttle shift from 1st to 2nd, it felt like the rear end was going to rip out, the wrap was so bad! One of the things that is definitely being changed when I pull the body off to put the new one on is loosing the rear blocks/extra leaf and going strictly springs on the back
#17
11-23-2010, 04:45 PM

The axle wrap on mine is horrible with close to 500hp and 3.55 gears, forget about doing a launch from a stoplight. And with the 429 race motor (around 600hp) that used to be in it, if you let it do a full throttle shift from 1st to 2nd, it felt like the rear end was going to rip out, the wrap was so bad! One of the things that is definitely being changed when I pull the body off to put the new one on is loosing the rear blocks/extra leaf and going strictly springs on the back
#18
11-23-2010, 04:57 PM
True, but the amount of extra leverage from the blocks only makes it worse. We put a set of ladders on a 77 that a friend of mine used to use at the truck pulls. Worked pretty good, and actually still had some decent wheel articulation. If I was back racing the truck, I would go to either ladders or a 4-link.
#19
11-23-2010, 05:18 PM
as always do it correct or DON'T do it.... especially on trucks and cars..... a 2 to 3 ton ballistic weapon waiting for a target....
#20
11-23-2010, 06:28 PM


NEVER run blocks in the front, it is a recipe for disaster!!! 4Wheel&Off Road has a good article explaining the "why not to do it" concerning lift blocks in the front. Do it right, or don't do it at all. Doing it wrong only guarantees we see more stupid politicians protecting us from ourselves by passing more and more laws.
Courtesy of Petersen's 4Wheel&Off Road �
4x4 Front Lift Blocks - Stop The Blockade!
Scary Truth Behind Front Lift Blocks
From the February, 2009 issue of 4Wheel & Off-Road
By Ali Mansour
Photography by Ali Mansour

For years we've been telling you to stay away from front lift blocks. Not only are they a danger to you, but to everyone around you as well. What makes them so bad? It all boils down to simple physics. Whether driving off-road at high speeds or cruising down the freeway at a normal pace, your vehicle creates a certain amount of rolling momentum. Whenever the brakes are applied, roughly 70 percent of the vehicle's weight is transferred to the front axle. This pitching action causes the front axle to roll forward, thus applying extreme pressure on the front U-bolts and springs. When you add a block into the equation it elevates the leverage point on the front axle, causing the axle roll to become even more dramatic. Enough force or pressure can be applied to fire the front block out from between the axle and the spring. This will result in loss of steering and frontend control, which may have a tragic result for you and the vehicle.
Some argue that welding the front blocks to the axle can eliminate the block from shooting out, and in their mind it's a safe fix. True or not, when you raise the spring perches higher on the axle you place a greater amount of force on the spring. The springs are now working harder to control the vehicle's vertical and lateral movement and can cause the axle to travel unpredictably, cause spring deformation, and also raise the leverage point on the axle. Sure, you won't shoot the block out, but instead the entire axle will wrap violently under the vehicle. Simply put: Don't run front lift blocks.

4x4 Front Lift Blocks - Stop The Blockade!
<table cellpadding="0" cellspacing="0"><tbody><tr><td valign="top"> Welding front blocks or building tall perches creates a high leverage point that creates more stress for the leaf spring. This diagram illustrates the forces the vehicle encounters during cornering (shown turning left). The lateral force is now intensified as much of the vehicle's leverage is placed high above the axle. Axlewrap during acceleration is also compounded. </td></tr></tbody></table>

4x4 Front Lift Blocks - Stop The Blockade!
<table cellpadding="0" cellspacing="0"><tbody><tr><td valign="top"> This diagram illustrates the forces the vehicle encounters during braking. The front lift block sits in a high-pressure area and as a result could easily be ejected from between the spring and the axle resulting in complete loss of control over the front end. This only intensifies as tire sizes become larger due to greater leverage. </td></tr></tbody></table>

4x4 Front Lift Blocks - Stop The Blockade!
<table cellpadding="0" cellspacing="0"><tbody><tr><td valign="top"> The only thing worse than having one block in the front is having two! Not only has this truck raised the leverage point by creating a taller perch, but having a loose block resting between the spring and the perch is a recipe for disaster. Seventy percent of your vehicle's braking power comes from the front. Although the blocks here are only a few inches tall, they can easily distort the leaf springs and become deadly projectiles. Another note to mention is welding anything cast is terribly difficult and requires a skilled professional welder to lay a solid bead. So don't do it! </td></tr></tbody></table>
IT IS COMPLETELY WRONG TO RUN BLOCKS UP FRONT THAT PART YOU ARE CORRECT ABOUT !!
THERE IS WAYS AS TO PUT SPACERS UP FRONT AS IN 1 - 2 INCHES
AND THAT IS TO DRILL A HOLE THROUGH THEM AND THEN PUT A LONGER CENTER BOLT THROUGH THEM AND YOUR SPRING PACK AND THAT WOULD TIE THEM ALL TOGETHER , YOU CAN EVEN STACK EXTRA LEAVES IN THE FRONT AND PUT A LONGER CENTER BOLT THROUGH ALSO !!
#21
11-23-2010, 06:56 PM

i had 0 money when I was 16 it wold have taken me years to put a lift on the truck...I tried doing things the wrong way and learned my lesson the hard way. This is all good advice!
But body lifts have their place, and this might be one of them, although i would personally just add a leaf.
One thing to consider is the amount of extra stress larger tires put on vehicles. If this is your only transportation take this in consideration. Without a gear swap, your truck is going to be slower. Just is. Move reciprocating mass. Which is harder on your transmission, ujoints, brakes, steering linkage etc. Basically everything. BUT only way to learn is to just do it. Just dont do it in anyway that might endanger yourself by doing it wrong.
#22
11-23-2010, 09:13 PM
DO YOU THINK THAT A 1 INCH SPACER IS THE SAME AS ALL THAT STUFF YOU PUT ON THERE ?
IT IS COMPLETELY WRONG TO RUN BLOCKS UP FRONT THAT PART YOU ARE CORRECT ABOUT !!
THERE IS WAYS AS TO PUT SPACERS UP FRONT AS IN 1 - 2 INCHES
AND THAT IS TO DRILL A HOLE THROUGH THEM AND THEN PUT A LONGER CENTER BOLT THROUGH THEM AND YOUR SPRING PACK AND THAT WOULD TIE THEM ALL TOGETHER , YOU CAN EVEN STACK EXTRA LEAVES IN THE FRONT AND PUT A LONGER CENTER BOLT THROUGH ALSO !!
- I've been around FTE since '03,(in my old alias, which I no longer use the email associated with that alias) and have been involved in off-roading since 84, starting with a F100 2wd that I lifted and setup like the old original Baja500 trucks.
- Anything I post a response to, I have either owned and done, or had personal experience in doing the build/repair. I don't make comments based on a friend who had a cousin who knew someone who did something. Whether it's going to St. Louis to talk to Bob Chandler in the 80's about doing a 460 swap on my Bronco, or building a 12:1 600+hp 429 and driving it on pump gas in my F250 just to prove it could be done. In the case of front blocks, a custom built Ranchero GT on a F250 4x4 chassis is the one I know personally. This was strictly used as a mud buggy"Tom" insisted on doing it cheap and made a set of 2" spacers for the front. The one on the right caused the spring to break, and the one on the left spit out when out 4wheeling.
- Adding a leaf to a springpack is not the same as adding a spacer. A leaf spreads its load out across the whole pack, and also is NOT 1 to 2 inches thick, thereby negating any added increase in side or front/rear torsional loading (leverage). Using additional leaves is an acceptable way to gain front lift, however, adding too many and you end up compromising any ride quality you had, as you have totally defeated the compression rates in the springs.
- Taking a 1-2 inch spacer (block) and just bolting it to the springpack allows the side and torsional loads to take place during cornering and braking, and even being "bolted" to the pack can overcome the strength of the bolt, shearing it and allow the "spacer" to come lose (at worst) and at best will still increase the torsional load against the small area of the spring that the "spacer" sits against, causing excess spring deflection, along with advanced wear on the spring.
#23
11-23-2010, 09:47 PM
Senior User
Join Date: Jun 2010
Location: Curwensville,PA
Posts: 408
Likes: 0
Received 0 Likes
on
0 Posts
#24
11-23-2010, 09:57 PM
Evidently you felt offended enough by my post to have to yell in your response to me, however I stand by my previous post, and offer these counter-points.
- I've been around FTE since '03,(in my old alias, which I no longer use the email associated with that alias) and have been involved in off-roading since 84, starting with a F100 2wd that I lifted and setup like the old original Baja500 trucks.
- Anything I post a response to, I have either owned and done, or had personal experience in doing the build/repair. I don't make comments based on a friend who had a cousin who knew someone who did something. Whether it's going to St. Louis to talk to Bob Chandler in the 80's about doing a 460 swap on my Bronco, or building a 12:1 600+hp 429 and driving it on pump gas in my F250 just to prove it could be done. In the case of front blocks, a custom built Ranchero GT on a F250 4x4 chassis is the one I know personally. This was strictly used as a mud buggy"Tom" insisted on doing it cheap and made a set of 2" spacers for the front. The one on the right caused the spring to break, and the one on the left spit out when out 4wheeling.
- Adding a leaf to a springpack is not the same as adding a spacer. A leaf spreads its load out across the whole pack, and also is NOT 1 to 2 inches thick, thereby negating any added increase in side or front/rear torsional loading (leverage). Using additional leaves is an acceptable way to gain front lift, however, adding too many and you end up compromising any ride quality you had, as you have totally defeated the compression rates in the springs.
- Taking a 1-2 inch spacer (block) and just bolting it to the springpack allows the side and torsional loads to take place during cornering and braking, and even being "bolted" to the pack can overcome the strength of the bolt, shearing it and allow the "spacer" to come lose (at worst) and at best will still increase the torsional load against the small area of the spring that the "spacer" sits against, causing excess spring deflection, along with advanced wear on the spring.
movement and in your post you are correct about the blocks shearing out !!
now with the TTB set up you dont have any side to side movement as each side of the axle beam is bolted to the frame on the opposite side of the truck !!
it is impossible for the TTB axle to move side ways more than the 6 bushings will allow , ( front and rear spring bushings on each side and the pivot bushings on the axle beams ) that is with a F250 leaf sprung axle!!
and with that type of front suspension there is less to worry about as compared
to a straight axles side ways movement !!
IMO the TTB handle better than a straight axle , that is in stock form or with up to 2 inches of lift !!

#25
11-23-2010, 10:18 PM
Elder User
Join Date: Feb 2009
Location: Up Up Upstate, NY
Posts: 786
Likes: 0
Received 0 Likes
on
0 Posts
#26
11-23-2010, 10:26 PM
#27
11-24-2010, 12:49 AM
I didn't realize you have a 5.0. If thats the case, I would not run large tires at all. The 5.0 doesn't make much low end torque. I could barely stand having 32 11.50s with mine. I have 31 10.50 now and don't want any bigger.
Body lifts are not the way to go on anything. They are complete crap.
Body lifts are not the way to go on anything. They are complete crap.

#29
11-24-2010, 09:17 AM
Elder User
Join Date: Aug 2003
Location: Bellingham, WA
Posts: 828
Likes: 0
Received 0 Likes
on
0 Posts
#30
11-24-2010, 10:34 AM
In regards to the TTB and using lift blocks, yes the axle halves have the advantage of 2 extra mounting points on the crossmember under the motor, and while the design is primarily to allow the independent articulation of each axle, it has the advantage of also serving much as the trac-bar on F350's in that it centers the axle halves in relation to their position under the vehicle. However that is strictly in side to side, not front to rear. Now we've all seen F150s and F250s with worn out springs and the corresponding look that comes with it, usually something like this (yes, I know it's a 2wd!)

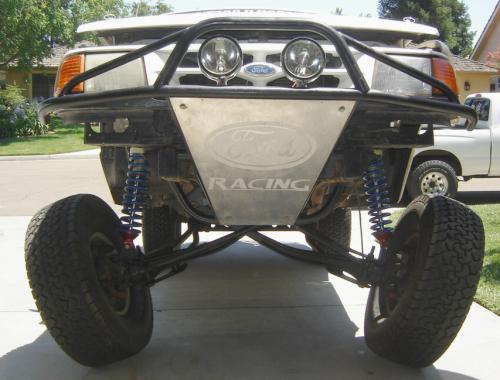
When lifting a TTB, you use drop brackets to keep the camber where it should be, otherwise you end up with too much positive camber. While this picture is obviously an excessive amount of positive camber it illustrates what I am referring to
To put it all in one picture, here is neutral, positive and negative camber:

One of the problems with excessive negative or positive camber is what it does to the contact patch of the tire, while we all may wish we could spend the majority of the time off road in our 4wd's the reality of it is we spend the majority of the time on the street, and pavement is much less forgiving to our tires when the contact patch looks like this

Now with the TTB the camber is controlled by the drop brackets and in the case of some brands of lift kits, by using adjustable camber bolts in the drop brackets to be able to put the camber within spec.
By adding a spacer or block without the bracket, you have now thrown your camber out the window and end up with something like the picture of the off-road racing ranger above.
Assuming we have 0* camber at stock lift, we can figure what the addition of 1" of lift without a spacer will do. For the sake of simplifying this, we will assume that the wheel sits at 90* (zero camber) relative to the leaf spring. Now on my 90 F250 dana50 TTB, the measurements are 22 inches from the pivot point to the center of the leaf, and 15" center of leaf to center of tire for an overall length of 37" and the frame to axle center over the leaf is 12" (6" lift with drop brackets). Inputting those measurements into a calculator gives us this:
Side A = Distance from axle centerline to frame, directly under the frame
Side B = Distance from axle pivot point, to spring pad, axle centerline, under the frame.
Side C = distance from pivot point to frame, directly over the spring pad
<table bgcolor="#4d99e5" border="1"><tbody><tr bgcolor="#ffffff"><td style="font-size: 8pt; font-weight: bold;">Side A (in)</td> <td style="font-size: 8pt; font-weight: bold;">Side B (in)</td> <td style="font-size: 8pt; font-weight: bold;">Side C (in)</td> <td style="font-size: 8pt; font-weight: bold;">Angle A (Deg)</td> <td style="font-size: 8pt; font-weight: bold;">Angle B (Deg)</td> <td style="font-size: 8pt; font-weight: bold;">Angle C (Deg)</td> </tr> <tr bgcolor="#f4e187"> <td style="font-size: 8pt; font-weight: bold;">12</td> <td style="font-size: 8pt; font-weight: bold;">22</td> <td style="font-size: 8pt; font-weight: bold;" bgcolor="lightgreen">25.05993</td> <td style="font-size: 8pt; font-weight: bold;" bgcolor="lightgreen">28.61</td> <td style="font-size: 8pt; font-weight: bold;" bgcolor="lightgreen">61.39</td> <td style="font-size: 8pt; font-weight: bold;">90</td></tr></tbody></table>
We now know the constant on side C (distance from pivot to frame) is 25.06"
Now we know that the tire centerline is approximately 15" out from the leaf pad for a total of 37" from pivot to tire centerline, which gives us this:
<table bgcolor="#4d99e5" border="1"><tbody><tr bgcolor="#ffffff"><td style="font-size: 8pt; font-weight: bold;">Side A (in)</td> <td style="font-size: 8pt; font-weight: bold;">Side B (in)</td> <td style="font-size: 8pt; font-weight: bold;">Side C (in)</td> <td style="font-size: 8pt; font-weight: bold;">Angle A (Deg)</td> <td style="font-size: 8pt; font-weight: bold;">Angle B (Deg)</td> <td style="font-size: 8pt; font-weight: bold;">Angle C (Deg)</td> </tr> <tr bgcolor="#f4e187"> <td style="font-size: 8pt; font-weight: bold;" bgcolor="lightgreen">19.20916</td> <td style="font-size: 8pt; font-weight: bold;">37</td> <td style="font-size: 8pt; font-weight: bold;">25.06</td> <td style="font-size: 8pt; font-weight: bold;">28.61</td> <td style="font-size: 8pt; font-weight: bold;" bgcolor="lightgreen">112.73</td> <td style="font-size: 8pt; font-weight: bold;" bgcolor="lightgreen">38.66</td></tr></tbody></table>
In this case, for the tire to have 0* camber, the angle at the tire to the frame needs to be 38.66* keeping it like this |-=--o
Now lets add the 1" spacer to the equation, which gives us this:
We know the constants are Side A (frame to axle which is now 12"+1" spacer=13") Side B (pivot to leaf) and Side C (pivot to frame)
<table bgcolor="#4d99e5" border="1"><tbody><tr bgcolor="#ffffff"><td style="font-size: 8pt; font-weight: bold;">Side A (in)</td> <td style="font-size: 8pt; font-weight: bold;">Side B (in)</td> <td style="font-size: 8pt; font-weight: bold;">Side C (in)</td> <td style="font-size: 8pt; font-weight: bold;">Angle A (Deg)</td> <td style="font-size: 8pt; font-weight: bold;">Angle B (Deg)</td> <td style="font-size: 8pt; font-weight: bold;">Angle C (Deg)</td> </tr> <tr bgcolor="#f4e187"> <td style="font-size: 8pt; font-weight: bold;">13</td> <td style="font-size: 8pt; font-weight: bold;">22</td> <td style="font-size: 8pt; font-weight: bold;">25.06</td> <td style="font-size: 8pt; font-weight: bold;" bgcolor="lightgreen">31.22</td> <td style="font-size: 8pt; font-weight: bold;" bgcolor="lightgreen">61.29</td> <td style="font-size: 8pt; font-weight: bold;" bgcolor="lightgreen">87.50</td></tr></tbody></table>
Notice at Angle C, we have gained approximately 2.5* of camber already, lets see what that puts at the wheel, since we now know that the constants are 25.06" pivot to frame (Side C), the distance from pivot to tire centerline is 37" (Side B) and the slope at Angle A is now 31.22* instead of 28.61*
<table bgcolor="#4d99e5" border="1"><tbody><tr bgcolor="#ffffff"><td style="font-size: 8pt; font-weight: bold;">Side A (in)</td> <td style="font-size: 8pt; font-weight: bold;">Side B (in)</td> <td style="font-size: 8pt; font-weight: bold;">Side C (in)</td> <td style="font-size: 8pt; font-weight: bold;">Angle A (Deg)</td> <td style="font-size: 8pt; font-weight: bold;">Angle B (Deg)</td> <td style="font-size: 8pt; font-weight: bold;">Angle C (Deg)</td> </tr> <tr bgcolor="#f4e187"> <td style="font-size: 8pt; font-weight: bold;" bgcolor="lightgreen">20.27603</td> <td style="font-size: 8pt; font-weight: bold;">37</td> <td style="font-size: 8pt; font-weight: bold;">25.06</td> <td style="font-size: 8pt; font-weight: bold;">31.22</td> <td style="font-size: 8pt; font-weight: bold;" bgcolor="lightgreen">108.94</td> <td style="font-size: 8pt; font-weight: bold;" bgcolor="lightgreen">39.84</td></tr></tbody></table>
So just by adding a 1" spacer we have added 1.2* of camber, with a 2" spacer, we get this:
<table bgcolor="#4d99e5" border="1"><tbody><tr bgcolor="#ffffff"><td style="font-size: 8pt; font-weight: bold;">Side A (in)</td> <td style="font-size: 8pt; font-weight: bold;">Side B (in)</td> <td style="font-size: 8pt; font-weight: bold;">Side C (in)</td> <td style="font-size: 8pt; font-weight: bold;">Angle A (Deg)</td> <td style="font-size: 8pt; font-weight: bold;">Angle B (Deg)</td> <td style="font-size: 8pt; font-weight: bold;">Angle C (Deg)</td> </tr> <tr bgcolor="#f4e187"> <td style="font-size: 8pt; font-weight: bold;" bgcolor="lightgreen">21.36664</td> <td style="font-size: 8pt; font-weight: bold;">37</td> <td style="font-size: 8pt; font-weight: bold;">25.06</td> <td style="font-size: 8pt; font-weight: bold;">33.83</td> <td style="font-size: 8pt; font-weight: bold;" bgcolor="lightgreen">105.40</td> <td style="font-size: 8pt; font-weight: bold;" bgcolor="lightgreen">40.77</td></tr></tbody></table>
Adding over 2* of camber.
Now considering most alignments call for around .3+/-.7 to .5+/-1 on the camber, you can see that taking the camber up an additional 1.2* is a bad thing for the tires. At best you would be sitting at .5+ assuming you started out at -.7 to begin with, and if you were already maxed out at .3 to .5 plus with no adjustment left, you are now sitting at 1.7+ camber. Those reasons alone should be reason enough to not just try and lift a TTB by throwing spacers into to.
Additionally, lets say you put some drop brackets on to keep everything in spec on the camber, the brackets are not designed to control twising movement if the axle starts twisting (for example hard braking). While the brackets are wide side to side, they are narrow front to rear, and with the increased leverage gained by spacing the axle away from the spring pack, any twisting force the axle exerts against them is going to place stress on the bracket and the bushing in a manner they are not designed to handle. At best just prematurely wearing the bushing out, and at worst bending or breaking the bracket.
When lifting a TTB, you use drop brackets to keep the camber where it should be, otherwise you end up with too much positive camber. While this picture is obviously an excessive amount of positive camber it illustrates what I am referring to
To put it all in one picture, here is neutral, positive and negative camber:
One of the problems with excessive negative or positive camber is what it does to the contact patch of the tire, while we all may wish we could spend the majority of the time off road in our 4wd's the reality of it is we spend the majority of the time on the street, and pavement is much less forgiving to our tires when the contact patch looks like this
Now with the TTB the camber is controlled by the drop brackets and in the case of some brands of lift kits, by using adjustable camber bolts in the drop brackets to be able to put the camber within spec.
By adding a spacer or block without the bracket, you have now thrown your camber out the window and end up with something like the picture of the off-road racing ranger above.
Assuming we have 0* camber at stock lift, we can figure what the addition of 1" of lift without a spacer will do. For the sake of simplifying this, we will assume that the wheel sits at 90* (zero camber) relative to the leaf spring. Now on my 90 F250 dana50 TTB, the measurements are 22 inches from the pivot point to the center of the leaf, and 15" center of leaf to center of tire for an overall length of 37" and the frame to axle center over the leaf is 12" (6" lift with drop brackets). Inputting those measurements into a calculator gives us this:
Side A = Distance from axle centerline to frame, directly under the frame
Side B = Distance from axle pivot point, to spring pad, axle centerline, under the frame.
Side C = distance from pivot point to frame, directly over the spring pad
<table bgcolor="#4d99e5" border="1"><tbody><tr bgcolor="#ffffff"><td style="font-size: 8pt; font-weight: bold;">Side A (in)</td> <td style="font-size: 8pt; font-weight: bold;">Side B (in)</td> <td style="font-size: 8pt; font-weight: bold;">Side C (in)</td> <td style="font-size: 8pt; font-weight: bold;">Angle A (Deg)</td> <td style="font-size: 8pt; font-weight: bold;">Angle B (Deg)</td> <td style="font-size: 8pt; font-weight: bold;">Angle C (Deg)</td> </tr> <tr bgcolor="#f4e187"> <td style="font-size: 8pt; font-weight: bold;">12</td> <td style="font-size: 8pt; font-weight: bold;">22</td> <td style="font-size: 8pt; font-weight: bold;" bgcolor="lightgreen">25.05993</td> <td style="font-size: 8pt; font-weight: bold;" bgcolor="lightgreen">28.61</td> <td style="font-size: 8pt; font-weight: bold;" bgcolor="lightgreen">61.39</td> <td style="font-size: 8pt; font-weight: bold;">90</td></tr></tbody></table>
We now know the constant on side C (distance from pivot to frame) is 25.06"
Now we know that the tire centerline is approximately 15" out from the leaf pad for a total of 37" from pivot to tire centerline, which gives us this:
<table bgcolor="#4d99e5" border="1"><tbody><tr bgcolor="#ffffff"><td style="font-size: 8pt; font-weight: bold;">Side A (in)</td> <td style="font-size: 8pt; font-weight: bold;">Side B (in)</td> <td style="font-size: 8pt; font-weight: bold;">Side C (in)</td> <td style="font-size: 8pt; font-weight: bold;">Angle A (Deg)</td> <td style="font-size: 8pt; font-weight: bold;">Angle B (Deg)</td> <td style="font-size: 8pt; font-weight: bold;">Angle C (Deg)</td> </tr> <tr bgcolor="#f4e187"> <td style="font-size: 8pt; font-weight: bold;" bgcolor="lightgreen">19.20916</td> <td style="font-size: 8pt; font-weight: bold;">37</td> <td style="font-size: 8pt; font-weight: bold;">25.06</td> <td style="font-size: 8pt; font-weight: bold;">28.61</td> <td style="font-size: 8pt; font-weight: bold;" bgcolor="lightgreen">112.73</td> <td style="font-size: 8pt; font-weight: bold;" bgcolor="lightgreen">38.66</td></tr></tbody></table>
In this case, for the tire to have 0* camber, the angle at the tire to the frame needs to be 38.66* keeping it like this |-=--o
Now lets add the 1" spacer to the equation, which gives us this:
We know the constants are Side A (frame to axle which is now 12"+1" spacer=13") Side B (pivot to leaf) and Side C (pivot to frame)
<table bgcolor="#4d99e5" border="1"><tbody><tr bgcolor="#ffffff"><td style="font-size: 8pt; font-weight: bold;">Side A (in)</td> <td style="font-size: 8pt; font-weight: bold;">Side B (in)</td> <td style="font-size: 8pt; font-weight: bold;">Side C (in)</td> <td style="font-size: 8pt; font-weight: bold;">Angle A (Deg)</td> <td style="font-size: 8pt; font-weight: bold;">Angle B (Deg)</td> <td style="font-size: 8pt; font-weight: bold;">Angle C (Deg)</td> </tr> <tr bgcolor="#f4e187"> <td style="font-size: 8pt; font-weight: bold;">13</td> <td style="font-size: 8pt; font-weight: bold;">22</td> <td style="font-size: 8pt; font-weight: bold;">25.06</td> <td style="font-size: 8pt; font-weight: bold;" bgcolor="lightgreen">31.22</td> <td style="font-size: 8pt; font-weight: bold;" bgcolor="lightgreen">61.29</td> <td style="font-size: 8pt; font-weight: bold;" bgcolor="lightgreen">87.50</td></tr></tbody></table>
Notice at Angle C, we have gained approximately 2.5* of camber already, lets see what that puts at the wheel, since we now know that the constants are 25.06" pivot to frame (Side C), the distance from pivot to tire centerline is 37" (Side B) and the slope at Angle A is now 31.22* instead of 28.61*
<table bgcolor="#4d99e5" border="1"><tbody><tr bgcolor="#ffffff"><td style="font-size: 8pt; font-weight: bold;">Side A (in)</td> <td style="font-size: 8pt; font-weight: bold;">Side B (in)</td> <td style="font-size: 8pt; font-weight: bold;">Side C (in)</td> <td style="font-size: 8pt; font-weight: bold;">Angle A (Deg)</td> <td style="font-size: 8pt; font-weight: bold;">Angle B (Deg)</td> <td style="font-size: 8pt; font-weight: bold;">Angle C (Deg)</td> </tr> <tr bgcolor="#f4e187"> <td style="font-size: 8pt; font-weight: bold;" bgcolor="lightgreen">20.27603</td> <td style="font-size: 8pt; font-weight: bold;">37</td> <td style="font-size: 8pt; font-weight: bold;">25.06</td> <td style="font-size: 8pt; font-weight: bold;">31.22</td> <td style="font-size: 8pt; font-weight: bold;" bgcolor="lightgreen">108.94</td> <td style="font-size: 8pt; font-weight: bold;" bgcolor="lightgreen">39.84</td></tr></tbody></table>
So just by adding a 1" spacer we have added 1.2* of camber, with a 2" spacer, we get this:
<table bgcolor="#4d99e5" border="1"><tbody><tr bgcolor="#ffffff"><td style="font-size: 8pt; font-weight: bold;">Side A (in)</td> <td style="font-size: 8pt; font-weight: bold;">Side B (in)</td> <td style="font-size: 8pt; font-weight: bold;">Side C (in)</td> <td style="font-size: 8pt; font-weight: bold;">Angle A (Deg)</td> <td style="font-size: 8pt; font-weight: bold;">Angle B (Deg)</td> <td style="font-size: 8pt; font-weight: bold;">Angle C (Deg)</td> </tr> <tr bgcolor="#f4e187"> <td style="font-size: 8pt; font-weight: bold;" bgcolor="lightgreen">21.36664</td> <td style="font-size: 8pt; font-weight: bold;">37</td> <td style="font-size: 8pt; font-weight: bold;">25.06</td> <td style="font-size: 8pt; font-weight: bold;">33.83</td> <td style="font-size: 8pt; font-weight: bold;" bgcolor="lightgreen">105.40</td> <td style="font-size: 8pt; font-weight: bold;" bgcolor="lightgreen">40.77</td></tr></tbody></table>
Adding over 2* of camber.
Now considering most alignments call for around .3+/-.7 to .5+/-1 on the camber, you can see that taking the camber up an additional 1.2* is a bad thing for the tires. At best you would be sitting at .5+ assuming you started out at -.7 to begin with, and if you were already maxed out at .3 to .5 plus with no adjustment left, you are now sitting at 1.7+ camber. Those reasons alone should be reason enough to not just try and lift a TTB by throwing spacers into to.
Additionally, lets say you put some drop brackets on to keep everything in spec on the camber, the brackets are not designed to control twising movement if the axle starts twisting (for example hard braking). While the brackets are wide side to side, they are narrow front to rear, and with the increased leverage gained by spacing the axle away from the spring pack, any twisting force the axle exerts against them is going to place stress on the bracket and the bushing in a manner they are not designed to handle. At best just prematurely wearing the bushing out, and at worst bending or breaking the bracket.