When you click on links to various merchants on this site and make a purchase, this can result in this site earning a commission. Affiliate programs and affiliations include, but are not limited to, the eBay Partner Network.
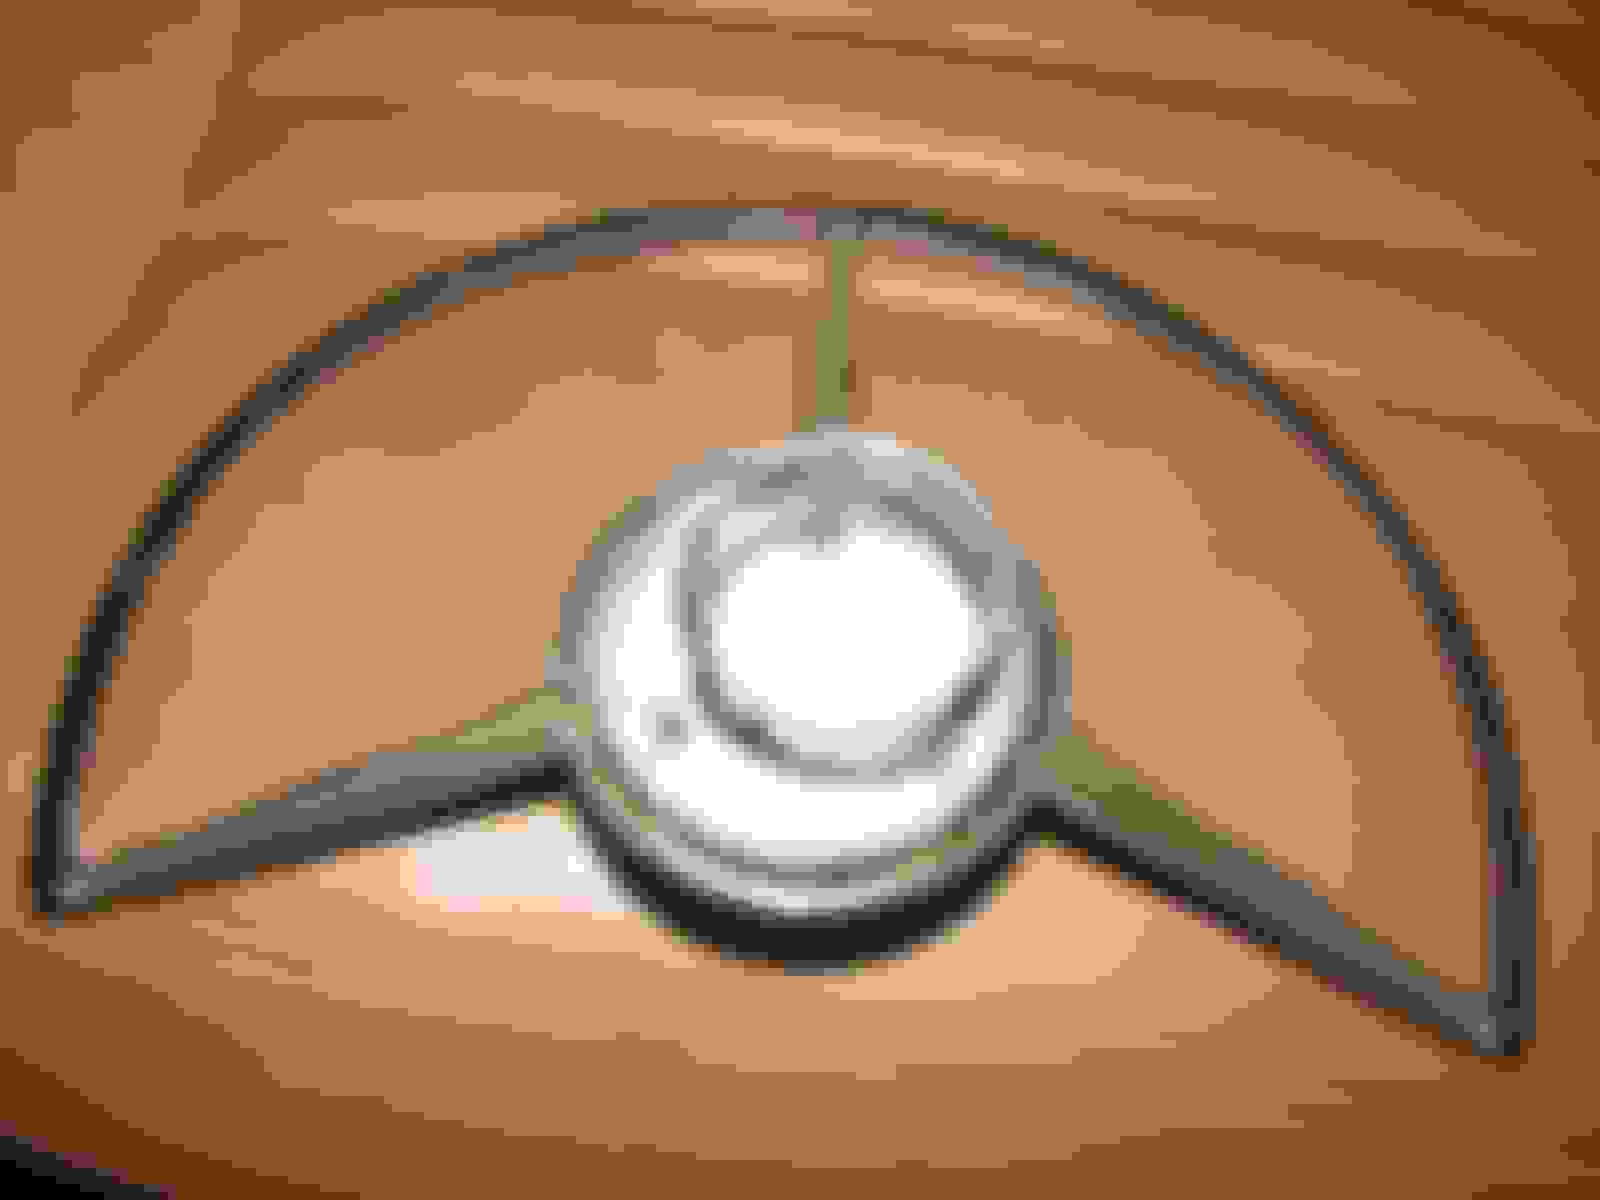
I am replacing the turn signal switch on my 66 F100, understand everything going on there. I have never had a horn all that is there is what is you see in the picture can anyone tell me what I am missing. I think this truck was originally a column mount shift and someone installed a 4 speed on the floor?
Thanks for your time!!
Suggest clean all surfaces starting at the horn ring to the turn signal switch, dissimilar metals tend to leave a residual film which can cause poor ground issues. Also, there are 2 horn brushes that are same, flimsy so I try and keep a spare on hand: 1 at the steering wheel collar and another at the turn signal switch. Rather than cut and splice the turn-signal wires, with patience one can remove the individual pins from the connector using tweezers, mini screw driver, or both. There is a tool perhaps other member's can offer info. Imagine member will be posting pic of the assembly? With regards to the horn ring/button, make sure the plastic retainer pins/ears that secure the ring/button to the collar are not worn or damaged. Removing the 3 screws on the horn ring retainer there is what I believe is referred to as a pressure pad. Make sure it's in decent condition and surfaces are clean.
Posting couple pic's may find helpful. Also, with regards to the cracks, etc. I used epoxy cement (A-B) type found at local hardware store. A 'how to' site suggest taking a rectangular file and widen the surface of the crack for the cement to adhere to. Also, it drys fast so only mix enough to fill each repair/crack and most important keep in mind what cement is applies will have to be sanded off so try and avoid steering wheel groves, etc. Also, keep hands and cement moist, easier to work with.
Thanks for all the information. As far as the horn it looks like from your pictures i am missing a spring and the half circle looking thing?
The horn brush (C2OZ-13A821-A) is the same: 1961/66 F100/250 2WD; 1966 F100 4WD & 1967/70 F100/350. Yours is in place, but take it out and look at it.
The brush contains a coil spring and has a thin copper wire that snaps. When this occurs, the horn no longer blows.
--------
The nylon retainer (C2DZ-13A809-A) is the same for the horn button and horn ring, has the same applications as the brush.
But some people don't know that to remove the button/ring, it has to be pressed down firmly, then turned. They attempt to pry the button/ring off, which breaks off one, two or all three of its "ears."
Now the button/ring sits catty wampus or if all three ears have broken off, won't fit on the steering wheel...period.
---------
But, be aware that the coil spring used with the horn button (C0DF-13A807-B) is different than the horn ring spring (C0DZ-13A807-B). Both are reproduced, but make sure you get the correct spring.
I posted the parts catalog pic, so you won't have to scroll up to post #4 to see it.
The following parts are shown as their basic part numbers: spring: 13A807 .. nylon retainer: 13A809 .. horn brush: 13A821
I just did this on my 66; I needed the turn signals, both buttons/brushes, the spring and a horn button.
Here is everything I bought from Dennis Carpenter for the horn:
2 each Horn Ring Contact & Brush 1961 - 72 Item ID: C20Z-13A821-A
1 each horn button spring Horn Button Spring Item ID: C0DZ-13A807-B
1 each horn button Horn Button Assembly Item ID: C3TZ-13A805-C
After assembly (easy), at first the horn blew continuously, so I had to trim the nylon ring a bit; now the horn works fine.
I just did this on my 66; I needed the turn signals, both buttons/brushes, the spring and a horn button.
Here is everything I bought from Dennis Carpenter for the horn:
1 each horn button spring Horn Button Spring Item ID: C0DZ-13A807-B.
This is the horn RING spring, the hornBUTTON spring is C0DF-13A807-B
While we're on the topic of horns, did all of these trucks come with a horn ring? My truck doesn't have a factory steering wheel, and my horn is a button over the ignition, which I'm not really a fan of.
By default the Custom Cab models got the horn ring and the Standard Cab models got the horn button. They are, however, easily swapped between like kinds as the mounting is the same for both styles.
 03-17-2018, 12:56 PM


 spring Horn
  Spring Item ID: C0D


