
The College/University Budget Build Thread
#1
 07-24-2012, 12:15 AM


The College/University Budget Build Thread
So... I finally got around to doing my build thread. First things first... I'll introduce myself.
I'm 22, in University in the Great White North, have a passion for anything with an engine in it, and used to know almost nothing about vehicles.
I've been around for three years now on FTE and have been slowly gaining knowledge and collecting parts.
Before I arrived to FTE, I often got confused when people would say anything about vehicles besides the obvious things like "engine, transmission". But I was determined to learn something...
Well, I've changed my lack of automotive skills and knowledge by hanging around on FTE, so before I start... I'd like to give a shout out to all you FTE'ers who have helped me through the years. You know who you are, and keep on paying it forward! You guys are all great on here, and you deserve to know it
So here we go... less text, more pictures. Saddle up, I've got three years to cover...
First summer (June 2010):
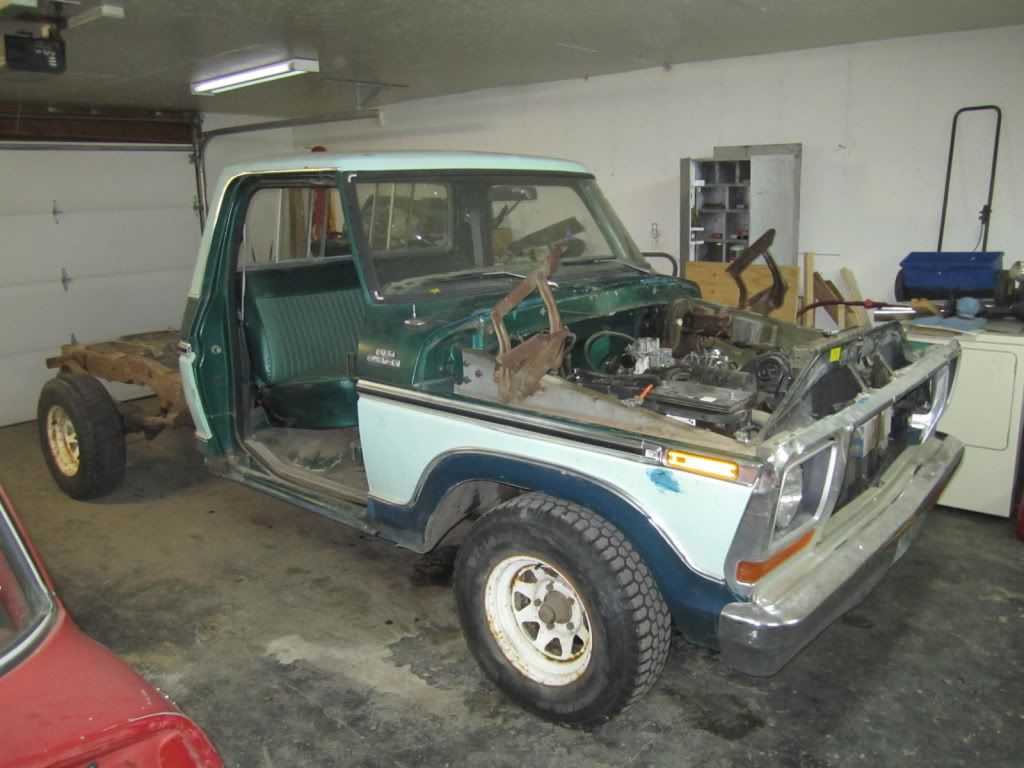
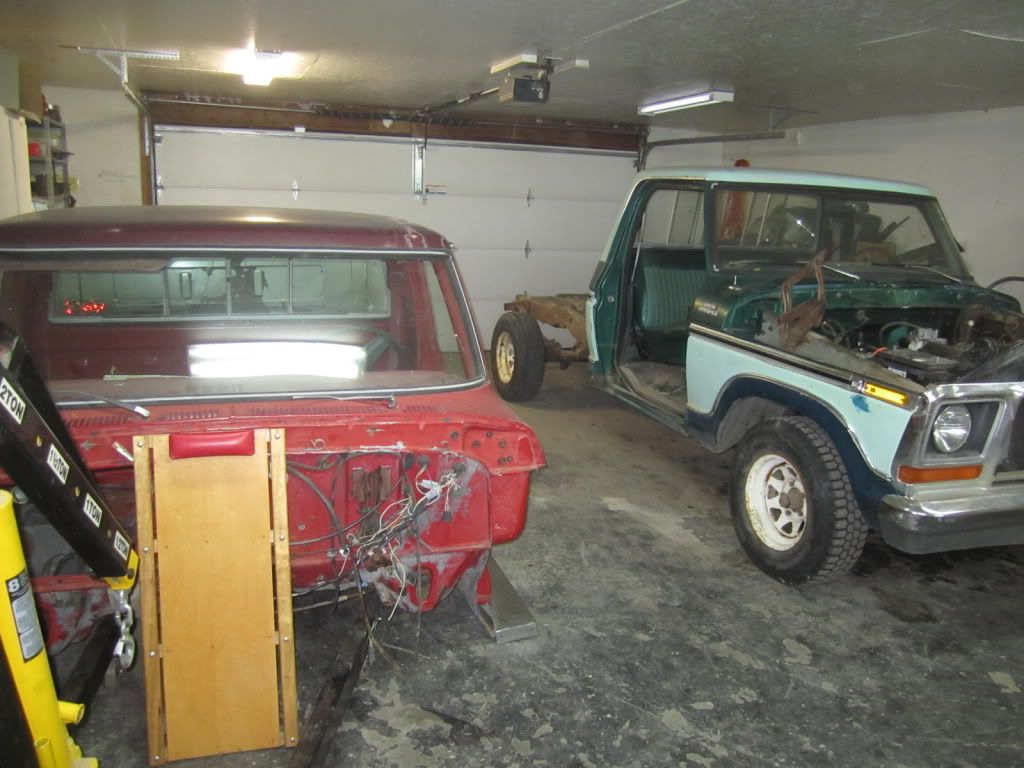
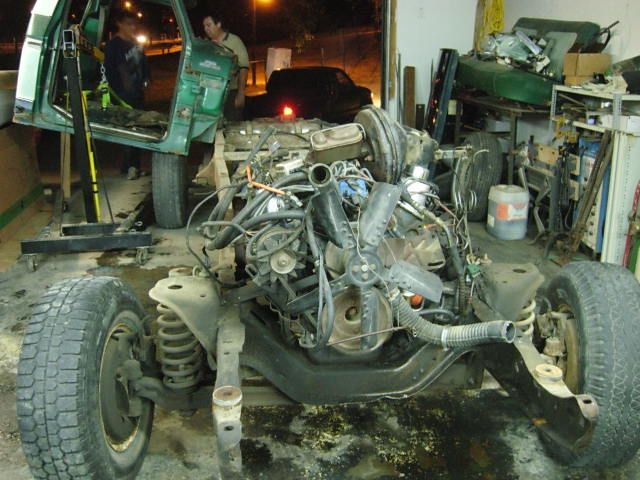
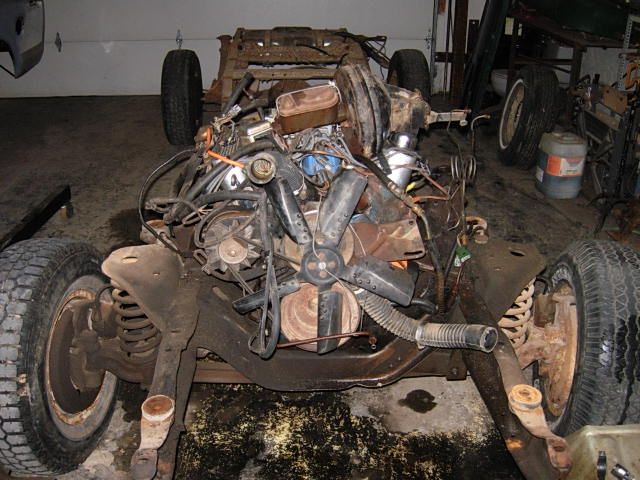
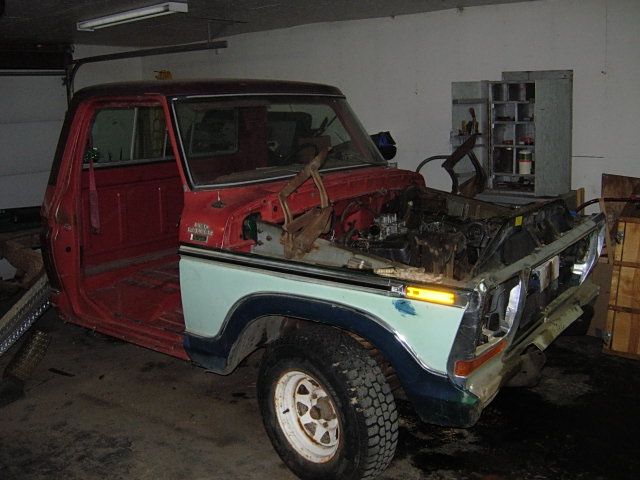
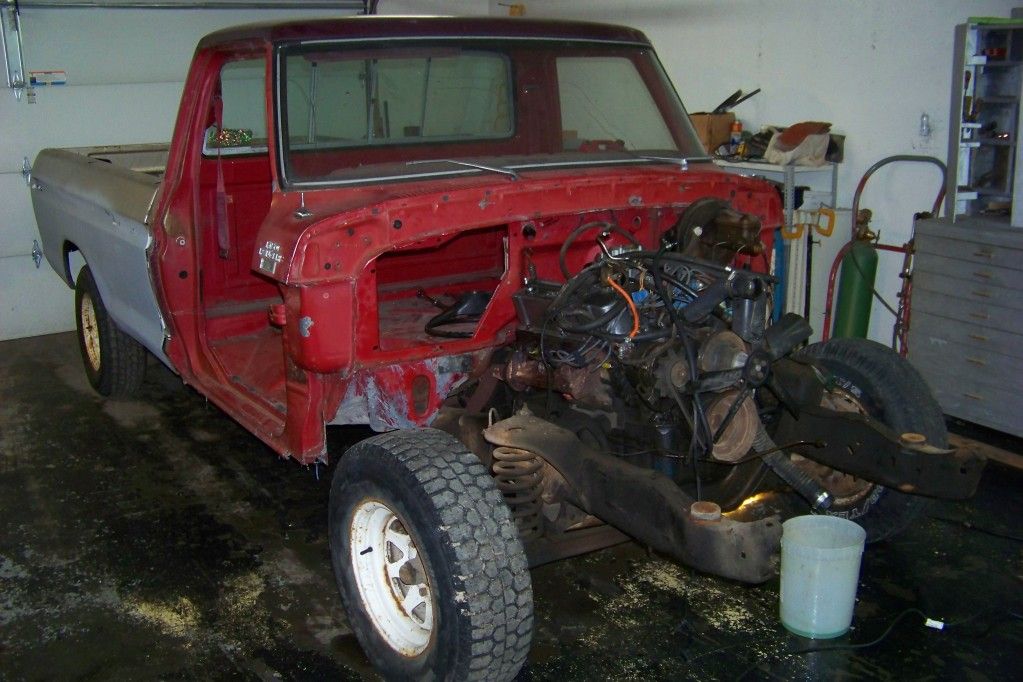
This is when I first got the truck. I bought it for $300 CAN. Came with no gas in it, barely ran because the carb was completely gunked up and it leaked everywhere. Loved every moment, even when the truck kept dying at every red light as I drove it home.
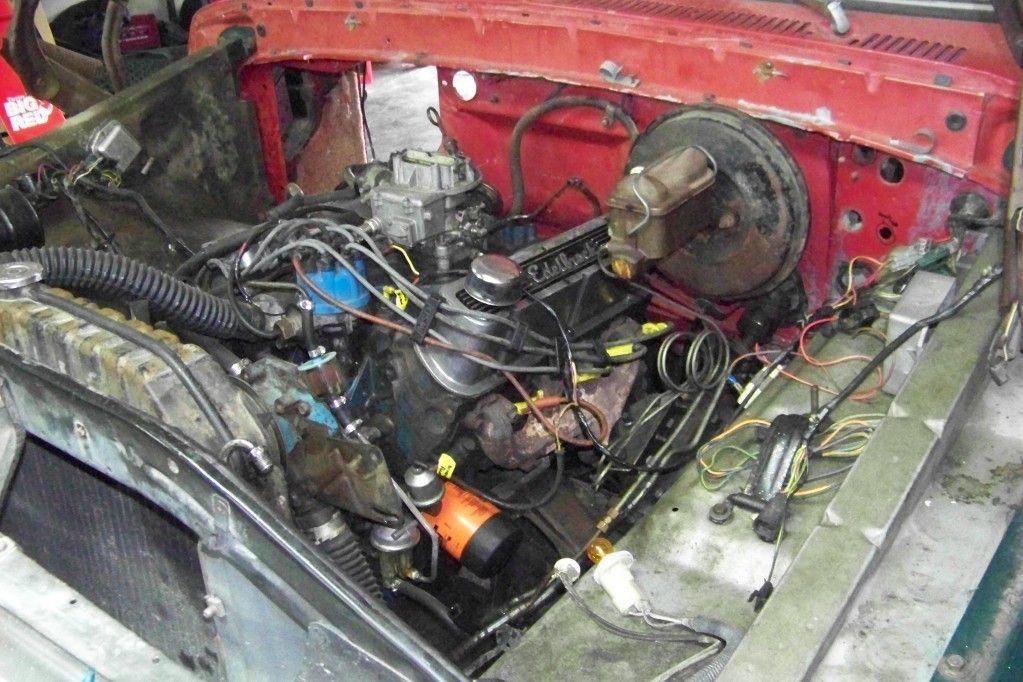
Truck Specifications:
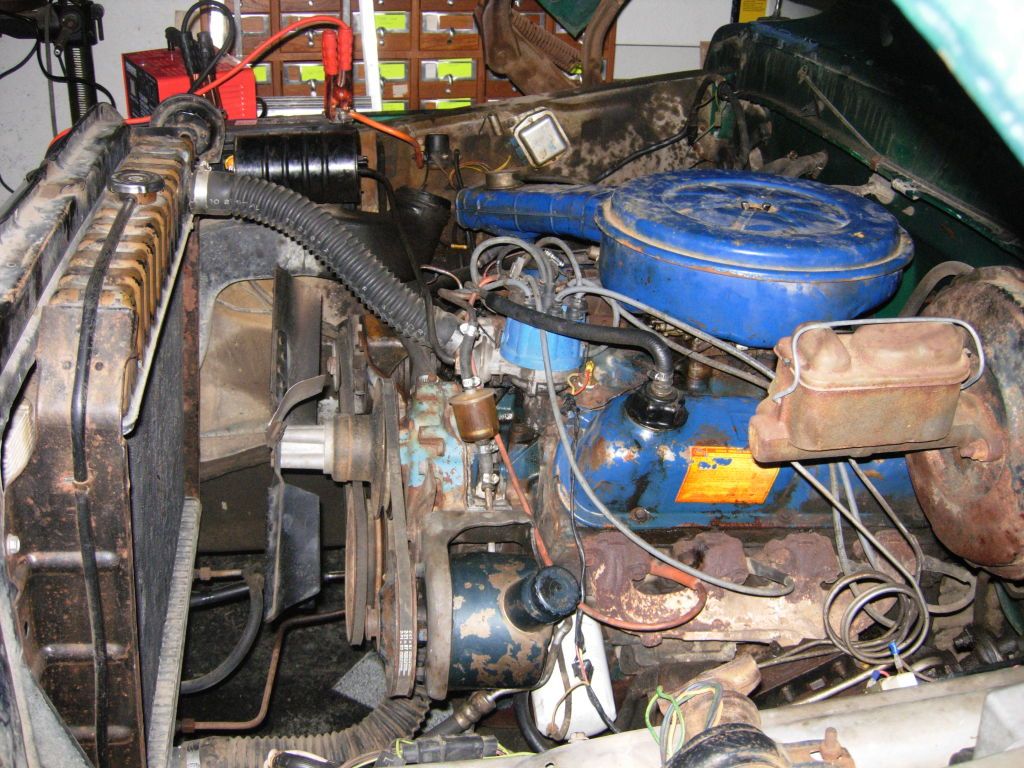
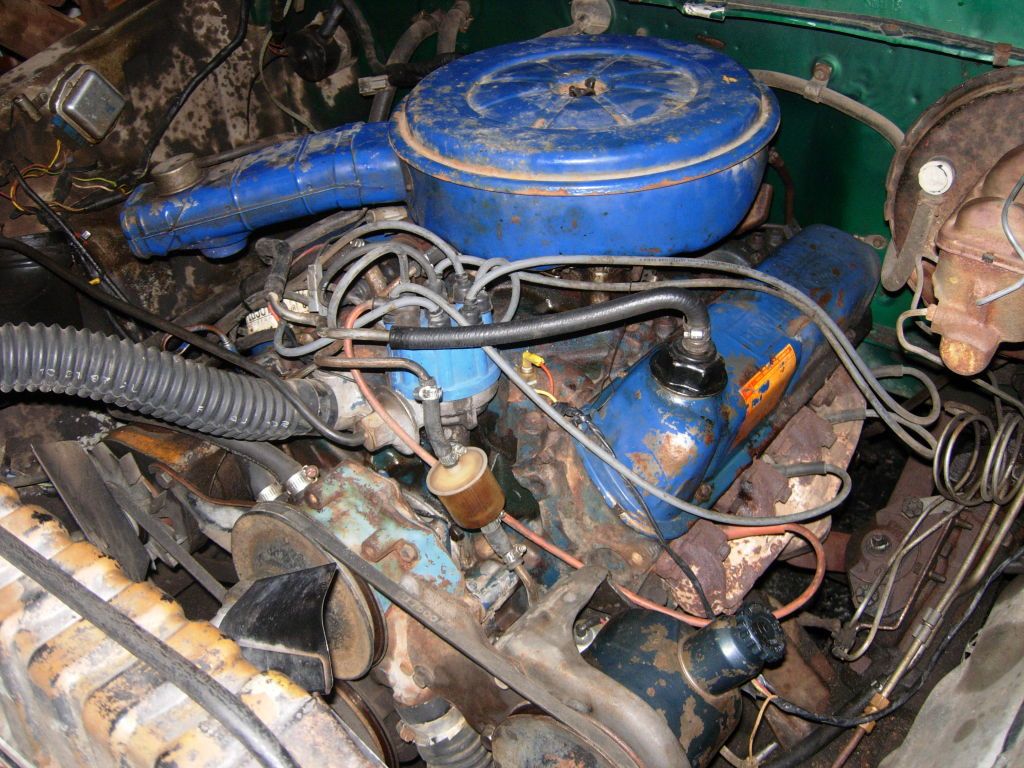
- 351W implanted from a 1972 Ford Galaxie (thick webbed Windsor and shorter deck height)
- FMX transmission (from the Galaxie, and leaks like a house without a roof)
- 2WD
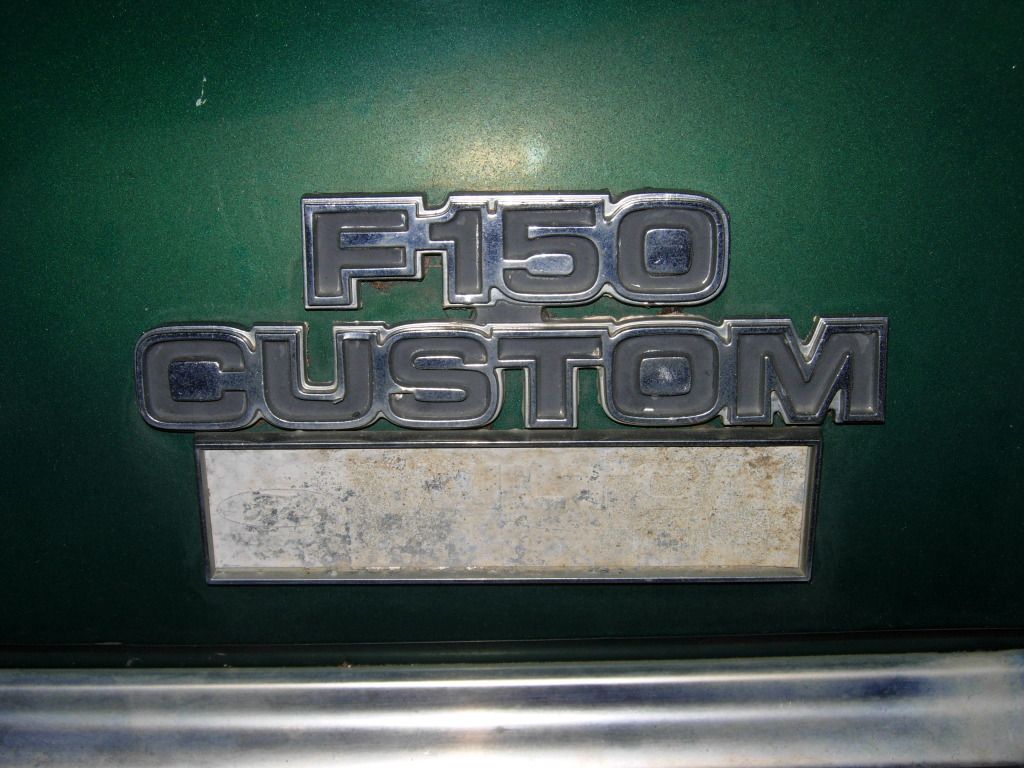
- Regular Cab (Custom & Racetrack Trim)
- Longbox
- Single Gas Tank
- No A/C
- Hacked up wiring
- Stupidly rusty & dirty all over (when I got it)
- P.O. said the vehicle turned over 3 times with the original (351M & C6) in it. Then once more with this "new" engine in it. For all intensive purposes, we're going to say this vehicle has hit the 500,000 km mark... just to make things easy...
- Super leaky and incorrect Power Steering Pump for the truck
- Crushed passenger valve cover from when they transplanted the 351W in (hit the cab firewall and dented that too...)
Sorry for the terrible pictures, but there was another vehicle in the garage when I brought it home. You get the idea though...
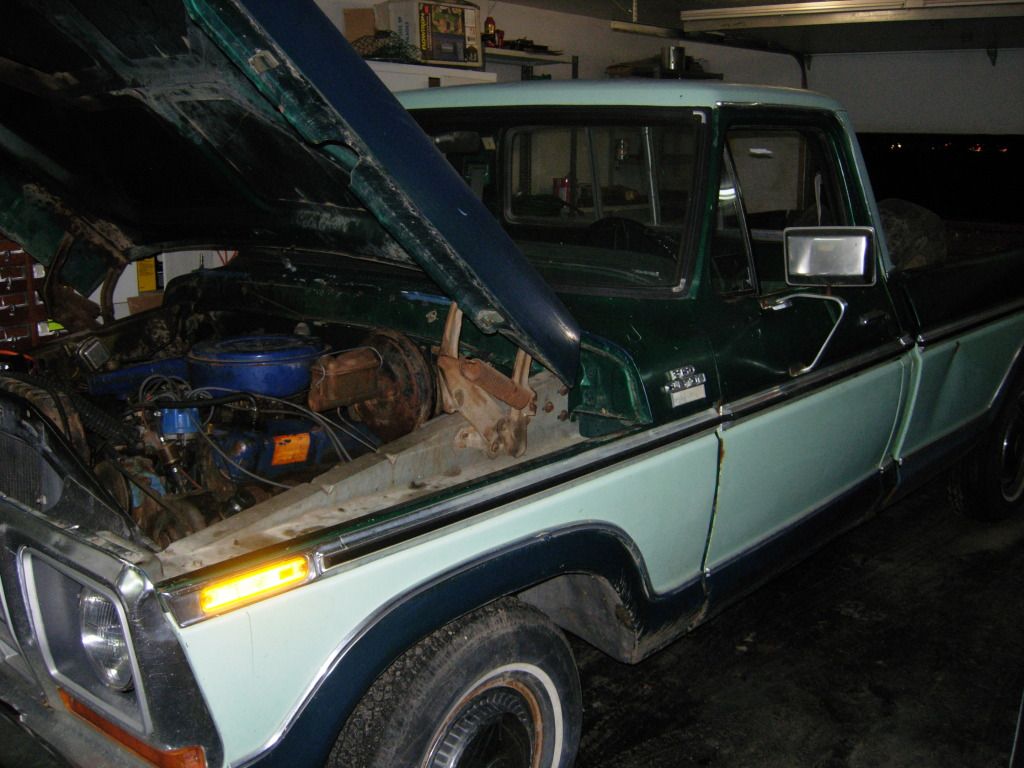
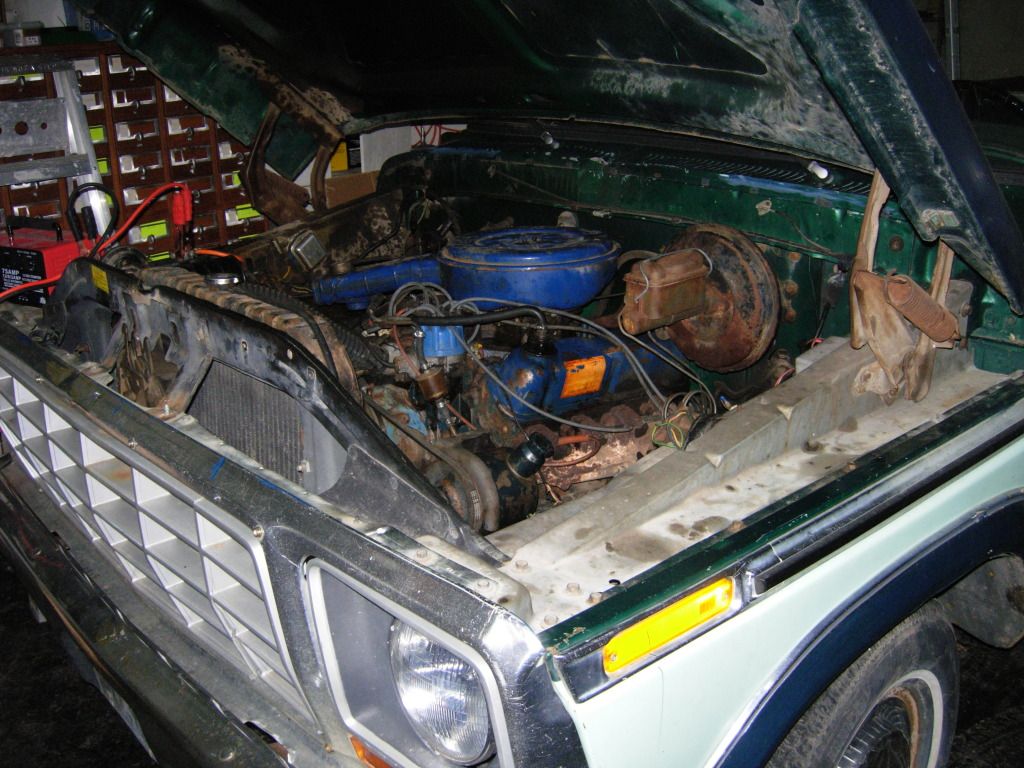
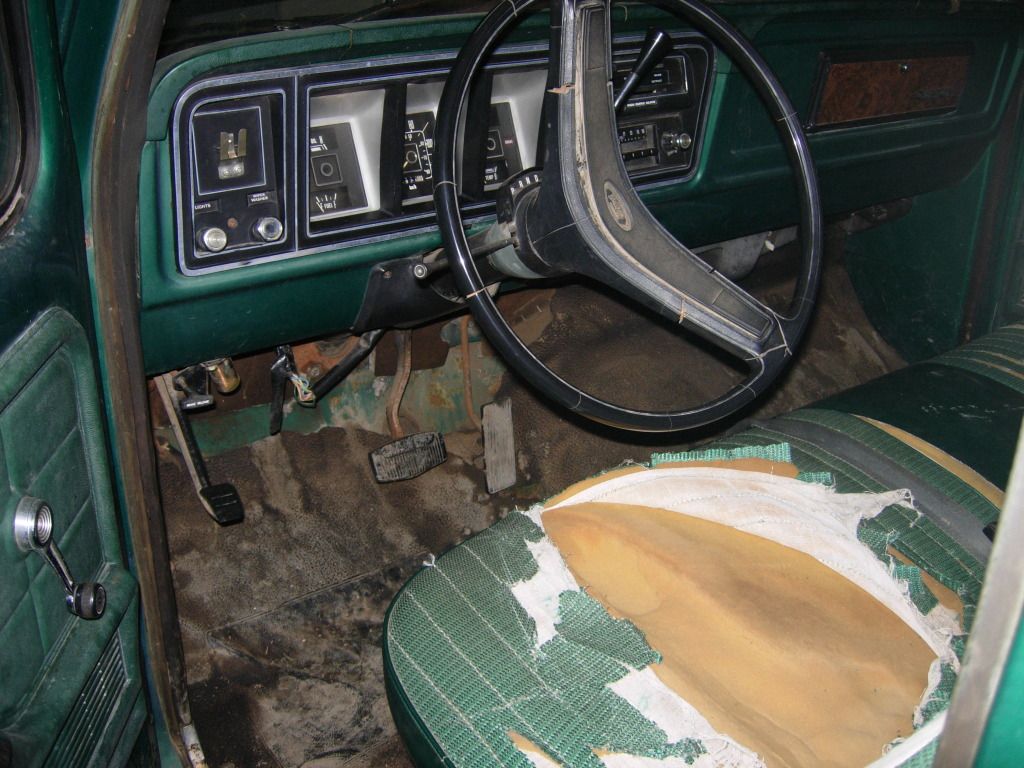

So there you have it. There was the truck when I got it.
During that first summer, I sorted out my carb problems and figured out that I had a bad fuel sending unit. I found myself a few contacts for parts/yards and started keeping in contact with them. I know I didn't get much done, but when you have a steep learning curve.. it's kind of hard to do anything.
I think maybe I even figured out what a valve cover was... moving on...
Second summer (June 2011):
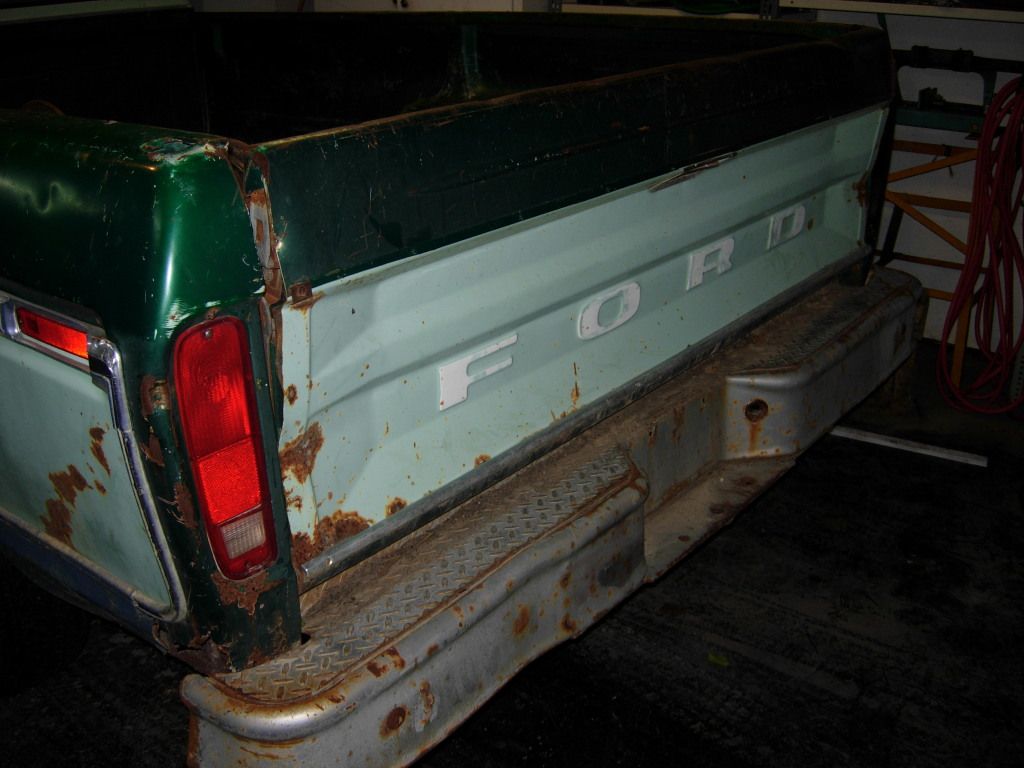
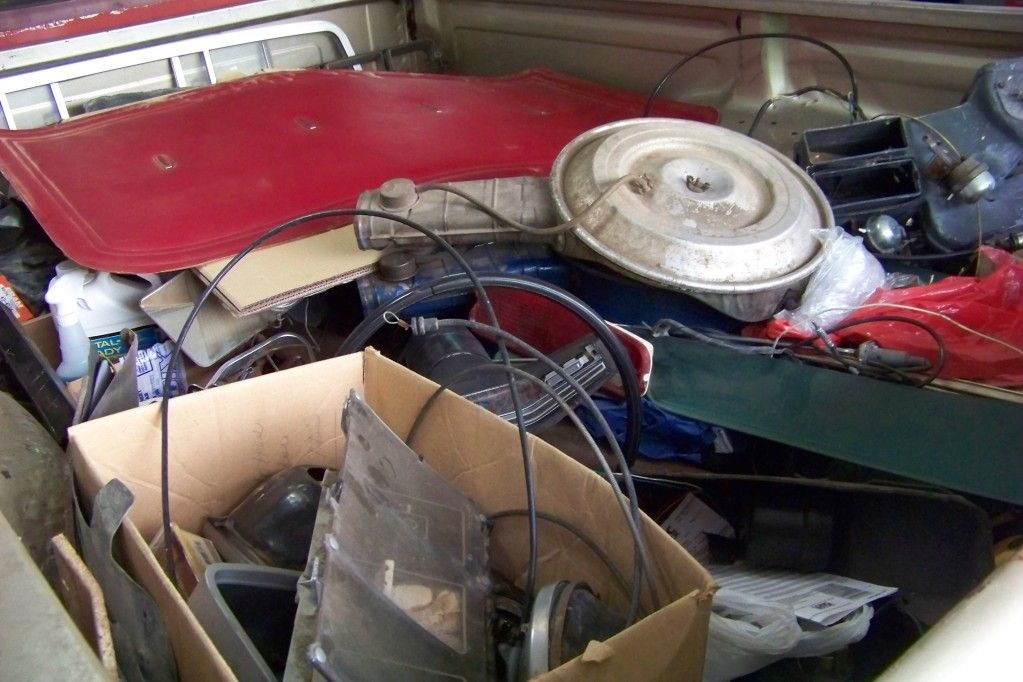
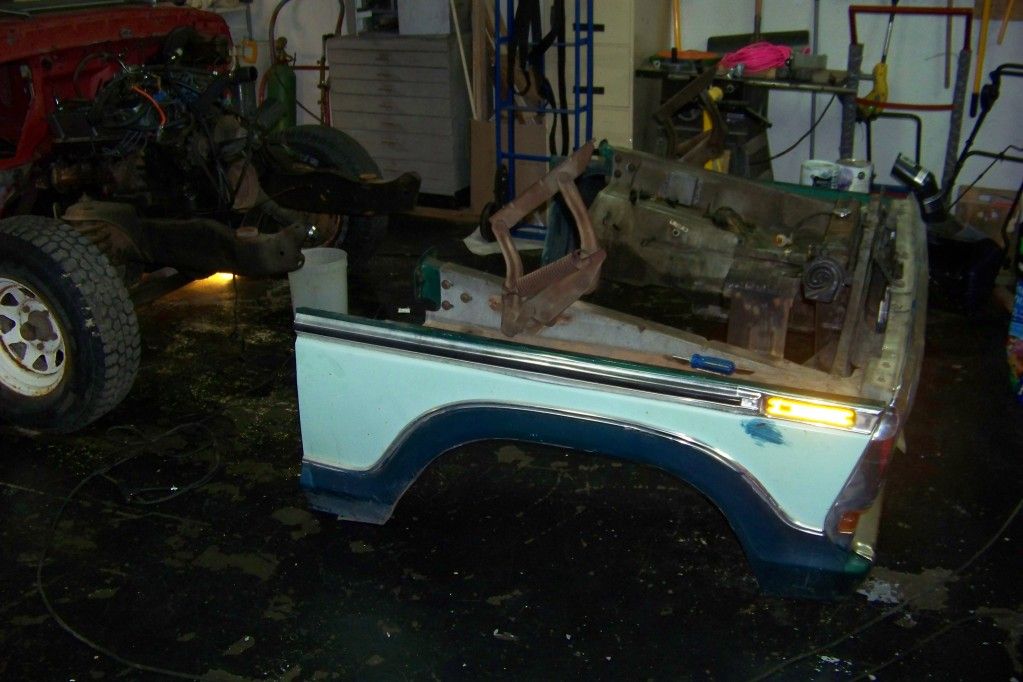
I got a little bit smarter and decided to start my search for body parts during my school year. I ended up stumbling across a box (Thanks to a member on FTE in one of the Canadian Chapters... Sheldon). I bought the box and found out it wasn't fixed correctly when I brought it home... but it was better than what I had...
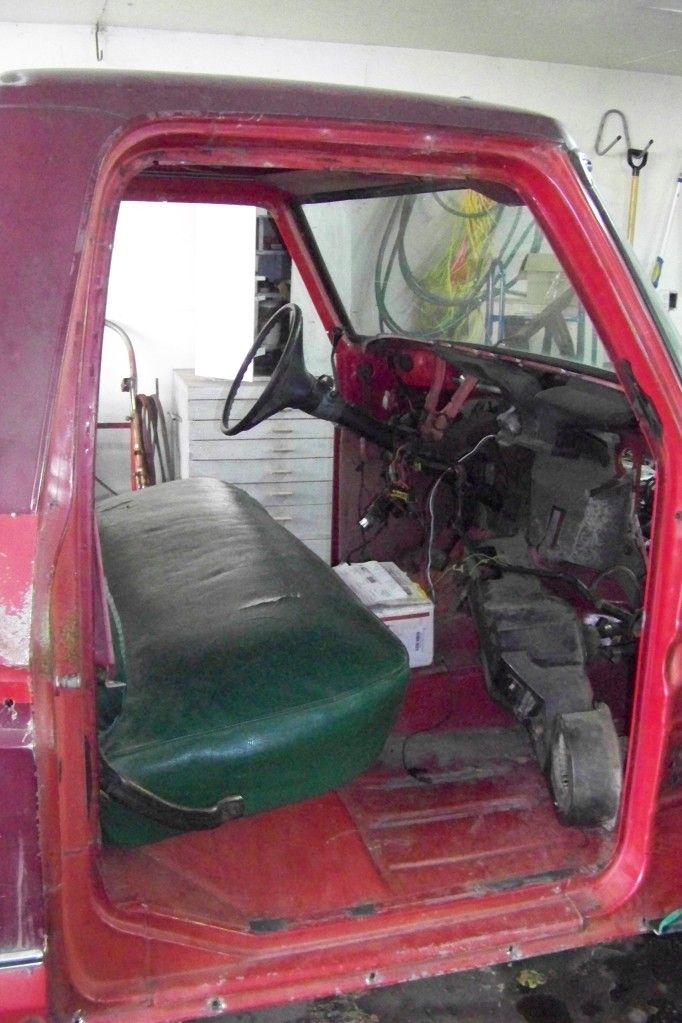
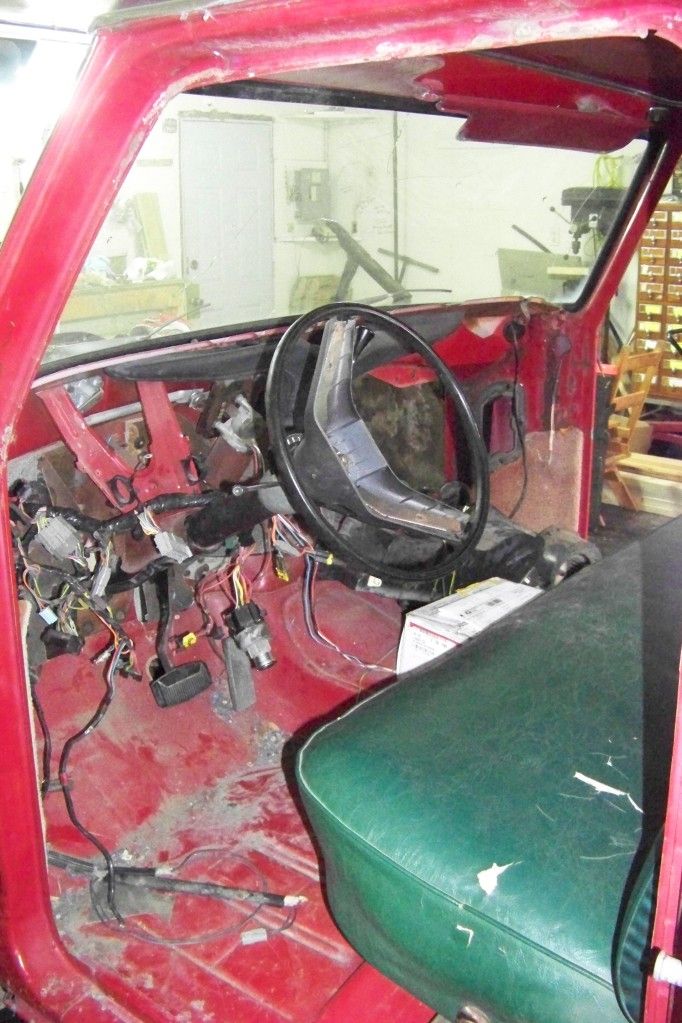
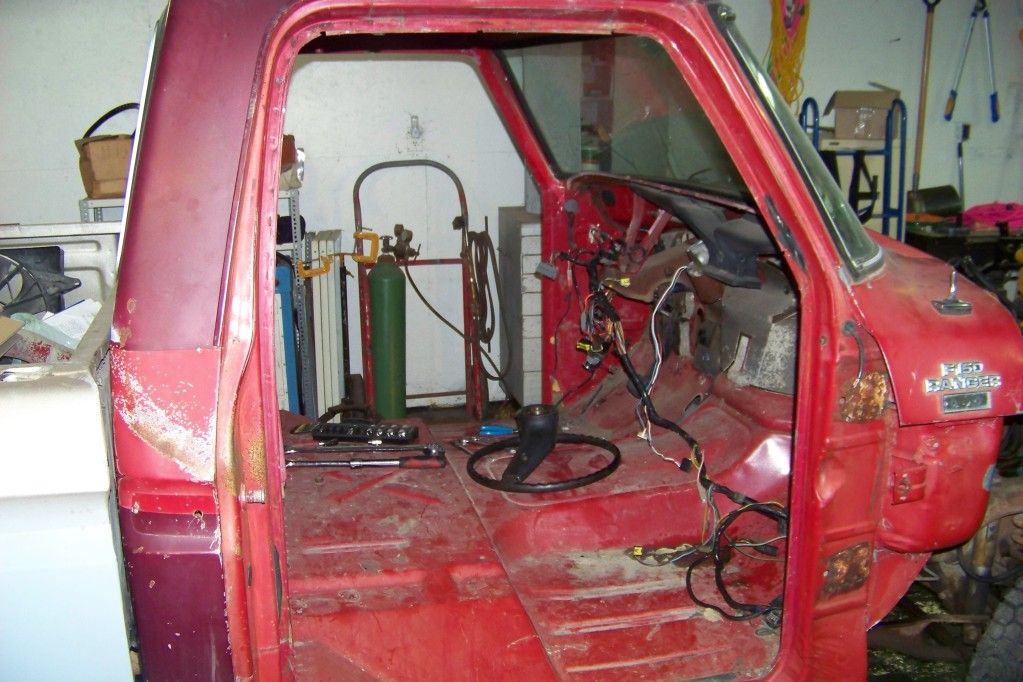
I also bought myself a cab from within my province as well. Rust-free cab with perfect corners and it was an A/C cab. Perfect. Had great doors, but no mirrors. The interior was cut up a bunch and the dash was ripped out along with the seat... but whatever... it was the best possible thing I could get in Saskatchewan without traveling.
The cab cost me $750, delivered to my door. The box cost me $700, had to go get it myself... eight hours of driving there and back. All in all, those are great deals here in Saskatchewan. Some guys in Alberta want $1000 for a box, and I have to go get it myself. Others want $1000 for a cab that isn't rust-free...
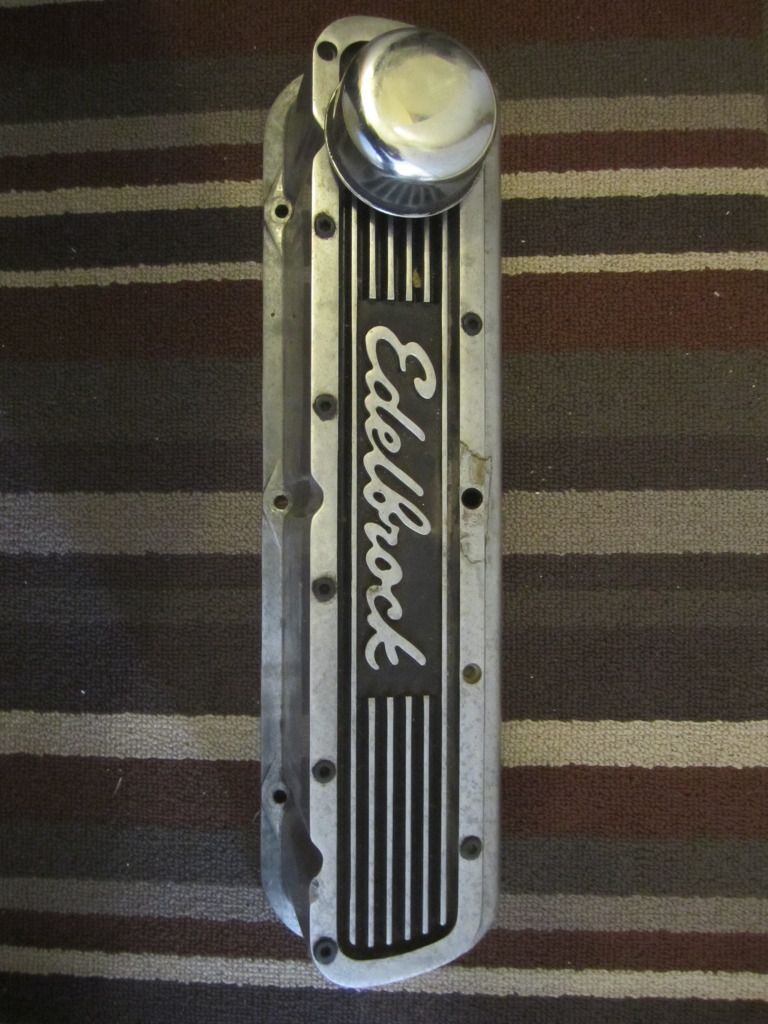
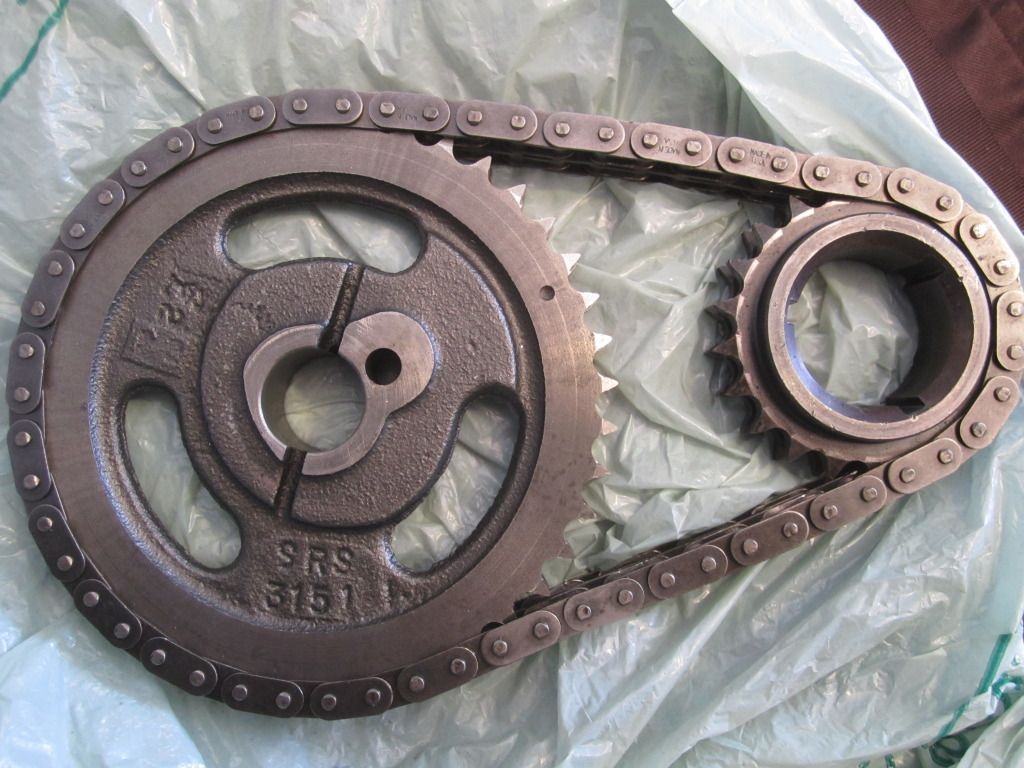
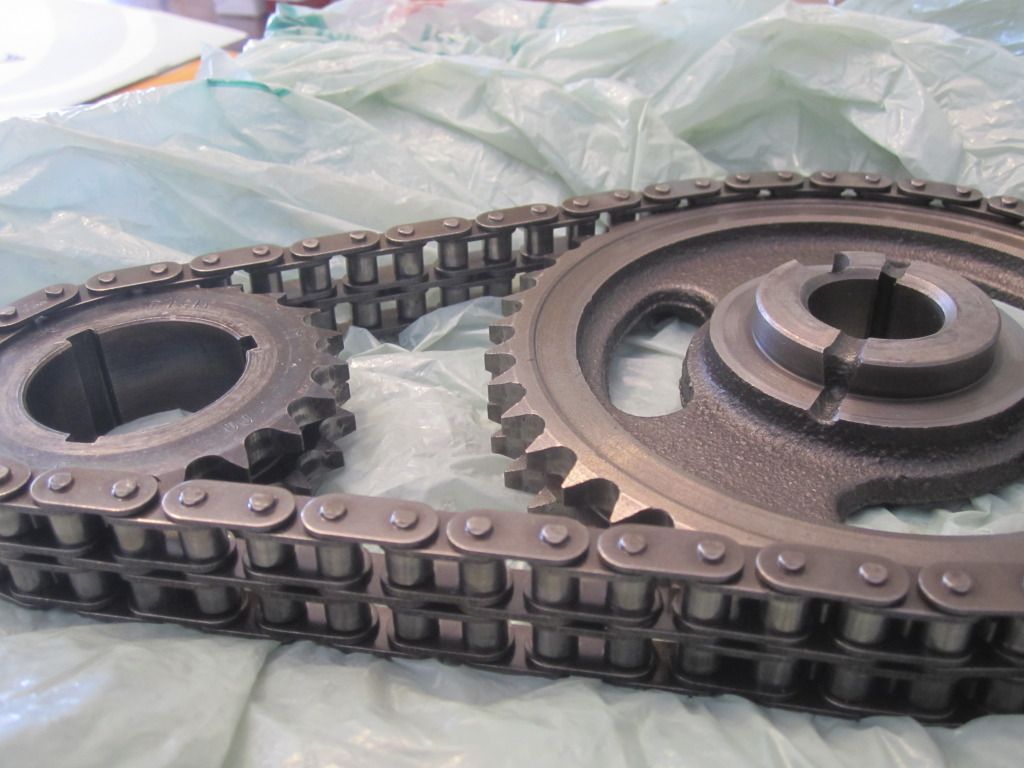
I picked up a few parts while I was in school. Used valve covers and a used double roller timing chain. The timing chain wasn't even used, but the valve covers ended up being broken during an install from the P.O. He welded them up and sold them to me cheap... turns out I got what I bought because the passenger side leaks oil like a drain pipe. Oh well, they look nice on my engine :P
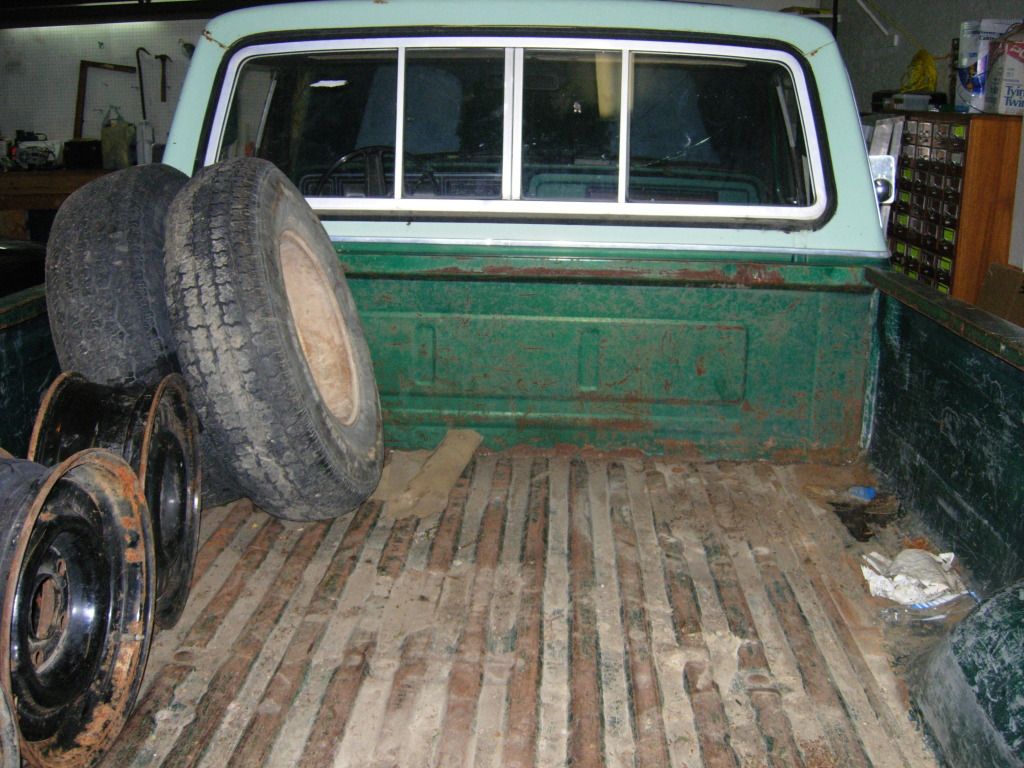
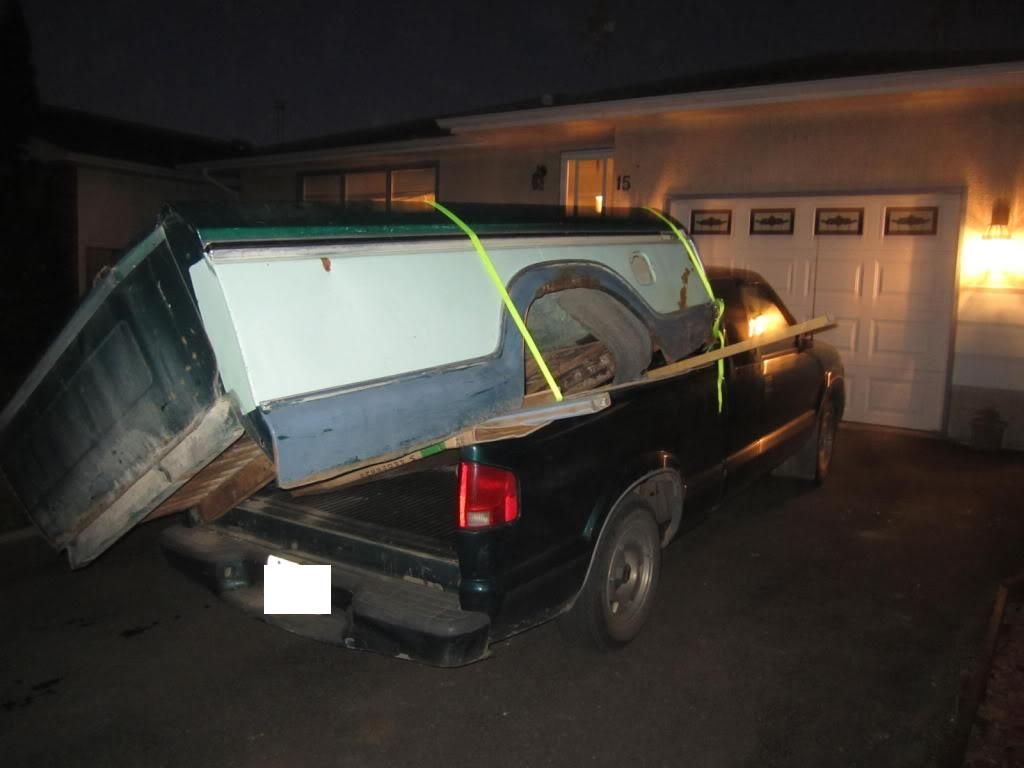
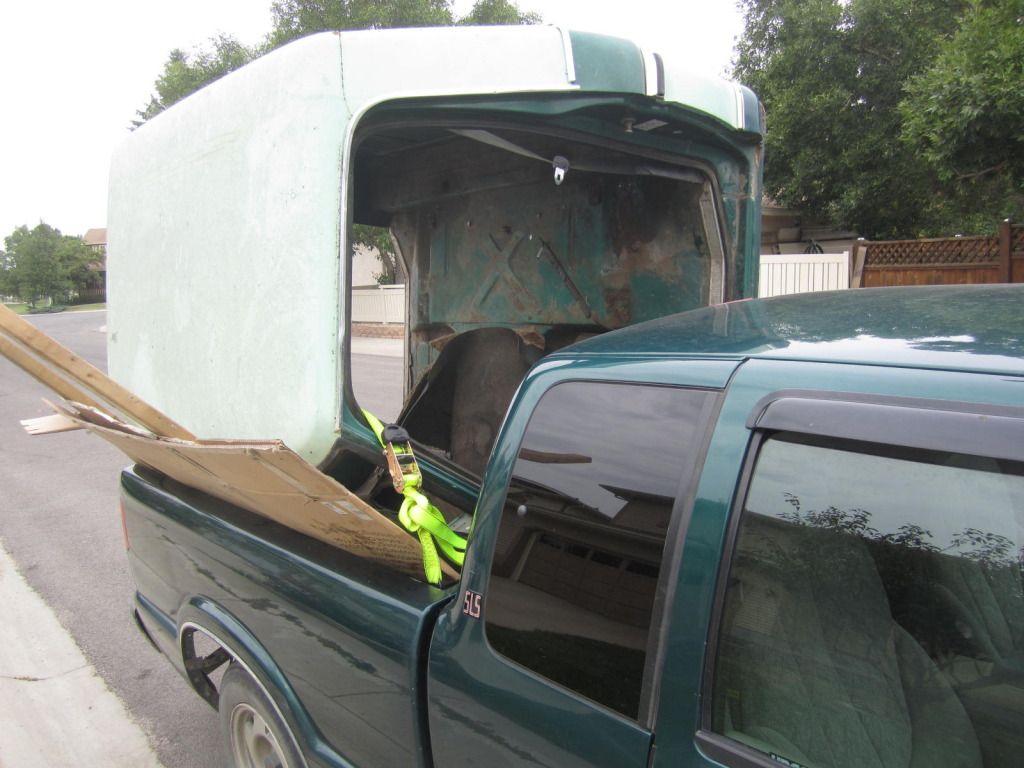
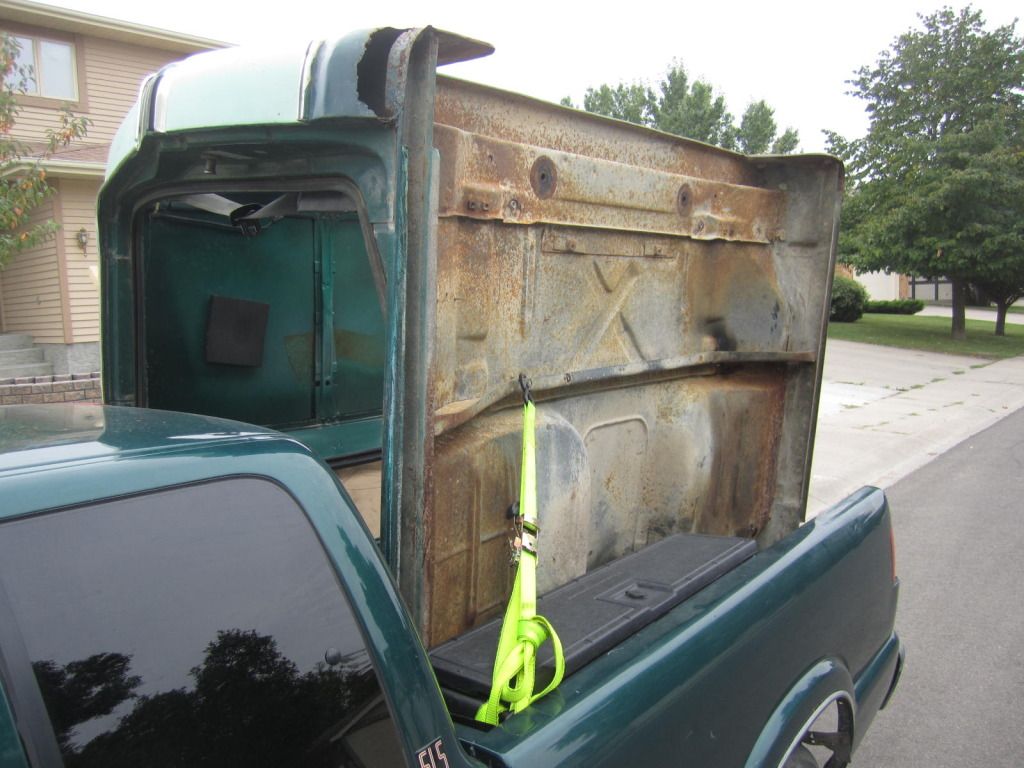
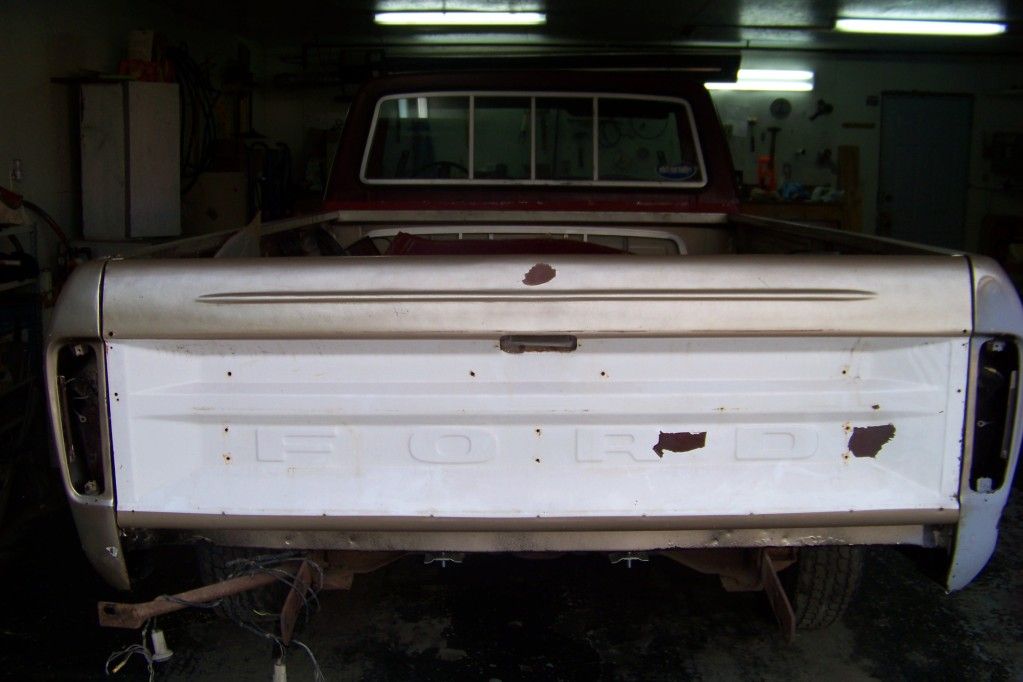
So here is a photo of the truck box the day that I brought it home. Twas a very cold Feb break, but I got it home in one piece. I'll post more photos of it when I get the chance to upload them.
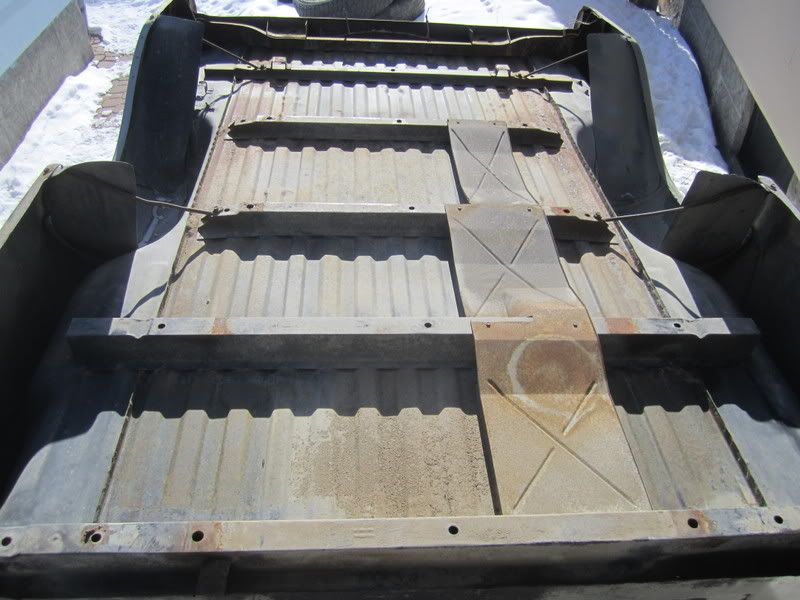
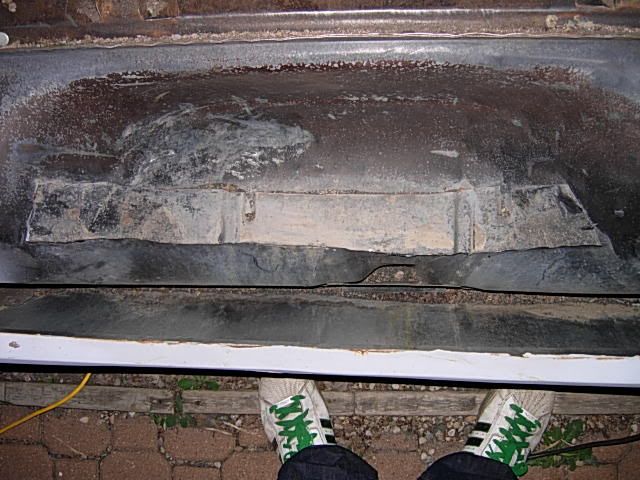
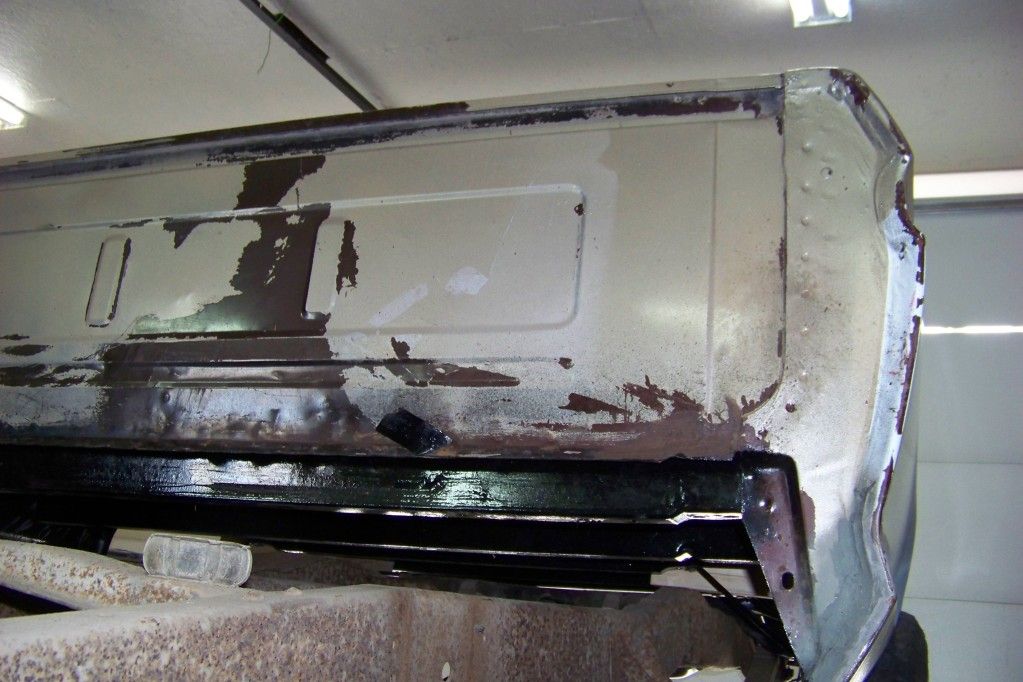
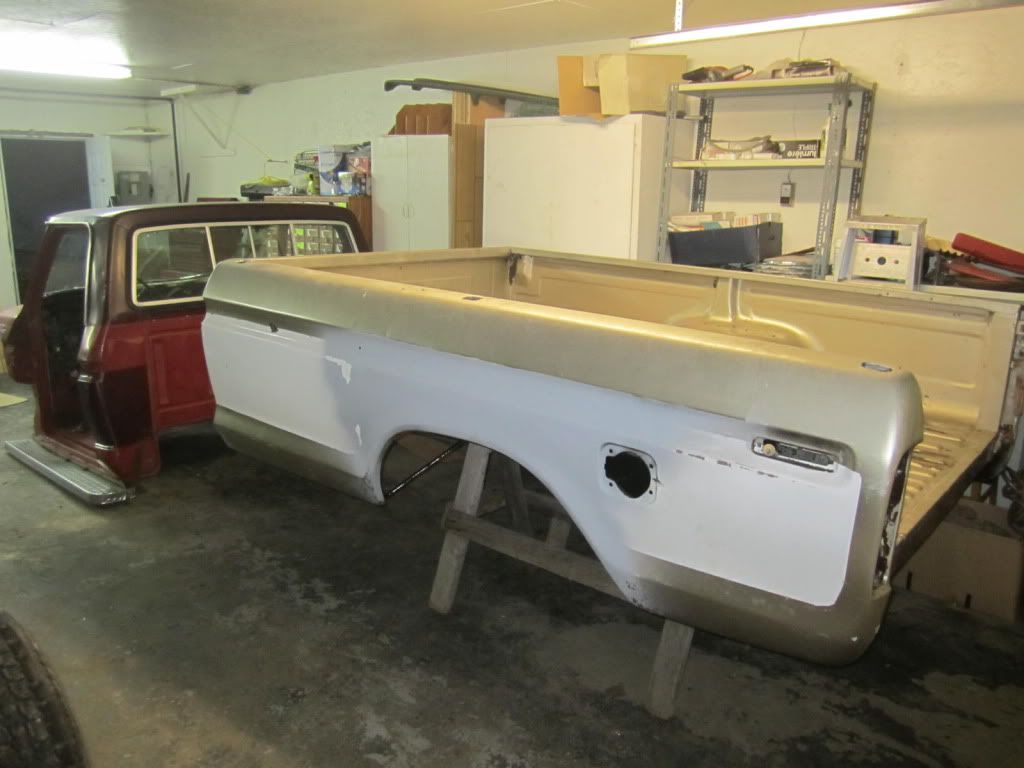
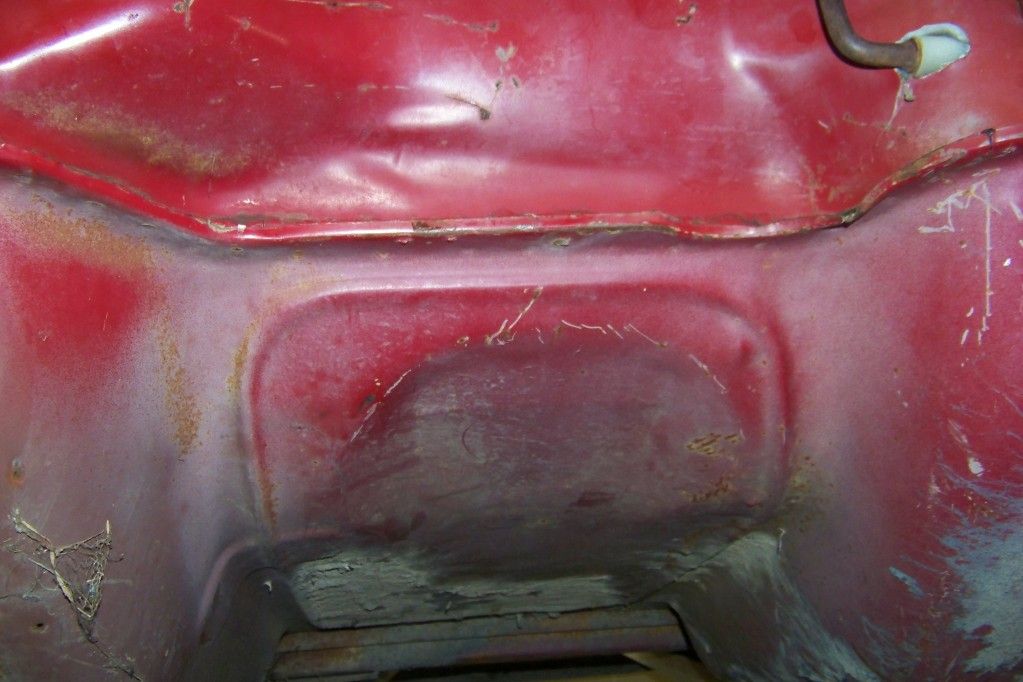
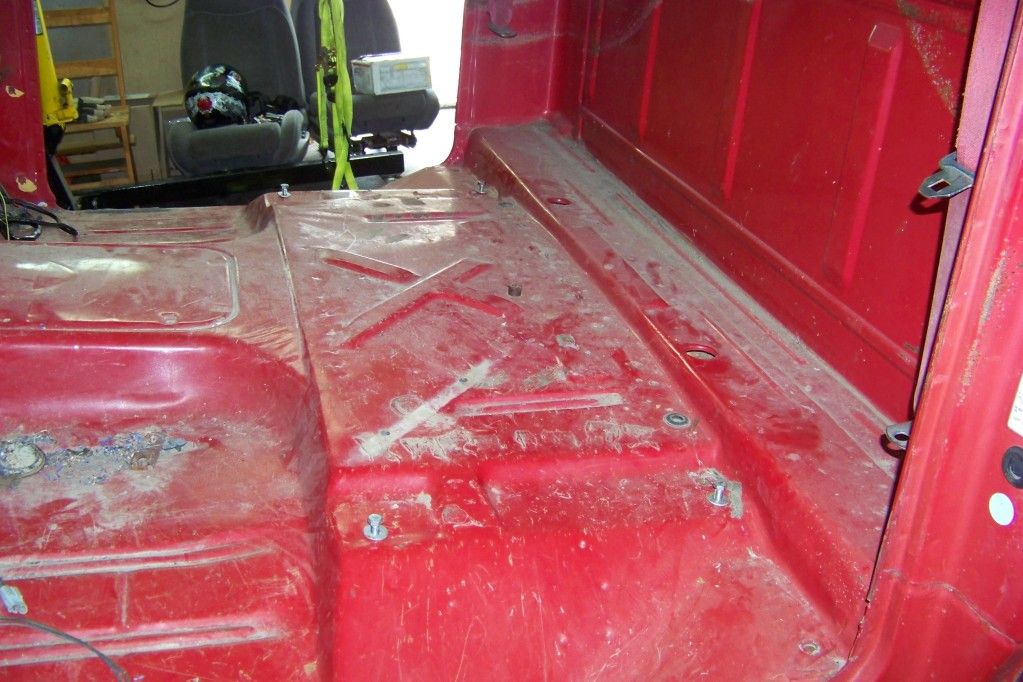
So then in the spring when I got home, I decided to clean up the box and use some POR-15 on it.

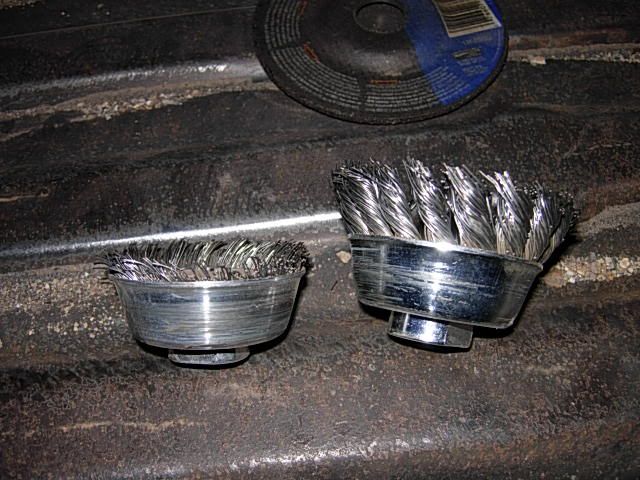
These get eaten up fast when you're on a mission to make everything rust-free.
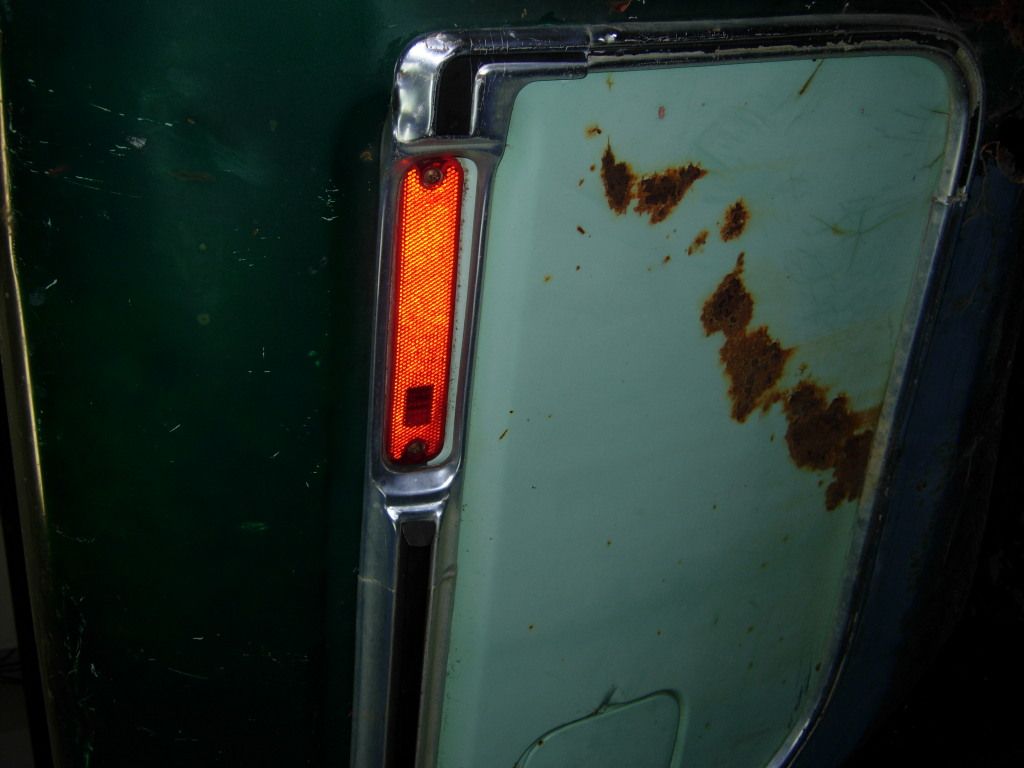
From this:
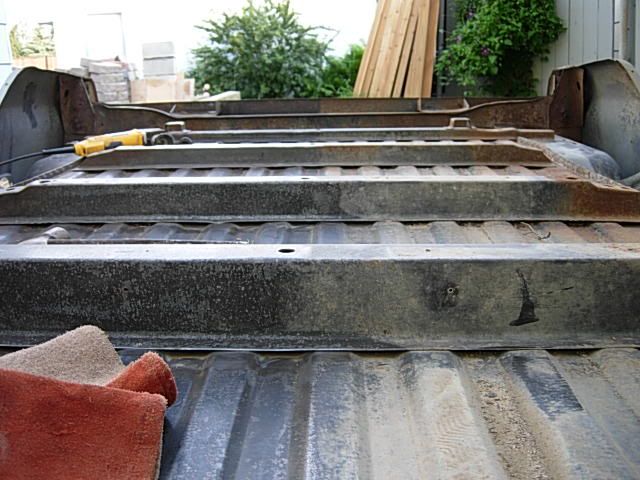
To this:
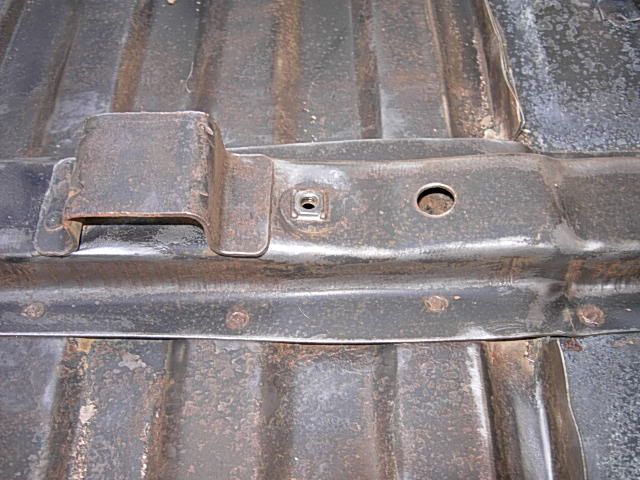
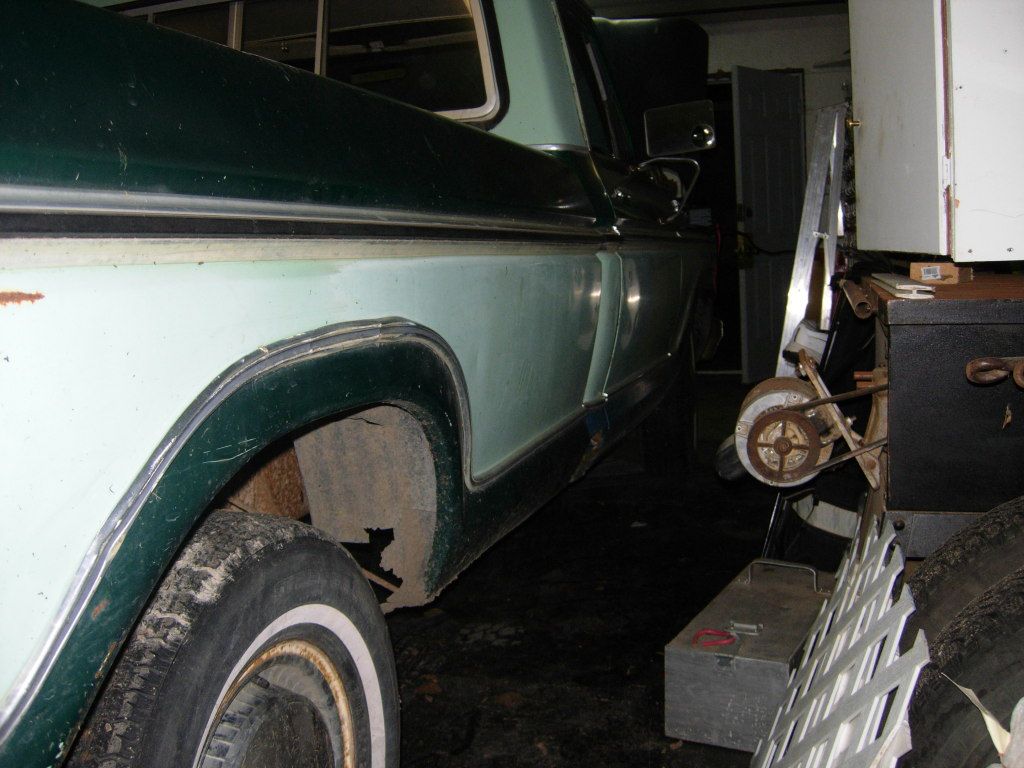
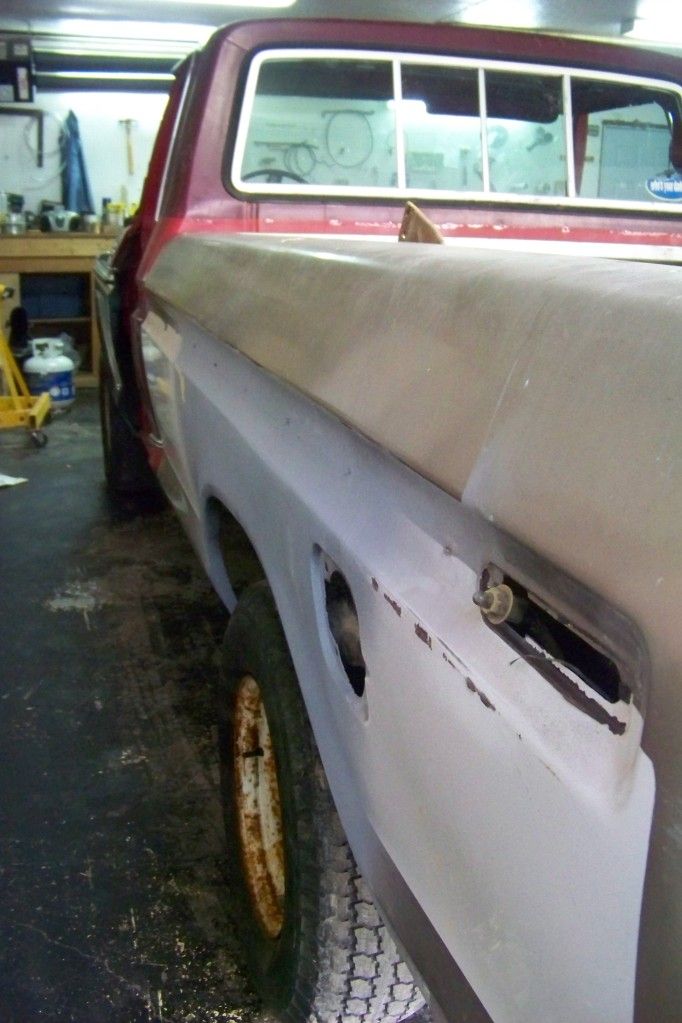
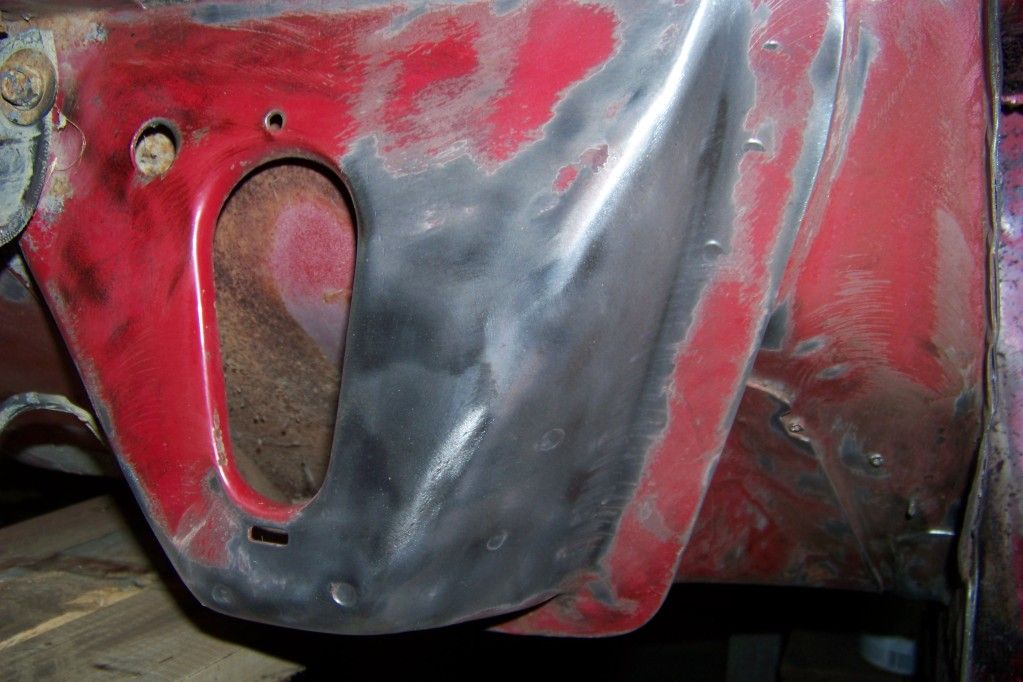
Also decided to cut out the fender wells because they've given a lot of other users greif and they cause everything to rust really badly if water gets caught up in there.
Zip-disked them out and then drilled out the rest of the spot welds. I can fix those holes in the wheel arch later... not worried because they're all POR-15'ed
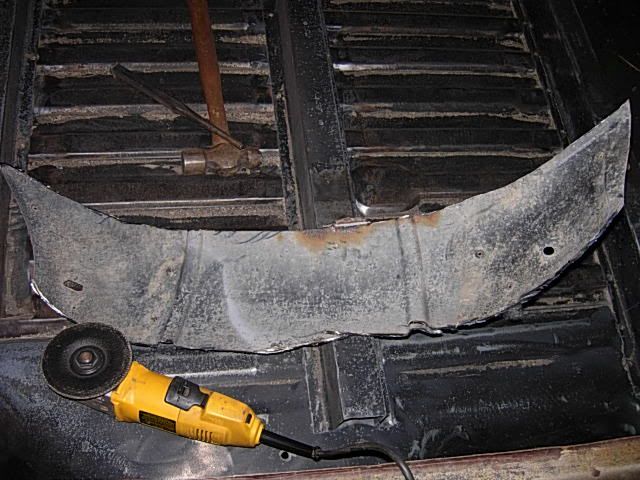
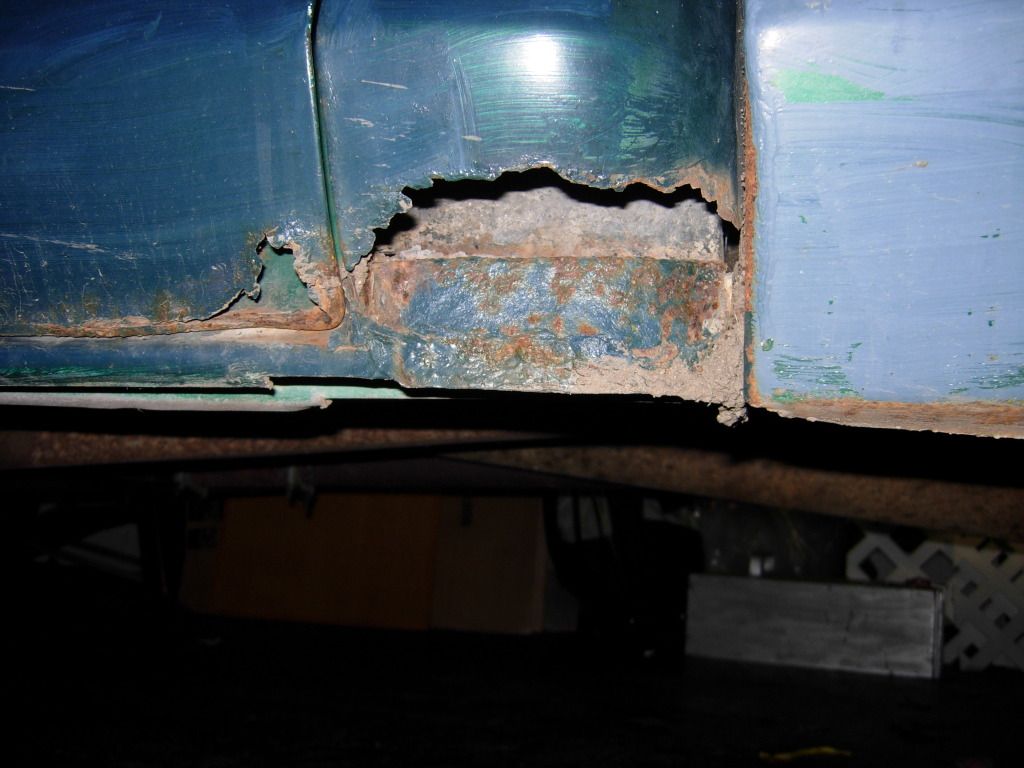
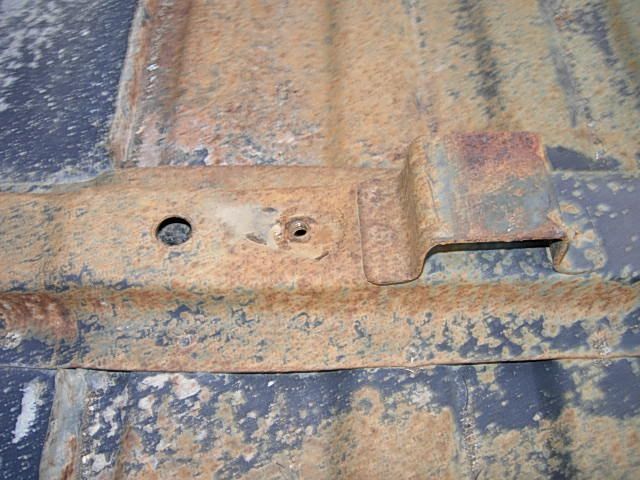
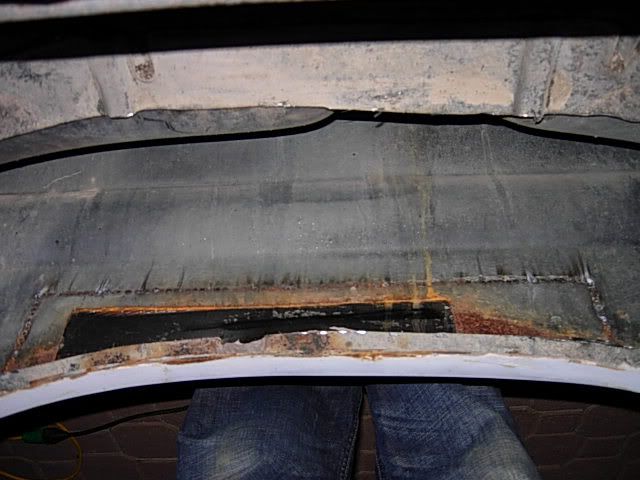
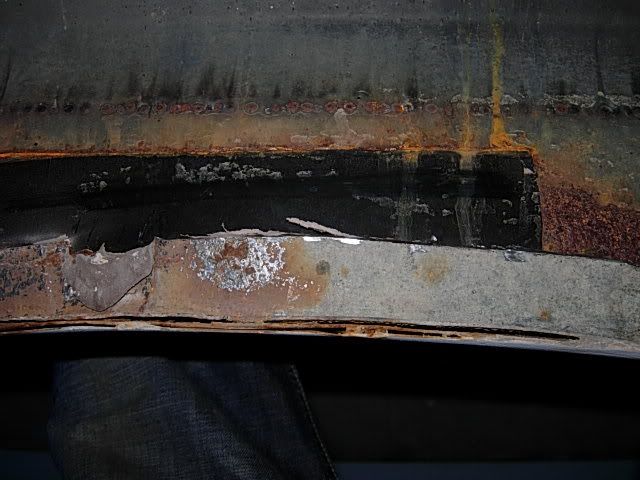
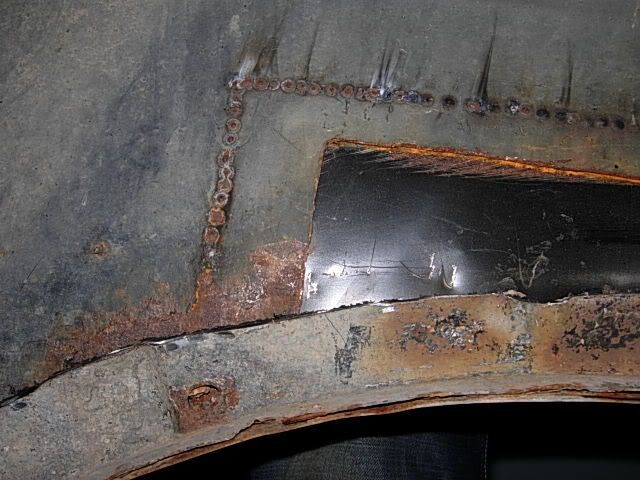
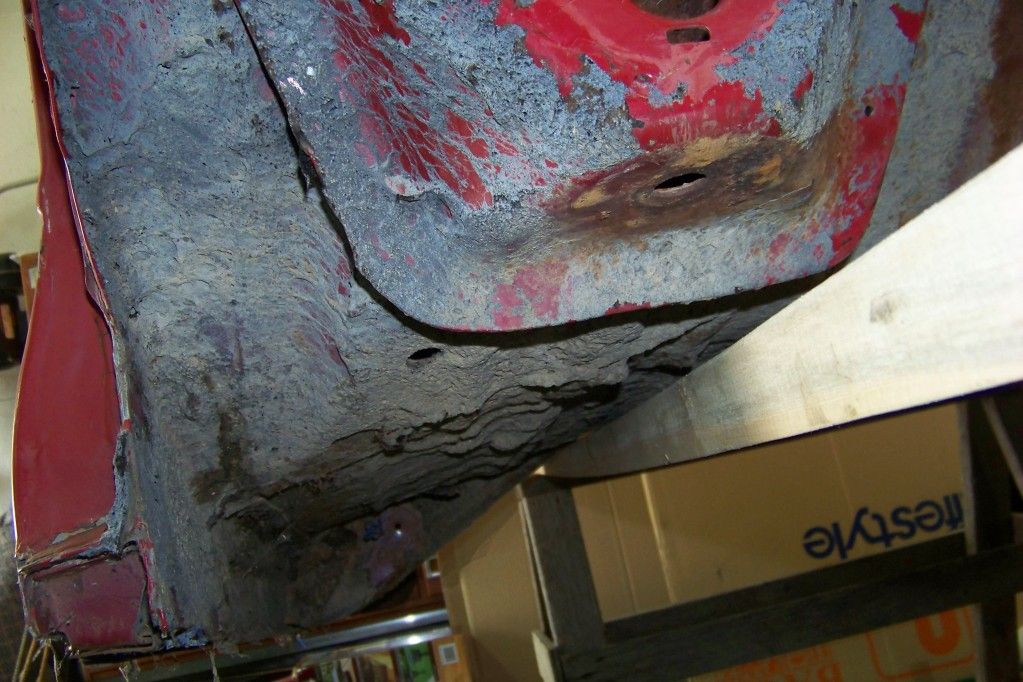
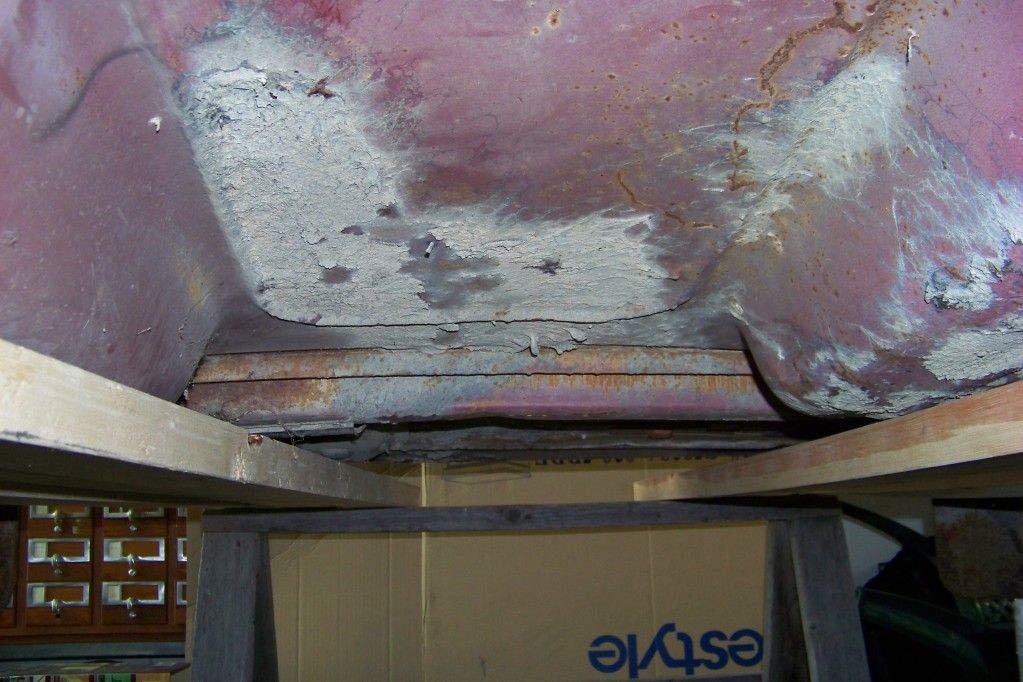
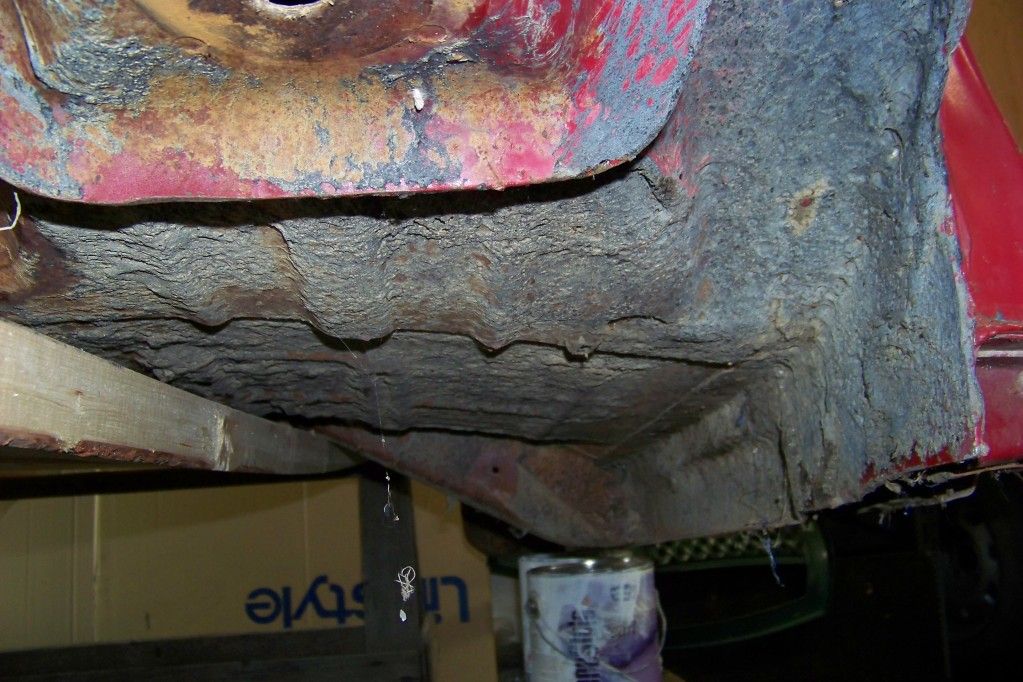
Once I had the wheel arches all cleaned up and ready to roll... I realized that there was something VERY wrong with the work that the P.O. of the box did....
Oh well though, this is a budget build. The sides of the box can get welded up with new material when I get a welder and some experience with it :P
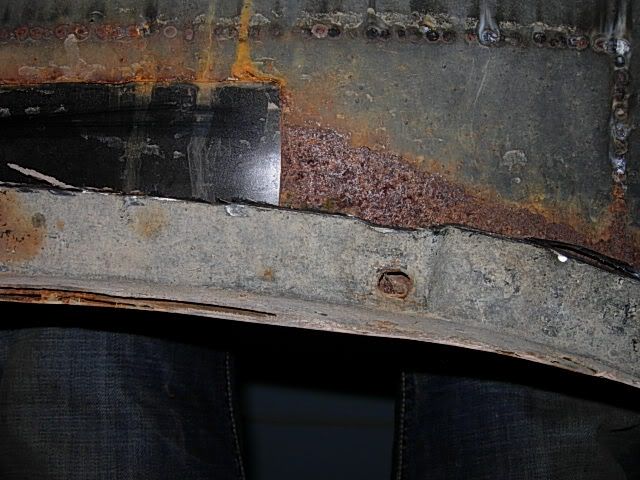
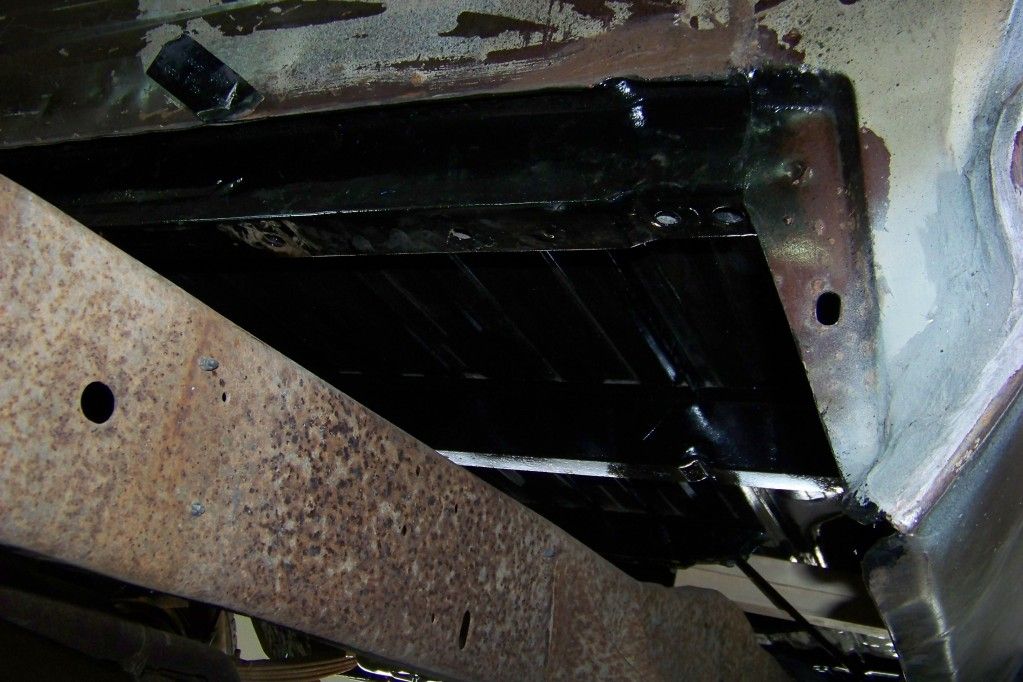
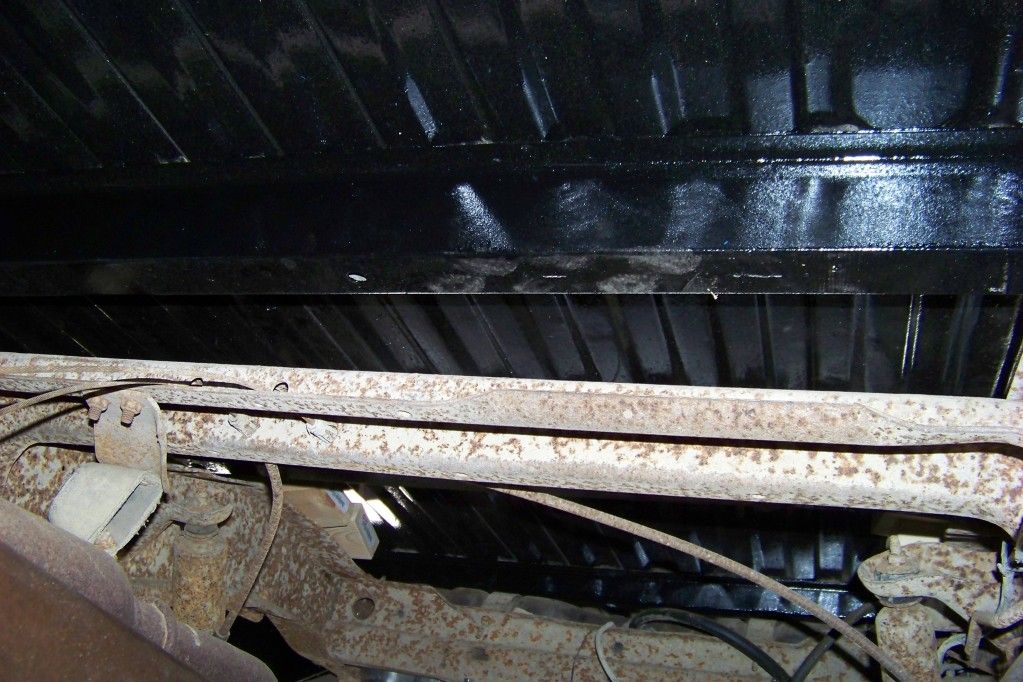
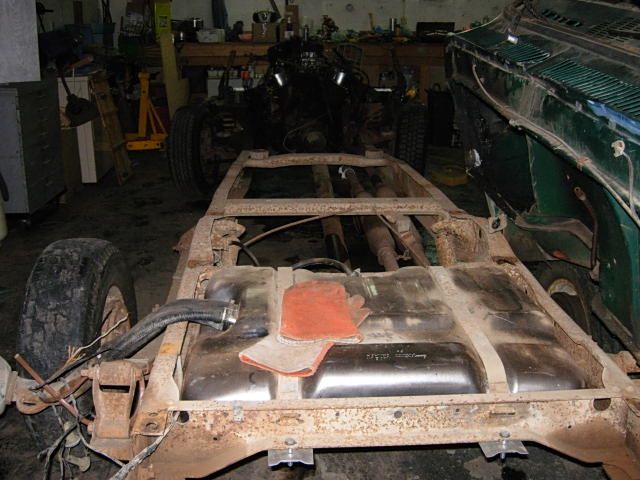
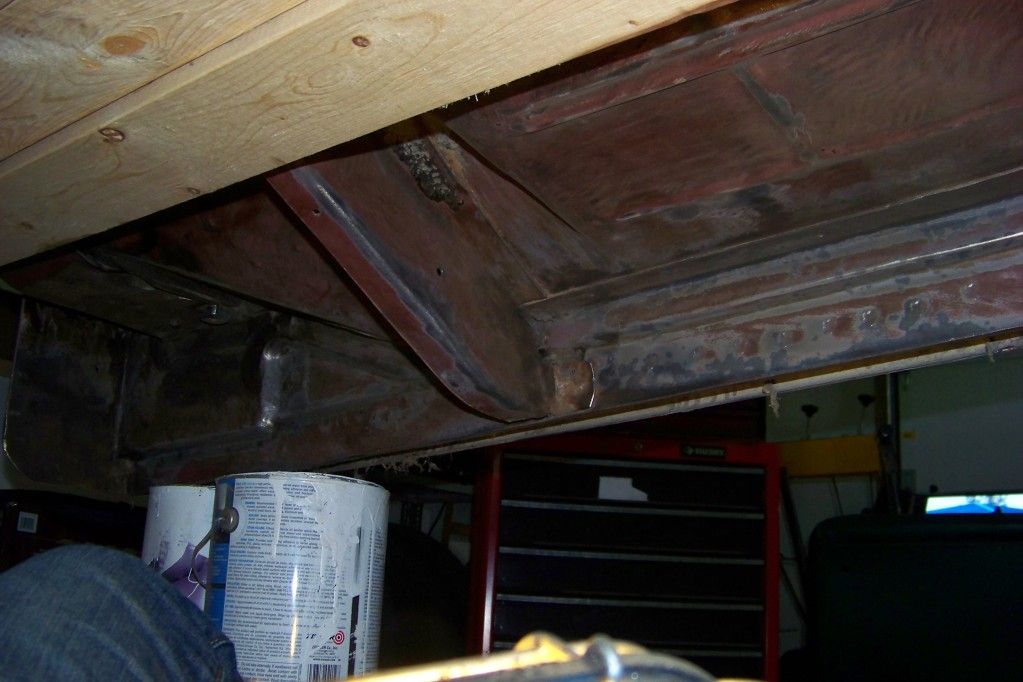
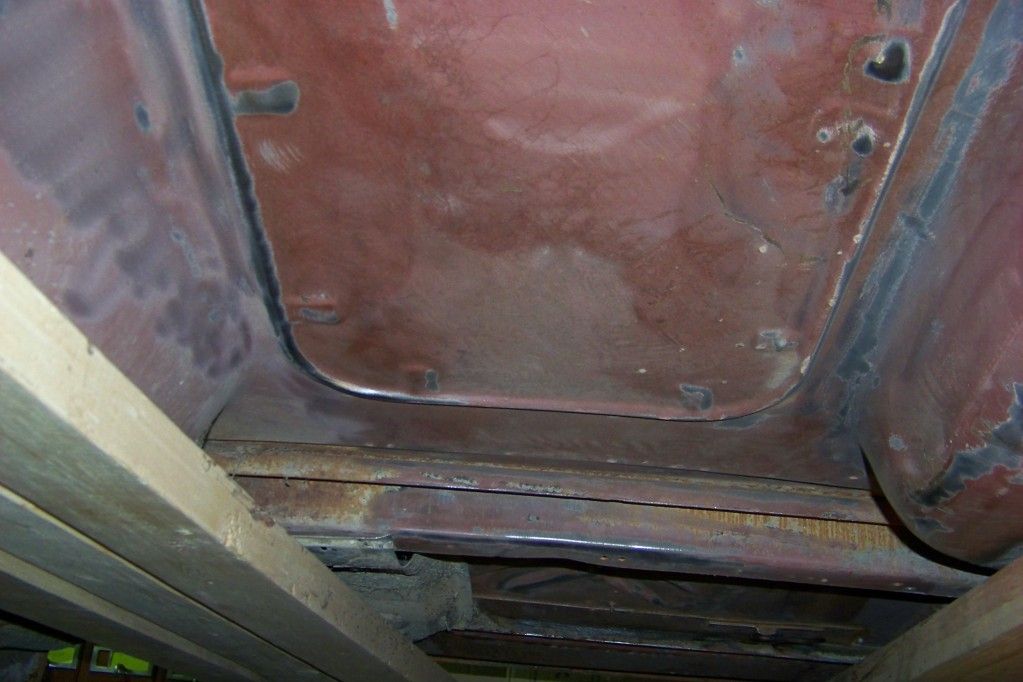
The fix for this will not come for a long time. Good news is that it's all POR-15'ed like crazy (I did THREE coats on the ENTIRE underbelly of my box). Like I said earlier... I want this stuff to be rust-free and stay that way....
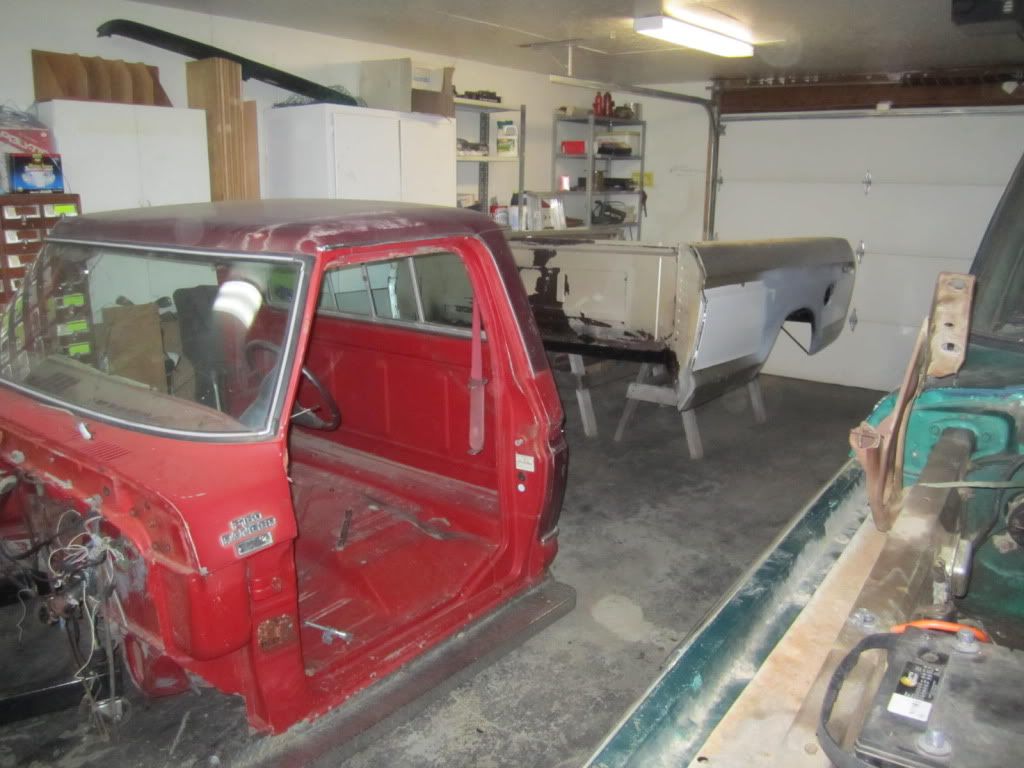
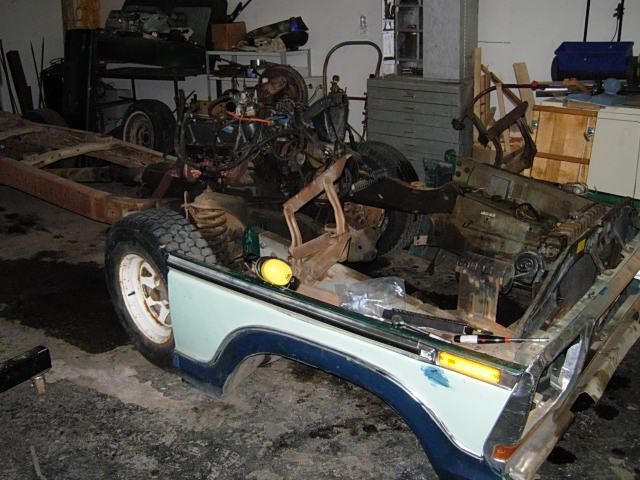
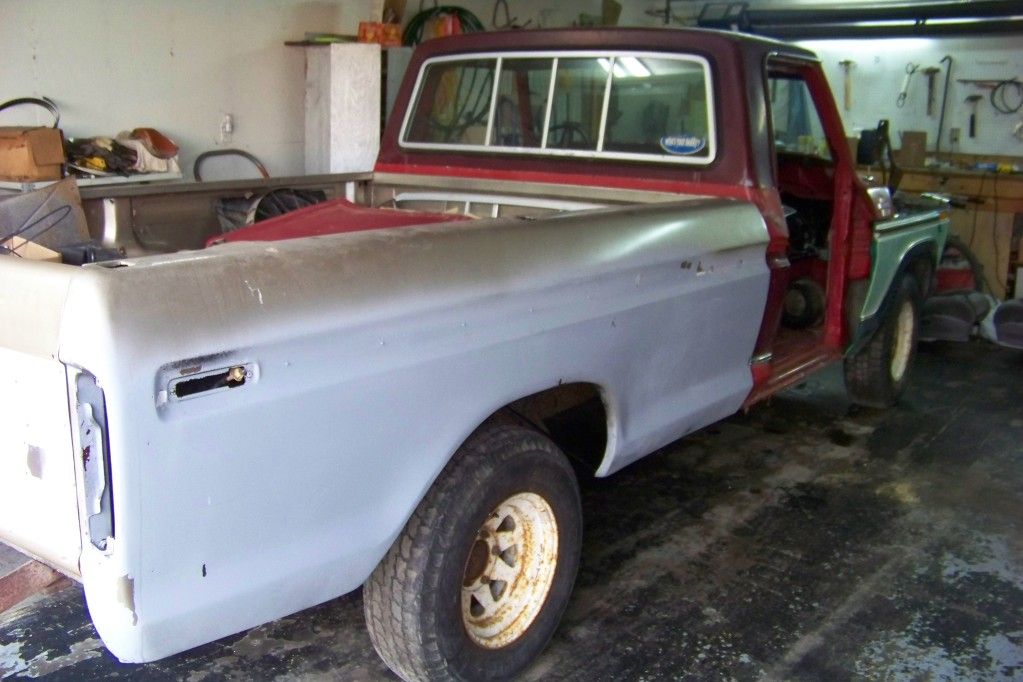
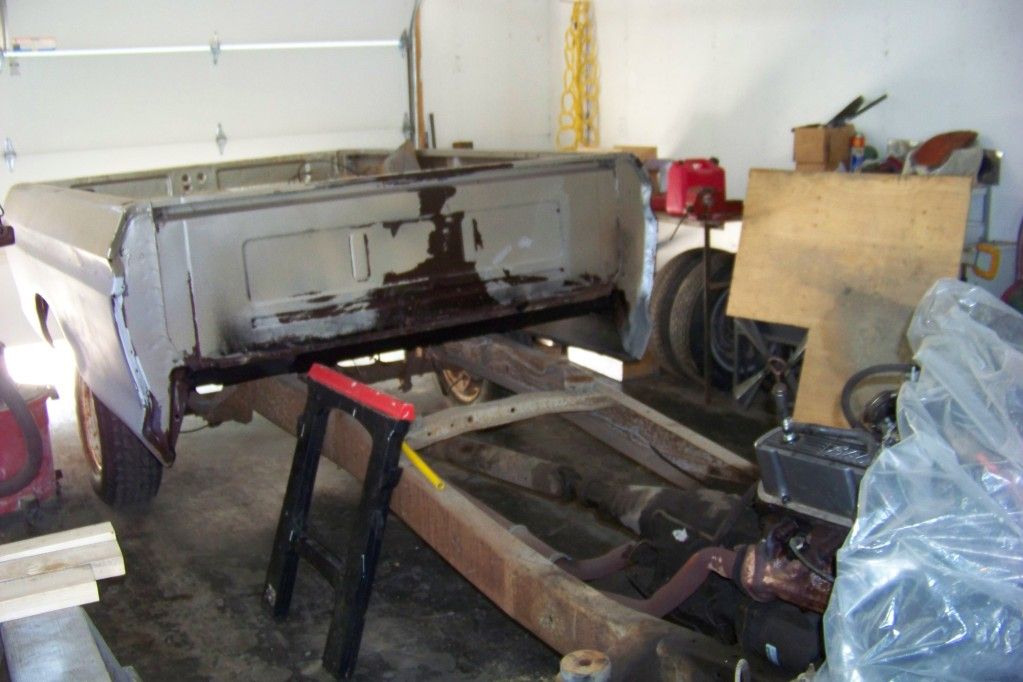
So after everything was all said and done... I got 3 burley friends and we "walked" the box around to the rear garage and put it in the garage on some wooden sawhorses. I eventually installed it on the truck, but that will come soon enough...
Here's what it looks like as of yesterday while on the truck. You can see how big of a difference it makes when it's actually clean under the truck. I no longer have to worry about using a hammer under my truck to bust old bolts and nuts off of anything because there is nothing to fall into my eyes anymore! Hurray!
So back to my cab...
The cab actually came to my doorstep back in first year now that I think about it... but I'm not going back to change the text... so all you need to know is that it sat in the back yard over winter just like my truck box did. Tarped it (but not sealed) just so that the snow would stay off the cab and that it would be 80% protected from the wind/snow. Rust is the enemy here...
I don't think I have a pic of my cab sitting in the back yard, but lets just say that there was a very funny-looking pile of snow in the back yard. Some may even say that it resembled the shape of a 1979 F-150 cab
So spring eventually comes around... the cab and box got walked into the rear garage in the same day.
Those cabs are ****ing heavy. It took four grown men to lift it and walk it through the back yard into the garage. We're not weaklings, we're all 250+ pounds and can hold our own... so I ended up borrowing my buddies engine hoist for the install of both the cab and box. Once we had everything in the garage... I got the ol' "YOU OWE US! WE'RE TIRED AS HELL!"
A case of beer quickly solved that issue.
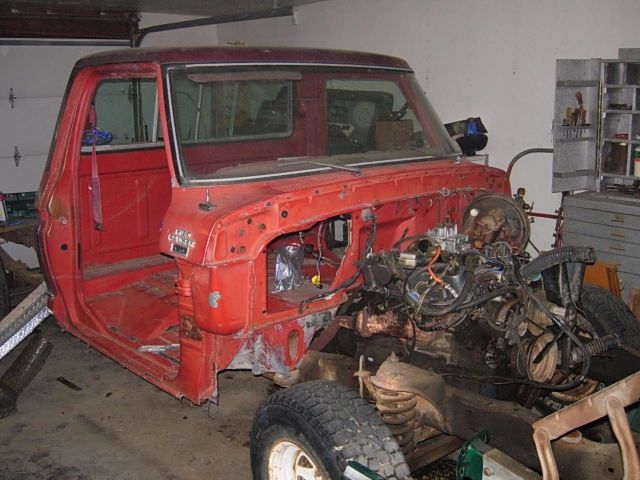
So here is a pic of the day that my cab and box were put into the garage. What a glorious day that was!
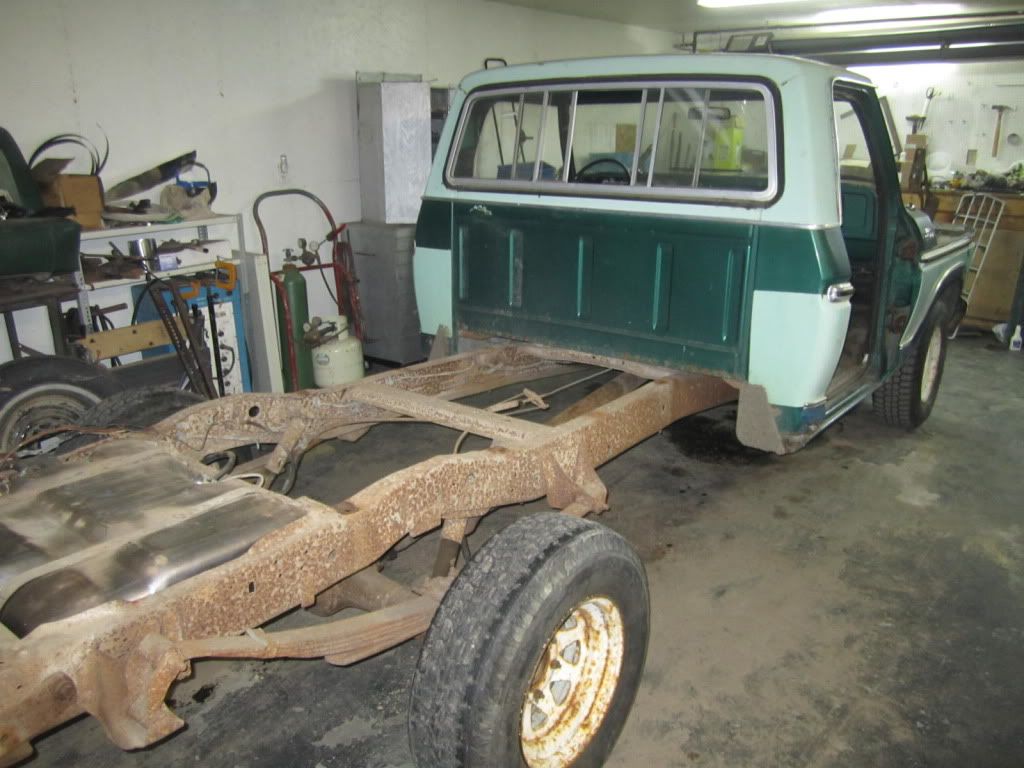
But wait... whatever happened to my old box? It wasn't on the truck in those last few pictures?
What did I do with it you say?
Well, I got out my handy-dandy torch is what!
You guys should have seen the looks I was getting as I rolled down the streets with a cut-in-half truck box on the only truck we've got in the family (besides mine). I drove it to a place that takes any sort of metal and pays you for it based on its weight.
1/4 ton truck carrying a 1/2 ton truck box... Priceless. I told you guys this was a "budget" build hahaha.
Hey! I actually made some money off this truck! Shweet!
So after that was gone, it was time to start working on the truck while I had everything apart.
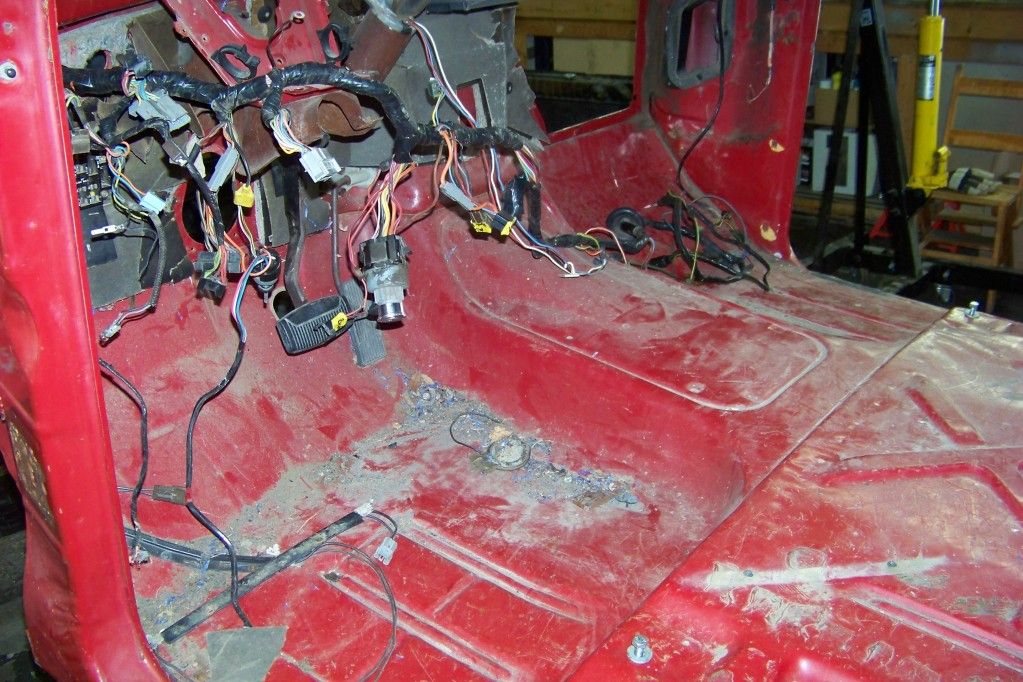
So I took apart the dash, found out that I had a bunch of wires burning up a storm in the original harness right in the heart of the bundle under the dash... Right behind the radio/heater controls.
When I turn the truck to "on", after a while I can see a very small stream of smoke coming from a large cluster of wires... ohhhhhhh goody. This truck just gets better and better.
So I decided to ignore the bad wiring for that summer and concentrate more on the carb because it was in terrible shape. All gunked up and not working properly.
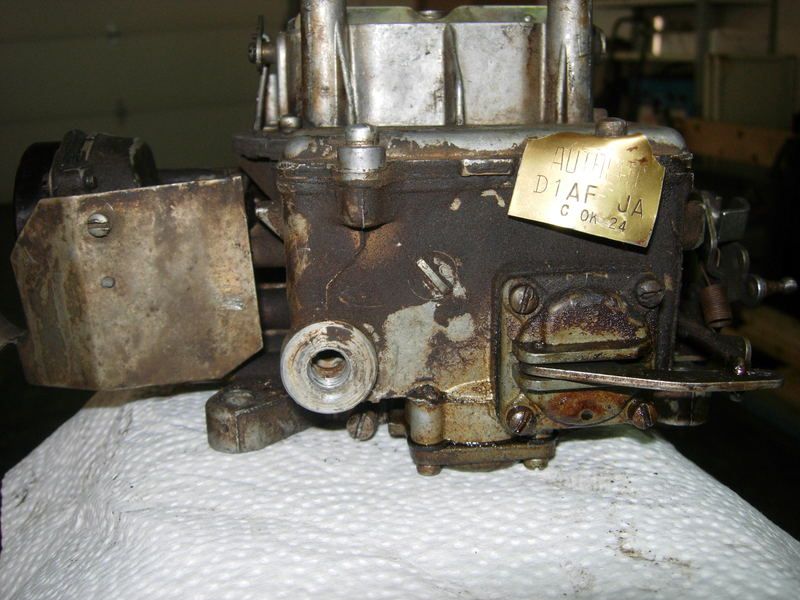
So I bought myself a carb kit from NAPA and a carb rebuild manual (which many of you know about because you've recieved it from me for free and it's still available here: )
My carburetor is a "D1AF-JA" which means it's from a Ford 1971-1973 vehicle, probably a car because the engine is from a 1972 Galaxie.
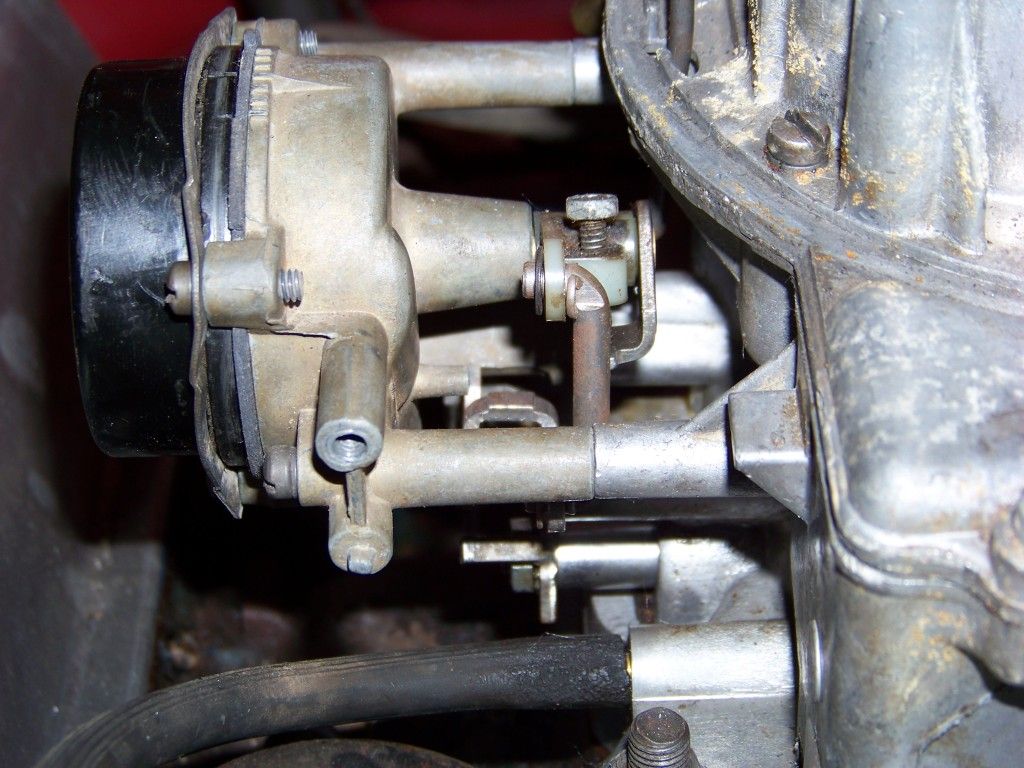
Anywho, I got myself through my carburetor rebuild without too many issues except one.. I lost an important piece in the choke housing . I can't remember what it is called off the top of my head, but it controls the temperature spring within the choke housing.
Since I lost mine, JSutton here on FTE sent me one for completely free. Only cost him something like less than $2 to send it all the way up to Canada. This is the exact reason why I love FTE. I didn't even ask for it and he just offered. What a great guy! Thank again JSutton, you've only added to this build of mine!
Before:
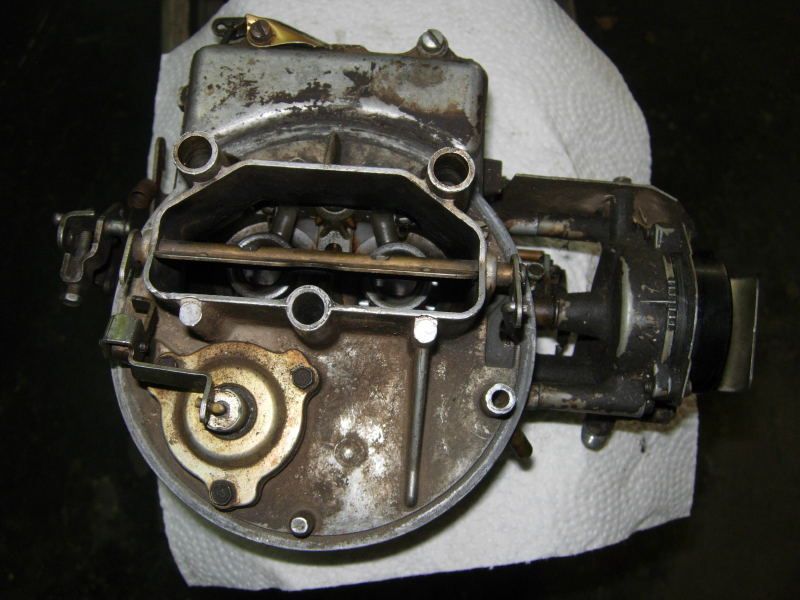
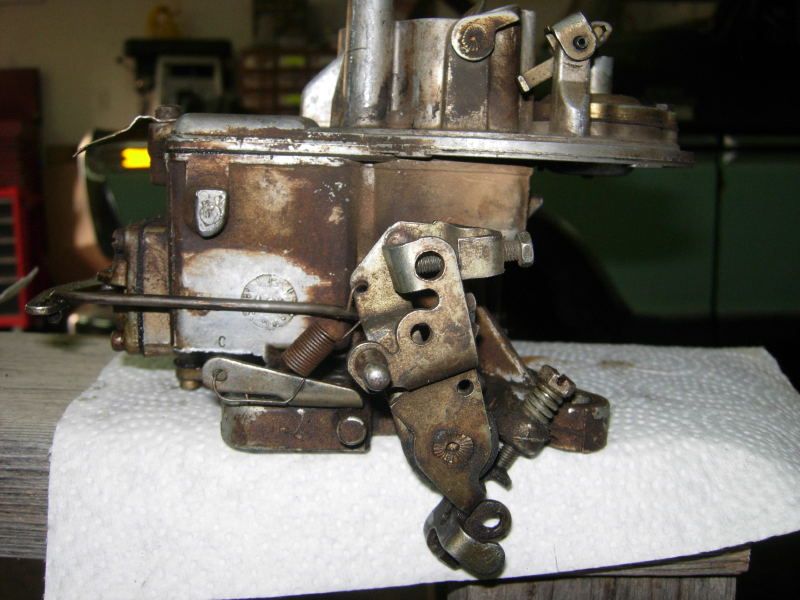
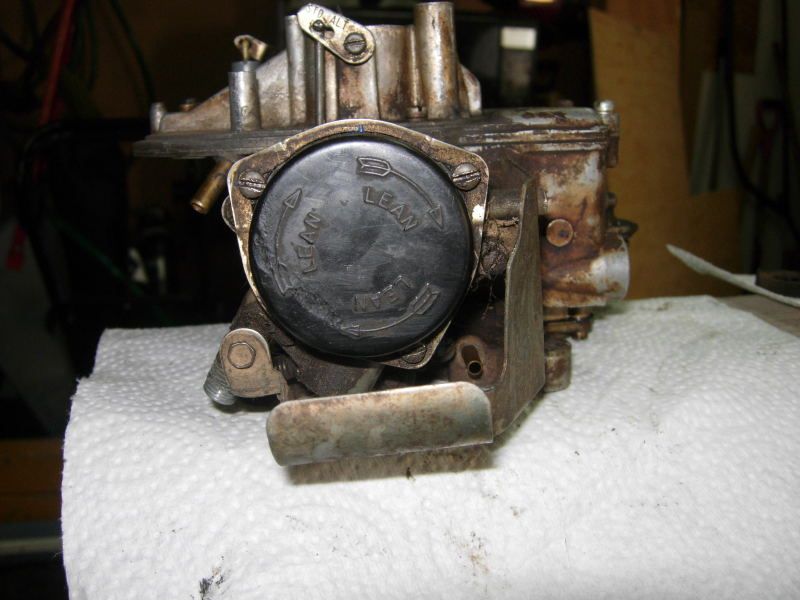
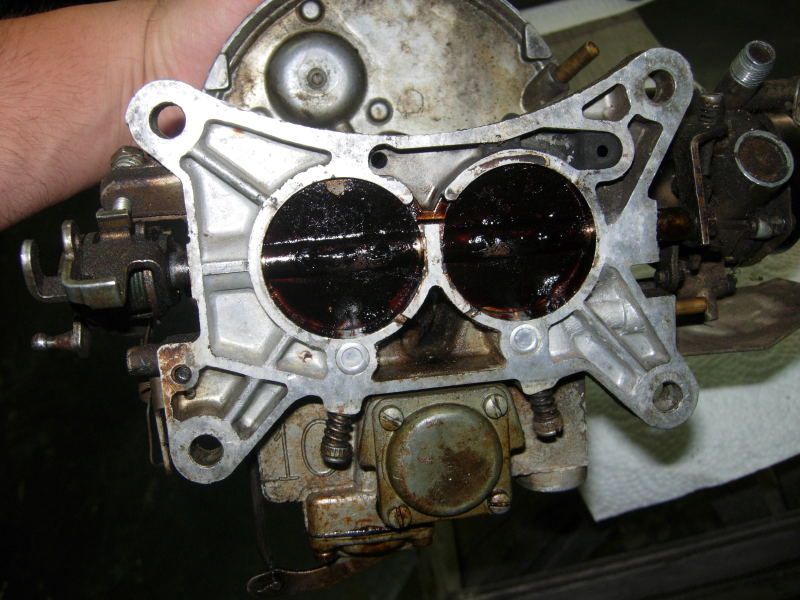
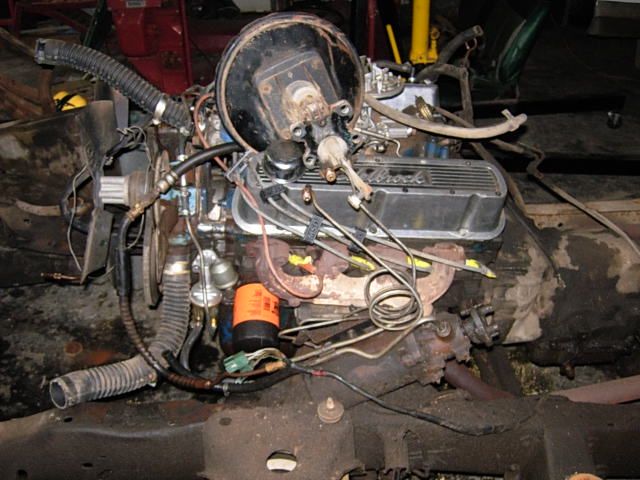
And of course... After:
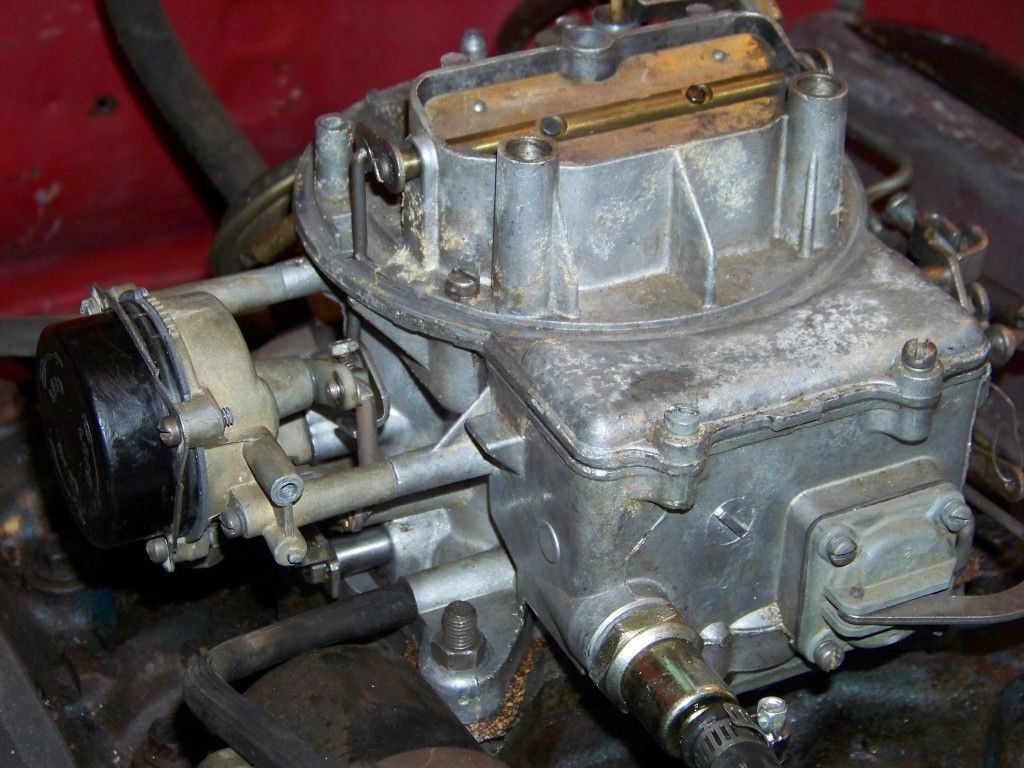
Made my very own gasket for the first time. Works like a charm for the time being.
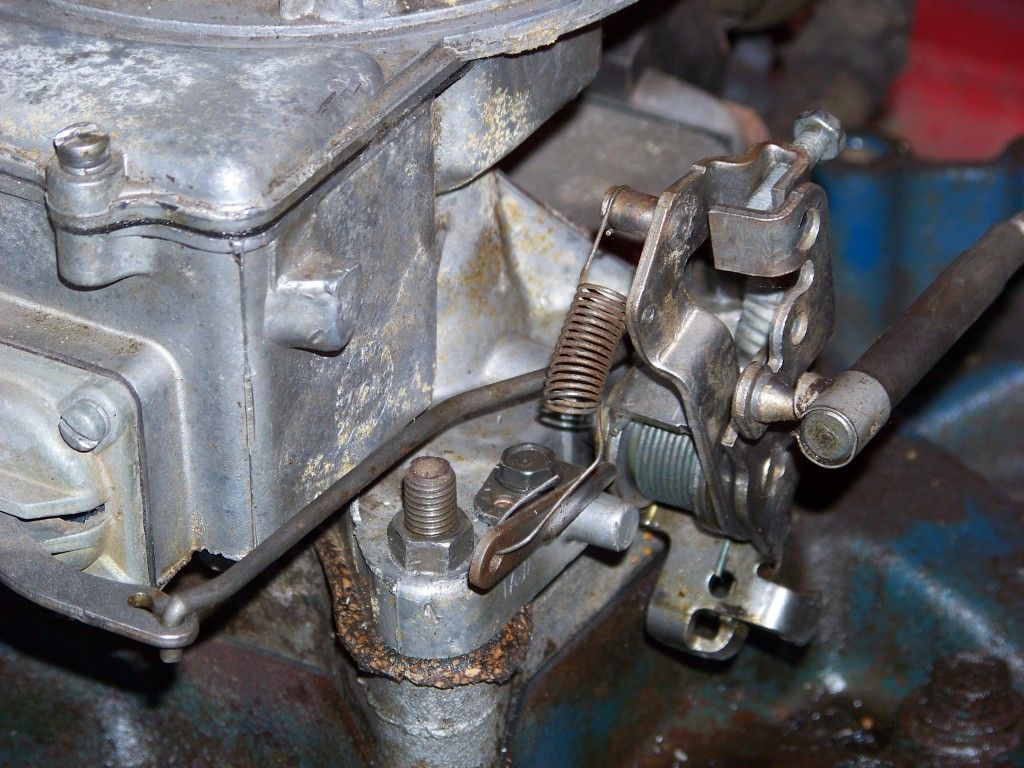

Clean carb on a dirty intake. Awesome!

A very special thanks go out fmc400 and mikeo0o0o0 for helping me through that rebuild/understanding process of my carburetor. They were both VERY helpful for me in identifying specific parts of my carburetor. They were understanding and patient with me through the entire thing and it turned out fantastic. Couldn't have come out cleaner nor running better.
There were others who helped me out with my carb rebuild process and you know who you are. Thanks to you as well.
After I had my carb rebuilt, my brand new 19 gallon tank and sending unit came in. Installed those and grabbed a new fuel filter as well as fuel pump. Fuel system fixed!
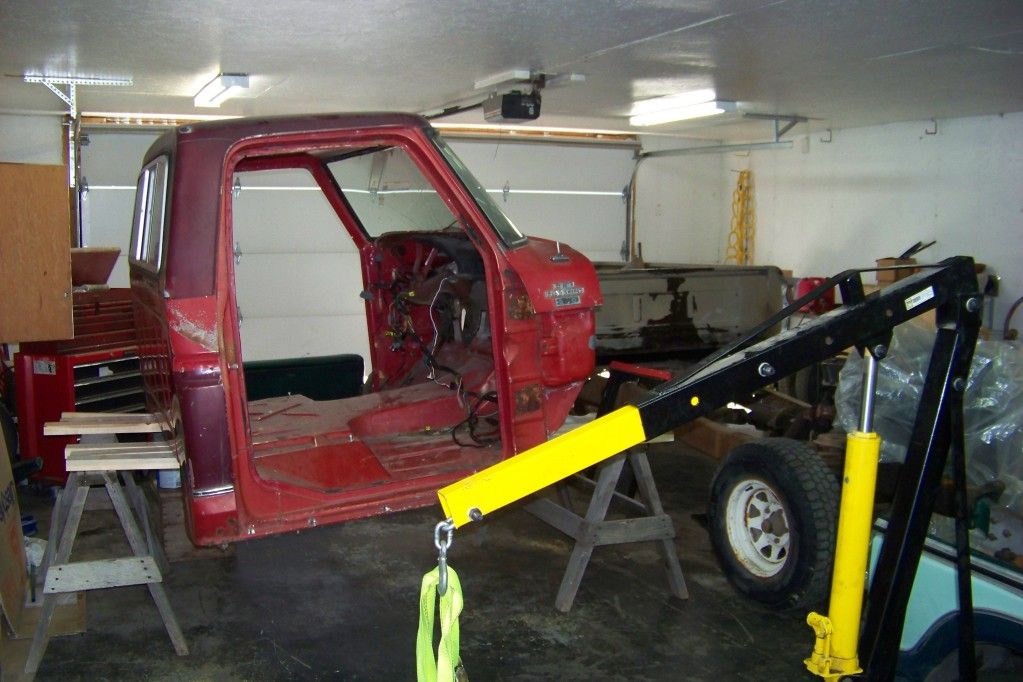
Once the fuel system was out of the way, I figured it was time for me to get the cab and box on the truck... but the old cab was still in the way...
So I took it off with the engine hoist and shimmied it through the garage (hopefully you can see from the photos, it's a bit tight because the ceilings aren't that high).

More moneys from a rotted out cab! Hurray!
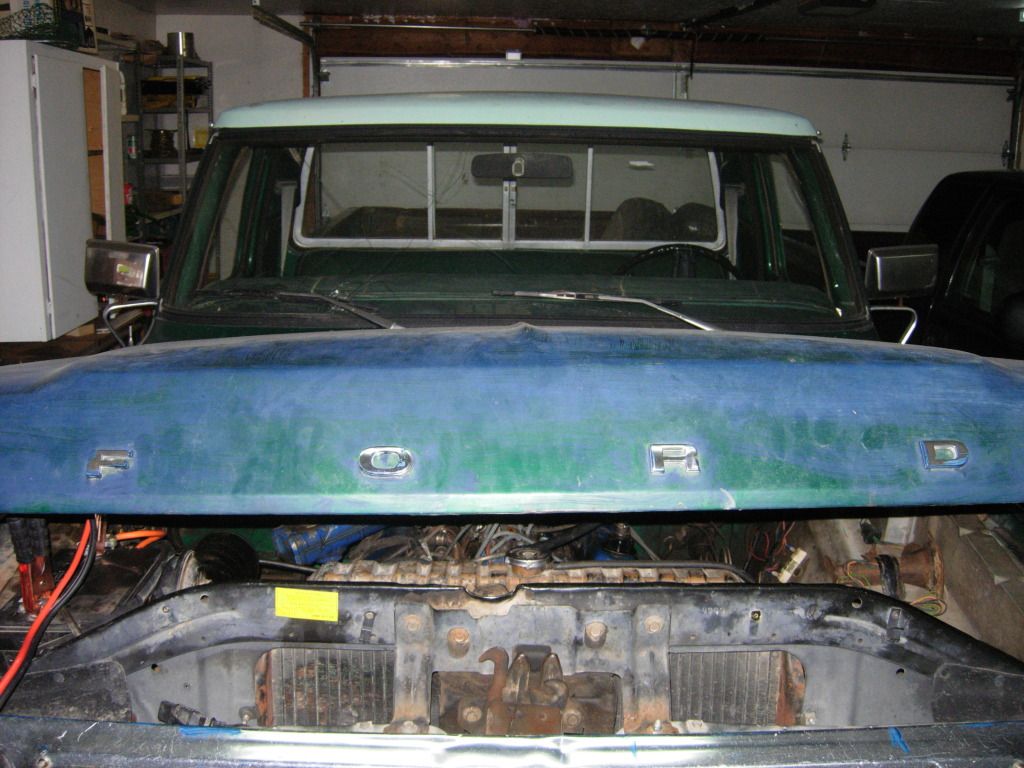
So I switched the old cab for the new one and got the front clip on no problem. You'll have to trust me that the new box on the truck... don't have any photos of it.
During the end of last summer, I had a massive and depressing roadblock with my truck.
I COULD NOT figure out what the hell was going on with the wiring to my old cab (thank god I kept the old wiring otherwise it wouldn't have moved before I went back to school).
I was having issues sorting out what was what under my hood because the P.O. had hacked everything up to get the 351W to work with what wiring the old cab already had. Turns out that I didn't have my igition coil hooked up at all with the old wiring because the "new wiring" from the cab I got didn't have the same shoty electrical work/connections from the old wiring...

Well, long story short... I got it all figured out with a little help from you guys here on FTE, got it to run. It sat until this current (2012) summer.
Third Summer (July 2012):
To be continued...
I'm 22, in University in the Great White North, have a passion for anything with an engine in it, and used to know almost nothing about vehicles.
I've been around for three years now on FTE and have been slowly gaining knowledge and collecting parts.
Before I arrived to FTE, I often got confused when people would say anything about vehicles besides the obvious things like "engine, transmission". But I was determined to learn something...
Well, I've changed my lack of automotive skills and knowledge by hanging around on FTE, so before I start... I'd like to give a shout out to all you FTE'ers who have helped me through the years. You know who you are, and keep on paying it forward! You guys are all great on here, and you deserve to know it
So here we go... less text, more pictures. Saddle up, I've got three years to cover...
First summer (June 2010):
This is when I first got the truck. I bought it for $300 CAN. Came with no gas in it, barely ran because the carb was completely gunked up and it leaked everywhere. Loved every moment, even when the truck kept dying at every red light as I drove it home.
Truck Specifications:
- 351W implanted from a 1972 Ford Galaxie (thick webbed Windsor and shorter deck height)
- FMX transmission (from the Galaxie, and leaks like a house without a roof)
- 2WD
- Regular Cab (Custom & Racetrack Trim)
- Longbox
- Single Gas Tank
- No A/C
- Hacked up wiring
- Stupidly rusty & dirty all over (when I got it)
- P.O. said the vehicle turned over 3 times with the original (351M & C6) in it. Then once more with this "new" engine in it. For all intensive purposes, we're going to say this vehicle has hit the 500,000 km mark... just to make things easy...
- Super leaky and incorrect Power Steering Pump for the truck
- Crushed passenger valve cover from when they transplanted the 351W in (hit the cab firewall and dented that too...)
Sorry for the terrible pictures, but there was another vehicle in the garage when I brought it home. You get the idea though...
So there you have it. There was the truck when I got it.
During that first summer, I sorted out my carb problems and figured out that I had a bad fuel sending unit. I found myself a few contacts for parts/yards and started keeping in contact with them. I know I didn't get much done, but when you have a steep learning curve.. it's kind of hard to do anything.
I think maybe I even figured out what a valve cover was... moving on...
Second summer (June 2011):
I got a little bit smarter and decided to start my search for body parts during my school year. I ended up stumbling across a box (Thanks to a member on FTE in one of the Canadian Chapters... Sheldon). I bought the box and found out it wasn't fixed correctly when I brought it home... but it was better than what I had...
I also bought myself a cab from within my province as well. Rust-free cab with perfect corners and it was an A/C cab. Perfect. Had great doors, but no mirrors. The interior was cut up a bunch and the dash was ripped out along with the seat... but whatever... it was the best possible thing I could get in Saskatchewan without traveling.
The cab cost me $750, delivered to my door. The box cost me $700, had to go get it myself... eight hours of driving there and back. All in all, those are great deals here in Saskatchewan. Some guys in Alberta want $1000 for a box, and I have to go get it myself. Others want $1000 for a cab that isn't rust-free...
I picked up a few parts while I was in school. Used valve covers and a used double roller timing chain. The timing chain wasn't even used, but the valve covers ended up being broken during an install from the P.O. He welded them up and sold them to me cheap... turns out I got what I bought because the passenger side leaks oil like a drain pipe. Oh well, they look nice on my engine :P
So here is a photo of the truck box the day that I brought it home. Twas a very cold Feb break, but I got it home in one piece. I'll post more photos of it when I get the chance to upload them.
So then in the spring when I got home, I decided to clean up the box and use some POR-15 on it.
These get eaten up fast when you're on a mission to make everything rust-free.
From this:
To this:
Also decided to cut out the fender wells because they've given a lot of other users greif and they cause everything to rust really badly if water gets caught up in there.
Zip-disked them out and then drilled out the rest of the spot welds. I can fix those holes in the wheel arch later... not worried because they're all POR-15'ed
Once I had the wheel arches all cleaned up and ready to roll... I realized that there was something VERY wrong with the work that the P.O. of the box did....
Oh well though, this is a budget build. The sides of the box can get welded up with new material when I get a welder and some experience with it :P
The fix for this will not come for a long time. Good news is that it's all POR-15'ed like crazy (I did THREE coats on the ENTIRE underbelly of my box). Like I said earlier... I want this stuff to be rust-free and stay that way....
So after everything was all said and done... I got 3 burley friends and we "walked" the box around to the rear garage and put it in the garage on some wooden sawhorses. I eventually installed it on the truck, but that will come soon enough...
Here's what it looks like as of yesterday while on the truck. You can see how big of a difference it makes when it's actually clean under the truck. I no longer have to worry about using a hammer under my truck to bust old bolts and nuts off of anything because there is nothing to fall into my eyes anymore! Hurray!
So back to my cab...
The cab actually came to my doorstep back in first year now that I think about it... but I'm not going back to change the text... so all you need to know is that it sat in the back yard over winter just like my truck box did. Tarped it (but not sealed) just so that the snow would stay off the cab and that it would be 80% protected from the wind/snow. Rust is the enemy here...
I don't think I have a pic of my cab sitting in the back yard, but lets just say that there was a very funny-looking pile of snow in the back yard. Some may even say that it resembled the shape of a 1979 F-150 cab
So spring eventually comes around... the cab and box got walked into the rear garage in the same day.
Those cabs are ****ing heavy. It took four grown men to lift it and walk it through the back yard into the garage. We're not weaklings, we're all 250+ pounds and can hold our own... so I ended up borrowing my buddies engine hoist for the install of both the cab and box. Once we had everything in the garage... I got the ol' "YOU OWE US! WE'RE TIRED AS HELL!"
A case of beer quickly solved that issue.
So here is a pic of the day that my cab and box were put into the garage. What a glorious day that was!
But wait... whatever happened to my old box? It wasn't on the truck in those last few pictures?
What did I do with it you say?
Well, I got out my handy-dandy torch is what!
You guys should have seen the looks I was getting as I rolled down the streets with a cut-in-half truck box on the only truck we've got in the family (besides mine). I drove it to a place that takes any sort of metal and pays you for it based on its weight.
1/4 ton truck carrying a 1/2 ton truck box... Priceless. I told you guys this was a "budget" build hahaha.
Hey! I actually made some money off this truck! Shweet!
So after that was gone, it was time to start working on the truck while I had everything apart.
So I took apart the dash, found out that I had a bunch of wires burning up a storm in the original harness right in the heart of the bundle under the dash... Right behind the radio/heater controls.
When I turn the truck to "on", after a while I can see a very small stream of smoke coming from a large cluster of wires... ohhhhhhh goody. This truck just gets better and better.
So I decided to ignore the bad wiring for that summer and concentrate more on the carb because it was in terrible shape. All gunked up and not working properly.
So I bought myself a carb kit from NAPA and a carb rebuild manual (which many of you know about because you've recieved it from me for free and it's still available here: )
My carburetor is a "D1AF-JA" which means it's from a Ford 1971-1973 vehicle, probably a car because the engine is from a 1972 Galaxie.
Anywho, I got myself through my carburetor rebuild without too many issues except one.. I lost an important piece in the choke housing
. I can't remember what it is called off the top of my head, but it controls the temperature spring within the choke housing.Since I lost mine, JSutton here on FTE sent me one for completely free. Only cost him something like less than $2 to send it all the way up to Canada. This is the exact reason why I love FTE. I didn't even ask for it and he just offered. What a great guy! Thank again JSutton, you've only added to this build of mine!
Before:
And of course... After:
Made my very own gasket for the first time. Works like a charm for the time being.
Clean carb on a dirty intake. Awesome!
A very special thanks go out fmc400 and mikeo0o0o0 for helping me through that rebuild/understanding process of my carburetor. They were both VERY helpful for me in identifying specific parts of my carburetor. They were understanding and patient with me through the entire thing and it turned out fantastic. Couldn't have come out cleaner nor running better.
There were others who helped me out with my carb rebuild process and you know who you are. Thanks to you as well.
After I had my carb rebuilt, my brand new 19 gallon tank and sending unit came in. Installed those and grabbed a new fuel filter as well as fuel pump. Fuel system fixed!
Once the fuel system was out of the way, I figured it was time for me to get the cab and box on the truck... but the old cab was still in the way...
So I took it off with the engine hoist and shimmied it through the garage (hopefully you can see from the photos, it's a bit tight because the ceilings aren't that high).
More moneys from a rotted out cab! Hurray!
So I switched the old cab for the new one and got the front clip on no problem. You'll have to trust me that the new box on the truck... don't have any photos of it.
During the end of last summer, I had a massive and depressing roadblock with my truck.
I COULD NOT figure out what the hell was going on with the wiring to my old cab (thank god I kept the old wiring otherwise it wouldn't have moved before I went back to school).
I was having issues sorting out what was what under my hood because the P.O. had hacked everything up to get the 351W to work with what wiring the old cab already had. Turns out that I didn't have my igition coil hooked up at all with the old wiring because the "new wiring" from the cab I got didn't have the same shoty electrical work/connections from the old wiring...
Well, long story short... I got it all figured out with a little help from you guys here on FTE, got it to run. It sat until this current (2012) summer.
Third Summer (July 2012):
To be continued...
Last edited by Aaron-71; 07-24-2012 at 01:38 PM. Reason: adding more more more
#2
07-24-2012, 12:16 AM
Third Year (July 2012):
And so the story continues... it took me a while to get the rest of this written because I have a list of excuses that no one wants to listen to anyways... so we'll just say that I have demanding parents and demanding friends haha.
Onward with pics and the tale that is my build!
So this is how we started this summer:

Lovely straight and highly discoloured body lines
These need to be sandblasted and powdercoated. Should cost me only $40 per rim, not bad Maybe next summer when my budget isn't so restricting. It's not like the company is going anywhere.
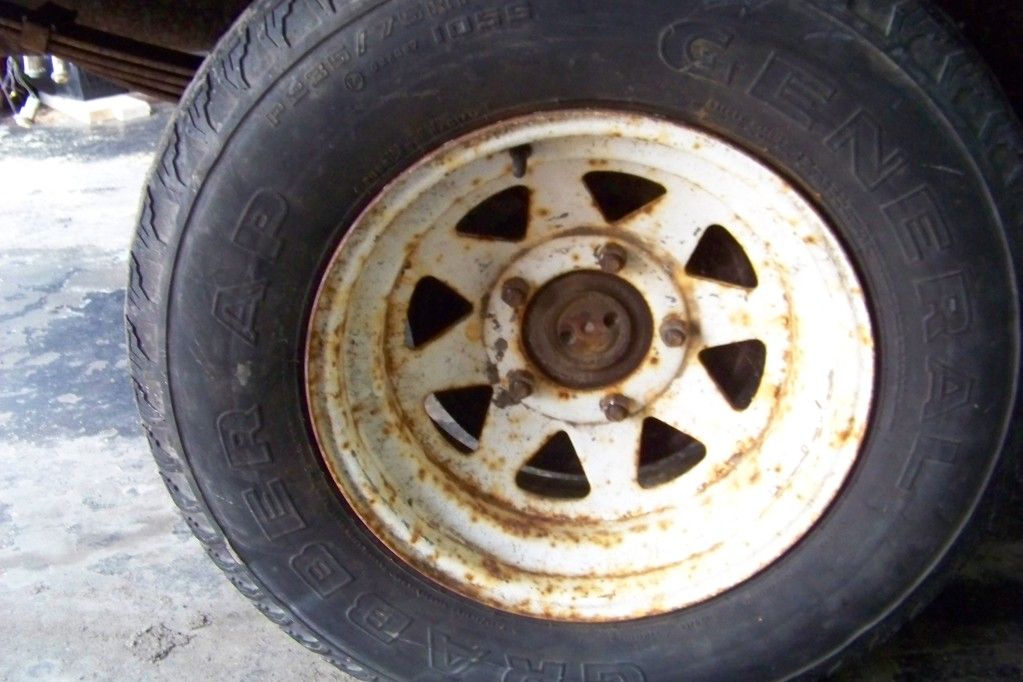

Look at that lovely... oh... right...
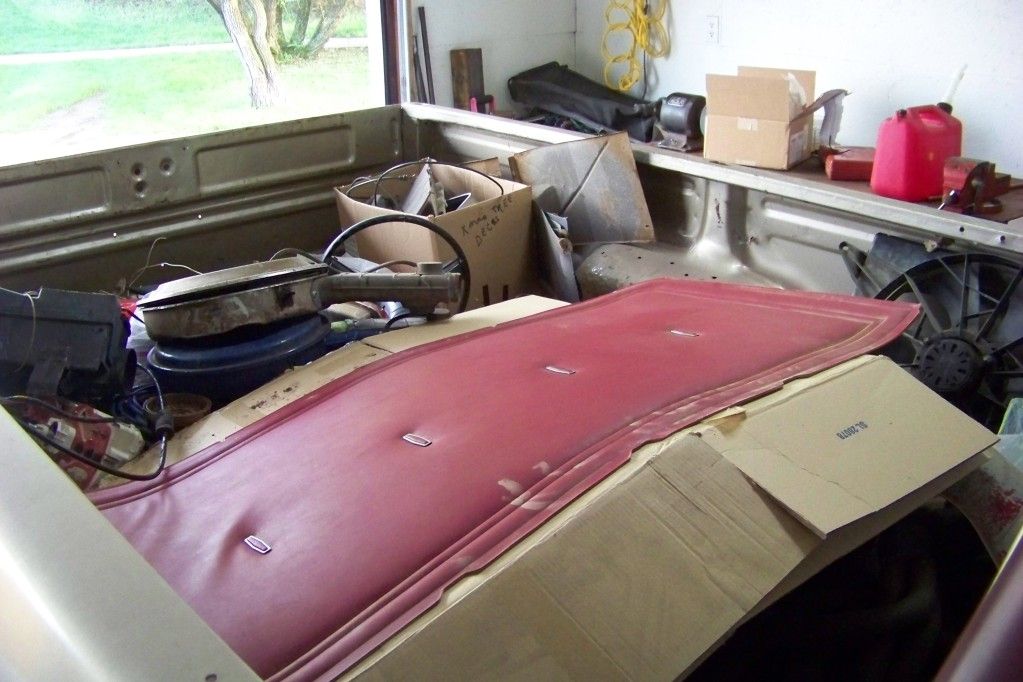
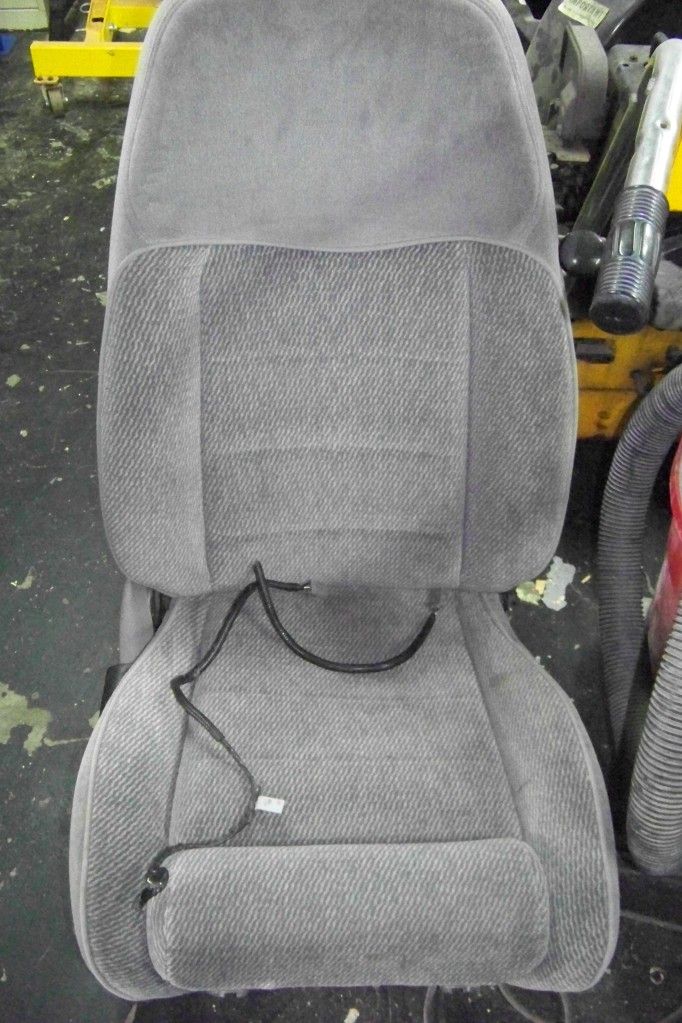
Picked a set of these up for $60... yeah... I don't know how I did it either. The guy I bought them off of was super friendly and had an awesome converted 4x4, lifted, V8 Ford Explorer. Awesome friggen vehicle... and a very nice person. Can't wait to install them. Full electronics. All movement, bolster, tilt & lumbar support. VERY comfortable.
So everything had to come off again because I decided that mid July I wanted to try and paint the cab mount locations for my truck with POR-15. I also wanted to coat the underside of my cab with POR-15 similar to my truck bed so that it's 100% cured of all its "diseases"... okay... not cured.... but at least they've got good prescription.
So I took it all apart again to get at the cab mounts. Replacing with new Polyurethane bushings! Nice!
RUSTY! Its gotta go!
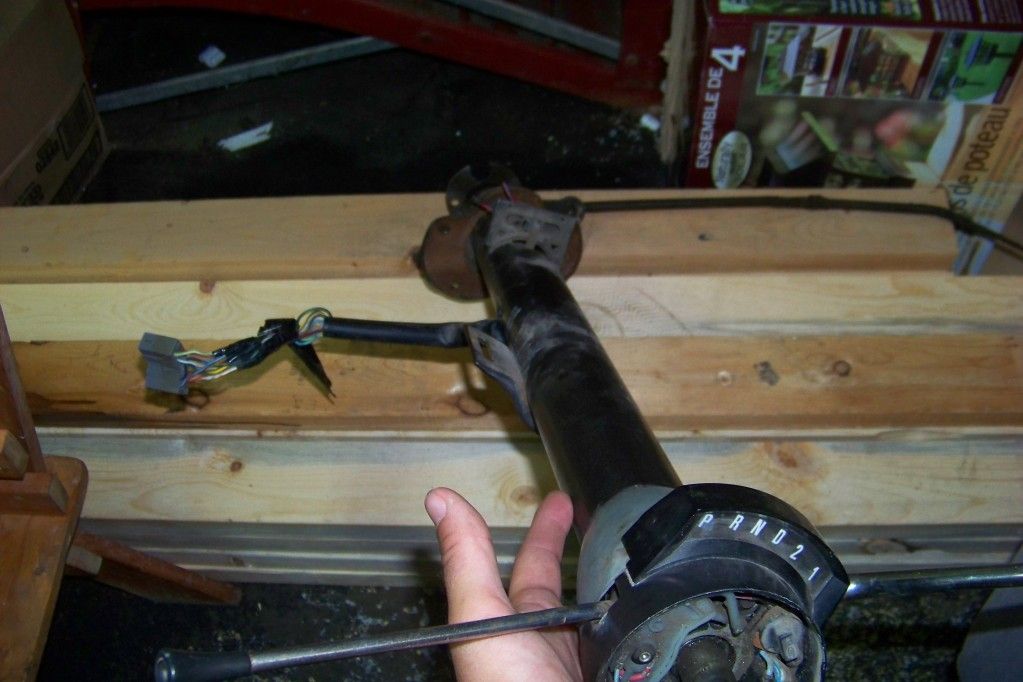
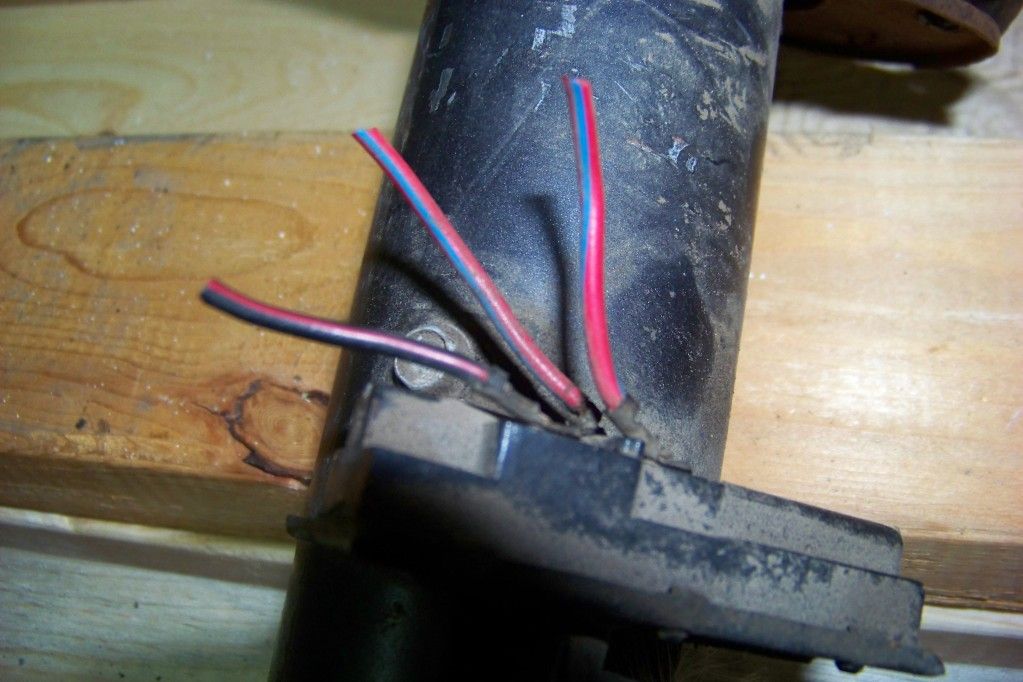
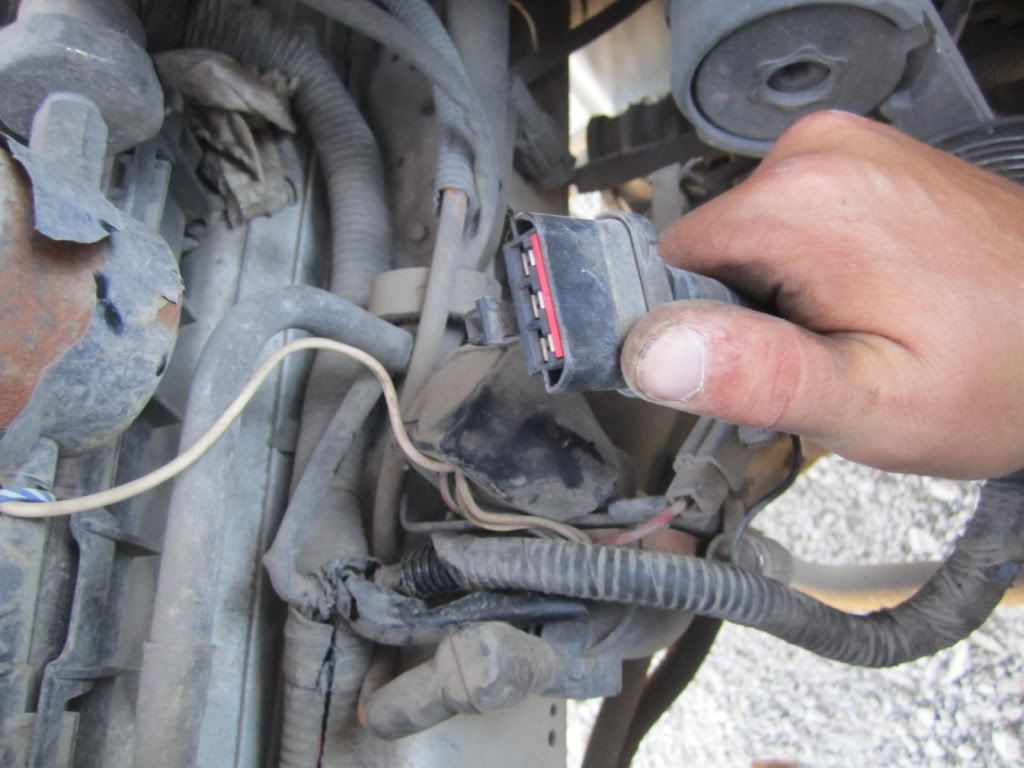
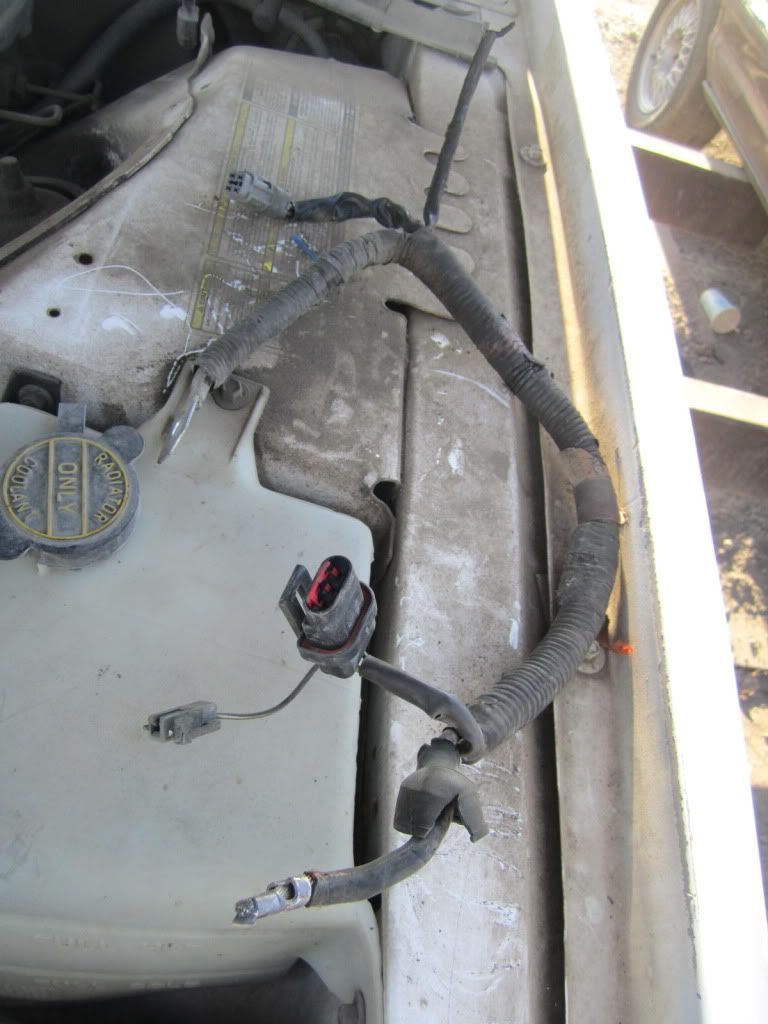
Also noticed this when I took my column out... wondering what they do.... all colour-coded the exact same Red w/ Blue-Tracer. Anyone know?

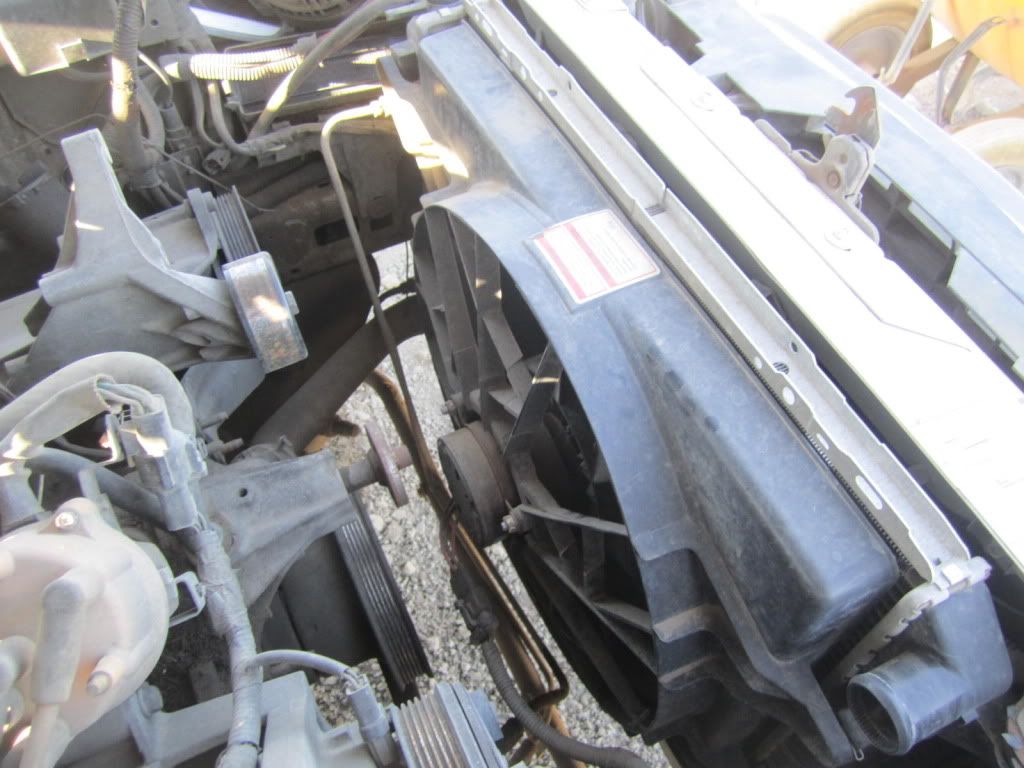
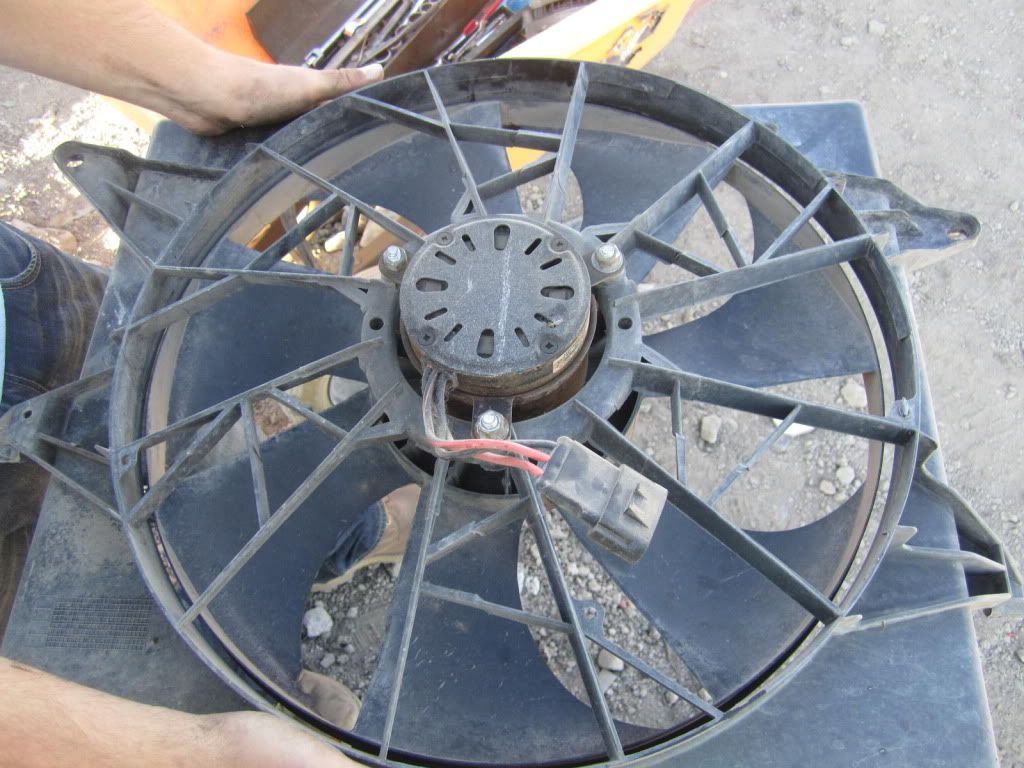
So somewhere between taking off my cab and the next bit of progress, I went out the picked myself up a Lincoln Mark VIII fan from a T-bird in the wrecking yard.
It'll provide a much better cooling system than that old stock fan will on the front of the engine. Take the stock one off and replace it with another! Well... not yet... but in the future. The parts keep piling up
Made sure I pulled all the plugs I needed. Don't want to let those plugs get crushed before I can grab them!
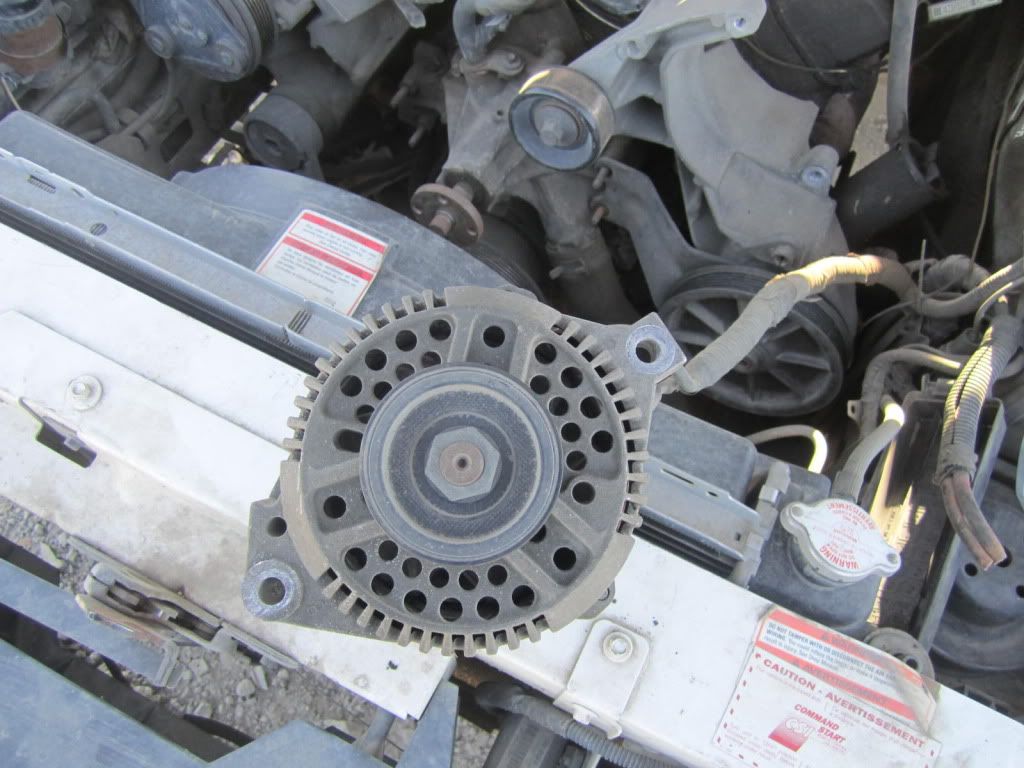
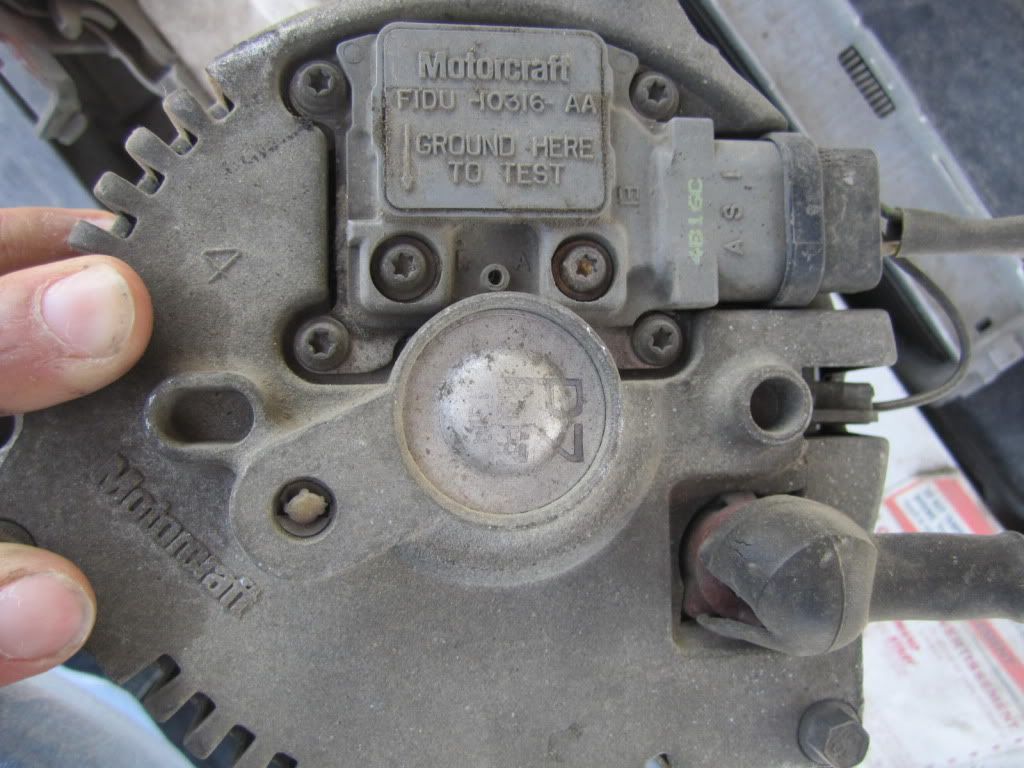
Also pulled myself a 3G alternator in the same day because I'm going to need it in the future. Sub box, amps, speakers, lots of lights and switches.... yeah...
I found exactly what I needed. Tim Allen - "More Power! Oh-hoho ho ho"
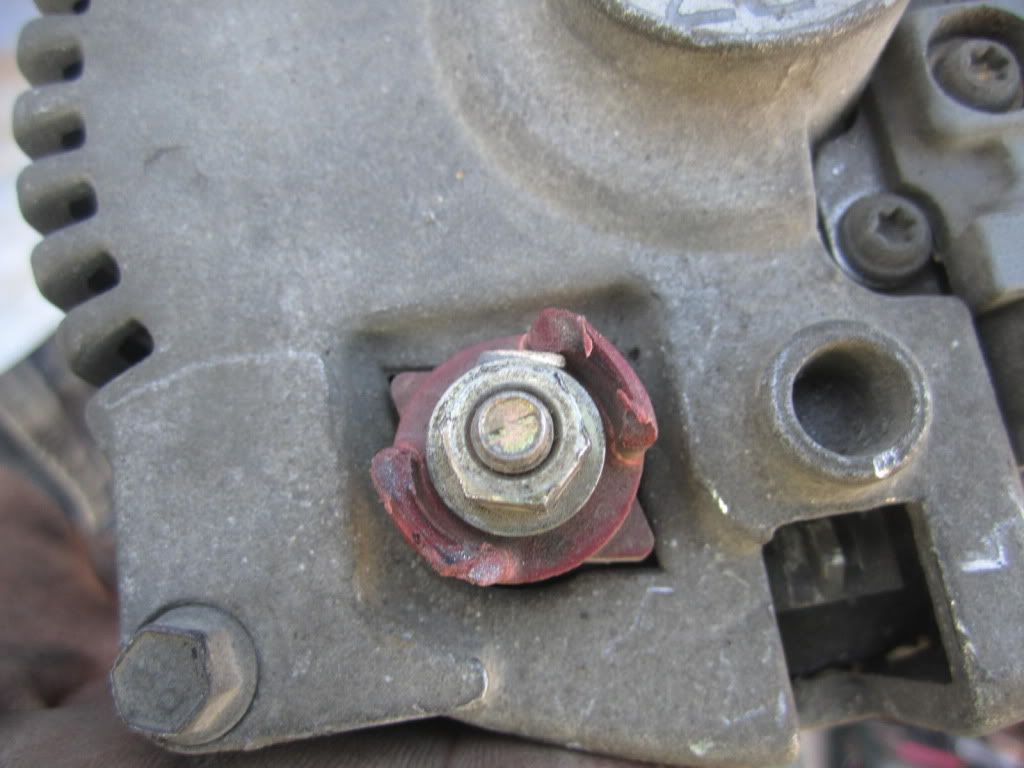
Everything looked good except for this... a potential road block because it just kept spinning. The plastics under it must be wrecked or something. I'll get the nut off when I actually install it and fix it later. If not, just go get another one
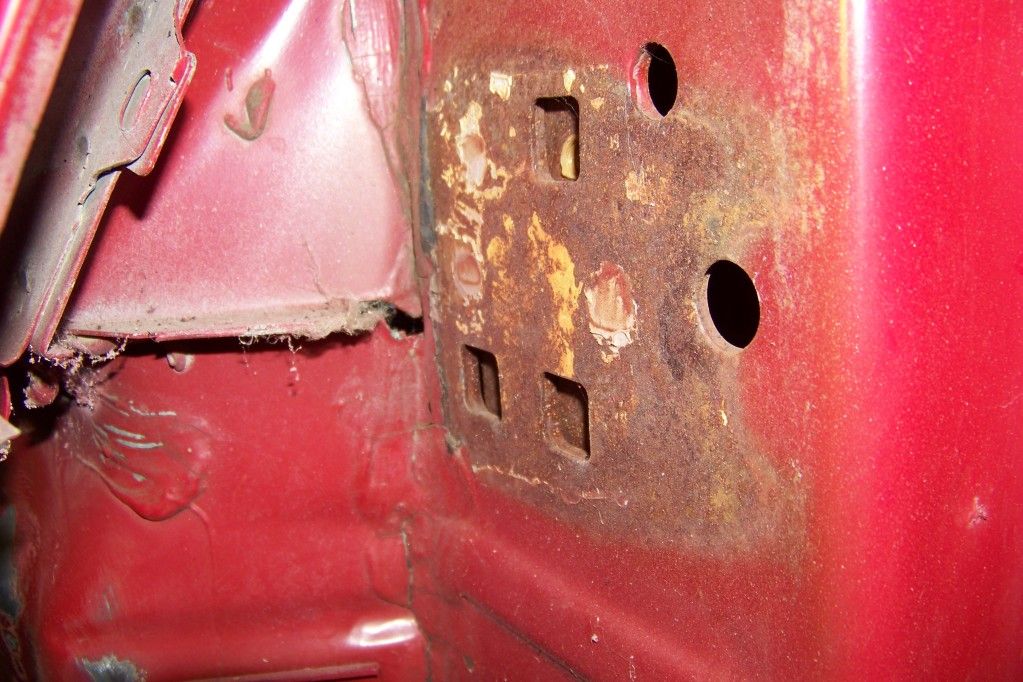
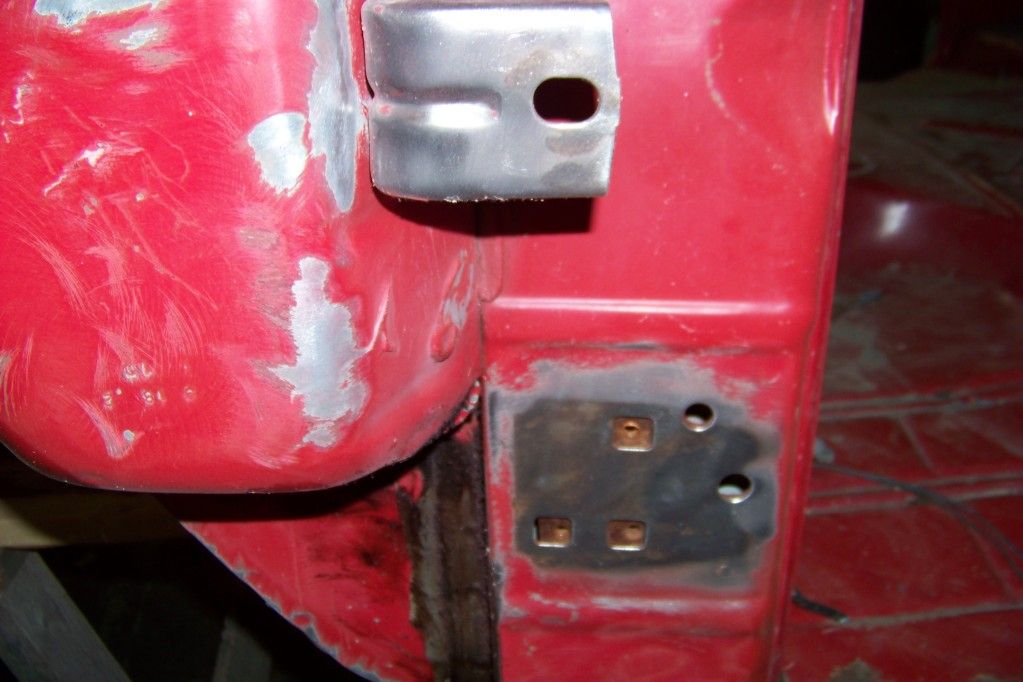
More progress. Borrowed a few tools from a plumbing friend and cut off those old nasty body bushings. They took a bit of convincing and burning, but they eventually came off... with one minor hitch...
Cleaned everything up, got it all prepped with a wire cup on an angle grinder. Took LOTS of time to get this progress all done in a night...
Word to the wise if you want to wire-wheel your frame... wear a hat, long sleeve shirt and long pants. You'll want to throw them away when you're done.
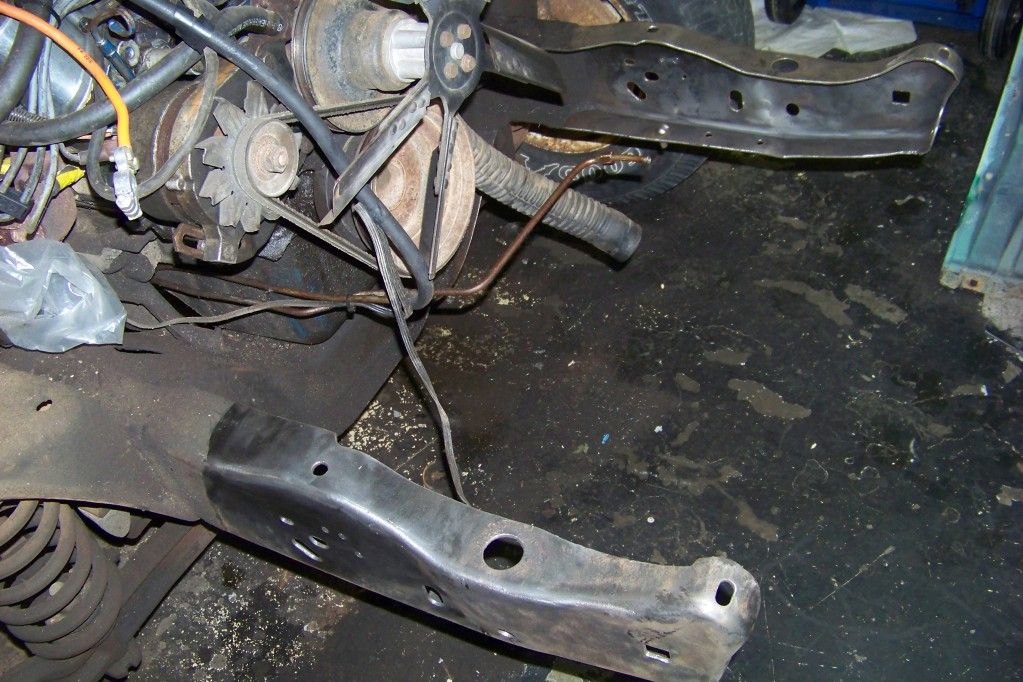
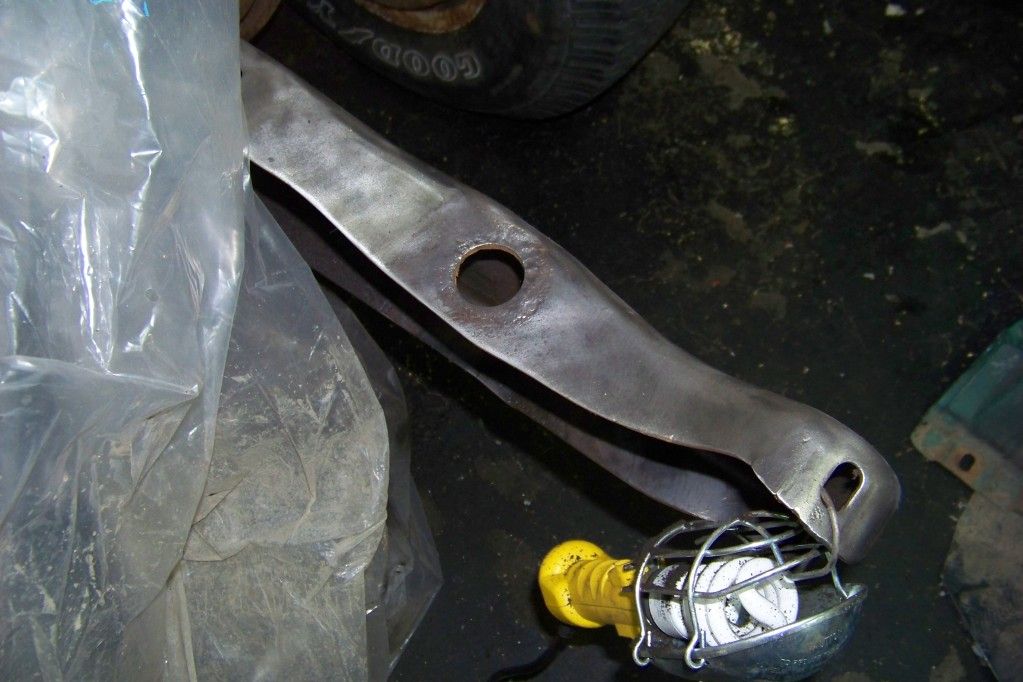
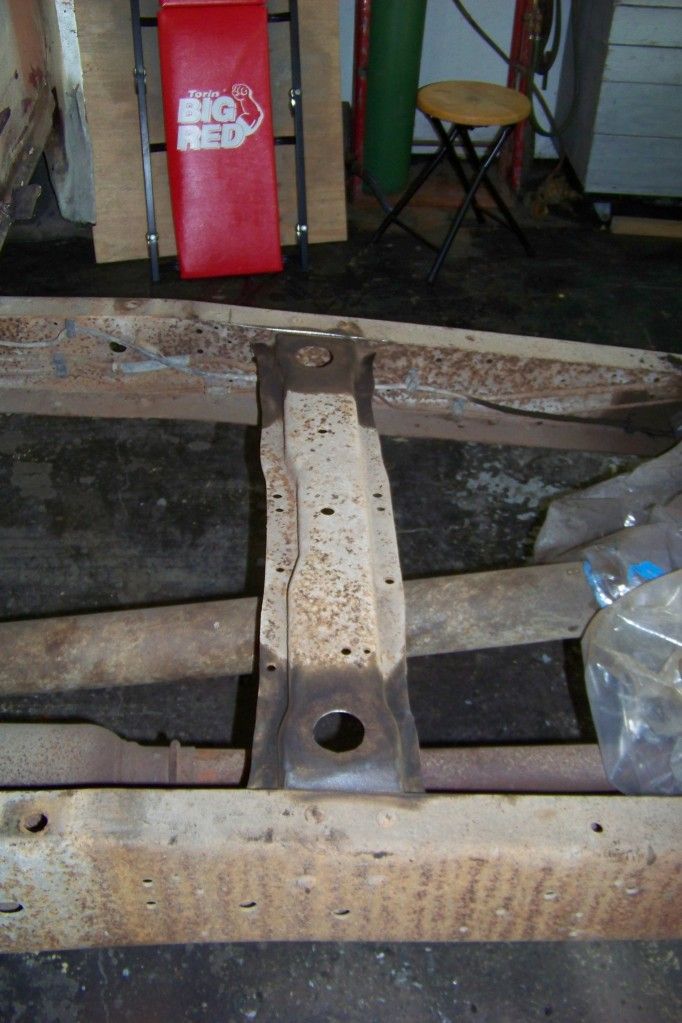
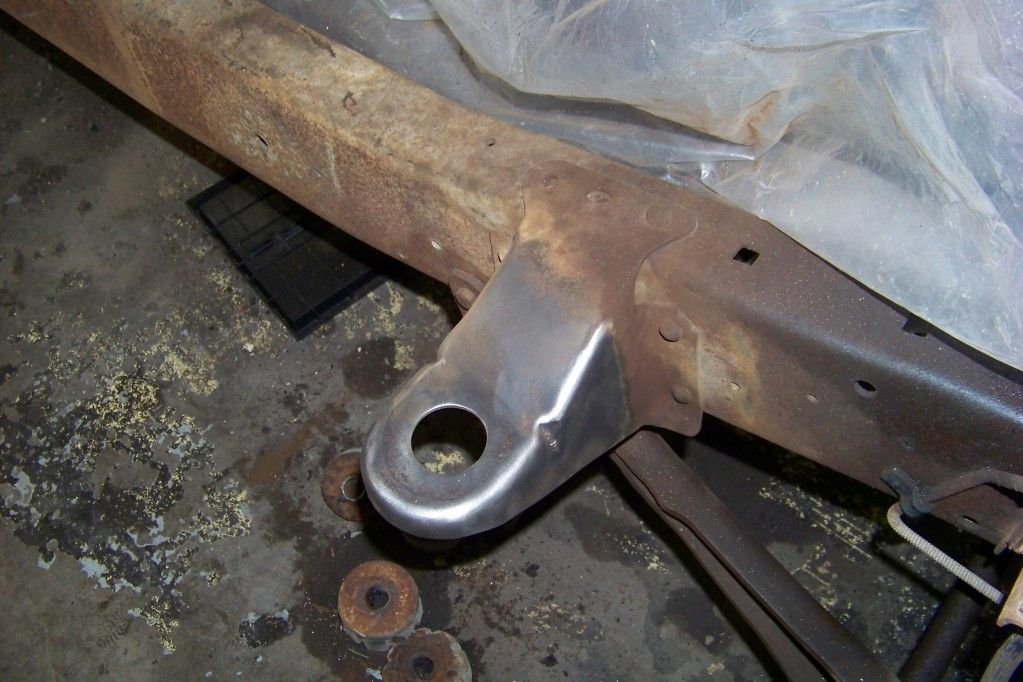
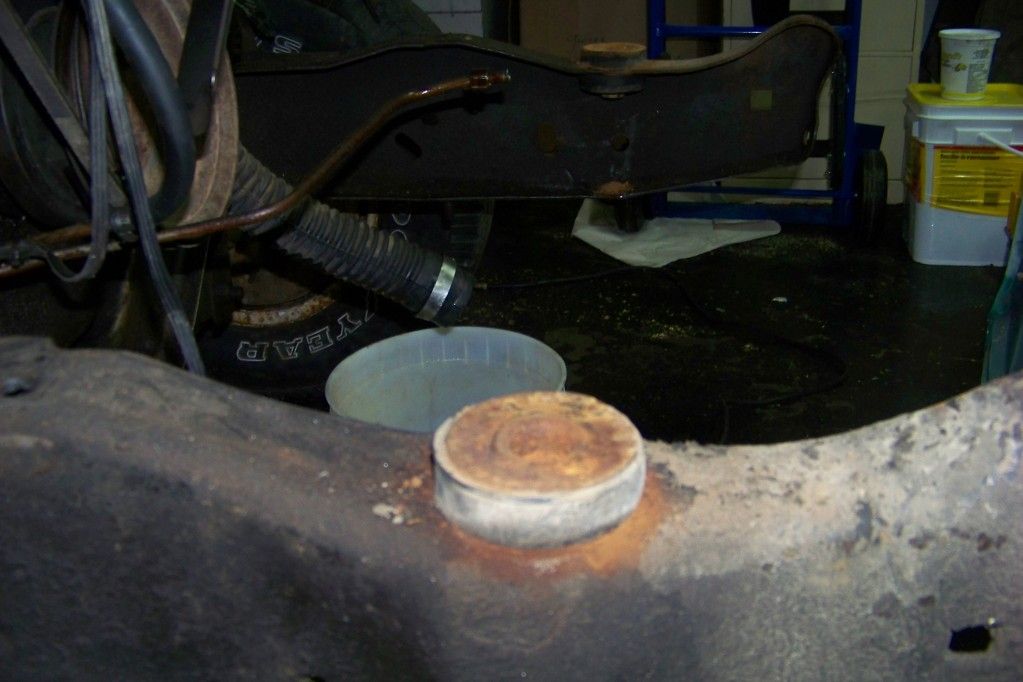
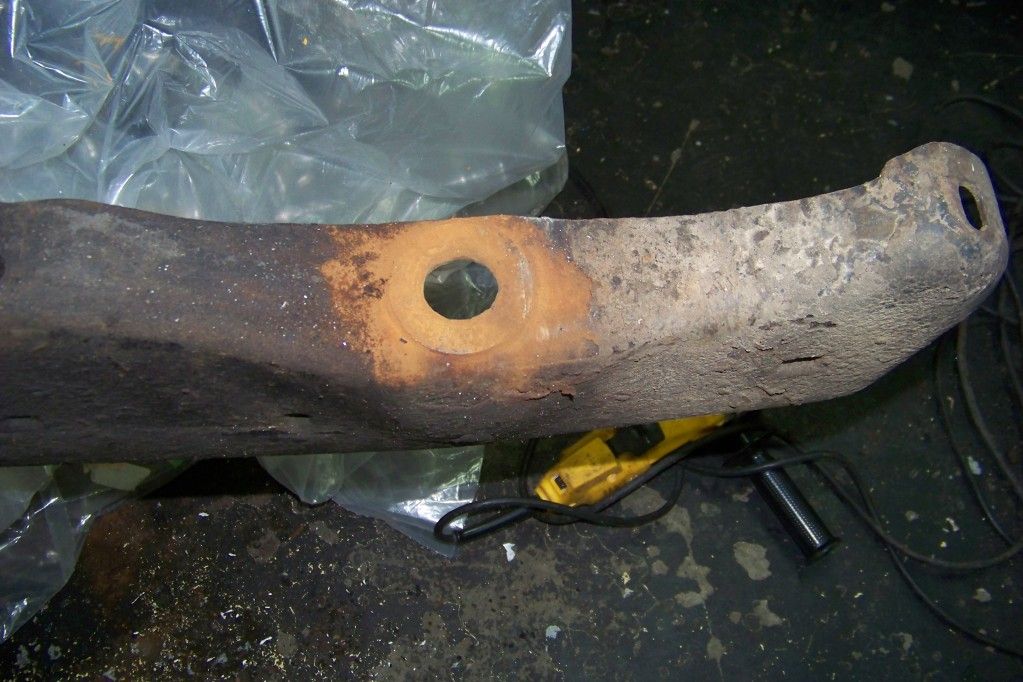
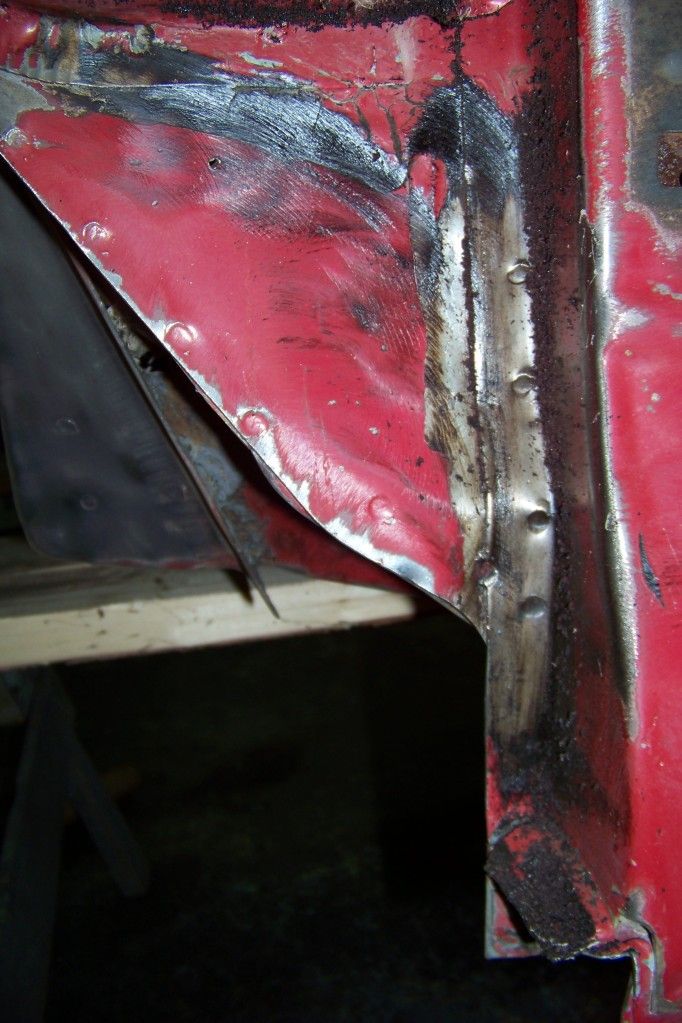
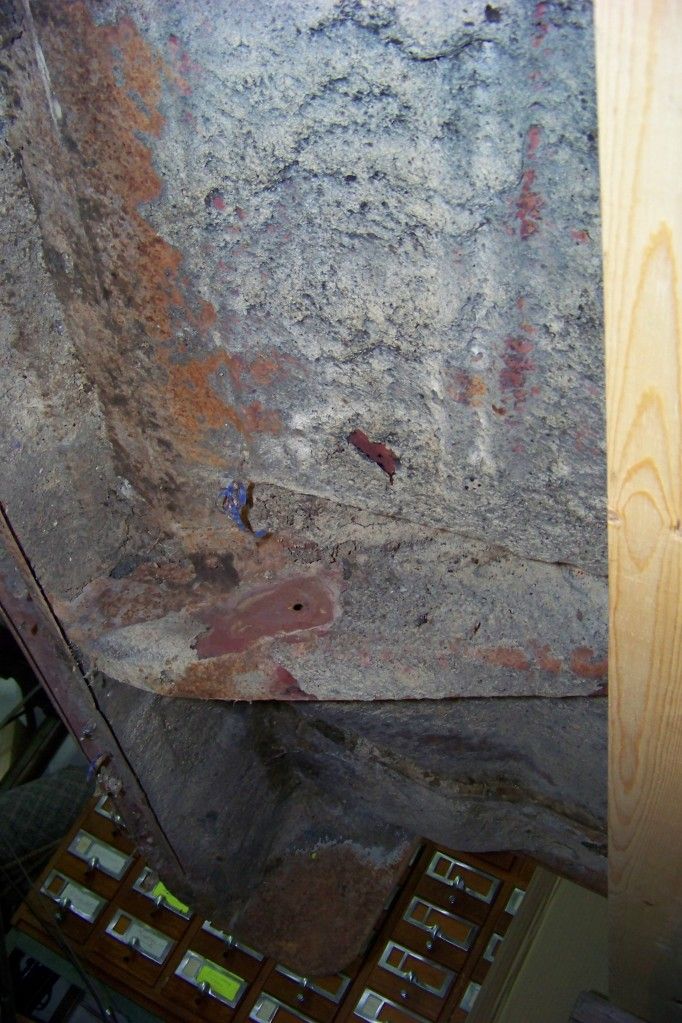
And my hitch in the progress...
Passenger side:
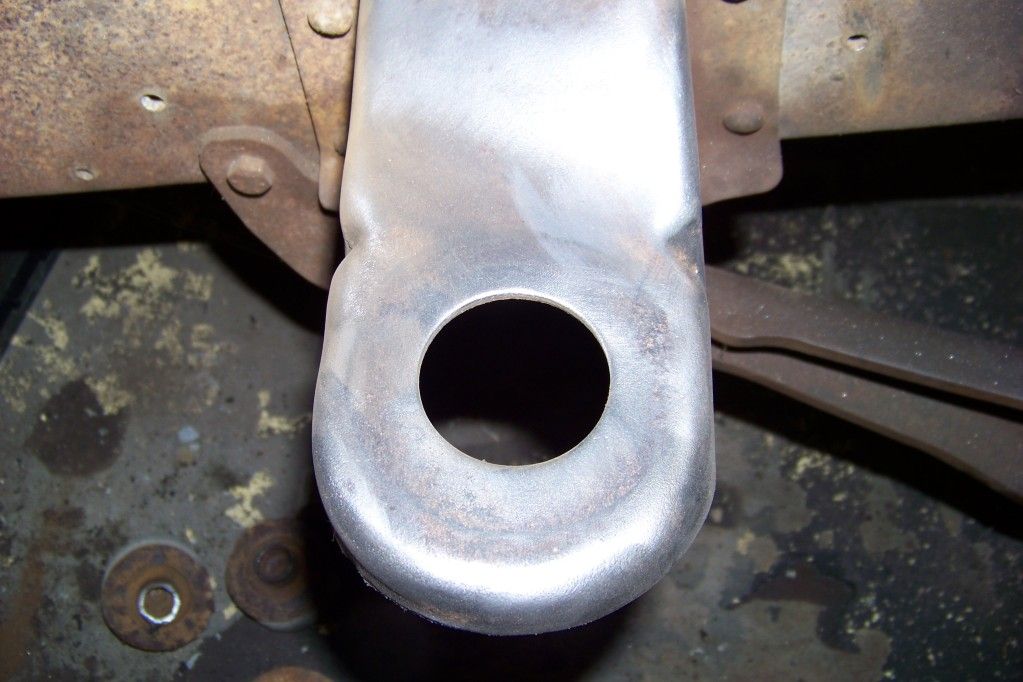
Drivers side:
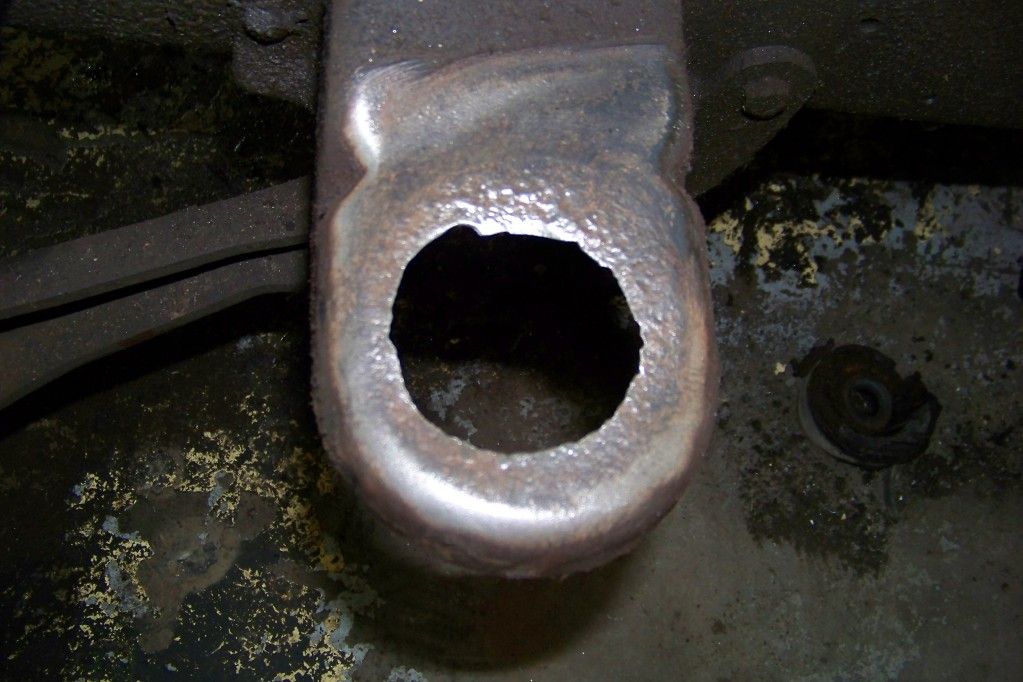
One of these things doesn't look like the other Wonder why?
No worries though. Just talked to my handy-dandy neighbour last night and I've got some great news.
He's got steel, he's got a plasma cutter, he's got a welder, and he's got skills. I'm sure you can think of what kind of progress is coming very shortly... He's doing it all for free.
One of the VERY FEW times I don't want to do something myself. I'm not skilled with a welder (yet), or I should say I was good 4 years ago in shop class... but that doesn't really count...
I've also never used a plasma cutter before. So this will be a learning experience for me just to watch... also motivation to get more tools when I'm done University
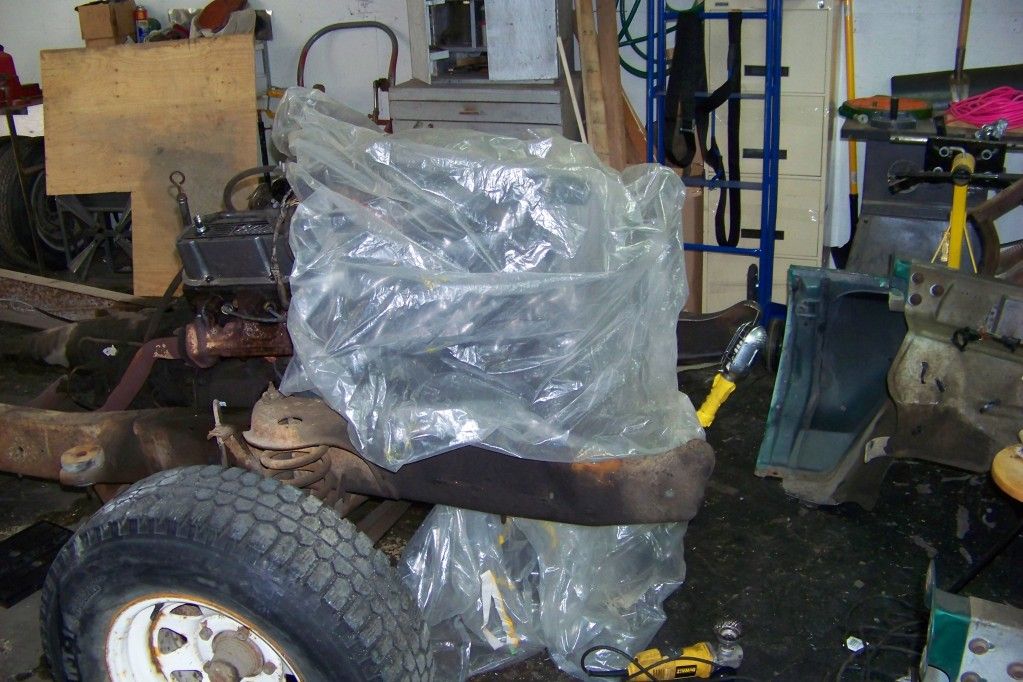
But wait! HOLD UP! What happened to the cab now? Well I'm glad you asked.
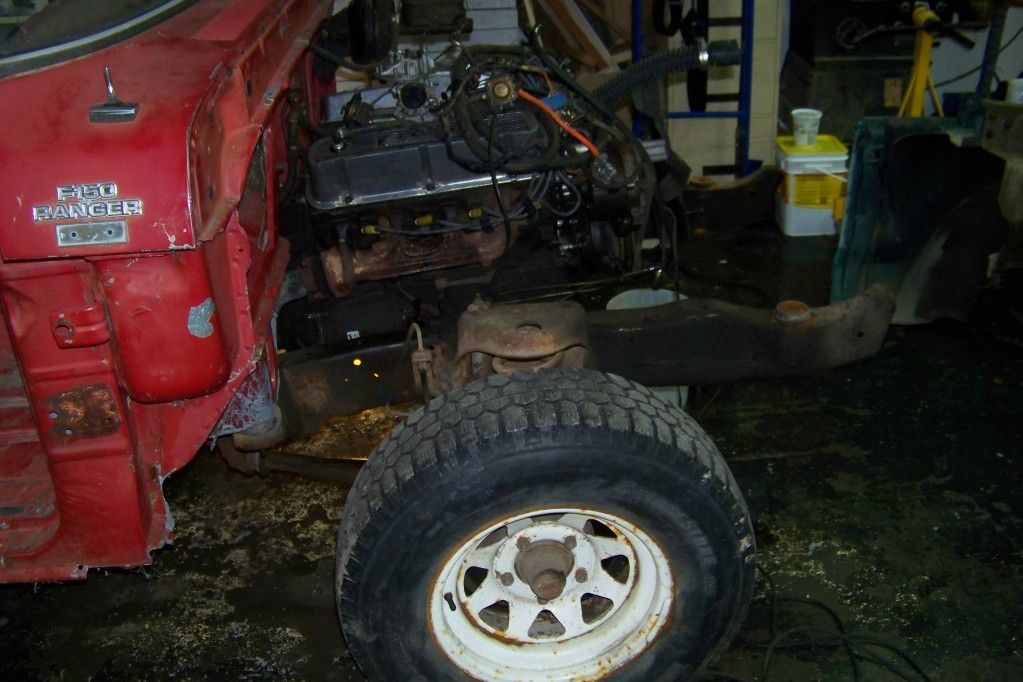
My father and I strong-armed the entire cab with the help of a friend's engine hoist. Damn it's nice to have friends with tools.
BTW, those of you who say that cabs aren't heavy... well... you know what I want to say don't you?
Eventually got the cab propped up on 6 2X4's and some old sawhorses. I can honestly say that i never thought my build would get this redneck, but whatever works. Right?
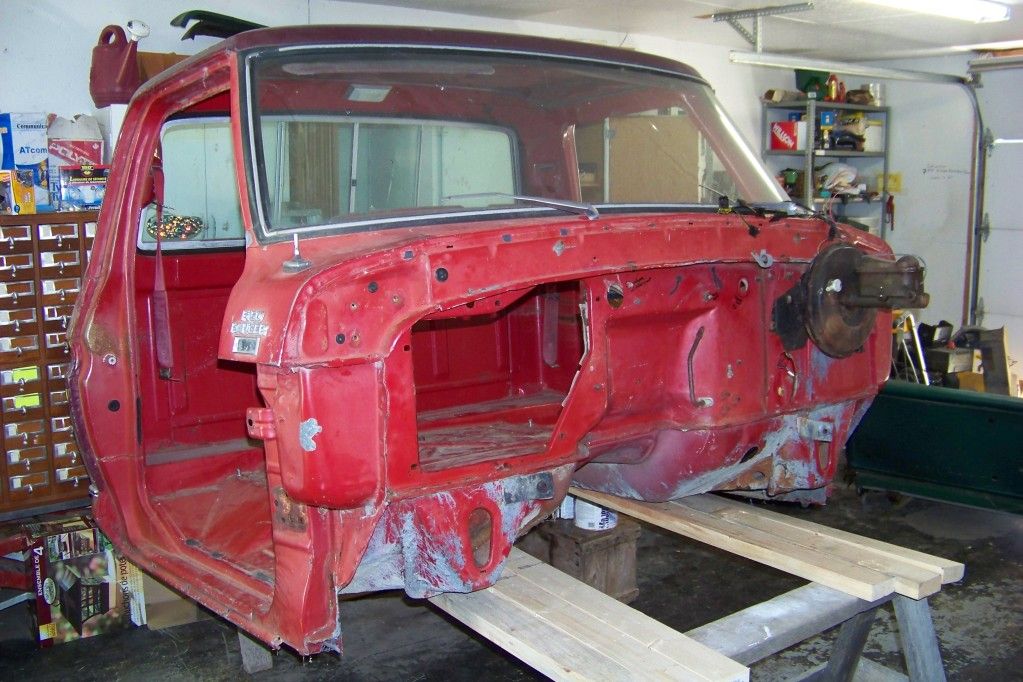
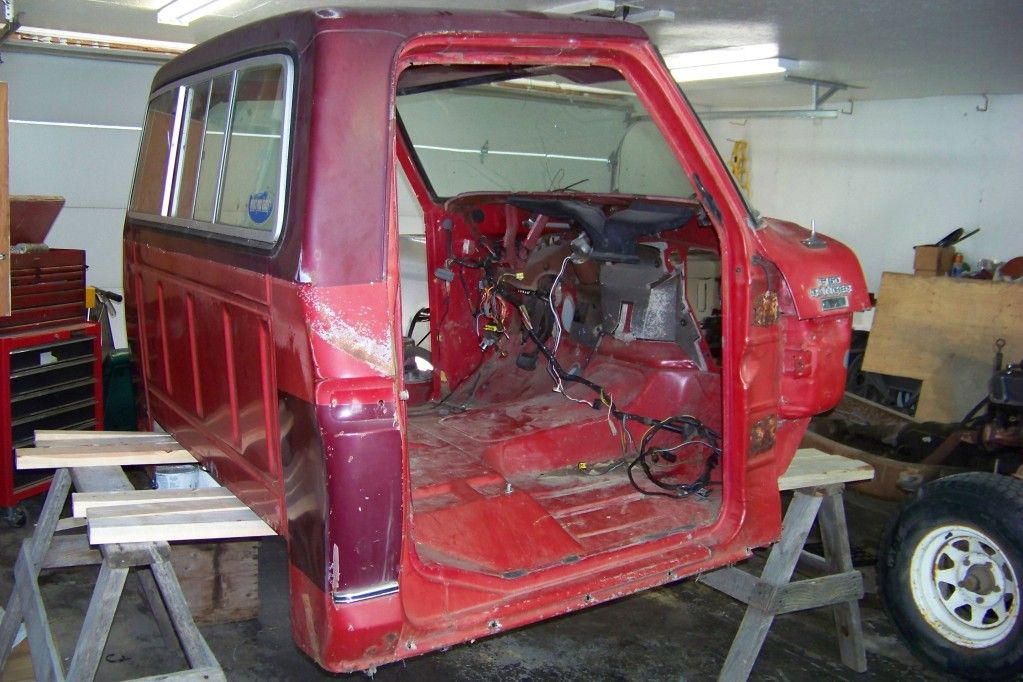
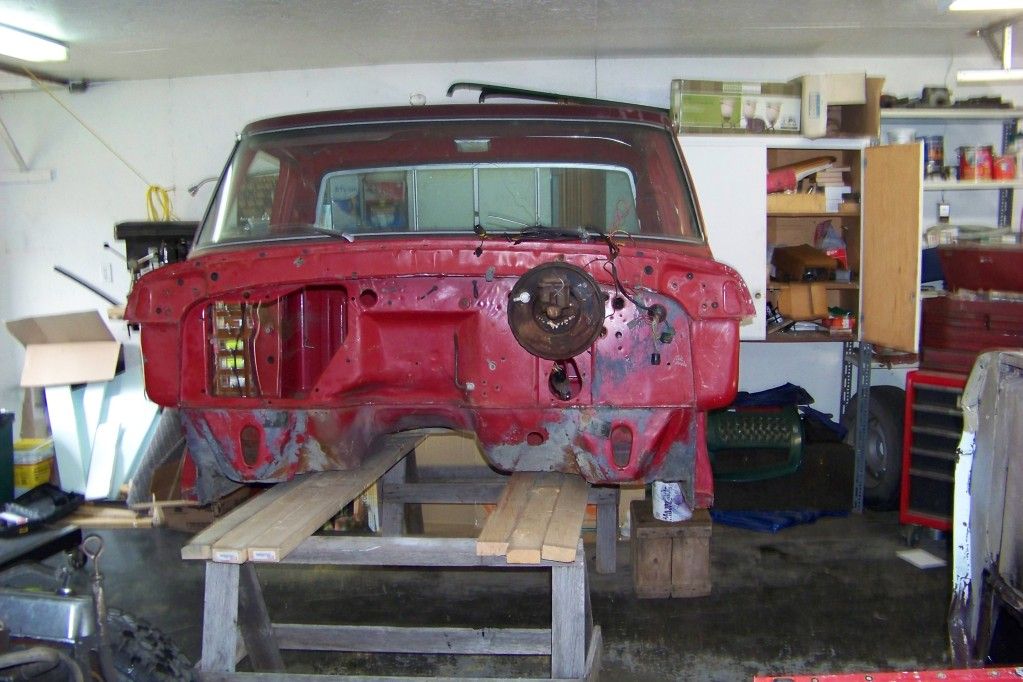
Time to do some cleaning! Before's:
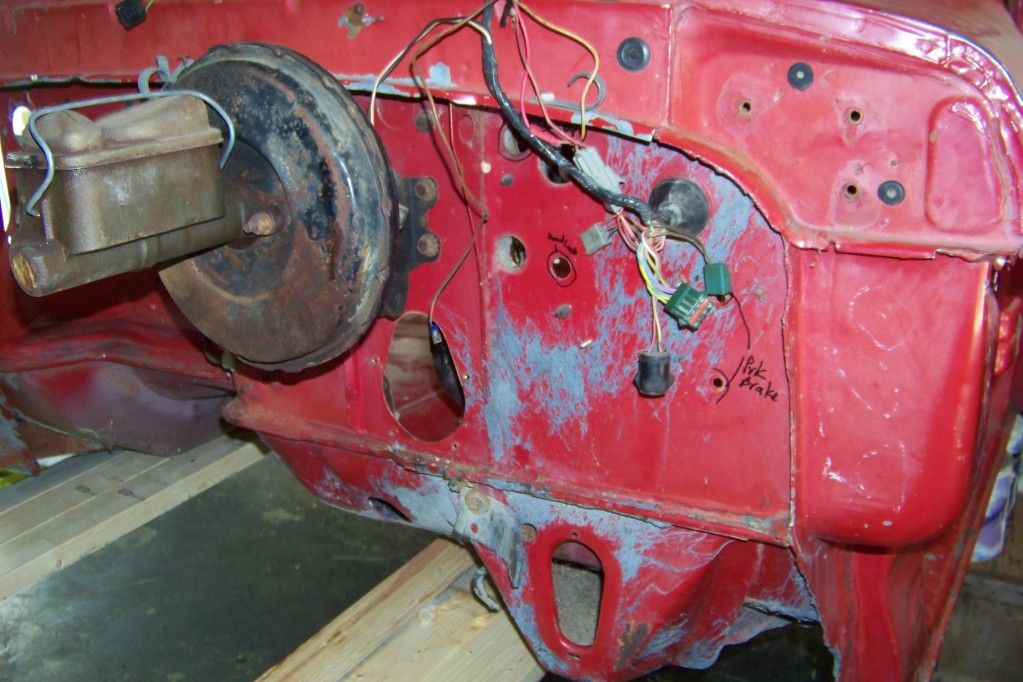
Overall, she ain't that bad. Just VERY dirty from sitting in a farmers field. Lots of mud and gunk. Back to my wire cups. Love those things.
Thought about taking it down to the bare metal, but I'm not sure I want to. This stuff heats up much too fast for my liking and doesn't show that it does... don't wanna warp the metal just because I'm paranoid about rust.
POR-15 SHOULD be able to soak right through the original paint if it's all scuffed properly and sprayed with the "toothing agent" (it's what I'm calling it because I don't remember the technical term) that will create small pores in any surface for the POR-15 to adhere to. Although, I would really love some feedback on that one...
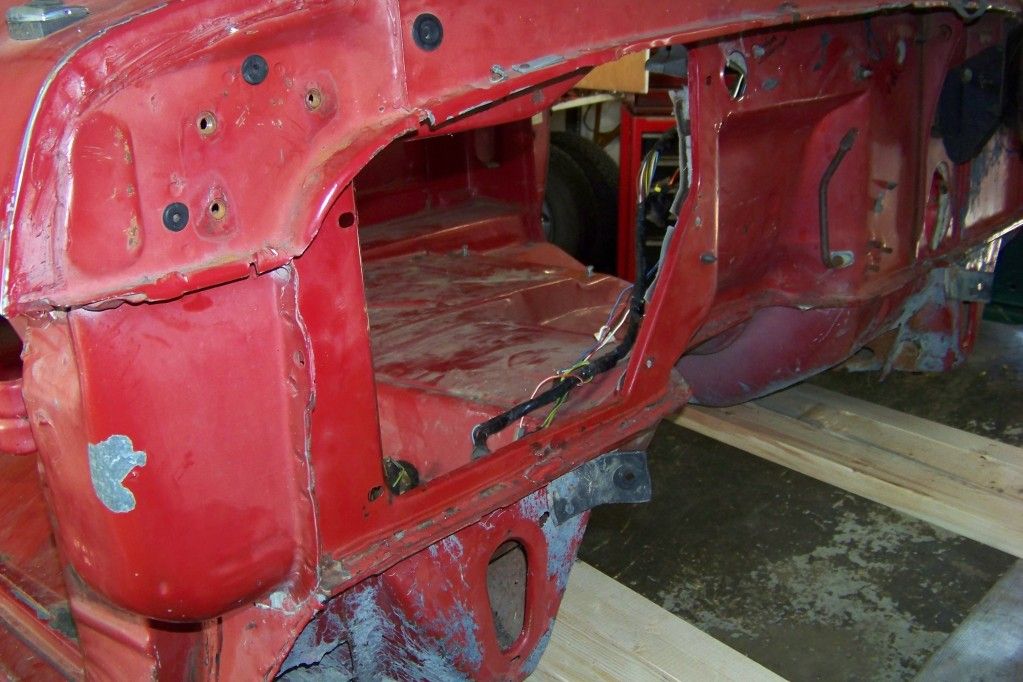
Doesn't look like much but it's much cleaner than it used to be. Less dirt.
Need to pick up some new Seam Sealer from 3M (Thanks HIO for the suggestion). Looking to pick it up today actually...
Passenger side (unfinished):
Drivers side (finished... almost...):

Looking a LOT better boys and girls!

Now I just need to get back to work sometime in the near future. This is honestly the progress up to date. August 3rd 2012...
Well, I've got lots of plans for the future, so lets go through those now. I know you're all itching to see what I can do with my budget.
Please keep in mind, I'm a dreamer:
I know it's a huge list, but I'm ambitious. I've got dreams, and I'll get to doing all of these things in some decade or another. Gotta dream guys. Gotta dream.
Well, I'll post more progress now within the thread itself, but my work on the first two posts is done.
Hope you all liked my story up to this point. Its been a HUGE learning expereince, met lots of great people and have overcome some massive obstacles.
Of course, another shout out to those of you who have helped me through this build so far. Carburetor, wiring and terminology have been massive road blocks for me up to this time... so I thank you again to those of you who have helped. You know who you are.
Continue watching for more action. I don't work on my truck all that often, but when I do I take lots of pictures... I know how you guys love your truck ****.
And so the story continues... it took me a while to get the rest of this written because I have a list of excuses that no one wants to listen to anyways... so we'll just say that I have demanding parents and demanding friends haha.
Onward with pics and the tale that is my build!
So this is how we started this summer:
Lovely straight and highly discoloured body lines
These need to be sandblasted and powdercoated. Should cost me only $40 per rim, not bad
Maybe next summer when my budget isn't so restricting. It's not like the company is going anywhere.Look at that lovely... oh... right...
Picked a set of these up for $60... yeah... I don't know how I did it either. The guy I bought them off of was super friendly and had an awesome converted 4x4, lifted, V8 Ford Explorer. Awesome friggen vehicle... and a very nice person. Can't wait to install them. Full electronics. All movement, bolster, tilt & lumbar support. VERY comfortable.
So everything had to come off again because I decided that mid July I wanted to try and paint the cab mount locations for my truck with POR-15. I also wanted to coat the underside of my cab with POR-15 similar to my truck bed so that it's 100% cured of all its "diseases"... okay... not cured.... but at least they've got good prescription.
So I took it all apart again to get at the cab mounts. Replacing with new Polyurethane bushings! Nice!
RUSTY! Its gotta go!
Also noticed this when I took my column out... wondering what they do.... all colour-coded the exact same Red w/ Blue-Tracer. Anyone know?
So somewhere between taking off my cab and the next bit of progress, I went out the picked myself up a Lincoln Mark VIII fan from a T-bird in the wrecking yard.
It'll provide a much better cooling system than that old stock fan will on the front of the engine. Take the stock one off and replace it with another! Well... not yet... but in the future. The parts keep piling up
Made sure I pulled all the plugs I needed. Don't want to let those plugs get crushed before I can grab them!
Also pulled myself a 3G alternator in the same day because I'm going to need it in the future. Sub box, amps, speakers, lots of lights and switches.... yeah...
I found exactly what I needed. Tim Allen - "More Power! Oh-hoho ho ho"
Everything looked good except for this... a potential road block because it just kept spinning. The plastics under it must be wrecked or something. I'll get the nut off when I actually install it and fix it later. If not, just go get another one
More progress. Borrowed a few tools from a plumbing friend and cut off those old nasty body bushings. They took a bit of convincing and burning, but they eventually came off... with one minor hitch...
Cleaned everything up, got it all prepped with a wire cup on an angle grinder. Took LOTS of time to get this progress all done in a night...
Word to the wise if you want to wire-wheel your frame... wear a hat, long sleeve shirt and long pants. You'll want to throw them away when you're done.
And my hitch in the progress...
Passenger side:
Drivers side:
One of these things doesn't look like the other
Wonder why?No worries though. Just talked to my handy-dandy neighbour last night and I've got some great news.
He's got steel, he's got a plasma cutter, he's got a welder, and he's got skills. I'm sure you can think of what kind of progress is coming very shortly... He's doing it all for free.
One of the VERY FEW times I don't want to do something myself. I'm not skilled with a welder (yet), or I should say I was good 4 years ago in shop class... but that doesn't really count...
I've also never used a plasma cutter before. So this will be a learning experience for me just to watch... also motivation to get more tools when I'm done University
But wait! HOLD UP! What happened to the cab now? Well I'm glad you asked.
My father and I strong-armed the entire cab with the help of a friend's engine hoist. Damn it's nice to have friends with tools.
BTW, those of you who say that cabs aren't heavy... well... you know what I want to say don't you?
Eventually got the cab propped up on 6 2X4's and some old sawhorses. I can honestly say that i never thought my build would get this redneck, but whatever works. Right?
Time to do some cleaning! Before's:
Overall, she ain't that bad. Just VERY dirty from sitting in a farmers field. Lots of mud and gunk. Back to my wire cups. Love those things.
Thought about taking it down to the bare metal, but I'm not sure I want to. This stuff heats up much too fast for my liking and doesn't show that it does... don't wanna warp the metal just because I'm paranoid about rust.
POR-15 SHOULD be able to soak right through the original paint if it's all scuffed properly and sprayed with the "toothing agent" (it's what I'm calling it because I don't remember the technical term) that will create small pores in any surface for the POR-15 to adhere to. Although, I would really love some feedback on that one...
Doesn't look like much but it's much cleaner than it used to be. Less dirt.
Need to pick up some new Seam Sealer from 3M (Thanks HIO for the suggestion). Looking to pick it up today actually...
Passenger side (unfinished):
Drivers side (finished... almost...):
Looking a LOT better boys and girls!
Now I just need to get back to work sometime in the near future. This is honestly the progress up to date. August 3rd 2012...
Well, I've got lots of plans for the future, so lets go through those now. I know you're all itching to see what I can do with my budget.
Please keep in mind, I'm a dreamer:
- 351W rebuilt by my hands with brand new parts
- C6 (small block) rebuilt by my hands (sitting in the garage, just never mentioned it yet)
- A/C installed and working
- Fully POR-15'd frame
- Fully POR-15'd underbelly (all undersides that will be looking at the road for the next 30 years)
- 50% 5-8 Grade Hardware (I'm not replacing everything... takes too much time and I'm not willing to re-tap all those damn holes in the cab, etc)
- Electric fan upgrade
- 3G alternator upgrade
- Un-butcher my wiring (all of it)
- Serpentine belt upgrade
- LED lighting on the side-markers, interior, tail lamps, etc.
- Customized rear lights (not sure how I'll do this, but I want to add some more bulbs... something to that extent... make it brighter somehow)
- New chrome bullet-hole rims... something fancy :P
- Sandblast the white spoke rims & powder coat white and keep for winter driving (mayyyyybe)
- Install new seats
- Change out fuse block to "new" style fuse block
- Get my cruise control working & figured out
- Replace/modify stock gauge panel and face plates on the interior
- Acquire all the chrome I need for racetrack trim, full chrome 1979 front (buckets and all), a few small pieces for the tailgate
- "Bumprettes" chrome front bumper, chrome step rear bumper (possibly from a 80+ truck)
- Custom center console
- POR-15, insulate, sound deaden the cab floor
- Carpet
- Wood grain trim interior with Lariat Badges all around (have almost everything I need to designate it as a "Lariat" truck. Super happy about that.)
- Change out the 2.73 gears for something around 3.3
- Open diff to a limited slip
- Body work
- Paint (tutone, not sure on colours yet. Too many to choose from that I love)
I know it's a huge list, but I'm ambitious. I've got dreams, and I'll get to doing all of these things in some decade or another. Gotta dream guys. Gotta dream.
Well, I'll post more progress now within the thread itself, but my work on the first two posts is done.
Hope you all liked my story up to this point. Its been a HUGE learning expereince, met lots of great people and have overcome some massive obstacles.
Of course, another shout out to those of you who have helped me through this build so far. Carburetor, wiring and terminology have been massive road blocks for me up to this time... so I thank you again to those of you who have helped. You know who you are.
Continue watching for more action. I don't work on my truck all that often, but when I do I take lots of pictures... I know how you guys love your truck ****.
Last edited by Aaron-71; 08-04-2012 at 12:50 PM. Reason: Adding to the story. Adding more the to story... again.
#3
07-24-2012, 02:12 AM
Posting Guru
#4
07-24-2012, 12:10 PM
#5
07-24-2012, 12:26 PM
#6
07-24-2012, 04:12 PM
Cargo Master
Join Date: Jan 2012
Location: Northeast Indiana
Posts: 2,654
Likes: 0
Received 0 Likes
on
0 Posts
#7
07-24-2012, 05:05 PM
Posting Guru
Trending Topics
#10
07-24-2012, 11:30 PM
Thanks for the kind words everyone. Glad to hear my build isn't as boring as I thought it was
More pictures and story have been updated. There are few things I forgot to mention, and lots of pictures have been added.
Tomorrow I might be able to get at this years progress, but it's another days worth of typing and getting photos on here. We'll see how the day goes.
More to come, stay tuned.
More pictures and story have been updated. There are few things I forgot to mention, and lots of pictures have been added.
Tomorrow I might be able to get at this years progress, but it's another days worth of typing and getting photos on here. We'll see how the day goes.
More to come, stay tuned.
#11
07-25-2012, 01:36 AM
Hotshot
Join Date: Aug 2007
Location: St. Charles, Missouri.
Posts: 12,183
Likes: 0
Received 14 Likes
on
12 Posts
Subscribed! You've done a lot of great work on your truck Aaron. And learning through experience is the best way. (Although experience isn't something you gain until after you need it)
The trucks looks a lot better already!
I will be staying tuned to see the progress you will make.
I just recently sent a fellow FTE member (Hardkasedaddy) a SCS door up to Courtenay from out here in Sunny Southern California, cost an arm & a leg and more to ship. But we were both happy, as I helped someone out. Not to be off-topic or anything, but as a fellow college student, I must ask. What are you majoring in?
#12
07-25-2012, 09:46 AM
Subscribed! You've done a lot of great work on your truck Aaron. And learning through experience is the best way. (Although experience isn't something you gain until after you need it)
The trucks looks a lot better already!
I will be staying tuned to see the progress you will make.
I just recently sent a fellow FTE member (Hardkasedaddy) a SCS door up to Courtenay from out here in Sunny Southern California, cost an arm & a leg and more to ship. But we were both happy, as I helped someone out. Not to be off-topic or anything, but as a fellow college student, I must ask. What are you majoring in?
The trucks looks a lot better already!
I will be staying tuned to see the progress you will make.
I just recently sent a fellow FTE member (Hardkasedaddy) a SCS door up to Courtenay from out here in Sunny Southern California, cost an arm & a leg and more to ship. But we were both happy, as I helped someone out. Not to be off-topic or anything, but as a fellow college student, I must ask. What are you majoring in?
When you put a love of math, the natural sciences, designing/drafting/drawing and construction together... you basically get a Civil Engineer. So I thought... hey! Why not try it out?
So far its been working for me... besides one thing... money. School aint cheap when you're paying for it by yourself.
What are you "in" for?
#14
07-25-2012, 09:35 PM

#15
08-02-2012, 09:56 PM