
LED Light Strips under Bedrails- Need Wiring Ideas
#1
 08-24-2010, 09:29 AM

I'm wiring up two 24" LED light strips under the bedrails of my F250. The idea is to have light in the bed of the truck that is independent of the cargo lamp/ interior lights. Plus with my toolbox lid open, the cargo light is blocked anyway.
I have already wired the lights to come on with upfitter #3. But again, the upfitters are only hot when the ignition is in the ON position. I'd like to use these LED lights without the truck running for various tailgate parties, loading my ATV, or whatnot without killing my battery with the key on.
So how about having a secondary switch somewhere in the bed (perhaps near the tailgate) that could turn the LED lights on/off without having to operate upfitter #3?
All I would need is a wire that is hot all the time and splice it into my +12v wire to the LEDs. Right??
Is there an existing wire in the rear of the truck that I can tap, or will I need to run a new +12v wire directly to the battery? The both LED strips together draw about 1a, so I need only very little current.
So what do you think?
What should it be: tap an existing wire that hot all the time, run a new wire directly to the battery, or......
#2
08-24-2010, 09:37 AM


I added the Led's under my tailgate and tied them into the parking lights. Took about 4-5 minutes to complete. Sounds like you will have to run a hot wire to lights in order to achieve turning them on without the truck being in the on position. You can turn your parking lights on without the keys in your ignition.
Not for sure, but isn't there a constant hot going to the stereo for the clock/time? If so that might work for your application.
Not for sure, but isn't there a constant hot going to the stereo for the clock/time? If so that might work for your application.
#3
08-24-2010, 10:17 AM

Here's my suggestion.......run a heavy gauge wire (6-8 ga) from the battery on drivers side (fused at battery) along the frame rail and up into the front of the bed through the plugs (between the cab and front board of the bed) to a fuse/ junction box inside the toolbox. You will now have up to 4 legs to power from inside the toolbox (protected), I bought a couple of generic automotive sockets and mounted them in my toolbox lid and plugged in 1157 bulbs, I also wired in a momentary toggle switch so that when I open the lid the 1157 bulbs light up. Mounted to the inside top of the lid (when opened) it lights up the whole bed with just 1 bulb. I also punched in an led to the drivers side of the toolbox that comes on when the light comes on, this way I can see through the mirror if the switch has lost contact and closed the circuit with the lid closed to prevent battery drain. You can mount the toggle for your under rail lights in the toolbox as well but you probably won't need them if you put a bright enough light on the inside of the lid. Most of the time when loading you'll probably have the lid open to get tie downs, etc. You will also have extra fused points to hook up a battery charger for cordless tools or ? else you have. Anyway you choose, I would definitely run 1 heavy gauge to tap off of in the future, nothing worse then having to run a second or 3rd wire again because the first is too small.
#4
08-24-2010, 10:20 AM
#5
08-24-2010, 11:19 AM
I ran a 4ga wire from the battery along the frame back to the rear of the truck along with a 4 wire (trailer wire) to use for switched relays and left 6 extra feet for when I get around to adding my deep cycle battery back there. I bought a pelican box (water proof box with clear lid and put a marine fuse block inside of it with circuit breakers and fuses now I have positive power at rear of truck and can run up to 6 circuits for anything I want in rear of truck. I mounted pelican box under truck because I wanted to make sure puppies didn't chew on it when they are back there. It makes it a little bit of a pain in the *** to change fuse or flip breaker but not that bad just have to get under truck and flip open lid to box.
For you I would run a heavy gauge power line to the back of the truck and then you can use it for other things to.
Not aware of a constant hot wire in the back of the truck
For you I would run a heavy gauge power line to the back of the truck and then you can use it for other things to.
Not aware of a constant hot wire in the back of the truck
#6
08-24-2010, 11:45 AM
Thanks gentlemen.
It looks like I will be running a wire from the battery to the rear of the truck. I currently do not have my toolbox mounted in my truck and do remove it on occasion. This is just a fun little project for the afternoons and it has the potential to be pretty cool, I think...
The thing is, I like for my wiring to be done cleanly! That's why I'm thankful for your suggestions. One run of wire is much cleaner and nicer than multiple runs of pink 16ga wire (yuck!)
#7
08-24-2010, 12:27 PM
Cargo Master
Trending Topics
#8
08-24-2010, 12:31 PM
I put my 4 ga and 4 wire trailer wire inside a black plastic loam then put electrical tape around it every 6 inches and then ziptied the loom inside the frame with black zipties you can't even see it and when you do it looks factory.
I would highly encourage you to run at least one smaller wire to the back to use with a switched relay. That way if you ever need it it is there. That is why I used the 4 wire trailer wire now I have 4 options doubt I'll ever use all four but they are already there if I want to use them.
I also mounted my relays indies the pelican box
#9
08-24-2010, 12:59 PM

If you have tow package with 7 terminal connector, you definitely have a constant 12V in the trailer wiring harness.
Even if you don't have tow package, I'm willing to bet there is a constant 12V line in the harness to the back, probably ending up in an unused connector tucked up alongside the frame rail or spare tire.
Even if you don't have tow package, I'm willing to bet there is a constant 12V line in the harness to the back, probably ending up in an unused connector tucked up alongside the frame rail or spare tire.
#10
08-24-2010, 09:02 PM
I thought I'd update this post with a few pics of my progress so far. It's not really to much, but it's something to look at!
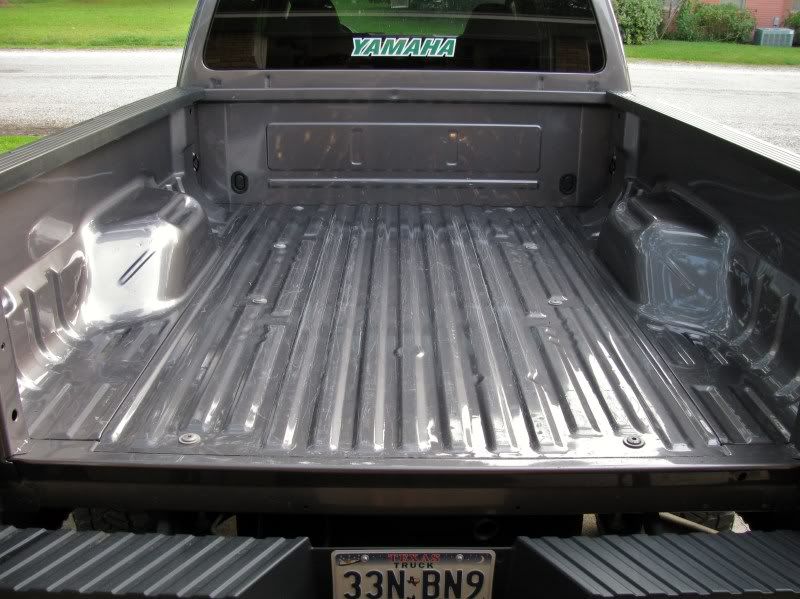
Here's what it looks like in the day. Nothing is in the way for my ATV or my groceries LoL
I'm not too goot at evening or night shots, but you get the idea...
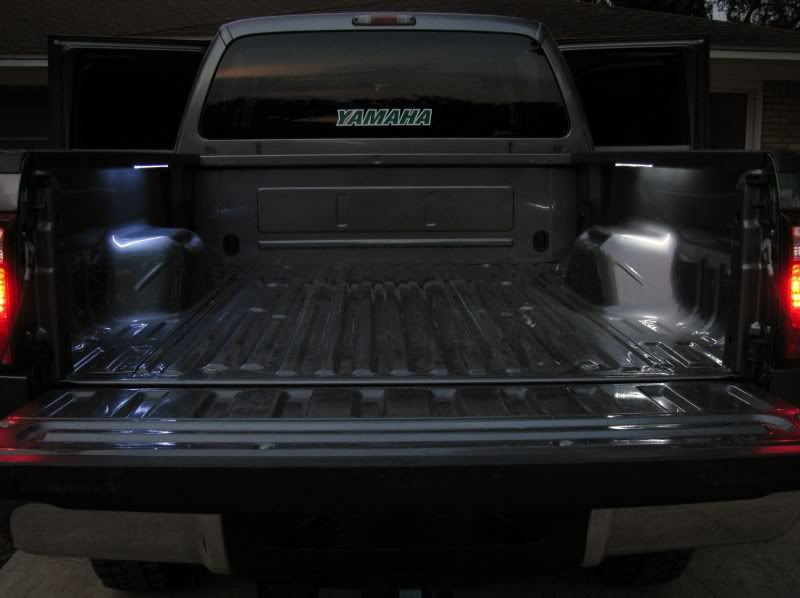
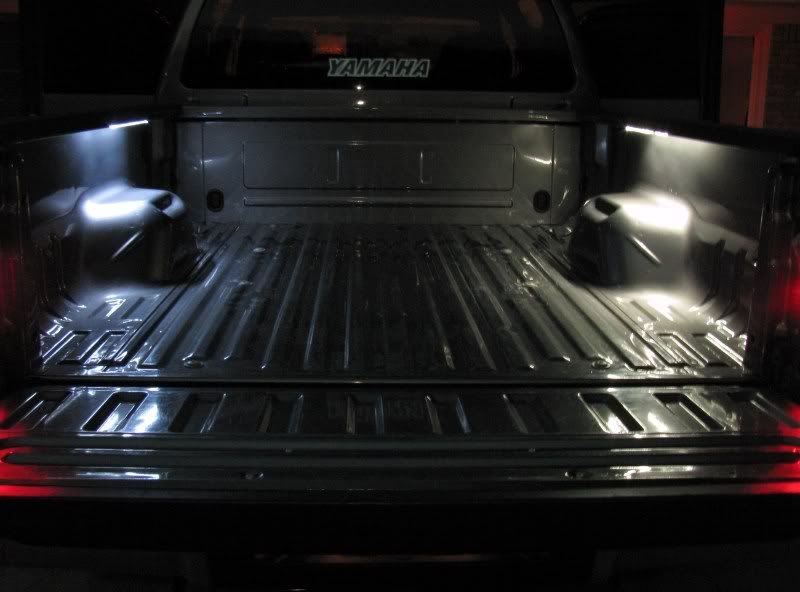
You can see that the lights are a different shade of white from each other. I contacted the company I bought them from to let them know of my problem. They quickly sent out another light strip to replace the cooler, more buish looking one. It's no sweat to change it out when it gets here in a couple of days. Good customer service.
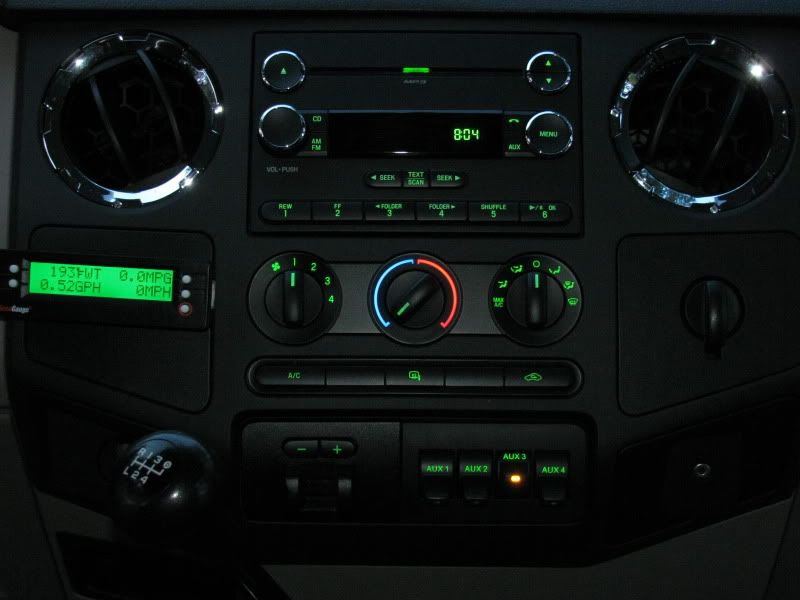
And finally, here's a pic just for fun. I've got the in-bed lights wired to upfitter #3 for now. I'm in the process of running another wire from the battery and installing a weatherproof switch somewhere in the bed to activate the lights independent of the upfitter.
As always, thanks for looking!
Here's what it looks like in the day. Nothing is in the way for my ATV or my groceries LoL
I'm not too goot at evening or night shots, but you get the idea...
You can see that the lights are a different shade of white from each other. I contacted the company I bought them from to let them know of my problem. They quickly sent out another light strip to replace the cooler, more buish looking one. It's no sweat to change it out when it gets here in a couple of days. Good customer service.
And finally, here's a pic just for fun. I've got the in-bed lights wired to upfitter #3 for now. I'm in the process of running another wire from the battery and installing a weatherproof switch somewhere in the bed to activate the lights independent of the upfitter.
As always, thanks for looking!
#11
08-24-2010, 09:28 PM
Cargo Master
how do your strips attach?
I've been looking at doing this, but don't want to use any of the strips that attach by adhesive. I'm also looking at putting 3 on each side to try to light the bed up light an Airport when they're on... It seems useful when burning brush at night or hitching to a gooseneck in the dark.
also, you shouldn't have a problem with this as the upfitter switches use a relay, but keep in mind the possibility of a backfeed when the outside switch is on.
#13
08-25-2010, 11:28 AM
They are the stick-on kind. I, too, wonder how the adhesive will hold up to the grievously hot Texas sun and the heavy rains. I suppose if my door molding hasn't fallen off, maybe these wil hold up. At least they're somewhat protected under the bed rails. We'll see...
Thanks for the heads-up.
I've never messed with diodes before but heard of them and their usefulness in dual battery setups. Can you, by chance, perhaps post a link or recommend a place to buy a diode like I would be needing. I'd appreciate it!
I've never messed with diodes before but heard of them and their usefulness in dual battery setups. Can you, by chance, perhaps post a link or recommend a place to buy a diode like I would be needing. I'd appreciate it!
#14
08-25-2010, 12:29 PM
Cargo Master
#15
08-25-2010, 12:47 PM
If the upfitter switch side power is going through a relay, you do not need any diode protection.
Protection is sometimes needed if there are other electronic entities in the same circuit or if the "switch" is a transistor, but not when it is a physical open like a relay or mechanical switch.
Protection is sometimes needed if there are other electronic entities in the same circuit or if the "switch" is a transistor, but not when it is a physical open like a relay or mechanical switch.