When you click on links to various merchants on this site and make a purchase, this can result in this site earning a commission. Affiliate programs and affiliations include, but are not limited to, the eBay Partner Network.
Saw your post from 2010 about 3g. I have a 1988 F350 7.3 that i recently put a 165 amp Neese Leville alternator on. Followed your instructions....4g wire and a 175 amp bar in between. The guy i bought it from knew enough to be dangerous so needless to say i gutted a floorboard full of wires. He had tapped into the light harness in 3 spots and there were scotch locks, wire nuts, and tape on everything. Even had a harness from another truck on here for the 70 amp alternator he had on here. Long story short my alternator has a pos and neg terminal and one post atop the regulator. My question to you is where does the green wire w red stripe go to? Im pretty sure it has something to do with the needle volt guage in my dash because that reads 12 every morning, it goes up, but when i test the battery/alternator combos im reading 13.8. Also when i put the red/grn wire to positive the battery light inside comes on
Last edited by Dustin Frontauria; 07-04-2018 at 05:31 PM.
Reason: Forgot to say something
So LMC has alternator upgrades (part: 47-0143 alternator-140 amp v belt) which states is a one wire alternator. Would I be correct to assume that using this would mean no internal modifications to the wiring under the hood? Sorry if this has already been covered somewhere.
Not necessarily. You will still need to figure out your ammeter/voltmeter (upgrade or disconnect) and your choke (if electric).
Here's how I am doing mine (with a true 1 wire like I believe your link is to): https://www.ford-trucks.com/forums/1...e-diagram.html
Oh I gotcha. I already had RCCI convert my ammeter to a volt meter (when I upgraded to a factory tach). This whole rewiring stuff just looks complicated.
Oh I gotcha. I already had RCCI convert my ammeter to a volt meter (when I upgraded to a factory tach). This whole rewiring stuff just looks complicated.
1982 F100 4.9 39k original miles
What are you going to do when that 1 wire alternator fails some years later? The truck will be down till you find another one like it. Nothing is easy.
I don't like the 1 wire ALTs
On older car I have if you use a 1 wire it may not charge the battery because the ALT sees it is putting out juice and cuts back but the battery is not getting charged.
Because you don't have any thing but a light you don't know you have issues till it is to late and you have a dead battery.
When you check to see if the ALT is working and it checks OK but it still not enough to charge the battery.
So no 1 wire for me
Dave ----
I'll play an advocate for the 1-wire (no real strong opinion towards either)
Originally Posted by Franklin2
What are you going to do when that 1 wire alternator fails some years later? The truck will be down till you find another one like it. Nothing is easy.
Yes, but if he is leaving the wiring harness in place, which he will be so he still has cab power, then if it fails he can throw a stock one back on with no trouble.
I don't like the 1 wire ALTs
On older car I have if you use a 1 wire it may not charge the battery because the ALT sees it is putting out juice and cuts back but the battery is not getting charged.
Because you don't have any thing but a light you don't know you have issues till it is to late and you have a dead battery.
When you check to see if the ALT is working and it checks OK but it still not enough to charge the battery.
So no 1 wire for me
Dave ----
I know you are making an example using your car and not our trucks but regarding our trucks - since he already has the converted gauge it will show the charging or discharging just like if he was using a 2-wire.
My warning for the 1 wire though would be the rpm startup/idle of the 6cyl. I've never owned one and don't know the normal rpm ranges of one but there would be a valid concern IF the startup rpm doesn't meet the 'kick-start' threshold of the 1 wire.
I got the 3 g upgrade finished with brand new ground wires everywhere. Grounded to the block to the frame and of course the alternator to those places as well as the battery. Used 00 guage just in case lol. Now the other day i drove around from point a to b running errands for around 5 or 6 hours. Never drove above 65 the whole time, my driving not due to power loss, then started to get on the interstate and it felt like i was trying to pull a house. Didnt over heat but got warm. Shifts fine and nothing sounds wrong either except the vague, intermittent pauses in power. Just dragging a$$. Its 1988 f350 7.3 idi non turbo. New alternator, waterpump, ground wires, starter, batteries, reading is always 14 on mutimeter, new injectors, new fuel lines both to IP and in between injectors. Ran fine all day then the drag a$$. Tried topping off the tanks, cause they were low, just put a new fuel pump and tried both tanks so not a fuel pump issue. I have a new fuel switch module thing to put in but with both tanks acting the same i doubt its that either. Just looked at the IP and the pump side mark is to the passenger side mark meaning its slightly advanced? Oil is good and new and so is trans fluid, 5 speed manual. Air filter is decent and air flow is strong. Any ideas?
I got the 3 g upgrade finished with brand new ground wires everywhere. Grounded to the block to the frame and of course the alternator to those places as well as the battery. Used 00 guage just in case lol. Now the other day i drove around from point a to b running errands for around 5 or 6 hours. Never drove above 65 the whole time, my driving not due to power loss, then started to get on the interstate and it felt like i was trying to pull a house. Didnt over heat but got warm. Shifts fine and nothing sounds wrong either except the vague, intermittent pauses in power. Just dragging a$$. Its 1988 f350 7.3 idi non turbo. New alternator, waterpump, ground wires, starter, batteries, reading is always 14 on mutimeter, new injectors, new fuel lines both to IP and in between injectors. Ran fine all day then the drag a$$. Tried topping off the tanks, cause they were low, just put a new fuel pump and tried both tanks so not a fuel pump issue. I have a new fuel switch module thing to put in but with both tanks acting the same i doubt its that either. Just looked at the IP and the pump side mark is to the passenger side mark meaning its slightly advanced? Oil is good and new and so is trans fluid, 5 speed manual. Air filter is decent and air flow is strong. Any ideas?
Hey Dustin, welcome! I would start a new thread for your question as it may take a fair amount of troubleshooting. You might also look at the 1987+ forum as it will be more specific to your truck and motor. Side note: your name made me have to look up Breaking Bad. Different spelling though
Okay, I wanted to upgrade my charging system, not because I need all the power, but mainly because I wanted to get rid of the dangerous spade terminal connections on the 2G alternator. I checked around and also learned that since a larger alternator is not straining as hard to put out the same amount of amperage as a smaller alternator might, it works less and lasts longer. I searched the internet and found plenty of 3G alternator upgrades documented, but I was confused, especially with the wiring (even though it is simple) and did not find one for our trucks.
A couple of people were interested in a write up, so here goes!
There are countless reasons to upgrade, and I am not here to sell you on them. If you are considering this upgrade, then you most likely have already researched the 3G alternator and where they come from. I got mine out of a Taurus (hint if you do not know where they come from).
If you want to do the upgrade, you will need beside the tools:
3G alternator
Mega Amp fuse
As long of a length of the alternator harness and battery wire from the back of the alternator out of the donor car you got the alternator from (it never hurts to have more and have to cut it, than not enough).
I completed this for about $30 in parts including the alternator.
There are a few different ways to go about the upgrade, and I do not know if mine is best, but it is simple and straight forward.
So lets start. *****DISCONNECT THE BATTERY***** The first and hardest part of this was getting out the old alternator. You can see why:
I ended up having to take the old one out from the bottom (you can also see the spade connector from the factory). VERY IMPORTANT - LAY THE OLD WIRING HARNESS ASIDE AND DO NOT DISCONNECT IT FROM THE TRUCK. Tape up the exposed ends and wire tie it safely out of the way. The wires are still HOT.
Now here is the new one with the V-belt pulley on it. It will need a spacer under the pulley to keep it from rubbing the case. I used the washer that had been behind the retaining nut from the old alternator as the spacer. I slipped it over the shaft and then the pulley, and lastly the nut.
Now onto the wiring. Do not let it intimidate you. You have 3 wires, "A,S, and I" coming out of the voltage regulator. Starting with "A" (the yellow wire), it only needs an eyelet on it and then loop it to the battery post of the alternator. Next wire is "S" (the white wire). It comes out of the connector and the other end plugs into the remaining terminal of the alternator. *This is already done by the factory as can be seen when you take the plastic wiring loom off the harness.* Last wire is the "I" (the green with red stripe wire). You will need to cut the green with red stripe wire in the truck's alternator wiring harness. You then solder this wire to the same color one in the truck's harness. One of the most confusing parts of the mod is now done.
You can now bolt the alternator into the truck. There is a bushing in the upper bracket. Slide it out toward the front of the truck slightly to make it easier to put the alternator in. Once you have the alternator bolted in and belt tensioned, you are ready to finish making the connections.
Next is on to the charging wire. This comes off the rear lug of the alternator and goes to the starter solenoid. Solder a loop terminal to the Solenoid end. YOU WILL NEED CIRCUIT PROTECTION. I picked up a Mega Fuse and bolted it to the loop terminal I soldered on to the solenoid end. I simply then bolted the the other end of the Mega Fuse to the battery side of the starter solenoid. I know they make fuse holders which look better and may or may not be safer, but I could not find them, and I taped over the end not connected to the solenoid.
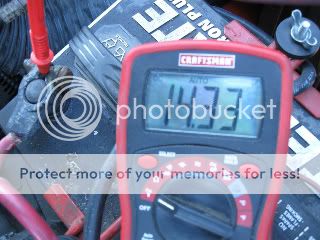
Reconnect the battery and try out the truck. If there is a problem, TURN IT OFF and re check the wiring and connections. Mine put out 14.33 volts at idle with everything on.
Good luck with this mod and please feel free to let me know if I forgot anything or should do anything different or if something could be done better.
Hello I'm. Currently doing a explorer 5.0l engine swap into a 1979 f100. My wiring has been taken from previous owner, I'm curious if the explorer alternator will work? I'm trying to keep the serpentine belt setup. can I wire it up as you have shown I'm pretty sure that it's a 3g alternator. Any help would be greatly appreciated. ty.
Hello I'm. Currently doing a explorer 5.0l engine swap into a 1979 f100. My wiring has been taken from previous owner, I'm curious if the explorer alternator will work? I'm trying to keep the serpentine belt setup. can I wire it up as you have shown I'm pretty sure that it's a 3g alternator. Any help would be greatly appreciated. ty.
What wiring are you using for the swap? Are you keeping the explorer wiring and the fuel injection?
I don't like one wire alternators for the simple fact that if your engine doesn't hit the right rpm to self excite then you are not charging that whole time. ive seen some one wire alternators have to hit 2,000 engine rpm before charging. All my carbed engines I have set for a 1,500 rpm cold idle as I think 2,000 rpm is way too high.
When I do my 3G alternator swap I am going to wire it in but I am looking at ways to wire it in without actually cutting my OE harness. I seen someone state that you can buy pig tail that will plug into the OE harness to make your connections. That way if I have to swap back to 1G if I cant source a 3G at a local store I don't have to do any wiring. But haven't found that pig tail though so still digging in that aspect.
For the ammeter I still have mine but plan on mailing it off later when I get into the interior to have it converted to a volt gauge and I will be running a secondary wire from alternator to the solenoid in 12ga which should make an effective gauge size of 10 ga with the OE charge wire and a supplemental wire. Should be good for a 95A 3G alternator.


 07-04-2018, 05:24 PM