Down and Dirty on D3VE head porting
#1
 04-08-2008, 06:34 PM

Down and Dirty on D3VE head porting
First off, let me say that I am in no way an "Expert" on head porting, not am I a machinist or head porter by trade. I just wanted to let everyone know what all is involved in helping your stock heads "breath" a little better. And I know that my picture suck, but you get the idea! I will start with the heads removed, and all the valves, springs, seals, rocker arms/pedistals removed, in other words a bare set of heads.
Now, to get started with the tech:
I searched many different web sites to get the information that I used, but mostly I paid the $25 and joined Scott Johnsons Re-In-Car-nation site (Re-In-"Car"-nation High Performance and Automotive Repair/index) as he is been around a while, and in talking with many of the big engine builders in the Ford world, is reputed as the best Iron Head porter in all of North America, so that is saying something!
After spending many hours on the site, I gatherd the tools that would do the job, and those are:
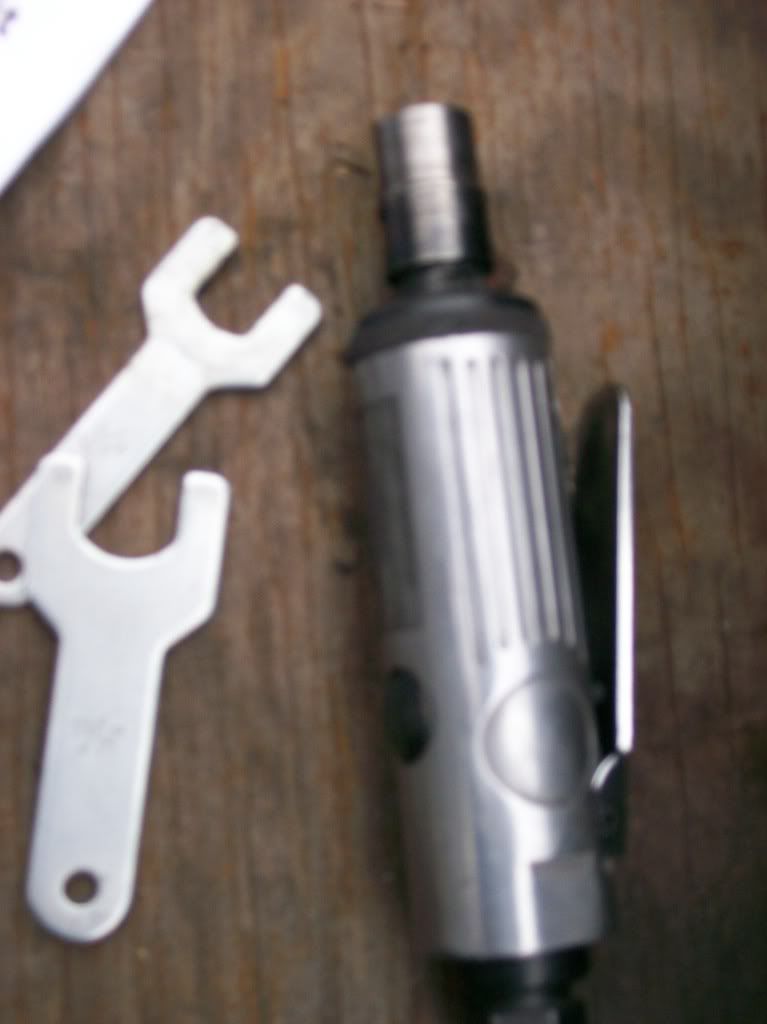
An air grinder and decent air compressor:
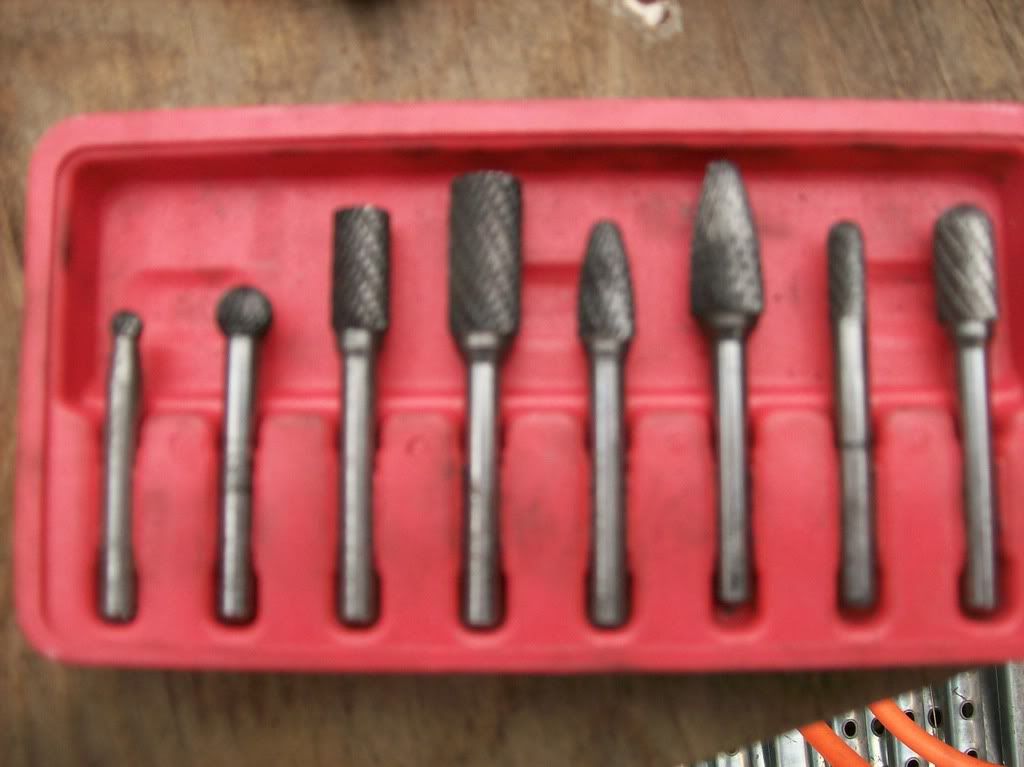
Carbide burrs (I got the kit from Eastwood.com):
Cone and cylinder sanding drums (also from Eastwood.com):
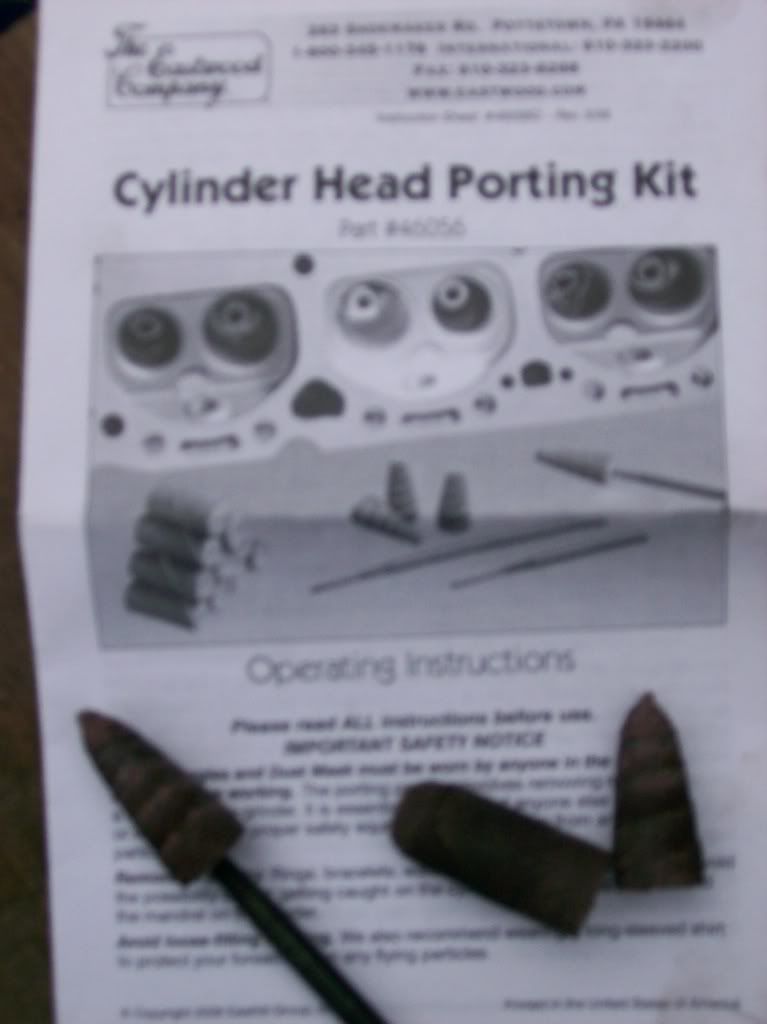
And lastly, a good stone bit:

Now that you have the tools, you need to start by cleaning your heads. I just used engine degreaser, then sprayed it again with brake cleaner to get what grease and oil was left. Your local machine shop will hot tank them for about $30-50, and is probably the best way to start out. I am taking mine in later for deck milling and valves, so I just cleaned them myself for now.
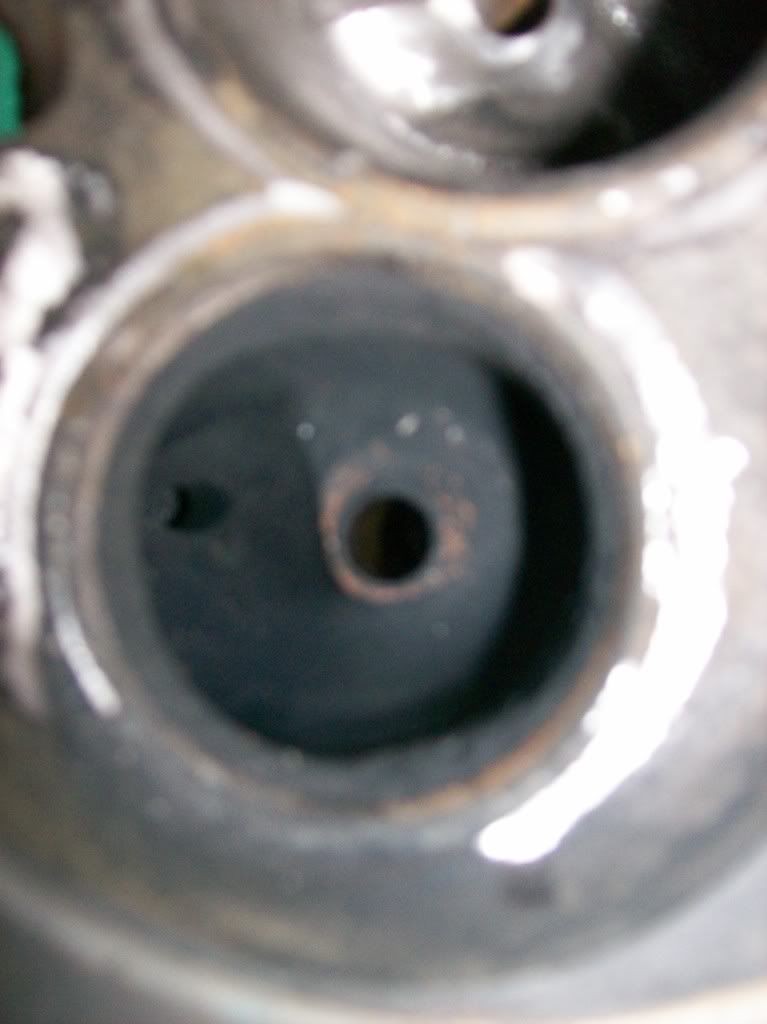
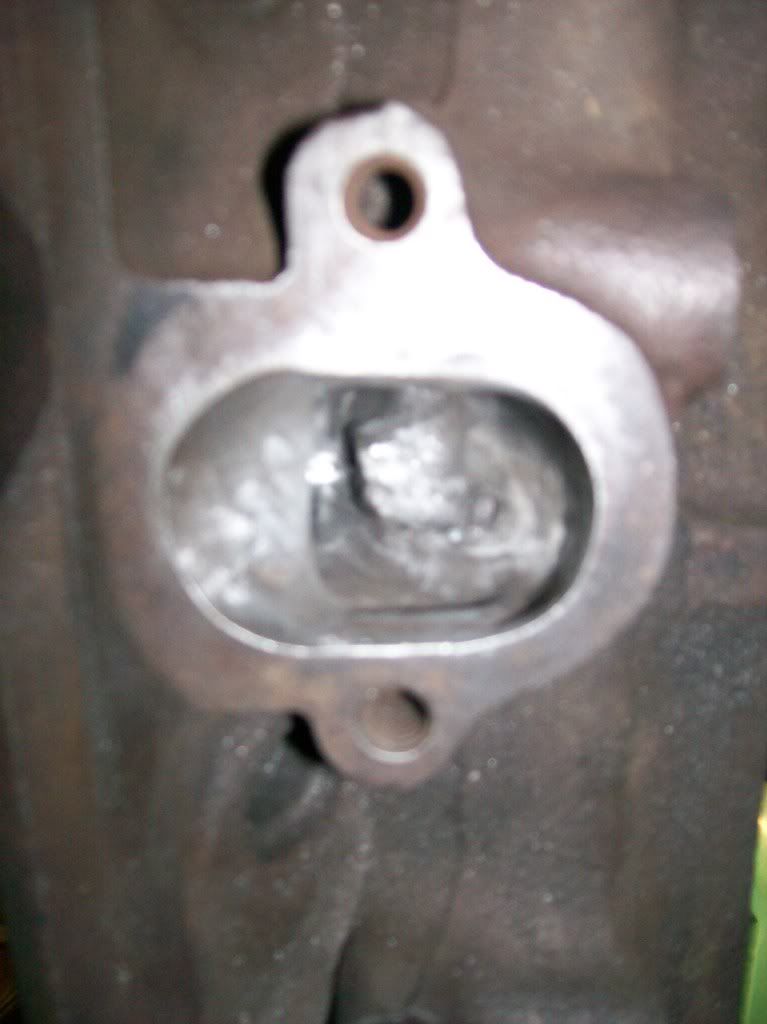
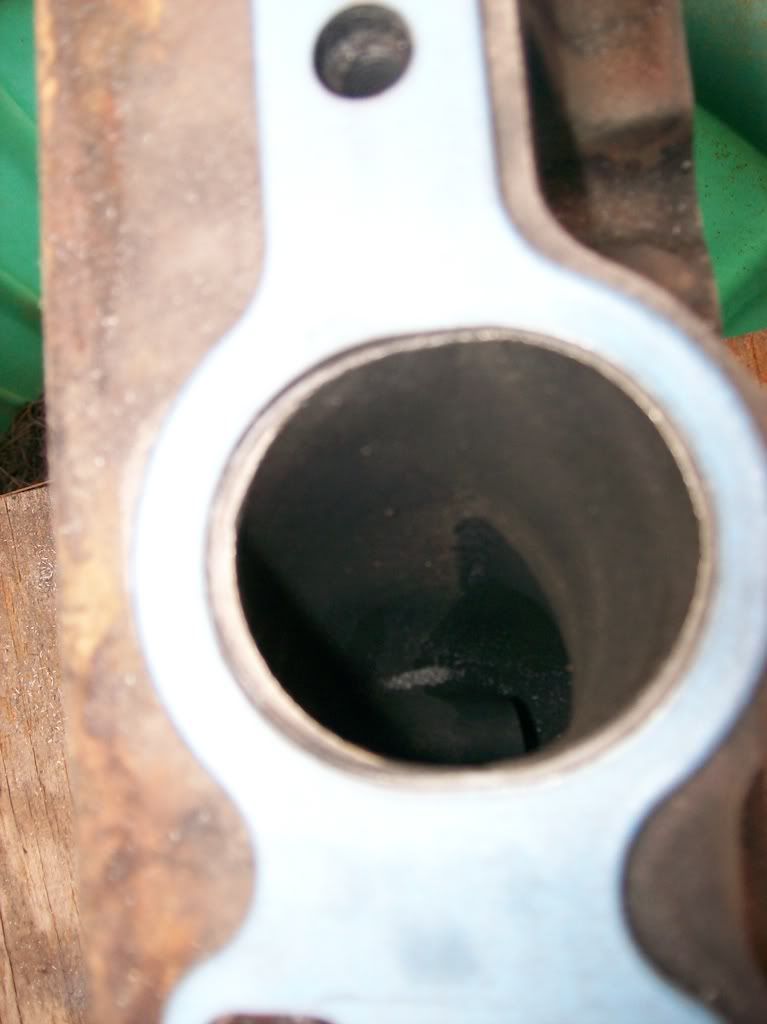
One of the 1st things after you get to this point, is to plug the thermactor hole. It is the hole located in the exhaust port, next to the valve guide. It looks like this:
Following Scotty J's site, to plug this, all you need is a letter "I" drill bit (try to get a good quality, hardend bit as the cast iron is a bit tough on the cheapy bits!), a 5/16" NF tap, and 6 1" long 5/16" NF allen head hardened set screws. For some reason (you'll see later) I shoulhd have gotten 1.5" set screws, but for now it will work. Later on, I'll take the plugs out and re-do it, right now I am just pressed for time to get the motor together.
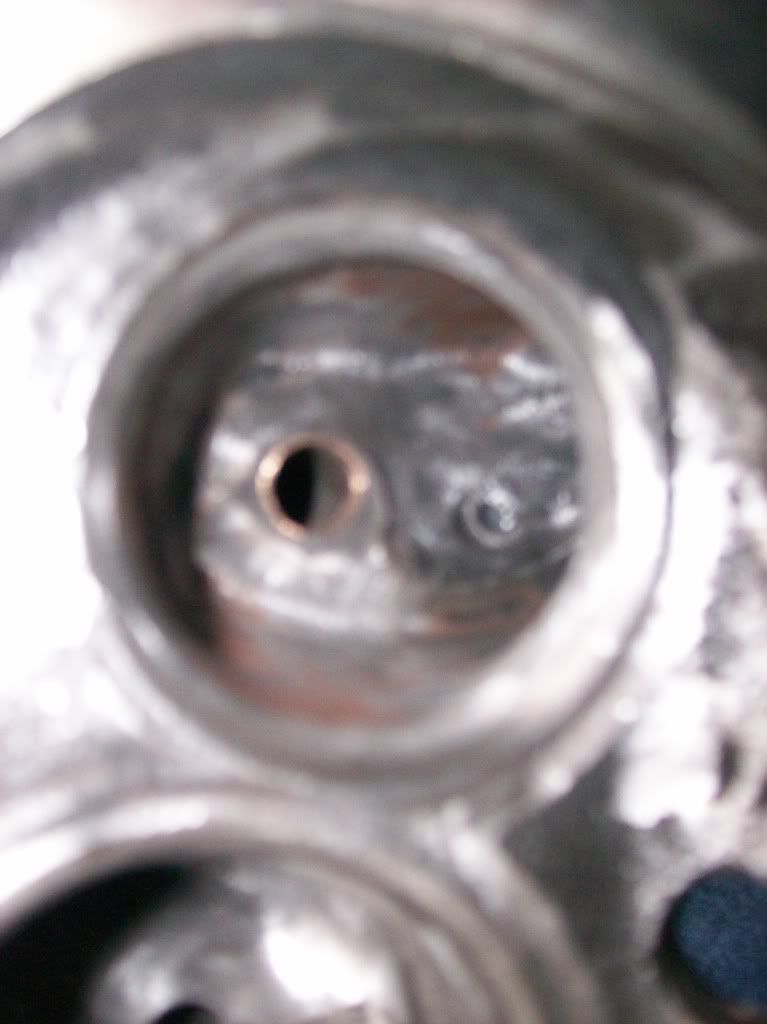
Drill the thermactor holes out with the letter "I" bit all the way to the roof, go slow, and you will feel it go through and touch the roof. Tap the hole with the tap, again going slow as it will really suck if you break that tap in the hole! Now, take your set screw, and notch the top of it (opposite end of the allen head!) with a groove. This will help the screw "bite" into the roof of the hole when it is intalled. Using RED Locktite, intall the screws, making sure they are fully seated and tight! This is where the stone comes in, when you port out the thermactor bump, use the stone on the screw, as that hardend screw will tear up your carbide burrs rather quickly. Like I said before, I should have used longer screws as it looks like the previous owner completely removed the bump with out plugging the holes, so when I put the screw in, I still had some of the allen head still showing. A truly ported to max effort will remove this all together, I'm not going that far with these heads. This is what it should sort of look like when it is plugged and ground down:
Again, since I had not real "bump to work with, I sort of followed what was done and made my own vane to direct exhaust flow and create some sort of swirl effect.
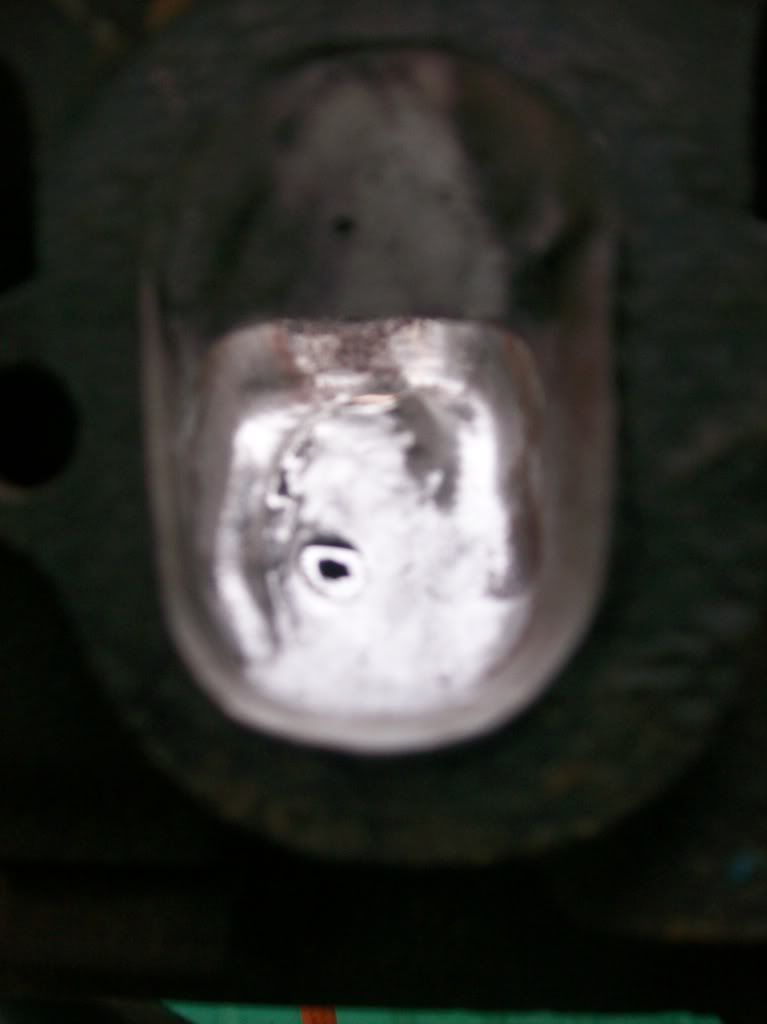
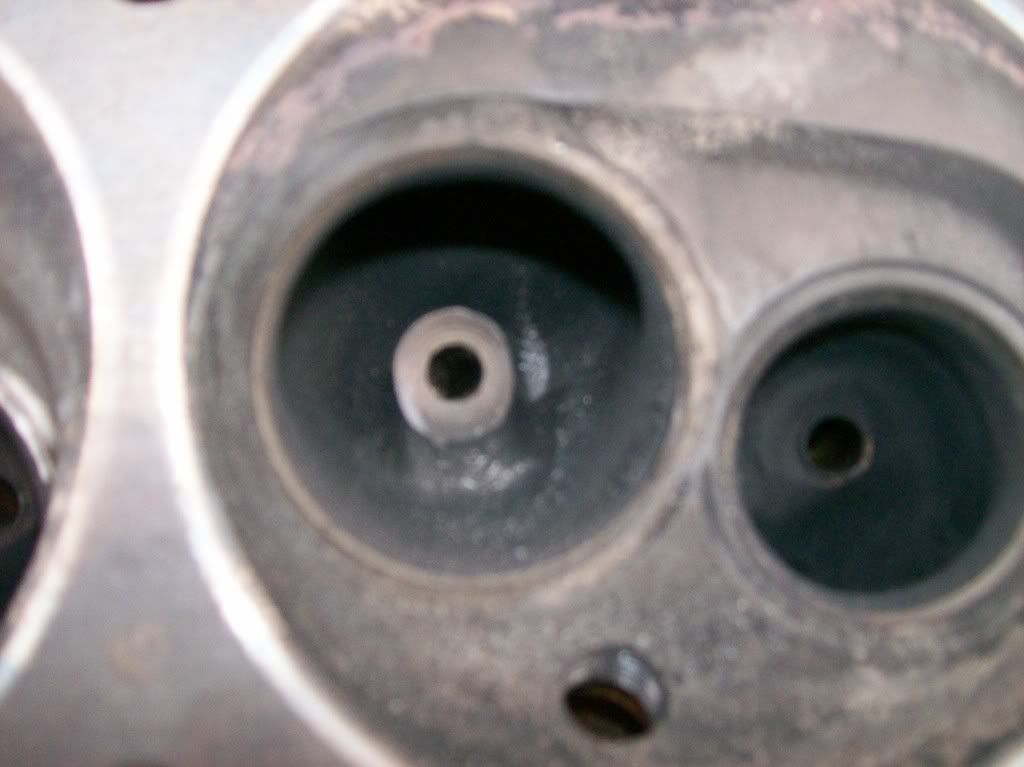
Now the boss is plugged, you can start using your burrs and sanding drums to do a bowl blend. This is where you go just inside of the bowl above where the valve seats, and blend in the cutter ridges to smooth out flow. This is my finished bowl, granted it's not a mirror finish, but it is rather smooth:
From there, you can touch up the short turn to smooth it out, but on a basic 429/460 motor, it's not all the necessary, just follow along with what Scot recommends. When it comes to the point of stroking and boring the motor, look to Scott to give you a max flow effort, or get a set of heads already done!
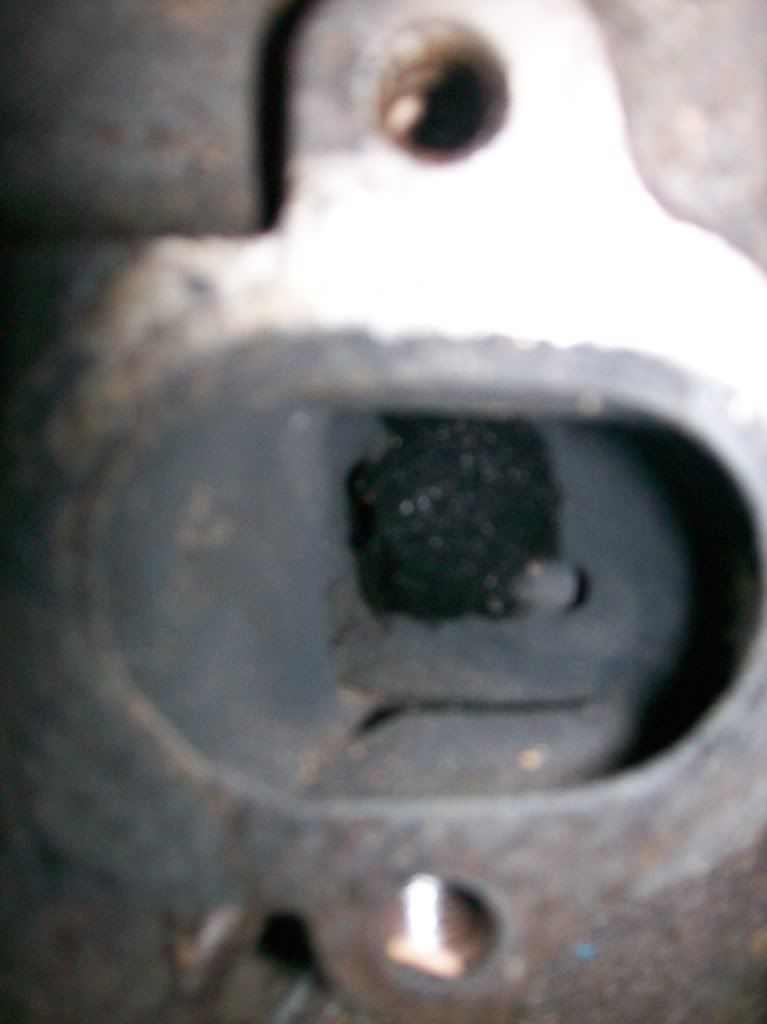
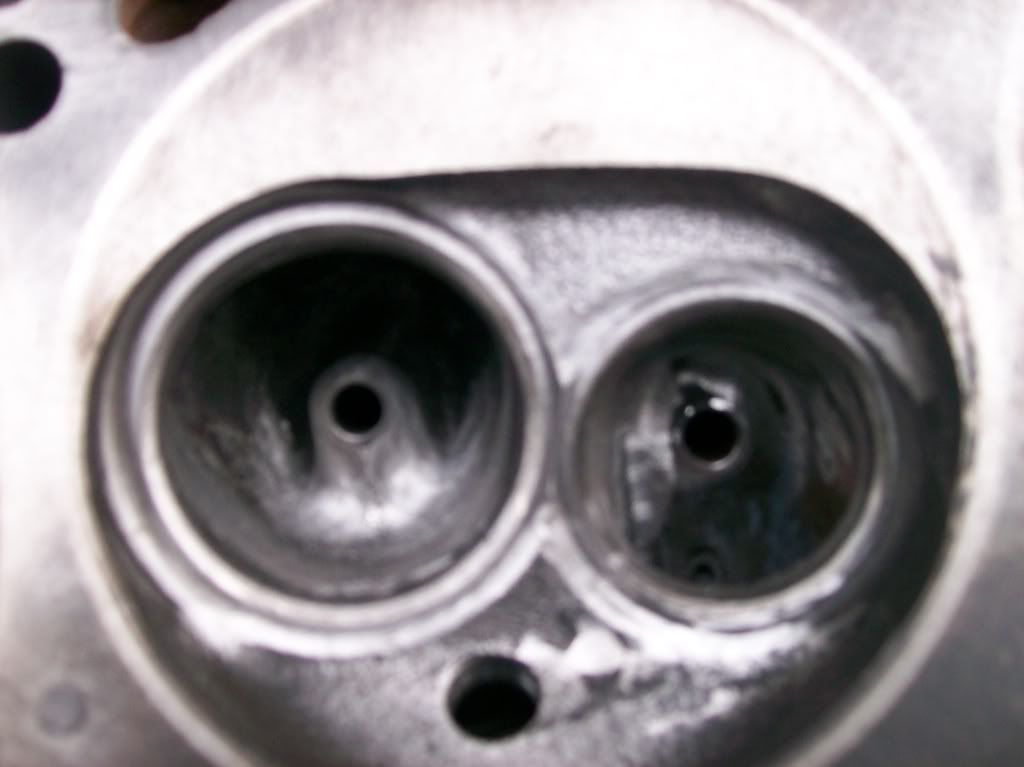
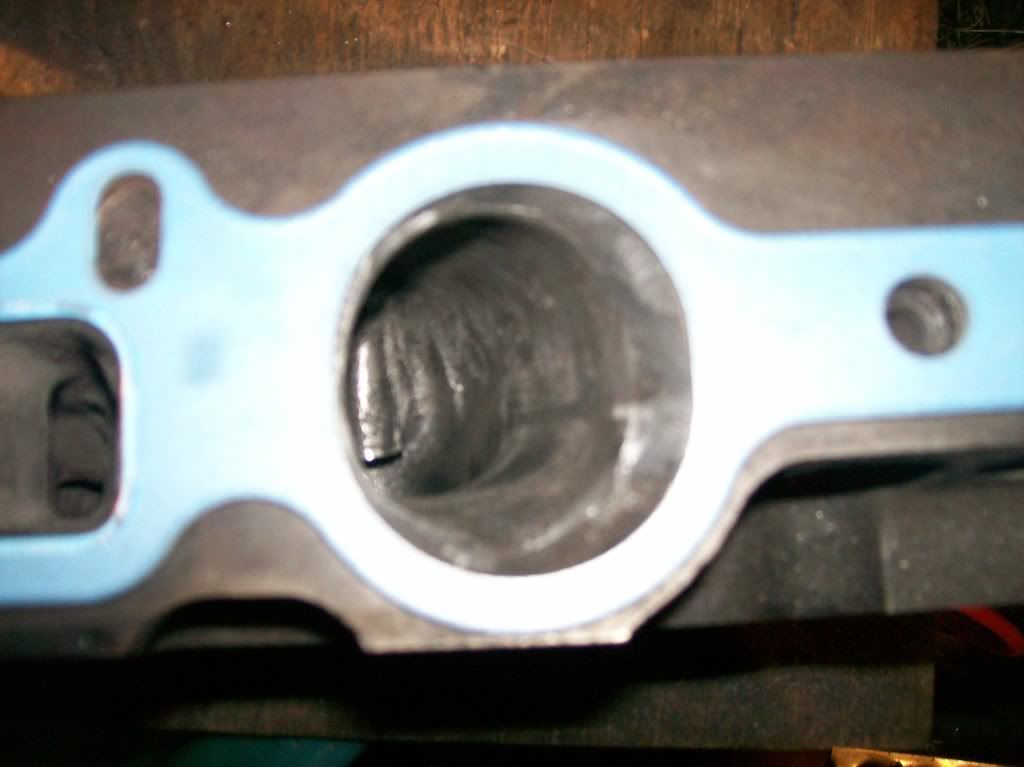
Lastly, you need to follow up and get your new exhaust gasket, lay it out on the head how it will be installed, and scribe a line into the head showing the outline of where the gasket lays. I use a pencil, as I can see the mark and follow it along rather nicely. Also, remove the bolt bump at the port and clean up the opening. It will look like this at 1st:
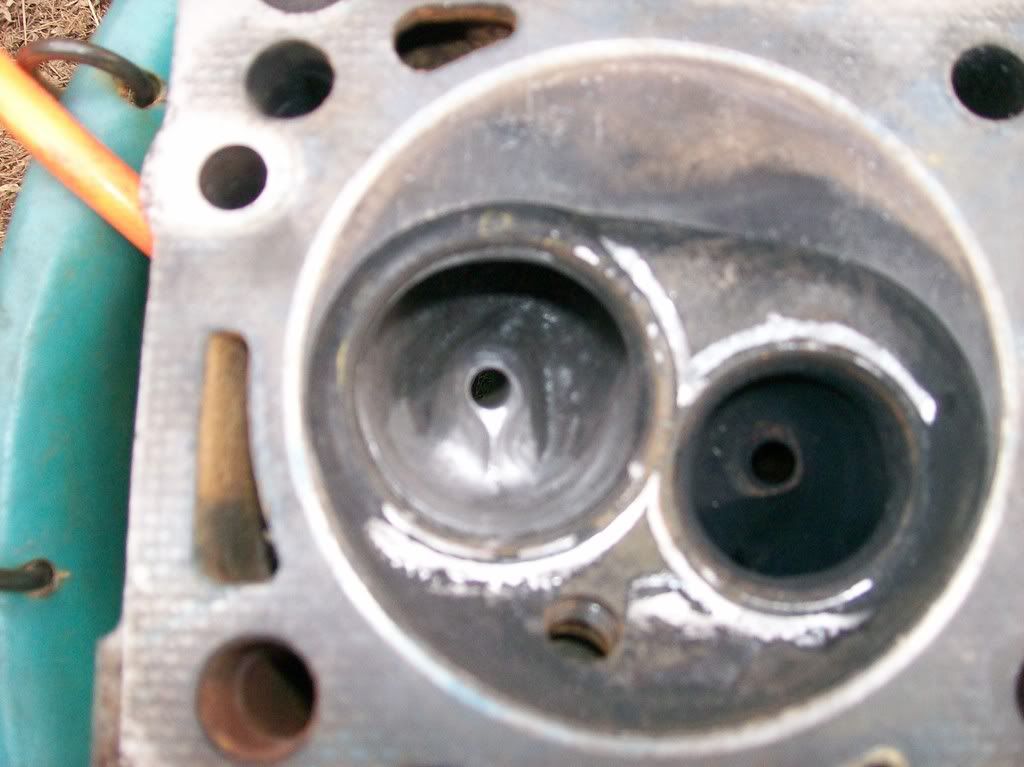
And this when cleaned up:
If you look close, you will see that it is more even all the way around and the roof has been slightly raised. For my 2 1/8" primary headers that I will be running, I am going to have to go back and do more work on the ports, I'll post that when I get all the parts.
Now, the best bang for the buck after this step is to get a set of larger exhaust valves as emmissions caused Ford to have to basically choke the motor with smaller exhaust valves, and this goes for ALL production/non race intended street use Ford motors made after 1972. For the D3 heads, they have 1.68 exhaust valves stock, the preferred step up is to the CJ size of 1.73, but you will need to revisit the bowl and blend it/ open it up to handle the increased flow of that size valve.
Oh, I almost forgot, in the combustion chamber (you know where the fire is made!), the valves are cut into the casting, to help smooth out the flow some, so that it is not having to make a suddend turn after it passed the valve head, lay back the ridge some, taking care to not nick the seat. It looks like this stock:
And like this after you lay them back:
I also removed some casting flash in the chamber while I was at it.
That is for this installment. Next I'll go over some stuff for the intake side.
Now, to get started with the tech:
I searched many different web sites to get the information that I used, but mostly I paid the $25 and joined Scott Johnsons Re-In-Car-nation site (Re-In-"Car"-nation High Performance and Automotive Repair/index) as he is been around a while, and in talking with many of the big engine builders in the Ford world, is reputed as the best Iron Head porter in all of North America, so that is saying something!
After spending many hours on the site, I gatherd the tools that would do the job, and those are:
An air grinder and decent air compressor:
Carbide burrs (I got the kit from Eastwood.com):
Cone and cylinder sanding drums (also from Eastwood.com):
And lastly, a good stone bit:
Now that you have the tools, you need to start by cleaning your heads. I just used engine degreaser, then sprayed it again with brake cleaner to get what grease and oil was left. Your local machine shop will hot tank them for about $30-50, and is probably the best way to start out. I am taking mine in later for deck milling and valves, so I just cleaned them myself for now.
One of the 1st things after you get to this point, is to plug the thermactor hole. It is the hole located in the exhaust port, next to the valve guide. It looks like this:
Following Scotty J's site, to plug this, all you need is a letter "I" drill bit (try to get a good quality, hardend bit as the cast iron is a bit tough on the cheapy bits!), a 5/16" NF tap, and 6 1" long 5/16" NF allen head hardened set screws. For some reason (you'll see later) I shoulhd have gotten 1.5" set screws, but for now it will work. Later on, I'll take the plugs out and re-do it, right now I am just pressed for time to get the motor together.
Drill the thermactor holes out with the letter "I" bit all the way to the roof, go slow, and you will feel it go through and touch the roof. Tap the hole with the tap, again going slow as it will really suck if you break that tap in the hole! Now, take your set screw, and notch the top of it (opposite end of the allen head!) with a groove. This will help the screw "bite" into the roof of the hole when it is intalled. Using RED Locktite, intall the screws, making sure they are fully seated and tight! This is where the stone comes in, when you port out the thermactor bump, use the stone on the screw, as that hardend screw will tear up your carbide burrs rather quickly. Like I said before, I should have used longer screws as it looks like the previous owner completely removed the bump with out plugging the holes, so when I put the screw in, I still had some of the allen head still showing. A truly ported to max effort will remove this all together, I'm not going that far with these heads. This is what it should sort of look like when it is plugged and ground down:
Again, since I had not real "bump to work with, I sort of followed what was done and made my own vane to direct exhaust flow and create some sort of swirl effect.
Now the boss is plugged, you can start using your burrs and sanding drums to do a bowl blend. This is where you go just inside of the bowl above where the valve seats, and blend in the cutter ridges to smooth out flow. This is my finished bowl, granted it's not a mirror finish, but it is rather smooth:
From there, you can touch up the short turn to smooth it out, but on a basic 429/460 motor, it's not all the necessary, just follow along with what Scot recommends. When it comes to the point of stroking and boring the motor, look to Scott to give you a max flow effort, or get a set of heads already done!
Lastly, you need to follow up and get your new exhaust gasket, lay it out on the head how it will be installed, and scribe a line into the head showing the outline of where the gasket lays. I use a pencil, as I can see the mark and follow it along rather nicely. Also, remove the bolt bump at the port and clean up the opening. It will look like this at 1st:
And this when cleaned up:
If you look close, you will see that it is more even all the way around and the roof has been slightly raised. For my 2 1/8" primary headers that I will be running, I am going to have to go back and do more work on the ports, I'll post that when I get all the parts.
Now, the best bang for the buck after this step is to get a set of larger exhaust valves as emmissions caused Ford to have to basically choke the motor with smaller exhaust valves, and this goes for ALL production/non race intended street use Ford motors made after 1972. For the D3 heads, they have 1.68 exhaust valves stock, the preferred step up is to the CJ size of 1.73, but you will need to revisit the bowl and blend it/ open it up to handle the increased flow of that size valve.
Oh, I almost forgot, in the combustion chamber (you know where the fire is made!), the valves are cut into the casting, to help smooth out the flow some, so that it is not having to make a suddend turn after it passed the valve head, lay back the ridge some, taking care to not nick the seat. It looks like this stock:
And like this after you lay them back:
I also removed some casting flash in the chamber while I was at it.
That is for this installment. Next I'll go over some stuff for the intake side.
Last edited by kjett; 04-08-2008 at 06:36 PM.
#2
04-08-2008, 06:56 PM
Round 2, the intake side!
Even though the most effective way to enhance your stock heads is to clean up the exhaust side, don't forget about the intake side either! Just simply removing the casting flash and cleaning up the bowl and around the intake valve boss will help out alot. Again, turning to Scotty J's site, we start with this (again, I know my pics suck, but pay the $$ and you can see his clear pics!):
ANd after cleaning up the bowl and creating a vane on the back side of the boss and smoothing it out some, it looks like this:
Now, you need to do some short turn work, but that is best described by Scott, so, for that you will have to visit his site.
Working on, port matching the intake, gasket and port. I use the FelPro gaskets, and matched out to that, so for reference, here is what the port looks like with the gasket, prior to matching:
There is a lost of dead space that is left to cause unwanted turbulence in the intake stream, so by port matching both sides to the gasket, you smooth out the flow, and allow more air, and a denser charge to get into the motor, and with your new freeer flowing exhaust ports you can get it out faster too!! Here is what the port looks like after being gasket matched:
You can see how it sort of "funnels" out to meet up with the gasket. The intake does the same, so that there is no sharp corners in the intake or exhast streams.
Again, follow through, and clean all of the ca****ng flash and any thing that would cause a lot of turbulence in the flow. Care also needs to be taken here, because the exhasut side can be polished to a mirror finish to reduce any residue from sticking to the walls, but the intake side needs to have some surface roughness will help to keep fuel in suspension. Especially on the passage floor.
Again, I don't claim to be a machinist or professional head porter. I'm just a guy trying to make a little extra HP oh a small budget, so I hope this helps out anyone that might be on the fence about porting their own heads. Get off the post and do it, it will be well worth it in the end!!
If this thread helps anyone out, make sure you hit the little scales in the corner, and give me some rep!!
#3
04-08-2008, 07:13 PM
Post Fiend
Join Date: May 2004
Location: St George, SC I-95
Posts: 5,277
Likes: 0
Received 0 Likes
on
0 Posts

#5
04-08-2008, 07:19 PM
Thanks! Oh, not planning on keeping up with your TFS at the moment. Next year will be a different story once the yget decked, larger intake and exhaust valves, and I open them up MORE for max flow! Then we'll see what happens in the ranger! Ah, who amd Itrying to kid, I'll probably look for the TFS or the Kasse heads and be done with it.....
#6
04-08-2008, 07:32 PM
Post Fiend
Join Date: May 2004
Location: St George, SC I-95
Posts: 5,277
Likes: 0
Received 0 Likes
on
0 Posts
#7
04-08-2008, 07:33 PM
Post Fiend
Join Date: May 2004
Location: St George, SC I-95
Posts: 5,277
Likes: 0
Received 0 Likes
on
0 Posts
Trending Topics

#10
04-08-2008, 07:38 PM
Speaking of the new hemi heads! One of the guys that I will be running against this year is a 6000 lb 1979 F-250 with a full Kasse built 601ci, 1200 hp motor, that will be running a 500 hp shot of NOS during the X and XX classes. During a test and tune they had, he launched it at 3600 rpm (stall is a 5000!) and on foot brake (didn't even use the trans brake!). The thing launched so hard the front tires must have come about 2 feet off the ground. And here I am with my little 2800 lb truck and only 400 or so horses. We'll see how it goes!
#11
04-08-2008, 07:42 PM
 ). It took me right around 40 hours to do all of it, but if the heads had been through a hot tank 1st, I'm sure I could have dropped that time a bit as I had to clean as I went. Keep in mind that 40 hours is quite a while when I only got to work on them at most 2-3 hours a night.
#12
04-08-2008, 07:42 PM
Post Fiend
Join Date: May 2004
Location: St George, SC I-95
Posts: 5,277
Likes: 0
Received 0 Likes
on
0 Posts
#13
04-08-2008, 07:48 PM
I was leaning a little on the conservitive side, but I think you hp guesstimate will be right, especially with the help of the cam Randy is grinding for me! Actually, he was thinking closer to 550-575 with the whole combinitation going and if I can get it jetted and tuned right.
Last edited by kjett; 04-08-2008 at 07:51 PM.
#14
04-08-2008, 07:51 PM
Post Fiend
Join Date: May 2004
Location: St George, SC I-95
Posts: 5,277
Likes: 0
Received 0 Likes
on
0 Posts
#15
04-08-2008, 08:01 PM