Curing the dummy oil pressure gauge (3.0l)
#1
 01-09-2008, 12:33 AM

Curing the dummy oil pressure gauge (3.0l)
One of the things I got done before the Christmas trip was to fix the Ford "dummy oil gauge".
As detailed on this site and many others, the oil pressure "gauge" on many Fords is a gauge all right, but is rigged up to only indicate mid-scale. The pressure sensing device is a typical snap-switch, and when pressure comes up to a minimum level, the switch is connected to the gauge via a 20-ohm resistor. So the gauge can only indicate two positions: OFF and mid-scale.
I wanted to change that, and since the path to doing this was so well-beaten . . .
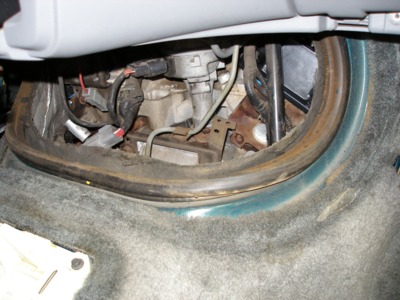
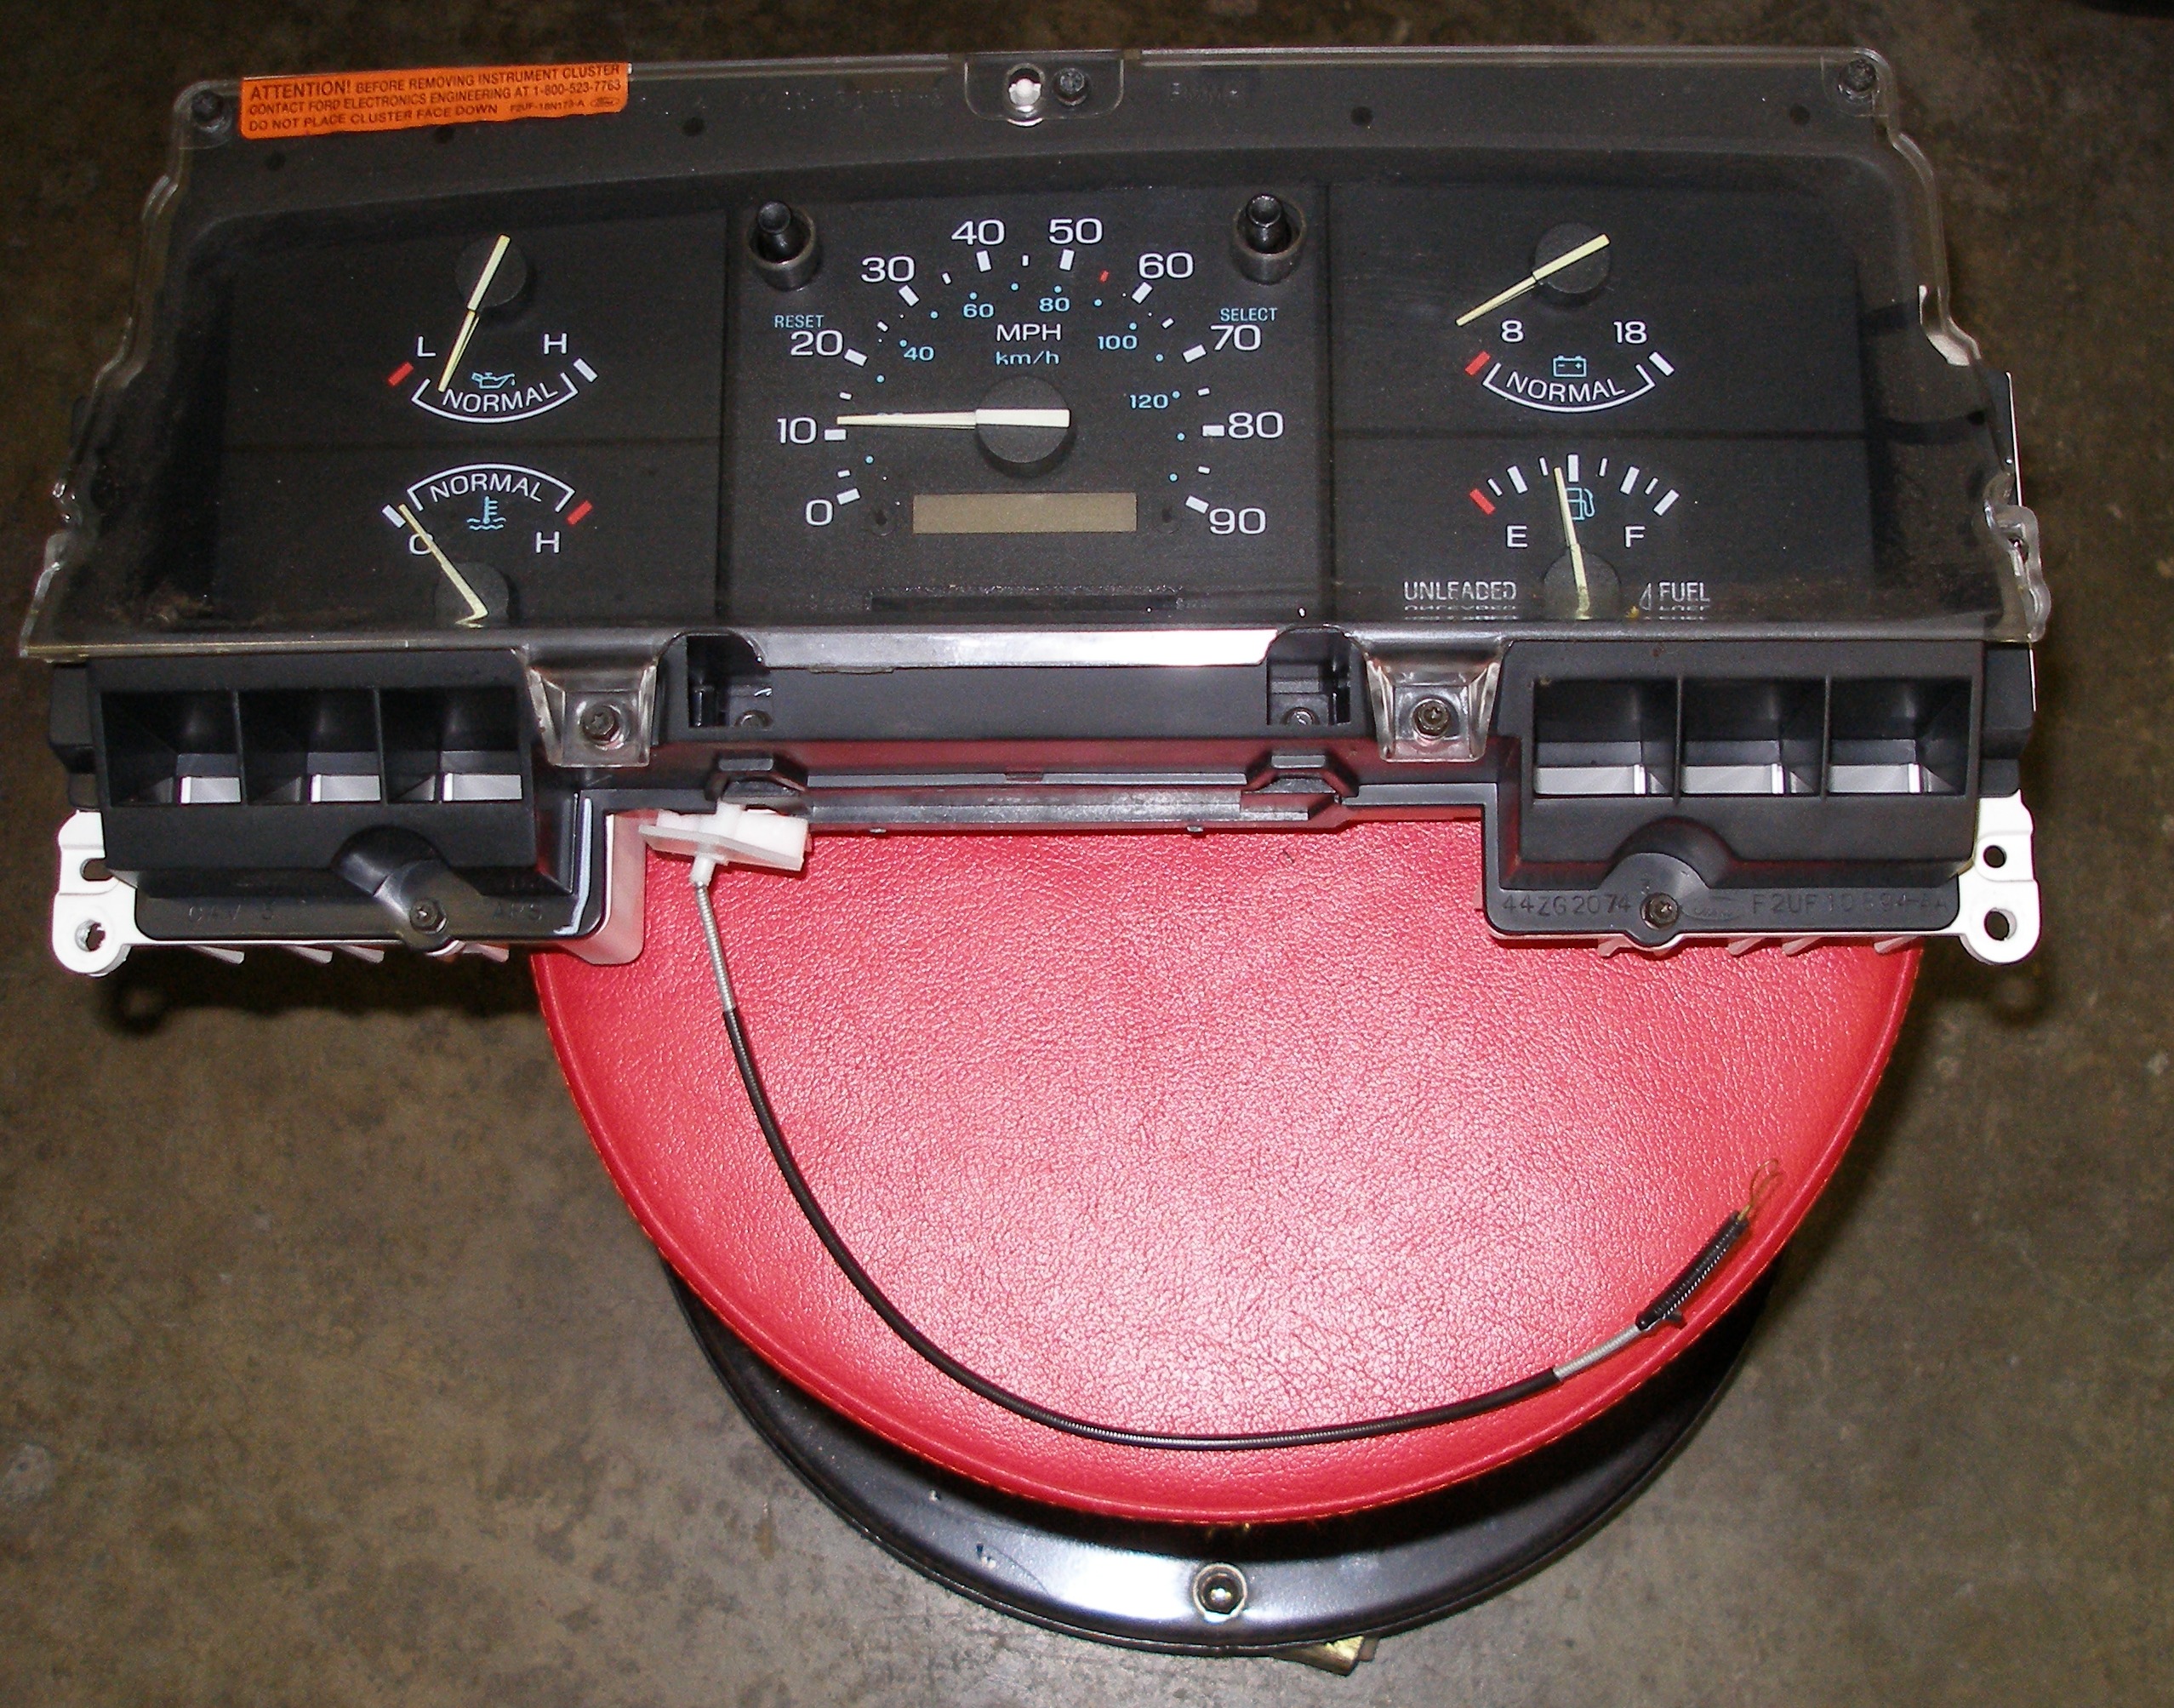
On my 1993 Aero (3.0l), removing the instrument cluster is more difficult than it first appears. Because the PRNDL is mechanically connected to the column shifter via a string cable, you have to remove the column lower plastic to disconnect it. Also the radio surround. Lots and lots of screws, many more than you'd think. And disconnecting the harnesses from the cluster is curse-worthy, too.
(click on any image for larger)
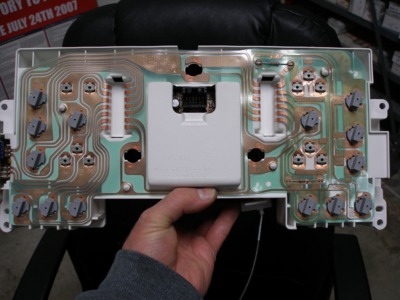
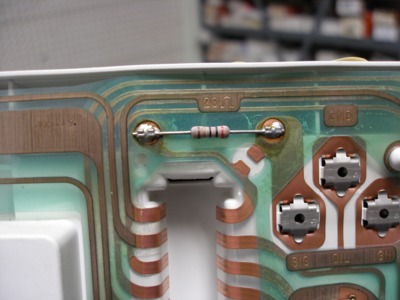
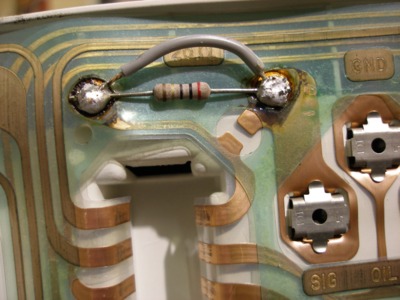
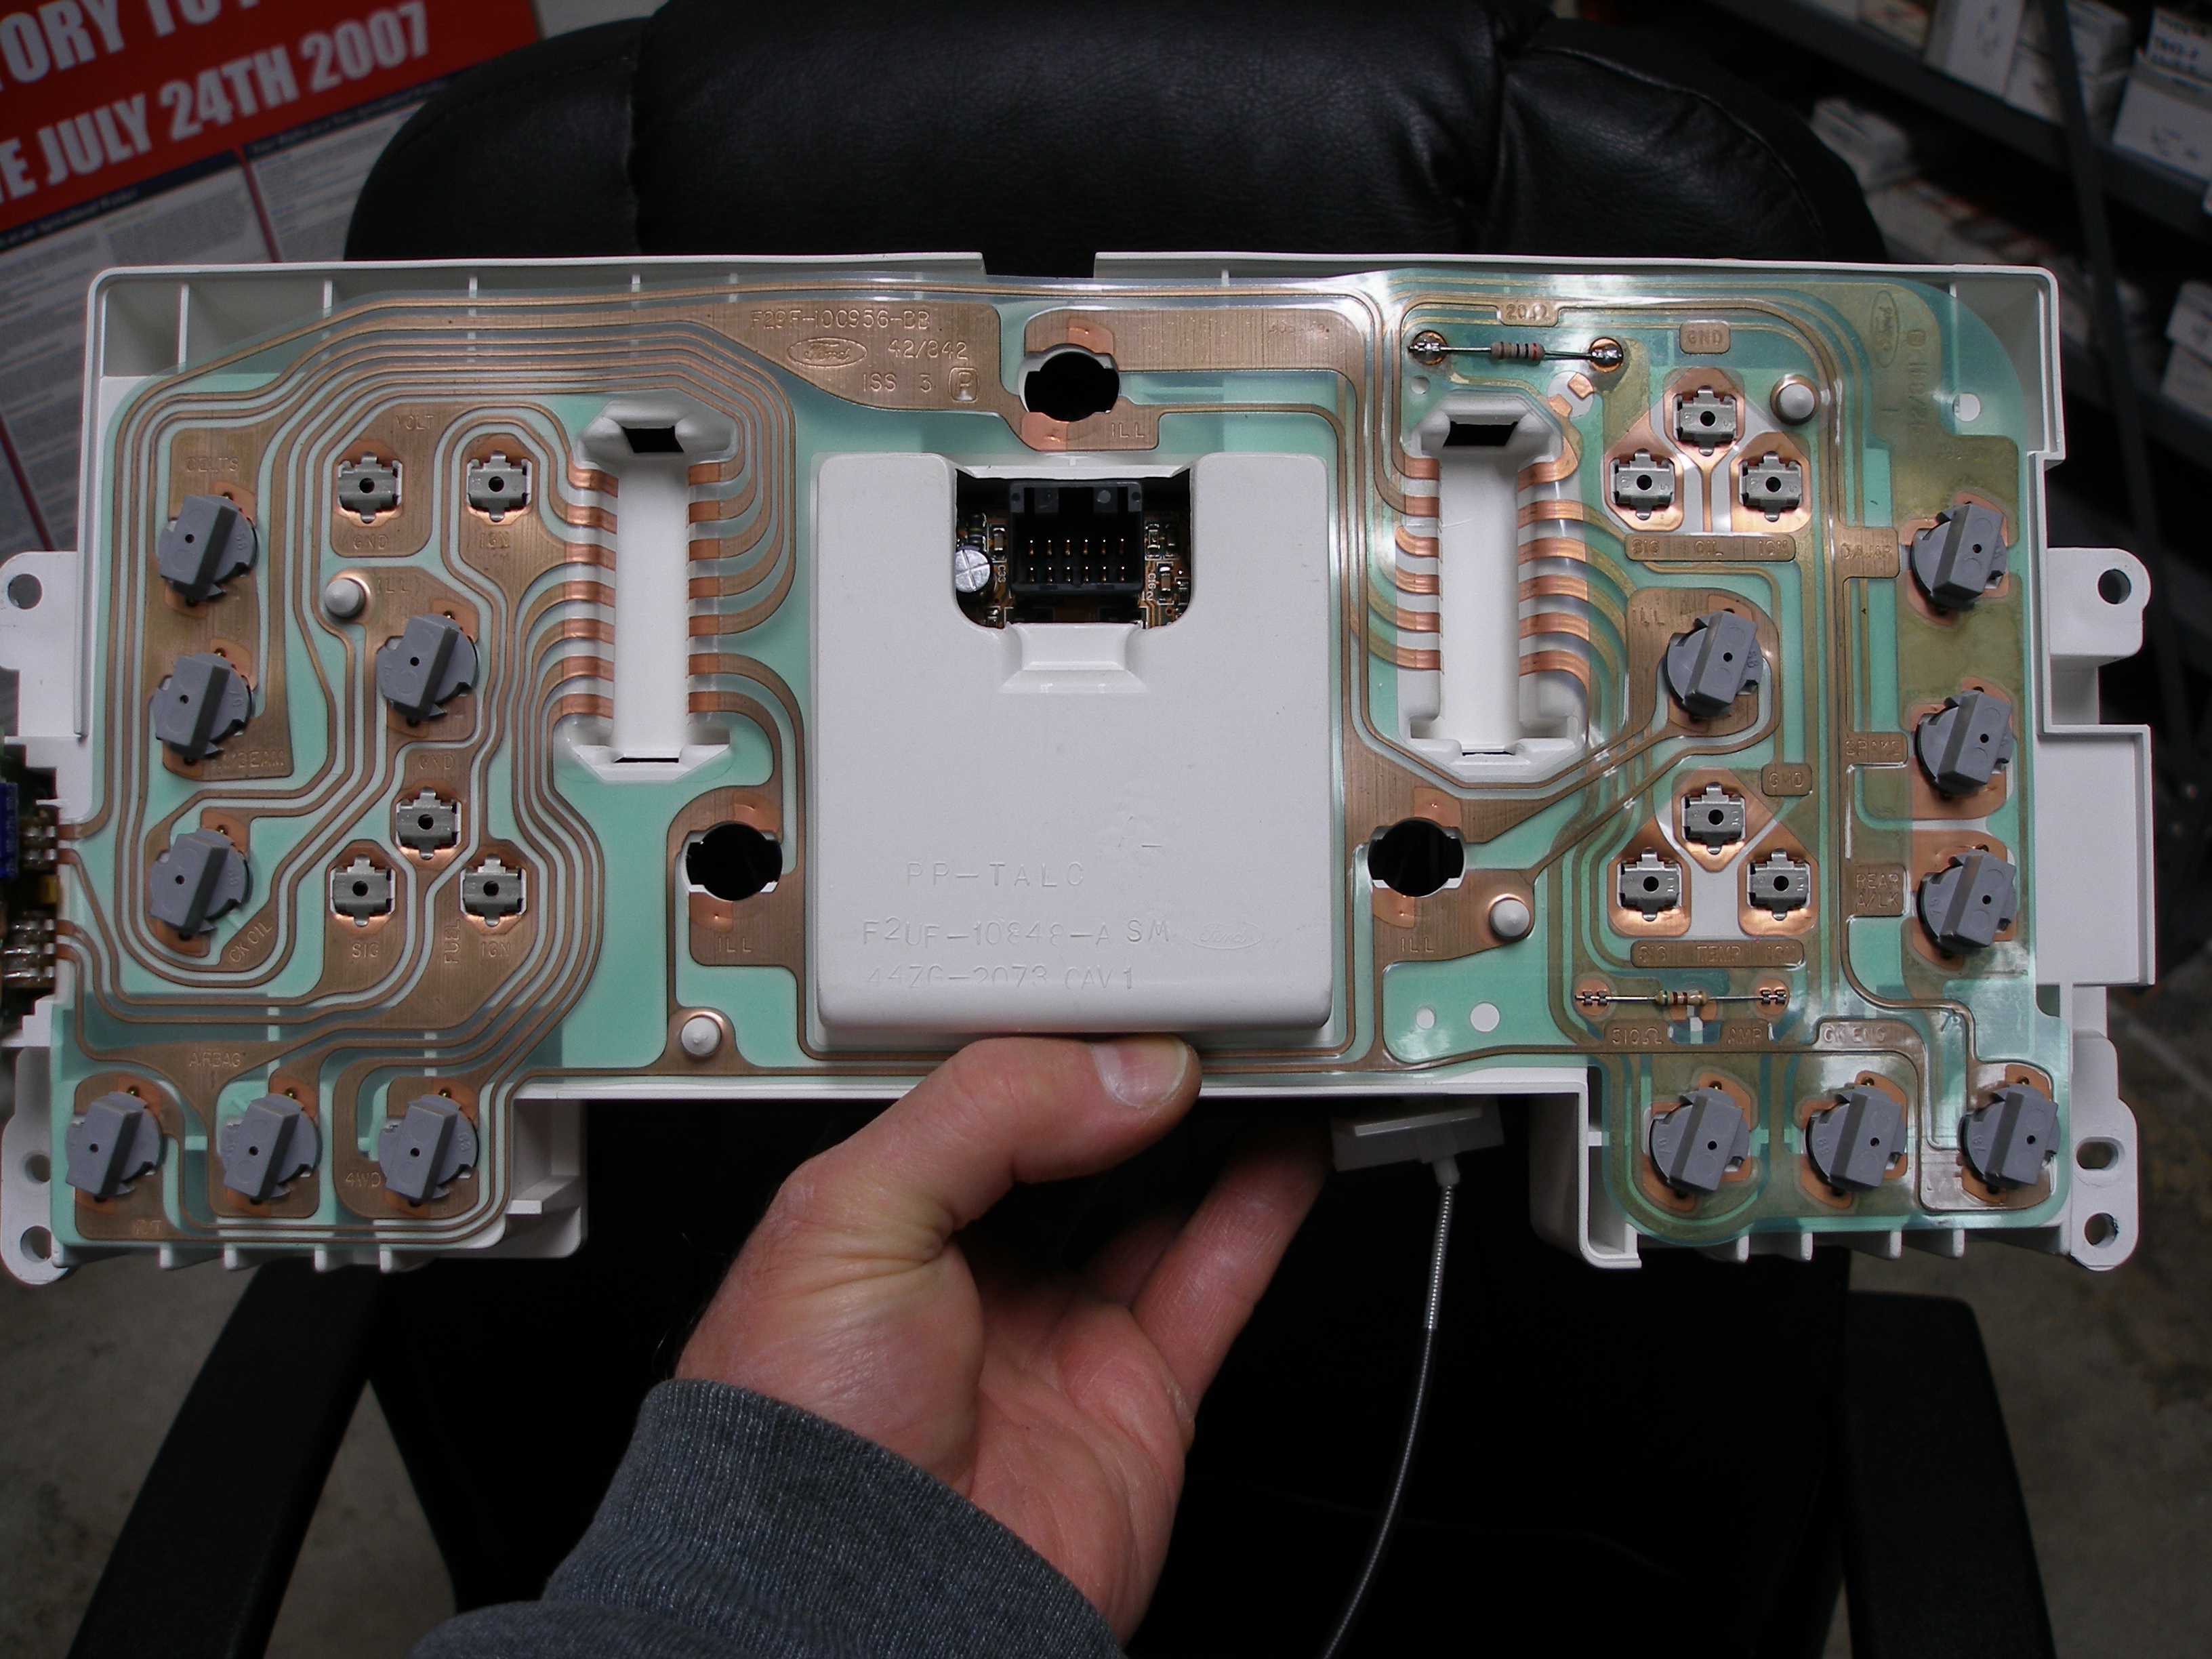
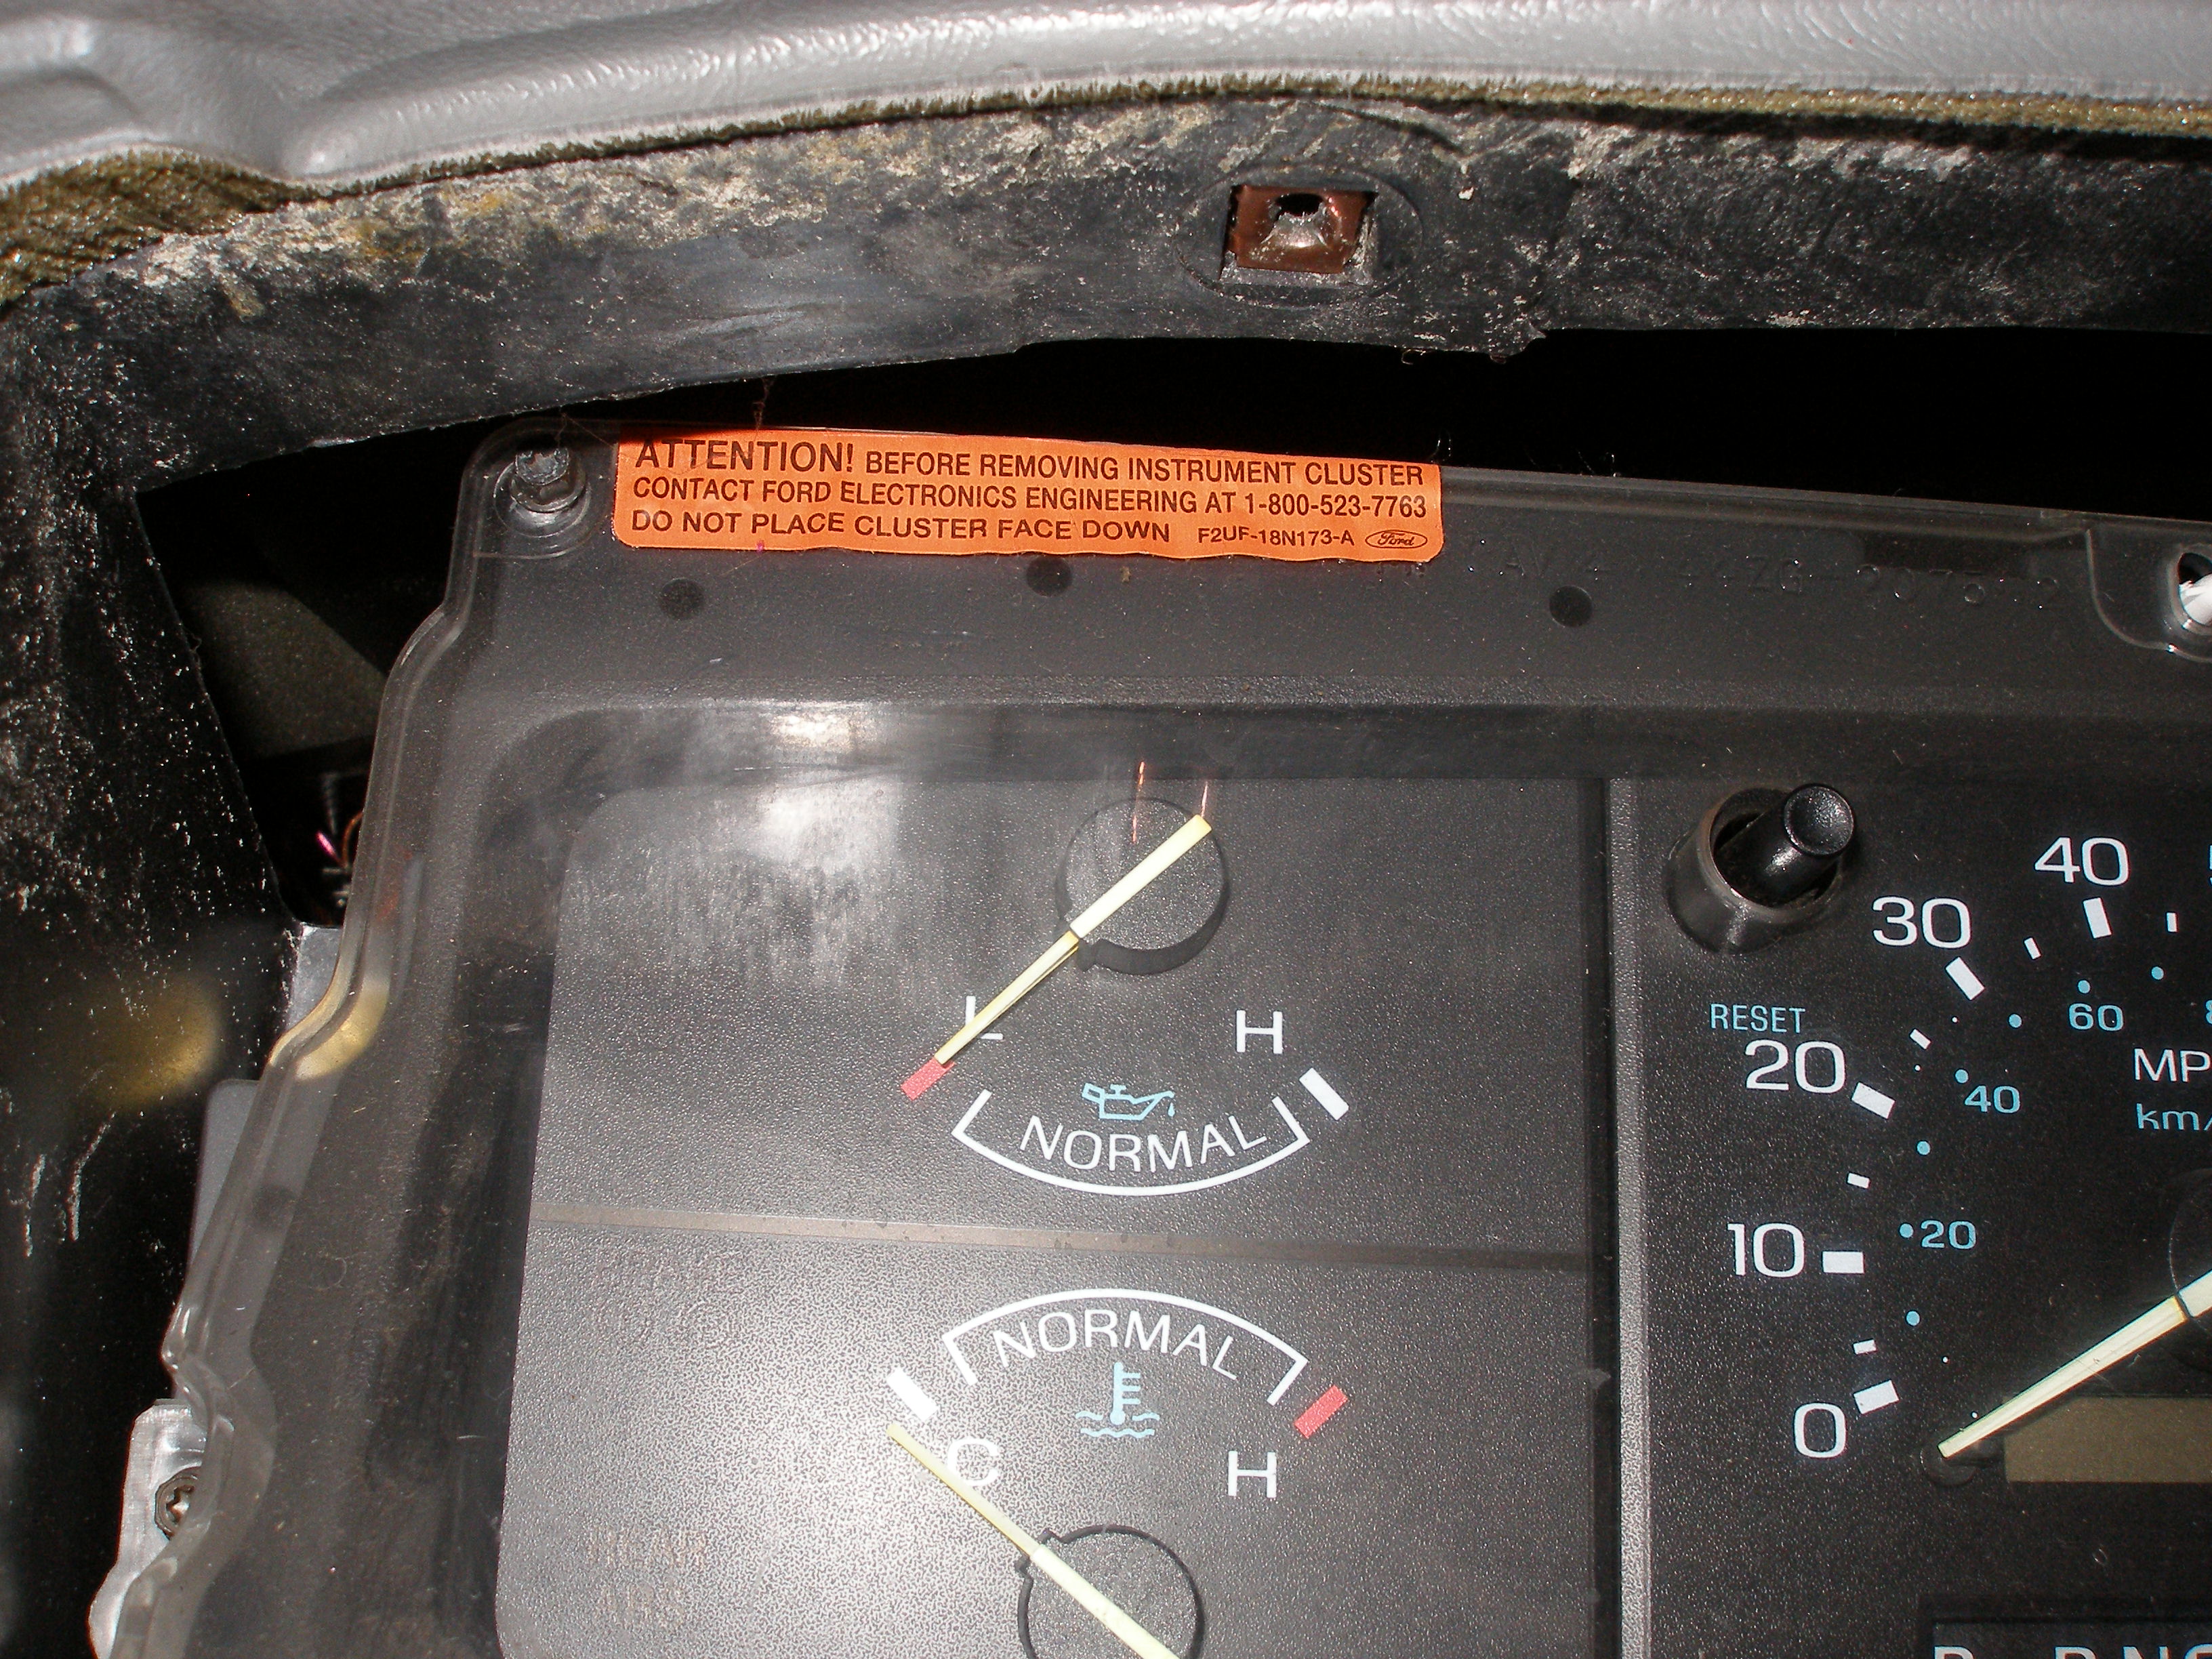
Back of the cluster. Locate and short the 20 ohm resistor:
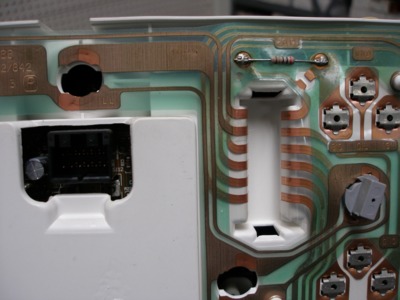
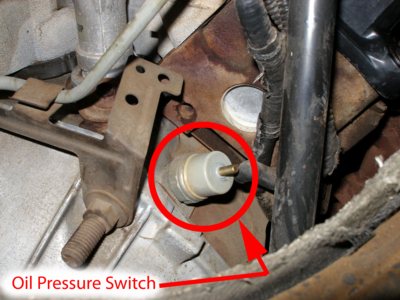
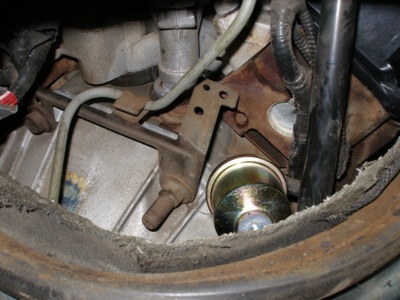
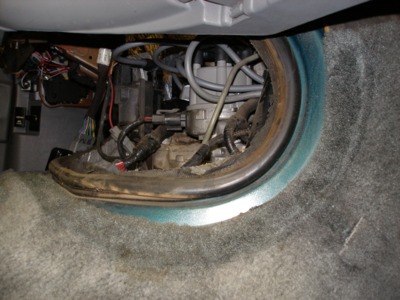
The hole you have to work through, and the oil pressure switch (grey) that you are replacing with a real sending unit. Note that this is a 3.0l; the OPS on the 4.0l is not in the same location:
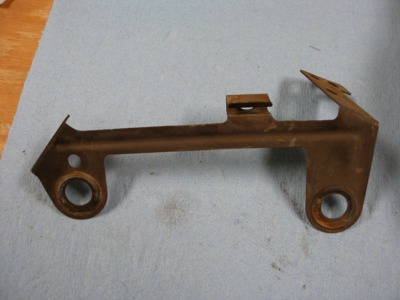
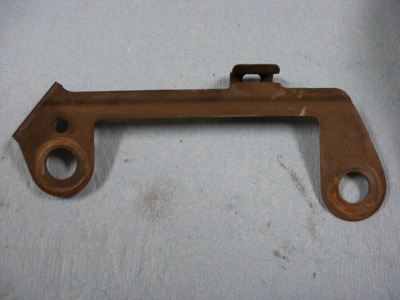
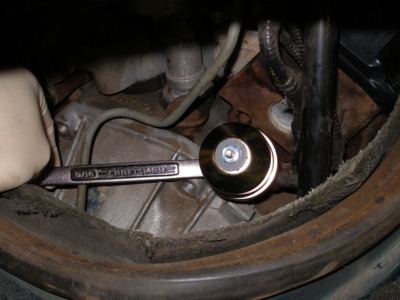
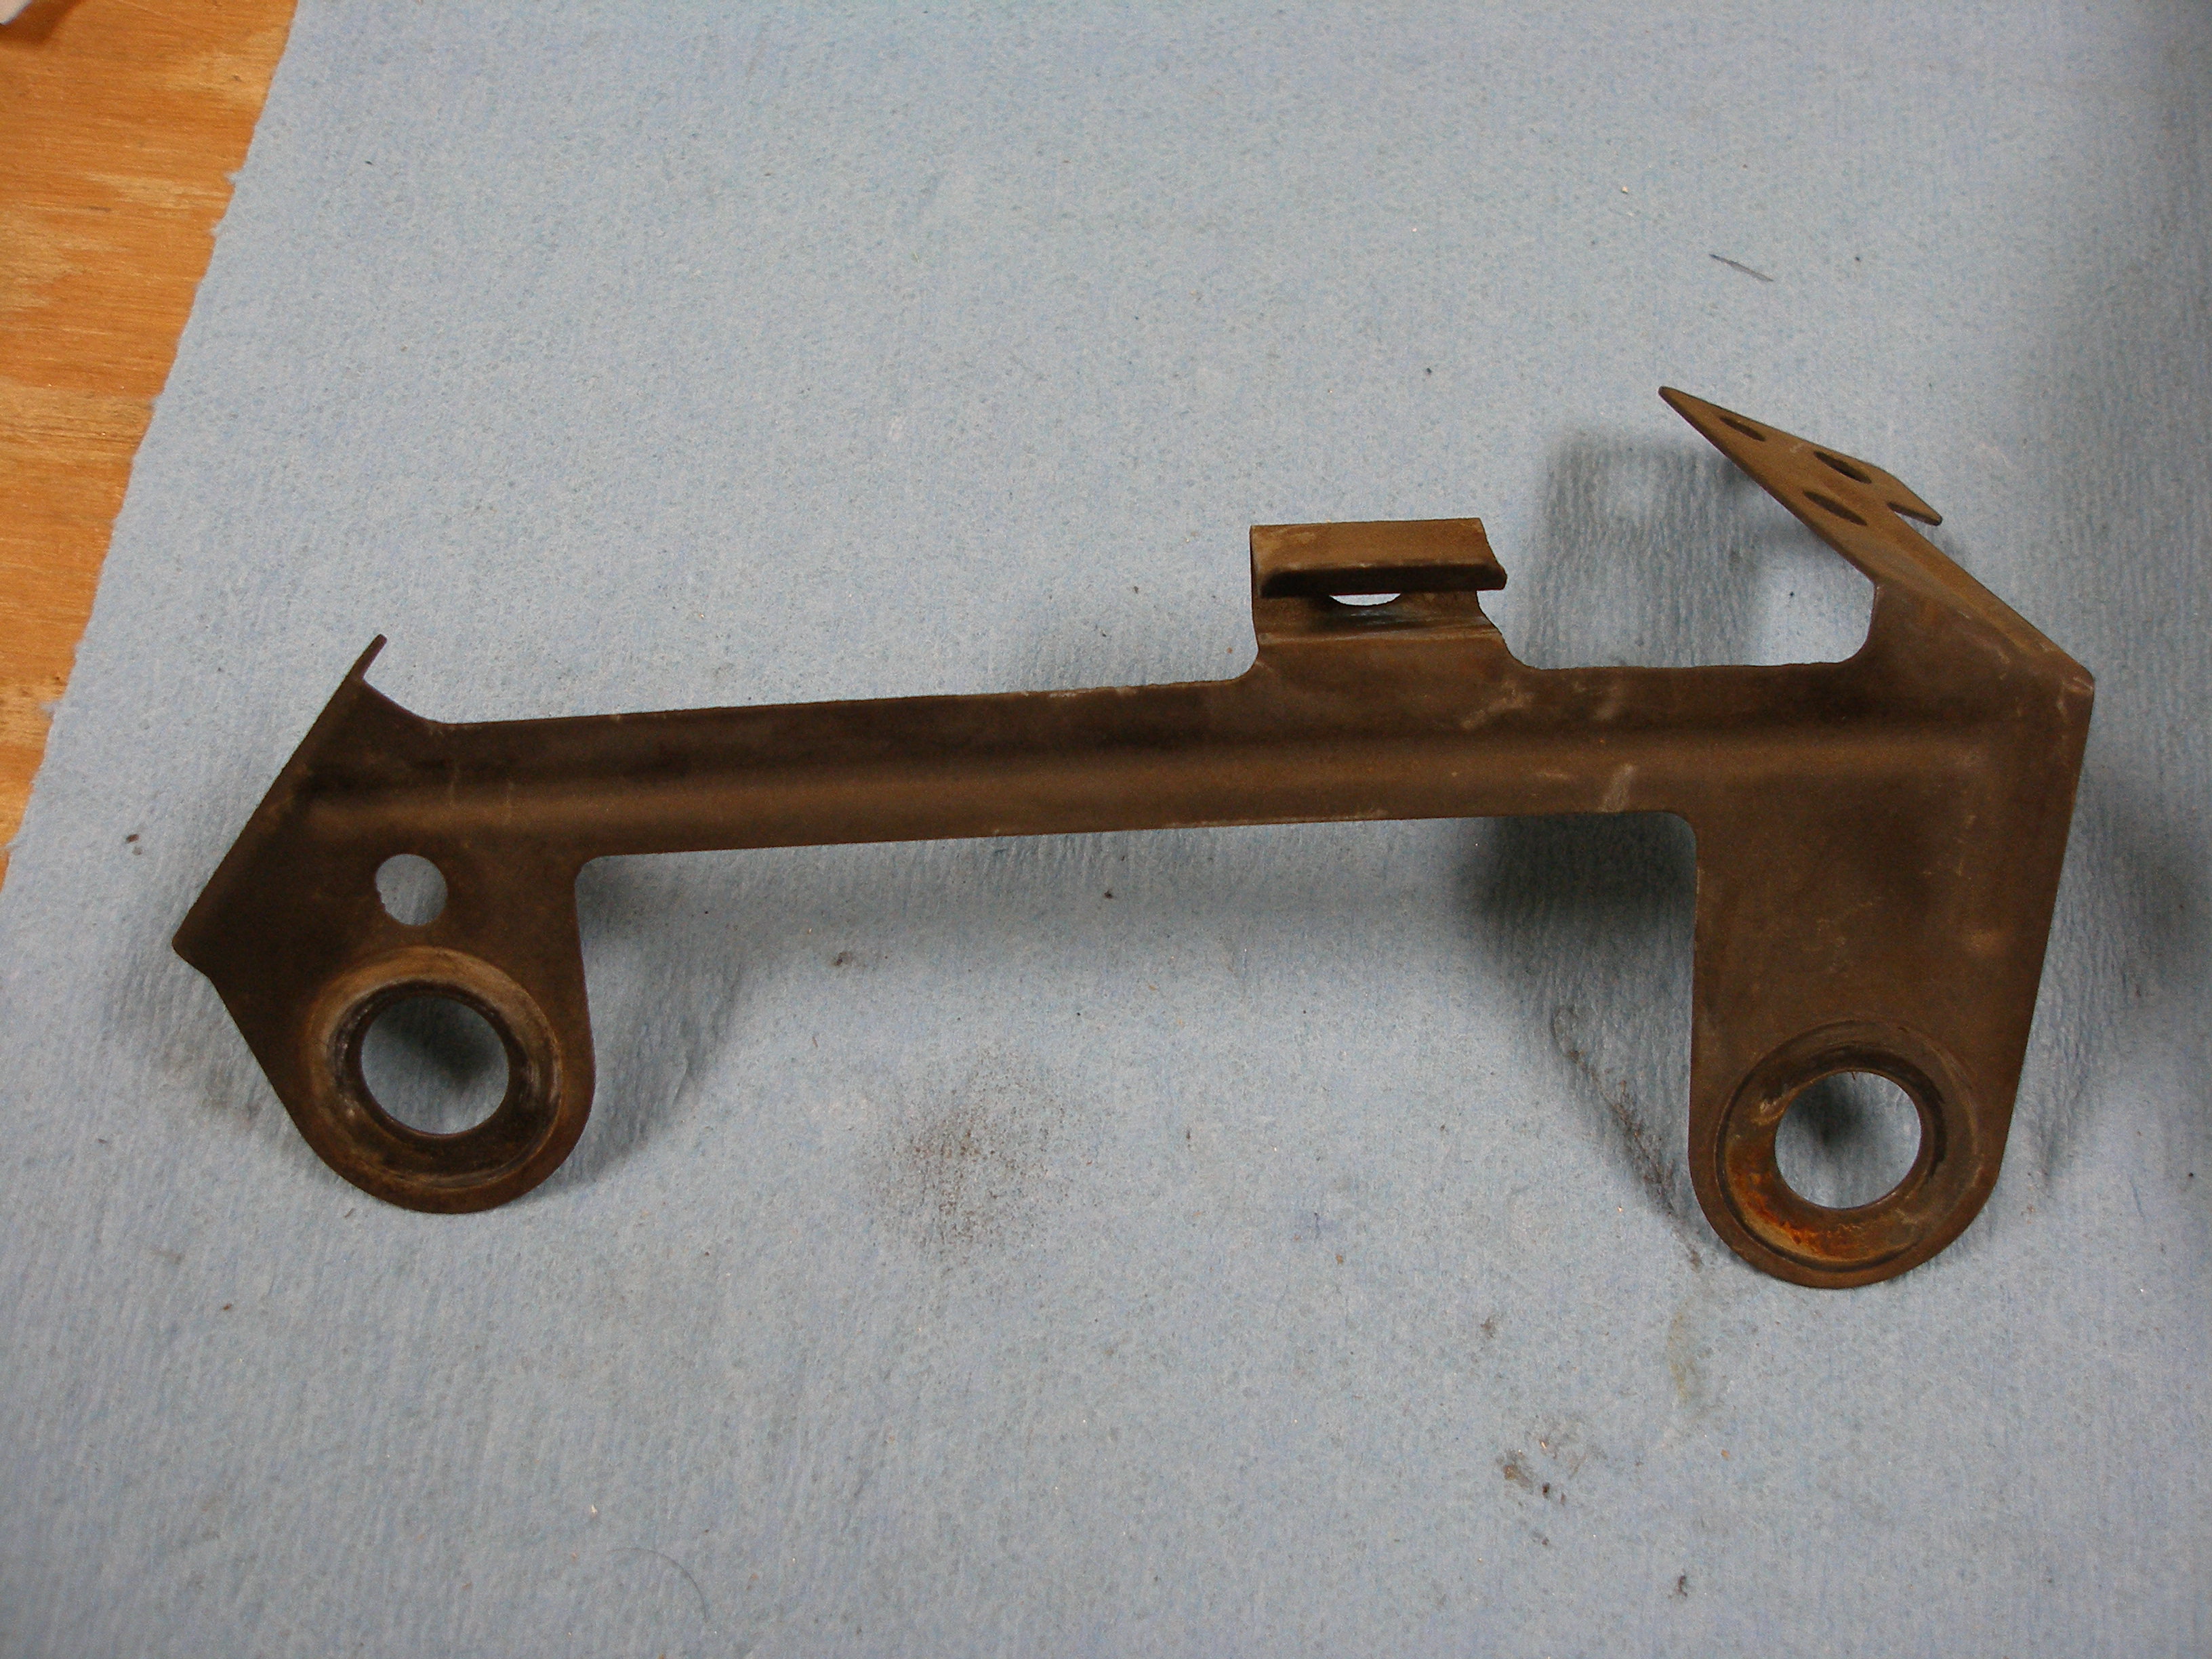
Note the steel bracket that supports the AT vacuum modulator line. Its right side needs to be trimmed to clear the fatter sending unit. I used my Dremel and a cut-off wheel:
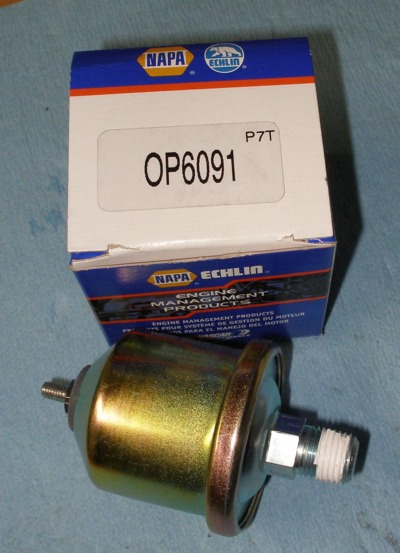
Sending unit. I paid $23 for the OP6091. Not shown is the 1/4 NPT 45� M/F adapter, a std. brass part ($4). It's needed because the sender will not clear the back of the head or the AT fill pipe. With the 45� adapter, it all fits nicely:
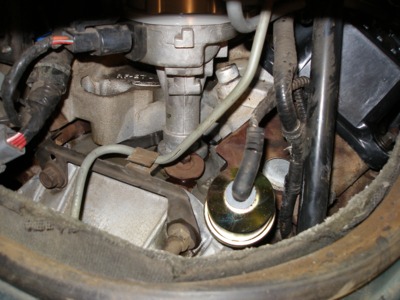
No clearance problem.
With the cluster mod and the sending unit instead of a snap switch, the oil pressure gauge is a real gauge now. It hovers a bit lower than mid-scale when cold or revved now, and moves lower at hot idle. I like it!
As detailed on this site and many others, the oil pressure "gauge" on many Fords is a gauge all right, but is rigged up to only indicate mid-scale. The pressure sensing device is a typical snap-switch, and when pressure comes up to a minimum level, the switch is connected to the gauge via a 20-ohm resistor. So the gauge can only indicate two positions: OFF and mid-scale.
I wanted to change that, and since the path to doing this was so well-beaten . . .
On my 1993 Aero (3.0l), removing the instrument cluster is more difficult than it first appears. Because the PRNDL is mechanically connected to the column shifter via a string cable, you have to remove the column lower plastic to disconnect it. Also the radio surround. Lots and lots of screws, many more than you'd think. And disconnecting the harnesses from the cluster is curse-worthy, too.
(click on any image for larger)
Back of the cluster. Locate and short the 20 ohm resistor:


The hole you have to work through, and the oil pressure switch (grey) that you are replacing with a real sending unit. Note that this is a 3.0l; the OPS on the 4.0l is not in the same location:


Note the steel bracket that supports the AT vacuum modulator line. Its right side needs to be trimmed to clear the fatter sending unit. I used my Dremel and a cut-off wheel:

Sending unit. I paid $23 for the OP6091. Not shown is the 1/4 NPT 45� M/F adapter, a std. brass part ($4). It's needed because the sender will not clear the back of the head or the AT fill pipe. With the 45� adapter, it all fits nicely:


No clearance problem.

With the cluster mod and the sending unit instead of a snap switch, the oil pressure gauge is a real gauge now. It hovers a bit lower than mid-scale when cold or revved now, and moves lower at hot idle. I like it!
#2
01-09-2008, 02:55 AM

Posting Guru
Join Date: Aug 2007
Location: Portland, Oregon
Posts: 1,036
Likes: 0
Received 0 Likes
on
0 Posts
#3
01-09-2008, 07:29 AM
Nice work asavage. This post should be stickied to the top of the forum.
Only thing is the gauge doesn't show actual numbers. Would be nice to hook up a mechanical gauge and get some idea of pressure at various conditions so you could relate numbers in general to the dummy gauge. I'll guess that the gauge would top out at 80 psi with 40 midway. If you get slightly below midway, your running about 35 psi, which is about what my 3.0 Aero tested out to hot at road speed on 10w30. I suppose there is no way to get at that resistor reaching up behind the dash. Too bad.
Only thing is the gauge doesn't show actual numbers. Would be nice to hook up a mechanical gauge and get some idea of pressure at various conditions so you could relate numbers in general to the dummy gauge. I'll guess that the gauge would top out at 80 psi with 40 midway. If you get slightly below midway, your running about 35 psi, which is about what my 3.0 Aero tested out to hot at road speed on 10w30. I suppose there is no way to get at that resistor reaching up behind the dash. Too bad.
#4
01-09-2008, 09:04 AM
Originally Posted by TallPaul
I suppose there is no way to get at that resistor reaching up behind the dash.
The cubby in which the cluster sits has a "floor". No access from below.
As DRCB mentions, I replaced all the 194 general illumination lamps with 194LL (long life) lamps while I was in there. They run all the time with the headlights on, so are the most likely to die. I didn't replace any of the other lamps, as they don't come on all that much, except maybe the turn signal indicators.
#5
01-09-2008, 01:11 PM
Asavage, Would you mind detailing the panel removal procedure. I would like to do this but am a bit put off by the intracacies of panel removal. Fear of screwing it up, you know, breaking more things than I fix, puts me off. Also if I get stuck and can't get it back on, my wife will jump all over me, so I need a feeling of confidence, then I would attack it.
Also my tach is on the steering colum cover, so probably have to remove that too.
Also my tach is on the steering colum cover, so probably have to remove that too.
#6
01-09-2008, 03:27 PM
From memory:
Remove ashtray, remove two screws behind it.
Work around the edges of the plastic around the radio, several pop clips hold it to the dash. Pull it out far enough to remove the screw under its top/left edge (behind Ign. key area).
Remove plastic knee bolster (three screws?, 7mm?)
Remove metal panel behind knee bolster (four bolts? 10mm?)
Pull off left vent -- it snaps in place. Screw under vent? Can't recall.
Used ell-shaped or hook tool to remove HL switch ****.
Pull black cluster surround off -- more snap clips.
Remove two vertical screws above speedometer (7mm).
Remove lower column plastic -- no need to remove upper. Disconnect string loop from hook on shifter linkage. Spin/unscrew PRNDL string adjustment **** to disconnect cable from housing.
Tilt steering wheel down, lay towel on upper column plastic, pull cluster out far enough to get your hands behind it, work loose two harness connectors from the cluster -- they have two lock tabs each and can be difficult to hold both lock tabs in and pull the connector back.
That's most of it. Just more to it than I would have thought, just looking at it. I may have missed some thing(s).
#7
01-09-2008, 03:48 PM
I mounted my transmission temp gauge on a Vumaxx pedestal bolted to the side window trim (A-pillar), which worked out very well.
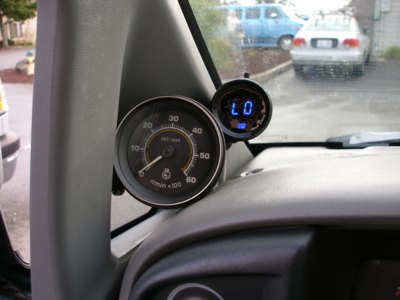
The 3-3/8" tach just sits in its can in that wedge area, and never moves (2600 miles on it, so far).

I have some more pics of the gauges installation, if anyone's interested.
The 3-3/8" tach just sits in its can in that wedge area, and never moves (2600 miles on it, so far).
I have some more pics of the gauges installation, if anyone's interested.
Trending Topics
#8
01-09-2008, 05:01 PM

Senior User
#9
01-09-2008, 08:18 PM


Asavage,
Do you have a digital instrument panel?
On my digital panel, if the oil pressure switch is open (no current flow to the sensor, or no ground detected by panel), it starts beeping out a warning about low oil pressure. I'm curious what current it needs to keep the alarm from sounding, if I also replaced the switch with a real sender.
#10
01-09-2008, 09:15 PM
Posting Guru
Join Date: Aug 2007
Location: Portland, Oregon
Posts: 1,036
Likes: 0
Received 0 Likes
on
0 Posts
#12
01-10-2008, 12:33 AM
Originally Posted by TheHandyman
I think my cluster has an instruction sticker that says not to lay it face down. What's up with that!?
I asked the same Q in this thread, and copper_90680 was the only one who responded:
Originally Posted by copper_90680
I think there is some damping fluid that'll leak out if you leave it face down.
Originally Posted by xlt4wd90
Asavage,
Do you have a digital instrument panel?
Do you have a digital instrument panel?
On my digital panel, if the oil pressure switch is open (no current flow to the sensor, or no ground detected by panel), it starts beeping out a warning about low oil pressure. I'm curious what current it needs to keep the alarm from sounding, if I also replaced the switch with a real sender.
I know the beep you mean; my oil pressure switch went bad four times in 85k miles; the Motorcraft ones lasted longest. I'd get false "no oil pressure" indications on the digital bar gauge, and that can't-turn-it-off, can't-ignore-it beeping until I'd order another oil pressure switch and swap it in. Scared the beejezus out of me the first time it showed no oil pressure (naturally, while towing). After that first time, I lost a sender every year or two and learned not to panic when it went off.
Hope you can find a similar mod to make your gauge a gauge.
Originally Posted by DCRB
... cut the alarm out???
hehehe. i placed my tach there too, only... i made a ghetto fab mount out of some duct straps and attached the tach to my plastic window frame cover.

#13
01-10-2008, 01:51 AM
Posting Guru
Join Date: Aug 2007
Location: Portland, Oregon
Posts: 1,036
Likes: 0
Received 0 Likes
on
0 Posts
That plastic trim is darned hard to find without the rearmost edge cracked (screw above your left ear, when you're driving). I finally found one after months of looking. I drilled most carefully
-------------------------------------------------------------------------------------
yeah i know what you mean. i can't remember if mine are cracked are not, that's one of the things i'm no too worried about, i know the passenger side one is cracked... what makes them crack?
at least your int. is grey, i have the wonderful rare blue interior.
the analog dash doesn't ding at people does it?
#14
01-10-2008, 06:58 PM
Originally Posted by asavage
With the cluster mod and the sending unit instead of a snap switch, the oil pressure gauge is a real gauge now. It hovers a bit lower than mid-scale when cold or revved now, and moves lower at hot idle. I like it!
So how did you select that particular part number sender?
Again, thanks for posting all this info. It's great stuff and hopefully many Aerostar owners will benefit from it.
#15
01-10-2008, 09:59 PM

Join Date: Sep 2003
Location: Southern California
Posts: 4,452
Likes: 0
Received 0 Likes
on
0 Posts