When you click on links to various merchants on this site and make a purchase, this can result in this site earning a commission. Affiliate programs and affiliations include, but are not limited to, the eBay Partner Network.
F350 2wd Radius Arm Bushings - Tricks and Chronology
Anyone who has changed Radius Arm Bushings on an old truck knows it's theoretically a simple job, but can be time consuming and frustrating due to the rust between the old bushing's shell and the radius arm, as well as the tension on the front suspension if you're like me and too lazy to remove the springs/shocks
Anyway, here is how I did this fun task and some of the tricks I found along the way. I'm sure there are many others.
My crewcab is an F350 2wd so I had it much easier - there isn't a solid axle or a differential in the way.
The first order of business is to get the truck off the ground, placing two jackstands under the frame.
Then, remove the 1/2" or 5/8" nuts off the bolts, and pull the bolts out. It's very likely the bolts will be stuck, so you may need to hammer them out. You can use a punch if you want, but because there wasn't enough room for my hand, the hammer, and the punch between the two radius arms I instead took a piece of 1/2" steel round stock and sharpened the end like a pencil - so the end diameter was about 1/4" in diameter, and the "point" was about 2" long. I essentially made a 2' long, one time use punch. This knocked the bolt right out, and I was far enough back under the center of my crewcab that I didn't have to worry about the tire moving towards me or the radius arm dropping in my head. Turned out things were so tight nothing moved once the bolt came out anyway. Never hurts to be careful.
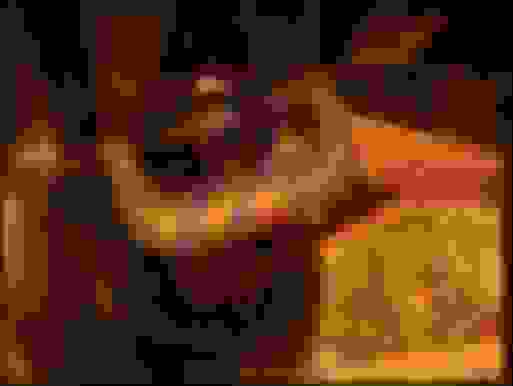
Removing the bushing is always a pain because the metal outer casing rusts to the radius arm. You can beat the snot out of it and it's not going to budge. So here is what I did... AIR CHISEL. Be careful not to nick the radius arm of course, and slice in so that the chisel goes between the outer edge and the center of the bushing, slicing right through the outer casing. This will also push out the center metal collar if it hasn't fallen out already.
Air chiseling it out took a whopping 15 minutes per side. Much better than the several hours I spent yesterday with a large oak dowel and a sledge hammer which resulted in oak splinters everywhere
The instructions I was given to insert the new bushing was to tap it in with a hammer, around the perimeter so that it remained straight. Yeah, right. I ended up using a large ball joint clamp which made easy work of this task:
And viola, the bushing goes right in. Make sure you dont push the bushing in all the way so the collar is flush - and measure so that the protrusion on each side of the radius arm is the same - or as close as you can get it - as this effects alignment afterwards.
Getting the bolts back in was a challenge, because the alignment of the holes in the bracket and the inner sleeve of the bushing probably will be out of alignment as without the radius arm bushing installed, the radius arms seem to like to "twist forward". Since hammering in the bolts would damage the threads, I used the 1/2" metal round stock I sharpened earlier, hammered it in and all the way through, then put the new bolt behind it, then tapped that through while the rod maintained alignment. This of course can scrape the threads a little bit, but nowhere near as much as would occur if one just beats on the bolt without a guide rod.
Anyway, that's what I did, and it worked out pretty well. Since one of the shock bushings are completely shot I have to replace the shocks to eliminate the rattling that's still there, but at least the front end tracks significantly better, even though it clearly needs an alignment.
fredrick i have a question about this truck does your front end have kingpins or ball joint to attach the spindles ?A friend of mine has the same truck and went to get inspected and they told him he had bad ball joints on the drivers side and hes not sure and i havent looked at it yet !! Thanks also great info cause his radius arm bushings are bad too
Tom - The front shocks have been there "forever" and look it
Linemo - Mine has balll joints. Certain 2wd F350's have kingpins as well, but I'm not sure what combinations of engine/GVWR would have them. I know most or all of the solid beam 2wd's have kingpins, and usually started off as chassis cabs.
Alz - fair enough. Though Napa called these radius arm bushings which is where I got the term from
Just to clear something up here, those are ttb pivot bushings being replaced.
I know this is really, really old but since I'm doing this job on my RWD Excursion and stumbled onto this thread I thought I would point out that this is incorrect. It is not a TTB pivot it is a radius arm bushing. Twin traction beam suspensions are for 4wd trucks with independent front suspension. This post is about a 2wd or RWD truck which uses radius arms
I am doing this on my RWD Excursion right now too. The 2WDs do have radius arms, but they have axle pivot bushings as well. If you look at the pictures, you can see he is replacing the axle pivot bushings, because it runs perpendicular to the wheel. The radius arms you linked to run parallel to the wheel, down the frame.
I circled both parts to make it more clear, the blue is the axle pivot and the red is the radius arm. BTW I believe the radius arm is also referred to as "control arm" when looking up bushings.
Hello Deagle12, i have the knuckle out and pressing in new ball joints on our 2002 excursion 7.3, 2wd,
with 200,000mi, i imagine the axle pivot bushings may need replacement, since i ordered SA code springs
(1" over free length) the axle beam should be pretty docile once the spring is out, i'm having trouble
finding polyurethane bushings for this Excursion, as soon as you enter 2wd excursion web pages
go blank as if 2wd excursions don't exist!
I'd appreciate any wisdom while i have the front end in many pieces......
Thanks, mikeG in NJ dresserider@comcast.net
Hi Mike, I apologize for the delayed response. I ordered these below off Amazon at the end of 2019 and they've been holding up just fine, although I don't put many miles on the Excursion these days.
I wish you luck with the replacement... I'm sure with the springs out it will be much easier. I had quite the fight getting these back in. Lots of wresting and cycles of jacking up/down to get the dang holes to budge a cm or so just to get the bolt through. I sure am glad the job is done!
Last edited by Deagle12; 09-03-2020 at 03:24 PM.
Reason: only linked the radius arm bushings before... added the axle pivot
I am doing this on my RWD Excursion right now too. The 2WDs do have radius arms, but they have axle pivot bushings as well. If you look at the pictures, you can see he is replacing the axle pivot bushings, because it runs perpendicular to the wheel. The radius arms you linked to run parallel to the wheel, down the frame.
I circled both parts to make it more clear, the blue is the axle pivot and the red is the radius arm. BTW I believe the radius arm is also referred to as "control arm" when looking up bushings.
How did you get the radius arm bushings in? It was hell getting the old one out and now my ball joint press does not open wide enough for me to press the new one back in 🤦🏾♂️
How did you get the radius arm bushings in? It was hell getting the old one out and now my ball joint press does not open wide enough for me to press the new one back in 🤦🏾♂️

 11-17-2007, 07:27 PM