starter Re & Re for 4WD Aerostar
#1
 10-05-2004, 10:20 AM


Join Date: Sep 2004
Location: Vancouver Island, British
Posts: 12
Likes: 0
Received 0 Likes
on
0 Posts
starter Re & Re for 4WD Aerostar
I have a 1993 4WD Aerostar and the starter is on it's way out. I just got myself a new (remanufactured) starter for the 4.0 L that's in it but couldn't get the front driveshaft out of the way in order to pull the starter out to replace it. Is there an easier way of going about this starter Re & Re besides giving in and going to the Dealer or other Professional to have it done ?
#2
10-05-2004, 11:21 AM

Join Date: Sep 2003
Location: Southern California
Posts: 4,452
Likes: 0
Received 0 Likes
on
0 Posts
#3
10-05-2004, 11:22 AM

Elder User
Join Date: Jul 2001
Location: Portland, OR
Posts: 510
Likes: 0
Received 0 Likes
on
0 Posts
#4
10-05-2004, 11:34 AM

You remove the front driveshaft coupling and move it as far to the driver's side as possible. The starter must be pulled, tipped upward (vertical) and moved along the space between driveshaft and engine block. It is a very tight fit but it can be removed and replace in this fashion.
There is not enough room to completely remove the driveshaft unless you block the transmission cross member, remove the retaining bolt on the driver's side and then jack the entire transmission/transfer case upwards slightly to allow the shaft to slip off the transfer case output shaft.
There is not enough room to completely remove the driveshaft unless you block the transmission cross member, remove the retaining bolt on the driver's side and then jack the entire transmission/transfer case upwards slightly to allow the shaft to slip off the transfer case output shaft.
#5
10-05-2004, 01:12 PM
Elder User
Join Date: Jul 2001
Location: Portland, OR
Posts: 510
Likes: 0
Received 0 Likes
on
0 Posts
Coincidentally (or maybe not) I just had to pull mine and can vouch for the above plus note that the two 13 mm bolts (the head size anyway) can be in tight and I had to apply additional leverage on the upper one by slipping a larger box-end wrench over the wrench on the bolt that hung down at a 90 deg. angle. Also, it helps to remove the main wire feed and the solenoid feed before you try and pull it out to far (but you have to tip it down first).
Biederboat
Biederboat
#7
06-13-2014, 09:34 PM

Junior User
AWD Starter Removal 4.0L 1994
Absolutely best to drop the front of the front drive shaft and move toward the drivers side. As stated before tilt the start up toward the sky and it will slide out. We did mark the drive shaft so it fit back in the same location. Bolts were 10mm. Had to put it in Neutral to rotate the drive shaft back to install it. 
Big difference in how it starts. Night and day.
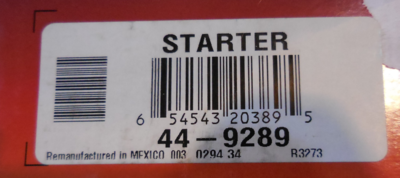
BTW I looked at the different rebuilt units and the NAPA Starter has far better parts, needle bearings instead of a bushing in the nose cone and comes with a 3 year warranty vs 1 year of the other stores. Within a few dollars for a better unit and better warranty.
Also same day we were replacing a fuel filter in a 1997 Ford F150 with that darn slip coupling. We had the correct tool and the first one come out in a few minutes, the second fitting was a struggle, after 20 minutes no progress. So we pulled the special tool out and put some Triflow (Teflon in oil) lubricant and it slipped a 1/16 of an inch more and released. I expect WD 40 or similar would also work.
Big difference in how it starts. Night and day.
BTW I looked at the different rebuilt units and the NAPA Starter has far better parts, needle bearings instead of a bushing in the nose cone and comes with a 3 year warranty vs 1 year of the other stores. Within a few dollars for a better unit and better warranty.
Also same day we were replacing a fuel filter in a 1997 Ford F150 with that darn slip coupling. We had the correct tool and the first one come out in a few minutes, the second fitting was a struggle, after 20 minutes no progress. So we pulled the special tool out and put some Triflow (Teflon in oil) lubricant and it slipped a 1/16 of an inch more and released. I expect WD 40 or similar would also work.
Trending Topics
#8
06-20-2014, 10:39 PM
I love Tri-Flow. I've been using it since 1977, when it was still called Tri-Flon, before Dupont sued them to change the name.
Tip: always shake the can. The teflon particles float to the top of the silicone carrier, and if you don't shake it, the last of the can will be all teflon sludge.
I keep a case of six 6 oz. cans at work at all times. Go through about one can per month, by myself. Great for locks & hinges.
Tip: always shake the can. The teflon particles float to the top of the silicone carrier, and if you don't shake it, the last of the can will be all teflon sludge.
I keep a case of six 6 oz. cans at work at all times. Go through about one can per month, by myself. Great for locks & hinges.
#9
06-25-2014, 09:05 PM


Actually on my 96 the front driveshaft can come out without much work. It needs to be turned in such a way so its thinner then pushed forward then it will come out..I did three of my vans this way. By the way no need to mark the shaft it can go in 180 out. Shaft isn't balanced with the yoke..
#10
06-27-2014, 02:04 PM
E4WD: I changed my starter last week. Not because it was giving any trouble, but to avoid unplanned downtime. The '97 now has over 170k miles and I'm commuting 55 mi./day; keeping it working is important to me right now. The alternator crapped out three weeks ago, and that usually means that the starter and water pump are close to follow -- maybe there's lots more life left in them, but I prefer not to wait on these higher-failure items.
The battery must be disconnected, of course. No way around it on this job.
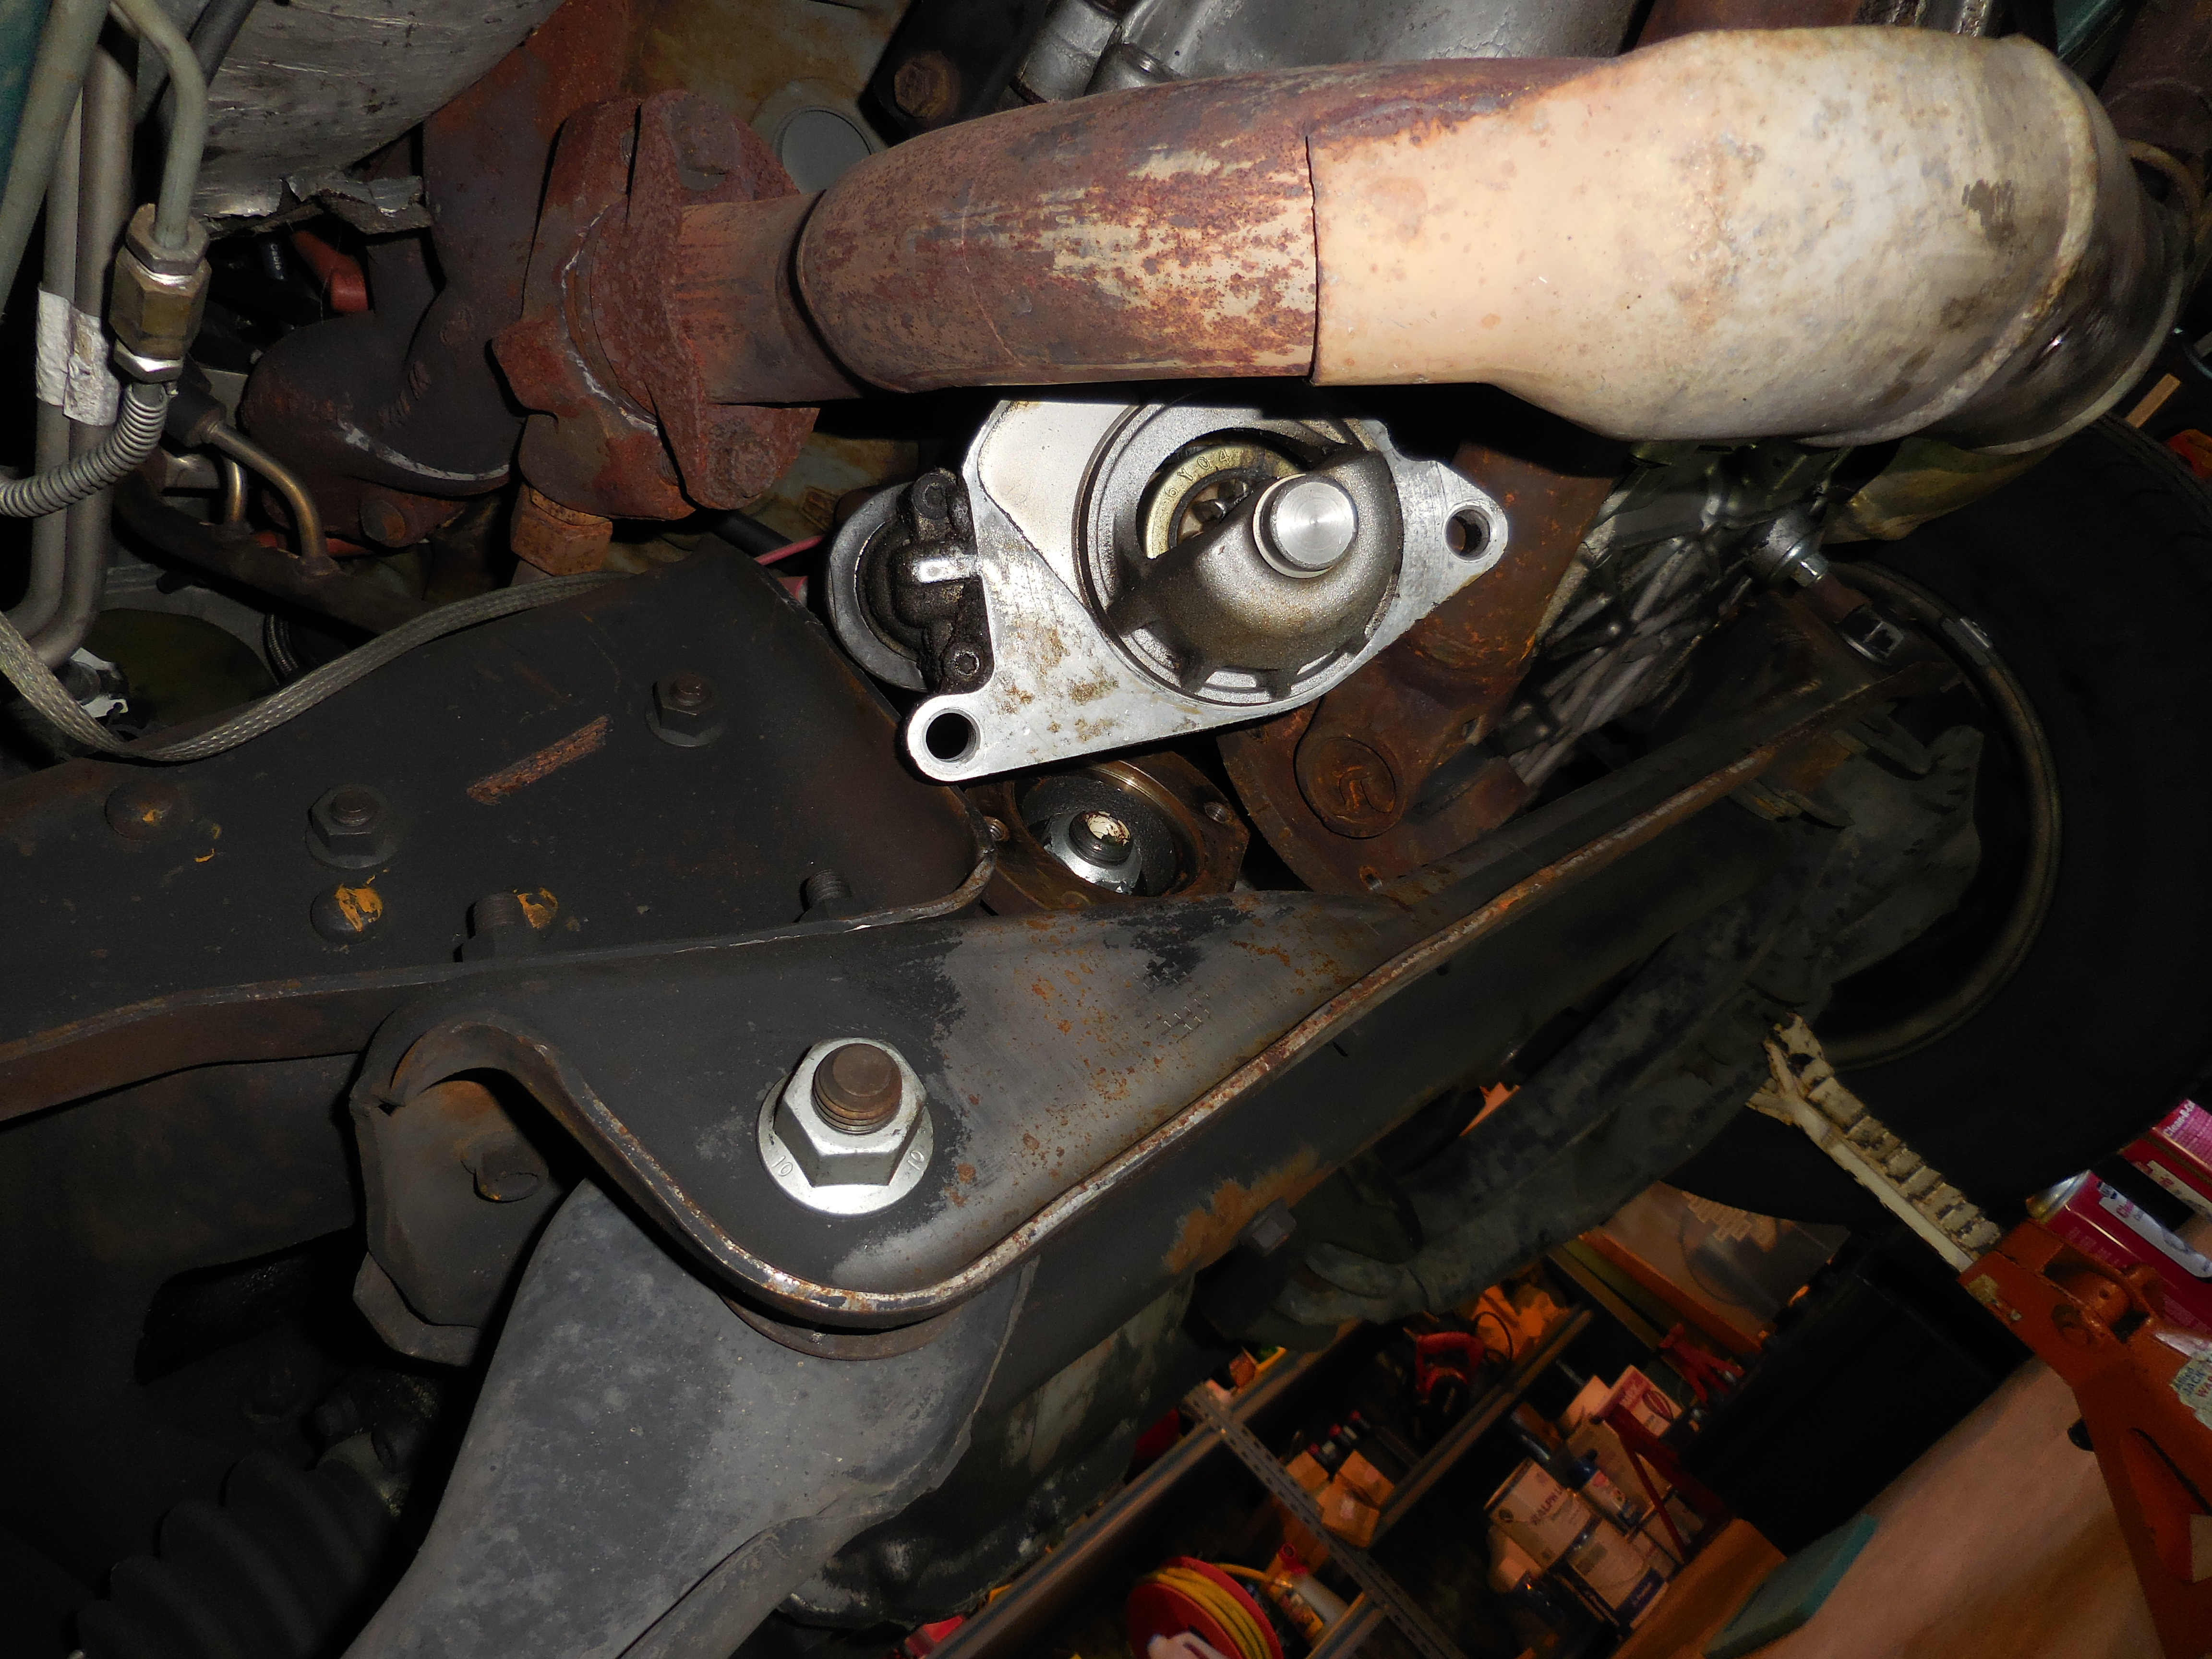
Pretty much my experience was what 96Aerostar related above: for the front driveshaft, remove two 10mm bolts, shift to Neutral to rotate the front driveshaft, shift back to Park to remove the last two bolts. I was able to move the driveshaft to the right, rather than the driver's side. No problem removing the starter.
Click HERE for larger

Click HERE for larger

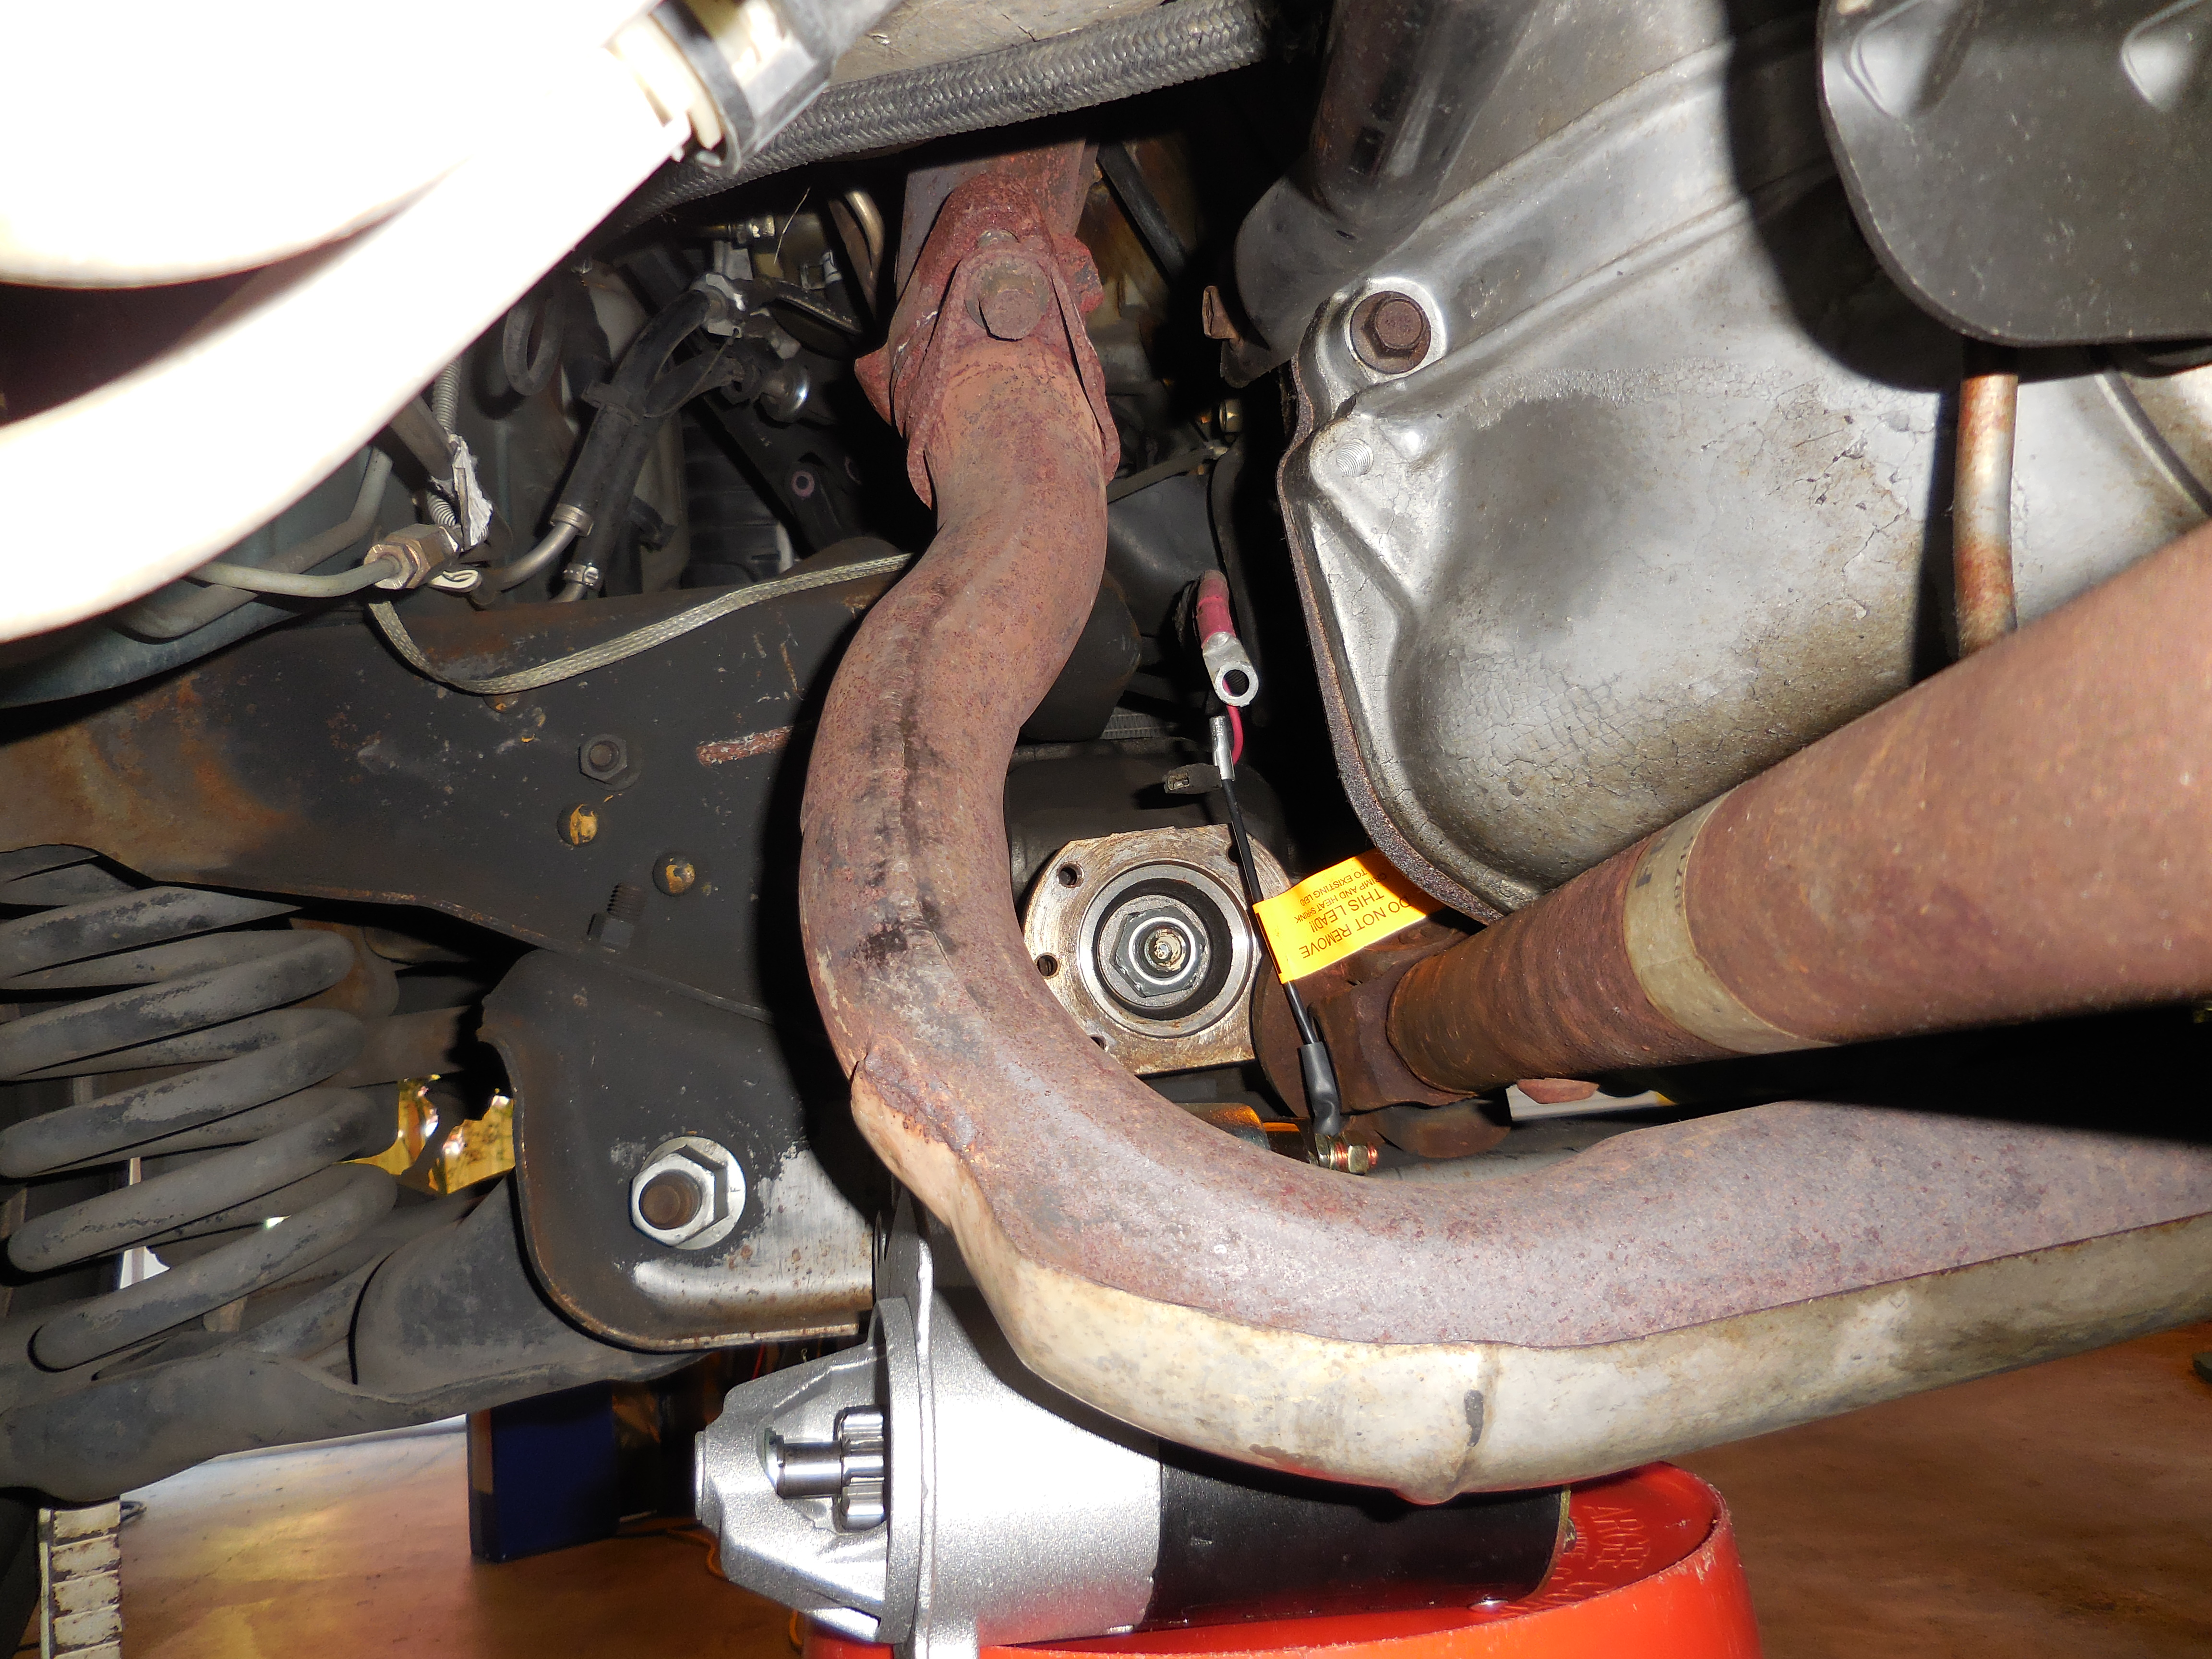
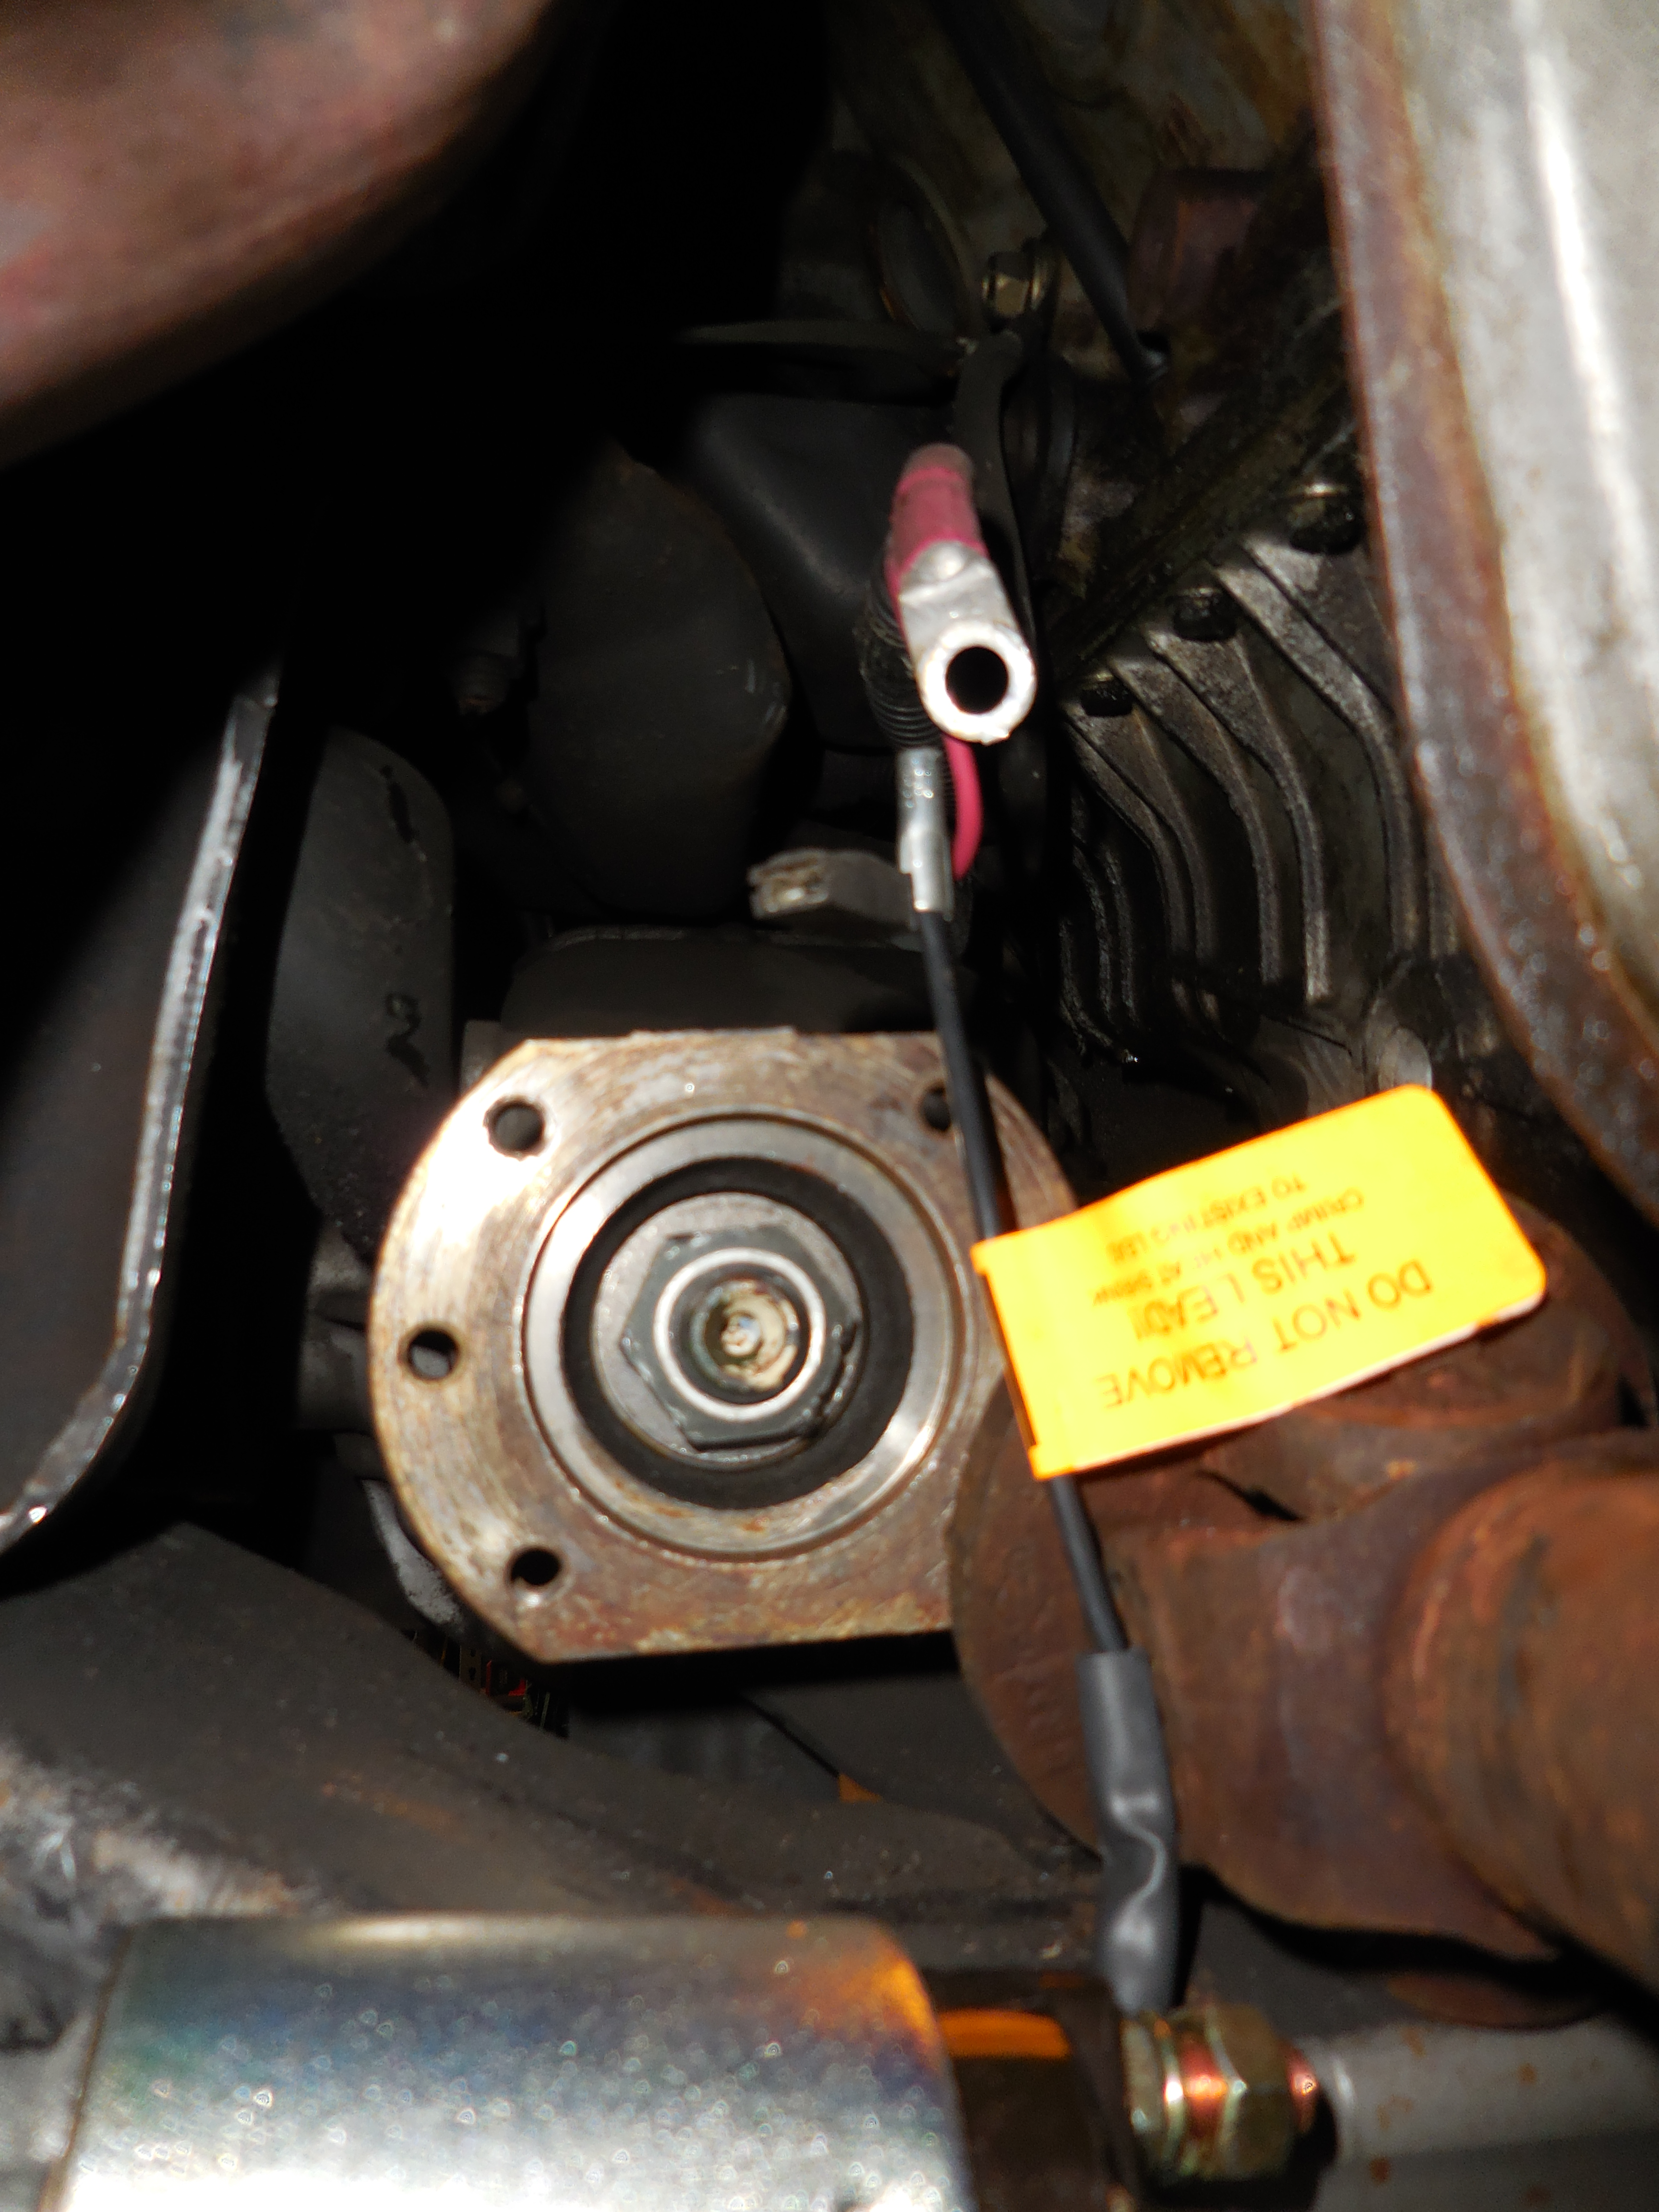
I used a 1/4" drive 13mm deep socket to remove the main battery cable form the starter. The wiring isn't long enough to drop the starter and remove the cable down lower, so removing it before moving the starter lower is necessary.
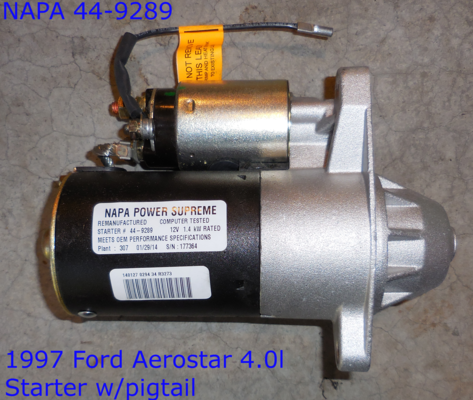
On very late production Aerostars, the smaller wire is bolted to the solenoid, but all the earlier ones use Faston (spade) terminals; with the earlies, you can just pull the wire off the male spade terminal on the solenoid. If you have a late starter, you'd need to remove the nut on the solenoid to disconnect the smaller wire. It looks to be 10mm. More on this below. My '97 has a production date of 12/96 and has a Faston terminal.
Click HERE for larger

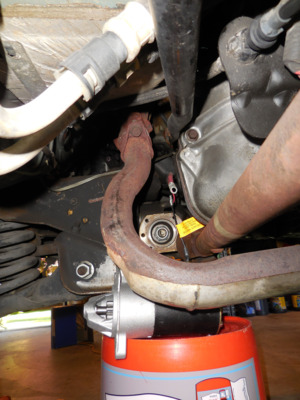
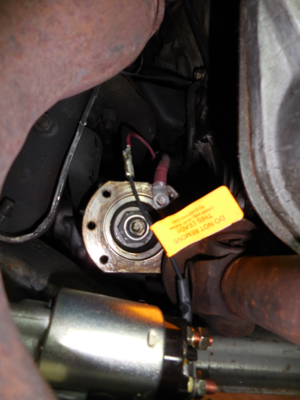
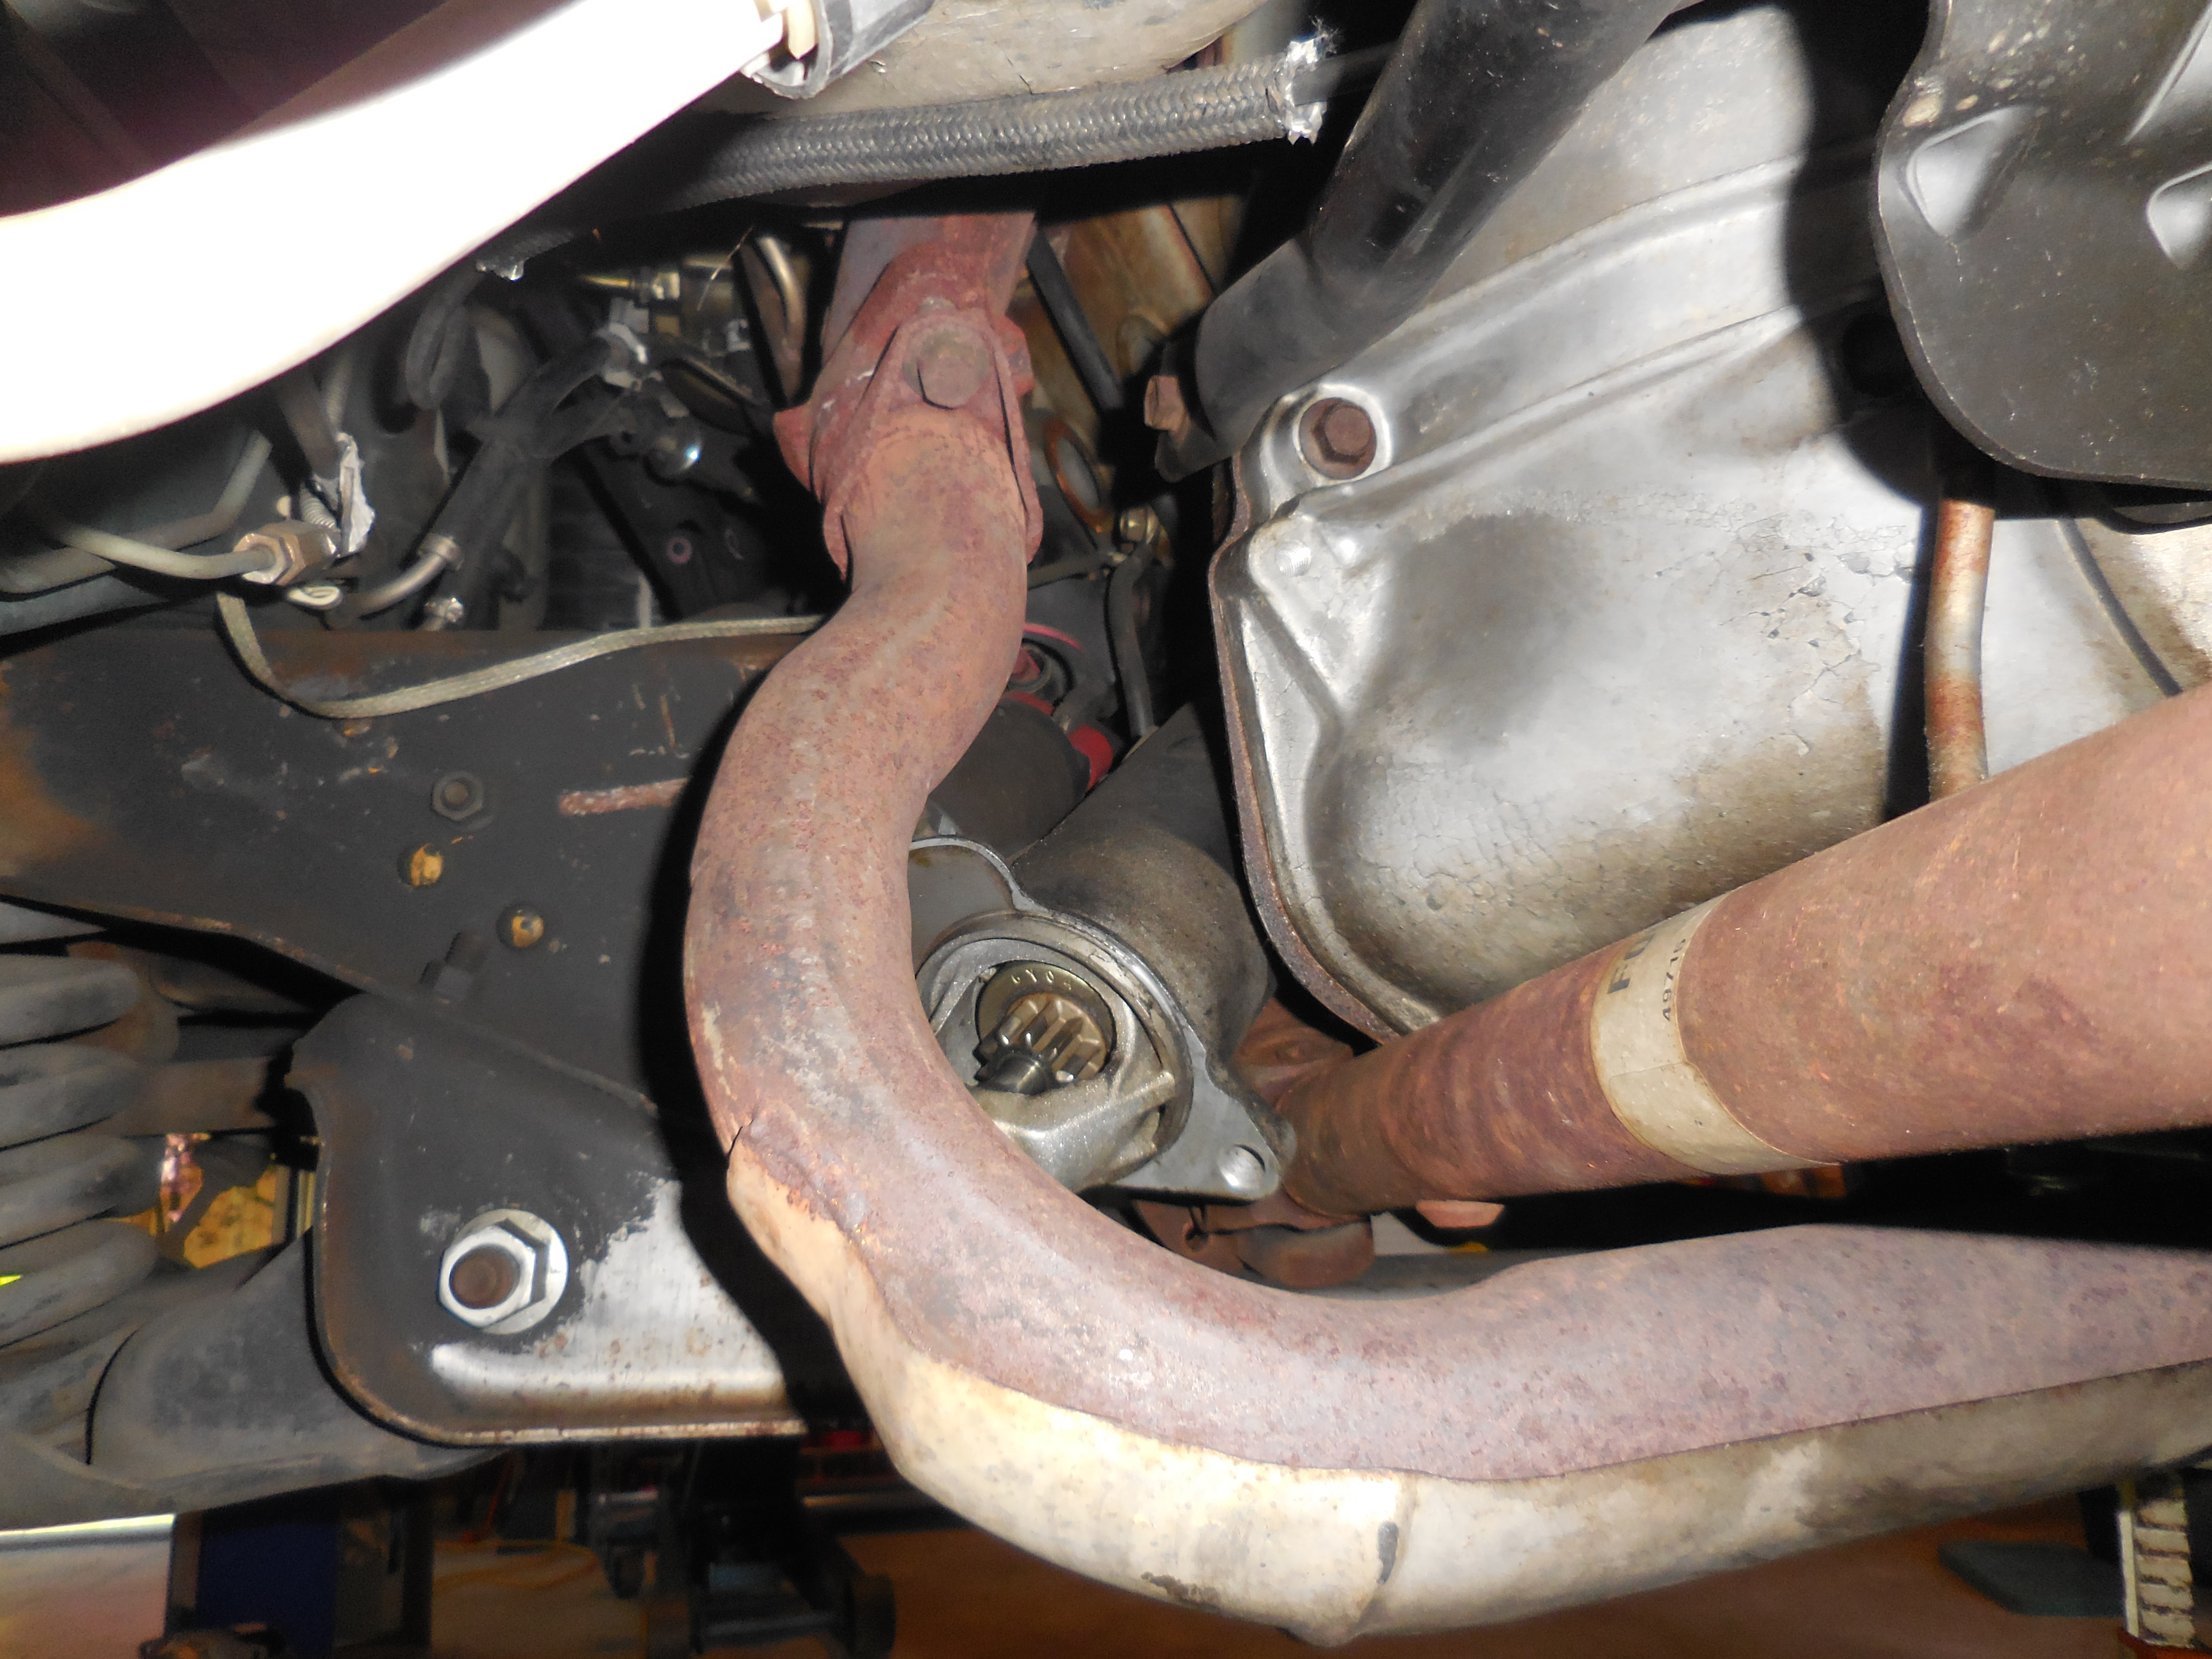
On the 4.0l, two bolts retain the starter to the bellhousing and access is quite good. I used a std box-end wrench and a cheater -- the bolts are quite tight. No clearance problem.
As you can see from the following pics, the starter can be removed with the driveshaft pushed toward the engine. It's tight but not a pry-bar job by any means. I couldn't get my starter out with the driveshaft pushed to the outside.
Click HERE for larger

Click HERE for larger

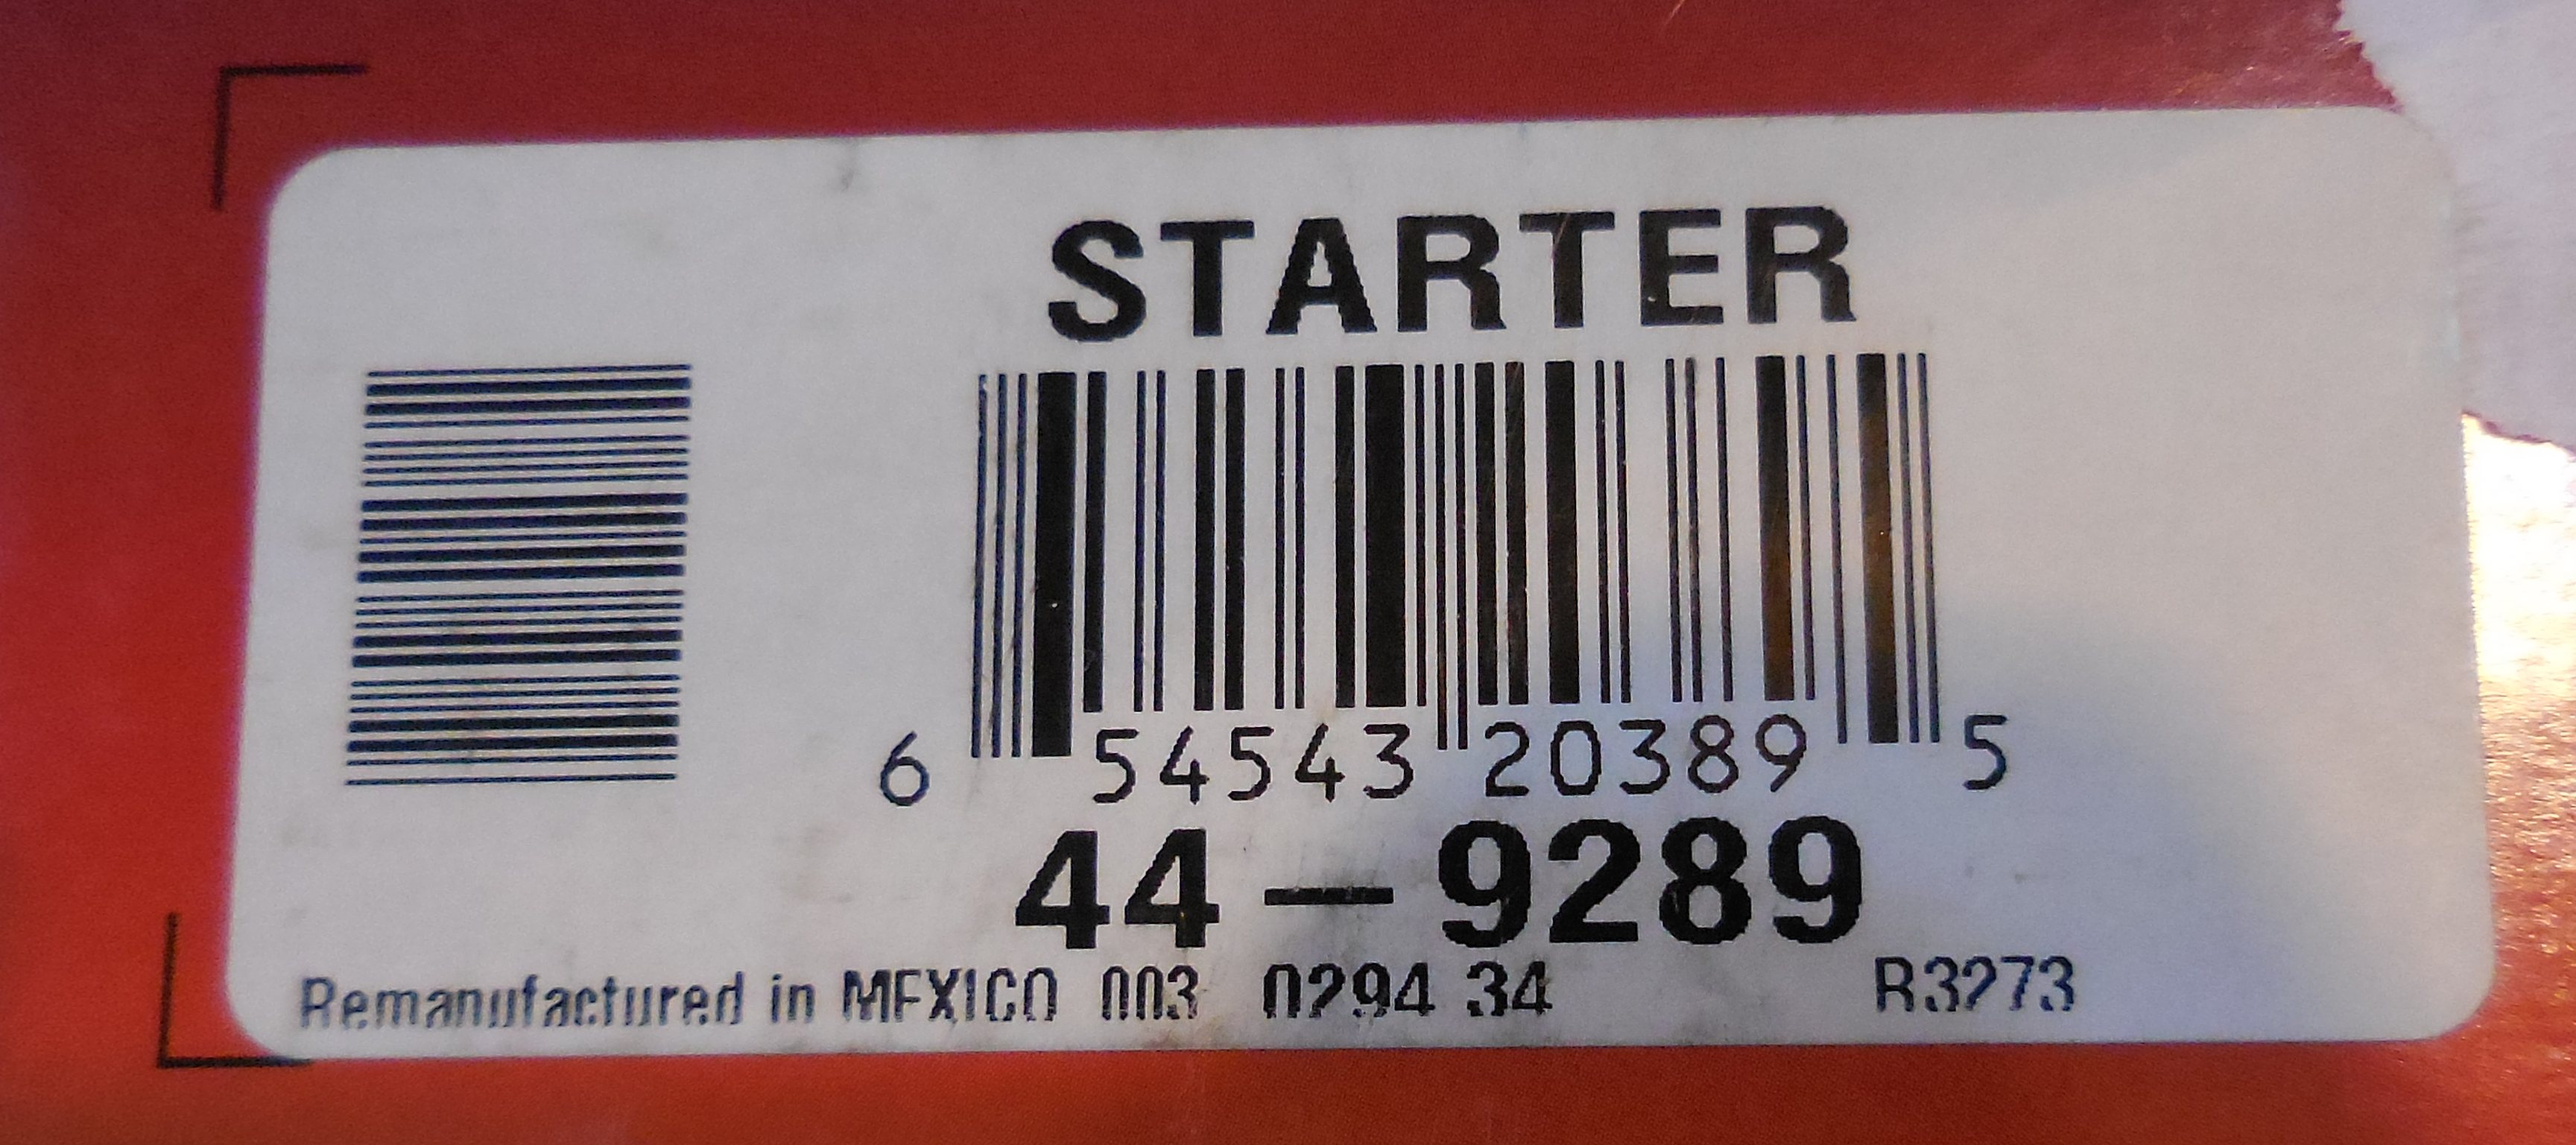
A note on NAPA products: for years, NAPA part Nos. that began with the numeral '2' were their consumer/cheaper line of products, and while this may or may not be the case any longer, I still find it hard to buy NAPA products whose numbers begin with '2'. This starter was about $20 more than the equivalent one that started with '2'.
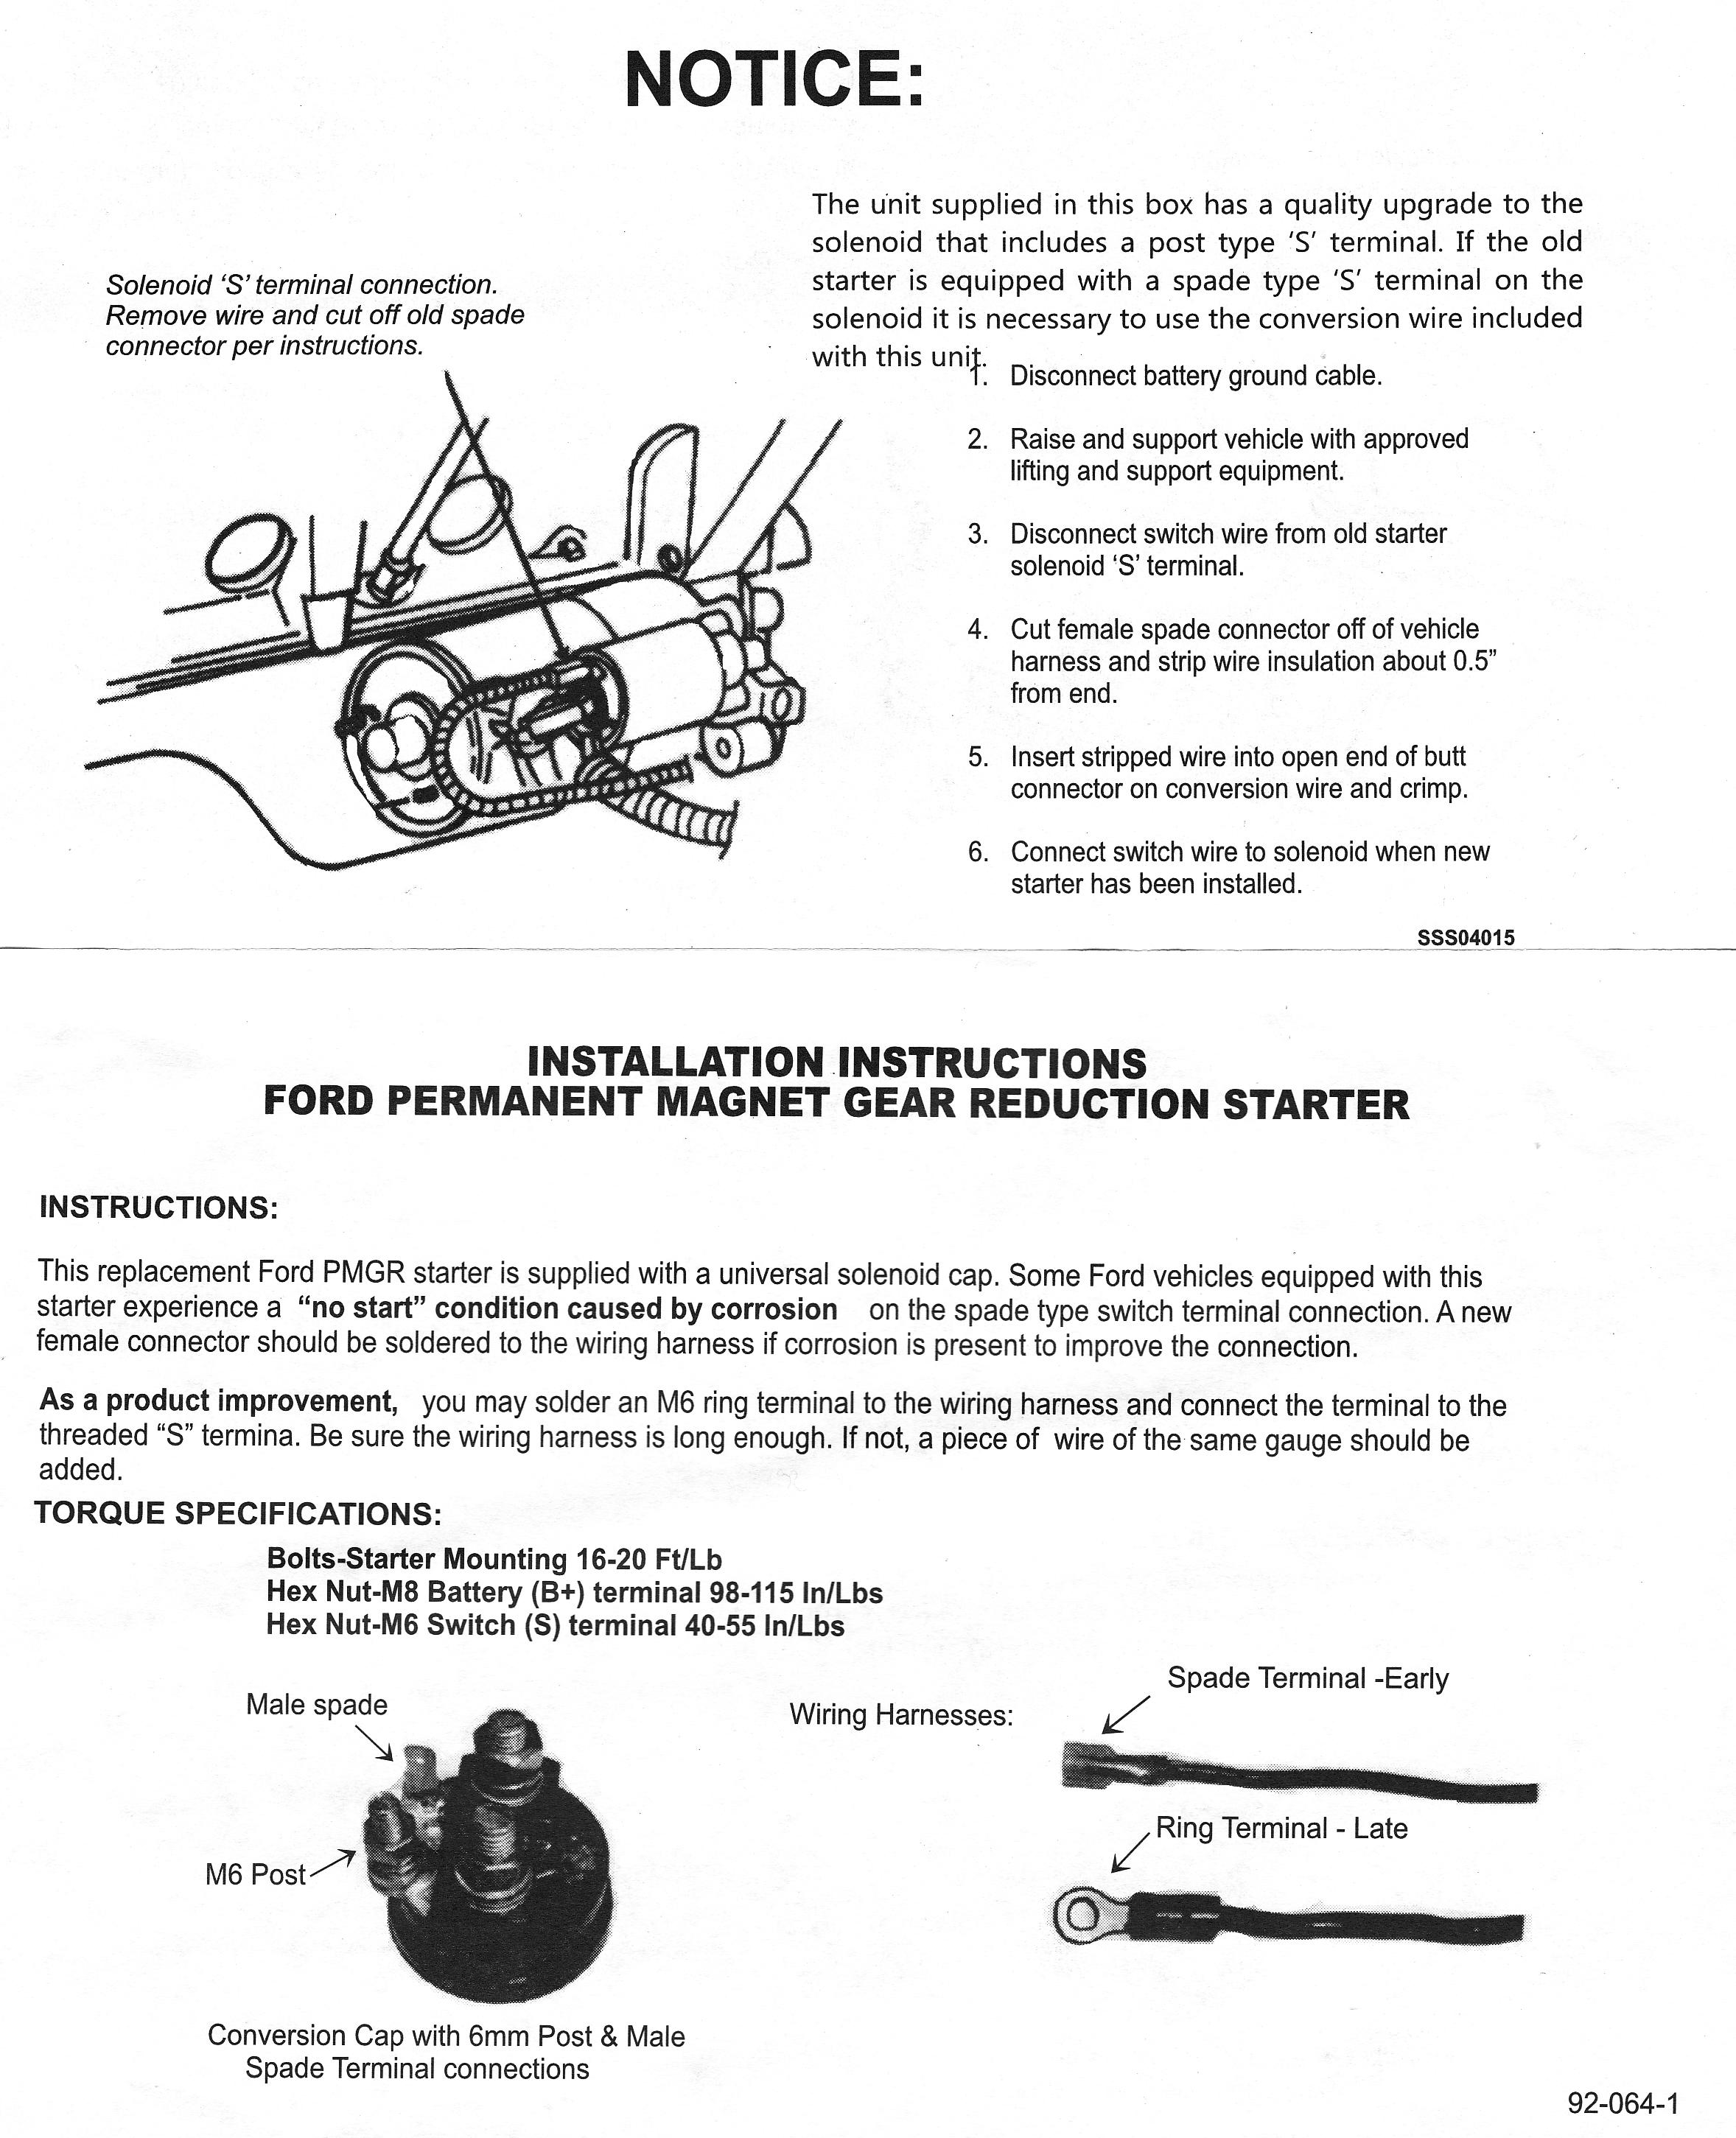
It comes with an explanation page that talks about the differences of the solenoid terminals over the years. Later production solenoids have a post terminal for the small wire, and the instructions say to cut the Faston terminal off the vehicle's wire harness, crimp the new starter pigtail to the old harness, and use the included shrink-wrap to seal the joint. The pigtail is a bit long for this application (this starter and setup is used through 2000 on Explorers etc.) and if I was to do it again, I'd probably shorten it a couple of inches.
So you need at least a crimping tool and a heat source to install this starter on an early production Aero that has a Faston terminal, rather than a post.
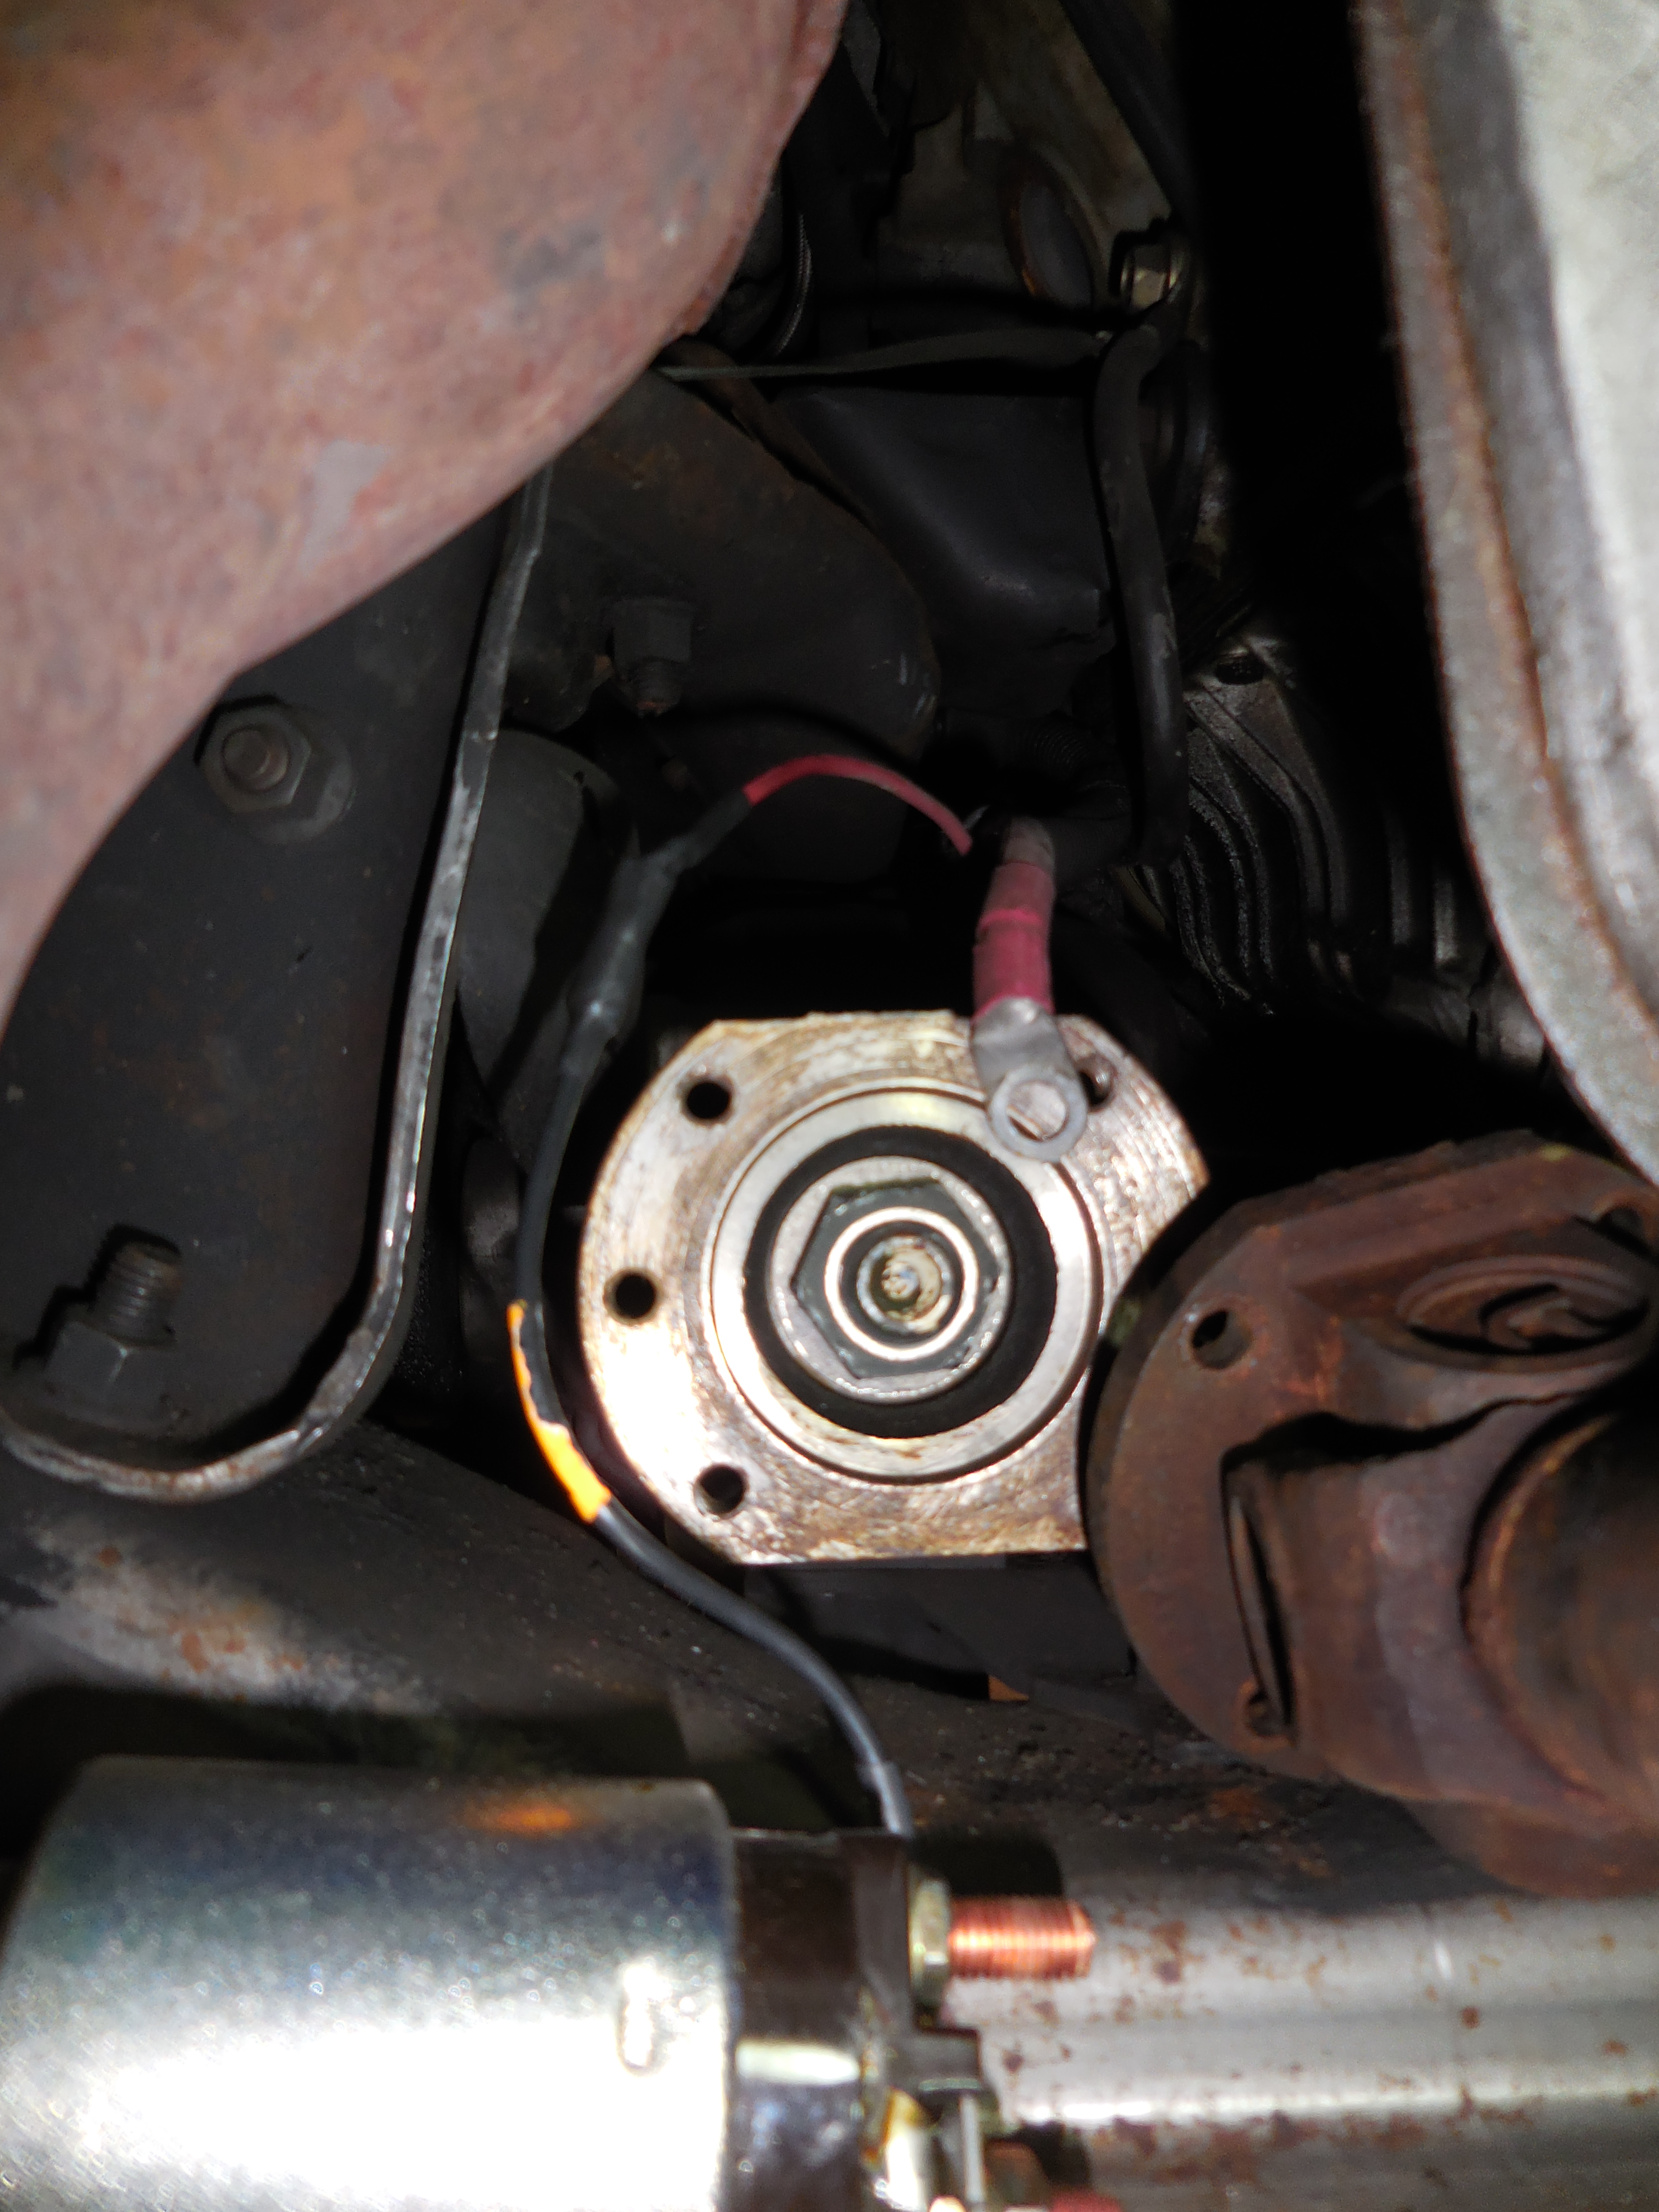
The harness is long enough that, with the starter removed, I could perform the crimp job. I could barely get the crimper up in that area, and I wasn't satisfied that it was a perfect crimp job, so I elected to solder the joint before shrinking the tubing. I used a small propane torch to shrink it. Worked well.
Click HERE for larger
Click HERE for larger
Click HERE for larger

I used an inverted plastic bucket to support the new starter high enough so I could do the crimping, soldering, and heat-shrinking.
Click HERE for larger

Click HERE for larger
Click HERE for larger

Click HERE for larger
Click HERE for larger

Once the crimp/solder/shrink job was complete, the starter slipped back up into place easily, a bit of LocTite blue on the two starter bolts, tightened them in place, reconnected the battery and reset my radio stations.
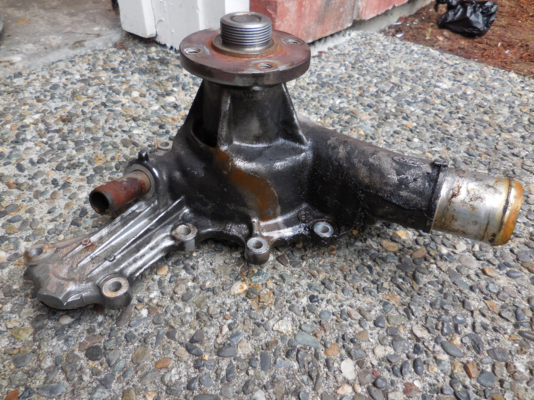
Oh, and while I was under there? I found a rust trail from the water pump and coolant dripping onto the front crossmember. Today's job is to replace the water pump
The battery must be disconnected, of course. No way around it on this job.
Pretty much my experience was what 96Aerostar related above: for the front driveshaft, remove two 10mm bolts, shift to Neutral to rotate the front driveshaft, shift back to Park to remove the last two bolts. I was able to move the driveshaft to the right, rather than the driver's side. No problem removing the starter.
Click HERE for larger

Click HERE for larger

I used a 1/4" drive 13mm deep socket to remove the main battery cable form the starter. The wiring isn't long enough to drop the starter and remove the cable down lower, so removing it before moving the starter lower is necessary.
On very late production Aerostars, the smaller wire is bolted to the solenoid, but all the earlier ones use Faston (spade) terminals; with the earlies, you can just pull the wire off the male spade terminal on the solenoid. If you have a late starter, you'd need to remove the nut on the solenoid to disconnect the smaller wire. It looks to be 10mm. More on this below. My '97 has a production date of 12/96 and has a Faston terminal.
Click HERE for larger

On the 4.0l, two bolts retain the starter to the bellhousing and access is quite good. I used a std box-end wrench and a cheater -- the bolts are quite tight. No clearance problem.
As you can see from the following pics, the starter can be removed with the driveshaft pushed toward the engine. It's tight but not a pry-bar job by any means. I couldn't get my starter out with the driveshaft pushed to the outside.
Click HERE for larger
Click HERE for larger
A note on NAPA products: for years, NAPA part Nos. that began with the numeral '2' were their consumer/cheaper line of products, and while this may or may not be the case any longer, I still find it hard to buy NAPA products whose numbers begin with '2'. This starter was about $20 more than the equivalent one that started with '2'.
It comes with an explanation page that talks about the differences of the solenoid terminals over the years. Later production solenoids have a post terminal for the small wire, and the instructions say to cut the Faston terminal off the vehicle's wire harness, crimp the new starter pigtail to the old harness, and use the included shrink-wrap to seal the joint. The pigtail is a bit long for this application (this starter and setup is used through 2000 on Explorers etc.) and if I was to do it again, I'd probably shorten it a couple of inches.
So you need at least a crimping tool and a heat source to install this starter on an early production Aero that has a Faston terminal, rather than a post.
The harness is long enough that, with the starter removed, I could perform the crimp job. I could barely get the crimper up in that area, and I wasn't satisfied that it was a perfect crimp job, so I elected to solder the joint before shrinking the tubing. I used a small propane torch to shrink it. Worked well.
Click HERE for larger
Click HERE for larger

Click HERE for larger
I used an inverted plastic bucket to support the new starter high enough so I could do the crimping, soldering, and heat-shrinking.
Click HERE for larger
Click HERE for larger

Click HERE for larger
Click HERE for larger

Click HERE for larger
Once the crimp/solder/shrink job was complete, the starter slipped back up into place easily, a bit of LocTite blue on the two starter bolts, tightened them in place, reconnected the battery and reset my radio stations.
Oh, and while I was under there? I found a rust trail from the water pump and coolant dripping onto the front crossmember. Today's job is to replace the water pump
#11
06-28-2014, 04:06 AM

Thanks for the great write-up and pictures.
I want to say that I used a long extension with a 13 mm socket to loosen the starter bolts. The ratchet was somewhere in front of the motor to do this.
The other thing was that someone on this forum suggested that I raised the tail of the transmission (remove crossmember nuts) a little to ease removal of the starter motor. It worked for me.
#12
06-28-2014, 01:48 PM
On my '97 4.0l, the starter is retained with only two bolts, and they're both easy to get to from below with a box-end wrench, and no ratchet required. I've done the stack-of-extensions job on other cars to get at a bolt or two on the top of the starter, but this one didn't require it -- maybe the earlier ones are different? All my other Aeros had the Vulcan.
The AWD driveshaft makes this just one step more complex than normal, and the wire splice I didn't expect. If you go to an online merchant, say RockAuto, some product lines explicitly list two different starters for 1997 ("w/post" and "w/spade"), and I was expecting the NAPA starter to come with the usual adapter so a post type could be converted to work with a Faston/spade harness, and I was surprised that NAPA went with the "cut and splice your harness" method instead. Fortunately, I had the supplies to do it that way, but not everyone would be prepared for that.
Oh, the water pump? It wasn't leaking much, but definitely ready to be changed.
Click HERE for larger


Thread
Thread Starter
Forum
Replies
Last Post
SubieDriver
1980 - 1986 Bullnose F100, F150 & Larger F-Series Trucks
38
04-28-2017 04:28 PM