
'05+ Front Axle with 2.5 Springs and Pro Comp Rear 22415
#1
 05-13-2022, 02:32 PM


'05+ Front Axle with 2.5 Springs and Pro Comp Rear 22415
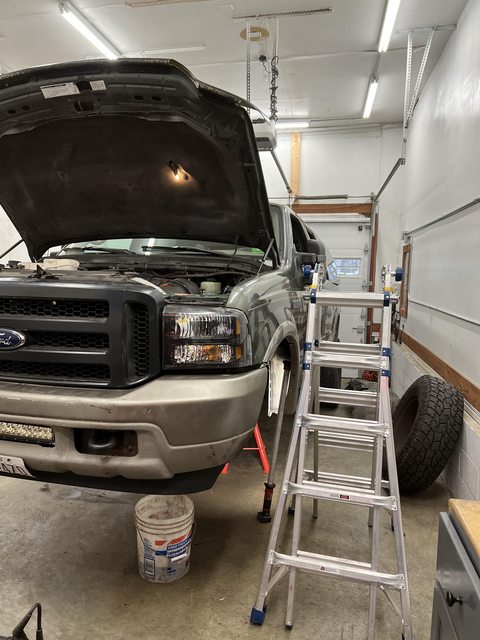
I wanted to share my axle swap with everyone. Thanks to Nicmike and others who posted their experiences and made this much easier to plan for and complete. I figured I would compile a lot of the information I learned into a more condensed write-up so people could reference it easily.
I went with the Pro Comp rear leaf springs 22415 to compliment a 2006 front axle on Carli 2.5” lift coil springs with Bilstein shocks. It took me a while to find a 4.30 front. I installed all these parts to replace the V and Modified B code super duty leaf springs that I installed a few years ago. I kept my rear axle (for now) and used BORA 2” spacers to match the track width. I already had rear Bilstein shocks 33-185569. I matched the same Bilstein shock valve profile with the newer front axle. I also kept the existing brake master cylinder. If/when I upgrade the rear, I will put in the larger master cylinder.
When I had any of the frame and body exposed, I would scrape the loose rust off and spray Noxudol 300 onto the area. Some pics you will see rusty parts and others were already covered in Noxudol. Any cavity areas were sprayed with Noxudol 700.
Below are some of the major parts I used, you may or may not use these for your own swap (listed as part, brand, P/N, link). Hopefully this is helpful to someone:
Radius Arm Brackets (2.5" lift), PMF, 1 x PMF-FRD-3013-25, http://www.pmfsuspension.com/2005-16...unts_p_74.html
Trackbar, PMF, 1 x PMF-FRD-5003-45, https://www.pmfsuspension.com/2005-2...kbar_p_57.html
Rear Leaf Top Plate / Tang, PMF, 1 x PMF-FRD-4050-AT-625, https://www.pmfsuspension.com/2005-2...kbar_p_57.html
Rear U Bolts - 5/8 x 2 1/2 x 8 1/2, PMF, 1 x PMF-UBR625-SRW-0, https://www.pmfsuspension.com/Airbag...tes_p_163.html
Front Shocks, Bilstein, 2 x 33-230351, https://www.4wheelparts.com//p/bilst...BBGL-33-230351
Front Springs, Carli, 1 x CS-FLC-05, https://www.dieselpowerproducts.com/...f-350-4x4.aspx
Front Brake Lines, Russell, 2 x RUS-657390, https://www.summitracing.com/parts/RUS-657390
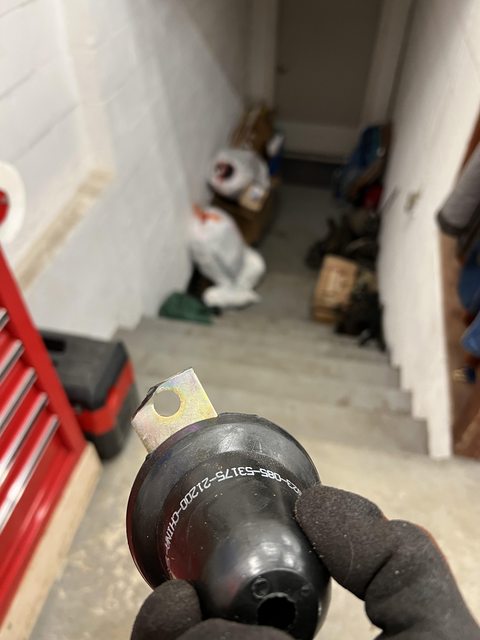
Front Bump Stops, Dorman, 2 x 523-085
Steering Damper, Bilstein, 1 x 33-170862, https://www.dieselpowerproducts.com/...rduty-4wd.aspx
Rear Leaf Springs, Pro Comp, 22415,
Rear Bump Stops, Energy Suspension, 1 x 9.9155G, https://www.rockauto.com/en/parts/en...ump+stop,19119
RH Coil Bucket, Ford, 1 x 5C3Z-5793-CA, https://parts.autonationfordwhitebea...RpZXNlbA%3D%3D
LH Coil Bucket, Ford, 1 x 5C3Z-5A306-CA, https://parts.autonationfordwhitebea...RpZXNlbA%3D%3D
Rear 2 Deg. Shim, WFO, WFO 2.0-3, https://www.wfoconcepts.com/<acronym...Wide/4384/4391
Coil Bucket Bolts 7/16-14 x 1.5, Amazon, 14 x 0142786,
Coil Bucket Nuts 7/16-14 x 1.5", Amazon, 14 x 37344,
Steering Gear Bolts M14-2 x 140, Fastenal, 3 x 11113744, https://www.fastenal.com/product?query=11113744
Rotors, Raybestos, 2 x 680280FZN, https://www.rockauto.com/en/parts/ra...FZN,rotor,1896
Brake Pads, Raybestos, 1 x SP1069TRH, https://www.rockauto.com/en/parts/ra...brake+pad,1684
Wheel Stud, Dorman, 16 x 610424, https://www.rockauto.com/en/parts/do...,lug+stud,7680
Dana Front Outer Axle Shaft Seal, Dana, 2 x 2023068, https://www.rockauto.com/en/parts/da...haft+seal,2336
Yellow O-ring Vacuum Hub, Dana, 2 x 54983, https://www.rockauto.com/en/parts/da...b+o-ring,12808
Inner Dust Seal, Dana, 2 x 2014835, https://www.rockauto.com/en/parts/da...haft+seal,2336
Hydro-boost to Steering Gear Hose, Gates, 365892, https://www.rockauto.com/en/parts/ga...sure+hose,7320
Steering Gear to Cooler Hose, Gates, 365437, https://www.rockauto.com/en/parts/ga...turn+hose,7324
Rear Bump Stops, Energy Suspension, 9.9155G, https://www.rockauto.com/en/parts/en...ump+stop,19119
Front Bump Stops, Energy Suspension, 9.9101G, https://www.rockauto.com/en/parts/en...ump+stop,19119
Front Brake Caliper, Duralast, 18-B4996, https://www.autozone.com/brakes-and-...996/564742_0_0
Front Brake Caliper, Duralast, 18-B4997, https://www.autozone.com/brakes-and-...997/564743_0_0
Wheel Bearing/Hub, Timken, SP940201, https://www.rockauto.com/en/parts/ti...ing+&+hub,1636
I only bought wheel studs so I can keep my coarse thread lug nuts (which match my rear axle). I only replaced one hub because only one felt bad and they aren’t cheap. I also replaced some of the worn steering component rod ends with Moog components (Moog ES80754, DS300008).
I also bought the OTC 6697 axle shaft install tool and a bunch of random consumables.
I tried to rebuild the calipers but failed miserably at getting the boots back on the pistons, so I just bought part-store pre-rebuilt calipers.
I replaced the steering gear to cooler hose because the o-ring on my existing line wasn’t in great shape and a brand-new replacement hose was only like 11 bucks on Rockauto.
If I were to do it again, I would probably make my own steering gear pressure hose with AN materials (using Russell 648060 and 648020), the one I used was pressed closely against the coil bucket. I wrapped the hard section in foam tape to hopefully alleviate any friction issues. I would also probably make my own brake lines so that I could use some pieces to “aim” the end away from the caliper/tire. I only used the listed Russell ones because PMF took too long with the custom ones that I ordered (they make custom ones to match whatever you need).
List of helpful torque specs (thanks to Nicmike and others):
Radius arm-to-frame 185 ft/lbs
Radius arm-to-axle 295 ft/lbs
Tie rod castle nuts (all) 67 ft/lbs
Stabilizer bar nuts 60 ft lbs
Stabilizer bar bolts 36 ft/lbs
Steering damper nuts 67 ft/lbs
Upper track bar bolt 406 ft/lbs (30 mm)
Track bar ball joint nut 183 ft/lbs
Steering gear to frame 111 ft/lbs red thread lock
Drag link to pitman arm nut 66 ft/lbs
Steering shaft to steering box 36 ft/lbs blue thread lock pinch bolt
Rear u-bolts 100 ft lbs (per PMF for their top plates)
I went with the Pro Comp rear leaf springs 22415 to compliment a 2006 front axle on Carli 2.5” lift coil springs with Bilstein shocks. It took me a while to find a 4.30 front. I installed all these parts to replace the V and Modified B code super duty leaf springs that I installed a few years ago. I kept my rear axle (for now) and used BORA 2” spacers to match the track width. I already had rear Bilstein shocks 33-185569. I matched the same Bilstein shock valve profile with the newer front axle. I also kept the existing brake master cylinder. If/when I upgrade the rear, I will put in the larger master cylinder.
When I had any of the frame and body exposed, I would scrape the loose rust off and spray Noxudol 300 onto the area. Some pics you will see rusty parts and others were already covered in Noxudol. Any cavity areas were sprayed with Noxudol 700.
Below are some of the major parts I used, you may or may not use these for your own swap (listed as part, brand, P/N, link). Hopefully this is helpful to someone:
Radius Arm Brackets (2.5" lift), PMF, 1 x PMF-FRD-3013-25, http://www.pmfsuspension.com/2005-16...unts_p_74.html
Trackbar, PMF, 1 x PMF-FRD-5003-45, https://www.pmfsuspension.com/2005-2...kbar_p_57.html
Rear Leaf Top Plate / Tang, PMF, 1 x PMF-FRD-4050-AT-625, https://www.pmfsuspension.com/2005-2...kbar_p_57.html
Rear U Bolts - 5/8 x 2 1/2 x 8 1/2, PMF, 1 x PMF-UBR625-SRW-0, https://www.pmfsuspension.com/Airbag...tes_p_163.html
Front Shocks, Bilstein, 2 x 33-230351, https://www.4wheelparts.com//p/bilst...BBGL-33-230351
Front Springs, Carli, 1 x CS-FLC-05, https://www.dieselpowerproducts.com/...f-350-4x4.aspx
Front Brake Lines, Russell, 2 x RUS-657390, https://www.summitracing.com/parts/RUS-657390
Front Bump Stops, Dorman, 2 x 523-085
Steering Damper, Bilstein, 1 x 33-170862, https://www.dieselpowerproducts.com/...rduty-4wd.aspx
Rear Leaf Springs, Pro Comp, 22415,
Rear Bump Stops, Energy Suspension, 1 x 9.9155G, https://www.rockauto.com/en/parts/en...ump+stop,19119
RH Coil Bucket, Ford, 1 x 5C3Z-5793-CA, https://parts.autonationfordwhitebea...RpZXNlbA%3D%3D
LH Coil Bucket, Ford, 1 x 5C3Z-5A306-CA, https://parts.autonationfordwhitebea...RpZXNlbA%3D%3D
Rear 2 Deg. Shim, WFO, WFO 2.0-3, https://www.wfoconcepts.com/<acronym...Wide/4384/4391
Coil Bucket Bolts 7/16-14 x 1.5, Amazon, 14 x 0142786,
Coil Bucket Nuts 7/16-14 x 1.5", Amazon, 14 x 37344,
Steering Gear Bolts M14-2 x 140, Fastenal, 3 x 11113744, https://www.fastenal.com/product?query=11113744
Rotors, Raybestos, 2 x 680280FZN, https://www.rockauto.com/en/parts/ra...FZN,rotor,1896
Brake Pads, Raybestos, 1 x SP1069TRH, https://www.rockauto.com/en/parts/ra...brake+pad,1684
Wheel Stud, Dorman, 16 x 610424, https://www.rockauto.com/en/parts/do...,lug+stud,7680
Dana Front Outer Axle Shaft Seal, Dana, 2 x 2023068, https://www.rockauto.com/en/parts/da...haft+seal,2336
Yellow O-ring Vacuum Hub, Dana, 2 x 54983, https://www.rockauto.com/en/parts/da...b+o-ring,12808
Inner Dust Seal, Dana, 2 x 2014835, https://www.rockauto.com/en/parts/da...haft+seal,2336
Hydro-boost to Steering Gear Hose, Gates, 365892, https://www.rockauto.com/en/parts/ga...sure+hose,7320
Steering Gear to Cooler Hose, Gates, 365437, https://www.rockauto.com/en/parts/ga...turn+hose,7324
Rear Bump Stops, Energy Suspension, 9.9155G, https://www.rockauto.com/en/parts/en...ump+stop,19119
Front Bump Stops, Energy Suspension, 9.9101G, https://www.rockauto.com/en/parts/en...ump+stop,19119
Front Brake Caliper, Duralast, 18-B4996, https://www.autozone.com/brakes-and-...996/564742_0_0
Front Brake Caliper, Duralast, 18-B4997, https://www.autozone.com/brakes-and-...997/564743_0_0
Wheel Bearing/Hub, Timken, SP940201, https://www.rockauto.com/en/parts/ti...ing+&+hub,1636
I only bought wheel studs so I can keep my coarse thread lug nuts (which match my rear axle). I only replaced one hub because only one felt bad and they aren’t cheap. I also replaced some of the worn steering component rod ends with Moog components (Moog ES80754, DS300008).
I also bought the OTC 6697 axle shaft install tool and a bunch of random consumables.
I tried to rebuild the calipers but failed miserably at getting the boots back on the pistons, so I just bought part-store pre-rebuilt calipers.
I replaced the steering gear to cooler hose because the o-ring on my existing line wasn’t in great shape and a brand-new replacement hose was only like 11 bucks on Rockauto.
If I were to do it again, I would probably make my own steering gear pressure hose with AN materials (using Russell 648060 and 648020), the one I used was pressed closely against the coil bucket. I wrapped the hard section in foam tape to hopefully alleviate any friction issues. I would also probably make my own brake lines so that I could use some pieces to “aim” the end away from the caliper/tire. I only used the listed Russell ones because PMF took too long with the custom ones that I ordered (they make custom ones to match whatever you need).
List of helpful torque specs (thanks to Nicmike and others):
Radius arm-to-frame 185 ft/lbs
Radius arm-to-axle 295 ft/lbs
Tie rod castle nuts (all) 67 ft/lbs
Stabilizer bar nuts 60 ft lbs
Stabilizer bar bolts 36 ft/lbs
Steering damper nuts 67 ft/lbs
Upper track bar bolt 406 ft/lbs (30 mm)
Track bar ball joint nut 183 ft/lbs
Steering gear to frame 111 ft/lbs red thread lock
Drag link to pitman arm nut 66 ft/lbs
Steering shaft to steering box 36 ft/lbs blue thread lock pinch bolt
Rear u-bolts 100 ft lbs (per PMF for their top plates)
The following 7 users liked this post by RPhil:
#2
05-13-2022, 02:33 PM
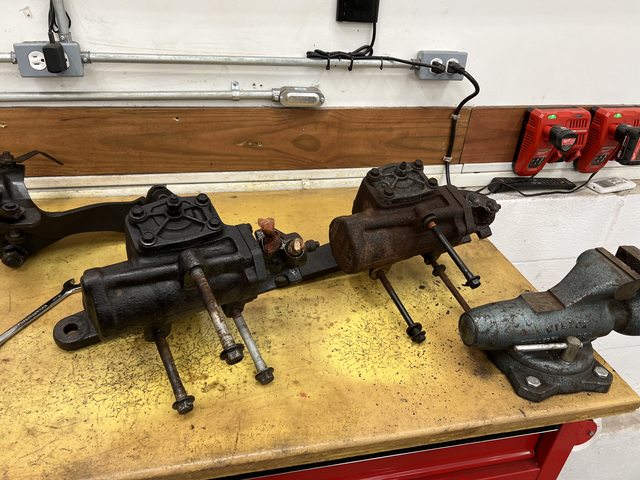
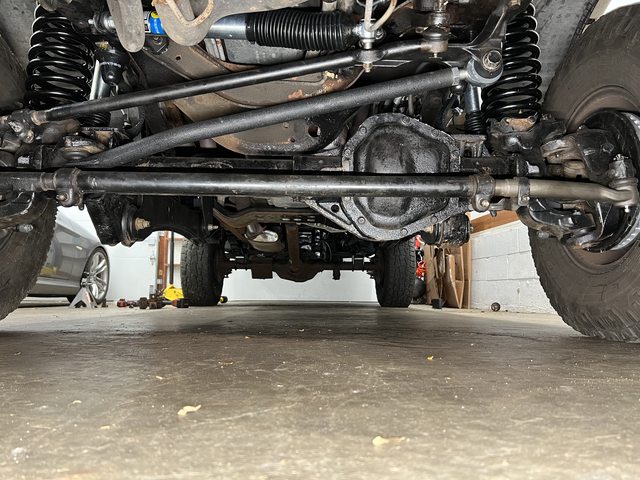
Front suspension:
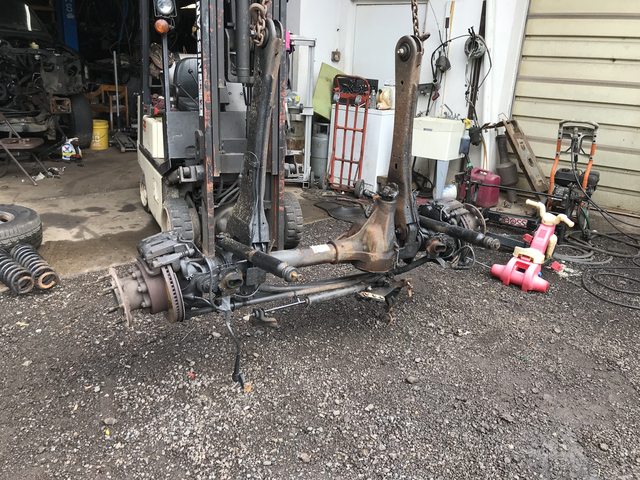
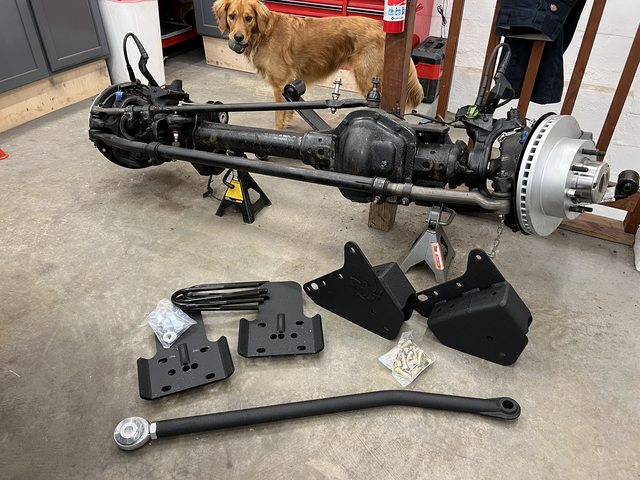
Acquire front axle, clean, tear apart, replace components as you see fit:
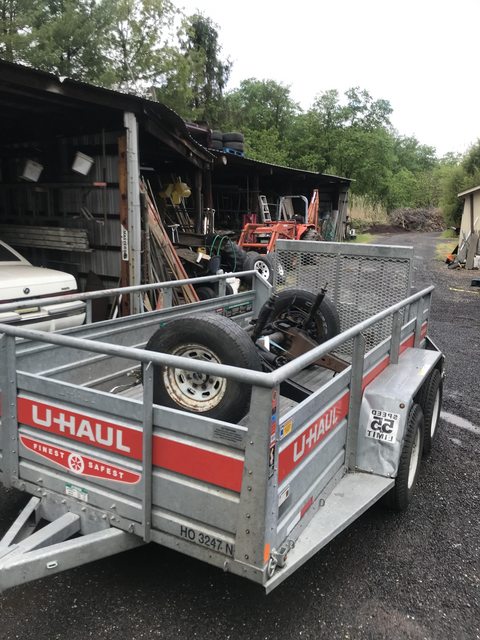
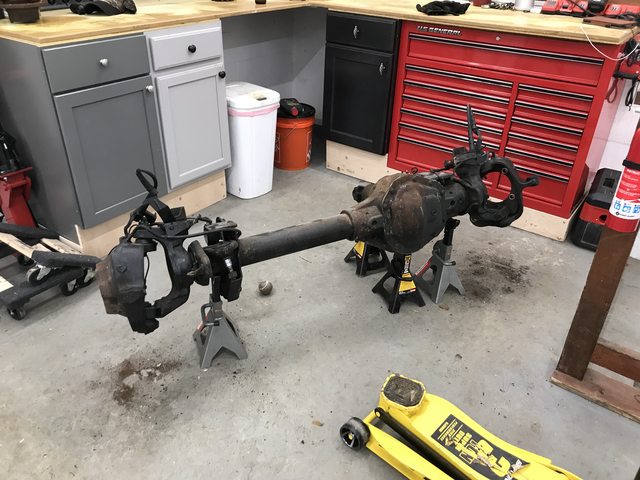
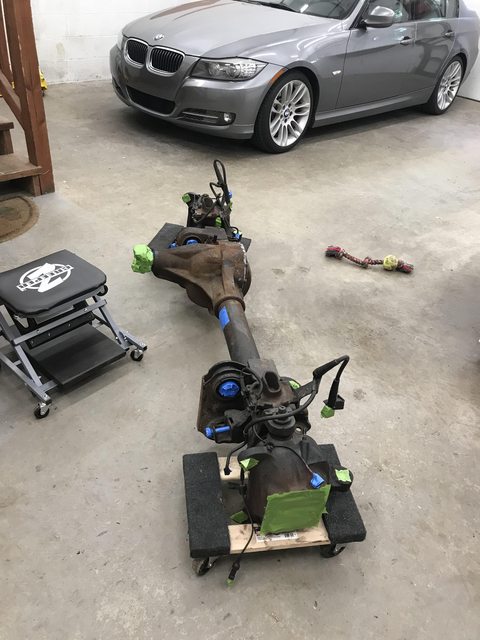
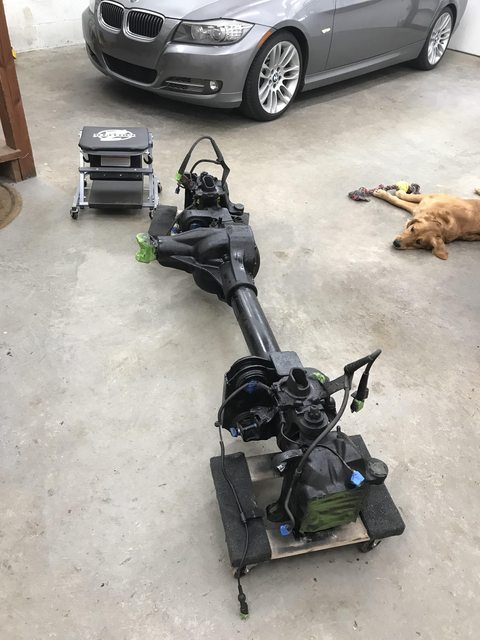
Acquire various swap related parts:
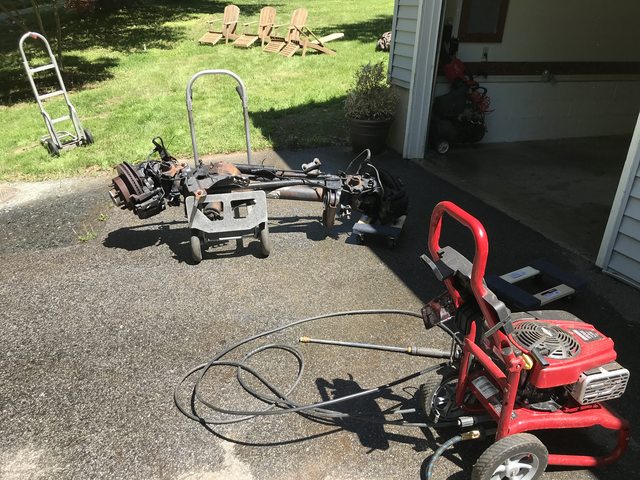
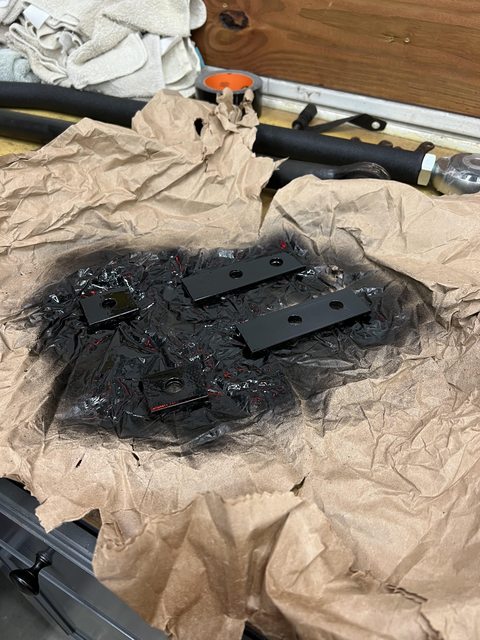
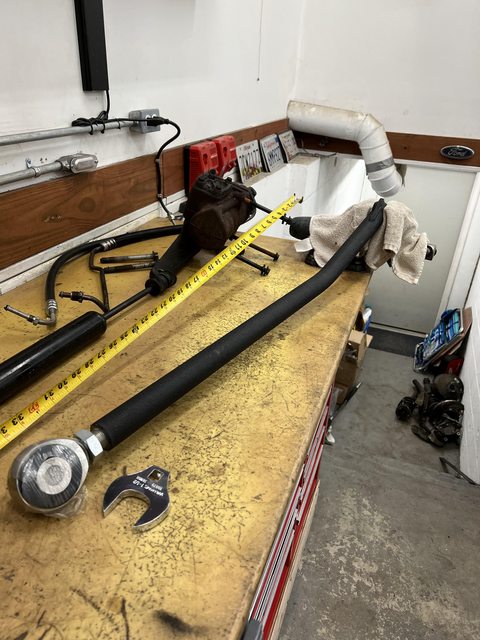
Then it was time to get to work. I’ll let the pictures do most of the talking:

Made some plate washers out of 1/4 flat stock:
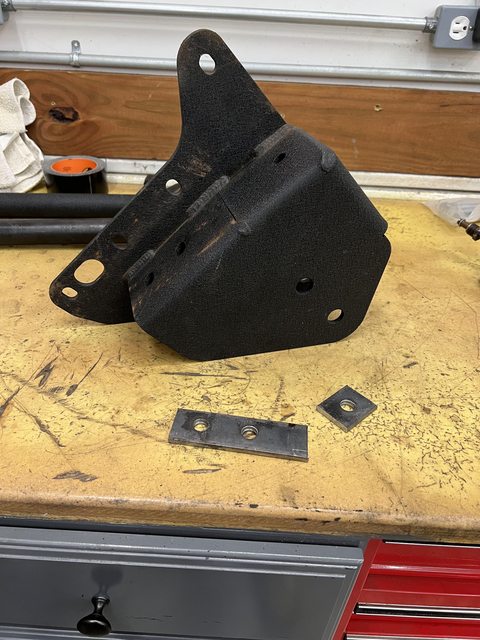
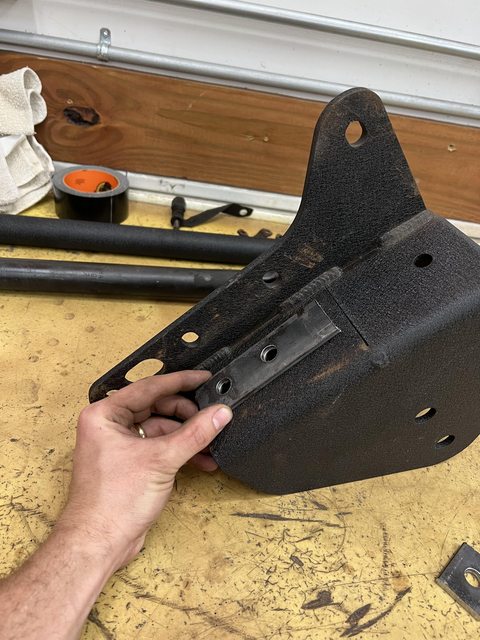
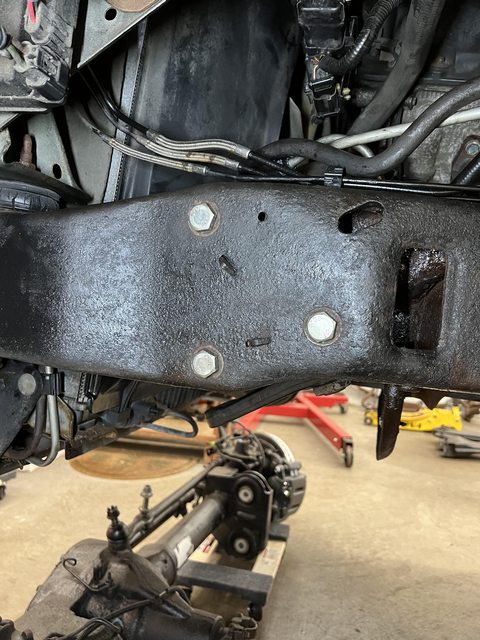
Bolted brackets up to existing holes so I could mark and drill out the others:
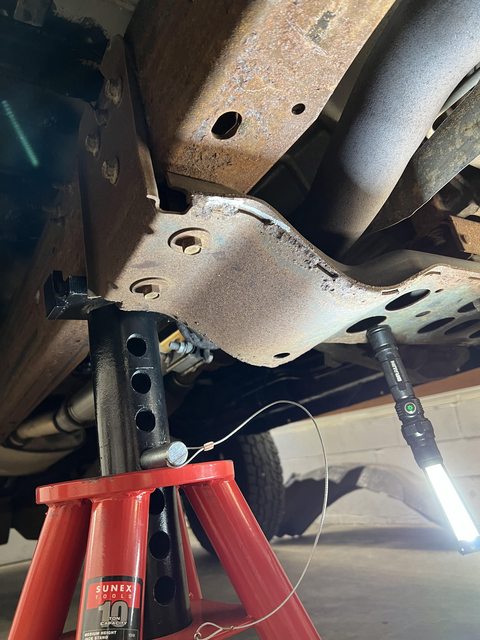
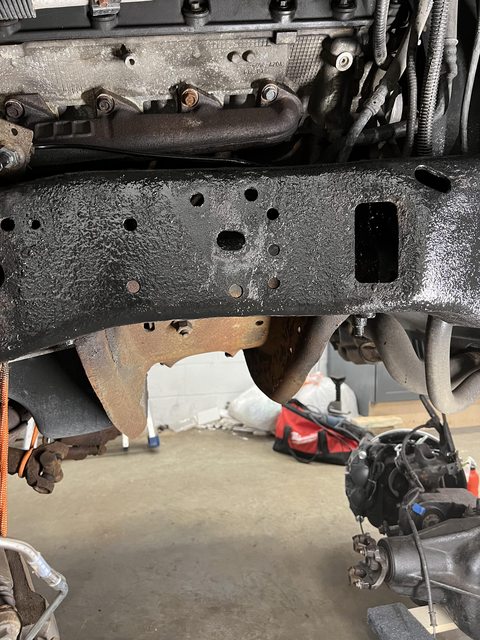
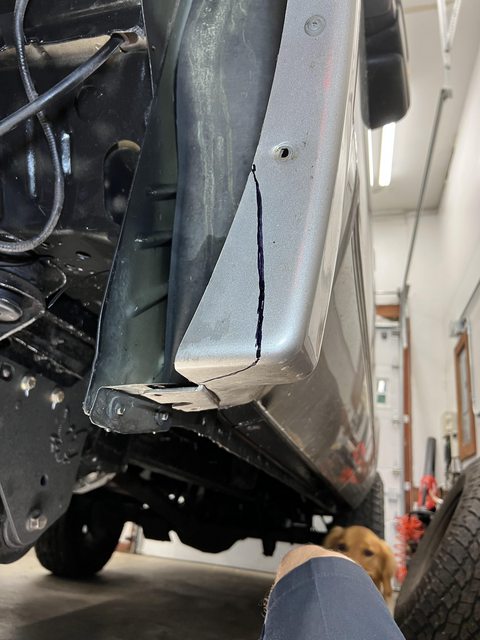
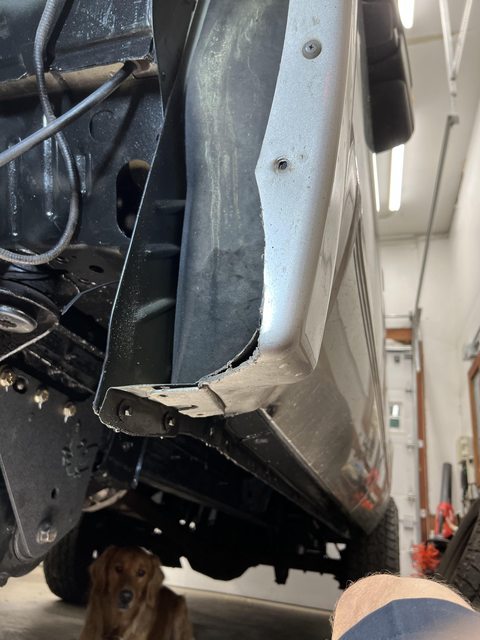
Had to trim crossmember slightly, see silver sharpie area:
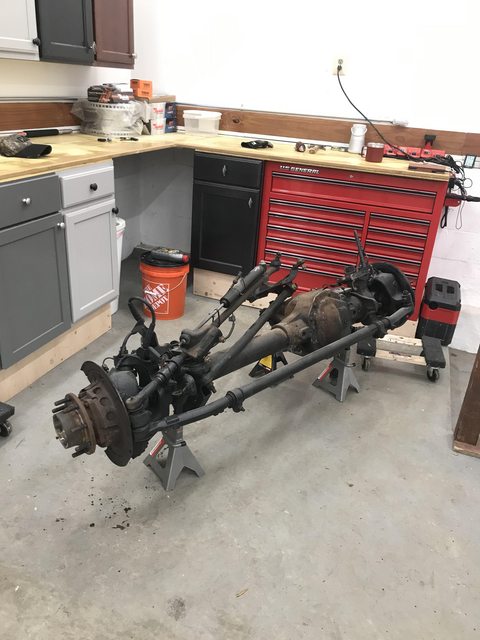
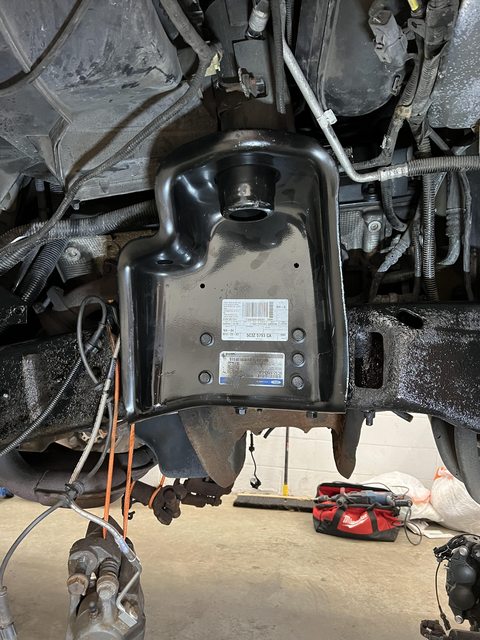
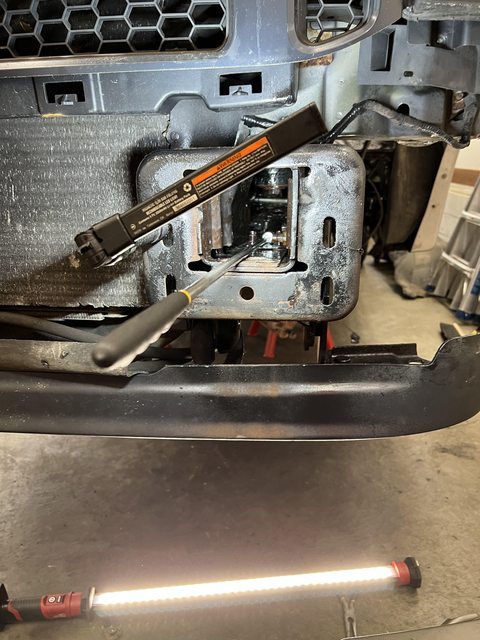
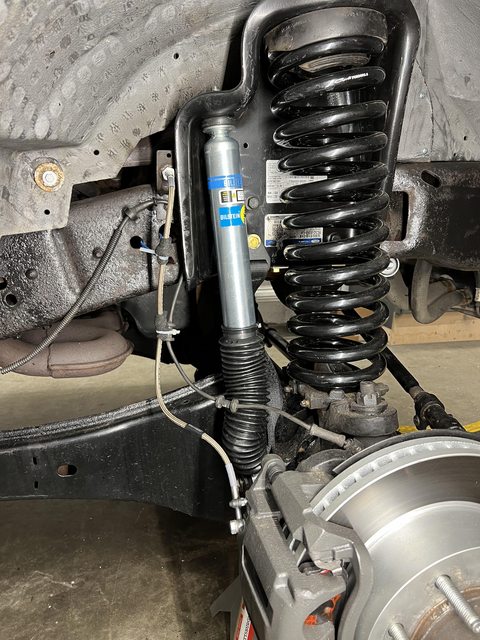
Coil bucket install:
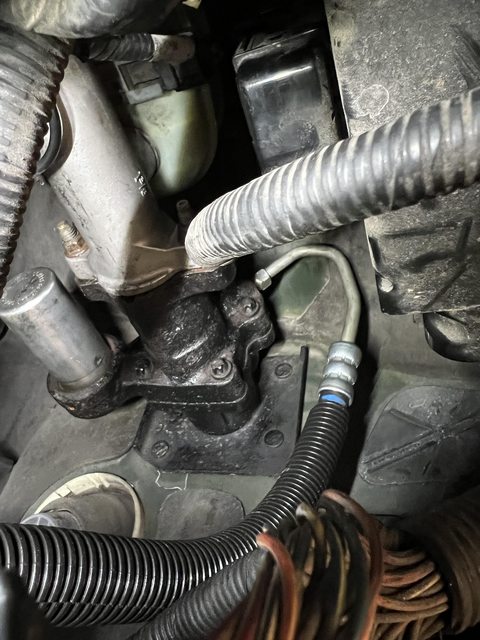
Steering gear bolts, had to drill these holes out for larger hardware:
New hydroboost-to-steering gear hose, had to remove the 90 deg. fitting that was at the hydroboost:
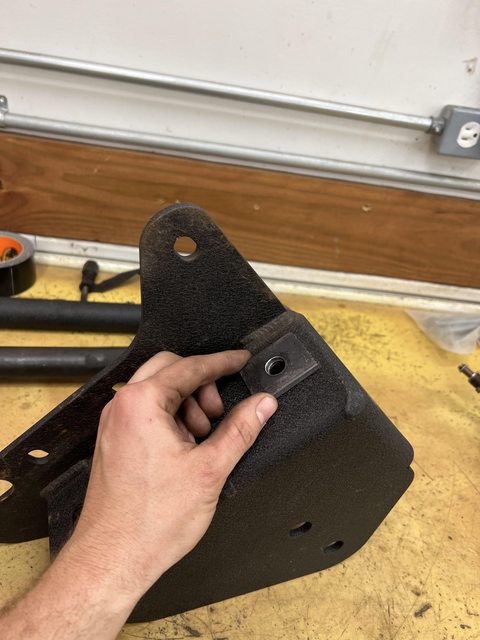
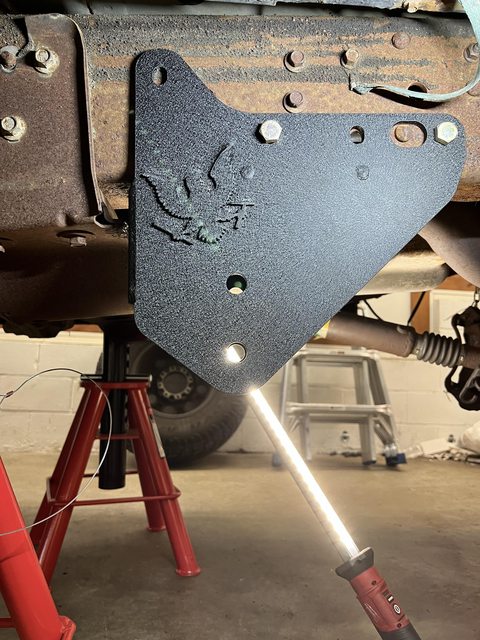
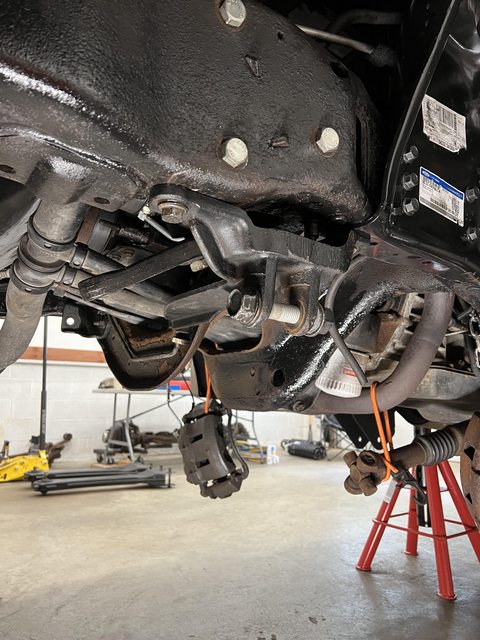
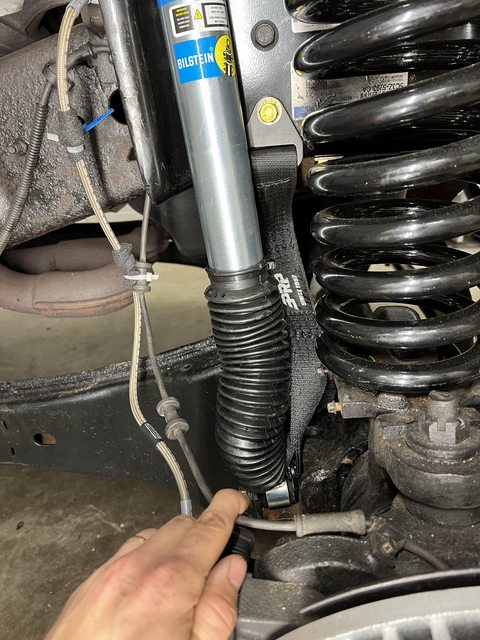
Track bar bracket:
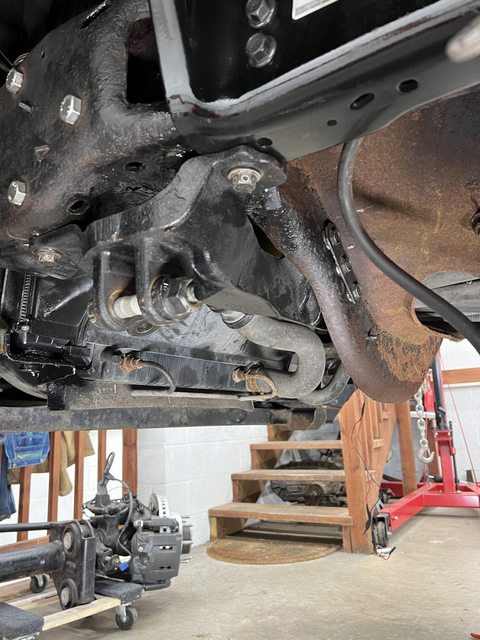
Fishing captured nut in through front frame for track bar bracket:
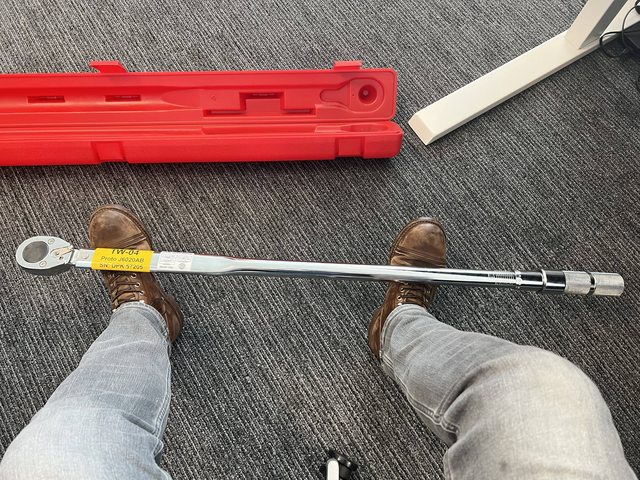
PMF adjustable track bar, needed a big crow’s foot adapter to properly torque:
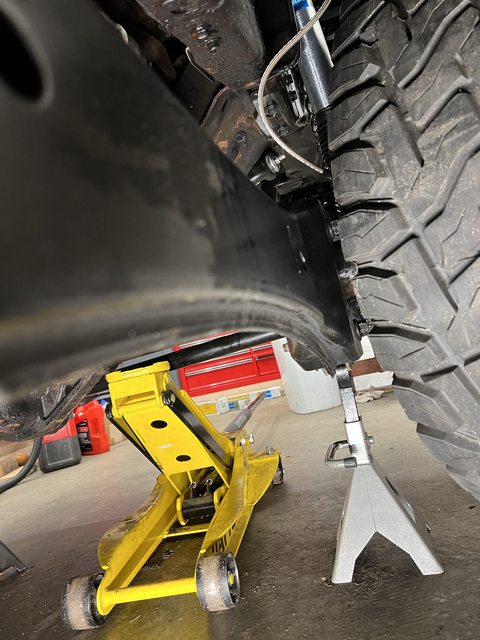
Then it was time to start moving the axle in:
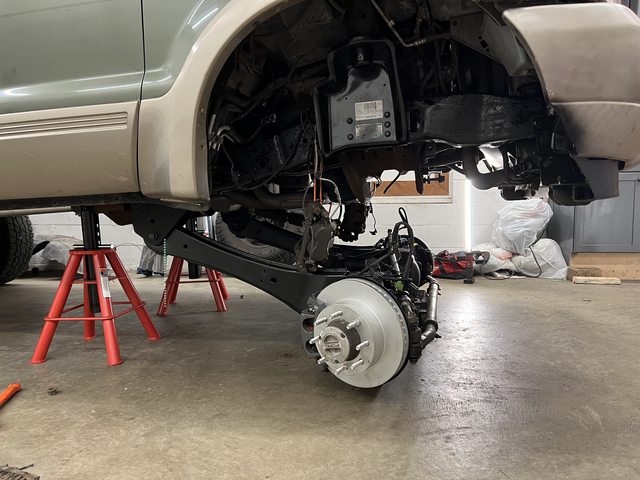
Attachment 278358
That’s a big torque wrench:
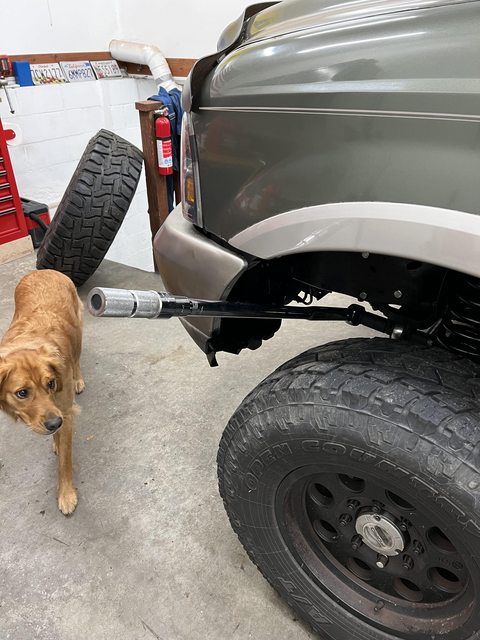
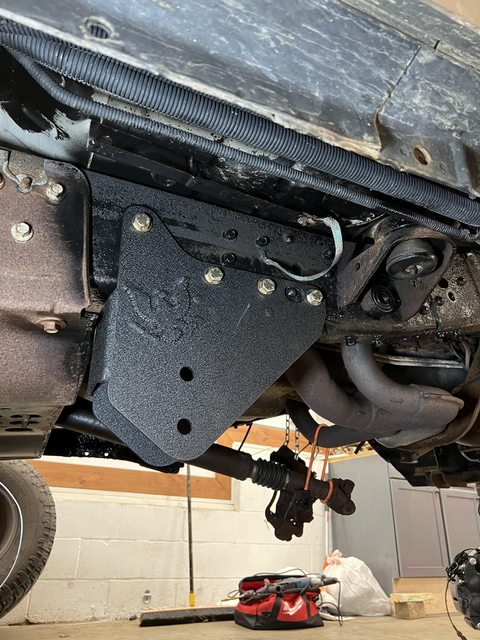
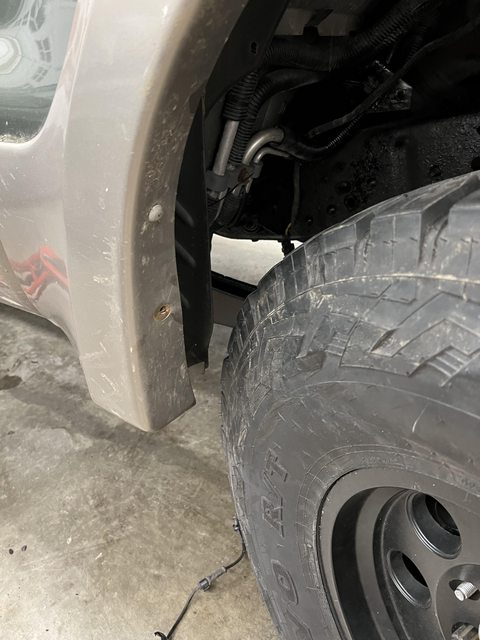
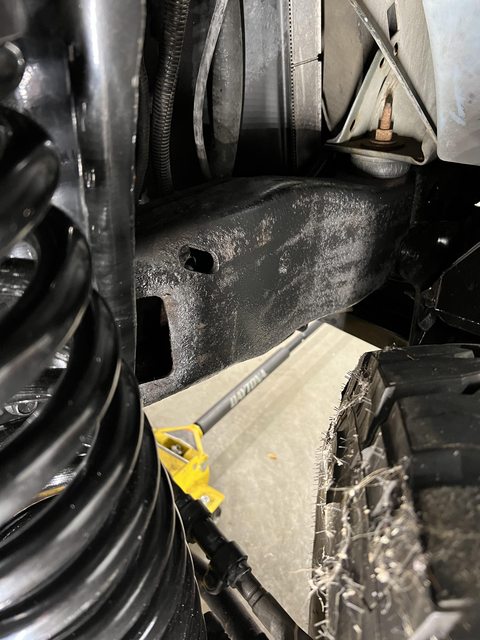
Front bump stop had to be trimmed due to proximity to track bar bracket:
Some final front end pictures. I did a lot of measuring to get that limit strap so it drooped just enough. Right around 4” of downtravel. This allows the axle to fall just far enough before the spring starts becoming unseated from the bucket, which is also right before the shock runs out of length. There is about 1” of safety built in here in case of strap stretch. There is about 5” of uptravel before the bump stop. It is right on the edge of the collapsed length of the shock. I don’t plan on jumping the truck or anything too crazy. I could space out the bump stop or get a longer one I guess.
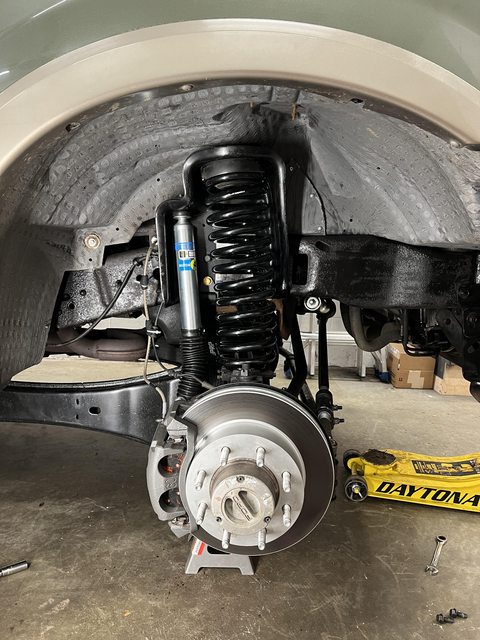
Good look at the PMF track bar:
Acquire front axle, clean, tear apart, replace components as you see fit:
Acquire various swap related parts:
Then it was time to get to work. I’ll let the pictures do most of the talking:
Made some plate washers out of 1/4 flat stock:
Bolted brackets up to existing holes so I could mark and drill out the others:
Had to trim crossmember slightly, see silver sharpie area:
Coil bucket install:
Steering gear bolts, had to drill these holes out for larger hardware:
New hydroboost-to-steering gear hose, had to remove the 90 deg. fitting that was at the hydroboost:
Track bar bracket:
Fishing captured nut in through front frame for track bar bracket:
PMF adjustable track bar, needed a big crow’s foot adapter to properly torque:
Then it was time to start moving the axle in:
Attachment 278358
That’s a big torque wrench:
Front bump stop had to be trimmed due to proximity to track bar bracket:
Some final front end pictures. I did a lot of measuring to get that limit strap so it drooped just enough. Right around 4” of downtravel. This allows the axle to fall just far enough before the spring starts becoming unseated from the bucket, which is also right before the shock runs out of length. There is about 1” of safety built in here in case of strap stretch. There is about 5” of uptravel before the bump stop. It is right on the edge of the collapsed length of the shock. I don’t plan on jumping the truck or anything too crazy. I could space out the bump stop or get a longer one I guess.
Good look at the PMF track bar:
The following 2 users liked this post by RPhil:
#3
05-13-2022, 02:34 PM
The following users liked this post:
#4
05-13-2022, 02:34 PM
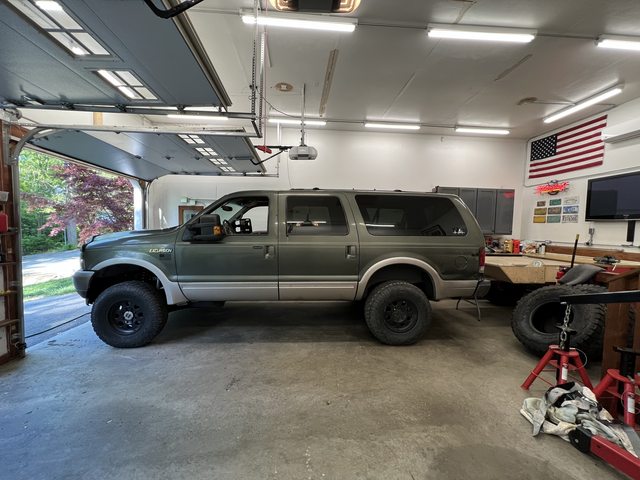
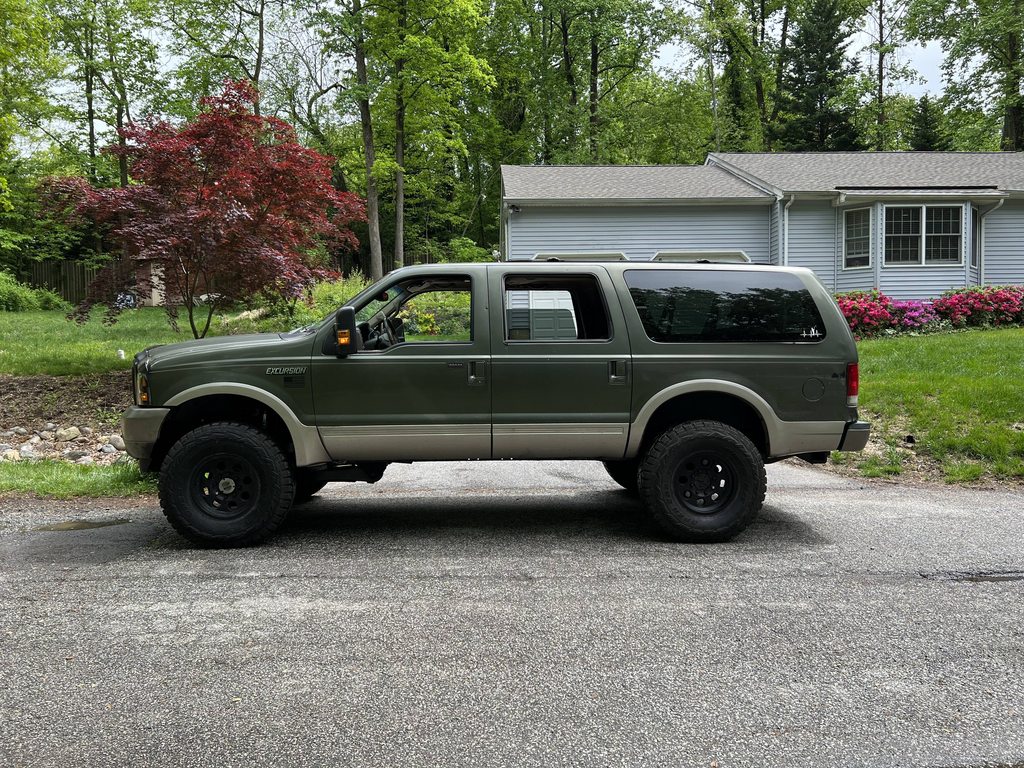
Tire clearances and before/after comparison:
Wheels are 17x8 and 4.5” backspacing. Trimmed front bumper a little bit before I even had my new tires. I didn’t take any pics during that time. Once I got my new tire mounted, the only spot it hit was the trim in the rear of the wheel well and some of the liner at bump. I trimmed the trim and cut the liner in certain spots and pulled it back with zip ties. I have 0 interference anywhere now and clearance lock-to-lock.
Before the trim cut (bumper side already done):

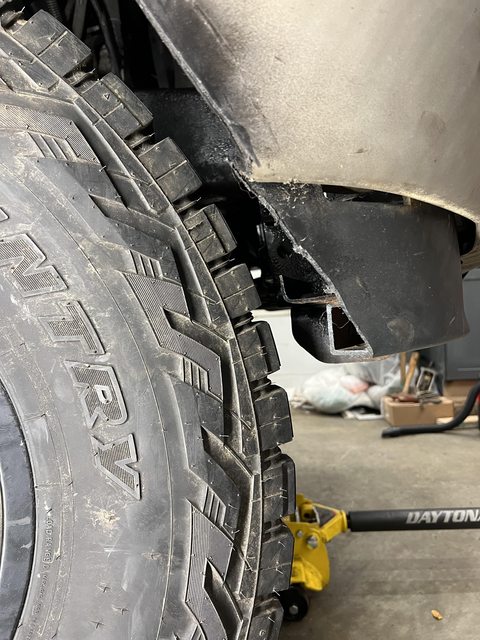
Trim:
Pull liner back:

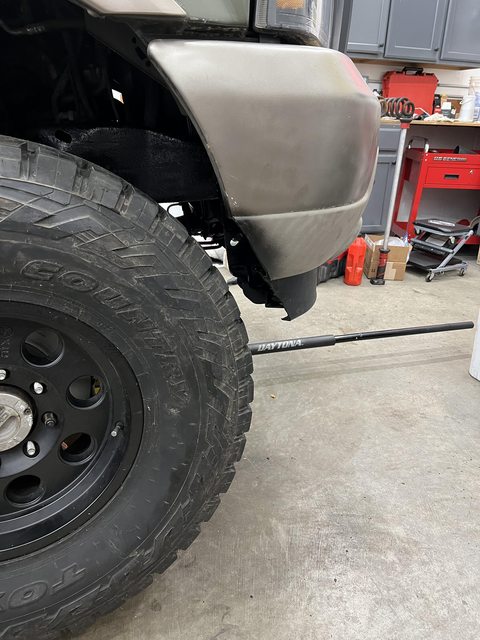
Lock-to-lock clearance on frame side:
Before pic with front V codes and rear modded B codes (had probably 400 or so pounds in the back as well here):

After pic:
Another after pic with the old tires:

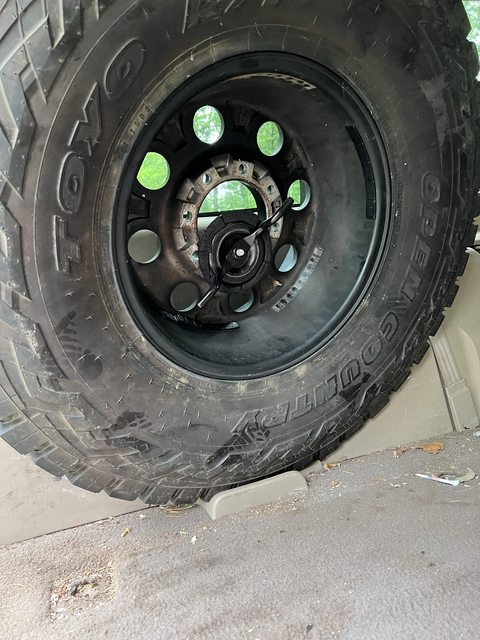
Final after pic with the 37x12.5 Toyo RT’s:
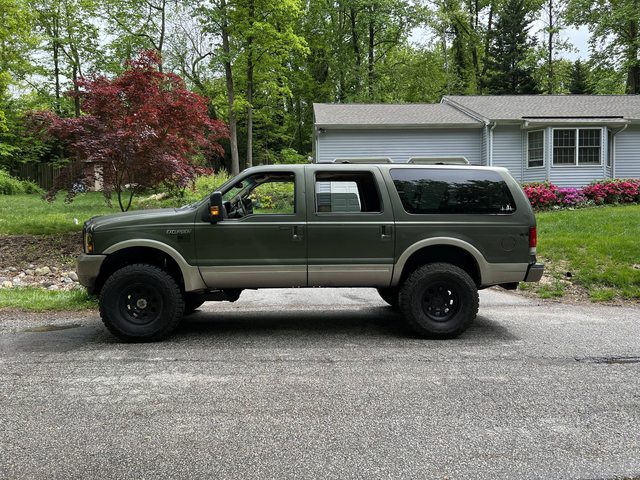
It sits right around 27" hub-to-fender at all four corners.
I hope this post is useful to someone. The truck drives so much better. It is much more compliant and comfortable. I still don’t have a front sway bar on it, it feels fine so far. I may try to find one to throw on. I also still need to get my alignment done. Thanks to everyone who shared their experiences before me, which made this much easier. Oh I also need to go get my driveshaft shortened 1" and re-installed as well.
Enlarged final picture to get a better look:
Wheels are 17x8 and 4.5” backspacing. Trimmed front bumper a little bit before I even had my new tires. I didn’t take any pics during that time. Once I got my new tire mounted, the only spot it hit was the trim in the rear of the wheel well and some of the liner at bump. I trimmed the trim and cut the liner in certain spots and pulled it back with zip ties. I have 0 interference anywhere now and clearance lock-to-lock.
Before the trim cut (bumper side already done):
Trim:
Pull liner back:
Lock-to-lock clearance on frame side:
Before pic with front V codes and rear modded B codes (had probably 400 or so pounds in the back as well here):
After pic:
Another after pic with the old tires:
Final after pic with the 37x12.5 Toyo RT’s:
It sits right around 27" hub-to-fender at all four corners.
I hope this post is useful to someone. The truck drives so much better. It is much more compliant and comfortable. I still don’t have a front sway bar on it, it feels fine so far. I may try to find one to throw on. I also still need to get my alignment done. Thanks to everyone who shared their experiences before me, which made this much easier. Oh I also need to go get my driveshaft shortened 1" and re-installed as well.
Enlarged final picture to get a better look:
The following 6 users liked this post by RPhil:
#5
05-13-2022, 03:58 PM


The following users liked this post:
#6
05-13-2022, 04:56 PM

8th Gear
The following 2 users liked this post by bigbluegashog:
#7
05-13-2022, 07:42 PM
Lead Driver
Nice write up
your link to the PMF track bar goes to the the radius arm bracket but you listed the correct part number.
i have used the other PMF track bar that comes with the the machined bolt insert to eliminate the stock balljoint, Just curious how yours attaches at the axle end ?
this one cured a death wobble in a lifted f250 that even a brand new stock track bar wouldn�t. Pricey but eliminating the ball joint at the axle end cures death wobble if you run into that.
https://www.pmfsuspension.com/2005-1...kbar_p_64.html
Trending Topics
#8
05-13-2022, 07:59 PM

The following 2 users liked this post by Nicmike:
#10
05-14-2022, 07:16 PM
Oh yeah, it was fun for the most part. The metal shavings from a carbide burr wasn't too enjoyable. I just left it on jack stands for a few weeks and plugged away as I had time.
Happy to help!
I'll fix the link. I did not get the "upgraded" one. I am still using the factory ball joint. The one here was in great condition. I will keep your comments in mind in case I run into any issues.
Hopefully I don't get any death wobble! I'll keep an eye on it.
Thanks. The 37s look just right. I'm surprised how not out of place they look. I had one mounted to my full size spare before I started the swap so I could mount it after the axle was in and figure out any interference issues before I went to get the others mounted.
Just checked a spreadsheet and I'm probably around 3k just in parts, not including the axle or tires. I spread it out over a while and hopefully I can sell some of the old parts to recoup the cost.
Nice write up
your link to the PMF track bar goes to the the radius arm bracket but you listed the correct part number.
i have used the other PMF track bar that comes with the the machined bolt insert to eliminate the stock balljoint, Just curious how yours attaches at the axle end ?
this one cured a death wobble in a lifted f250 that even a brand new stock track bar wouldn’t. Pricey but eliminating the ball joint at the axle end cures death wobble if you run into that.
https://www.pmfsuspension.com/2005-1...kbar_p_64.html
Great job! I know the satisfaction of doing this yourself...
I agree with Camo...get rid of that factory ball joint if you want to minimize ever experiencing death wobble. I'm running a heim joint with bolt on an adjustable track bar now...all home brewed and super solid.
I agree with Camo...get rid of that factory ball joint if you want to minimize ever experiencing death wobble. I'm running a heim joint with bolt on an adjustable track bar now...all home brewed and super solid.
Just checked a spreadsheet and I'm probably around 3k just in parts, not including the axle or tires. I spread it out over a while and hopefully I can sell some of the old parts to recoup the cost.
#11
05-15-2022, 10:35 AM
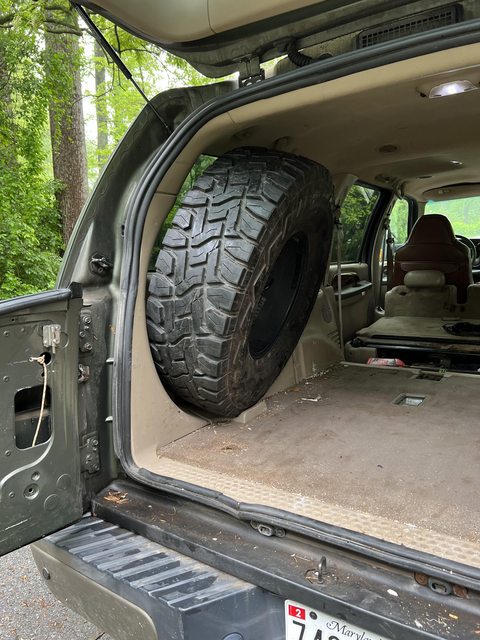
Full size spare doesn't fit too well while inflated. If / when I get a compressor mounted I will deflate and shove it in there better:
Also got the truck weighed so I can dial in tire pressures:
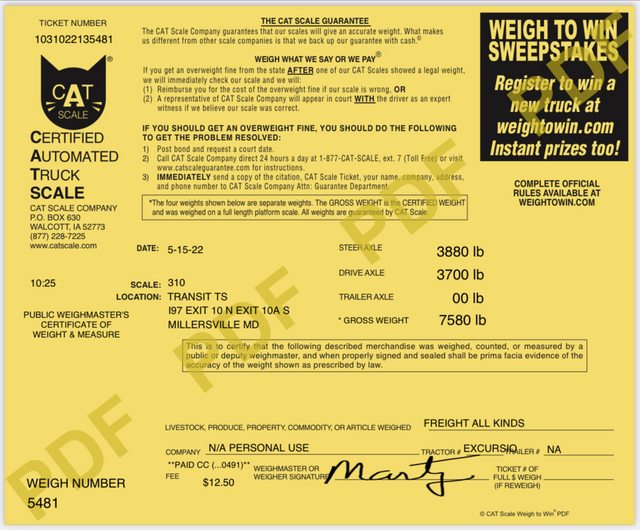
Per Toyo, this size RT is 124Q with max load of 3525 per tire at 50 PSI.
My front axle at 3880/2 = 1940 lbs needed to support from each tire.
Quick math would be 1940/3525 = x/50; x=27.5 PSI. (Similarly, for the rear, it puts me at ~26 PSI). When I look at the tire load limits at various pressures table on Toyo's website, it says 25 PSI is good for 2150 lbs. These PSI numbers seem low to me. Pirate, is my logic sound here? I'm going to wait for your feedback before I go change them all.
Toyo's website also tells me that these tires are 565 revs/mile. If we put 628 into Forscan for revs/mile (can't go lower than 600), we only need to adjust for 10% additional (565/628 = .9). We can then adjust the tone ring from 120 to 108 (10% lower) which should put us close enough.
I'll make that change and check at some point against my GPS to see how close it gets me.
Also got the truck weighed so I can dial in tire pressures:
Per Toyo, this size RT is 124Q with max load of 3525 per tire at 50 PSI.
My front axle at 3880/2 = 1940 lbs needed to support from each tire.
Quick math would be 1940/3525 = x/50; x=27.5 PSI. (Similarly, for the rear, it puts me at ~26 PSI). When I look at the tire load limits at various pressures table on Toyo's website, it says 25 PSI is good for 2150 lbs. These PSI numbers seem low to me. Pirate, is my logic sound here? I'm going to wait for your feedback before I go change them all.
Toyo's website also tells me that these tires are 565 revs/mile. If we put 628 into Forscan for revs/mile (can't go lower than 600), we only need to adjust for 10% additional (565/628 = .9). We can then adjust the tone ring from 120 to 108 (10% lower) which should put us close enough.
I'll make that change and check at some point against my GPS to see how close it gets me.
The following 2 users liked this post by RPhil:
#12
05-21-2022, 08:39 AM

Very helpful post. I did similar axle swap, but went Carli buckets and 2.5 dominator package up front and Carli excursion spring and shocks out back, running on 275/70r18 now and needed your pic to help me decide on 35’s or 37’s.
If I can ask a question about the rear, what is the purpose of the shims? I had a shop put my rear together, and they didn’t mention using shims…
If I can ask a question about the rear, what is the purpose of the shims? I had a shop put my rear together, and they didn’t mention using shims…
#13
05-21-2022, 09:09 AM
Lead Driver
how to measure your driveline
https://spicerparts.com/anglemaster/measuring-angles
#14
05-23-2022, 07:56 AM
Very helpful post. I did similar axle swap, but went Carli buckets and 2.5 dominator package up front and Carli excursion spring and shocks out back, running on 275/70r18 now and needed your pic to help me decide on 35’s or 37’s.
If I can ask a question about the rear, what is the purpose of the shims? I had a shop put my rear together, and they didn’t mention using shims…
If I can ask a question about the rear, what is the purpose of the shims? I had a shop put my rear together, and they didn’t mention using shims…
37s fit great with very minimal trimming, you just need to decide if you would be happy with the gearing based on your powertrain and how you use the truck. I don't really tow much and have a V10, but with 4.30 gears. It is a dog, but I want to drop a CR Cummins in eventually. So 4.30's and 37's should put me in a good spot when that happens. Until then, I'll just deal with it. What are your shock specs? Where did you source them? I would love to get a bigger shock but I had to draw the budget line somewhere.
On another note the first alignment shop didn't have the bushings needed to get my specs where I wanted them. They never called me back, so I picked my truck up and am taking it somewhere else. I put all 4 tires at 30 psi and the ride is very nice.
I purposefully hit a wide speed bump much, much faster than one should in an 8k lb truck and it handled it far beyond my expectations. I can't say enough for how much the ride has improved. It is night and day.
#15
05-23-2022, 09:53 AM
Laughing Gas
Welcome to the Dana 60 club  I enjoyed the concise write-up. Seeing yet another Ex go coil sprung makes me wanna do mine all over again bad, but I've got a few bigger issues to address first.
My Ex sees 50/50 time puttering to work and whoopin' nasty backcountry roads and mudholes, and as such I've just about used up my 5100s. If I was driving like an old lady on pavement, 5100s probably would have been just fine. When I go coils, I'll likely move to a 5160 or Fox 2.5s
I changed the tone ring count as well to get my speedo correct. I think I got the Revs/Mile down to about 605 or so before the computer started hating me, then went the rest of the way with the tone ring. I don't recall the exact numbers, not that it matters since we will all see some variance from tire to tire.
I enjoyed the concise write-up. Seeing yet another Ex go coil sprung makes me wanna do mine all over again bad, but I've got a few bigger issues to address first.My Ex sees 50/50 time puttering to work and whoopin' nasty backcountry roads and mudholes, and as such I've just about used up my 5100s. If I was driving like an old lady on pavement, 5100s probably would have been just fine. When I go coils, I'll likely move to a 5160 or Fox 2.5s
I changed the tone ring count as well to get my speedo correct. I think I got the Revs/Mile down to about 605 or so before the computer started hating me, then went the rest of the way with the tone ring. I don't recall the exact numbers, not that it matters since we will all see some variance from tire to tire.