


1995 Lightning-ish build
Hotshot
Joined: Nov 2017
Posts: 17,495
Likes: 2,773
From: Northern Ontario
Looking good, following along. Nice find on the springs, looks like you gained an extra leaf too.
The radiator mounts, Jeffs Bronco Graveyard has them separately.
https://shop.broncograveyard.com/198...ctinfo/331035/
You can also buy just the upper or lower bushing separate.
Cheers, 🍻
The radiator mounts, Jeffs Bronco Graveyard has them separately.
https://shop.broncograveyard.com/198...ctinfo/331035/
You can also buy just the upper or lower bushing separate.
Cheers, 🍻

Thread Starter
|
Mountain Pass
Joined: Oct 2020
Posts: 159
Likes: 35
the bronco, truck, van, pin out for SD, and MAF
Ford Fuel Injection
Ford Fuel Injection
Looking good, following along. Nice find on the springs, looks like you gained an extra leaf too.
The radiator mounts, Jeffs Bronco Graveyard has them separately.
https://shop.broncograveyard.com/198...ctinfo/331035/
You can also buy just the upper or lower bushing separate.
Cheers, 🍻
The radiator mounts, Jeffs Bronco Graveyard has them separately.
https://shop.broncograveyard.com/198...ctinfo/331035/
You can also buy just the upper or lower bushing separate.
Cheers, 🍻
Took a day off and heading back to the junkyard for the MAF and harness along with a rear light harness for the bed.
Still need to find a forward rear spring bolt or just get the mount with a bolt. P.S. I hate Rust....
Logistics Pro


Joined: Aug 2010
Posts: 3,716
Likes: 583
From: Chillicothe
Good score on the springs, but the old one wasn't cut. They broke... i had a couple do that on my original pack in my truck. Ive personally seen it on 3 f150s from 88 to my 95, but only in manual trucks. I heard mine leave the truck when i was pulling onto the highway and some jack wagon changed lanes after i was committed to turning. Power shifted the 1-2 and heard a pop, ting ting ting. Looked in the side mirror and saw in skating down the lane.
Thread Starter
|
Mountain Pass
Joined: Oct 2020
Posts: 159
Likes: 35
Ahh, that makes sense on the springs then. Well, that's why they are getting replaced!
I was able to get the MAF airbox, Y-pipe intake adapter and i believe the necessary harness pieces to do the MAF conversion...AFTER the new engine is started and run on the current SD setup. No need to chase no starts AND a wiring harness change. I did have a slight scare that the ECU I grabbed was an OBD-II ECU as the vehicle was a "Custom" E150. The Incomplete vehicle from ford is dated 12/95, and the "Custom" maker dated it as a 4/96. I think I'm in the clear as the MAF connector is the correct 4-wire type for an OBD-I if I recall correctly.
Almost got another H9 LSD diff but the retaining pin bolt was partially stripped. If its still there when I go back next time, I'll grab it for the non-rusted gears.
Also, how sought after are ZF RWD transmissions for SBF bellhousings? There's a 5.8 RWD manual with the ZF I believe in the yard...
Thread Starter
|
Mountain Pass
Joined: Oct 2020
Posts: 159
Likes: 35
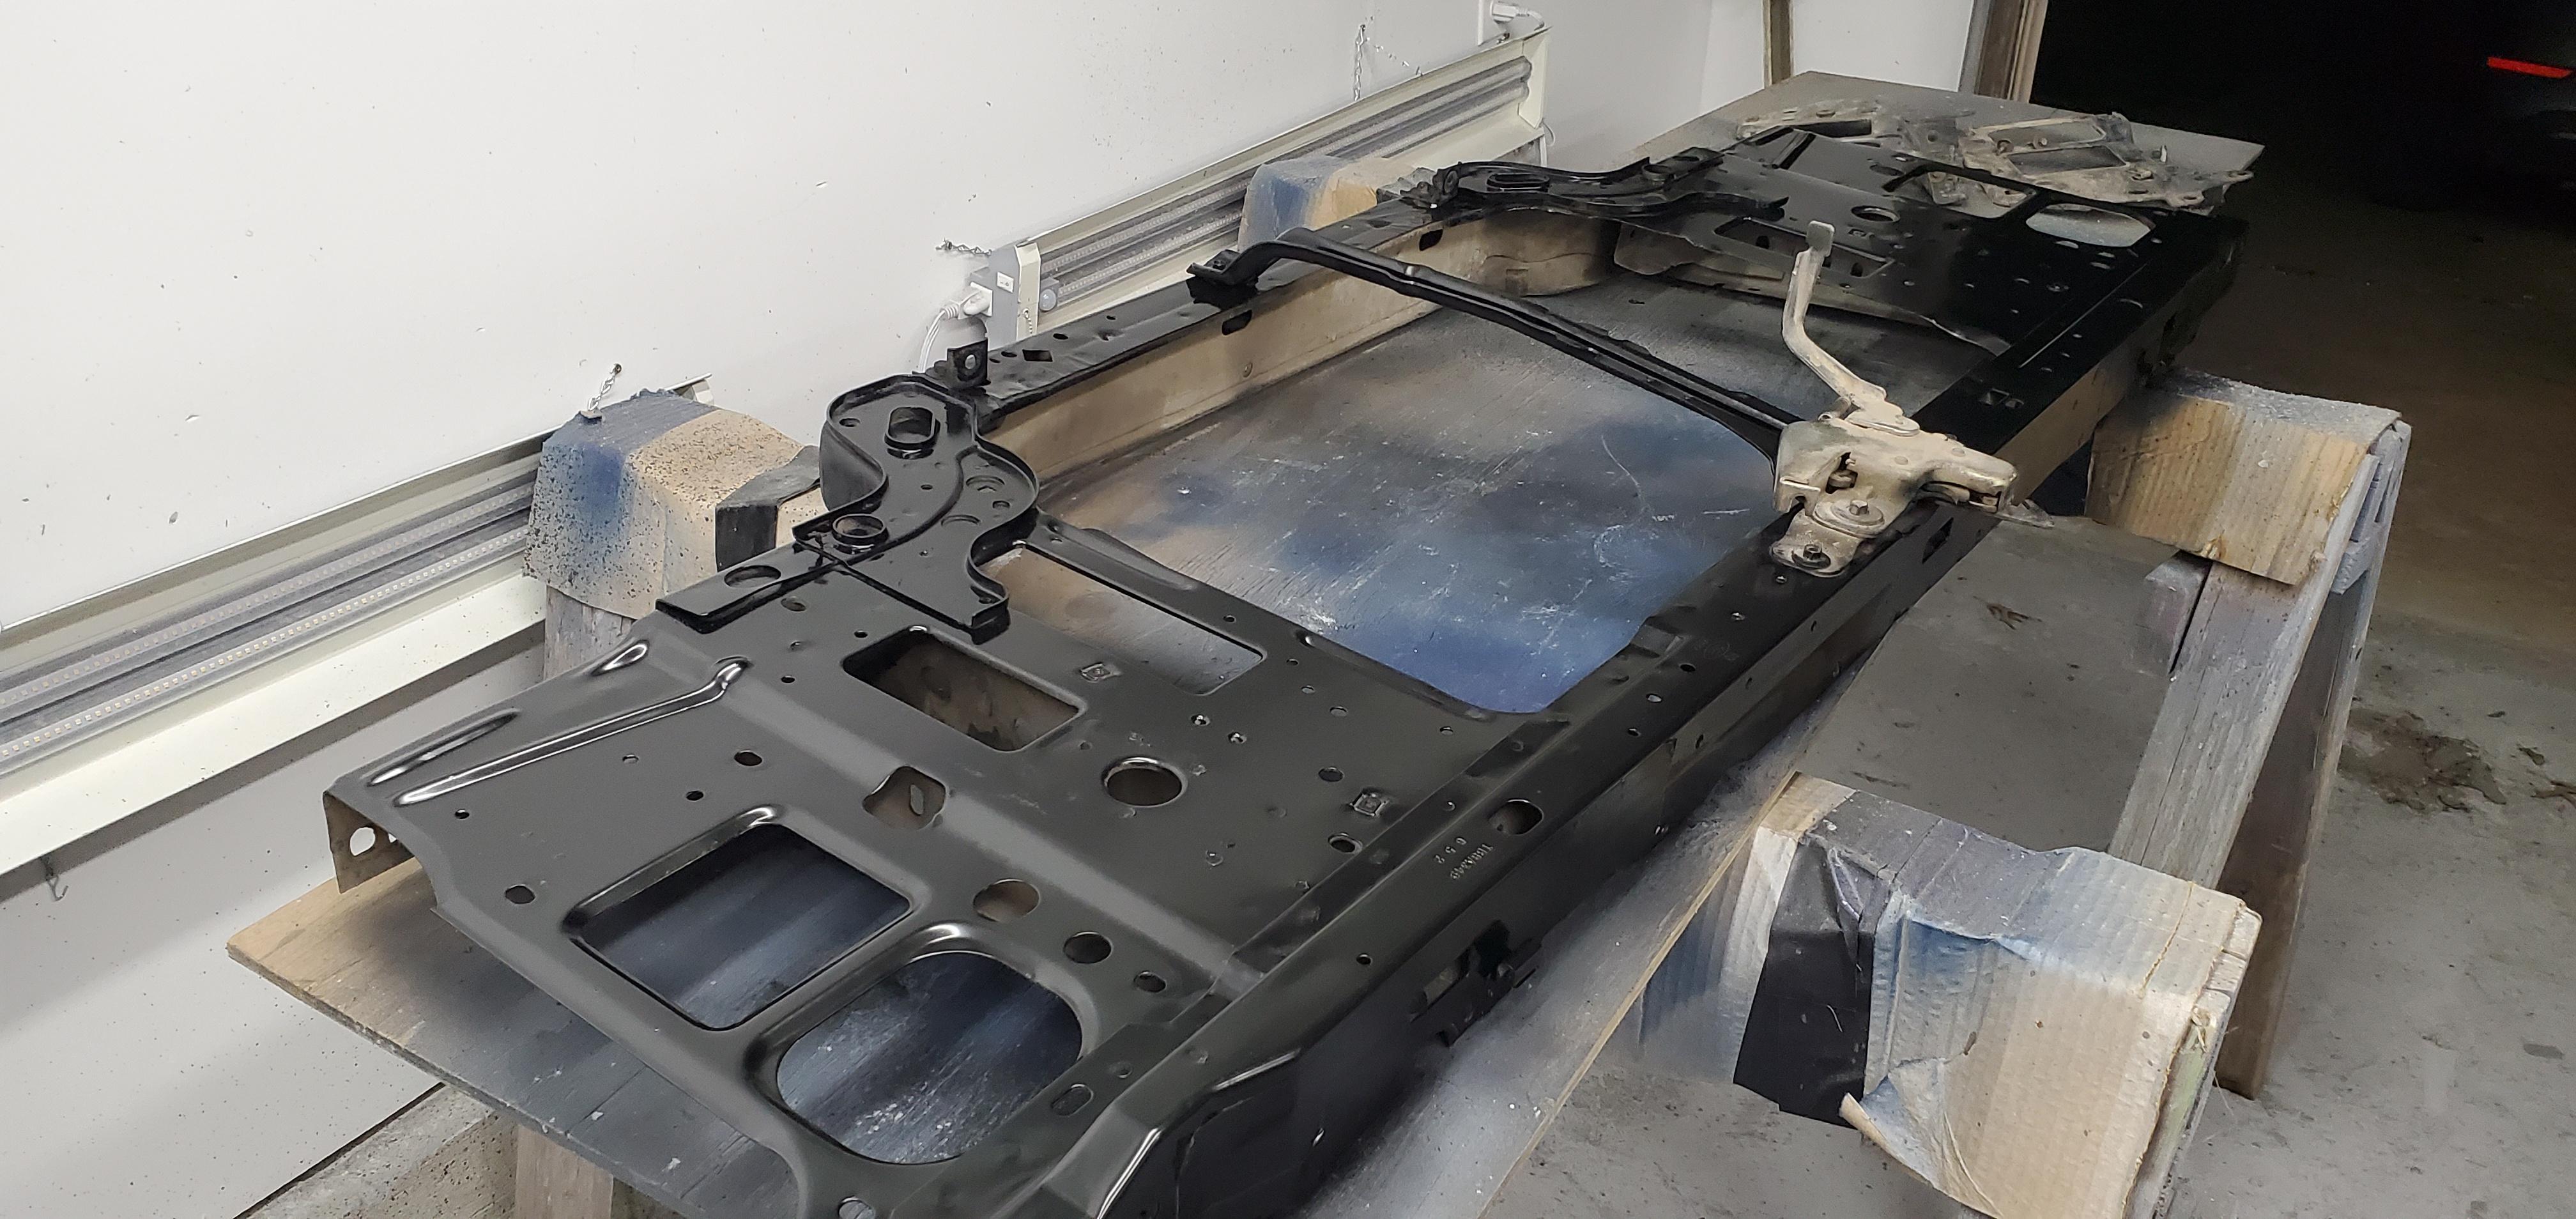
Spent a good bit of the weekend getting prepped for painting the cab, doors and fenders. Ended up doing all 6 body mounts due to having to replace the radiator header panel...man the cab mounts were a pain! First cab mount took 2.5 hours to get apart and last one took about 10 minutes (sawzall FTW). Got the doors all stripped of seals and paint, bedlined the section of the cab that would be covered by the bed and put rust converter on a good bit of the top and outsides of the frame rails. Had to address some rust issues on the cab floor and one on the left rear corner before they became bigger issues. Also got some dents and creases pulled and filled on the cab and doors as well. Getting closer by the week!
Better view of the rust on the old header panel

Back of cab bedlined

Part of the cab under the lower valence painted gloss black to not show white through the vented sections


New header panel painted gloss black and installed

driver's side floor rust and patch


Better view of the rust on the old header panel
Back of cab bedlined
Part of the cab under the lower valence painted gloss black to not show white through the vented sections
New header panel painted gloss black and installed
driver's side floor rust and patch
Elder User
Joined: Dec 2016
Posts: 854
Likes: 39
From: Mid Missouri
Your project is coming along nicely.
Is that floor patch you made welded in or screwed/riveted in? Where�s the source of that rust area coming from do you suppose? Looks like it could be coming from the firewall or underneath somewhere.
Is that floor patch you made welded in or screwed/riveted in? Where�s the source of that rust area coming from do you suppose? Looks like it could be coming from the firewall or underneath somewhere.
Thread Starter
|
Mountain Pass
Joined: Oct 2020
Posts: 159
Likes: 35
I also had a bit of a thought regarding the dash cluster as the stock 90mph speedo is a bit limiting in the current age/location. Out here in the mid-west, 75-85mph speed limits are common. I see people looking for the RARE lightning speedometers to get a "120MPH" speedo. Given that these PSOMs are programmable, I believe we can create our own 120mph or better speedo with an overlay and a proper cal change. It would make sense to me that both the speedo and tach modules are identical from a hardware point and only cals and overlays being the difference in variants.
FTE Stories
Ford Trucks for Ford Truck Enthusiasts

3 Best / 3 Worst Parts of Modern Ford Ownership
Brett Foote
10 Amazing Upgrades That Solve Common Ford Truck Owner Headaches
Pouria Savadkouei
Every 2026 Ford Engine Explained
Brett Foote
10 Ugly Ford Trucks That We Still Kinda Love
Joe Kucinski
10 Things Every Truck Owner NEEDS (2026 Edition)
Michael S. Palmer
Rezvani's Latest Post-Apocalyptic Monster Is a Ford F-150 Raptor Underneath
Verdad Gallardo
Top 10 Most Expensive Ford Trucks Ever Sold on Bring a Trailer
Joe Kucinski
2027 Ford Super Duty Buyer's Guide (Every Model, Engine, & Package)
Brett Foote
Top 10 Ford Truck Tragedies
Joe KucinskiLogistics Pro

Joined: Mar 2011
Posts: 4,197
Likes: 558
From: Central Wisconsin
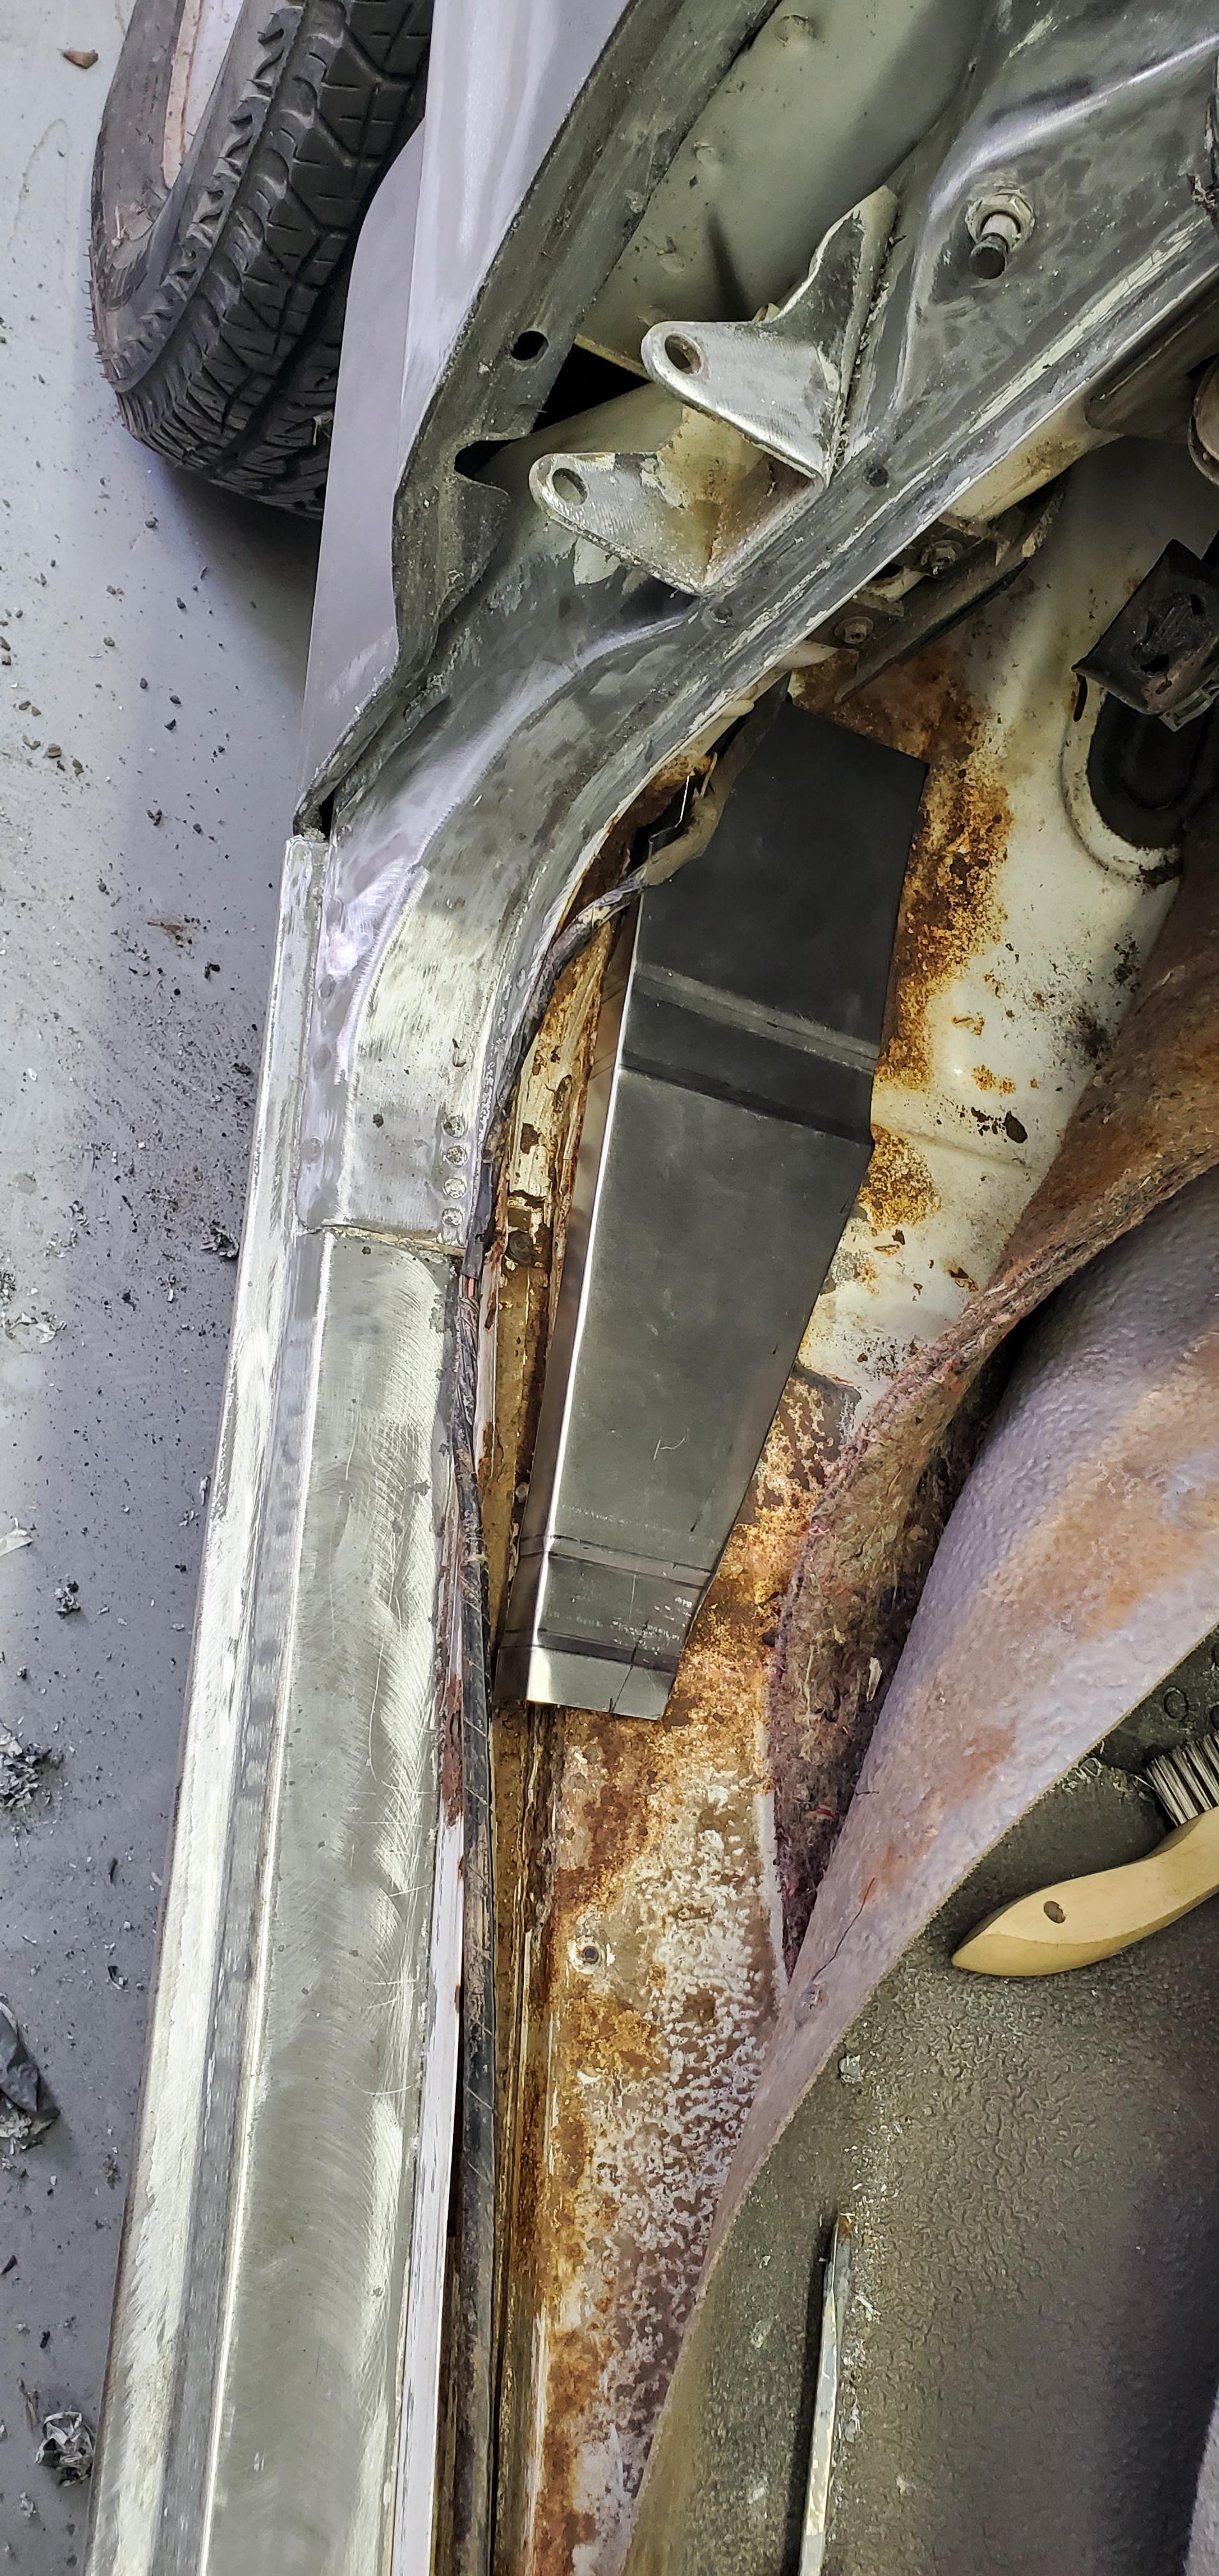
JJF20 and I discussed this in another thread. There's a large oval hole, maybe 2" by 5", in the front of the cab support bracket, toward the tire that is entirely open to the elements. Ford didn't plug this, so any dirt, debris, dust and water that makes it in there rots your floor out from underneath.
Thread Starter
|
Mountain Pass
Joined: Oct 2020
Posts: 159
Likes: 35
Spent some time sanding the initial coat of primer on the cab and hung the doors. Doesn't sound like much, but man did we have to fiddle with the driver's side to get it to line up somewhat decently. This was also with new door pins and bushings. We had to resort to adjusting the body side of the hinges to get the driver's side to play nice. Passenger's side door took us one try and was darn near perfect. Not much else we can do for a bit as the painter doesn't need any extra hands until the 600grit wet sanding after teh 2nd coat of primer some time this week. At least he has a heated garage! (our current weather in OK was -2*F this morning).


Thread Starter
|
Mountain Pass
Joined: Oct 2020
Posts: 159
Likes: 35
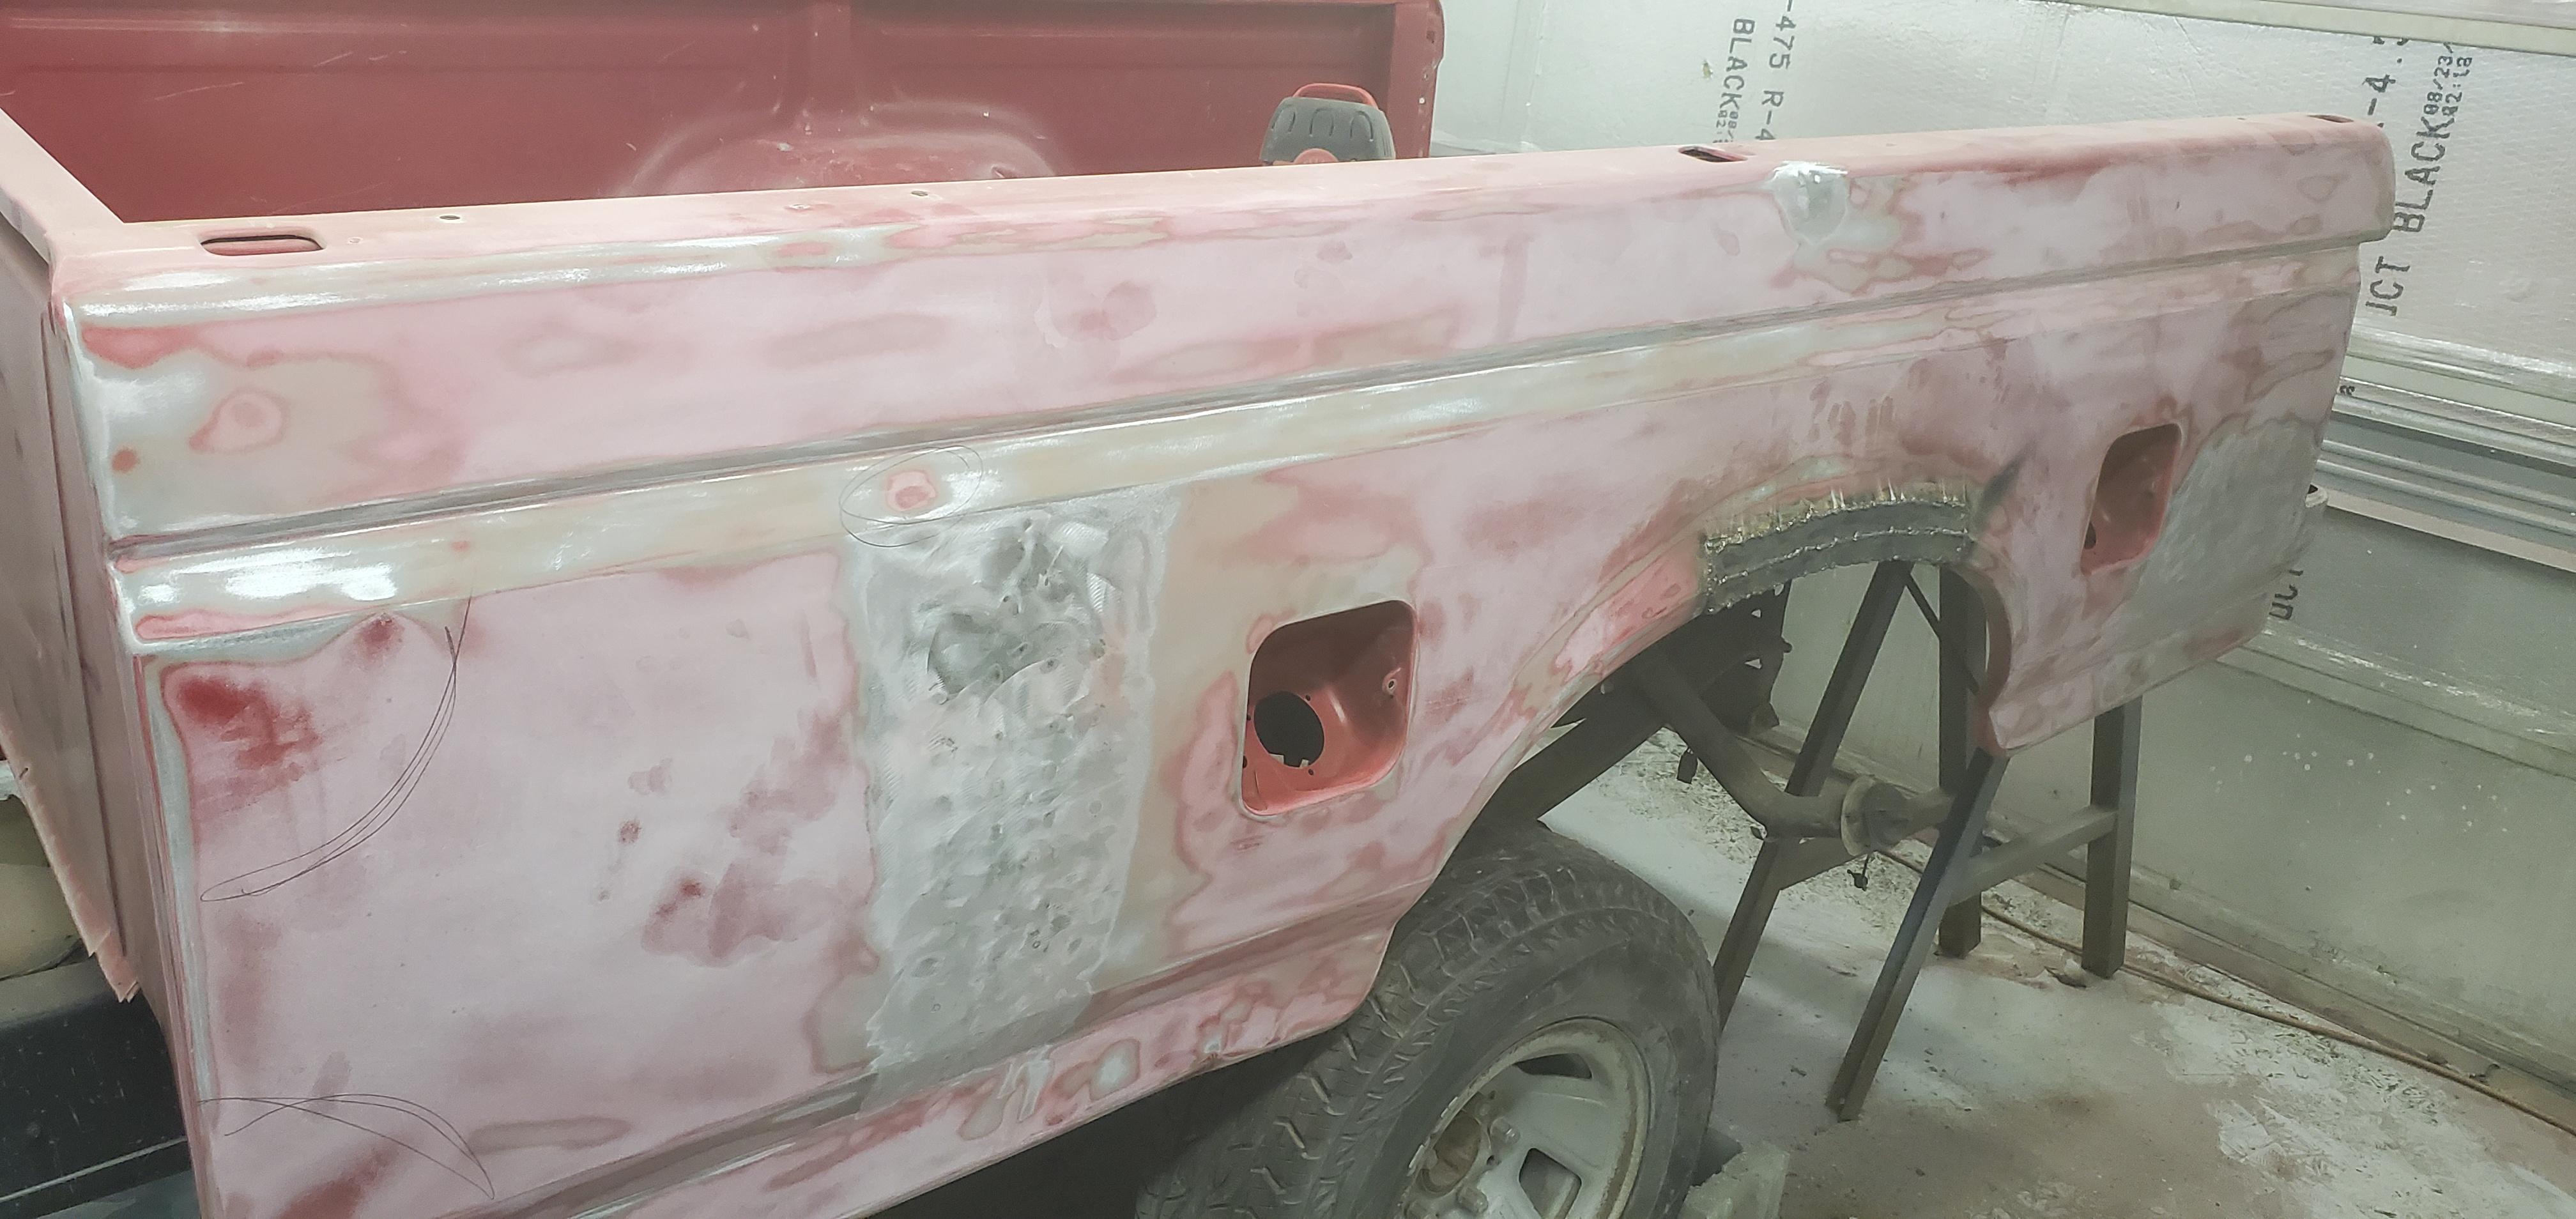
Got more done, primered the cab and fenders, and color laid on the cab and underside of the hood. Due to some issues we have to sand the outside of the doors and fenders again and respray. Brought the bed in and set it on the back with room to work around. Pulled some dents and got into the rust above the rear wheel wells. Ended up ordering panels for the right side due to all the rust and crap found. Left side was less bad and we were able to fab up patch panels from 16ga steel. Further grinding and filler needed for final profiling, but it should be fine when done.
I also have been looking into wheel and tire options. With Taxmas coming, I have been considering moving to an aftermarket 17" wheel to accommodate more contemporary tire options. Current wheels are 15x7.5 and I am considering going with a 17x8.5. with a centered 0 backspacing wheel and 0 offset, this should only add 1/2" of width to the inside. I would wager that this will clear everything as its not a crazy change in size. Coupled with a 265/65R17 tire, it is identical to a 265/75/R15 tire which was a stock option. Anyone run this size wheel and tire?


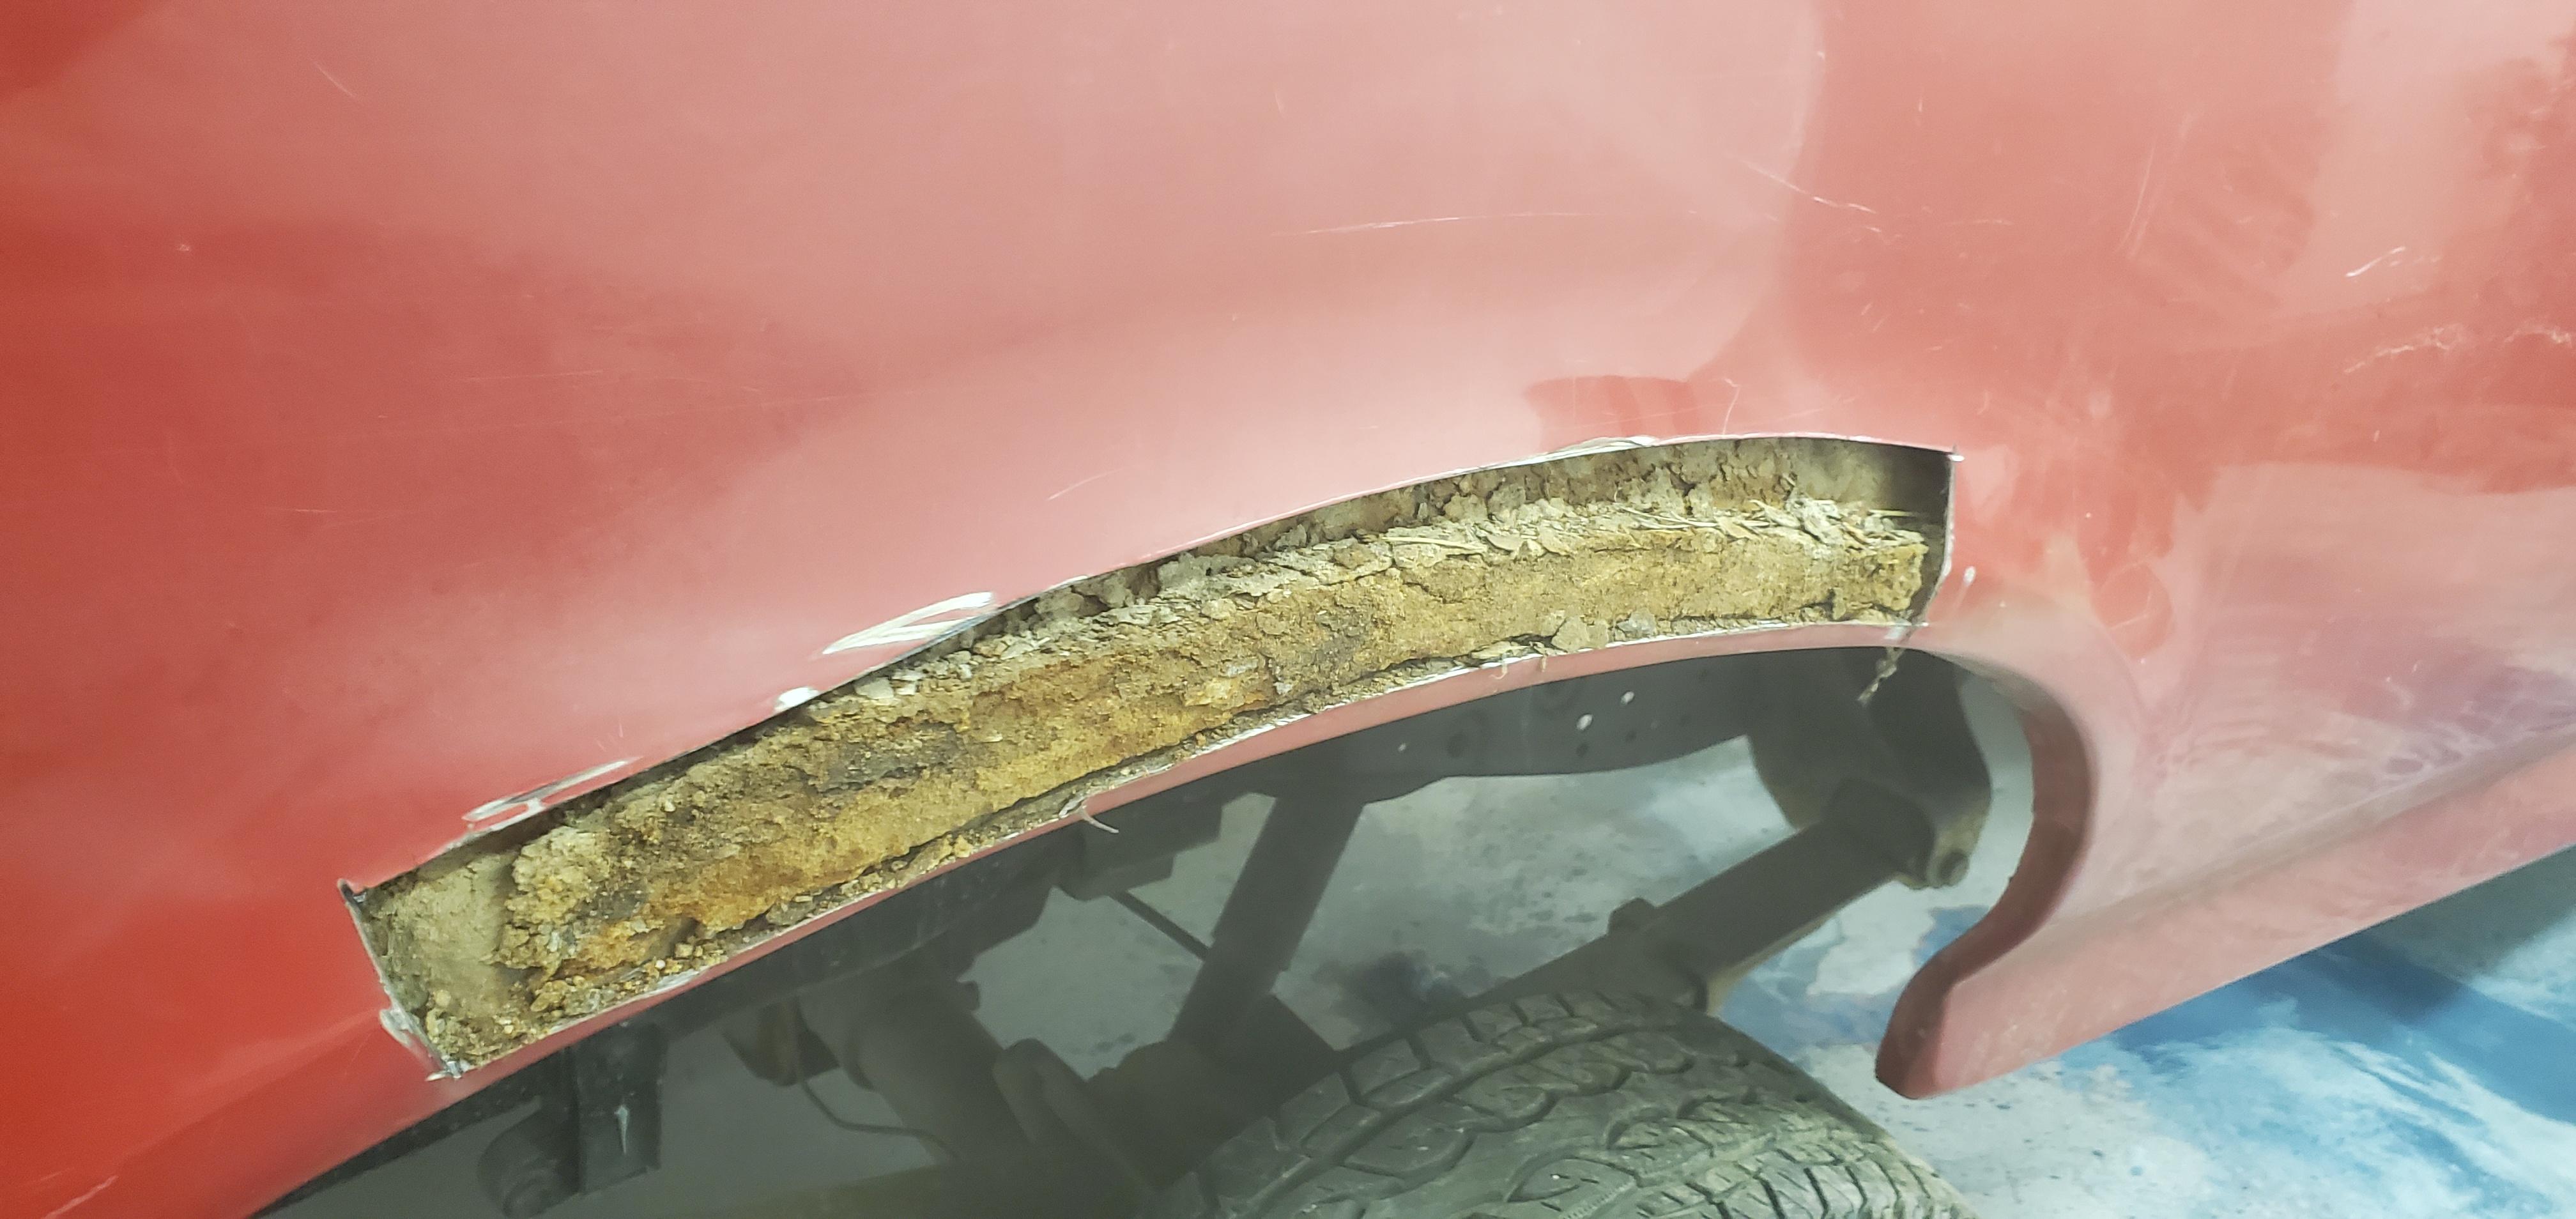
Talk about a bunch of dirt! and this was just the left side...


Right side had more dirt and crap in the seam than the left. I am thinking of using some mud flap material to make a baffle to prevent more dirt/crap from flying up into that seam catch pocket again.

I also have been looking into wheel and tire options. With Taxmas coming, I have been considering moving to an aftermarket 17" wheel to accommodate more contemporary tire options. Current wheels are 15x7.5 and I am considering going with a 17x8.5. with a centered 0 backspacing wheel and 0 offset, this should only add 1/2" of width to the inside. I would wager that this will clear everything as its not a crazy change in size. Coupled with a 265/65R17 tire, it is identical to a 265/75/R15 tire which was a stock option. Anyone run this size wheel and tire?
Talk about a bunch of dirt! and this was just the left side...
Right side had more dirt and crap in the seam than the left. I am thinking of using some mud flap material to make a baffle to prevent more dirt/crap from flying up into that seam catch pocket again.
Thread Starter
|
Mountain Pass
Joined: Oct 2020
Posts: 159
Likes: 35
Plus I'll be bedlining the wheel side of the inner fenders as well.