When you click on links to various merchants on this site and make a purchase, this can result in this site earning a commission. Affiliate programs and affiliations include, but are not limited to, the eBay Partner Network.
Woohoo the head is out! My engine hoist isn’t long enough so I manhandled the head and exhaust manifold out in one piece. I crawled in the engine bay and stood on the radiator supports. My oh my.
The lower rear 3 head bolts caused me just a little trouble, as expected, but I did NOT have to lower the engine or remove the heater box to get it out! This is a huge relief.
I zip tied the heck out of the timing chain and cam gear as to ensure no movement there, so as long as I can reinstall the head with the cam in the same position, timing should be good.
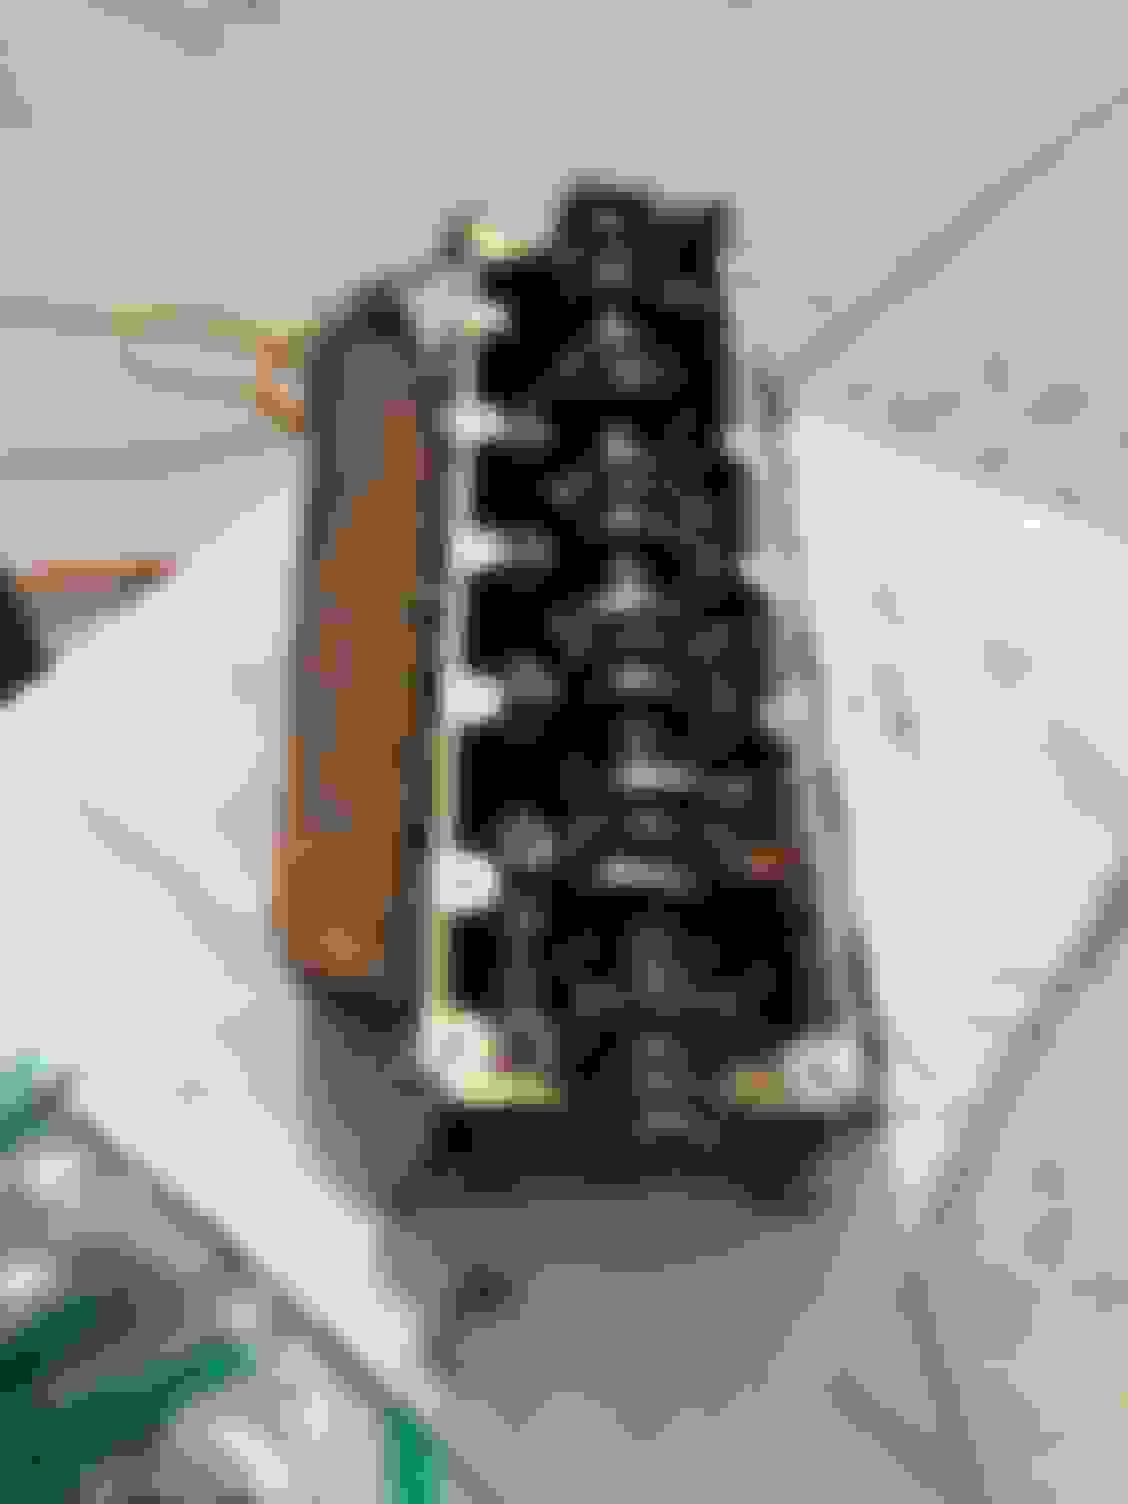
I’m including a photo of the valves from cylinders 4 and 5. Cylinder 4 is crusted up just like the spark plug was on that one originally.
Does anyone one know how to verify that the rings are good on that cylinder before I reassemble? I suppose if I remove the valves and they’re damaged, I’ll know the low compression was caused by that...
I’ve officially reached the end of my experience with this stuff. From here on out I’m a first timer.
I had pretty easy access to the head bolts with the fender liner out. Zip ties for insurance. Looks like it came out of an aircraft. Large. That feels good. 5 on left, 4 on right. The intake valve on 4 is particularly ugly.
Last edited by wbubble; 06-10-2019 at 12:00 AM.
Reason: typo
i know of no way to verify piston rings at this point.
I say that with authority because I had my head(s) removed and wondered the same thing for much much thought time.
i know of no way to verify piston rings at this point.
I say that with authority because I had my head(s) removed and wondered the same thing for much much thought time.
I reassembled mine on faith.
Yours... is quite a mystery.
I filled up the cylinder with water and let it sit overnight. It was still full this morning.
I don't think that head gasket breached. Maybe the gasket came apart as you disassembled it.
As for water to test for leaks, water has a high surface tension and it might not flow into a narrow enough area to really test if the cylinder isn't sealing.
I'd check the valve guide clearance on #4's intake valve.
It will cost $400 to $500 to refurbish this head. Done right. Could be as simple as a valve seal but probably a bad guide too in addition to a bad valve. And your left with a refurbished head that needs a thicker HG.
My advise is get a new one for a few hundred dollars more.
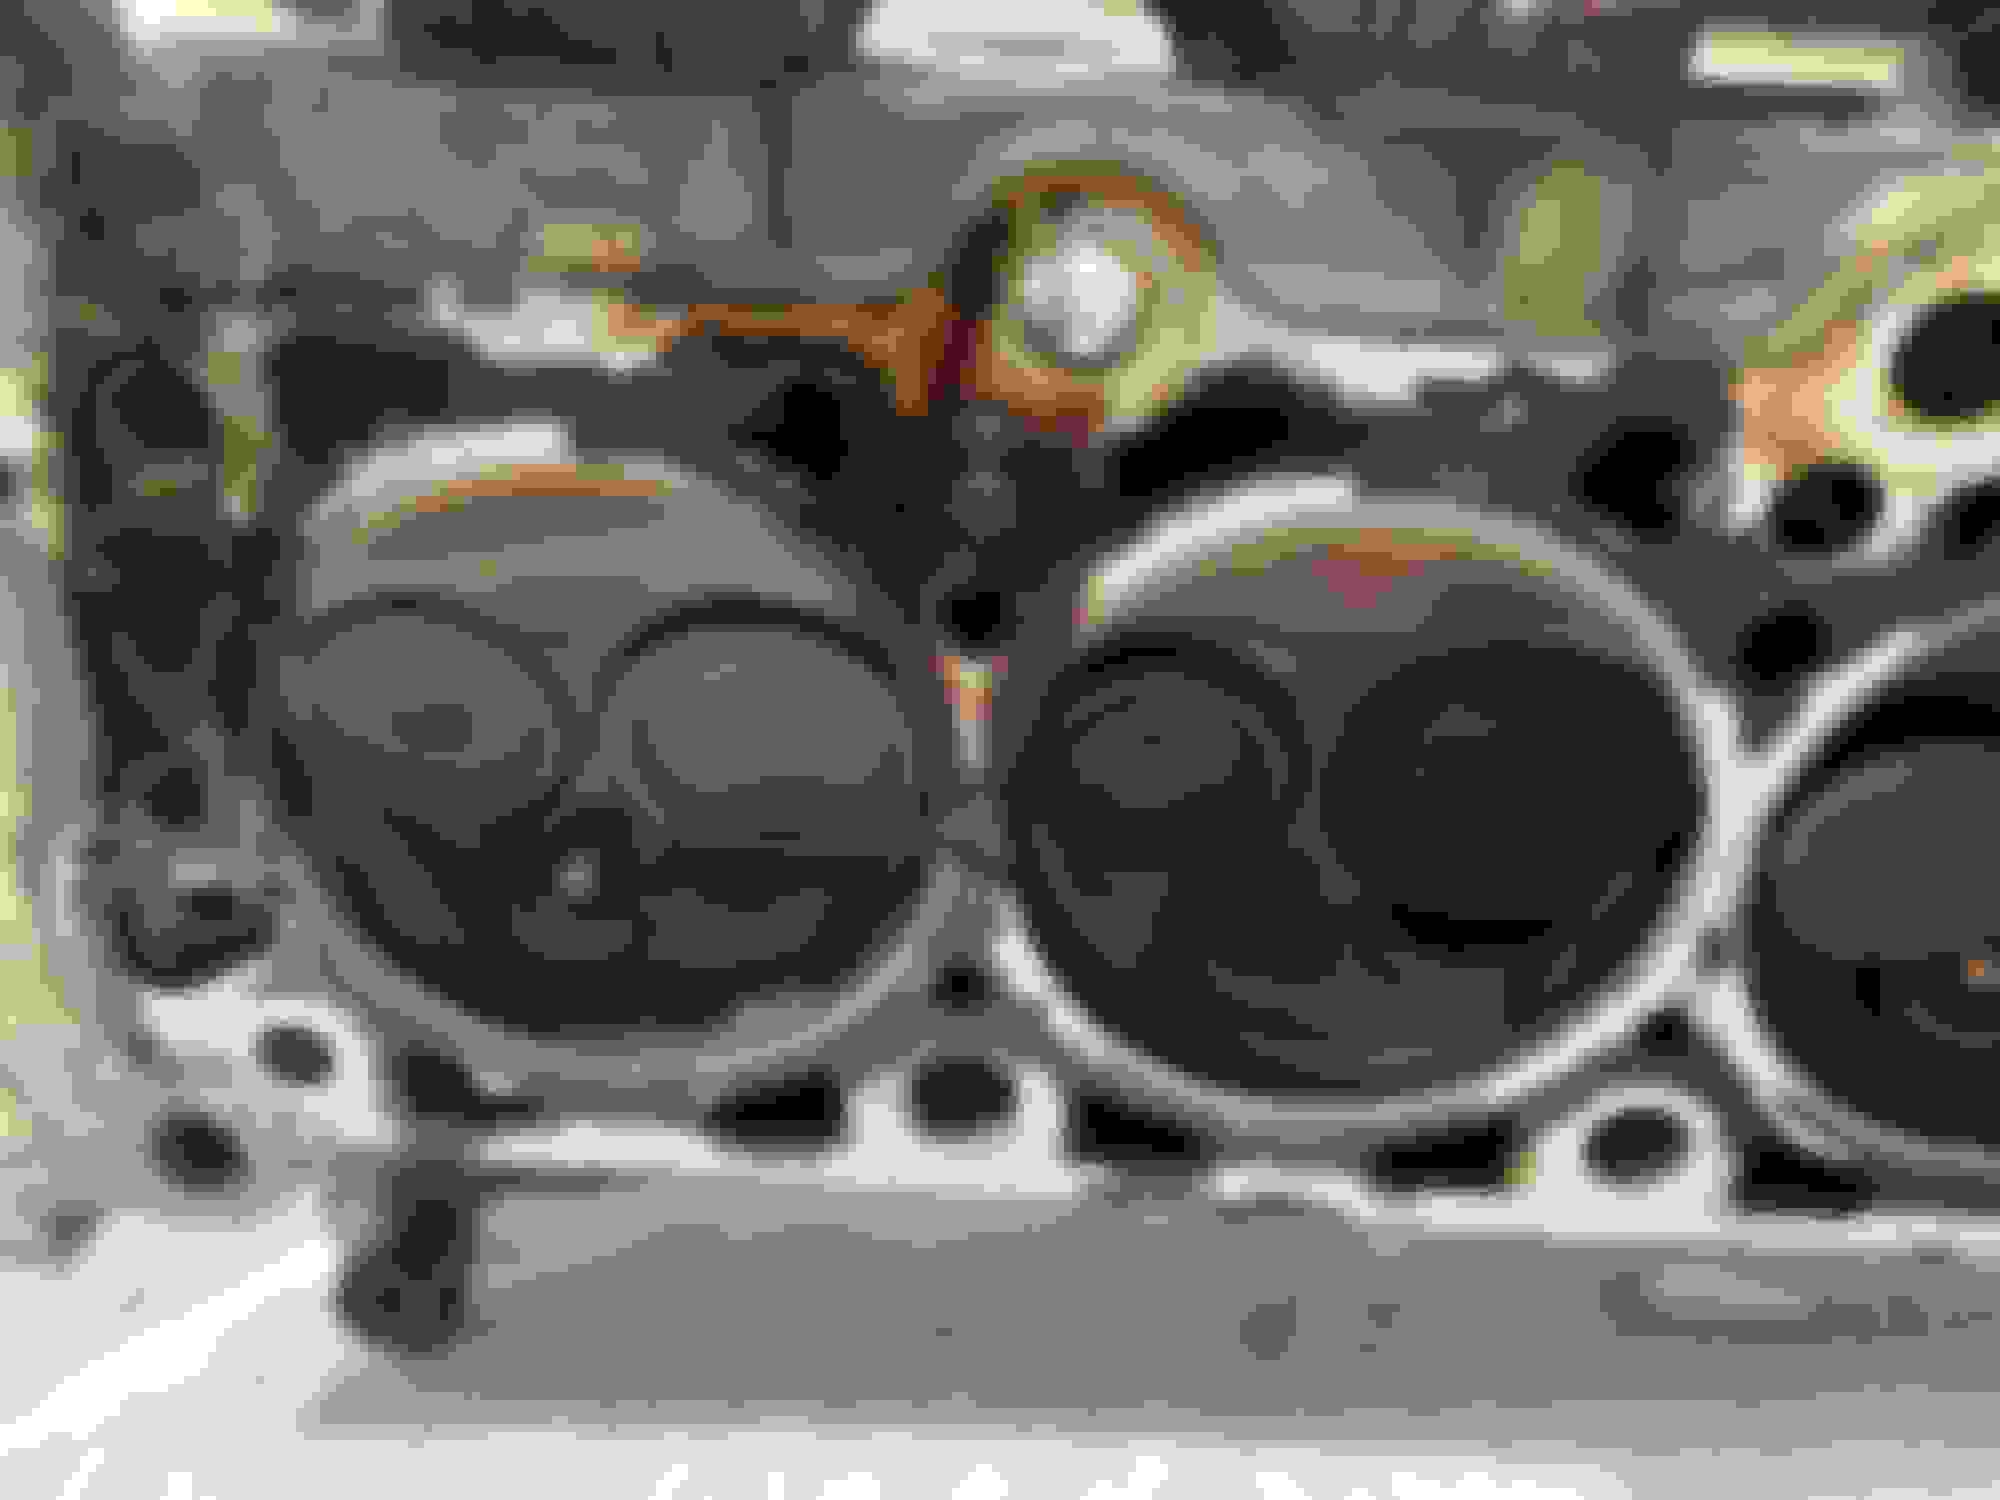
Also look closely at discoloration between #1 and #2 cylinders on block. Something looks odd with redish brown color on those two.
It will cost $400 to $500 to refurbish this head. Done right. Could be as simple as a valve seal but probably a bad guide too in addition to a bad valve. And your left with a refurbished head that needs a thicker HG.
My advise is get a new one for a few hundred dollars more.
Also look closely at discoloration between #1 and #2 cylinders on block. Something looks odd with redish brown color on those two.
I got mine rebuilt for $325-ish. Per head. A month apart so it didn’t feel like $650.
Head is cleaning up and my straight edge indicates that it’s very straight! That’s a gross valve. I’ll be testing all 10 but I’ve already ordered intake and exhaust for #4.
 06-07-2019, 02:46 PM