The engine that failed


#92
 02-14-2019, 05:55 PM

I've pulled many engines out of a whole variety of vehicles. I've had a few different issues while using engine hoist. I've had them tip over sideways. I've had them tip forward, dumping the engine on the ground. . I've had bolts pull out of the engines ( the one holding the chain to the engine ) . And the last engine I lifted with a hoist did not go well. I got in a hurry, which is usually when things go bad. I had a caravan 3.3L V6 on a engine stand. I needed to remove it from the stand and load it into the back of my E250 for the night. I didn't have a chain handy so I just used a strap from a ratchet hold down set up. Well I got it off the stand and was just about to the rear bumper of my van when the strap got cut on a sharp edge of the engine. The engine dropped right to the ground. It landed right on the oil pan sump. It caved in the sump and bent the pick up tube. I got lucky I didn't get hurt or do more damage to the engine.
You have to be careful and take things slow.
You have to be careful and take things slow.
#93
02-16-2019, 07:32 AM
#94
02-20-2019, 10:28 PM
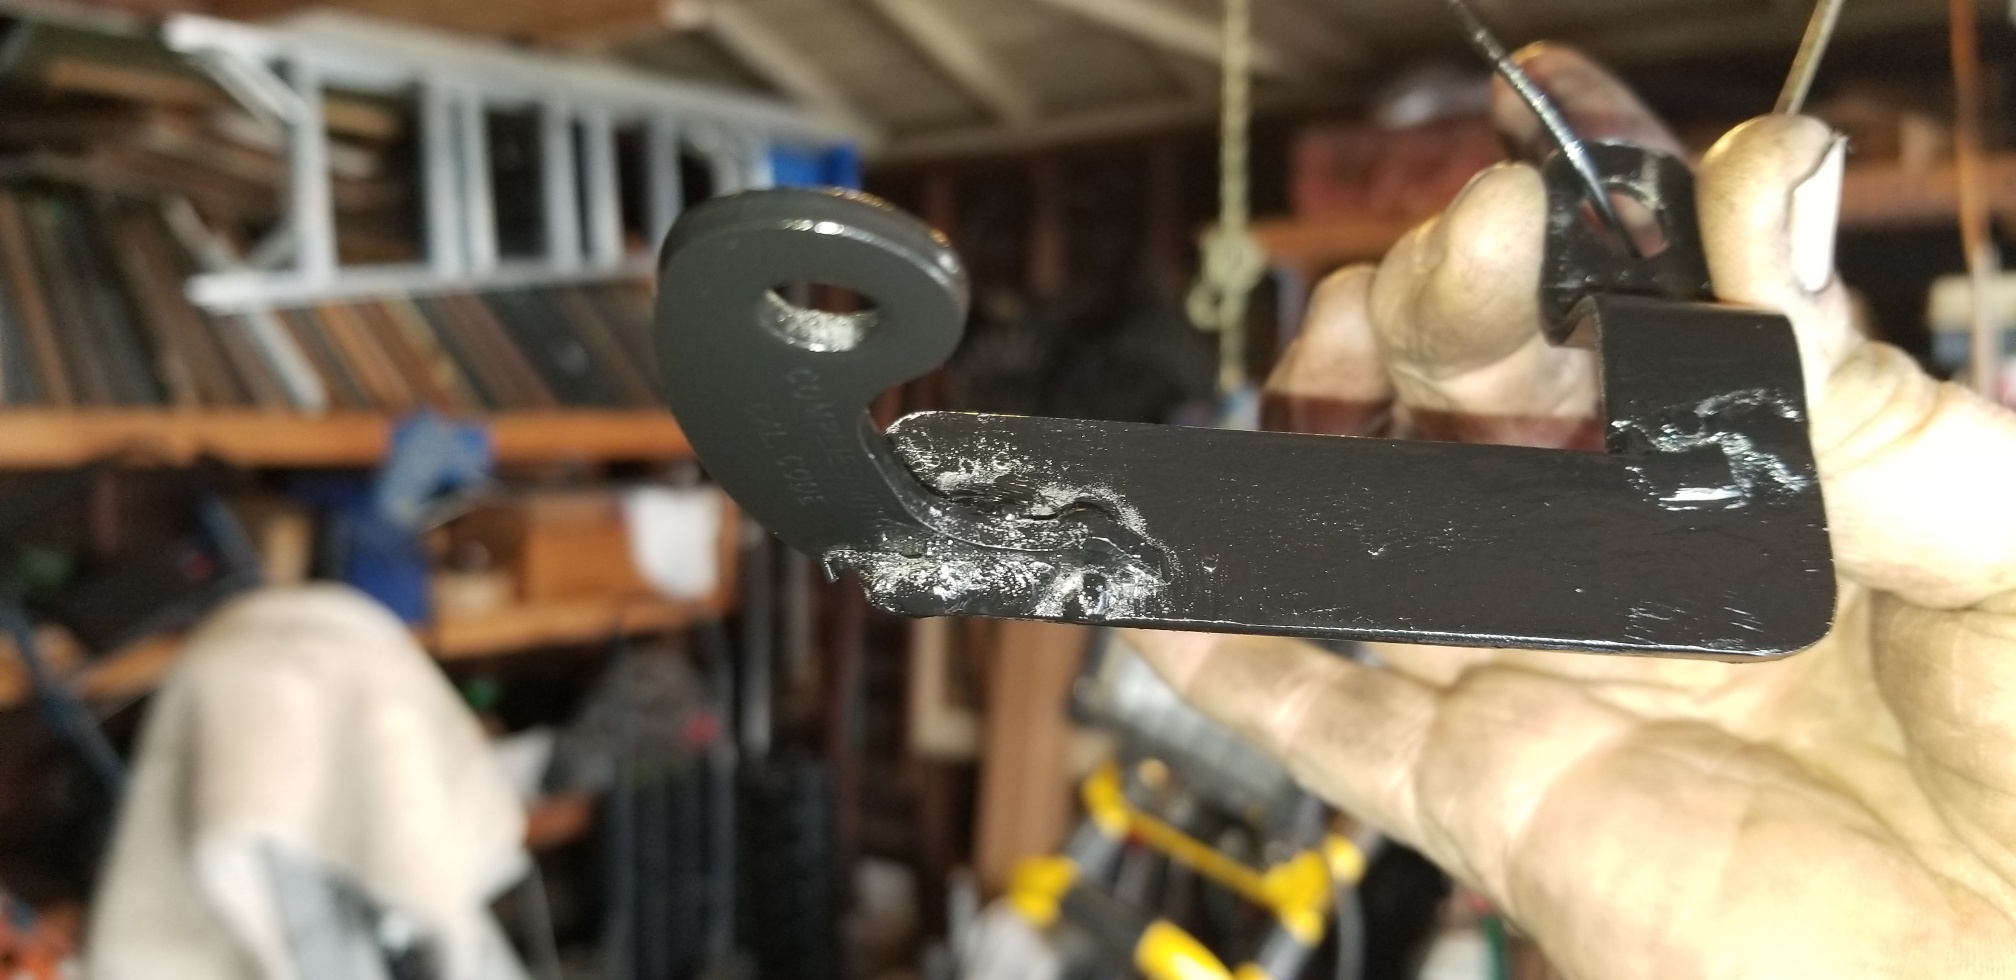
I couldn't find a throttle return spring bracket to fit this carb. I bought a nice fancy one on ebay, but my acc. pump mechanism is in the way. So, I dug through the junk bin and took a Quadrajet bracket and some other hook shaped thing-a-ma-bob, cut them up and with a piece of 3/4" stock metal, I made a spring bracket--just me and little wire-feed welder.
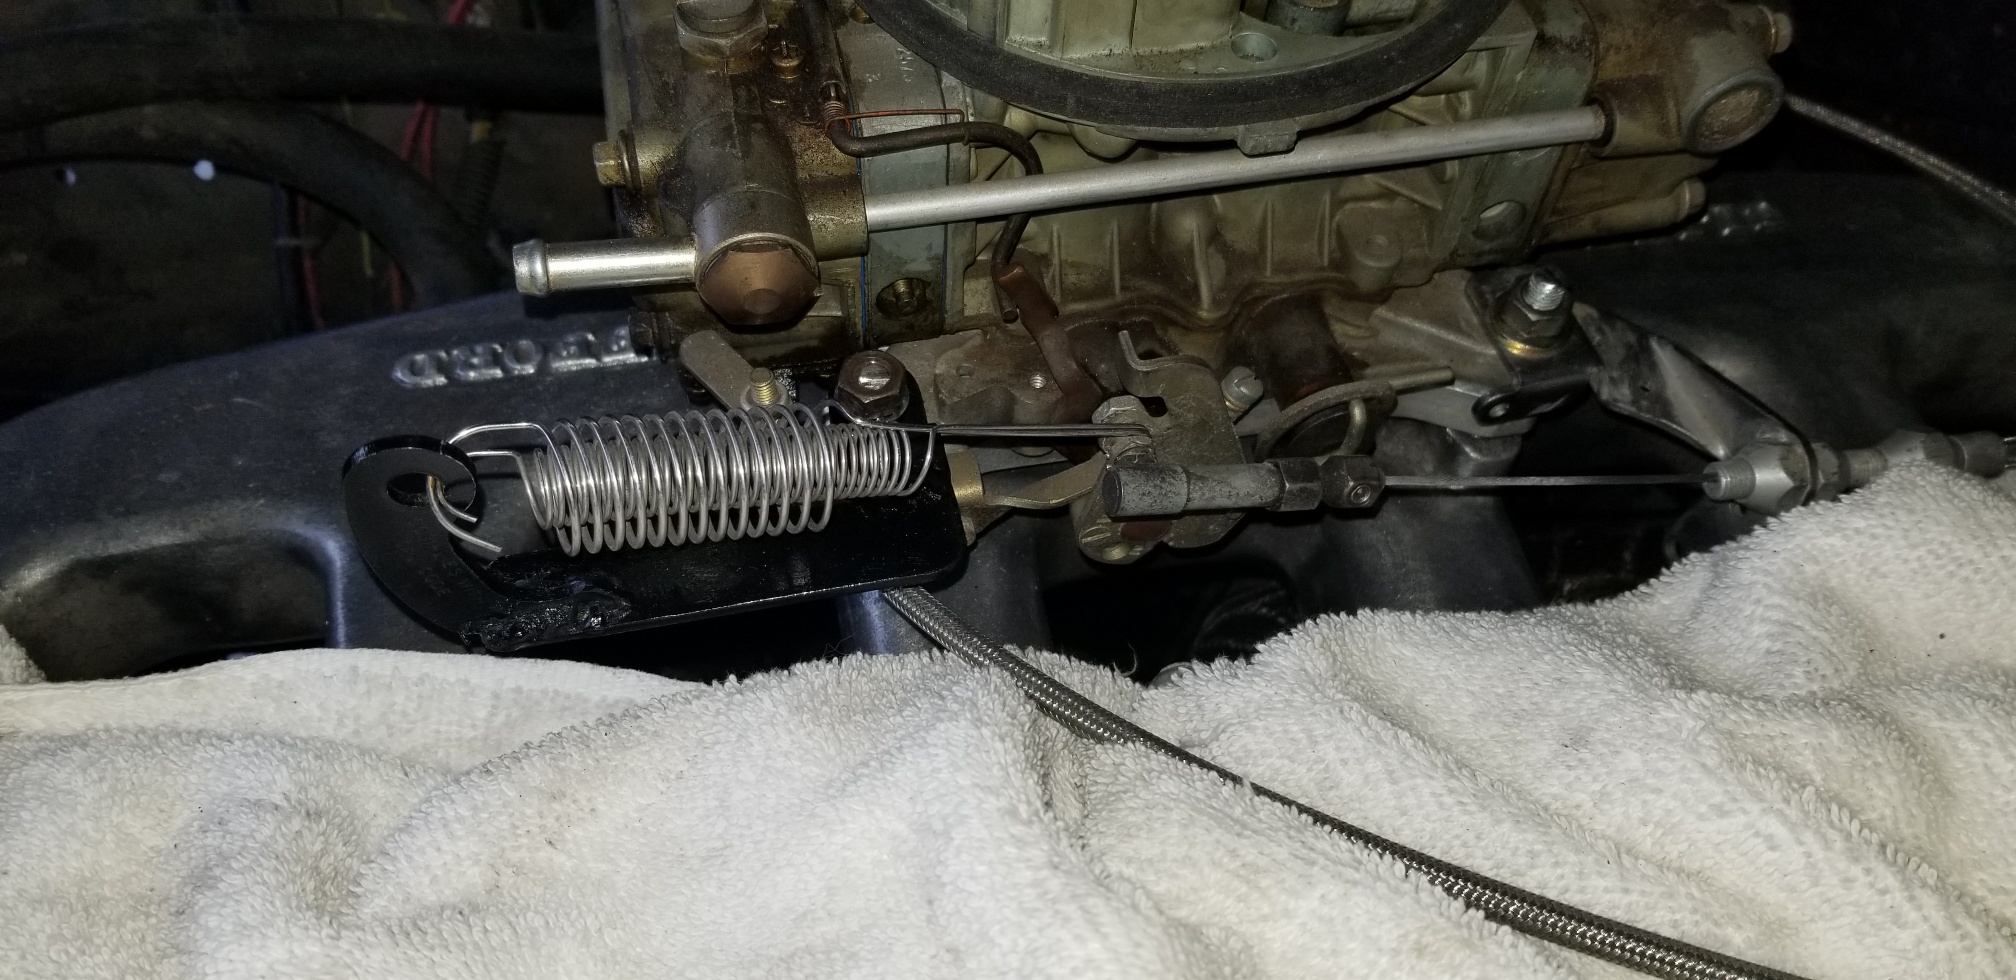
Then I started to bolt on my fuel pump and found I had a gap between the mounting surface and the pump mount above the bolt holes. Warped badly. Maybe that was why it leaked so. I thought about filing it flat, then realized that it was ten years old and most likely at the end of its life, so off to the parts store I went. My throttle cable now wraps the carb in a circle.
The carb has been sitting for two months+. I hope I don't need new gaskets prior to start up. What say yee, forum members?
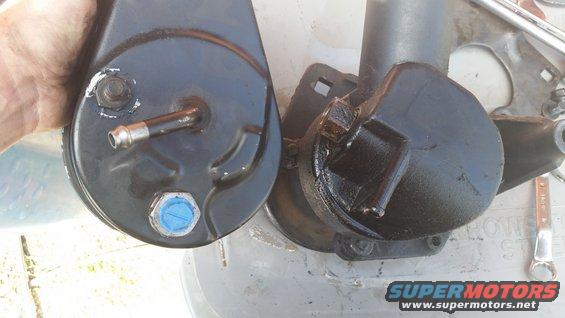
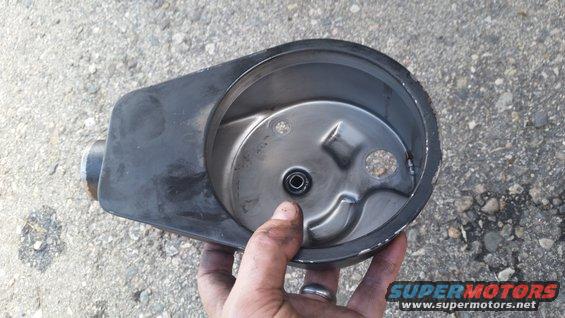
Fordman and AB: I have this saginaw pump (below), and I need to cut off the two return line attachment tubes, just past their hose flair, so I can slip on a compression attachment hose fitting. But I can't get metal fragments into the tubes. How can I prevent that?
Attachment 280176
Then I started to bolt on my fuel pump and found I had a gap between the mounting surface and the pump mount above the bolt holes. Warped badly. Maybe that was why it leaked so. I thought about filing it flat, then realized that it was ten years old and most likely at the end of its life, so off to the parts store I went. My throttle cable now wraps the carb in a circle.
The carb has been sitting for two months+. I hope I don't need new gaskets prior to start up. What say yee, forum members?
Fordman and AB: I have this saginaw pump (below), and I need to cut off the two return line attachment tubes, just past their hose flair, so I can slip on a compression attachment hose fitting. But I can't get metal fragments into the tubes. How can I prevent that?
Attachment 280176
#95
02-21-2019, 09:52 AM
Nice work on the throttle bracket. Looks good and solid.
Not sure on the Saginaw pump. However, the back side of that one looks a lot different than mine. The return hose was nice and short, and then there's the single hole (the one with the blue plastic cap in it) for the high pressure hose to screw into.
Saginaw on the left, stock on the right.
Maybe you could track down a different casing in a JY?
#96
02-21-2019, 10:55 AM
Yeah, I could do that. But I'm going to put compressed air in the top and vacuum at the tube, and cut off the flair. The compression fittings, I hope!, should give me a leak proof seal. We'll see.
I think the pressure connection, one return line, and the brace stud are in the same position on both reservoirs. Mine just has an extra return tube, right?
Almost time to pour fluid into my projects! Oh no!
I think the pressure connection, one return line, and the brace stud are in the same position on both reservoirs. Mine just has an extra return tube, right?
Almost time to pour fluid into my projects! Oh no!
#97
02-21-2019, 11:03 AM
#98
02-21-2019, 11:45 AM
#100
02-23-2019, 07:28 PM
It was easy. That was the first one I've done. I didn't know the whole thing was sitting on an O-ring. Anyway, it's back together. Now I just need to press the pulley on, once I get the proper pulley.
Now I'm on to the U joints, at the rear end yoke for the driveshaft, and the new U for the steering column connection.
With the hydroboost braided lines and the AN fittings, it's a pain to find a local source for those fittings. If you get one wrong, suddenly you have to wait three days to mail order a new fitting. Oh well.
#101
03-01-2019, 09:59 PM
I finally got back to it. Today I made new braided lines for the Saginaw p/s pump to hydroboost. Routing did not turn out the best, but I refused to spend more by ordering special Aeroquip fittings that would have made it look better by routing the lines in a better way. The fittings are Aeroquip from p/s to hydro., and to the steering box. The two return lines are Summit fittings (black). I used hose clamps to secure the non-braided return lines to the oem cooling tubes. Dang it. Forgot the filter.
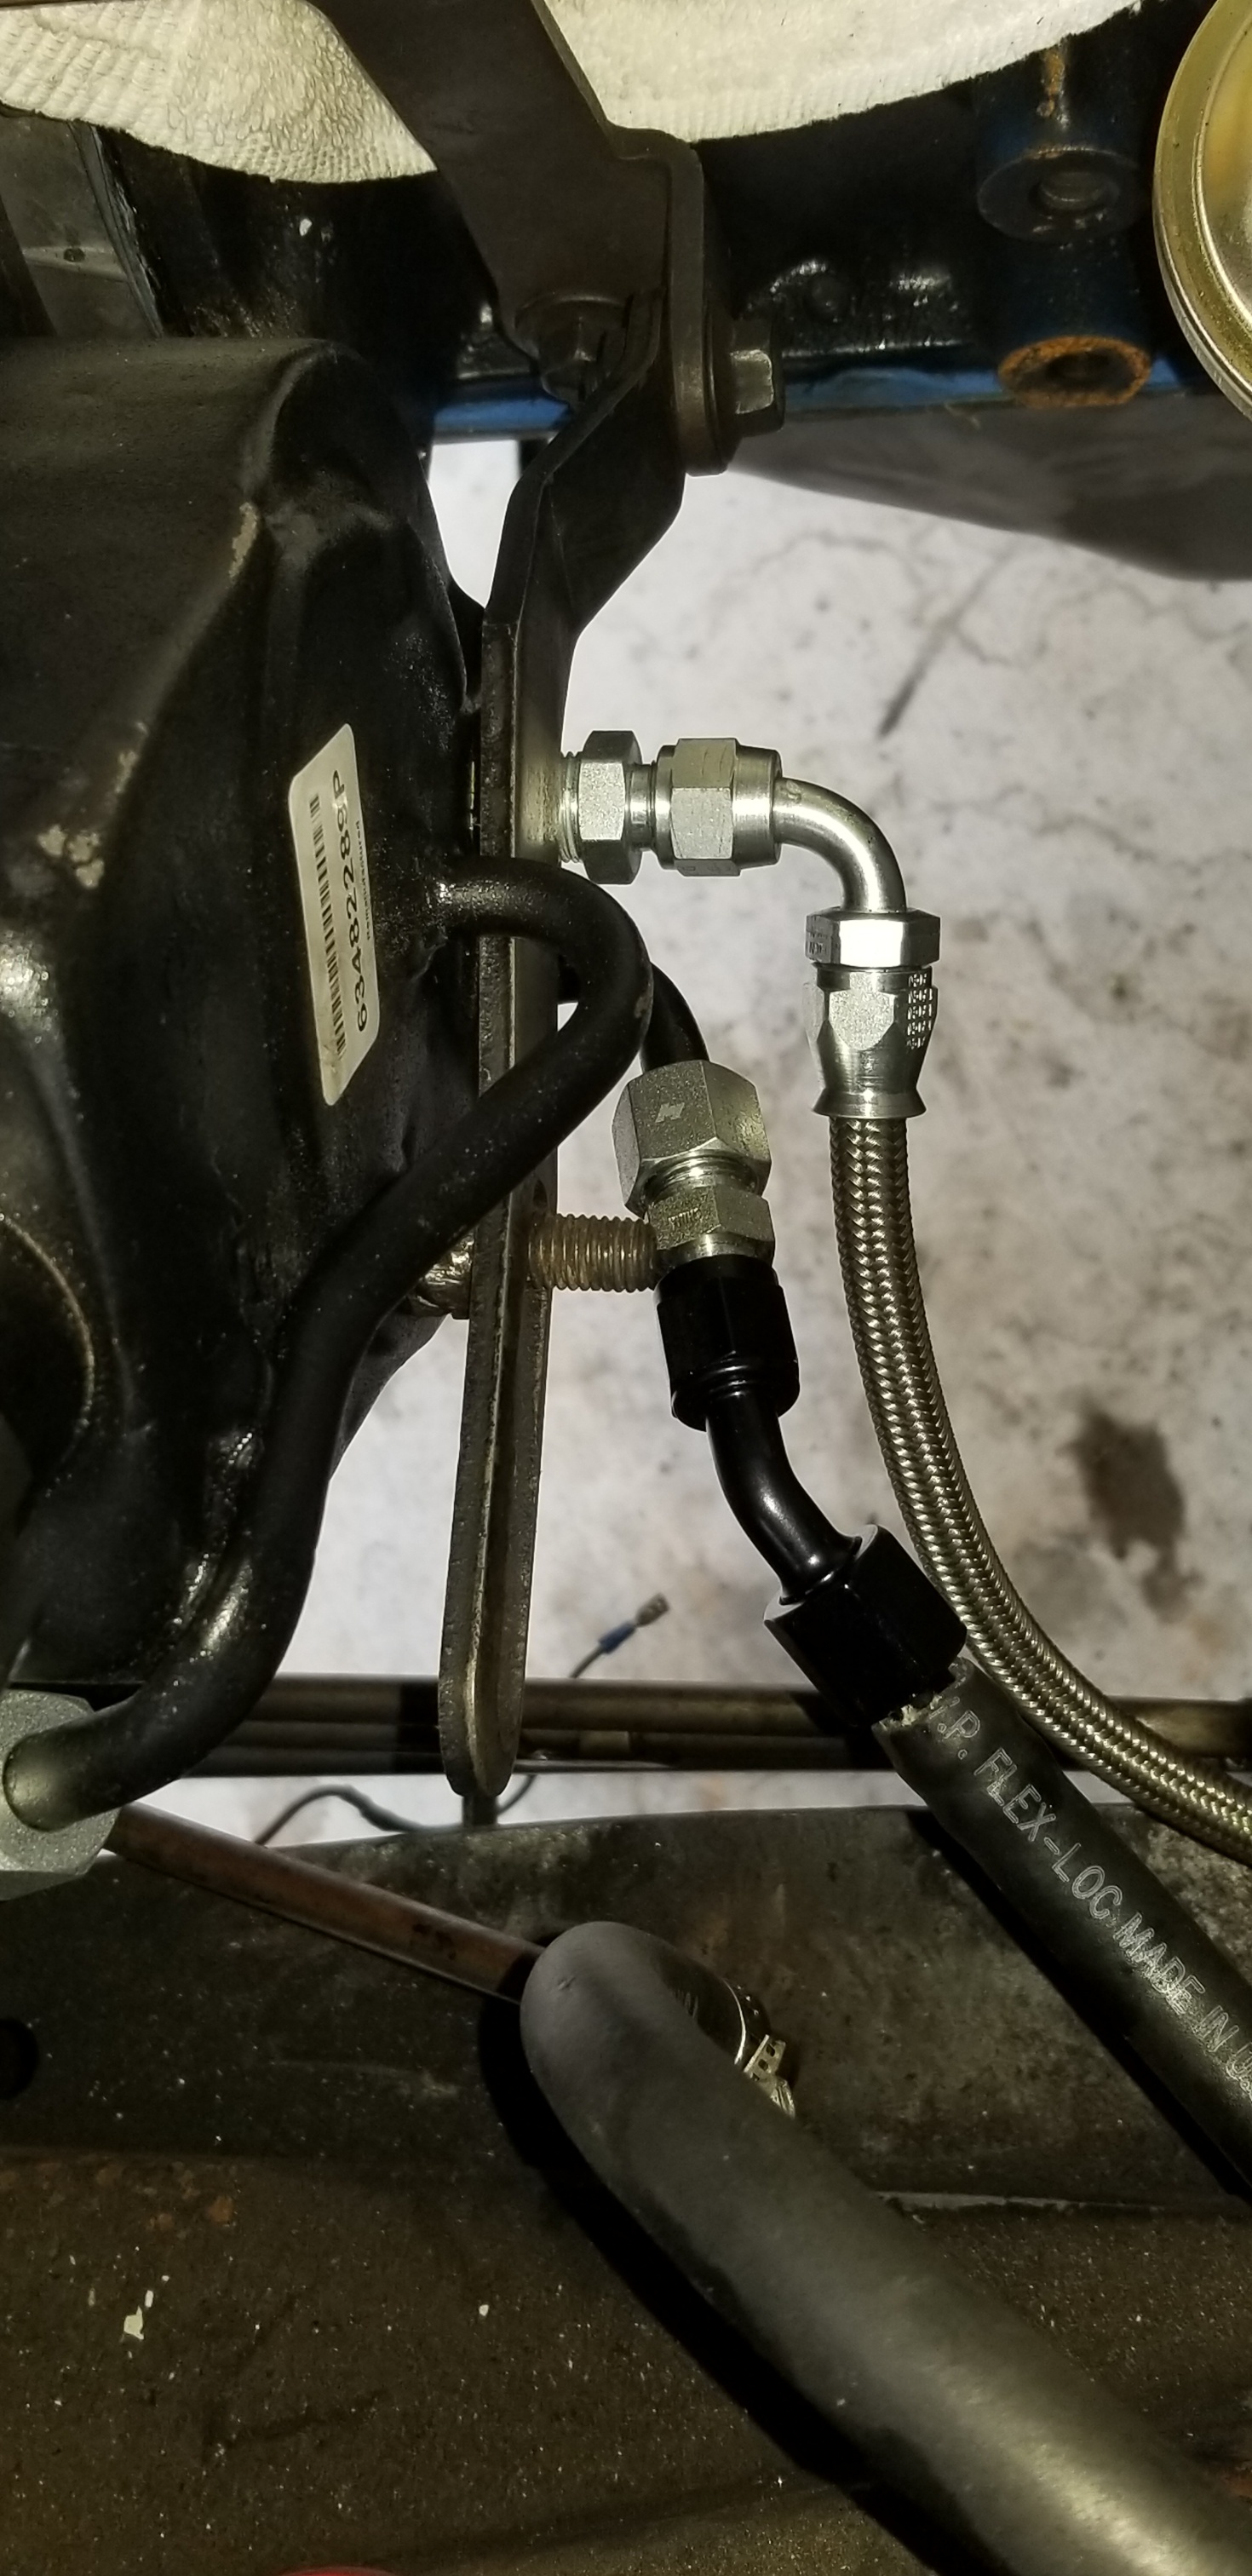
It is great to get rid of the SuperDuty lines that draped across the E.compartment, but that left side high pressure line should be routed initially toward the firewall, down and forward, to avoid the high profile that might rub on hood, and not look cool when I open the hood.
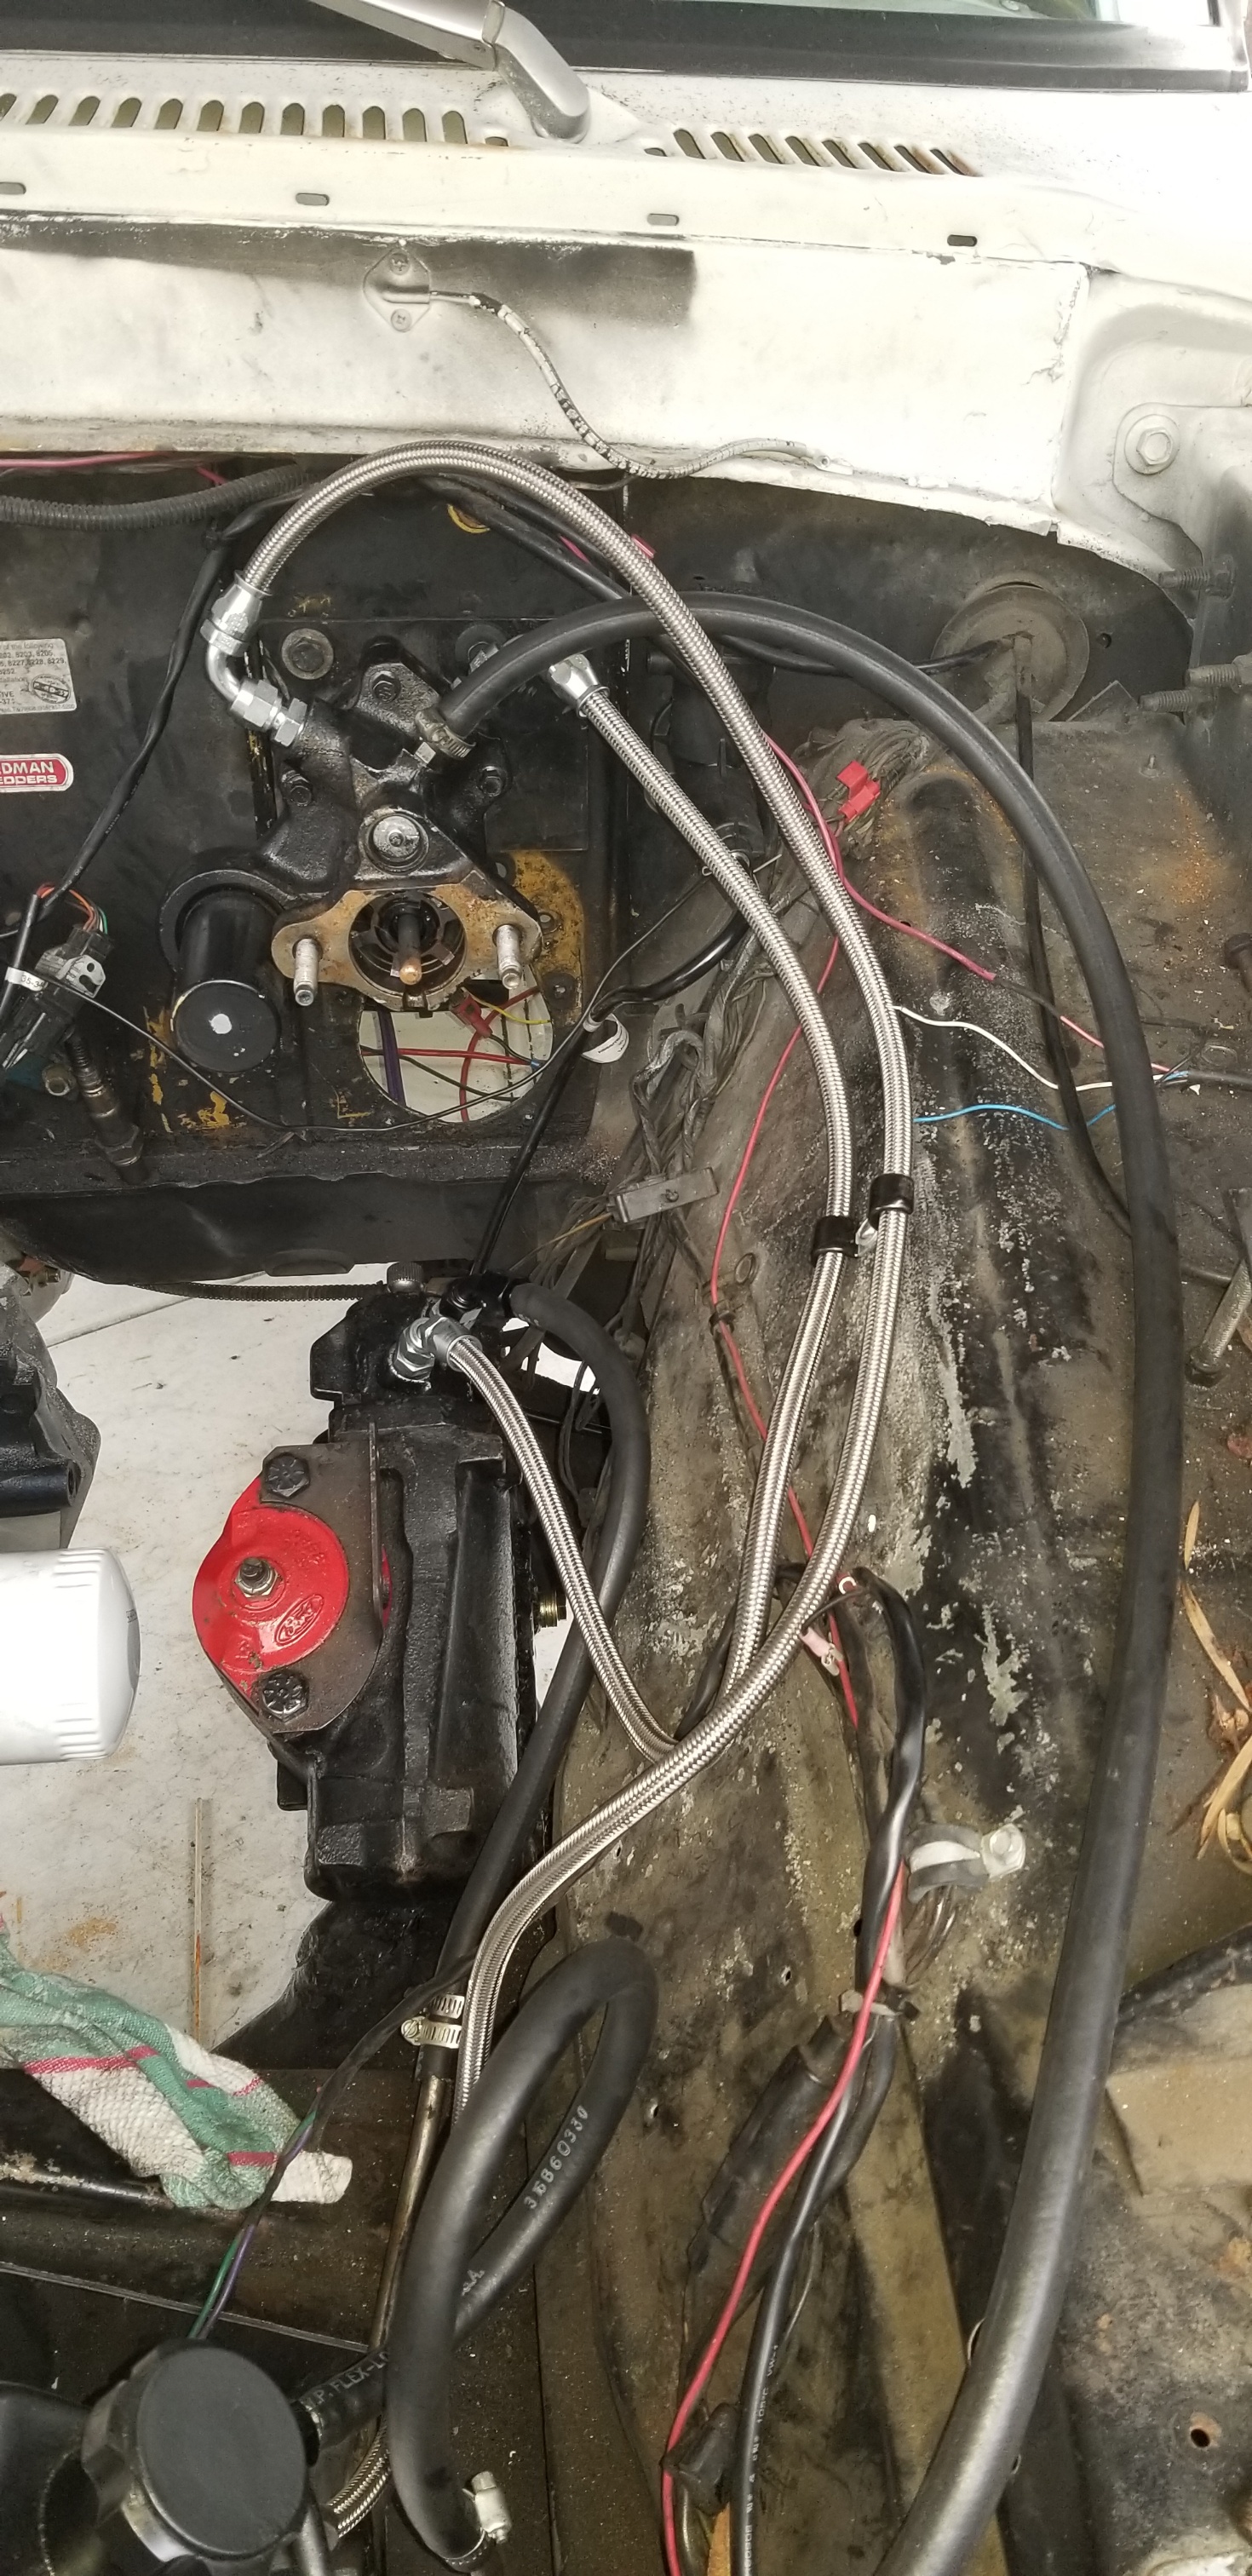
It is great to get rid of the SuperDuty lines that draped across the E.compartment, but that left side high pressure line should be routed initially toward the firewall, down and forward, to avoid the high profile that might rub on hood, and not look cool when I open the hood.
#102
03-08-2019, 12:03 PM
If all goes well, I should be starting the engine tomorrow and doing the cam break in. There was a lot of dust on top of the Harlan Sharpe box when I took out my r.rockers for a good soaking. Yes, they've been sitting for quite a while. That is if my wobbling p/s pulley doesn't throw the belt.
#103
03-08-2019, 01:20 PM
#104
03-08-2019, 01:50 PM
I don't recall, did you measure your pushrods to make sure the roller tip was centered on the valve stem? I know I ended up with several different length pushrods.
I imagine you've gone through a good, pre-cam break in check list.
Always a stressful moment, but lovely once you hear it run!
Oh, and if you are having issues with the PS pump, you can always leave it disconnected during break-in. You don't want anything to have to force you to shut it down and detract you from doing it properly, if you don't have to.
#105
03-09-2019, 03:28 PM
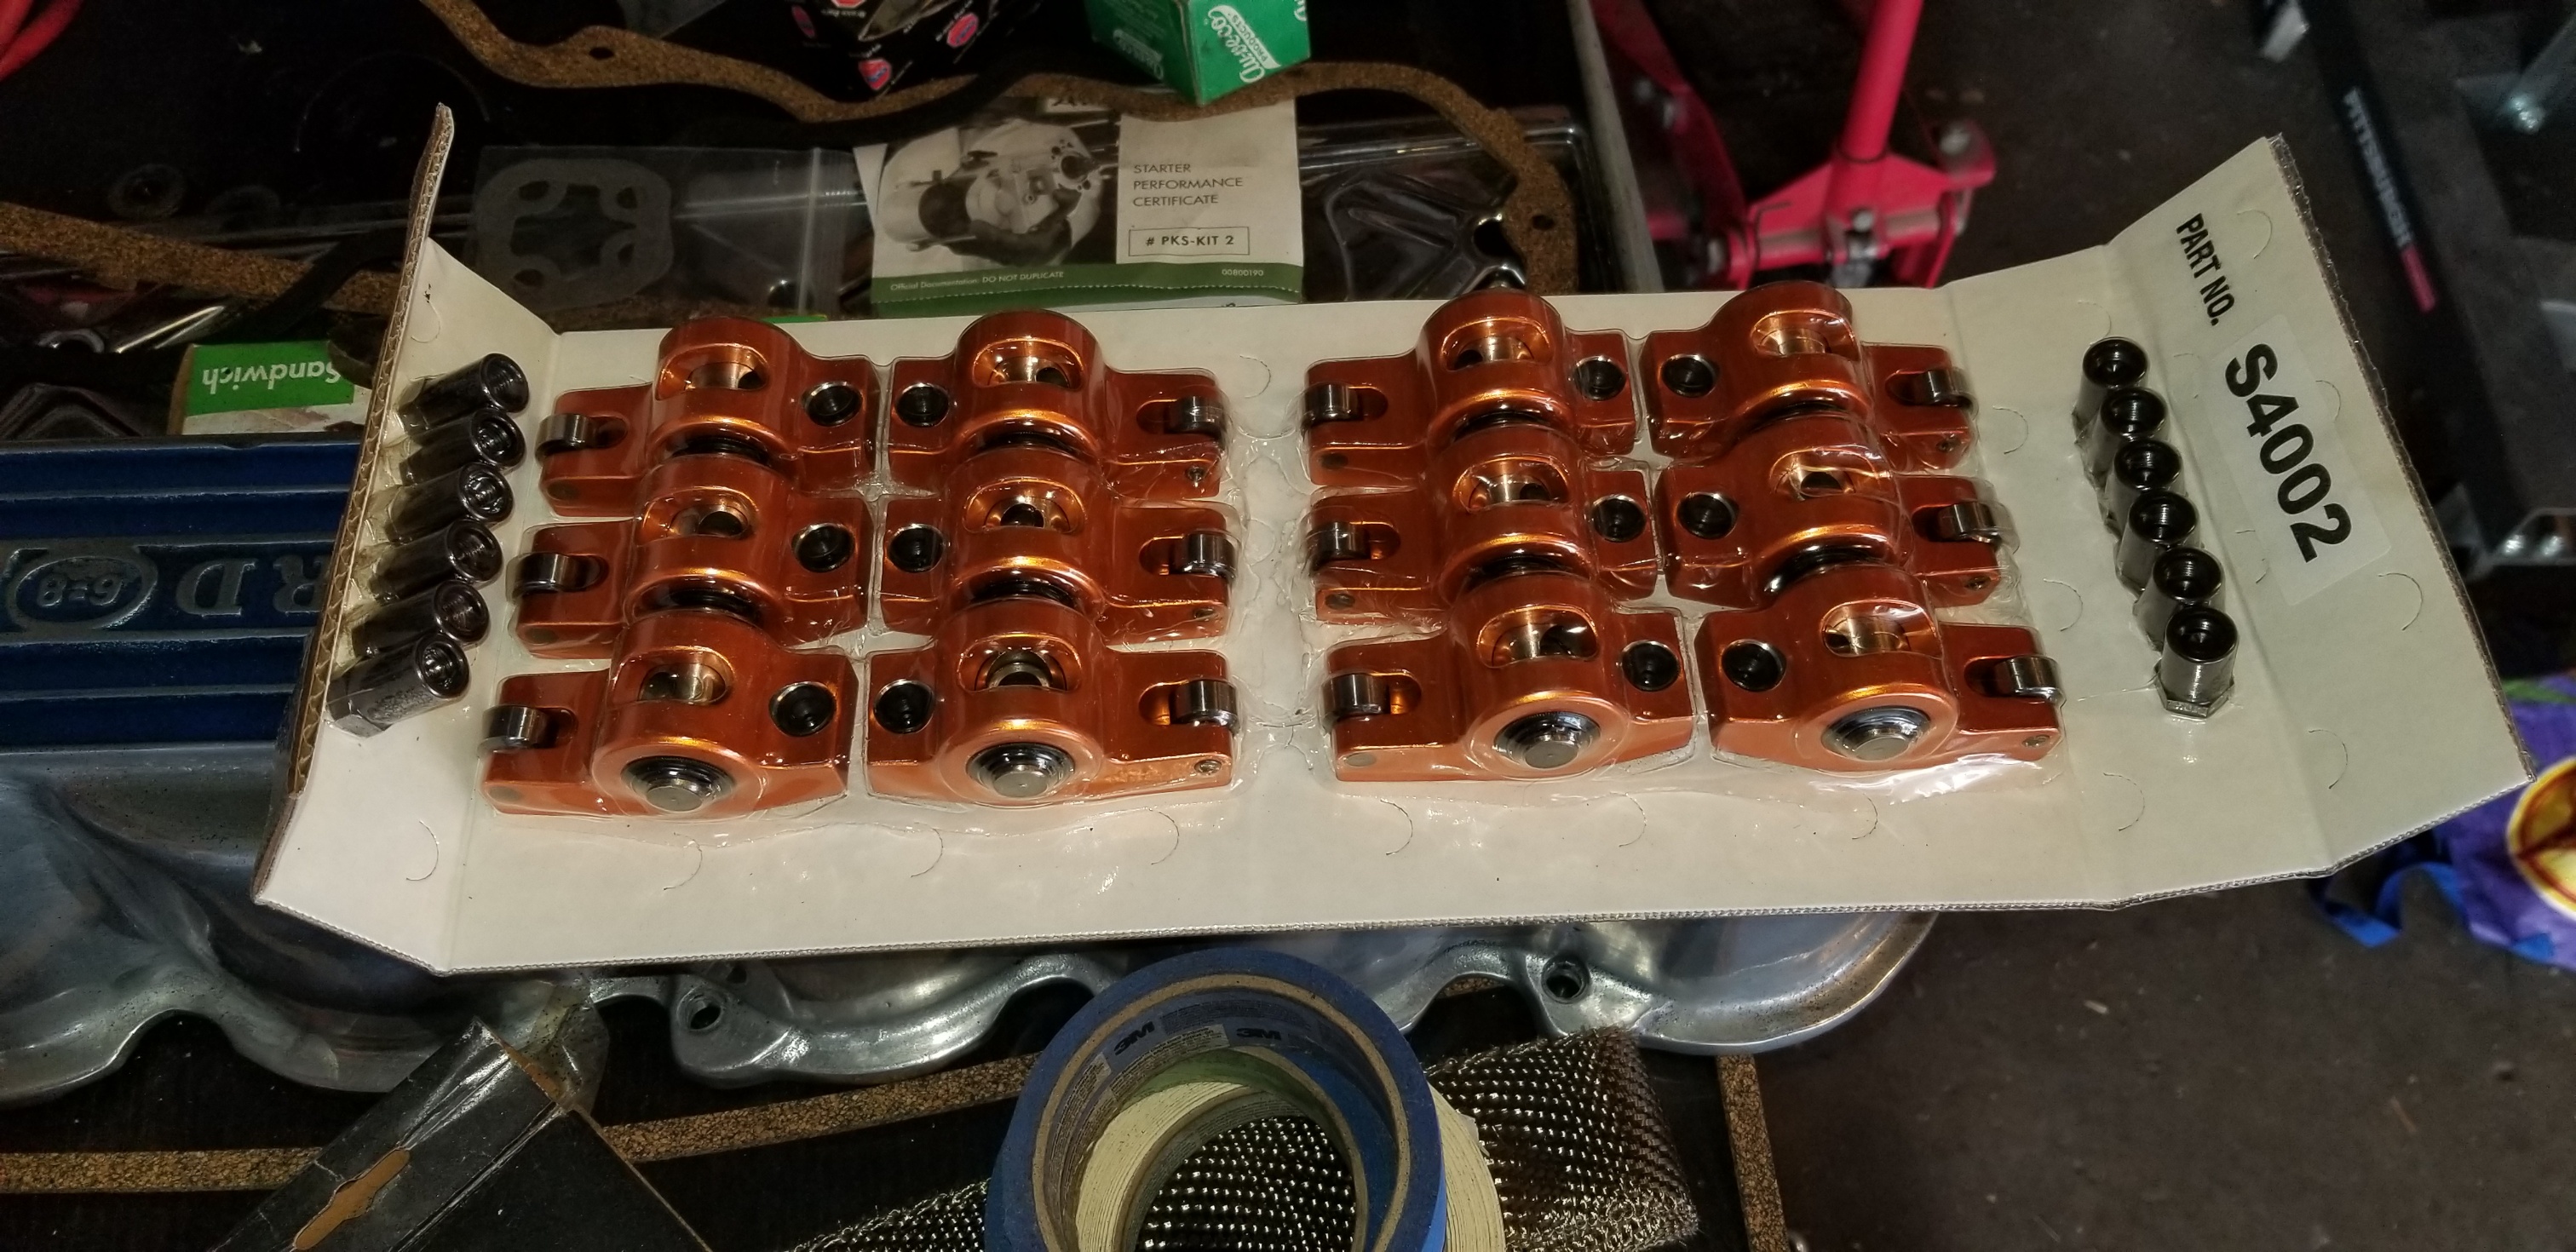
The engine is coming along nicely, but rather slowly. I am having the bit of a problem with the Harlan Sharp roller rockers. The poly lock nuts don't seem to want to enter into the circular groove or recess in the rocker arm pivot shaft that the screw and stud goes through. I am having to align the groove or recess with a screwdriver as I screw in the poly lock. I don't remember having that difficulty with the crane roller rockers that I had on a different engine. It just seems as though it should be aligned since it's designed for a 3/8 and stud and that's what I have. Also, the nuts seem to tighten up very quickly before they reach the rocker pivot shaft. But anyways I'm sure that'll work itself out once I get a little further along in the installation process. I guess I should add that when I take the rocker off the shaft I can set the poly lock nut down into the recess without any hindrance whatsoever.
AB asked about the p.rod length. I did use the adjustable p.rod I have and then bought these shorter ones. I will test again once the engine is running.
With this Clifford C intake I have to run my Lokar 48" throttle cable in a circle and it gets tight around the carb, making putting on the air cleaner difficult and may create a bind with the drop from the high v.cover to the bottom of the carb. I may have to turn the primaries to the firewall side to give me more free play.