When you click on links to various merchants on this site and make a purchase, this can result in this site earning a commission. Affiliate programs and affiliations include, but are not limited to, the eBay Partner Network.
Appreciate that.
They are 18/5.75 offset/spacing, I went with the 295/65 specifically to keep as much of the tire under the fender as possible.
it lacks about an inch from being flush. But this is the narrower 35” tire you can find. Everything is is too much for my liking.
Not wont let me edit the above sentence for some reason, but that is supposed to say everything else I’ve seen is too wide for my liking. 12.50 or 305-325 tires
This is the most direct pic I have right now I can take one straight down the side today if you’d like. But you can get a decent idea of that rear tire from this angle
sorry new to the aftermarket wheel scene. But i really like the setup you have. What wheel width are you using? I also do not want tire outside of the wheel well. I like the idea of 18in rims over 20s because of the taller sidewall.
sorry new to the aftermarket wheel scene. But i really like the setup you have. What wheel width are you using? I also do not want tire outside of the wheel well. I like the idea of 18in rims over 20s because of the taller sidewall.
These rims are a 20x9, if I replace them some day, or a new truck, I’m thinking about an 18”. The 295/65/20 is a 35”OD and 11.5 wide. 12.50 or wider is just too much rubber outside the wheel well. With these, I can roll thru a water puddle and not get spots all down the sides.
The first picture was taken at 5:15 and the last at 5:45 :30 total which included organizing the items, install and taking pictures; VERY EASY to install!! LOOKS AWESOME!!!! Husky Wheel rear well liners, INSTRUCTIONS and hardware. Let your liners sit in the sun for a few min and they will bend a little easier. Not my idea, someone already suggested it I'm just passing the tip on... Read and make it easy!! Not much to read actually... Start with the PS (passenger side) as the positions A,B,C,D in the picture are in reference to the passenger side. If you start with the drivers side and look at the picture for reference it is backwards. Note the A,B,C,D (FOR /AFT) is for the passenger side start there. Drivers side will be a snap if you do. Before... no not studded tires... Before #2 After... AFTER!!!
All that is left over. The needle nose pliers were used to squeeze the clips that were installed on the truck to make sure they stayed in place and also used to expand the clips that were installed on the liner.
Last edited by '18_F250_4x4; 10-11-2018 at 09:06 PM.
Reason: Add time required to complete installation
curious to see what you thought of the install? And total dollars all in
The hardest part of the install was removing the airbag. I had a bear of a time getting the tabs pressed in to release it on mine. Other than that, disconnect battery(ies), it's 3 screws for the column shroud, 1 bolt and 3 plugs for the wheel.
I ordered the PnP wiring harness from BGG which isn't here yet, but you don't have to remove the wheel to install it. I was going to just splice wires in, but decided it wasn't worth my time and hassle.
All in for the wheel and BGG's harness will be about $465
Wait for one of Ebay's 15 or 20% off anything codes, and you can get a Raptor wheel for around $360-ish
Yesterday took it for its first road trip. 8hrs from NC to GA, did the 2-3hrs of work that needed to be done, then drove 8hrs back. Left at 4am and returned at 1130pm. Close to 1000 miles round trip and averaged 13.3 mpg.
side note, does anybody with cloth seats have issues with their back sweating on long trips? 6 hrs into my trip I stopped to fill up and noticed the bottom of my shirt was soaking wet.
The first picture was taken at 5:15 and the last at 5:45 :30 total which included organizing the items, install and taking pictures; VERY EASY to install!! LOOKS AWESOME!!!! Husky Wheel rear well liners, INSTRUCTIONS and hardware. Let your liners sit in the sun for a few min and they will bend a little easier. Not my idea, someone already suggested it I'm just passing the tip on... Read and make it easy!! Not much to read actually... Start with the PS (passenger side) as the positions A,B,C,D in the picture are in reference to the passenger side. If you start with the drivers side and look at the picture for reference it is backwards. Note the A,B,C,D (FOR /AFT) is for the passenger side start there. Drivers side will be a snap if you do. Before... no not studded tires... Before #2 After... AFTER!!!
All that is left over. The needle nose pliers were used to squeeze the clips that were installed on the truck to make sure they stayed in place and also used to expand the clips that were installed on the liner.
where are you getting these wheel wells? Amazon seems to only have the Husky REAR wheel wells for $99.
Just ordered a Leer 100XQ for my CCLB Dually. Now to wait 4 weeks until it comes in. I got it with the tilt in front slider and with the Thule Aero Blade Roof Rack System installed. Figured it would be better to have that installed as they build it instaed of afterwards. Also getting the Bedrug. We had a cap on our last truck and even with having a CC, once we put our 100 lb. GS in there, not much room for anything else. Will post some pics once installed.
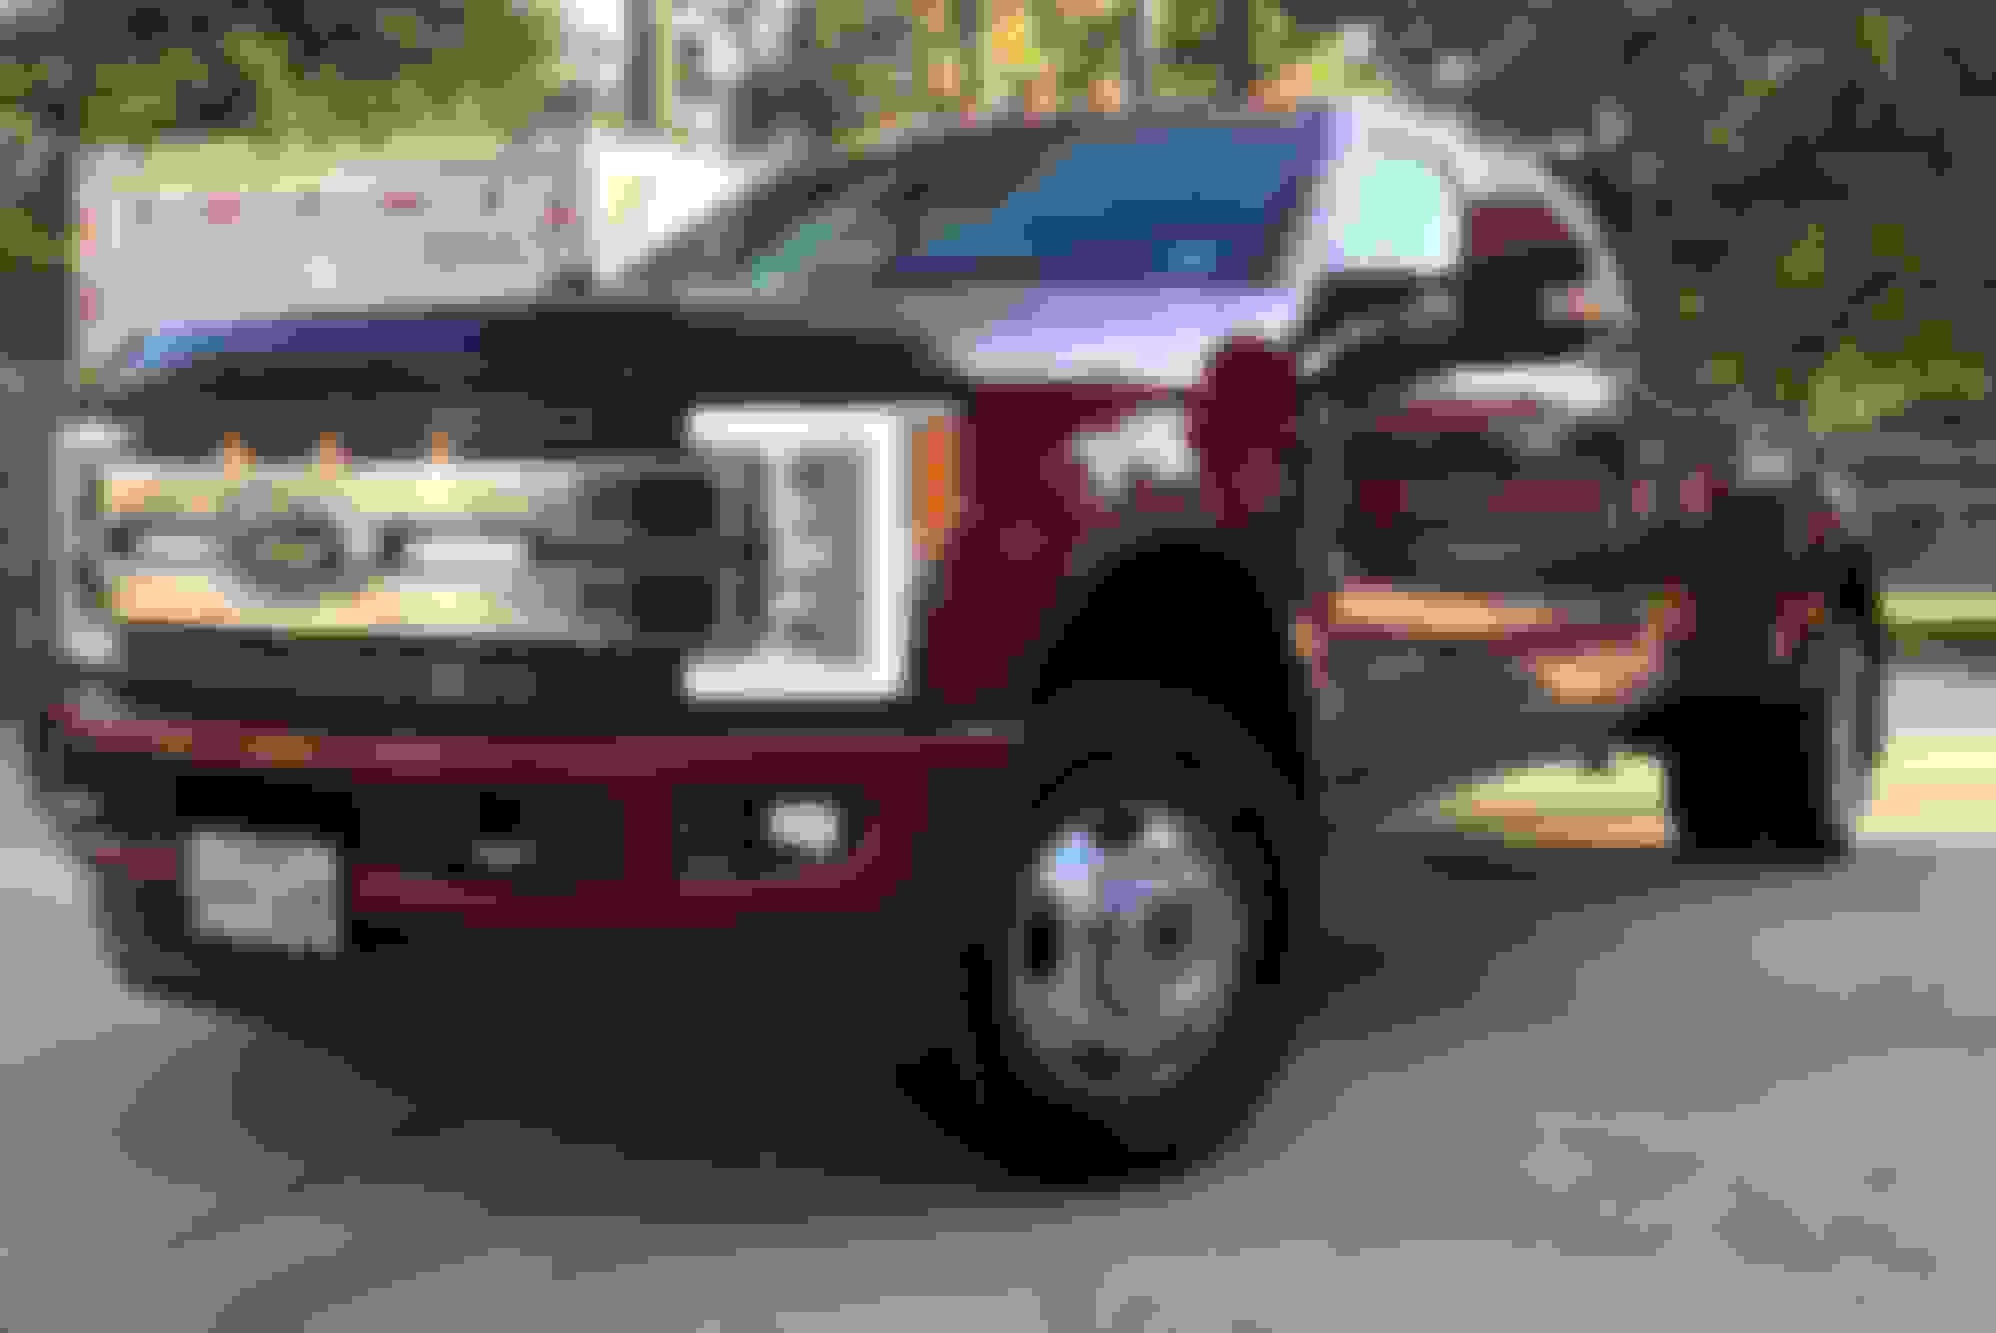
Special order and took 6 months to get it, but that's another story all together. My 2018 F-350 Limited. Love the Truck.
1. Retrax Pro bed cover
2. Rough Country LED lights in the cut out part of the grill
3. Raptor Style LED lights in the grill. (I had to custom build the brackets)
4. 2-wheel drive front center caps. I hate the hole in the 4x4 wheel covers.
5. Tint
6. F-150 style Chrome "Limited" letters on bed sides.
7. Chrome Tufskinz lettering on tailgate.
8. Wash it every other day. LOL
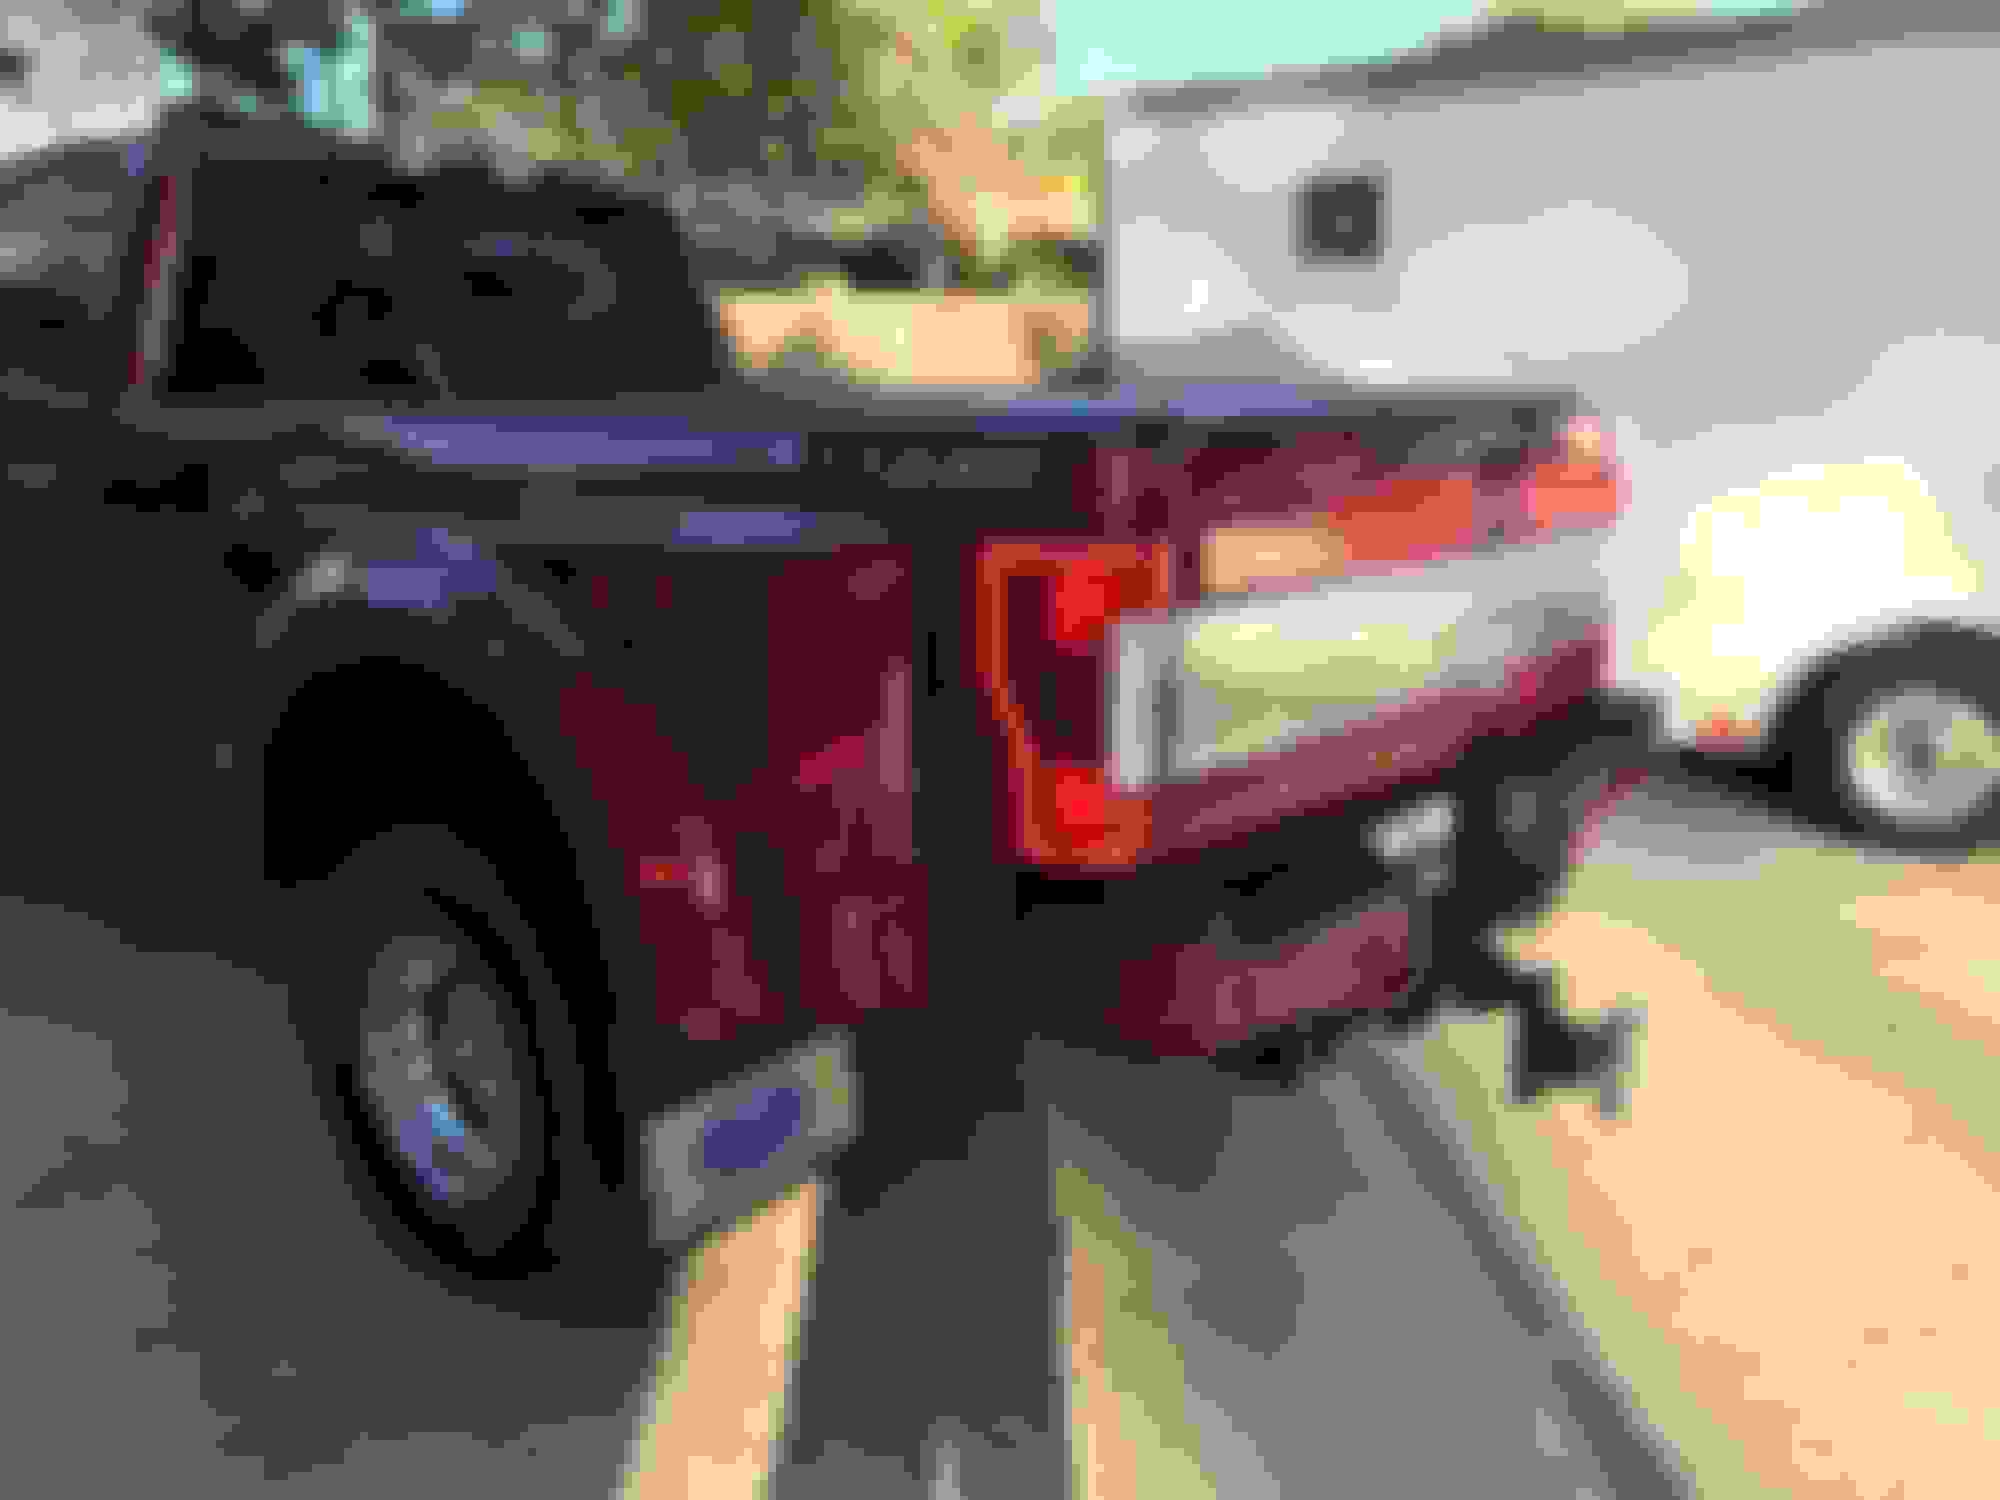
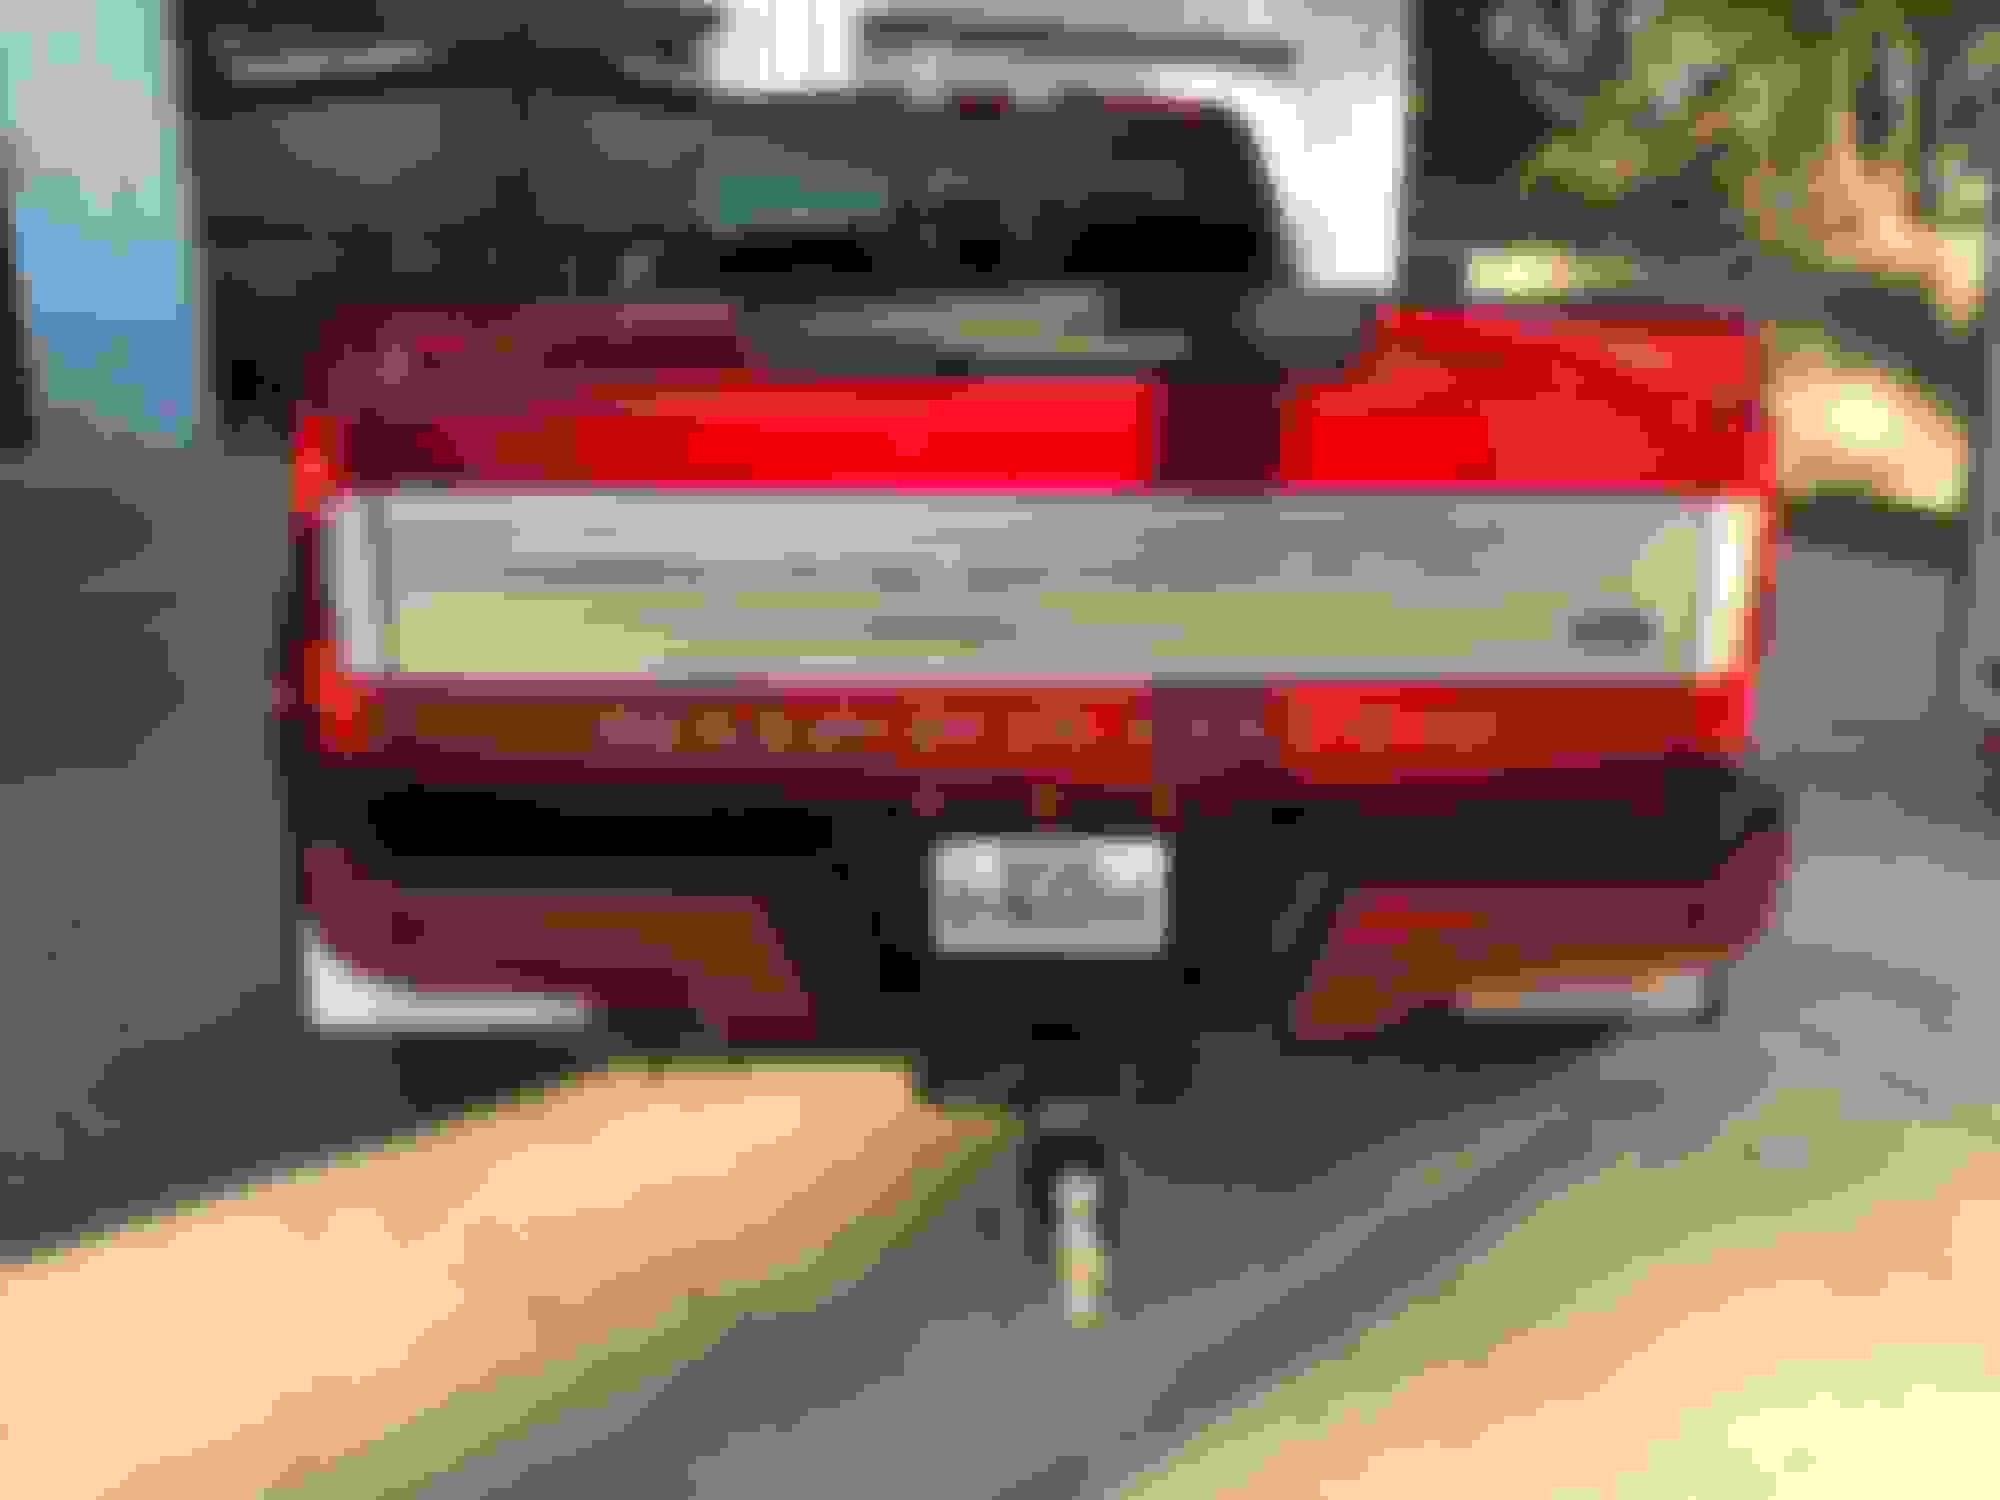
Added the TUFSKINZ Hood and Tailgate SUPER DUTY letter inserts (VERY EASY install and LOOK AWESOME) then replace the stock front bumper with a fog light equipped takeoff. (VERY EASY R&R) Installed a new Headlight switch to make it all work. Took all of about an hour and truck looks sweet!!
Thinking LEDs once there is a bulb failure and looking to fill the grill slots with LED Bars wired to an upfitter switch.
B&W Goosneck hitch is next on the list as are TINT and maybe leather but that will be later, much later... like next week!!! Maybe....
 10-11-2018, 05:34 PM