300 RV Motor - Project Bulletproof
#1
 11-13-2017, 09:45 AM


Join Date: Nov 2008
Posts: 106
Likes: 0
Received 0 Likes
on
0 Posts
300 RV Motor - Project Bulletproof
Thought I would start a new thread documenting my "build" of my 300. The intention for this project is to hopefully build a reliable engine first and foremost. Everything else will be secondary to that. I'm hoping to do an overhaul of the motor, fixing/replacing any parts that are out of tolerances, but keeping what I can.
The background for this motor was that it came out of a 1970 25ft Winnebago with 70,000 miles on it. Not sure if I believe that, but I did at least get to inspect the old RV and everything. Here's to hoping the motor was one of those that was used for 2 weeks out of the year, and garaged for the rest of the year.
Now to the build:
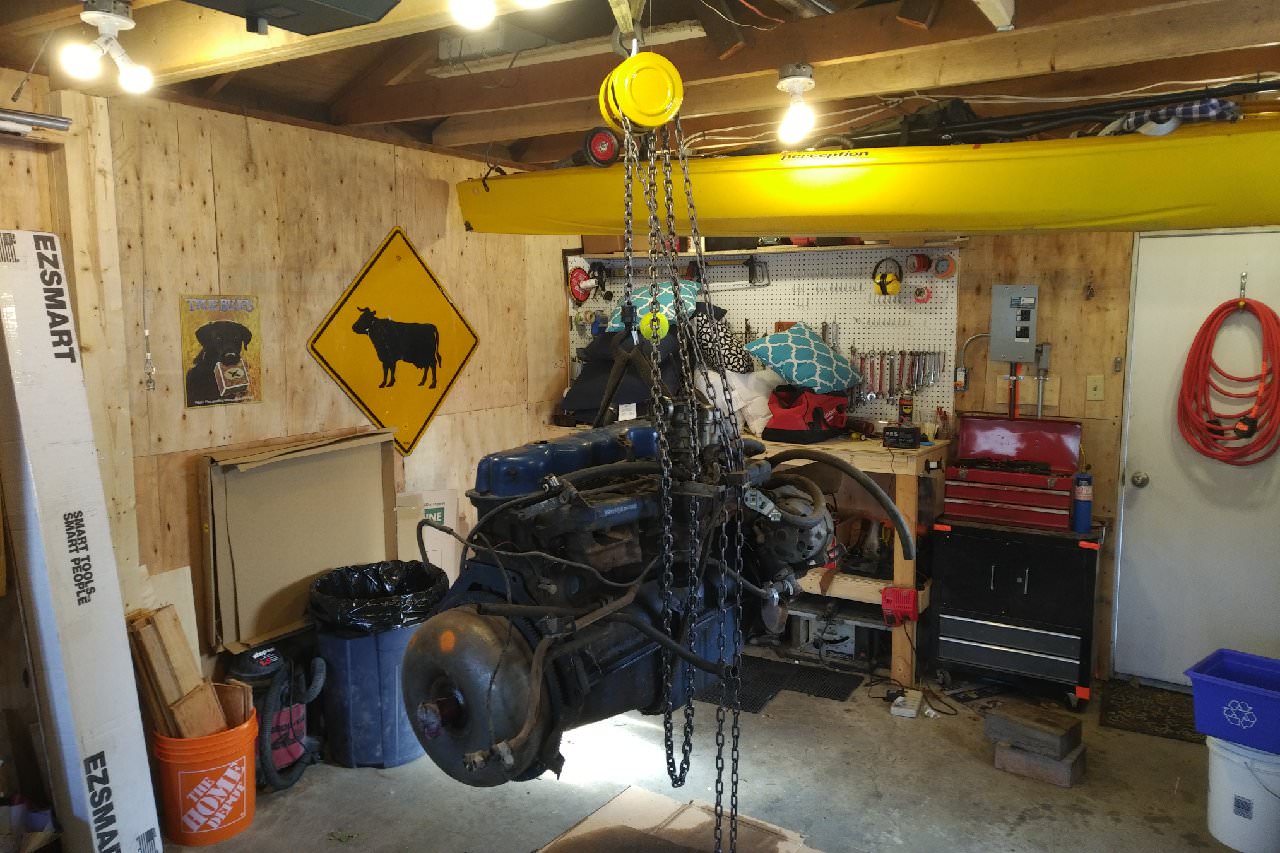
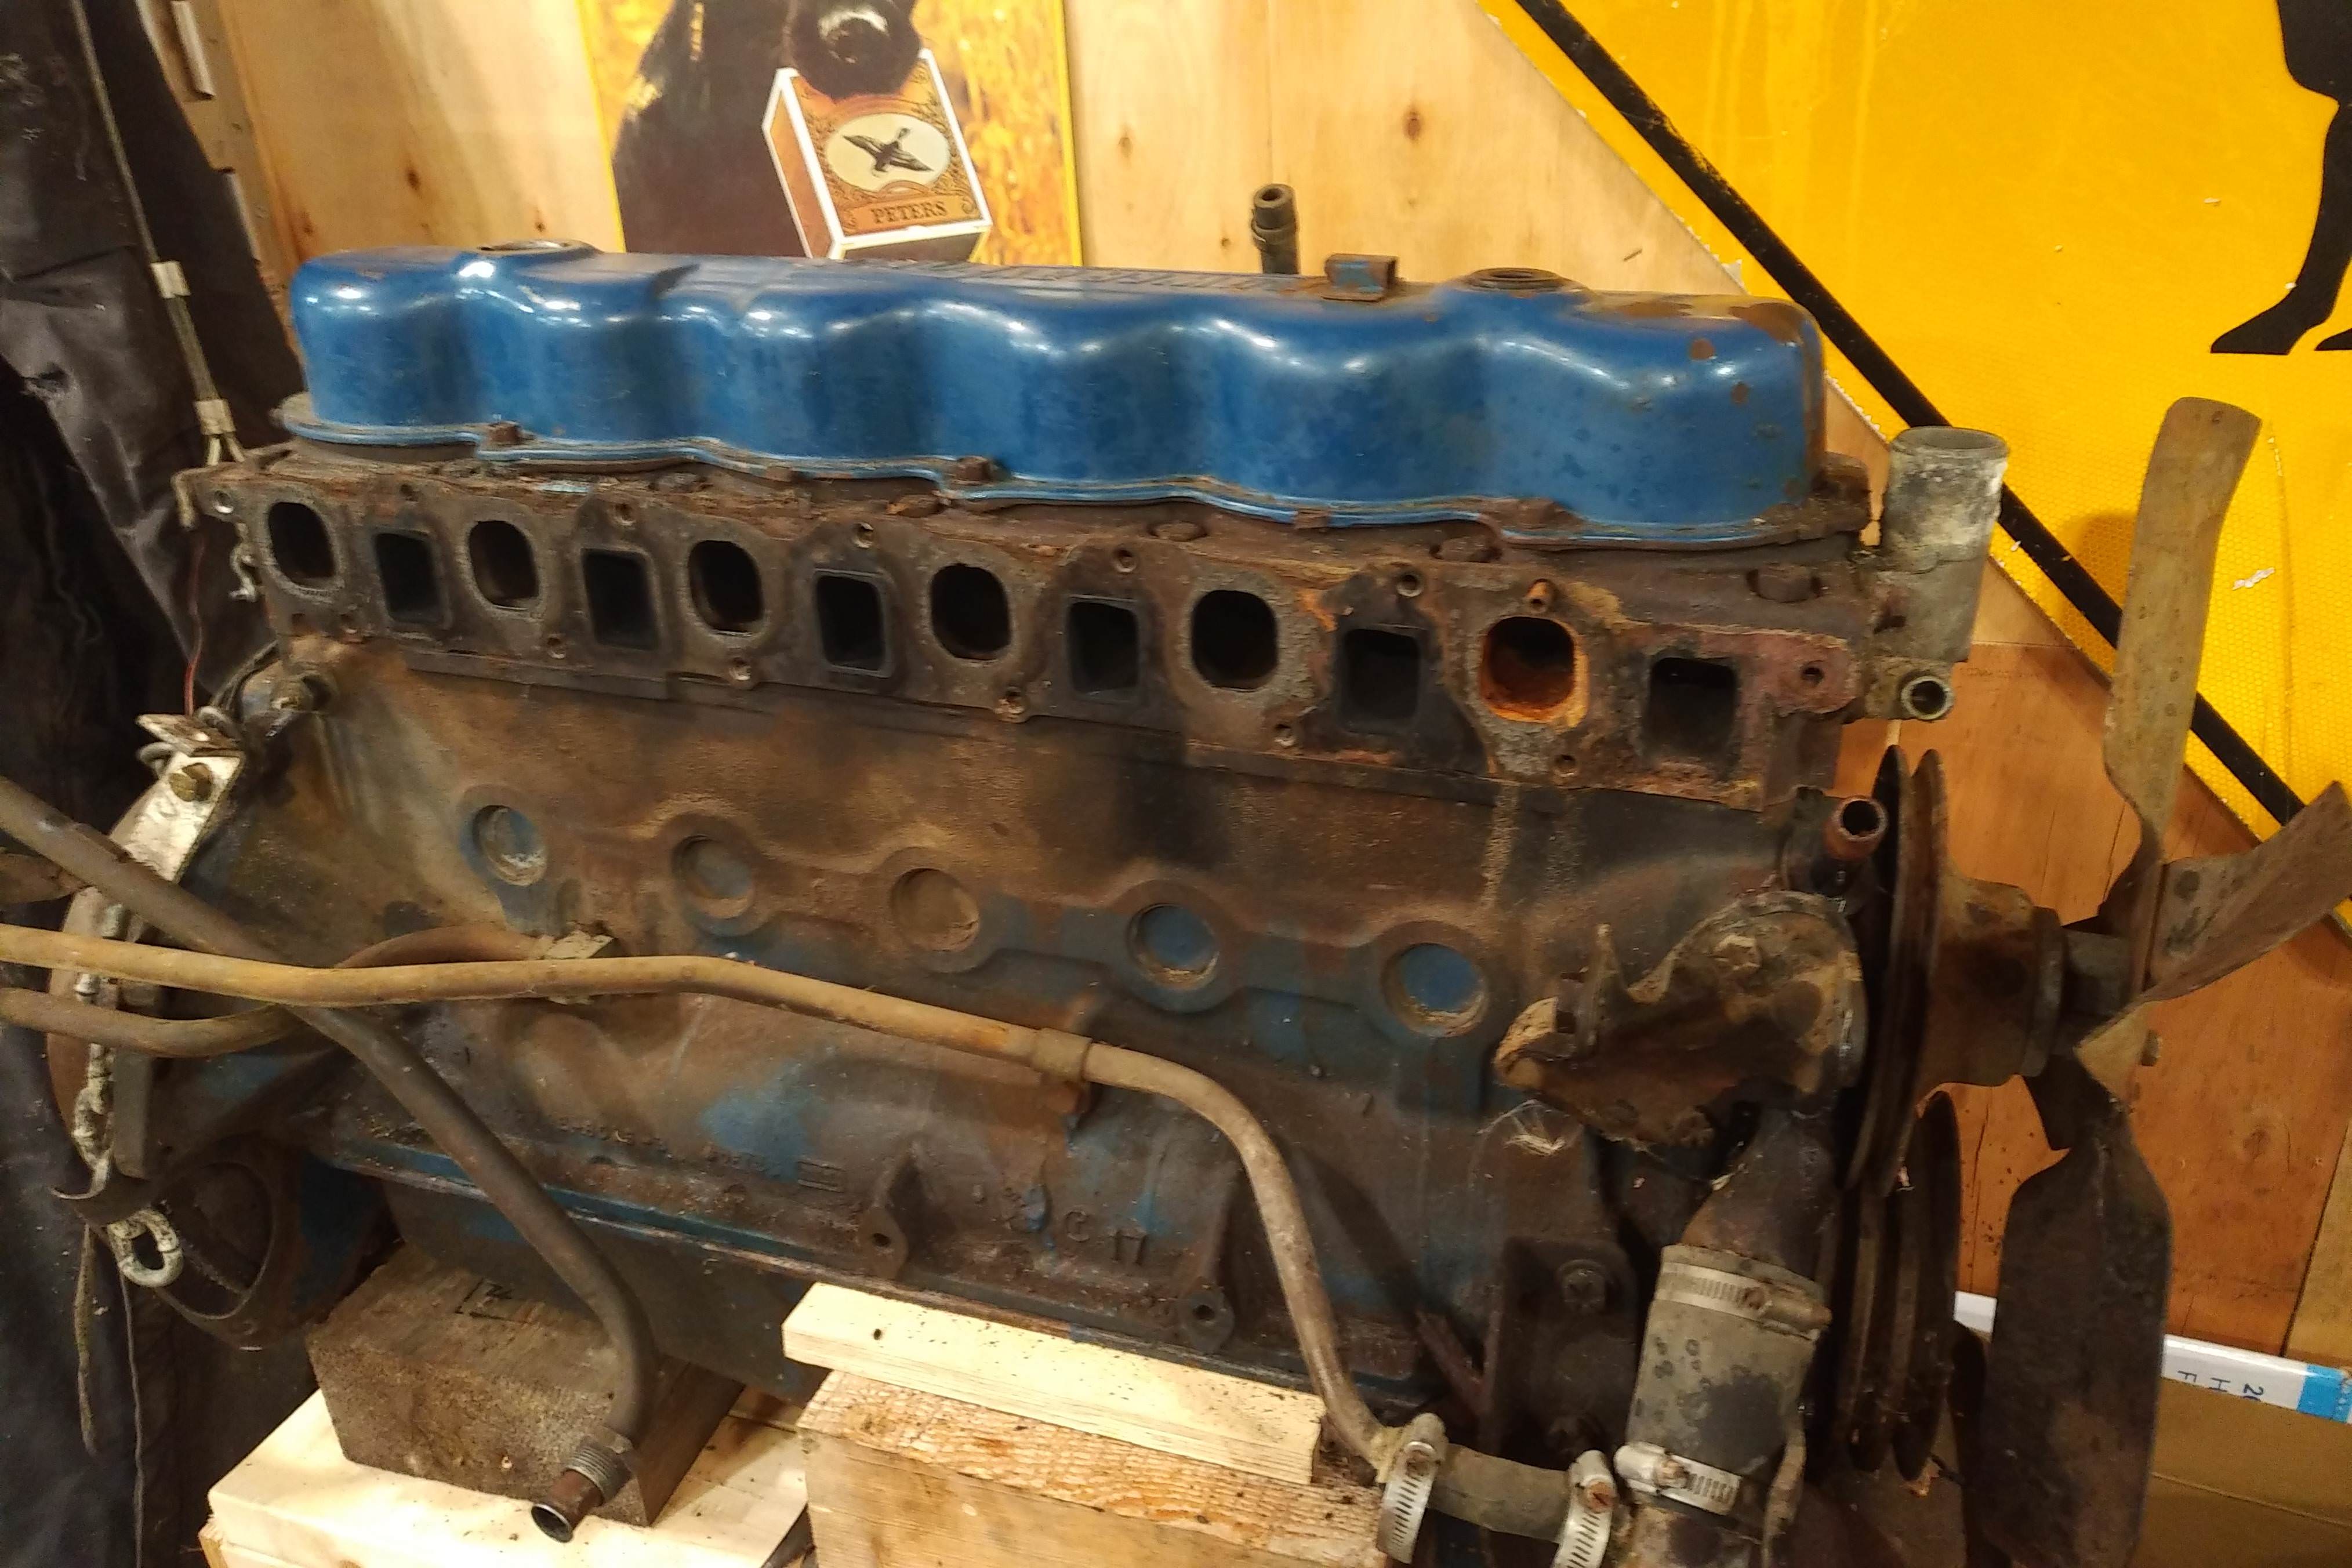
Managed to track down a 300 engine after looking since spring (long story.) Got it unloaded from the truck:
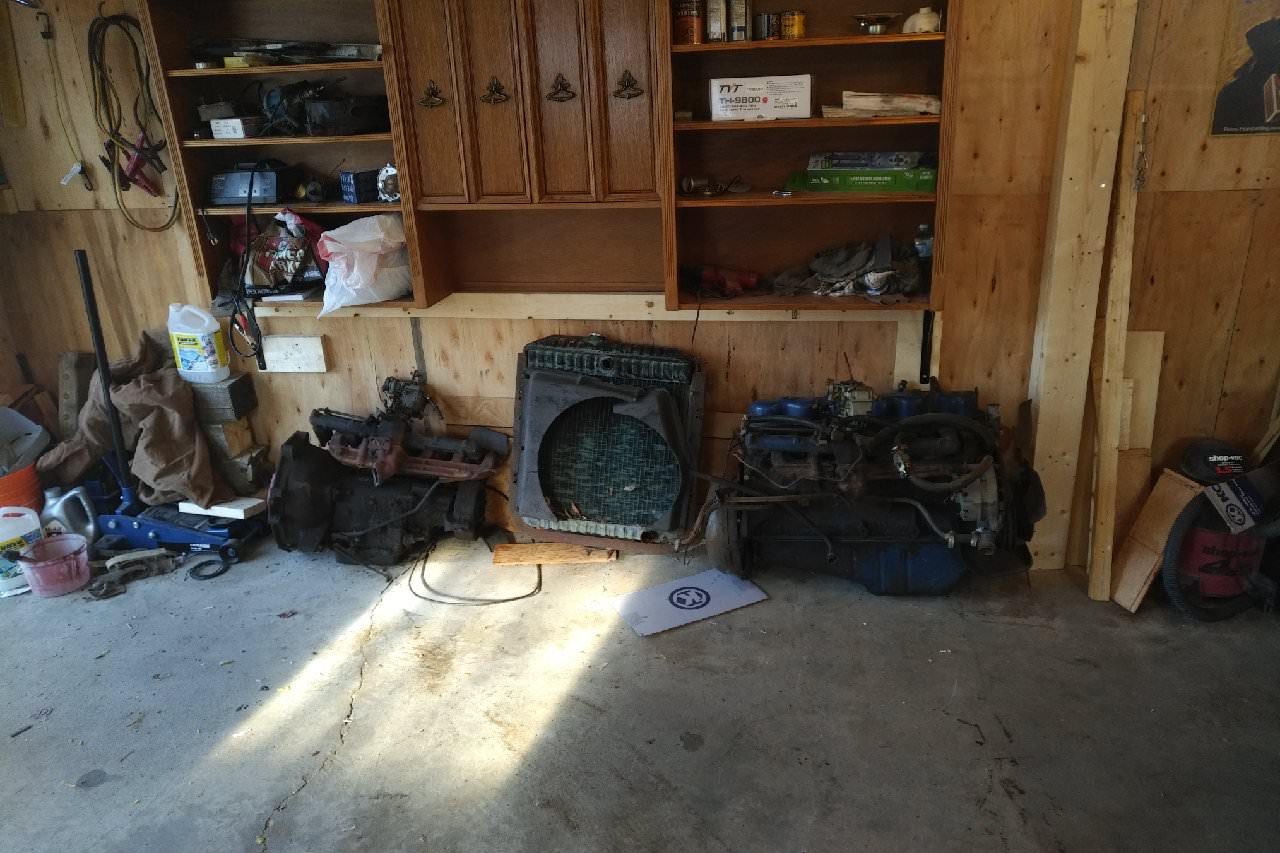
All the parts unloaded:
Don't have an engine stand, so will need to figure something out. Read somewhere that the inline 6 doesn't like engine stands (it's too long) and crappy engine stands will sometimes break if you put a 300 block on them. No idea if this is true or not, but doesn't seem too unreasonable I suppose.
Made a mistake right off the bat though:
I picked up (what I think is) the Cruise-O-Matic automatic transmission that came with the engine, thinking that the bellhousing attached to it would also work to join up to an NP435. Fun fact: it definitely does not. I don't know why I thought this would work, and definitely wasn't my finest moment, but now I'm stuck with an automatic transmission that I don't need. I'll probably hit it with a pressure washer, get it cleaned up, and hopefully sell it down the road.
In the mean time, I'm now looking for a NP435 Windsor-pattern bellhousing
The background for this motor was that it came out of a 1970 25ft Winnebago with 70,000 miles on it. Not sure if I believe that, but I did at least get to inspect the old RV and everything. Here's to hoping the motor was one of those that was used for 2 weeks out of the year, and garaged for the rest of the year.
Now to the build:
Managed to track down a 300 engine after looking since spring (long story.) Got it unloaded from the truck:
All the parts unloaded:
Don't have an engine stand, so will need to figure something out. Read somewhere that the inline 6 doesn't like engine stands (it's too long) and crappy engine stands will sometimes break if you put a 300 block on them. No idea if this is true or not, but doesn't seem too unreasonable I suppose.
Made a mistake right off the bat though:
I picked up (what I think is) the Cruise-O-Matic automatic transmission that came with the engine, thinking that the bellhousing attached to it would also work to join up to an NP435. Fun fact: it definitely does not. I don't know why I thought this would work, and definitely wasn't my finest moment, but now I'm stuck with an automatic transmission that I don't need. I'll probably hit it with a pressure washer, get it cleaned up, and hopefully sell it down the road.
In the mean time, I'm now looking for a NP435 Windsor-pattern bellhousing
#2
11-13-2017, 09:51 AM
Join Date: Nov 2008
Posts: 106
Likes: 0
Received 0 Likes
on
0 Posts
Went on vacation this weekend and read way too much on the forums about building a 300. Came home feeling inspired, and last night built an engine table for the build.
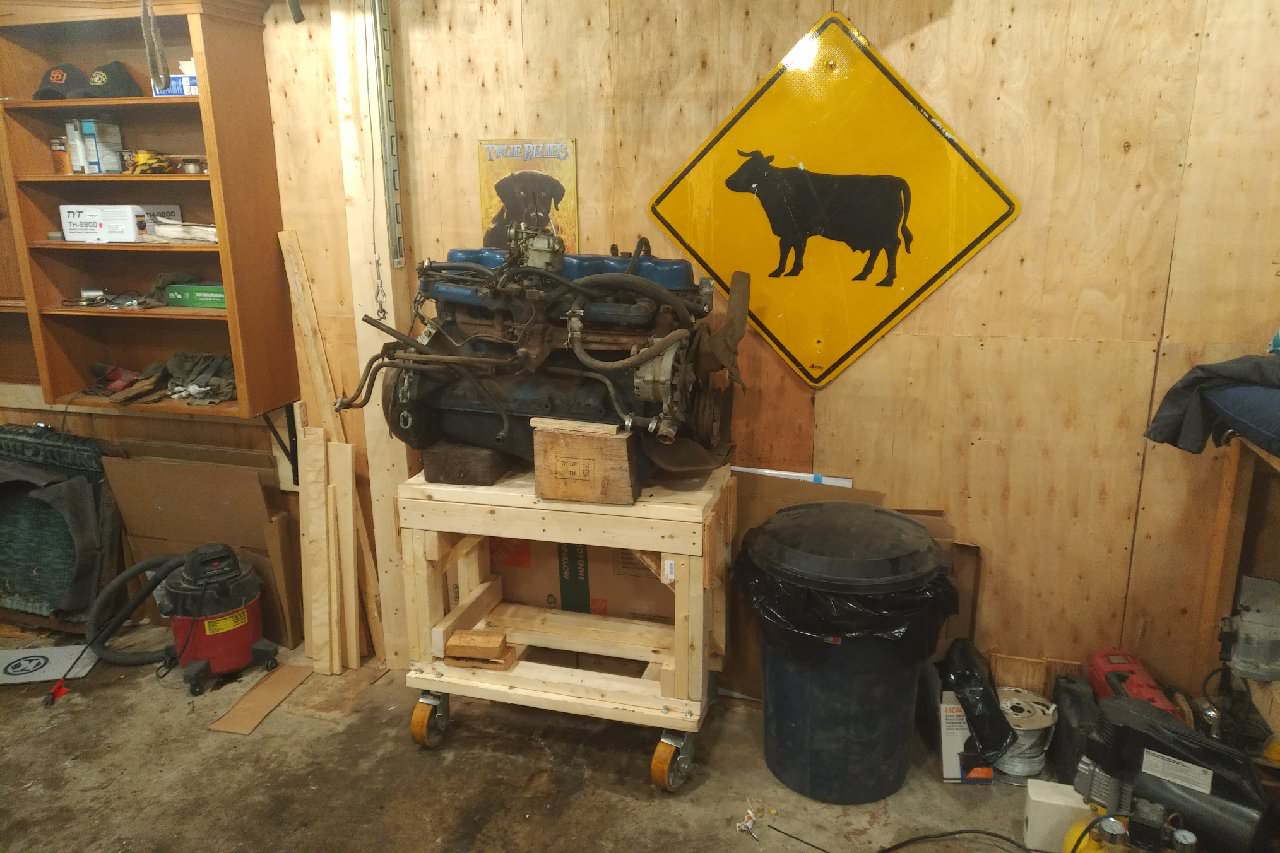
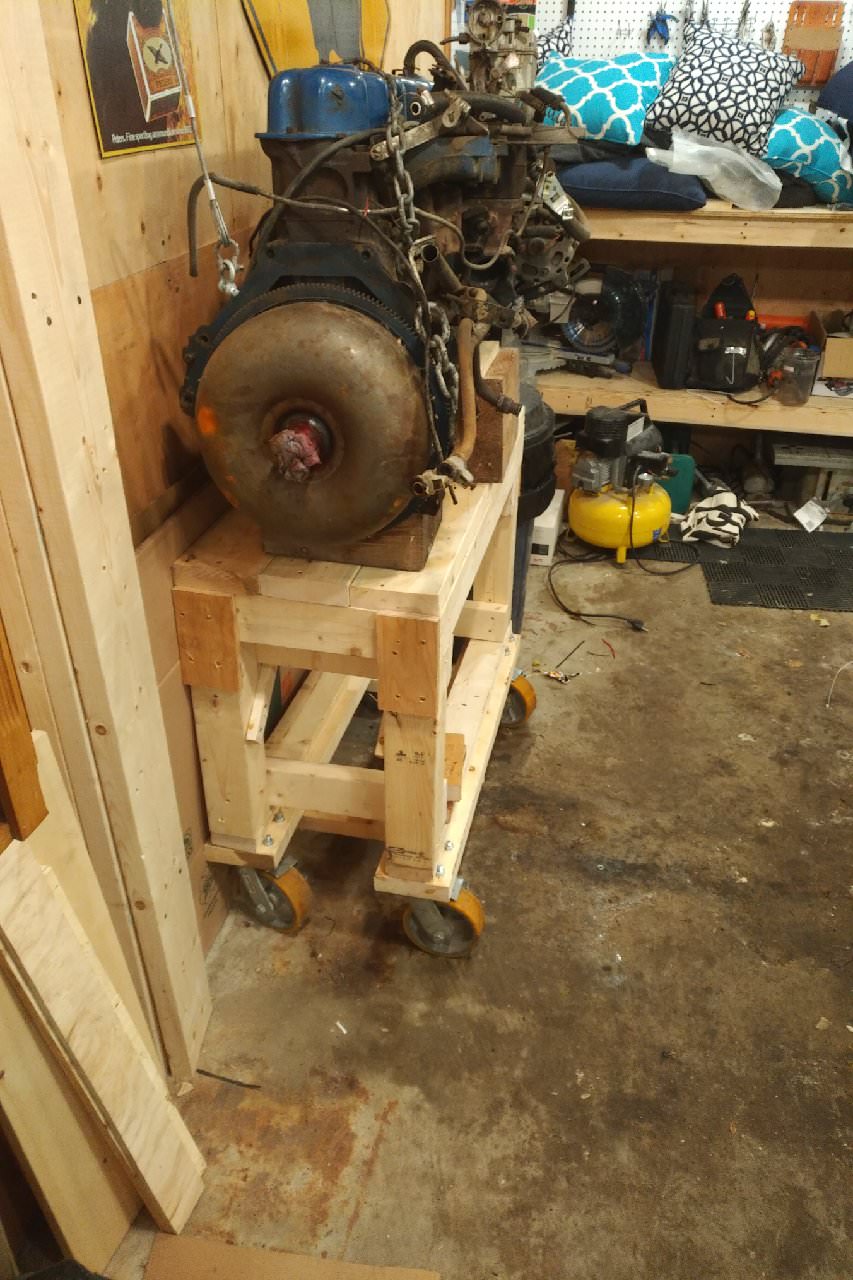
With the whole long block on there, it is just a tiny bit more top-heavy than I would like, but it should suffice while I take off all the extra bits and get the head off.
Also did some google-fu, and came across the industrial rebuild manual for these motors. Google "194-210 CSG649" and there you go. I've also ordered some ford smallblock manuals, and an older flathead manual, as I'm hoping I can use the general tips and tricks listed in those books, and apply them to the 300.
#3
11-13-2017, 10:04 AM
Join Date: Nov 2008
Posts: 106
Likes: 0
Received 0 Likes
on
0 Posts
A bit about where I'm going with this build:
Basically just looking to get the engine to breathe better. I'm going to do the 4.9L manifold conversion, and picked up an Offenhauser C-series. I'm going to divide the C-Series plenum in half with a divider plate, to hopefully increase the airspeed through the manifold and pick up some torque. This is a truck motor first and foremost, so I'm trying to chase torque as opposed to horsepower.
Probably will top it off with an Autolite 2100.
I figure while I have the engine on a stand, I may as well do all of the gaskets, a new oil pump, and a new water pump too. I'll look at the condition of the bearings and rings too and see where that goes.
Lastly, I was kicking around picking up some 1.75 Comp Chevy rockers, based on some of the reading I was doing. Supposedly the 1970 300 head I have has the 3/8 pressed-in studs that will allow a guy to slap the 1.75 rockers right on the motor, with no other work.
Having said that, I don't know if any of that is true. It seems like there is conflicting information all over the place, and I'm not sure if a guy can just slap new rockers on a head without readjusting the valves and all of that. Maybe a few of the more experienced guys here can chime in.
#4
11-13-2017, 01:01 PM

Hi hansol, Sounds like a nice build up you have going on.
I'd definitely second replacing all of the gaskets and, at least, the oil pump while it's out. Might as well do the water pump too, but that's something you can always do with the engine in the vehicle.
As for the rocker arms and adjustment, that completely depends on your rocker studs. I don't know 100% since I haven't had a head that old, but from what I recall, there are 2 different types of pressed in studs. Both have a 3/8" base, but the later ones also taper down to a 5/16" thread at the top. The ones that taper aren't adjustable. You just torque them down to 20 - 25 ft/lbs and call it a day. The ones that are 3/8" all the way to the top have adjustable valves.
Either way, if you have to adjust the valves, that's just an adjustment you do after everything's installed. But if that's the case, you'd have to adjust them with ANY rocker arms you put on, stock as well.
#5
11-13-2017, 08:20 PM
Elder User
Sounds like you've got realistic goals, and arent shy of hard work, or homework. Thats most of the battle, right there.
An autolite, or motorcraft 2 bbl carb will be a nice upgrade compared to the old carter. I have ran a couple motorcrafts before myself. I couldnt leave well enough alone, and had to jump on the quickfuel bandwagon lol!
AB makes a valid point. Be sure you know which studs are pressed into the head before you buy new rockers...just to be sure they'll fit. If any parts will be visiting the machine shop, talk to the machinist about cross drilling and pinning the stud bosses. If your studs are not tapered, and you choose to go with the chevy rockers, it'll add more stress to your valvetrain. Either pin them, or have some quality threaded studs installed. It'd be a shame to refurbish that motor, and have a stud let go from the head.
Its relatively cheap insurance in the "grand scheme" of things.
As far as engine stands...a fella can build one with 4x4s and 2x4s to fit the block. Wont look pretty, but it does work. I still have one that i built 4 years ago. Will be using it again this next spring on two more builds. Shoot me a PM if need be.
#6
11-13-2017, 09:23 PM
Join Date: Nov 2008
Posts: 106
Likes: 0
Received 0 Likes
on
0 Posts
OK so I had some extra time tonight, so spent the evening tearing down the top end of the engine.
Started with the intake and exhaust manifolds. The exhaust manifold runner off of Cyl 1 was cracked and fell right out
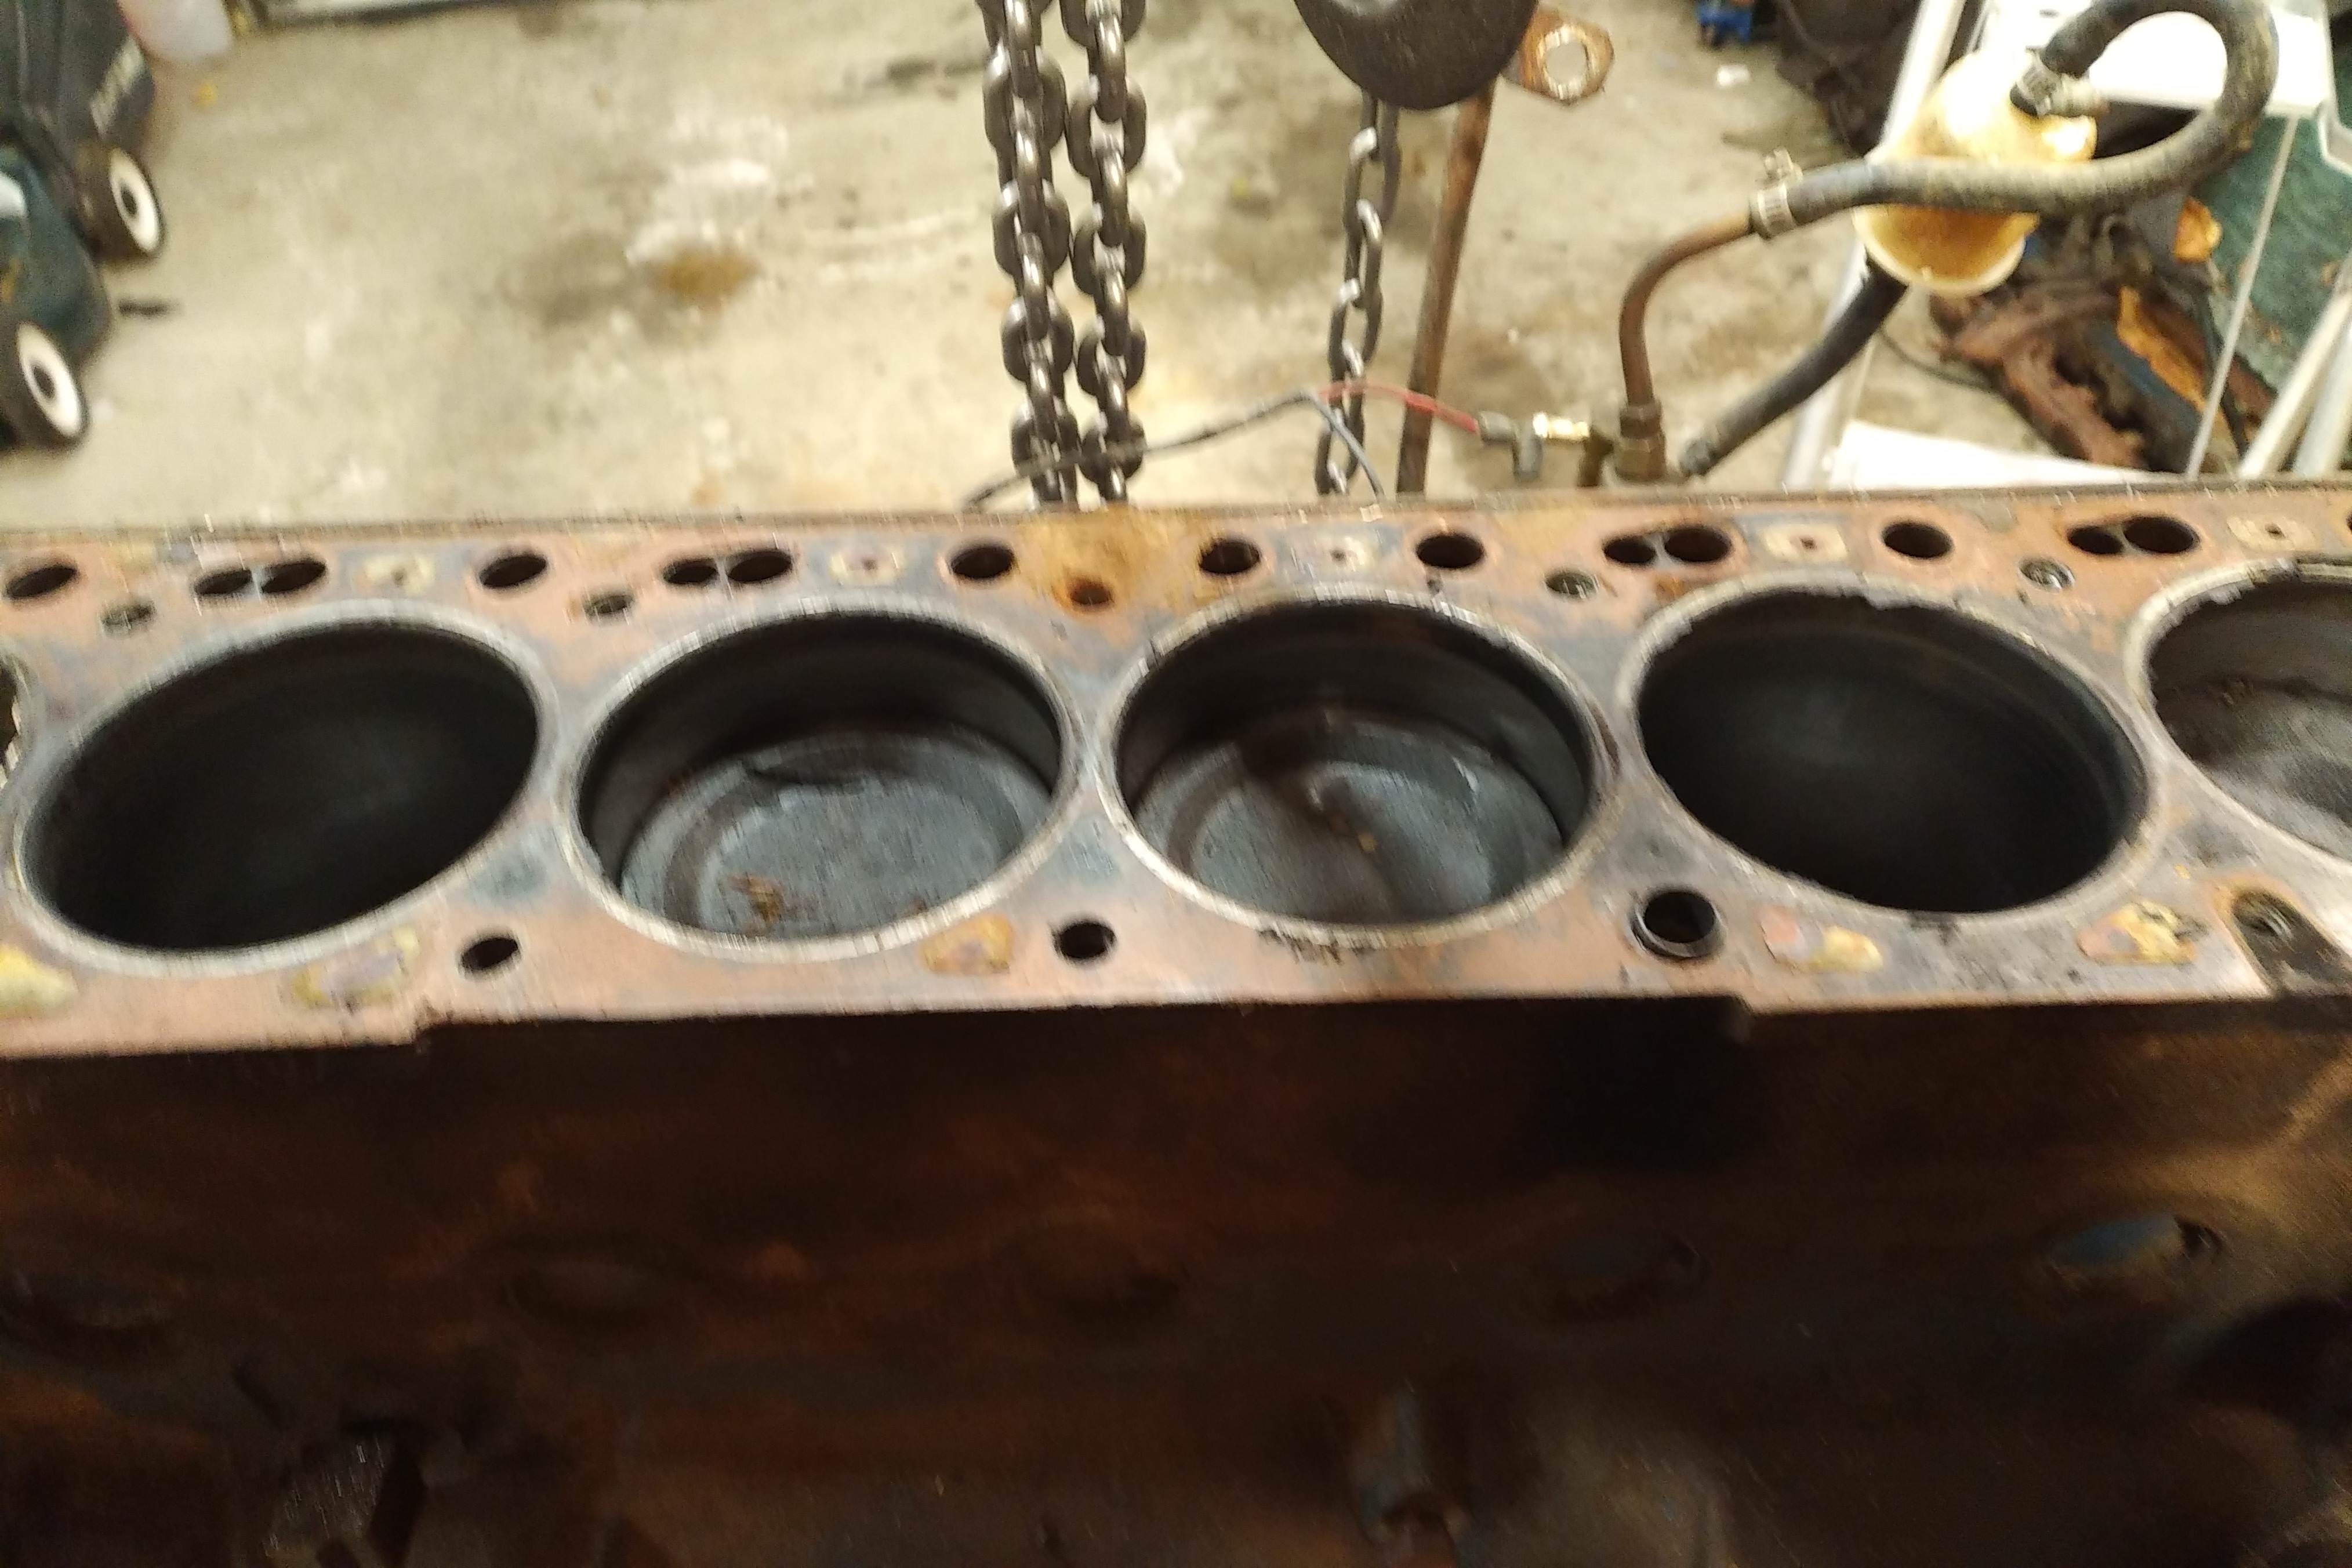
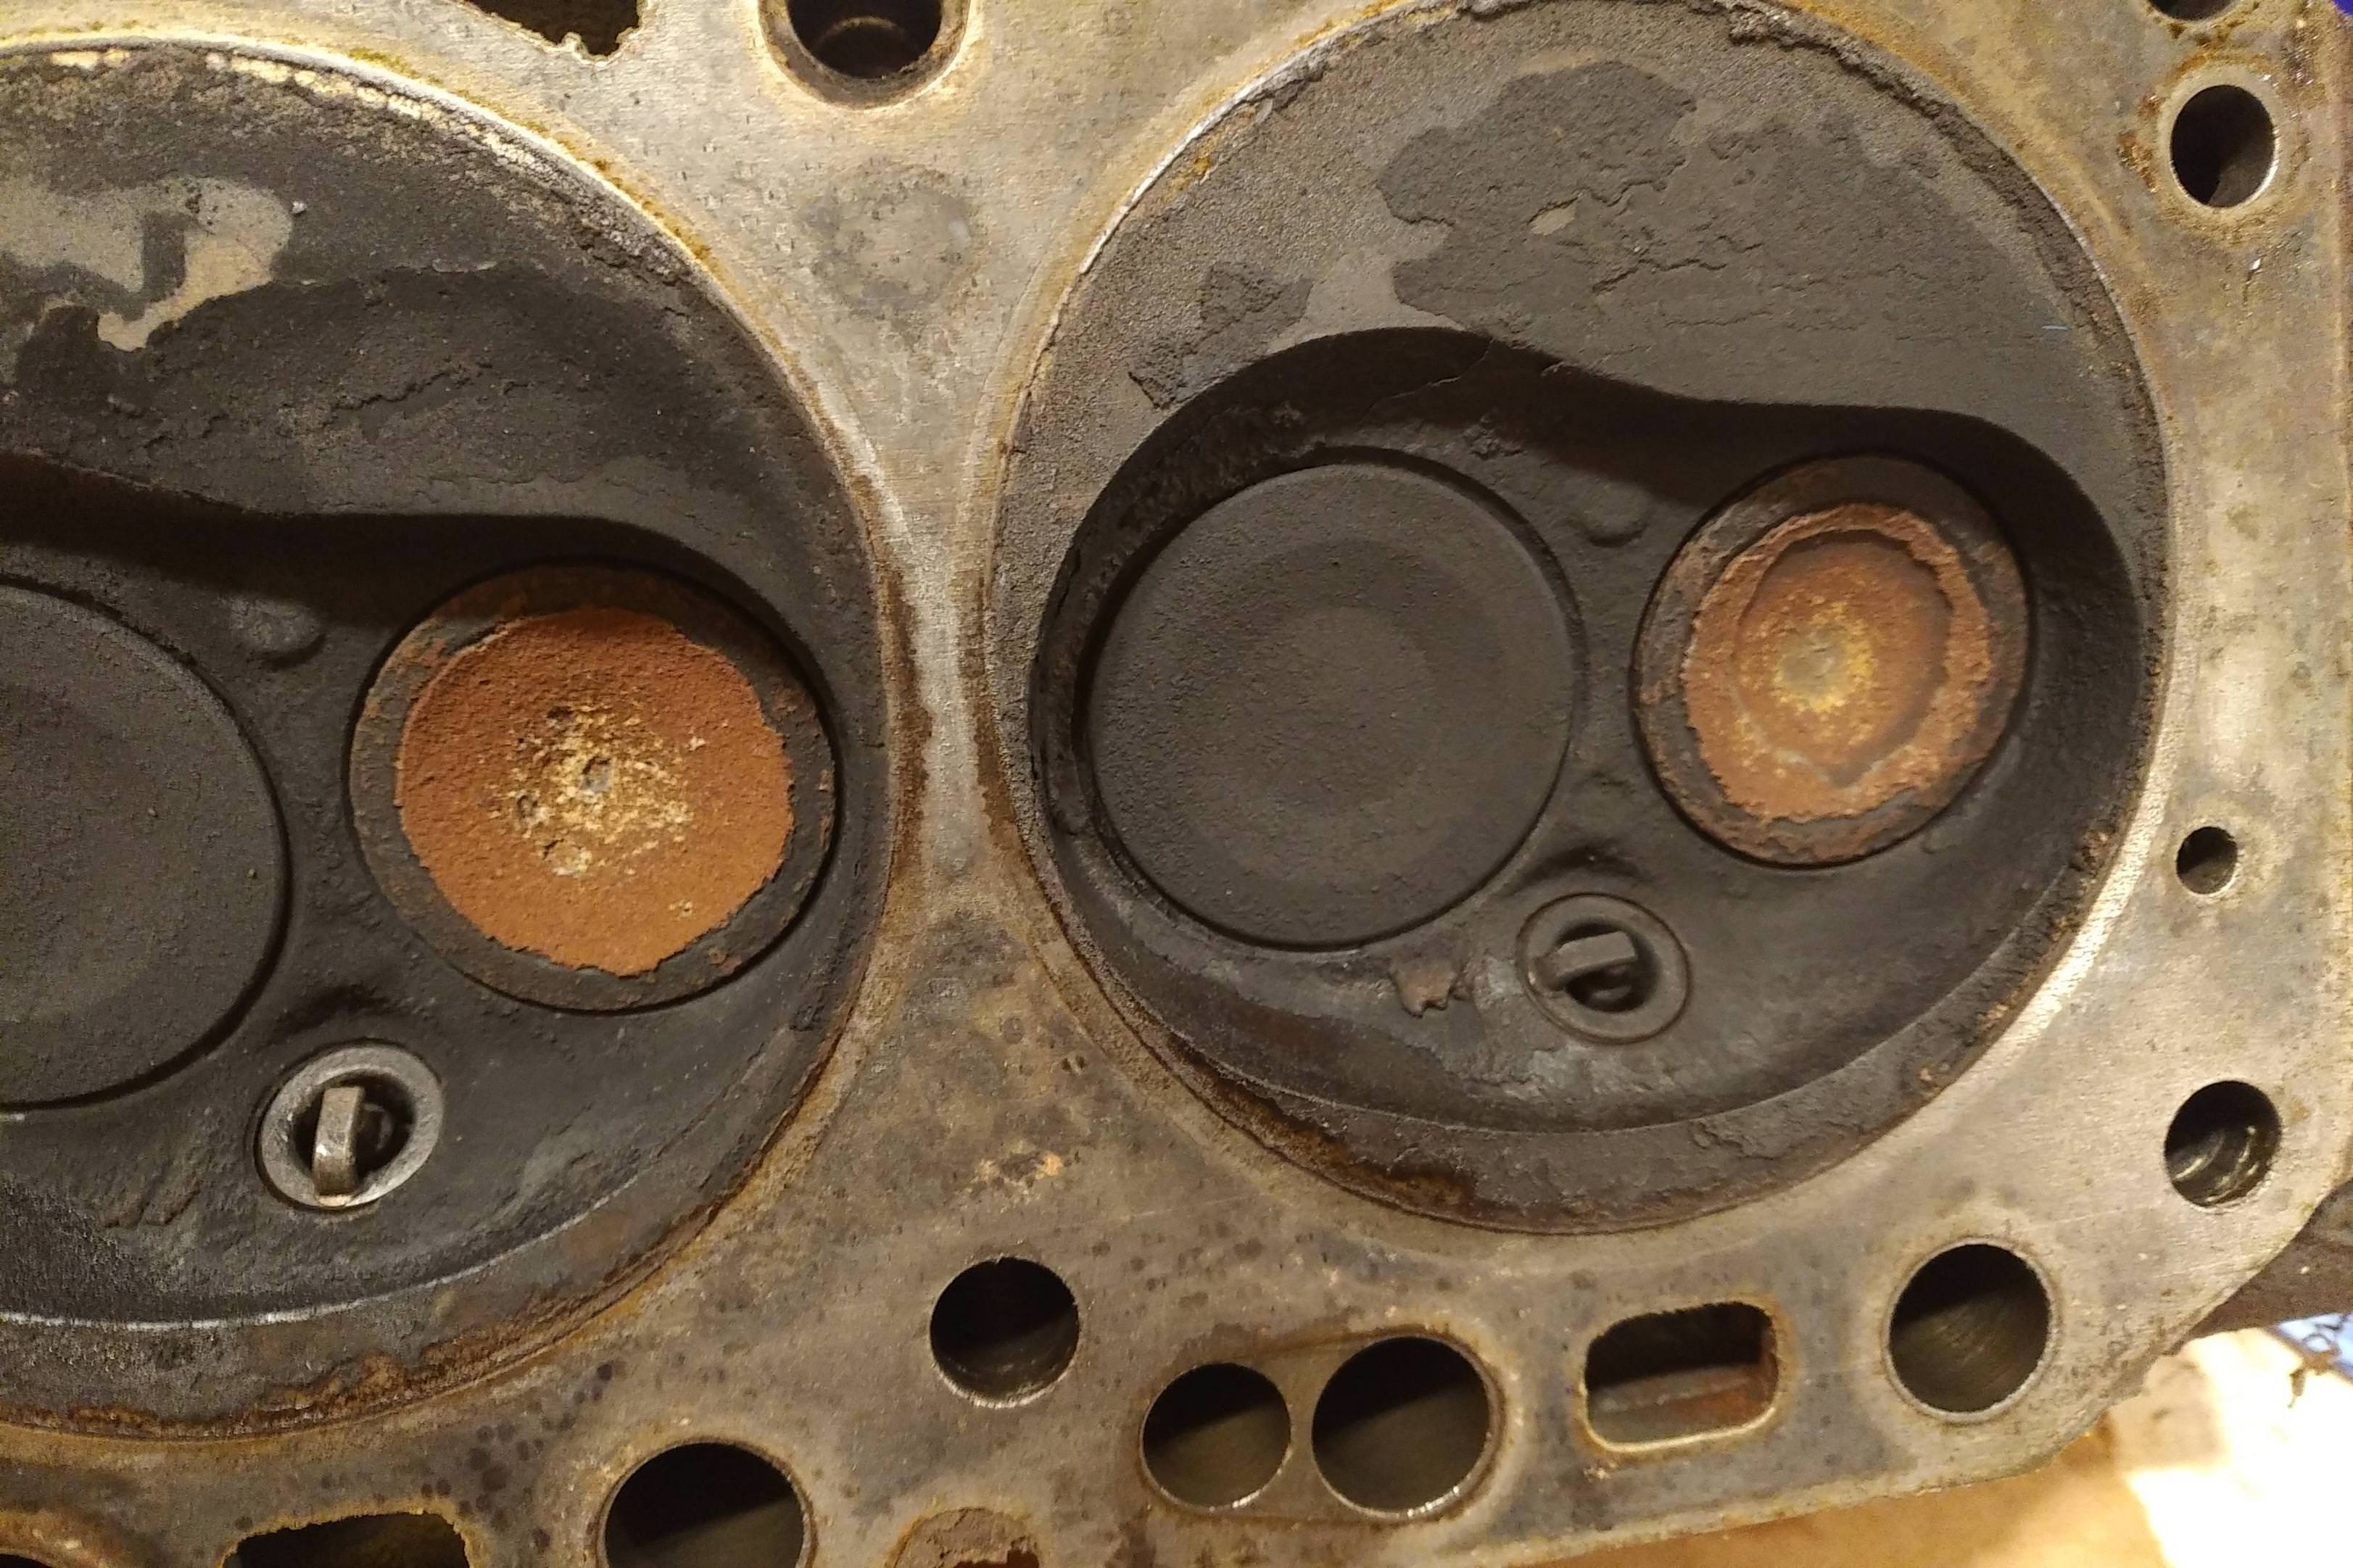
Pulled the head off. Not sure what I'm seeing here, but I don't like that one rust spot. Good news is the cylinders and crank all rotate smoothly. I could turn the whole engine by simply grabbing the ring gear and turning.
Piston ridge I'm not sure about. I cleaned the ridge ring area really really well on one cylinder, and then ran my fingernail vertically along the inside of the cylinder. My fingernail didn't catch on any ridge as far as I could tell, so I think that's a positive sign.

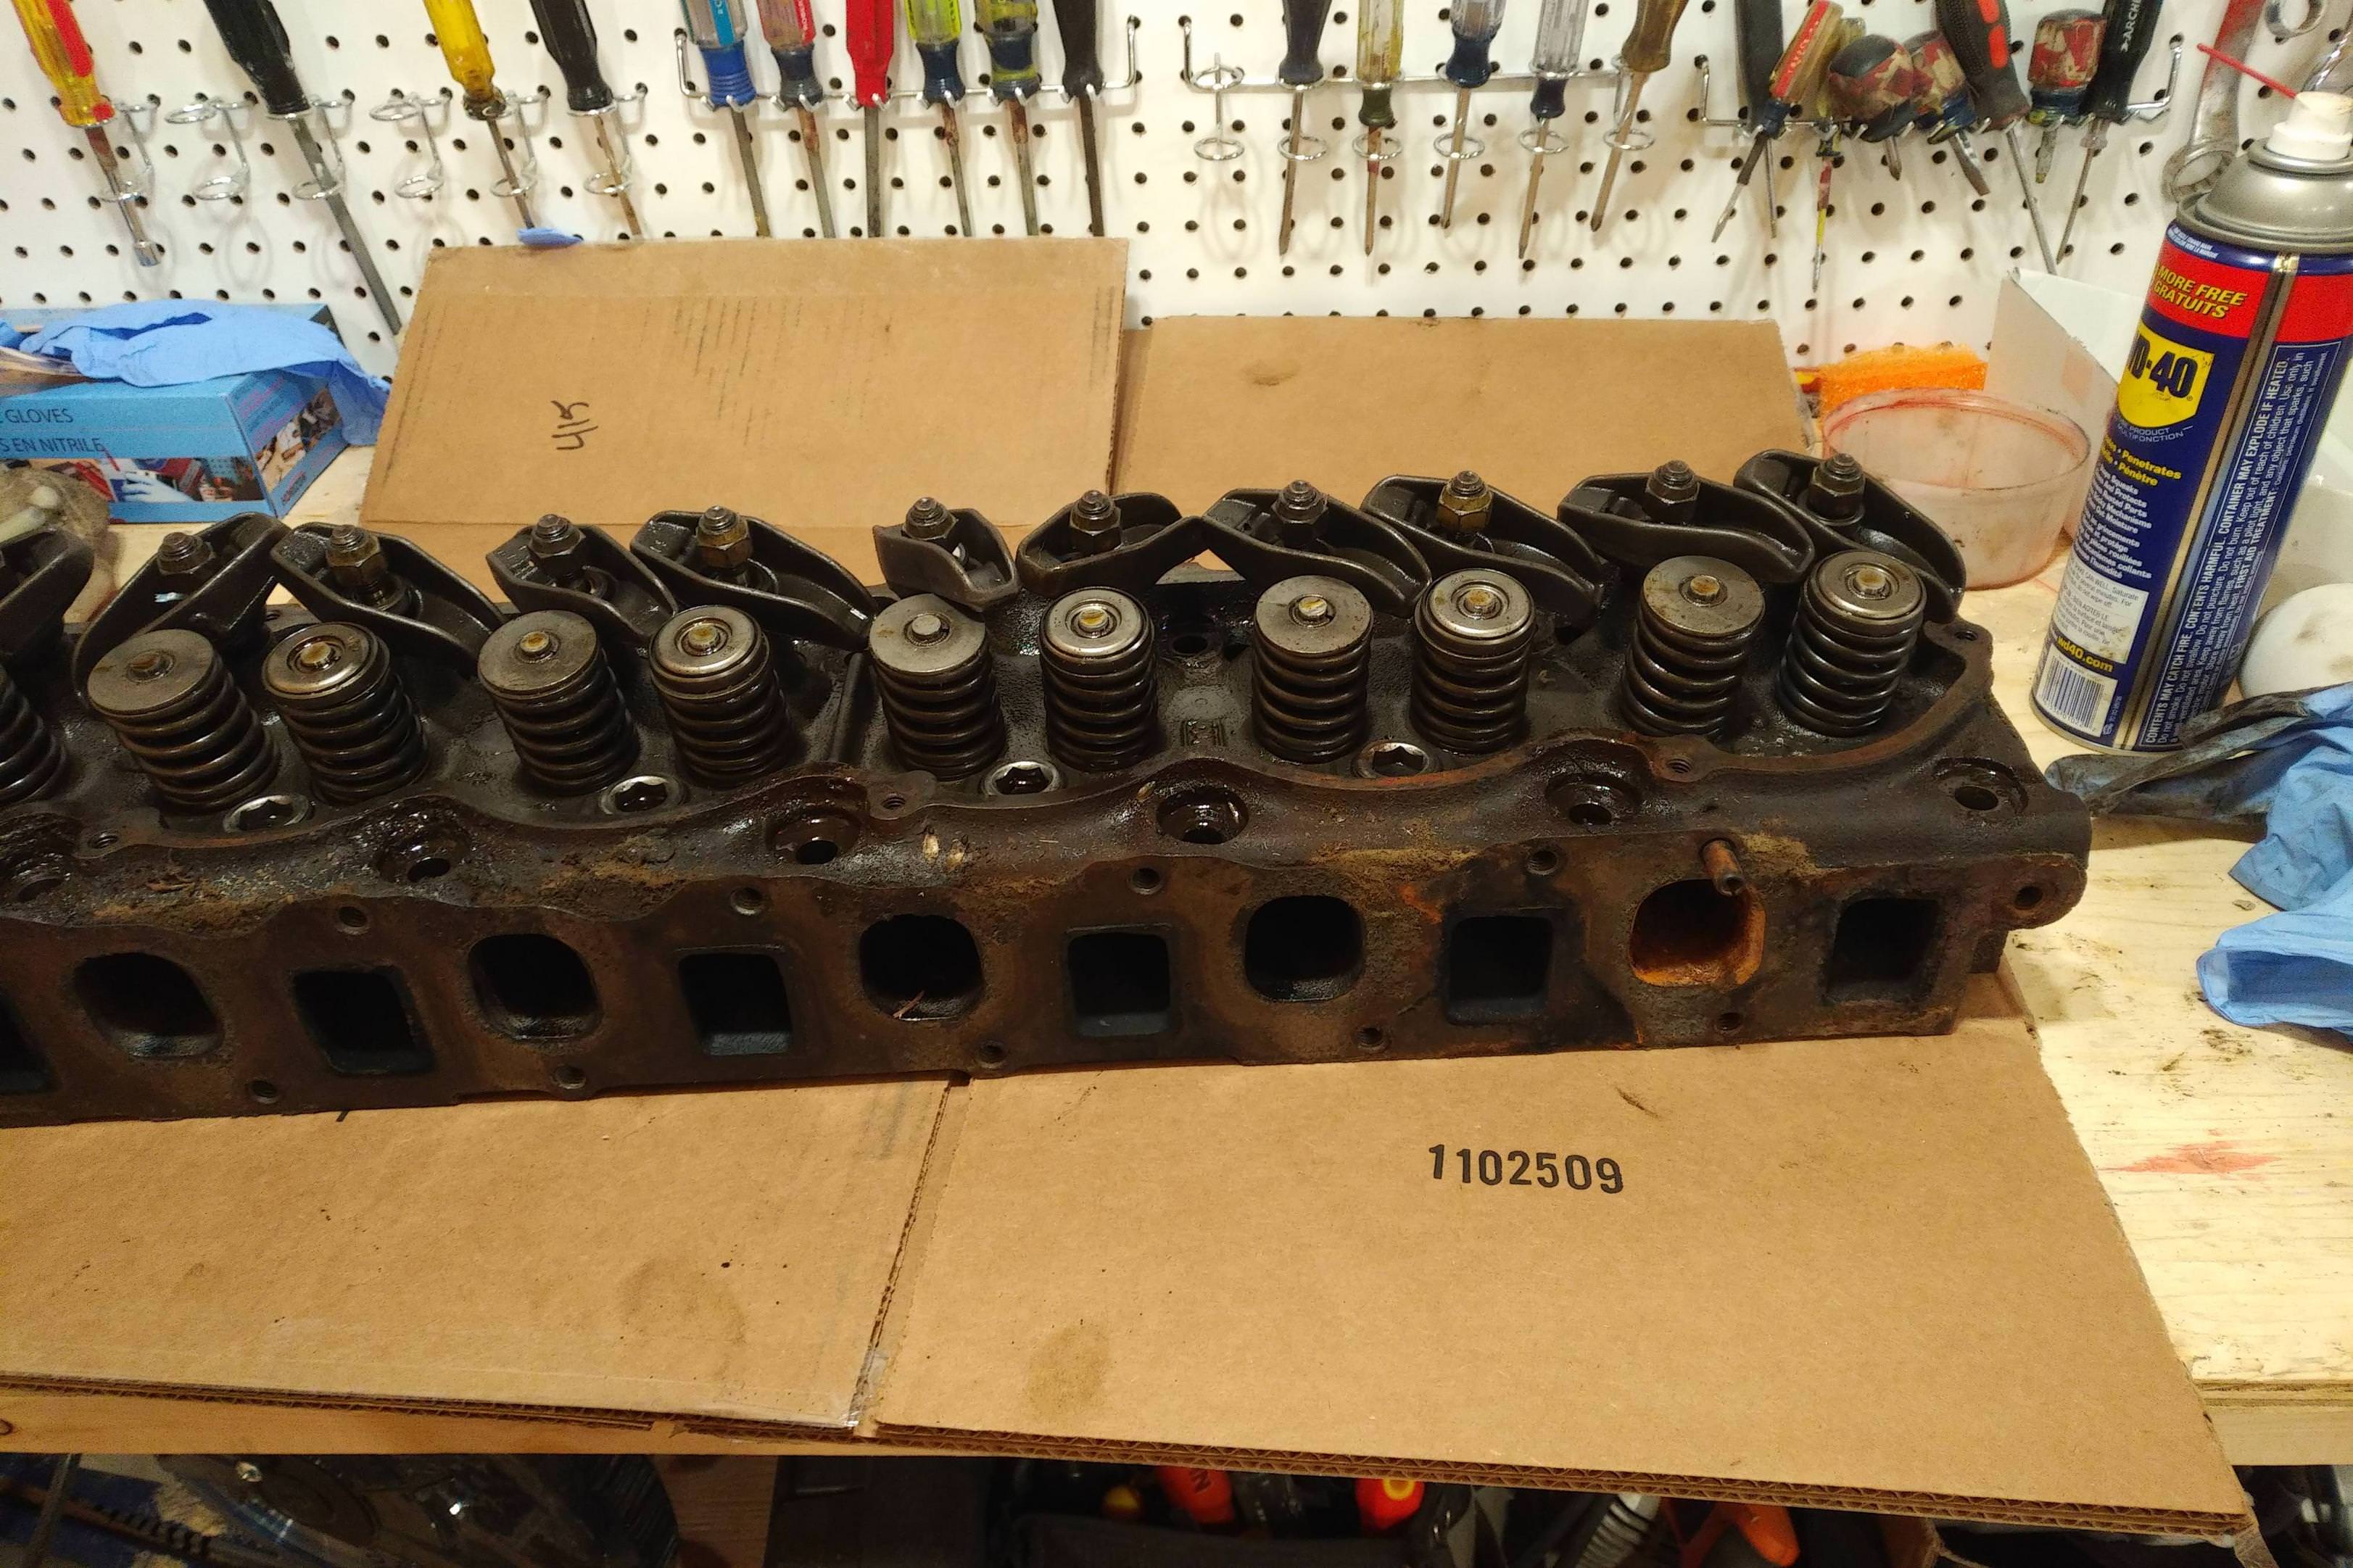
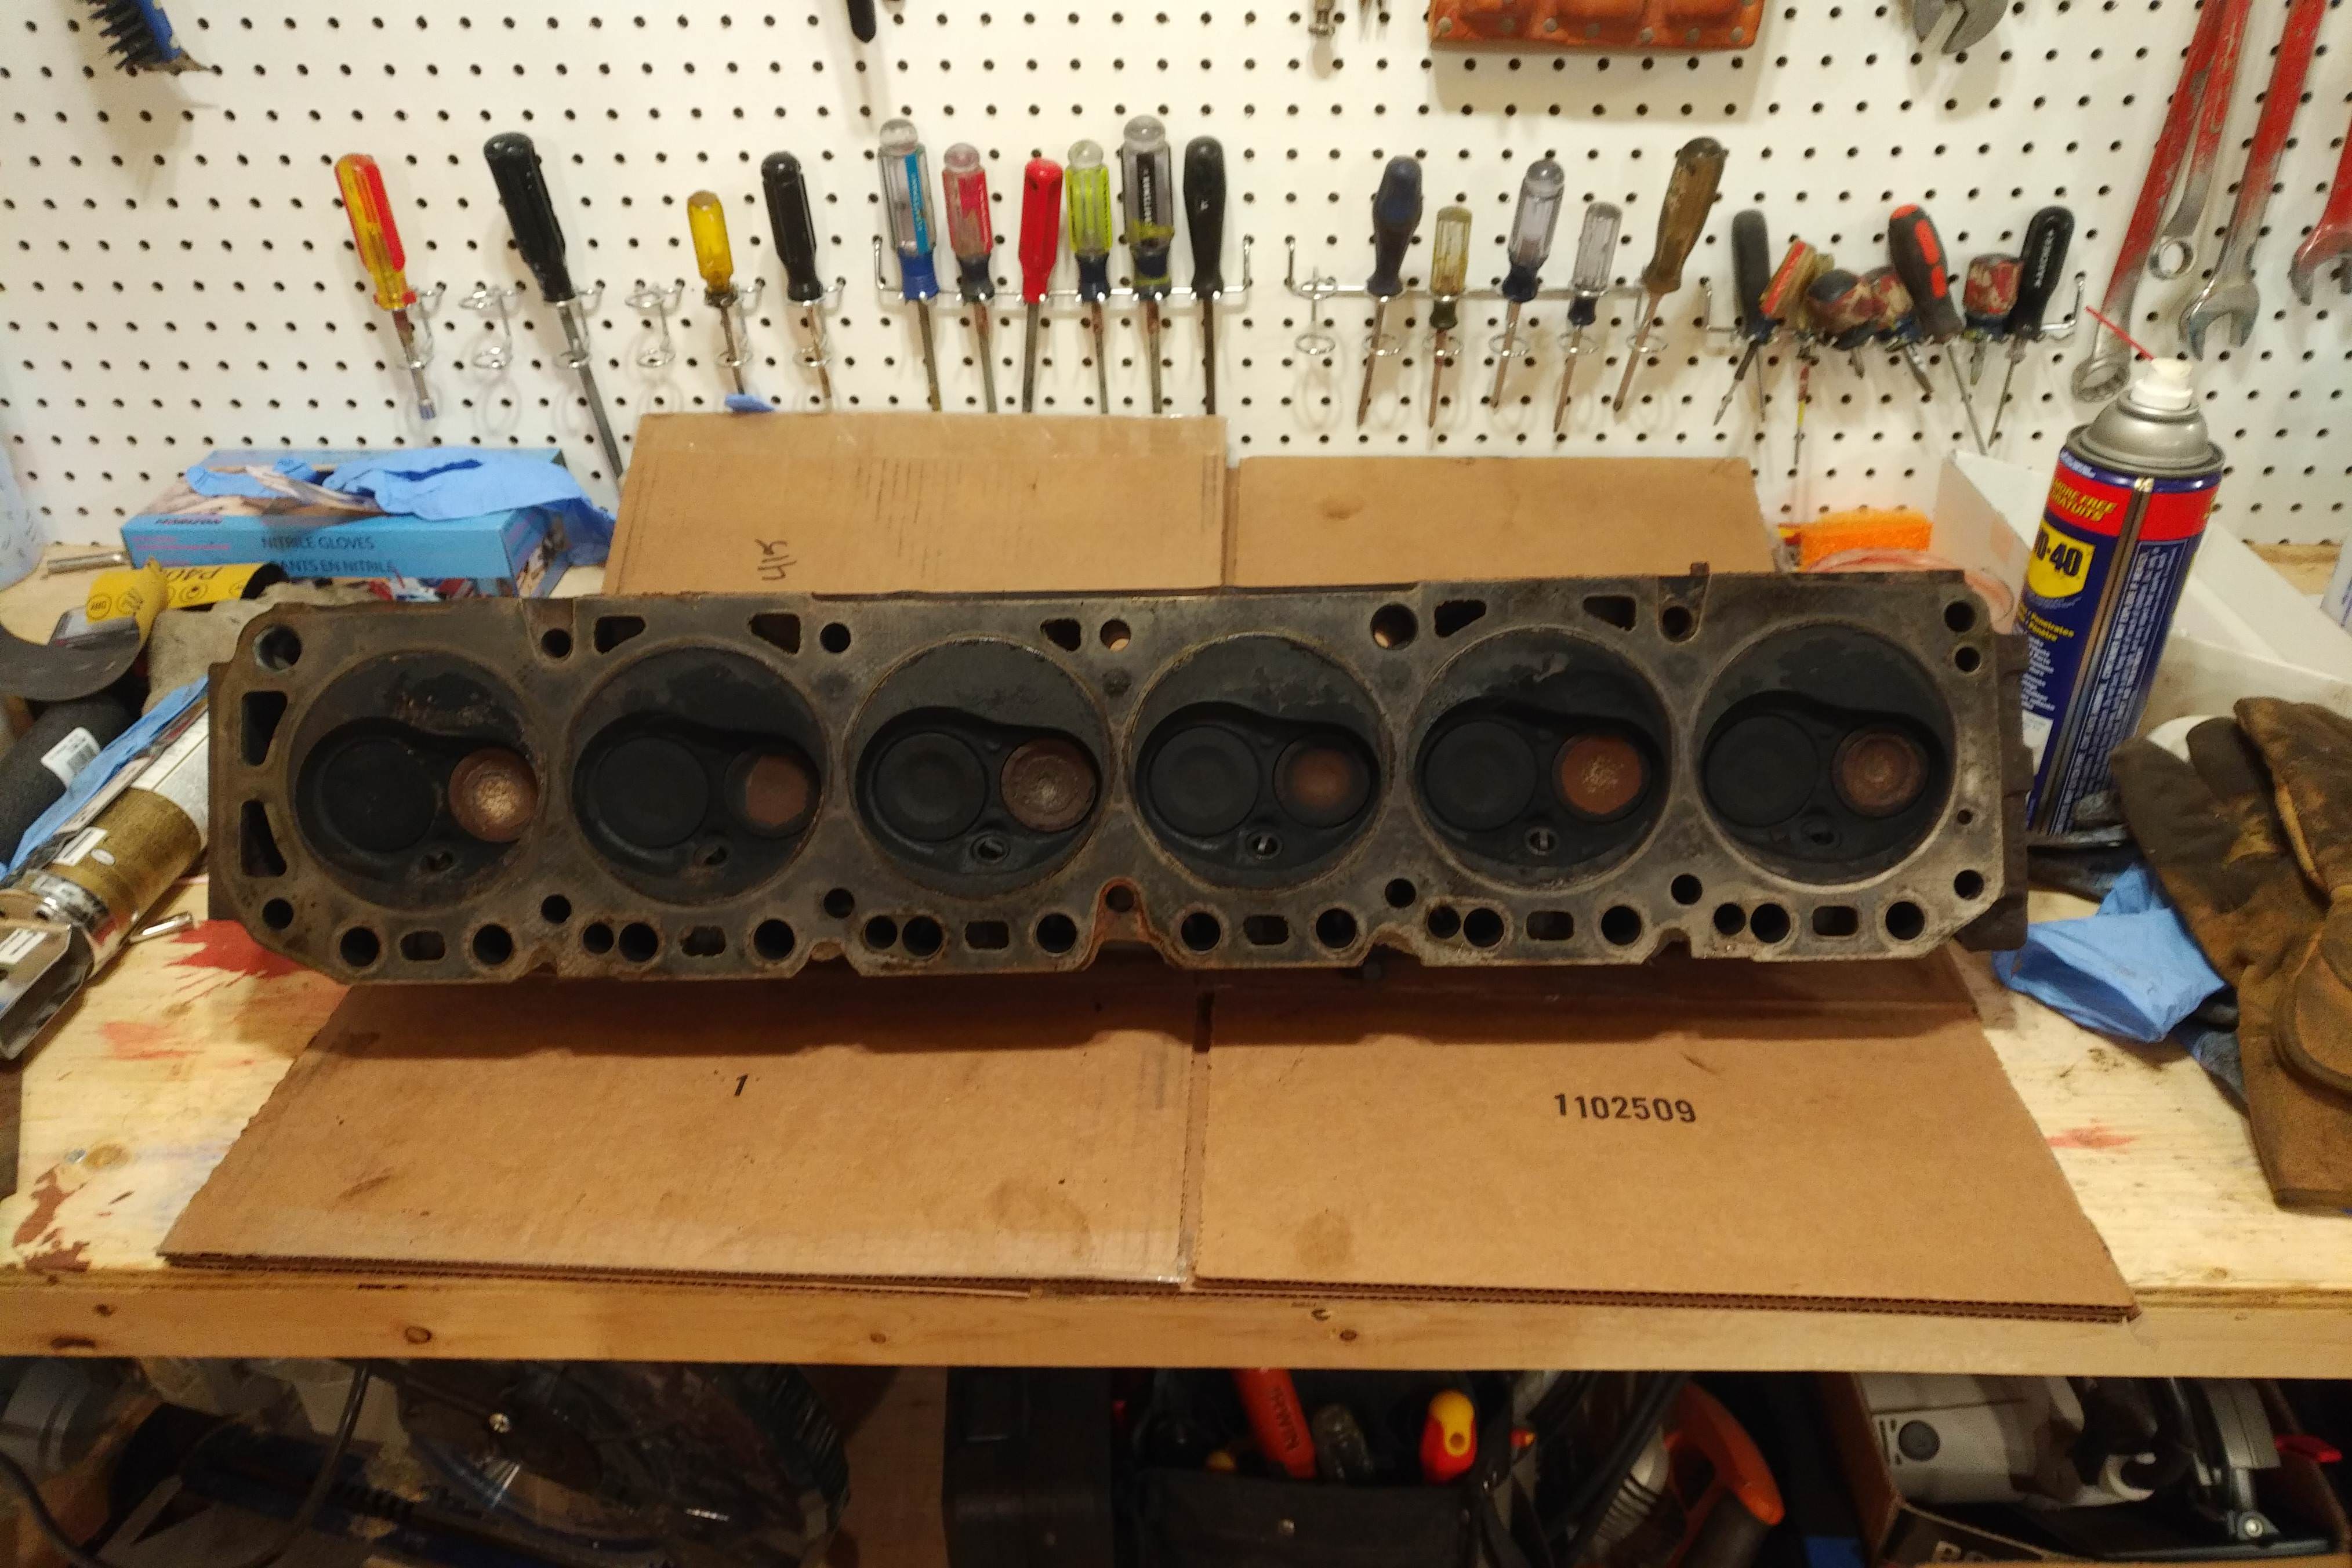
Had a look at the valves. Not sure what any of this means either. They look filthy though. Probably need to do some cleaning, and maybe even need new valves?
Anyway thanks about as far as I'm going for tonight. Maybe later this week I will tackle the bottom end and see what the bearings look like.
Started with the intake and exhaust manifolds. The exhaust manifold runner off of Cyl 1 was cracked and fell right out
Pulled the head off. Not sure what I'm seeing here, but I don't like that one rust spot. Good news is the cylinders and crank all rotate smoothly. I could turn the whole engine by simply grabbing the ring gear and turning.
Piston ridge I'm not sure about. I cleaned the ridge ring area really really well on one cylinder, and then ran my fingernail vertically along the inside of the cylinder. My fingernail didn't catch on any ridge as far as I could tell, so I think that's a positive sign.
Had a look at the valves. Not sure what any of this means either. They look filthy though. Probably need to do some cleaning, and maybe even need new valves?
Anyway thanks about as far as I'm going for tonight. Maybe later this week I will tackle the bottom end and see what the bearings look like.
#7
11-14-2017, 09:46 AM
If it were me, I'd have the head rebuilt. Considering its age, you're definitely going to want to machine it back to flat as it is most likely warped anyway. Secondly, again due to its age, it may not even have hardened seats for unleaded gas. Dunno 100% on that, but worth looking into. At the very least, hot tank it and get rid of all that scale, and check the head for flatness.
Valves aren't particularly expensive (about $6 ea.) so you might be better off just replacing them. But, if there's nothing wrong with them, just clean them up and relap them.
Lastly, it looks like you have the adjustable rocker arm studs.
Valves aren't particularly expensive (about $6 ea.) so you might be better off just replacing them. But, if there's nothing wrong with them, just clean them up and relap them.
Lastly, it looks like you have the adjustable rocker arm studs.
Trending Topics
#8
11-14-2017, 10:04 AM

#9
11-14-2017, 05:14 PM

I would focus on a small bump in compression and head work.
I like the compression right around 9.0:1-9.2:1.
The head is the big restriction on this engine. So anything you can do to improve the flow is going to help a lot. Even if you don't go all out on it. There is a lot to gain by doing some porting. Especially in the bowl areas.
I would also go with some ARP screw in rocker arm studs. Going with a higher ratio rocker arm is going to put more stress on the stock studs. And if you are having other machine work done on the head it's not that much more to have the work done to install the screw in studs.
Depending on where you are located. I've got a few bell housings and I'd be willing to sell one. It's a big heavy chunk of cast iron, so shipping wouldn't be cheap.
Here's a picture of one of them.
#10
11-15-2017, 02:09 PM
Join Date: Nov 2008
Posts: 106
Likes: 0
Received 0 Likes
on
0 Posts
AB, I was hoping to get away from machining on this if I can. Having said that, often times there's a big difference between what a guy wants vs. reality... So that leads me to a couple questions then:
-Is there an easy way to check if the head is warped?
-How can a guy tell if the heads have hardened valve seats?
(And yes, I will start googling and reading up on this as well, but seeing as you have a bunch of experience with these motors, I figured I would pick your brain as well.)
-Is there an easy way to check if the head is warped?
-How can a guy tell if the heads have hardened valve seats?
(And yes, I will start googling and reading up on this as well, but seeing as you have a bunch of experience with these motors, I figured I would pick your brain as well.)
If it were me, I'd have the head rebuilt. Considering its age, you're definitely going to want to machine it back to flat as it is most likely warped anyway. Secondly, again due to its age, it may not even have hardened seats for unleaded gas. Dunno 100% on that, but worth looking into. At the very least, hot tank it and get rid of all that scale, and check the head for flatness.
Valves aren't particularly expensive (about $6 ea.) so you might be better off just replacing them. But, if there's nothing wrong with them, just clean them up and relap them.
Lastly, it looks like you have the adjustable rocker arm studs.
Valves aren't particularly expensive (about $6 ea.) so you might be better off just replacing them. But, if there's nothing wrong with them, just clean them up and relap them.
Lastly, it looks like you have the adjustable rocker arm studs.
#11
11-15-2017, 02:13 PM
Join Date: Nov 2008
Posts: 106
Likes: 0
Received 0 Likes
on
0 Posts
FM75,
For compression, is there any way a guy can cheat and use a taller piston or rod to get a compression bump? Or is machining the only way to go about doing this?
I know I could try and track down a 240 head as well, but in my area that can be tough to do.
Picked up a Dremel tool last night to start cleaning the head a bit, and maybe do some porting down the road. I realize that with a Dremel this will take a looooong time compared to an air die grinder, but my compressor is too small to run a die grinder full-out for long periods of time, and my neighbours would likely start to get grumpy as well.
PM sent about the bellhousings.
I would focus on a small bump in compression and head work.
I like the compression right around 9.0:1-9.2:1.
The head is the big restriction on this engine. So anything you can do to improve the flow is going to help a lot. Even if you don't go all out on it. There is a lot to gain by doing some porting. Especially in the bowl areas.
I would also go with some ARP screw in rocker arm studs. Going with a higher ratio rocker arm is going to put more stress on the stock studs. And if you are having other machine work done on the head it's not that much more to have the work done to install the screw in studs.
Depending on where you are located. I've got a few bell housings and I'd be willing to sell one. It's a big heavy chunk of cast iron, so shipping wouldn't be cheap.
Here's a picture of one of them.
#12
11-15-2017, 02:42 PM
For the head warp, you can lay a straight edge against it and check. But it's a long head, so chances are high it's warped.
Secondly, if you plan on using either the stock intake or exhaust manifolds, you'll want to check those too, and they're most likely warped.
Machining to flat isn't particularly expensive. I think I had my manifolds machined for about $40 a piece or something.
You'll also pick up a slight compression bump by machining the head.
However, if the head is warped, you can't use it without machining it, or it won't properly seal, and will probably blow your head gasket.
You'll probably also want it magnafluxed and checked for cracks, or you'll have even more issues.
It sucks, but these are things you really can't just skirt. Especially if reliability is your goal.
On the hardened seats, that's something I'm not familiar with as I've only dealt with newer heads that already had them.
Longer rods would have to be custom made as the 6.208" is the stock length and about all that's available.
Also, unfortunately, there isn't a big aftermarket for 300 pistons, so the stock 25cc is about all that's available.
On my build, I swapped in some early era connecting rods from a 65 - 68 300 that have a smaller wrist pin, which allowed me to use pistons from a 351w v8.
But if you could bush down your connecting rods to 0.912", you can use 351 pistons which give a much broader selection. You'd have to do some checking with the compression distance and such, but if you went that route, you would have a lot more room to play with on bumping up your compression. I see on Summit there's even some 6cc pistons that would fit, and that'd bump you up to about 9.2:1. Granted... They're ~$50 a pop.
It's all in what you want to spend.
Secondly, if you plan on using either the stock intake or exhaust manifolds, you'll want to check those too, and they're most likely warped.
Machining to flat isn't particularly expensive. I think I had my manifolds machined for about $40 a piece or something.
You'll also pick up a slight compression bump by machining the head.
However, if the head is warped, you can't use it without machining it, or it won't properly seal, and will probably blow your head gasket.
You'll probably also want it magnafluxed and checked for cracks, or you'll have even more issues.
It sucks, but these are things you really can't just skirt. Especially if reliability is your goal.
On the hardened seats, that's something I'm not familiar with as I've only dealt with newer heads that already had them.
For compression, is there any way a guy can cheat and use a taller piston or rod to get a compression bump? Or is machining the only way to go about doing this?
Also, unfortunately, there isn't a big aftermarket for 300 pistons, so the stock 25cc is about all that's available.
On my build, I swapped in some early era connecting rods from a 65 - 68 300 that have a smaller wrist pin, which allowed me to use pistons from a 351w v8.
But if you could bush down your connecting rods to 0.912", you can use 351 pistons which give a much broader selection. You'd have to do some checking with the compression distance and such, but if you went that route, you would have a lot more room to play with on bumping up your compression. I see on Summit there's even some 6cc pistons that would fit, and that'd bump you up to about 9.2:1. Granted... They're ~$50 a pop.
It's all in what you want to spend.
#13
11-15-2017, 05:18 PM

#14
11-16-2017, 11:46 AM
I thought these videos were pretty good on rebuilding a 300 I6...
A Buildup of Ford's Classic Inline Six | HorsePower | PowerNation TV - Full Episodes
Part 1 Building an Old Skool Six | Engine Power | PowerNation TV - Full Episodes
Hopping Up an Old Skool Six Part 2 | Engine Power | PowerNation TV - Full Episodes
A Buildup of Ford's Classic Inline Six | HorsePower | PowerNation TV - Full Episodes
Part 1 Building an Old Skool Six | Engine Power | PowerNation TV - Full Episodes
Hopping Up an Old Skool Six Part 2 | Engine Power | PowerNation TV - Full Episodes
#15
11-16-2017, 01:55 PM

