Hitch adapter - it's driving me nut!
#16
 09-04-2017, 10:38 PM

looks about like how my curt one is... only yours sits flush with the end where mine sticks out a little.. but mines just so tight theres no room for any play.. while i have grounded down the back side of it to make it easier for removal its still a tight fit once it gets back to where i can get the pin in...
if your just wanting it to stay in you could try wrapping some electrical tape around the back end to increase the thickness.. i do that around the latch posts for my doors since theyre non-adjustable to keep them from rattling when i hit bumps...
if your just wanting it to stay in you could try wrapping some electrical tape around the back end to increase the thickness.. i do that around the latch posts for my doors since theyre non-adjustable to keep them from rattling when i hit bumps...
#18
12-08-2017, 10:05 AM


#20
12-10-2017, 12:11 PM


#25
12-11-2017, 11:38 AM
#26
12-11-2017, 11:48 AM
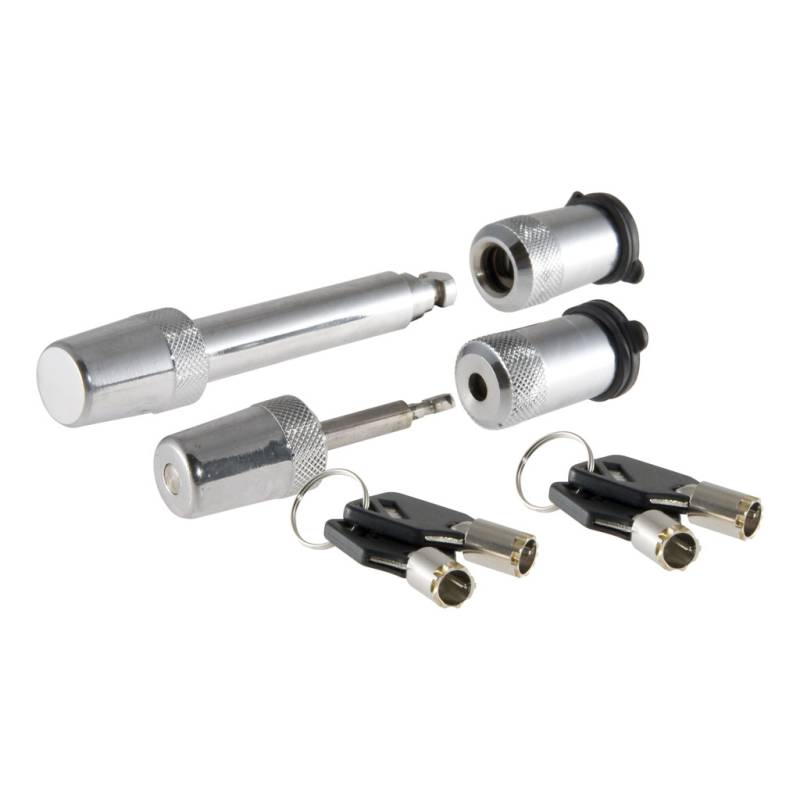
Ya'll are some unlucky folks. Had the same receiver lock on my truck for over 12 years, never had a problem with it rusting or breaking. I don't bother with the cheap $9.99 locks and pony up the $30 for the stainless ones with the lock cover like the ones in my image above, maybe that is the difference?
#27
12-11-2017, 10:56 PM
Ya'll are some unlucky folks. Had the same receiver lock on my truck for over 12 years, never had a problem with it rusting or breaking. I don't bother with the cheap $9.99 locks and pony up the $30 for the stainless ones with the lock cover like the ones in my image above, maybe that is the difference?
And yes I paid more for the better lock.
#28
12-20-2017, 04:45 AM

Curt sells a collar for $6 retail in raw steel that anyone can buy and tack weld onto their current insert.

#29
12-20-2017, 07:51 AM

Junior User
Join Date: Nov 2017
Location: FLORIDA
Posts: 67
Likes: 0
Received 0 Likes
on
0 Posts
#30
12-20-2017, 05:25 PM
You can have that...

The "flange" on these Curt inserts is a really nice casting, big and bulbous around the rim, easy to grab, and obviously resistant to open end perimeter deformation during towing. I don't work for Curt, I just really like pre cast collars.
All 3 of my Reese TiTaN V hitches have huge heavy castings around the receiver openings. Very durable collar. Reese as a company has changed hands twice in the last nearly 20 years since my hitches were made (in USA and Canda), so not sure if the current Reese products (made in China) are built the same.
I needed a 2" insert for my 2.5" hitch, so I bought this longer (24") one from Curt, with the collar casting...

In my case it was cheaper to buy one that was too long, and cut off what I didn't need, then to have to buy another short piece of receiver tubing later, since I have a future little project in mind for the part I cut off.

To make the insert adapter insert well, I bevel ground the raw cut off edges...

And then finished the edges smooth with a disc sander...

While I was at my grinding/sanding station, I took a few minutes to bevel grind a chamfer on ONE flat of a very large hex nut, so that the nut could snuggle right up to that Curt cast reinforcement collar (in lieu of flange) that I was talking about earlier, which can be seen really clearly in the photo below...

A profile shot of the chamfer I put on the big nut...

And now we come to the reason I responded to this thread. The title caught my eye "Hitch Adapter... it's driving me nut!" The OP (Prostock) had left off the letter "s", as we usually say "nuts" for crazy. But the singular usage of nut in the title reminded me of welding this particular nut on my hitch adapter. Here is where I scored the location to weld it...

I tacked the nut in place, on several flats, so that the pull from shrinkage would equalize. The balance to strike is not distorting the nut with weld heat to the point where a bolt won't screw into it. I also didn't want to put too much heat into that adapter that might anneal it's strength...

With the nut welded in place, I could then thread a thick bolt... the same thickness as the shank of a hitch ball (1.25" diameter)...

This is a big bolt. Here is another shot of that bolt head in the context of how it is used. I put a dime in the shot to give you a sense of scale...

The idea here is to use a longer hitch insert adapter than normal, in order to take advantage of the step bumper's V5 certified weight carrying hitch rating...

... in combination with the 2.5" Reese Titan V's weight carrying hitch capacity. That's the main reason why I bought a longer adapter and cut it to the exact length needed to fit FULLY front to back within the 2.5" receiver, as well as to extend outward far enough to end up under the otherwise unused tow ball hole of the step bumper. But in lieu of a tow ball being put in the tow ball hole, a big bolt the same diameter of the tow ball shank is installed instead.
This creates a truss set up that distributes the stress over several structures... the receiver hitch mounted to the frame flange and the bumper mounted to the frame web. As seen from underneath the truck, the set up looks like this...

Scanning the photo above from left to right, we have a stainless steel hitch pin lock, and then the Reese Titan V's huge, thick, meaty cast collar that reinforces their 2.5" hitch opening, then we have the Curt 2" hitch adapter, that extends to the left all the way inside and through the Reese receiver, and that extends to the right all the way to the edge of the step bumper, where it is terminated by its own cast reinforcement collar around the opening. On top of the adapter is the welded nut that the "tow ball bolt" threads into, and the 2" stinger of the apparatus mounted in the adapter is locked in place by the blue hitch pin lock. There is also an light grey anti rattle casting with a compression bolt, seen at the far right of the photo surrounding the adapter's opening.
I did all the above so that I could haul this below. I was within 1 inch of the DOT's regulations of how much load can overhang the last point of support on the vehicle. I basically needed to extend my bed beyond the tailgate's reach in order to provide majority support for the length I was hauling...

But getting back to hitch adapters and the quote I am responding to... "If I could get a flanged insert AND the holes lined up, that would work"... you might have to drill the pin hole where it needs to be, even if you just want the cast collar on the Curt to simply function as a limit flange.
Drilling 5/8" holes in steel is no big deal, but using a twist drill bit with a hand drill can hurt you if the bit catches, so I took a few photos of the method I use to drill larger than 1/2" holes in steel, that doesn't snap wrists and sprain forearms like large diameter twist drills can when they lock up.
To start, I measure twice, make my mark, draw my cross hairs, paint my hole silhouette, and then punch my center..

Then I drill my initial pilot hole, very small diameter, with a twist drill. Note that the chips are chips, not pulverized powder (would happen if bit were dull), and not long twisty helical entrails (would happen if drilling too fast)...

I do the above on both sides of the tube, then I increase the diameter of the pilot bit, enough to get a new bite, but not so much as to get caught in the twist. In this case, I had to short chuck the second bit it a little bit because I didn't have a sharp enough taper length drill bit handy. The purpose of the second pass of drilling is to cross drill an alignment pilot hole across both walls of the tube, so that the holes will absolutely register together at the final diameter, keeping the hitch pin horizontal...

With all the piloting done, it's time to mousse it up a little... (clinging foam cutting oil, for the main task to come):

I don't have a fancy Rotobroach, or a Hougen magnetic drill press. So this is my poor man's way of getting annular cutter safety and performance, that grinds up the least amount of metal as possible, with meager means that are substantially less than a government agency's seemingly unlimited budget... using regular ol hole saws found in any home improvement store...

The donut that remains is the best evidence of the drill efficiency of using a hole saw (annular cutter) instead of a twist drill. A twist drill would have to grind the entire contents of that hole slug into chips. On the other hand, the hole saw only chips away at what is necessary to make the hole. Here is what the chips look like...

And here I stopped drilling mid way and wiped off some of the chips for an in progress photo op of the cutting signature...

With the hole completed, a hitch pin is inserted to test for fitment. Good tolerances can be achieved without a drill press... just drilling using a hand drill and a hole saw...

So now my hitch adapter has two holes... one hole to retain it to my 2.5" receiver, and the other hole to retain the stinger of the apparatus inserted in the smaller 2" hitch...

So to review the process I use to drill my own holes into hitch adapters for perfect alignment...

1. Measure
2. Measure twice
3. Mark
4. Punch
5. Pilot
6. Cross Pilot Align
7. Core drill (annular cutter, hole saw... just not a twist drill)
8. Step Drill, to chamfer the hole edge a touch to ease pin insertion.
Voila, your very own hitch adapter, that has a rugged cast collar for a flange, and that has holes lined up exactly where you want them.