When you click on links to various merchants on this site and make a purchase, this can result in this site earning a commission. Affiliate programs and affiliations include, but are not limited to, the eBay Partner Network.
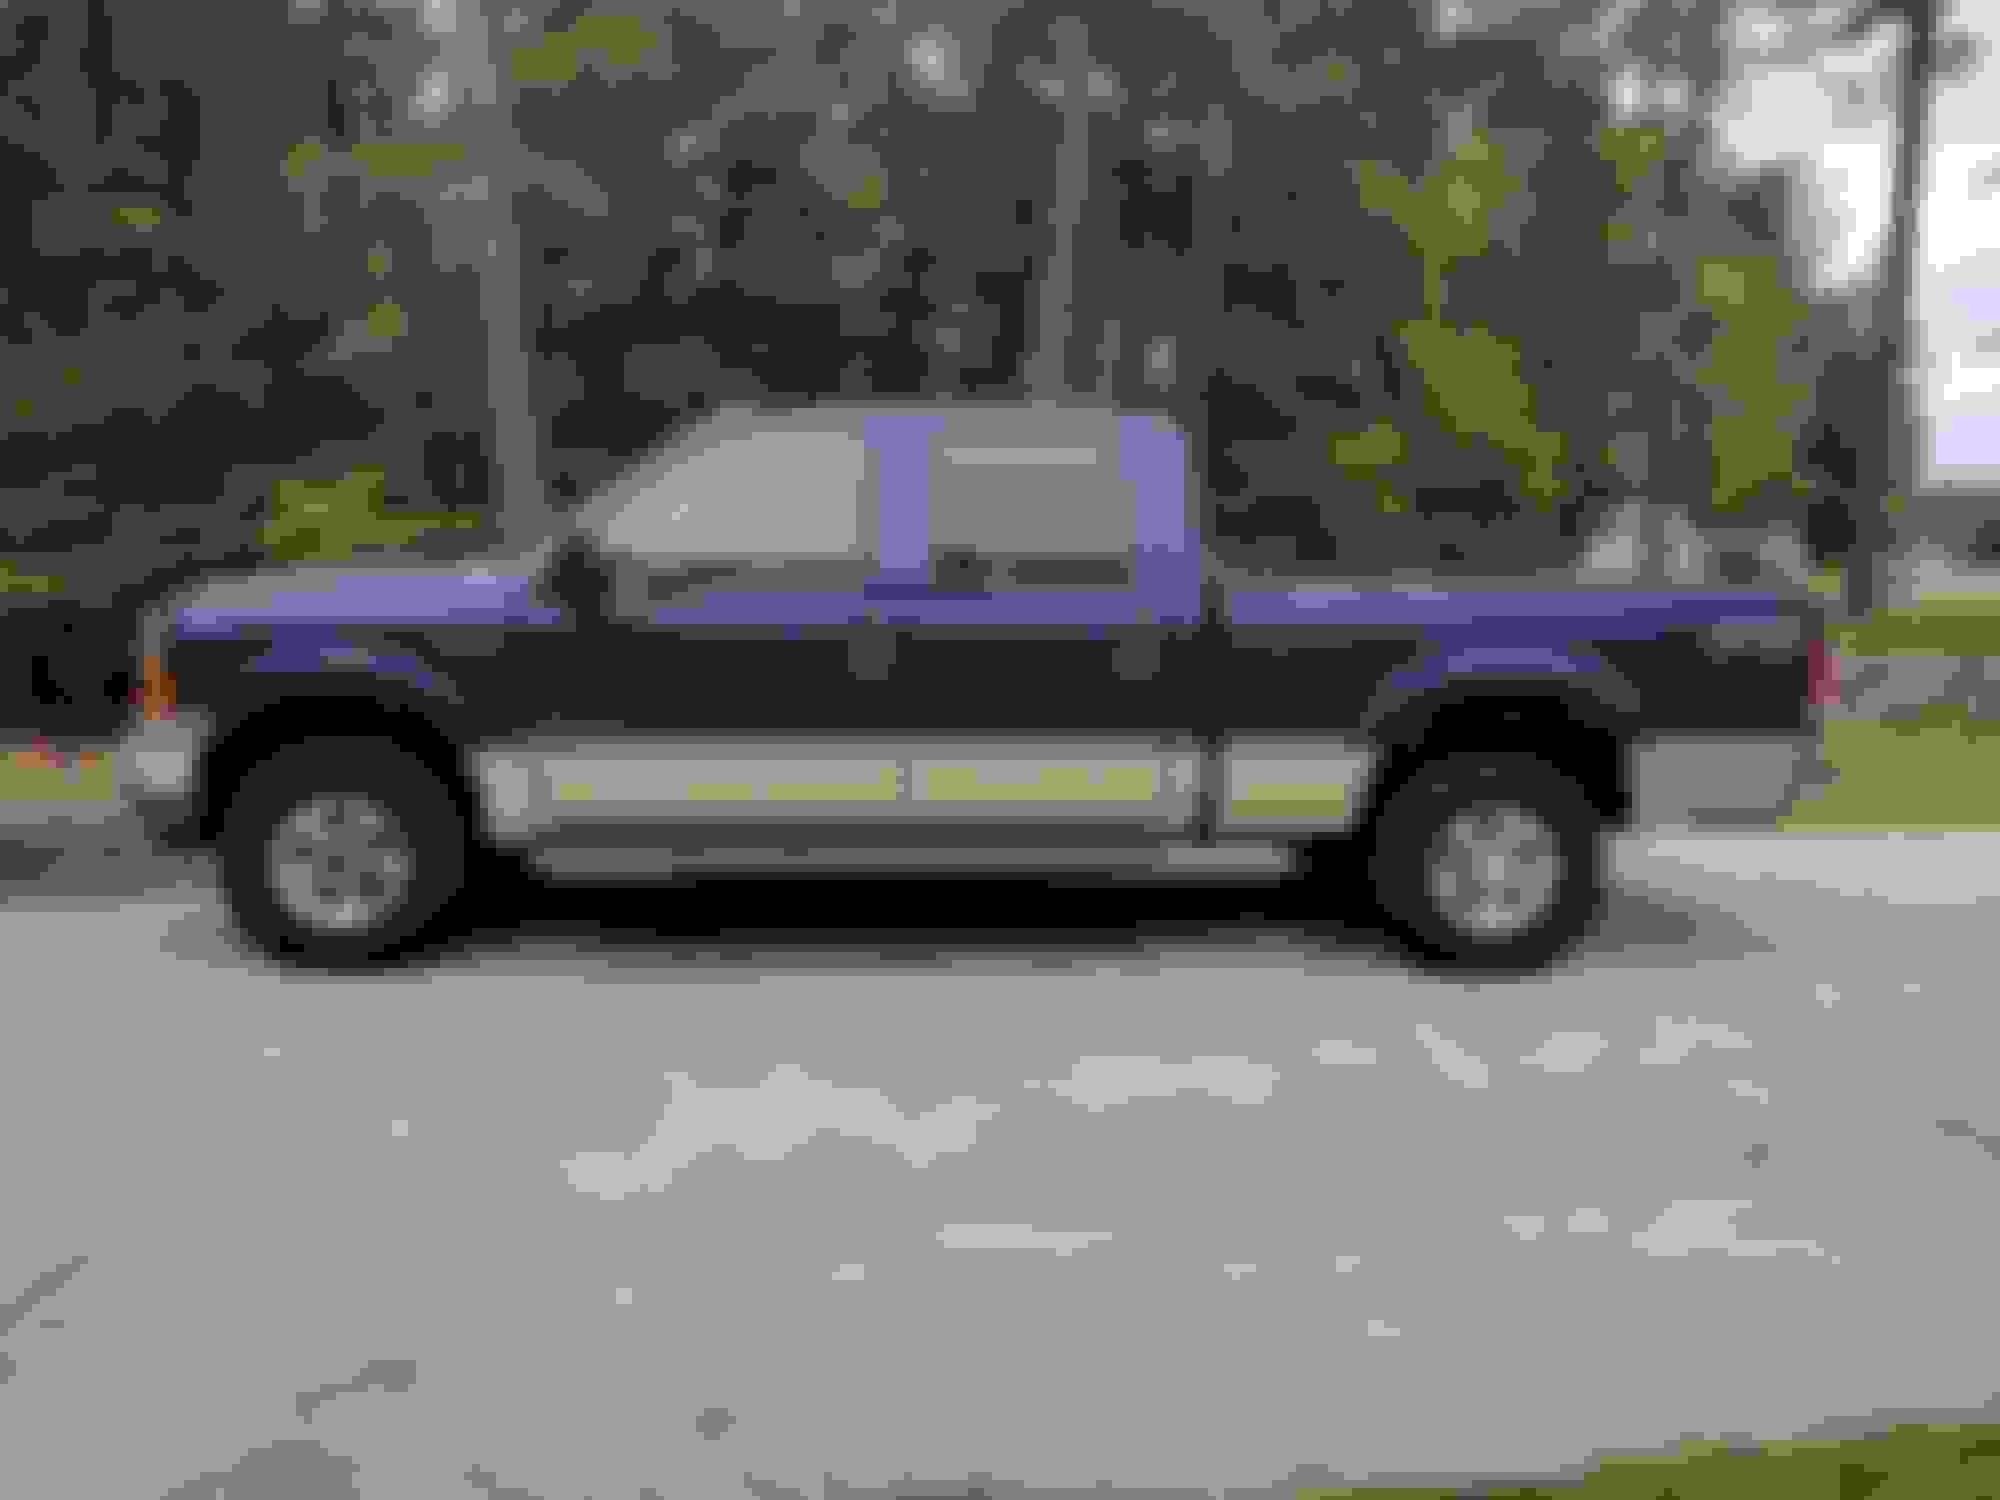
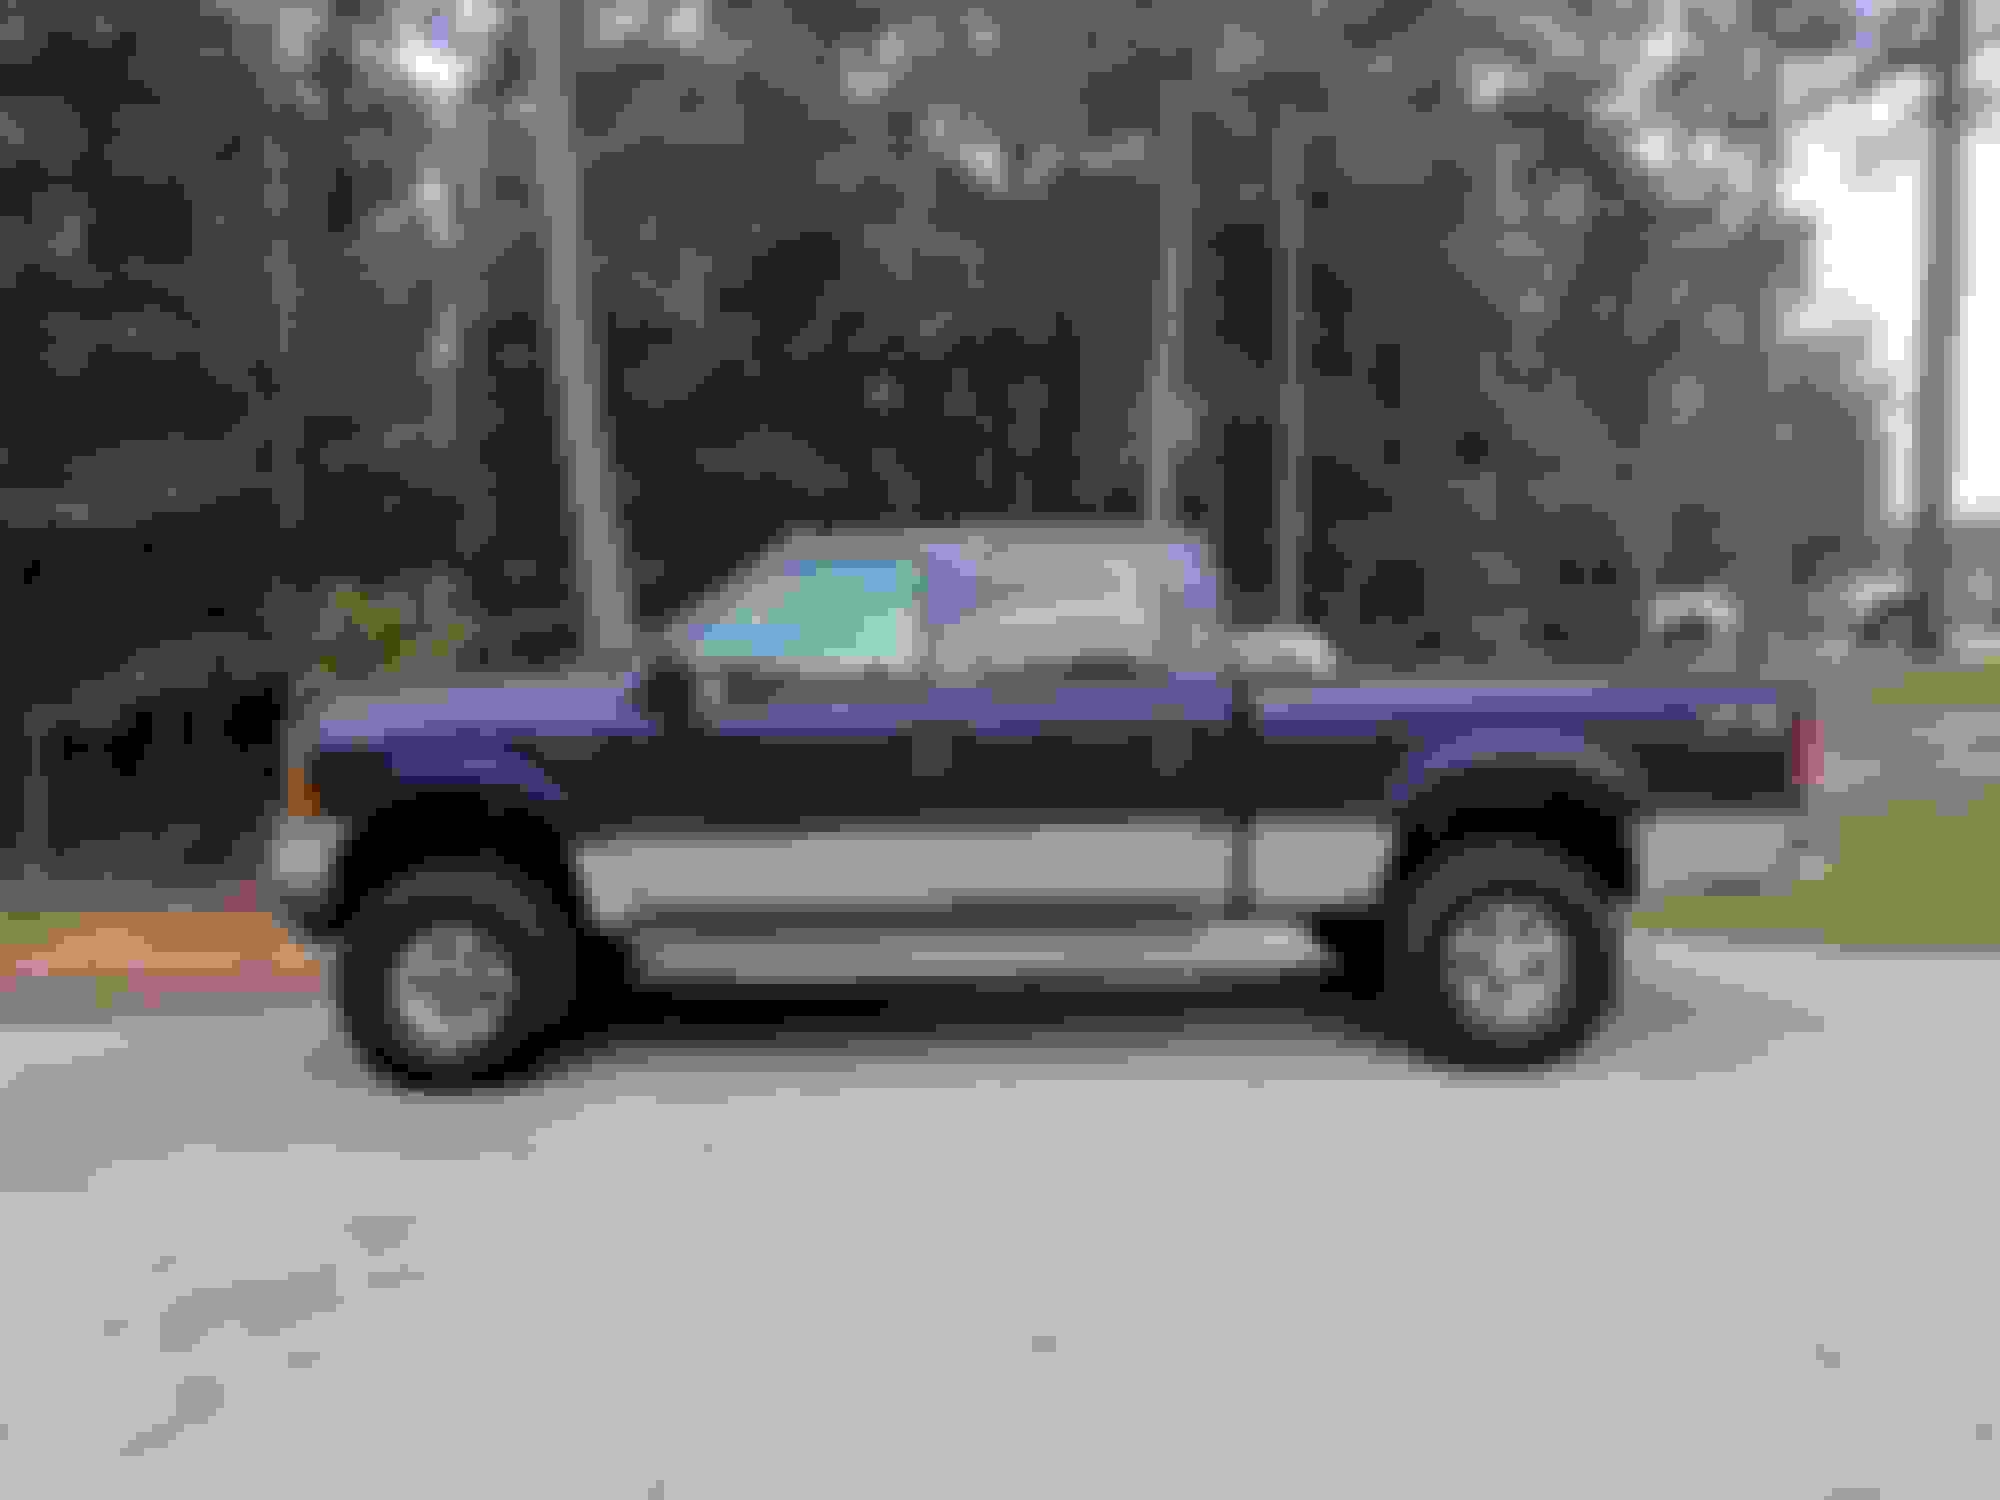
4" Rough Country Lift Installation on 2001 Ford F-250 7.3
Back in May I purchased a 2001 F-250 7.3 with 105k miles. I wanted an all leaf-spring lift because I hate using blocks. Did some searching around and found that for the 99 - 03's, the only (affordable) lift without blocks was the Rough Country. I had been gone all summer due to work, but finally got home and had a chance to order and install the lift. The exact lift I ordered was the 4" 501.20
Figured I'd post the things that stood out to me while installing this kit. Let me first start off by saying that I am in no way affiliated with Rough Country, their products, or sales.
Here are some things that stood out (good and bad):
- I ordered it on a Wednesday and it was here the next Monday. Impressed with how quickly it got here.
- Very impressed with the fitment of everything. I ordered the additional carrier drop bracket and installed it. I liked how they made the bracket tapered to make for a better drive-line angle. I was glad to see that...almost like they cared when they made the bracket.
- Very impressed with the track bar drop bracket. All the holes lined up perfectly and I didn't have a problem getting the bolts started back in the nut plate (inside the frame) like I thought I would as I was removing the old one. Once again, it's like they actually cared when they made the bracket.
- Liked how the track bar drop bracket has the option of two holes, one for the 4" and one for the 6" lift. I did go ahead and purchase an adjustable track bar because I didn't want to have to deal with trying to get the holes to line up. Glad I did because it was so easy to lower the front end, adjust the bracket to the correct length, then push the bolt through. I'd read horror stories of trying to get the bolt lined up, but the adjustable track bar fixes that problem. Was happy to see that my drag link and track bar are perfectly parallel.
- I ordered the drop pitman arm, but it's not required for the 4" lift; I was going to install it anyway, but the drag link and track bar line up perfectly so no need to install it. Should have read the instructions first. Hoping RC will let me return it.
- The springs were obviously the hardest part of the lift to install. They are extremely heavy and since I was working by myself, it was a little difficult getting them positioned and the pins on the leafs to line up with the holes on the axle, but with some boards, big hammers, and pry bars, I got it. Was very happy with how everything lined up. So far, they don't squeak or creak like my Skyjacker leafs did on another lifted pickup I owned, but I've only had this lift installed for a day. They have "Made in Indonesia" stamped on them so only time will tell as to how good of quality they actually are.
- As for the tires and wheel combination, I kept the stock 16" wheels, and went with a set of 315/75R16 (35X12.5R16) Toyo A/Ts II. Not sure of the backspacing on the stock rim, but I had read somewhere that 12.5" wide tires may rub the leafs when fully locked. I was afraid I'd need to run wheel spacers to move the wheels out away from the leafs, but I'm happy to say I turned the wheel full lock both ways and haven't noticed any rubbing (yet). Haven't really been off road though, so can't 100% verify that.
- The only (albeit minor) complaint is I asked RC if I needed extended brake lines and they said no, but in order to install the leafs I had to lower the axle so much that the stock brake lines were extended waaay beyond what I was comfortable with. I probably could have played a tune on the lines, and the axle still wasn't low enough. I still had to pry on the front leafs to get the shackle bolt to pop in. If I was to do it over again, I would have ordered the extended brake lines so I could have lowered the axle more. That would have made installing the front leafs so much easier. Didn't really have a problem with the brake lines on the rear. I think I will still order the extended brake lines because I don't like knowing that the axle can drop that much making the brake lines that tight.
- The ESOF vacuum lines are way too short. Going to go grab some inline vacuum tube splices and add about 6" to the vacuum tubes. Not a big deal.
- Took me about two full days. Being the middle of August in the South with temps 90+, I had to pace myself or else I'd get to working so hard and fast I'd overheat. One night around 2 AM (when it was still 80+ degrees out) I realized I could hardly lift a tool (literally). I felt nauseated, dizzy, was sweating profusely, and had a headache...all signs of heat exhaustion. By the time I made it inside to the A/C, I could barely stand. Drank some water and cooled down and I was fine. Definitely wouldn't recommend doing this by yourself, but if you do, don't do it in the South in the middle of August. I grew up on a farm/ranch and am used to hard work, but this was tough. I'm a bigger, relatively strong guy and it took 110% of my strength to loosen most the bolts and lift the leaf springs into place by myself. The reverse button on my impact broke, so I did everything by hand with wrenches and ratchets. I did go buy a really nice impact the next day, but even it couldn't loosen some of the bolts. I ended up mostly using cheater wrenches on the end of wrenches, or a breaker bar with a pipe on the end. At one point I used the hydraulic bottle jack to jack on the end of the wrench to loosen one of the track bar bolts.
- Overall I'm very happy with the lift! I love how basic (albeit difficult) the installation was and the fact that RC includes rear leaf springs for my pickup
Sounds like it worked out well. What impact dis you buy? Any pictures of the finished product?
I picked up a Porter Cable PCE211 7.5 amp impact from TSC for $79.99. Pretty good considering the cheapest I could find them online was for $99.99. It did a good job of loosening most the hardware, but it was late at night and I was afraid of waking the neighbors up so I ended up doing most of it by hand anyway. I like Porter Cable because they (along with DeWalt's Commercial grade tools) are among the few left that still use metal instead of plastic gears, but you don't pay for the DeWalt name. All my tools are Porter Cable and have had zero issues with them so far.
My Milwaukee impacts will rip most things off of trucks including bigger machinery.
I use blocks for cribbing too, however I recommend at least finding some left over glue-lam at a construction site instead of those cedars. They will crack and you won't want to be anywhere near it.
I have a giant cedar block that cracked recently, now its a wheel chock, soon will meet fire.
Truck look's sharp.
How do you like the Bilstein shocks? Plan on cleaning up the frame at all?
Good to know, didn't know that about cedars. Thanks for the tip!
I believe that Porter Cable is rated for 240 ft lbs. It did a pretty good job of getting everything loose. Only thing it couldn't budge was the lower track bar bolt. Which Milwaukee do you have? They make great tools as well.
It came with the Bilsteins so I don't really have a baseline to compare it to. I changed out the front shocks for the ones Rough Country sent because the Bilsteins were too short, but when I went to swap out the rears, the Bilsteins were a hair longer and lined up just right, so I kept them. Have no complaints with them so far.
Funny you mention that; I'm not exactly sure why it's rusty...it's been in northern Mississippi it's whole life away from salt and the body has zero rust, but for some reason the frame is extremely rusty. No idea why...? I'd like to clean it up but not really sure how to remove rust from an entire frame without sandblasting the whole thing...any ideas are welcome.
I have a Milwaukee Fuel 1/2" High Torque Generation 1 that's rated for 700 ft-lbs, smaller impact I have is rated around 100 ft-lbs. 240 ft-lbs should be good for most uses and inexpensive is nice too.
I have seen some on here use POR15 but it can be expensive, some have used fluid film or similar. Super Duty Service, former sponsor uses some oil based paint that look's decent, but would require body off the frame to fully coat. Would love that for My truck someday.
That looks like the perfect stance to me, not too tall but more aggressive than stock. Did you happen to take any measurements to see if you actually gained 4" and an overall increase with the tires? I park in a garage at work and I'm limited on how high I could go. Another hats off for the bottle jack idea too.
I have a Milwaukee Fuel 1/2" High Torque Generation 1 that's rated for 700 ft-lbs, smaller impact I have is rated around 100 ft-lbs. 240 ft-lbs should be good for most uses and inexpensive is nice too.
I have seen some on here use POR15 but it can be expensive, some have used fluid film or similar. Super Duty Service, former sponsor uses some oil based paint that look's decent, but would require body off the frame to fully coat. Would love that for My truck someday.
Yes por15 can be pricey, but its worth it. I live in chicago, as long as you do the correct prep steps it works amazing. Never had rust under my por15- when painting over all the rust.
Great job!! Truck looks tough. It's nice to have some extra hands when you're installing a lift kit, but there is also great satisfaction when you do it all by yourself so hats off to ya! Post up some more pics and nice write-up!
I have a Milwaukee Fuel 1/2" High Torque Generation 1 that's rated for 700 ft-lbs, smaller impact I have is rated around 100 ft-lbs. 240 ft-lbs should be good for most uses and inexpensive is nice too.
I have seen some on here use POR15 but it can be expensive, some have used fluid film or similar. Super Duty Service, former sponsor uses some oil based paint that look's decent, but would require body off the frame to fully coat. Would love that for My truck someday.
700 ft-lbs...wow. That's what I needed two nights ago haha. But like you said, I was happy with my $79.99 impact that gets most things loose.
I'll look into the POR15 stuff, thanks!!
Originally Posted by GN1220
That looks like the perfect stance to me, not too tall but more aggressive than stock. Did you happen to take any measurements to see if you actually gained 4" and an overall increase with the tires? I park in a garage at work and I'm limited on how high I could go. Another hats off for the bottle jack idea too.
I didn't happen to take any measurements, sorry.
Originally Posted by Projectlittleredf250
Yes por15 can be pricey, but its worth it. I live in chicago, as long as you do the correct prep steps it works amazing. Never had rust under my por15- when painting over all the rust.
Good to know, thanks!
Originally Posted by Sir Kayakalot
Great job!! Truck looks tough. It's nice to have some extra hands when you're installing a lift kit, but there is also great satisfaction when you do it all by yourself so hats off to ya! Post up some more pics and nice write-up!
Very satisfying but still wished I had some help haha. My bro was going to help me but had to go out of town last minute so decided to do it myself...should have waited for him to get back.
I'm actually considering the same lift kit. How is the ride compared to the stock suspension? Did you get the standard shocks that comes with the kit?
Have you towed with it yet? Sorry about all the questions...
I'm actually considering the same lift kit. How is the ride compared to the stock suspension? Did you get the standard shocks that comes with the kit?
Have you towed with it yet? Sorry about all the questions...
Honestly it rides about the same, but I'm probably not the best person to ask. This isn't directed at you, but it's always kinda baffled me when someone asks how an 8,000 lb, 3/4 ton pickup rides; I didn't buy this thing for a smooth ride; it's going to ride rough. I bought it to do all the stuff my wife's smooth riding minivan can't do.
Yeah, before you can check out it requires you to select their N2.0 shocks (at least on RC's site).
I have not towed with it yet.
I don't mind the questions at all. I posted to help others out.

 08-17-2017, 08:46 AM