When you click on links to various merchants on this site and make a purchase, this can result in this site earning a commission. Affiliate programs and affiliations include, but are not limited to, the eBay Partner Network.
1975 F-250 Supercab shortbed Barn Find: Lifted 2wd Build
I have decided to do a build write up on the 75 short bed super cab 2 wheel drive barn find that I got back in late September. Started working on it couple months ago ran into a couple of snags and have been trying to find parts for it those have been found and so the build begins in earnest. My plans on this build are for a 5 inch suspension lift it will have bent beans up in the front all new poly bushings all new shocks new brakes rotors calipers anything that I can change out will be. Motor is a 390 with a C6 I will probably do a mild build on those has air conditioning and obviously y that's going to stay I made change out the mechanical fan as I have a dual electric fan setup that I was going to use on the crew cab but I'll just get another one later probably if this works well on this one photos to follow:
Without rewriting verbatim What was written a few months back when I actually bought the vehicle the short of it is that this it's been sitting inside a shed for 20-something years where it was parked by the original owner. He was an RV dealer and so he kept it up real well and had tons and tons of spare parts that were for this vehicle and a few others that he had, stored in the back of the bed of this thing that had a camper when I got it. I sold most of the parts but did keep the four or five sets of airbags that I will probably use on the different vehicles that I own. The daughter did not want anything that was back there and said I should keep it. I told her that I would split the money with her and she would have none of that. So I basically I made back what I paid on the vehicle and more. Having this thing not being started and ran for over 20 years had me a little bit concerned, but also knowing these beasts will go through a long hard hibernation and come back strong with very little tinkering. In fact we put a battery into it, cut the fluid lines as they were dry put a can inside the engine bay with a gallon of fuel, squirted some miracle oil into the cylinders and it fired up, after we also changed out one of the hoses from the heater core back to the block which was cracked we basically just looped it and the motor ran fine it even sounded like when he was still keeping time very well. This was at 11 at night that we got done after an hour's worth of tinkering with it. We did change all four tires and were very carefully backing it up and driving the three miles to my in-laws for the build. My son followed behind me, the roads which which were vacant at this time of night in the country, allowed us to drive the three miles with nothing but the emergency handbrake.The brake pedal was all the way to the floor. The following day my son washed it up as I think all the dirt protected the paint underneath, as he did one pass with the buffer and it actually came out pretty good, we have not done it again until we finish everything else, we're going to Buff it and wax the hell out of it and try to preserve the patina.
I have a hidden tool box that will reside under the cover when done. Saving to have the spray in liner applied, they sure are price proud on that linex crap. The OG drop in liner will stay for a bit. 1st wash in over 20 yrs
The front grill off the truck is very very clean so we carefully have removed it and are going to sell it as we will not be using it. Our plan is to remove the entire front end and then use donor 78-79 parts to the get the big mouth look that I love so much
As it turns out being that the truck is a 75, it has the older style dual piston caliper that has more parts and is more problem prone and has fewer performance pad options. So I've got a donor vehicle 78 F-250 2-wheel drive heavy duty and am swapping and refurbishing all the arms and beams. Along with that I was able to use the round headlight buckets that I like so much that came on that year as well as the grill.
I learned while pulling parts off of the 78 that you have to be careful to make sure you check the VIN numbers on your donor Vehicles because there are different size kingpins which dictate some differences in rotor part # compatibility wise between the 75 to 78-,79 conversion. In fact the rotors unless the vehicle gross vehicle weight are matching you need to find out if the spindles are the same size because there are some differences. I thought that I was just going to be able to use the late 76 through 79 caliper brackets on the 75 spindle, it doesn't work that way, the 75s uses screw on pins that the pads ride thru( this is a nice thought except for the small springs that tend to break after a while and are a pain to deal with, had they made it more like modern day pins it would have been the superior system), where as the 78 79 use drop in pads( from the bottom, so drop in if the caliper is off and upside down) and an anti-shatter spring on it much better system in my opinion. I was looking for the ease of Maintenance and the availability of better pad Choices which the 78 79 provide, the earlier ones only have one option.
In the end I ended up using and refurbishing a good portion of the parts from the 78 which are more specific from 76 1/2 to 79. I ended up using one arm from the 78 and one from the 75. One of the 75s radius arms bushing area was badly hour glass shaped, and did not make sense to reuse, and the other one was actually bent pretty badly
I ended up using one radius arm from the 78 and one from the 75 I used both I beams from the 78 as I needed those specific kingpins for the gross vehicle weight so that it would match up with the the 79 rotors that I am using. I I used the 78 caliper brackets and refurbish those I got new and Os brake calipers dual piston and I painted those with caliper red paint just because I also use the 78 dust Shields but cut those down as I don't really like having anything stuck in there or having them bent making noise so I cut them down really small so that it basically just takes up the space that the entire Shield was there before and it does give just a small amount of protection for the inner bearings. I did have to modify the 75 radius arm. One thing that I wanted the truck to have as it was missing was front and rear sway bars. The arms have a small notch on the top or on the bottom of the ear ends of the arm that fits a dowel pin on the sway bar bracket. I simply used a grinder and made a notch. Fit perfectly. This is what I cut off the shields. Ground and smoothed and painted them.
These are the 75 dual piston calipers that I wanted to replace. too many parts and only one pad choice.
The type of calipers you want are these: these are not mine just a pic to show what I am referring to.
you can see what portion of the shields I am keeping. The flange does provide a little protection of the rotor inner bearing along with the knock in seal.
Thing that I did not do to the blue 79 which this truck is almost identical to is that I never replaced any of the bushings on the suspension at all. As I was taking this thing apart I realized that if I'm going to this extent it's going to get everything replaced that's possible while it's part so I decided to go with all polyurethane bushings wherever possible. The donor I beans definitely needed bushings as they were like uh next to nonexistent. The problem is is if there is any of the bushing material still left in there you have to get it out and if you damage or destroy the inner metal insert that the bushing goes into the gets pressed into the I beam end you will have to cut the other one out and put one back in and it is a major pain in the butt. For me I ended up having to replace them with new parts this again is another problem because you're not able to just get the metal shell you have to get the metal shell with the rubber already installed and then get the rubber out if you want to use polyurethane in the end it was a bear in my machine shop spent a long time trying to get those out I tried to drill them out and burn them they ended up having to do all sorts of stuff to make it work. So in the end I had to put new shells that I almost had to destroy to get the rubber off so that I could install them again into the beans and be able to run polyurethane bushings which by the way is definitely the way to go use a lot of lubricant. Another snag I ran into that I found out was the fact that upon replacing the kingpins and the reason being was that one was completely stuck I could not even move the spindle whatsoever so those would have to be replaced and I did I bought the correct set after having The Machinist use their huge press to get these things out with a lot of lubricant and some heat it was a real bear. But now it has brand new King Pins with the metal bushings not the nylon ones which are prone to fail. And they turn just as smooth as anything. After some cleaning the spindles were in great shape so I did not have to Source out new ones for those and those were off of the 78 they were not bent none of the threads were messed up and all the surface was were in great shape.
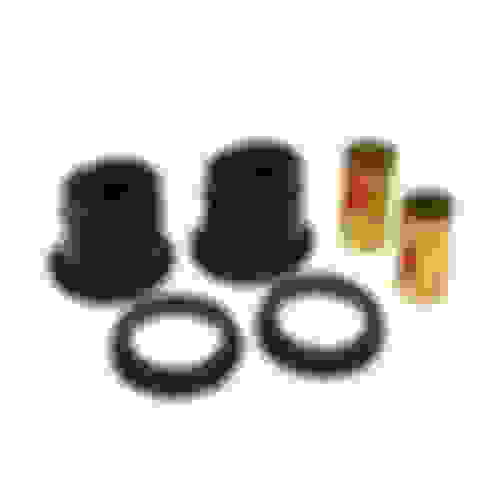
These are the replacement polyurethane bushings that are used on the I-beam end pivots.
If this is the Kingpin set that I used actually bought 2 sets just to have a spare just in case you can see that it has the metal bushings instead of the nylon bushings that need to be reamed to size by the Machine Shop when they are pressed installed.
New rotors. these are the replacement rotors, I am partial to the drilled and slotted. If nothing else they look cool. They worked great on my last build, but everything was new as well so it would be hard to say definitively, if it was the rotors or the sum of the whole package.
As I wanted a 5" and only the AutoFab kit available over the counter, I made my on bent beam kit for the last 79 SB SC build. That one was only 4". I used a set of Moog coils originally meant for a 1980ish to ? E-350 van with a diesel. The wire size is larger they are progressive rate. The height is taller and has the correct coil ends to fit my application, best of all they ride nice. Moog progressive rate coils
I also used these cast spacers in lieu of the stock lower coil retainer, which allows for the extra1" in height.
I reinstalled the radius arms with new poly radius arm bushings, also installed taller poly bump stops. Most of the front end is now on. All new grade 8 or F911 grade 9 hardware.
Here you can see the new bolt does not have enough thread even though it is 1 inch longer compared to the stock 7 inch long bolt which is almost halfway threaded down the shank of the Bolt
you can see in that picture that I also modified the bracket. I moved the mounting point of the end of the link of the stock Sway bar bar, the reason being I plan on running dual shocks as well. I relocated the mounting point to the other side and moved the upper mounts a bit forward. With the lift and new geometry I also lengthened the links as the shanks were also corroded and hour glassed, so they needed to be replaced , but I cut and welded a new portion and installed with poly bushings both on the upper(greasable) and lower mounts. Just a shout out to fellow member and Vendor KingBee( he got a swaybar f/r for my project here and at a great price, Thanks Bruce!.
Here everything is cinched together except for the sway bars also installed the new Ranchos that are New Old Stock V speeds and yes I did ask Rancho and they said these can be run upside down I have used these before in that configuration and they work just fine.
Are you sure you don't wanna send that grill shell and inserts over my way for the price of... on the house? lol. I'd love to swap my '77's grill out for a '75. I love the 73-75 grills myself. I've considered replacing my springs with some new MOOG springs. Is there any difference in ride height between a regular set and those progressive ones that you're using? Or do they simply get stiffer at some point during their travel?
Hey 75, the son wants to put the grill on Ebay as we are going to give it a minute polish and black spray. It really is nice and you probably know what they are getting for them. I wouldn't mind trading for a new rear contour bumper(wink wink I will probably start a sell/trade page with the parts I am not using. I like you, are partial to certain years, mine 78-79. The Moog springs I use are CC860S. Meant for a 1 ton van with a diesel. They gave me 4" of extra height enough to clear the 33" tire I used on my last build. My trucks are also the HD version which has the taller coil spring buckets. These would actually cause the height to be shorter as the coil sits higher and adds no additional height. The standard buckets sit shorter so using the same coils would yield more lift. Just so you know(I was aware before the start of both builds, that once I lifted the trucks this height, I would have to have the I-beams bent at a HD truck shop to get the tires to be centered rather than toeing out at the top, which is caused when you raised the track and do not use drop brackets at the end pivot points) I hate drop brackets and did not use them on the last build. The ride with these coils and suspension was better than ever imagined. Funny, since on the last build which is almost identical to this one I never changed the bushings, so I feel this builds ride should be even better.
I am about to start the new rotor and new bearing install. Here's a pic of the front suspension with the sway bar all hooked up.
You can see the new location of the lower link on the modified bracket.
Refurbished sway bar, new brackets as the OG one where tweaked. I got the greasable ones with the new poly bushing kit, made sense for a couple of extra buck to get them.
The long term plan was to make all of the builds 4x4s since I have three drive trains. But I may just build this one almost as a Pre-runner for now and later make some wider I-beams and longer plated radius arms. I can build the Crewcab as a 4x4. For now this is 95% the same as the suspension I made and installed on my blue 79 I just sold ,and it worked great.
These are the rims and tires that I kept from my 79 Supercab that I sold. The tires are probably 90% still good, they're not weather checked or anything and are 33x12.50x 16.5s along with these cool turbines, that I cannot find a spare for. Anyways, should I go with these on this build or this other set? The tires that are going to go on the other set would probably be Swampers, just because we have them in the same size already.
Old School 16.5 slots. I have two sets of these and a fifth spare, so I got nine of these slots. Four of them are on the crew cab right now with some mismatched tires. I would take those off and put a set of SSRS Super Swampers that I have at home as 4 those guys are near brand new their radials. what do you guys think?

 07-29-2017, 02:05 PM