
Clutch slave cylinder install--How?
#1
 04-06-2017, 11:43 AM

Clutch slave cylinder install--How?
Anyone done this before? I had a spare Luk sitting in my shop so I thought I would put it in to see if it helps my pedal feel a little bit. I have searched but haven't found an exact DIY video or write up. Doesn't seem to be too difficult. Mine is pre-bled.
#2
04-06-2017, 08:44 PM
Pretty simple. The hardest part on the pre-bled set up is getting the rod off the clutch pedal. A screwdriver or long pick placed between the end of the plastic bushing and the nub on the pedal will let you pull the rod off the pedal when you pry outwards.
Then it's go under the good at the firewall and grab the plastic square piece and give it a 1/4 turn to get it loose from the firewall. It might take a pair of channel locks, or you might be able to do it by hand.
The same 1/4 turn will loosen the slave cylinder from the bell housing down below. The key here is to slowly pull the slave out of the transmission. There is a plastic tab that looks V shaped that can catch on the housing when you pull the slave cylinder and drop the plastic tip down into the bell housing.
To install, go in reverse order. The slave cylinder will have those V shaped plastic things attached at first. Leave them alone and install the slave. The first time you push the clutch they pop loose.
After the slave is installed, push the rod into the master if it isn't already inserted and install the master in the firewall. The opposite 1/4 turn installs both the slave and master cylinder. The rod with new bushing just pushes onto the clutch pedal nub and you're good to go.
Keep in mind once the rod is off the clutch pedal there is nothing but the spring controlling the pedal position. Push it down and it goes and stays on the floor. Start to pull it up and it reaches a tipping point that will cause it to jump forward and slap you in the forehead, so keep your hand on it while you're putting the rod back on the pedal.


#5
04-07-2017, 01:55 PM
Originally Posted by F350-6
Pretty simple. The hardest part on the pre-bled set up is getting the rod off the clutch pedal. A screwdriver or long pick placed between the end of the plastic bushing and the nub on the pedal will let you pull the rod off the pedal when you pry outwards.
Then it's go under the good at the firewall and grab the plastic square piece and give it a 1/4 turn to get it loose from the firewall. It might take a pair of channel locks, or you might be able to do it by hand.
The same 1/4 turn will loosen the slave cylinder from the bell housing down below. The key here is to slowly pull the slave out of the transmission. There is a plastic tab that looks V shaped that can catch on the housing when you pull the slave cylinder and drop the plastic tip down into the bell housing.
To install, go in reverse order. The slave cylinder will have those V shaped plastic things attached at first. Leave them alone and install the slave. The first time you push the clutch they pop loose.
After the slave is installed, push the rod into the master if it isn't already inserted and install the master in the firewall. The opposite 1/4 turn installs both the slave and master cylinder. The rod with new bushing just pushes onto the clutch pedal nub and you're good to go.
Keep in mind once the rod is off the clutch pedal there is nothing but the spring controlling the pedal position. Push it down and it goes and stays on the floor. Start to pull it up and it reaches a tipping point that will cause it to jump forward and slap you in the forehead, so keep your hand on it while you're putting the rod back on the pedal.
Then it's go under the good at the firewall and grab the plastic square piece and give it a 1/4 turn to get it loose from the firewall. It might take a pair of channel locks, or you might be able to do it by hand.
The same 1/4 turn will loosen the slave cylinder from the bell housing down below. The key here is to slowly pull the slave out of the transmission. There is a plastic tab that looks V shaped that can catch on the housing when you pull the slave cylinder and drop the plastic tip down into the bell housing.
To install, go in reverse order. The slave cylinder will have those V shaped plastic things attached at first. Leave them alone and install the slave. The first time you push the clutch they pop loose.
After the slave is installed, push the rod into the master if it isn't already inserted and install the master in the firewall. The opposite 1/4 turn installs both the slave and master cylinder. The rod with new bushing just pushes onto the clutch pedal nub and you're good to go.
Keep in mind once the rod is off the clutch pedal there is nothing but the spring controlling the pedal position. Push it down and it goes and stays on the floor. Start to pull it up and it reaches a tipping point that will cause it to jump forward and slap you in the forehead, so keep your hand on it while you're putting the rod back on the pedal.
#6
04-08-2017, 07:56 AM
Fleet Owner
If you have time of course...
Look forward to hearing how it went.
#7
04-08-2017, 09:12 AM
Hotshot
Trending Topics
#8
04-08-2017, 10:31 AM
#9
04-08-2017, 10:33 AM
Mine didn't. What did wear out on the pedal was the plastic bushings at the top of the pedal, which then wallowed out the hole and made shifting a little difficult and also kept breaking those plastic clips where the Heim joint mod goes..
#10
04-08-2017, 11:02 AM
Hey Chris, by the way, you did 560,000 on the 7.3? What's your secret? LOL But seriously,I really want that for this truck I just bought. It runs better than any of my previous 7.3s and it has 253k miles. I really want and expect to take it to 500,000. That would be a great accomplishment. Did you do much other than normal maintenance?
#11
04-08-2017, 06:18 PM
#12
04-08-2017, 09:32 PM
#13
04-08-2017, 09:43 PM
Originally Posted by F350-6
Pretty much nothing other than normal maintenance. Replaced a few items as preventative maintenance if they were known to have issues.
My son in law currently uses the truck as his daily driver.
My son in law currently uses the truck as his daily driver.
#14
04-09-2017, 05:22 PM
Alright guys, slave is installed. I have to say that the pedal feel is 100 times better! And now feels more like a car than a farm tractor. For some reason the other slave and master made it feel really stiff, but this LUK set up really softened it up like I figured that it would. The removal and install was a lot easier than I thought it would be. The only difficulty I ran into was having to use a pair of vise grips in the cab to twist the master on the fire wall to remove it. The installation of the new one was a breeze. Just like it was said in an earlier post, a quarter turn to pull it out and then the same way to install it. I was going to do a write up and I think I still will, but I will post a couple of pictures here because, truth be told, there isn't really much to write about other than what is already been said.
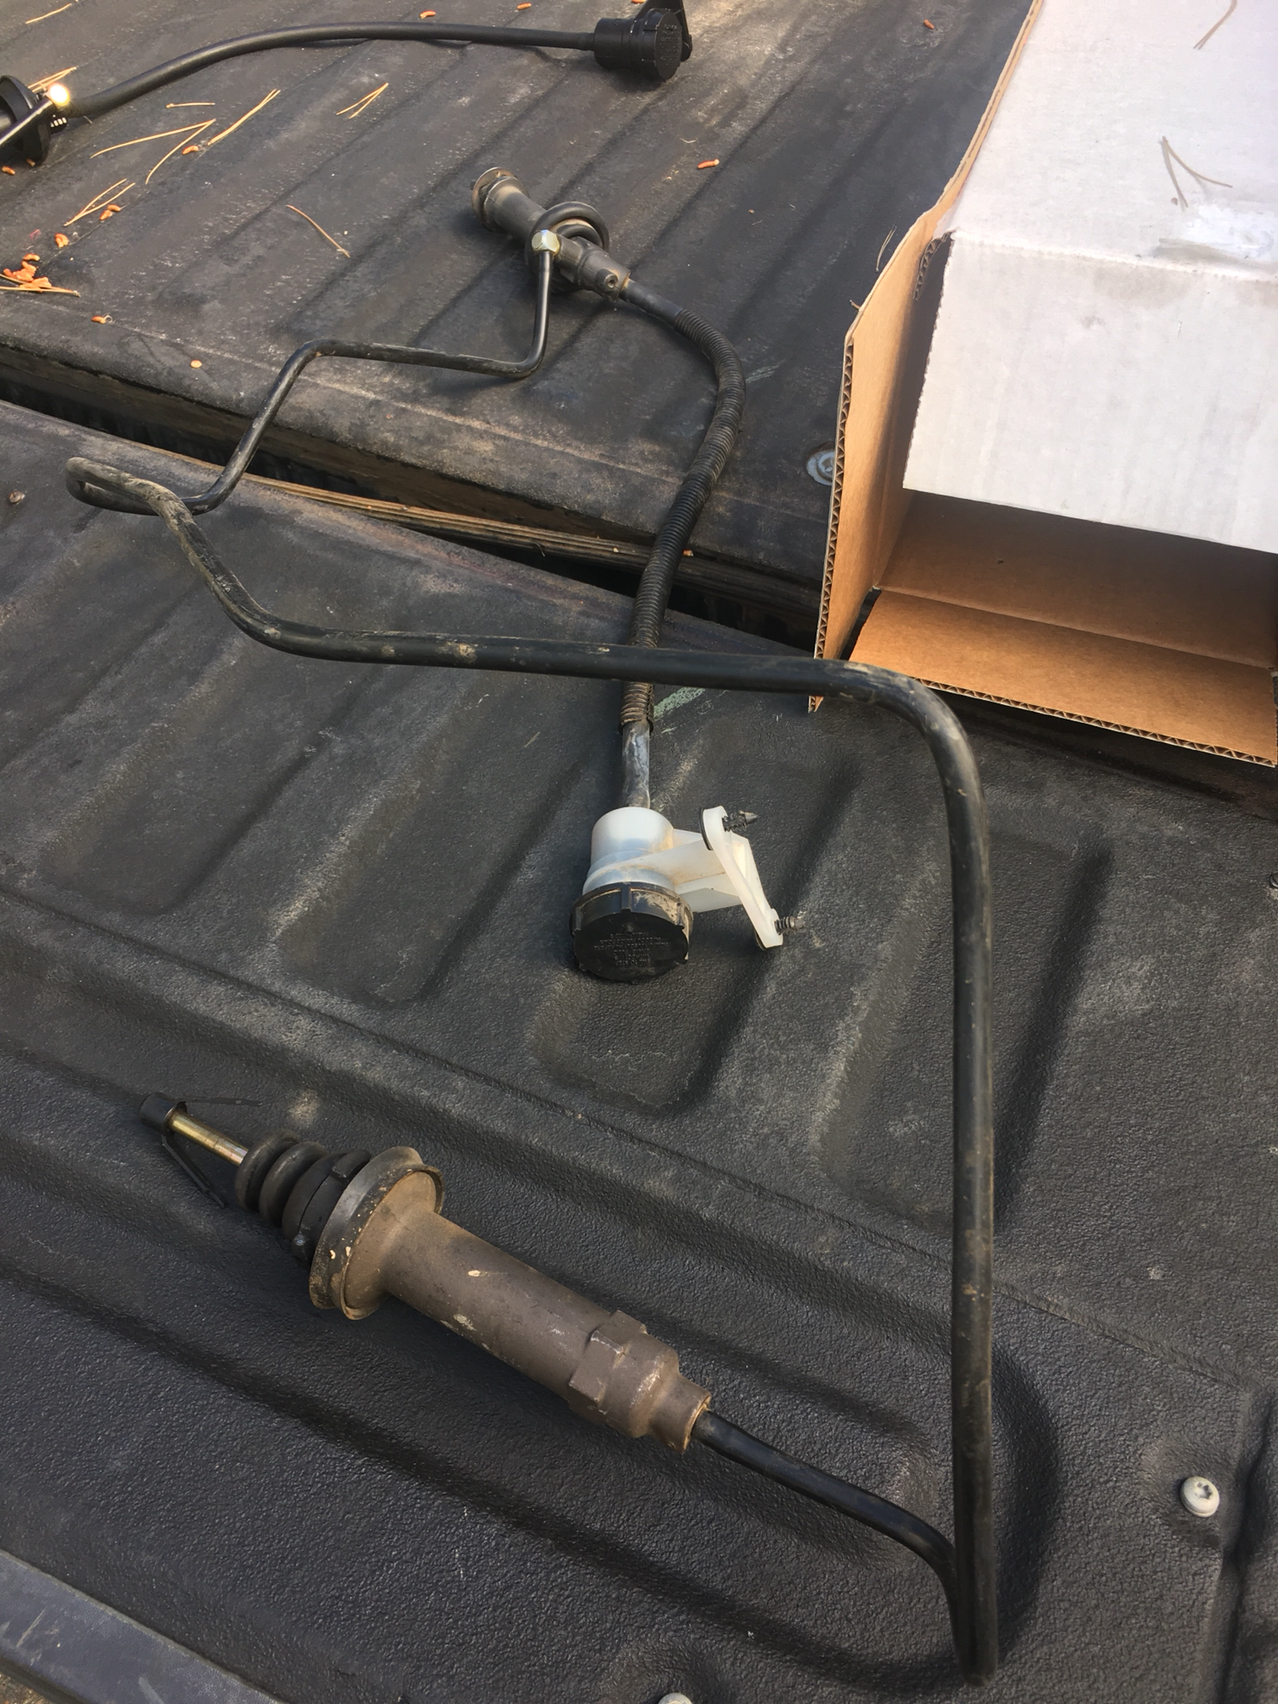
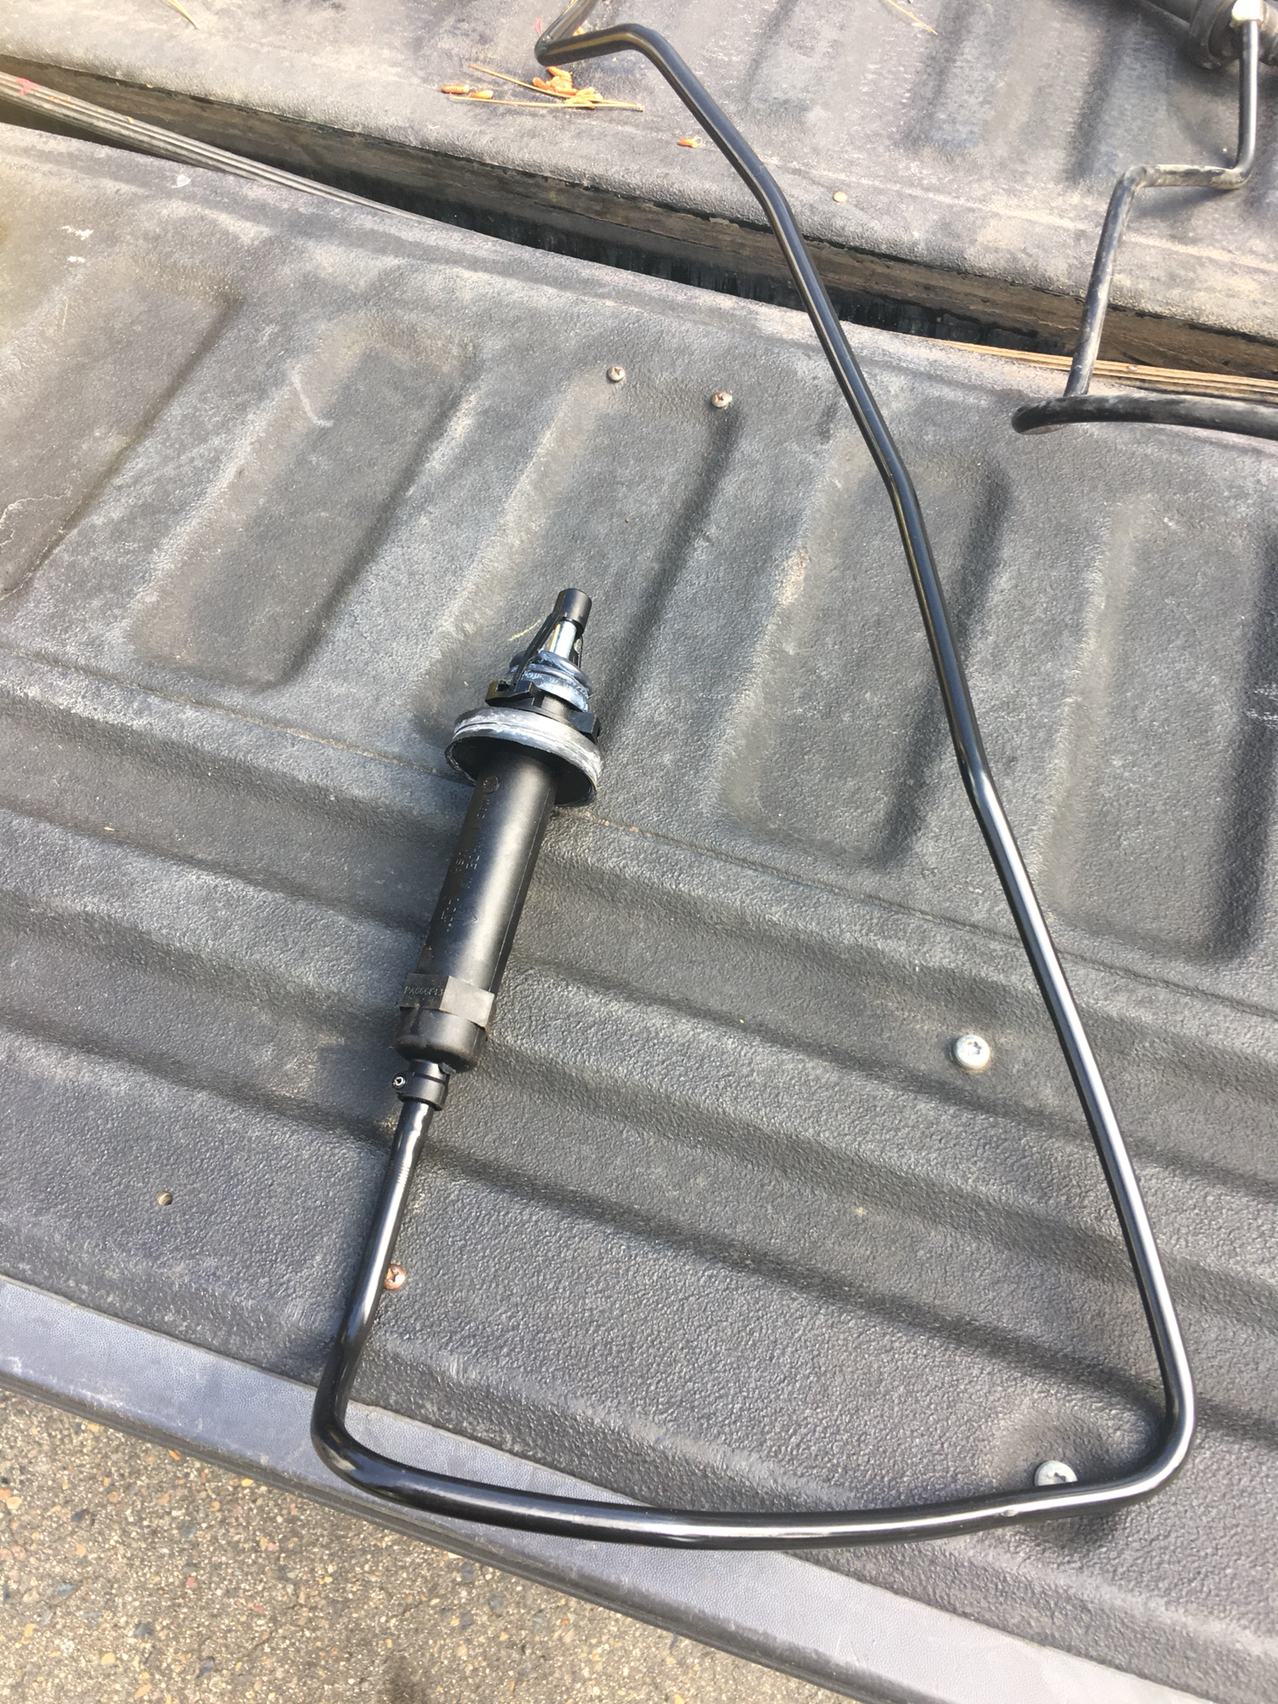
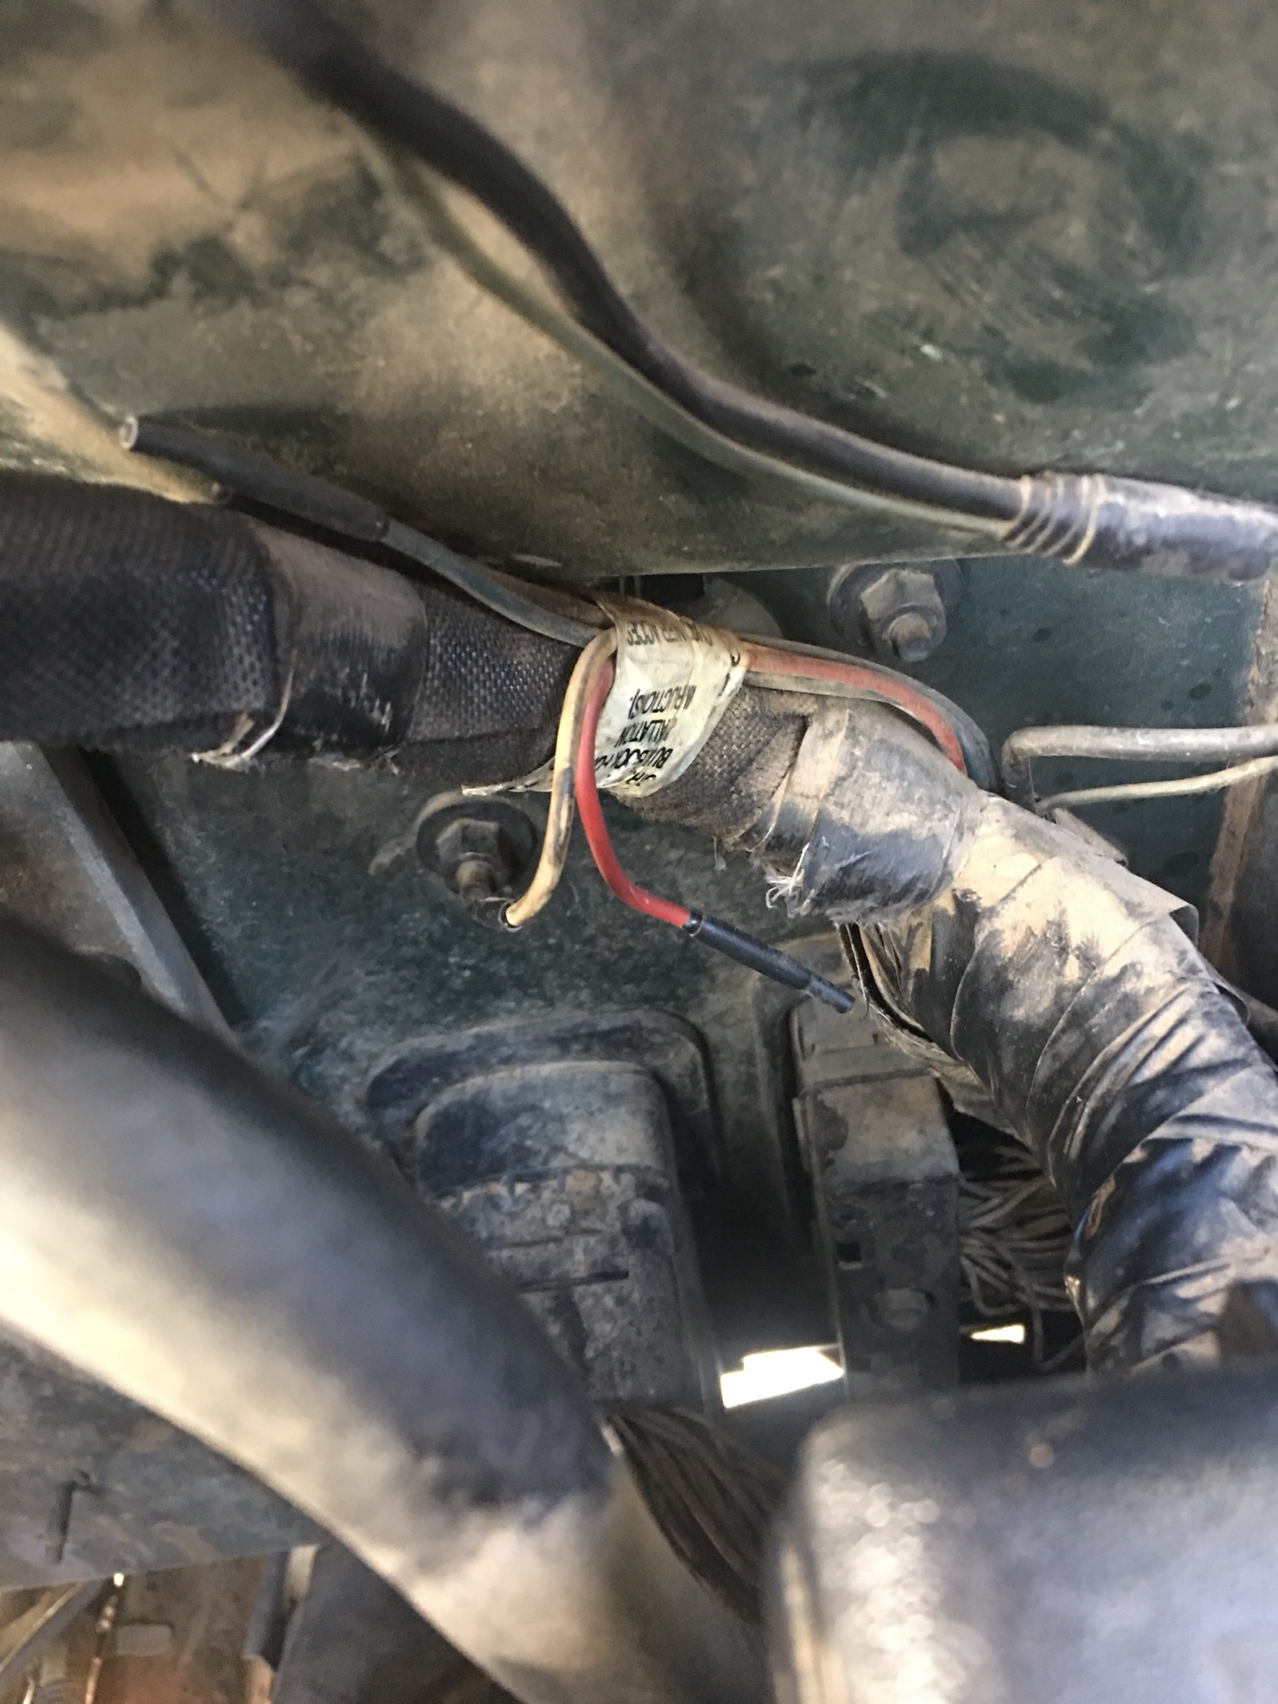
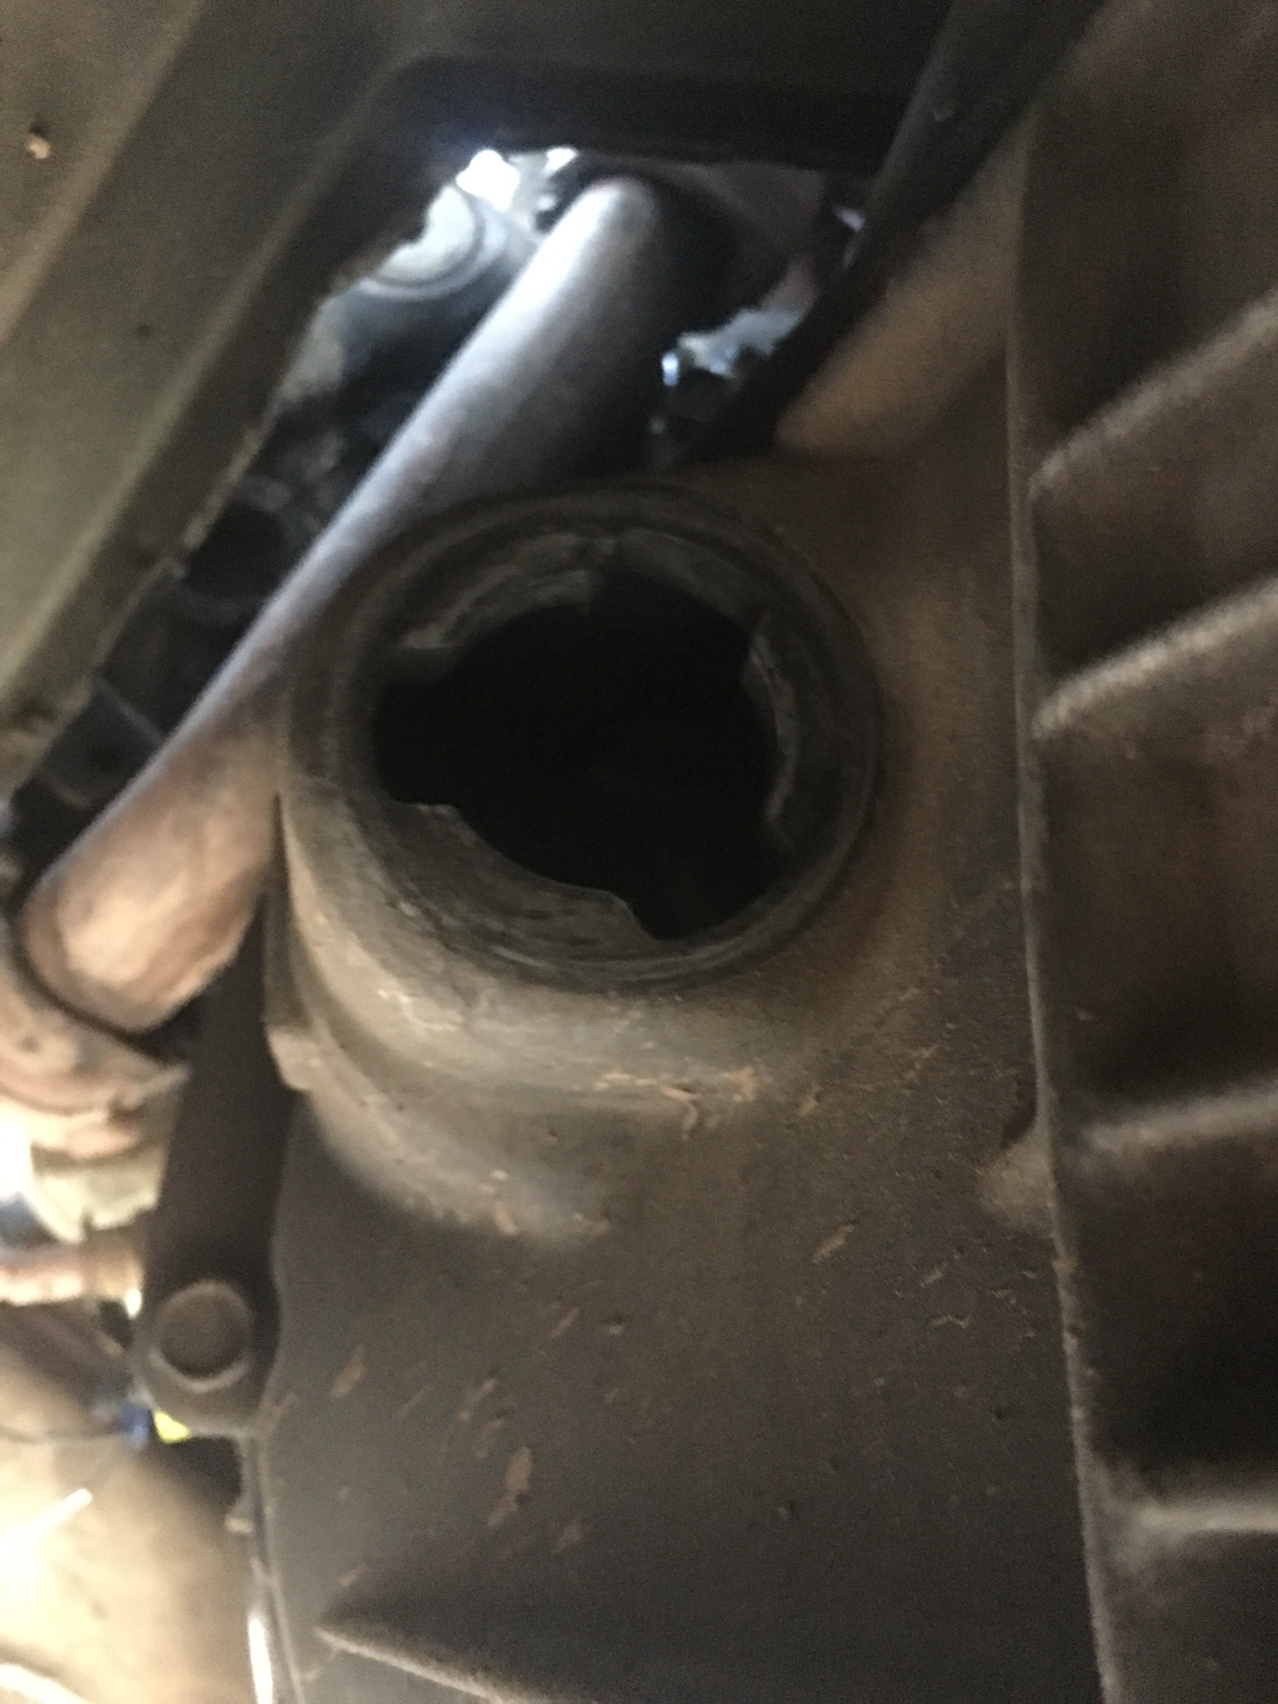
The top photo is the old unit, and the bottom photo is the new set up. The photo on the fire wall isn't that great, but the place where the master goes into is right above where the PCM is located. The last photo is the location in the transmission where the slave is installed.
Let me know if anyone has any questions. Thanks for all your help guys.
#15
04-09-2017, 05:42 PM
Fleet Owner
Did you bleed the system prior to re-installing it?
The 1/4 turn, was that turning the part that is joined to the transmission?
Did you pull the assembly out from the top or bottom once everything was loose?
The only symptoms you were having were a difficult to depress pedal?
The slave portion is the reservoir down to the first plunger?
The master is the portion with the longer/more twisted line?
Did you only replace the slave portion, or the entire assembly?