1948 - 1956 F1, F100 & Larger F-Series Trucks Discuss the Fat Fendered and Classic Ford Trucks

My daughter's 4 year project and counting

Thread Tools
 
Search this Thread
 
  #121  
Old 06-26-2019, 08:01 PM
Skip1970's Avatar
Skip1970
Skip1970 is offline
Hotshot
Join Date: Nov 2008
Location: Semper Fi tell I die!
Posts: 15,014
Received 31 Likes on 22 Posts
your build and daughter are both beautiful. congrats to a great dad and craftsman.
 
The following users liked this post:
  #122  
Old 06-27-2019, 01:28 AM
mytoolman's Avatar
mytoolman
mytoolman is offline
Laughing Gas
Join Date: Nov 2015
Location: San Diego
Posts: 907
Received 67 Likes on 32 Posts
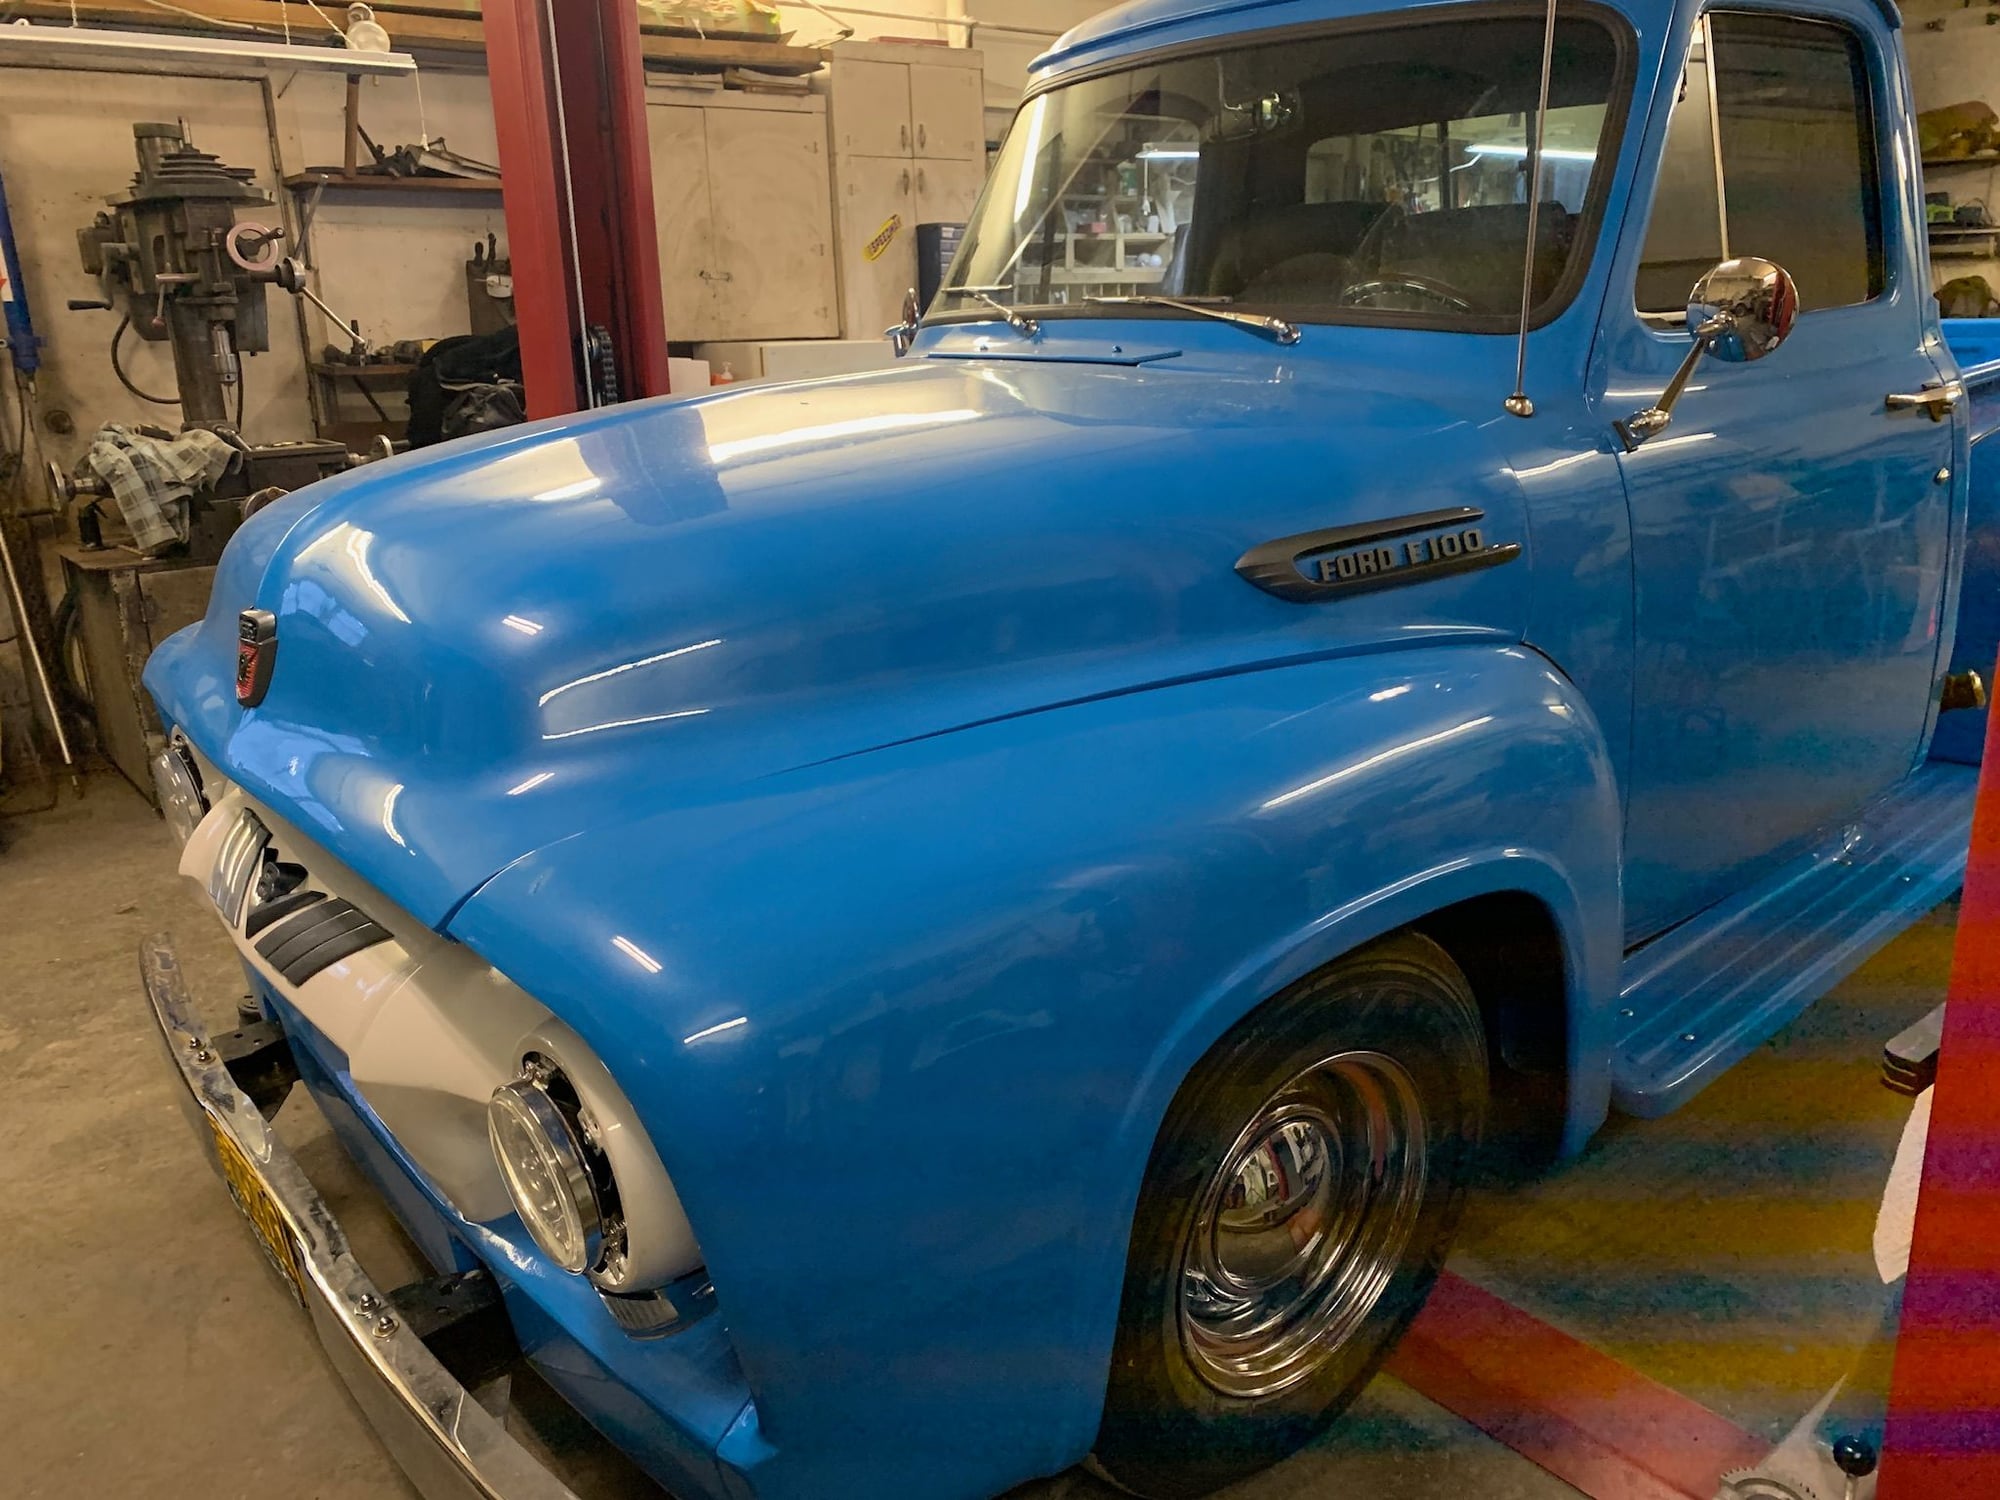
I really like that shade of blue....what is it?.....What brand of paint...paint code???? I want to go blue on Edith...My 55 C600 resto mod...
 
  #123  
Old 06-27-2019, 10:46 AM
Speedcanuck's Avatar
Speedcanuck
Speedcanuck is offline
Senior User
Thread Starter
Join Date: Mar 2014
Location: Alberta Canada
Posts: 103
Received 5 Likes on 5 Posts
Valspar LVB paint code S3317
white epoxy primer, 3 coats of paint, 1 coat of clear with silver pearl, 3 coats of clear on top.

my daughter is in 3rd year university.

not quite complete, still got the emblems to put on, modify door panels with cup holder. Little things.
 
  #124  
Old 06-27-2019, 01:26 PM
vonhef's Avatar
vonhef
vonhef is offline
Senior User
Join Date: May 2018
Location: God's Country (Oklahoma)
Posts: 187
Likes: 0
Received 6 Likes on 5 Posts
Very nice build! Thank you for sharing your experience.
 
  #125  
Old 07-03-2019, 05:03 PM
Johnny Mayday's Avatar
Johnny Mayday
Johnny Mayday is offline
FTE Town Crier
Join Date: Jan 2017
Posts: 953
Likes: 0
Received 0 Likes on 0 Posts
I saw the write up on the front page, and I love stories like this... I always wanted to do something like this with my dad, but there never seemed to be the time. As far as projects this intense go, four years is a pretty good turnaround time! Bravo!
 
  #126  
Old 07-03-2019, 05:44 PM
Speedcanuck's Avatar
Speedcanuck
Speedcanuck is offline
Senior User
Thread Starter
Join Date: Mar 2014
Location: Alberta Canada
Posts: 103
Received 5 Likes on 5 Posts
4 years was when i started documenting it here. It will be just shy of 7 years at ‘completion’ this year- October 31st 2012 start. (cause you NEVER complete a project like this).

The time will never be there. Just do it and get where you are going. I admit is was heroic pushing through some of the stages, but as i said to my dad, ‘how do you eat an elephant?......one bite at a time!’

he would say ‘ you bit off more than you can chew! ‘, and i would reply ‘im chewing dad, im chewing!’

the final word to my dad is ‘i ate it!’
 
  #127  
Old 04-06-2020, 03:13 PM
Speedcanuck's Avatar
Speedcanuck
Speedcanuck is offline
Senior User
Thread Starter
Join Date: Mar 2014
Location: Alberta Canada
Posts: 103
Received 5 Likes on 5 Posts
little updates


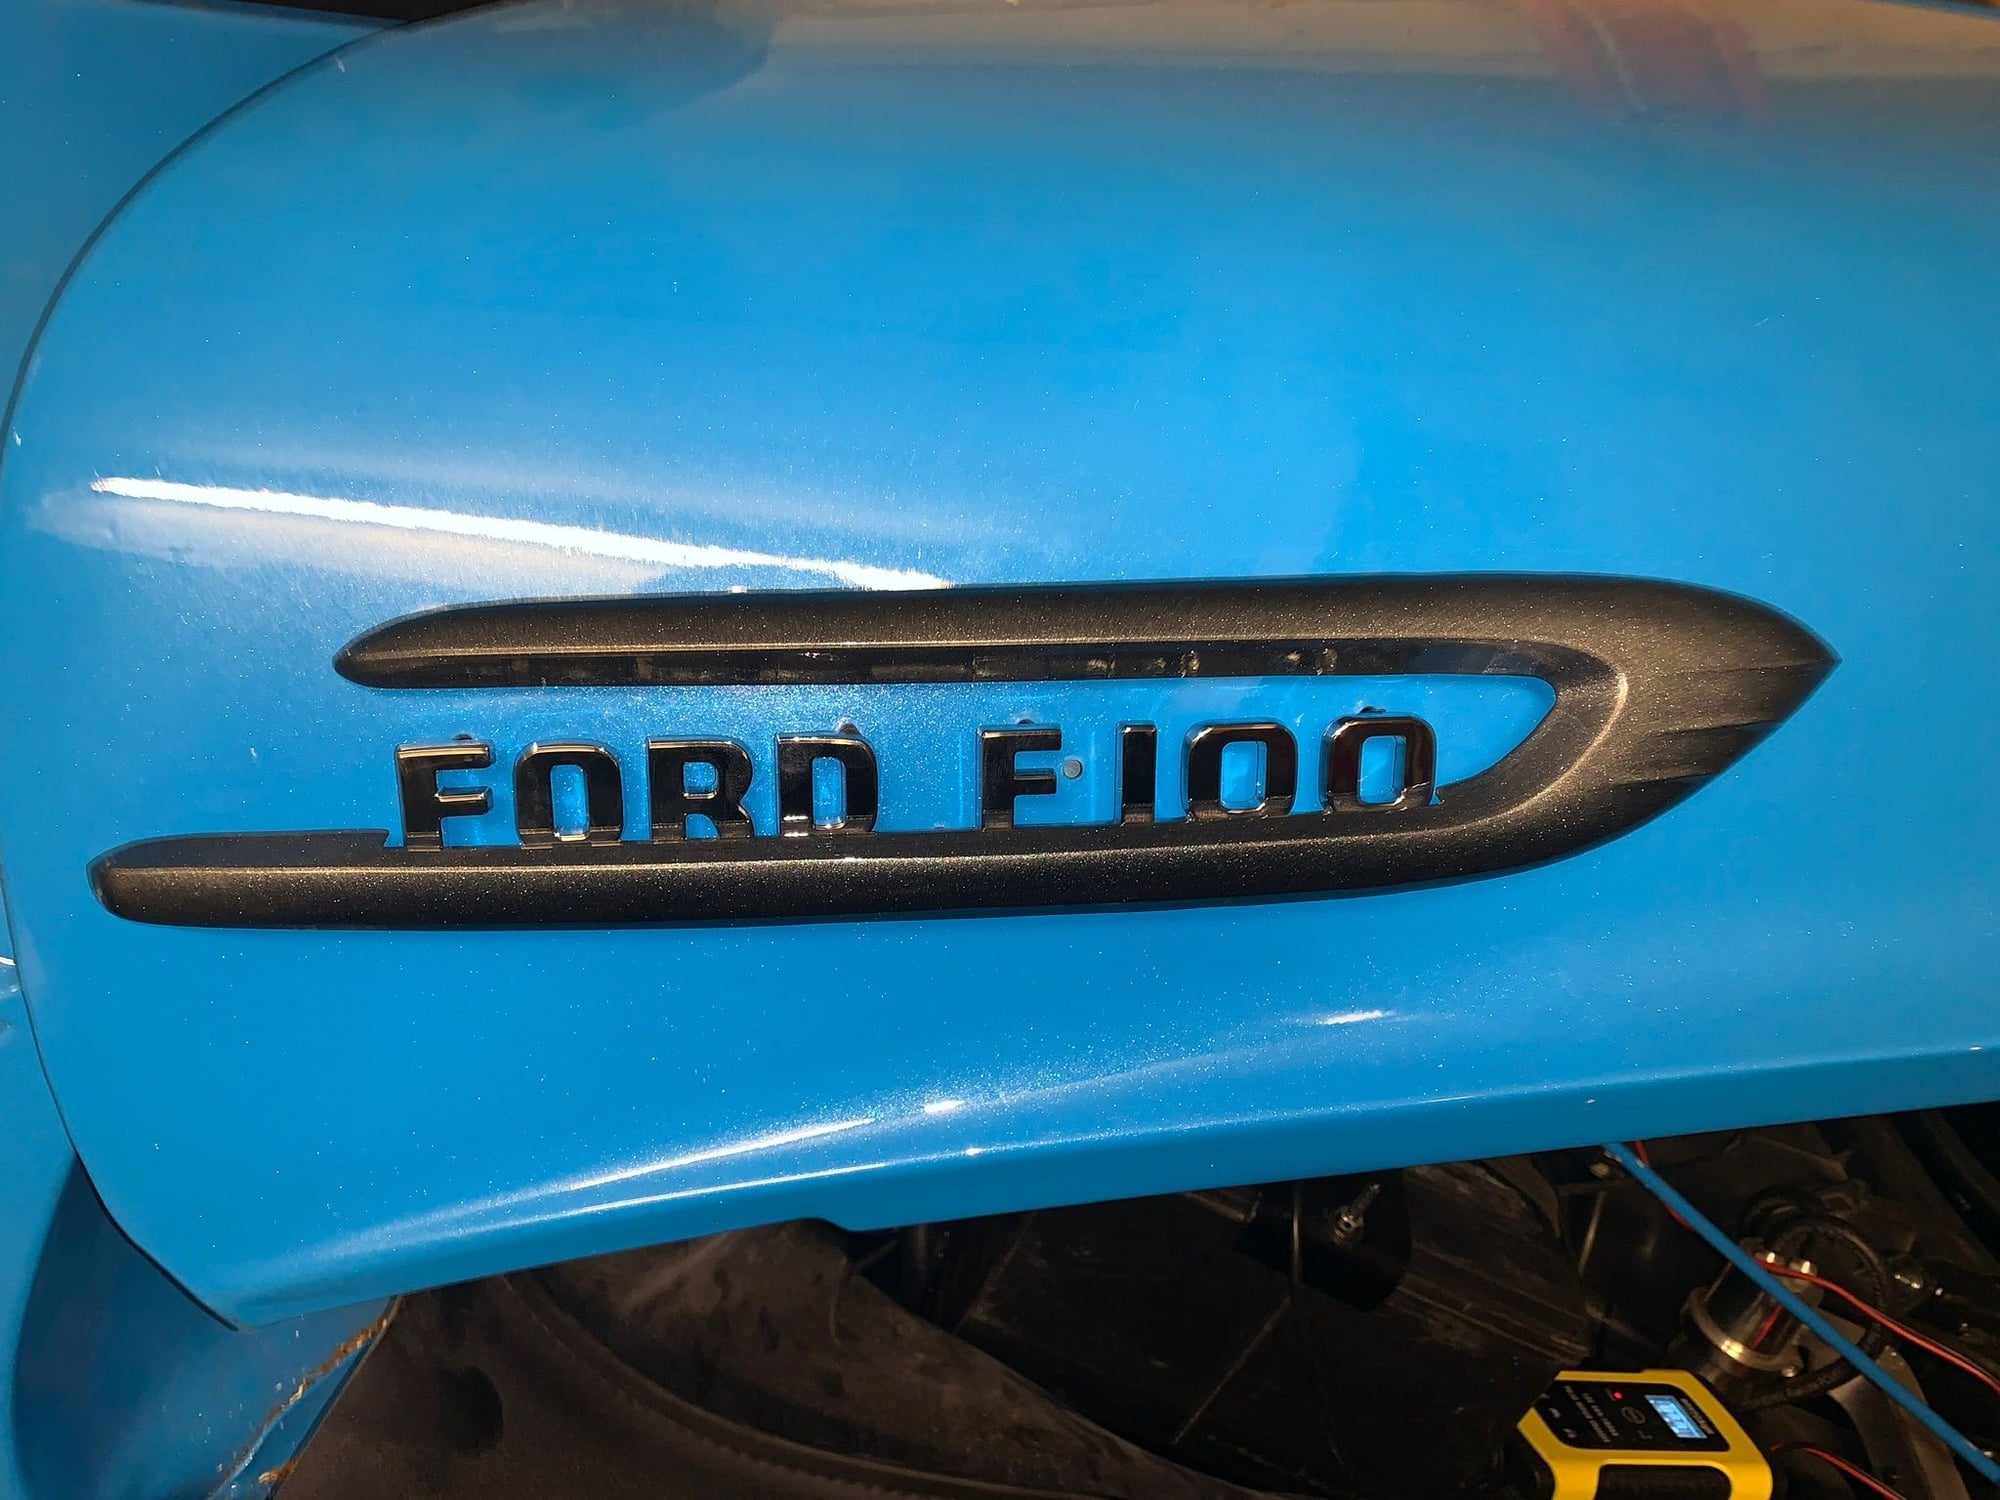
So couldn't rationalize paying $100 per emblem to re-chrome, and so I did some trial and error, and ended up just black gloss and then high pearl coat in the clear.
Wanted to also keep the original emblems on the truck.
They look awesome! Even better in the sunlight!

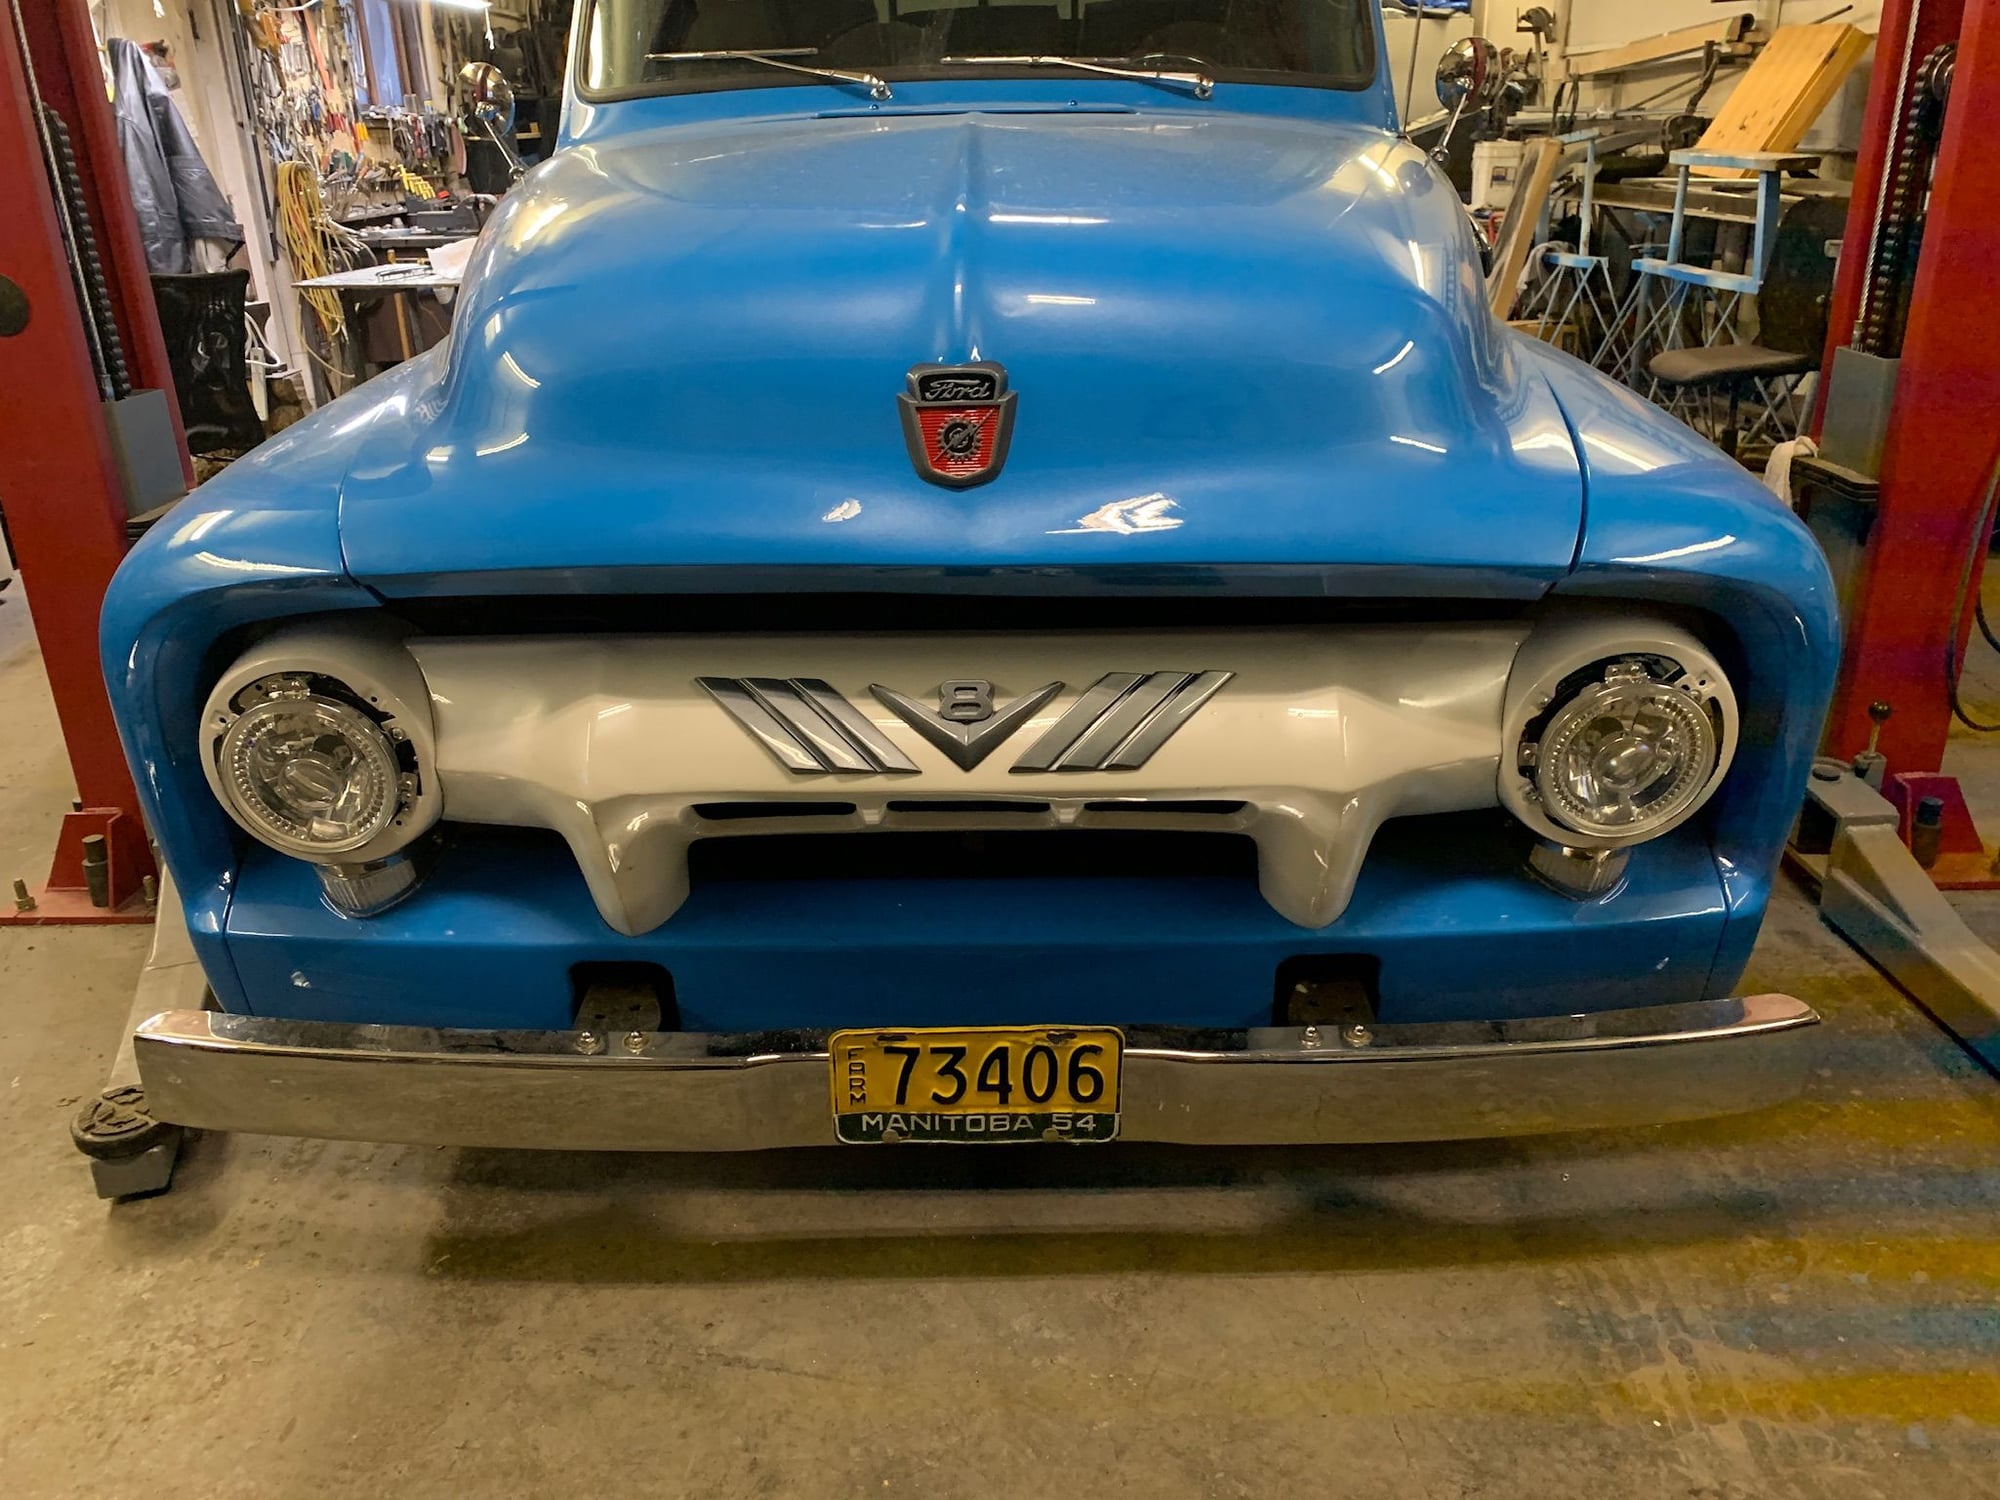
Just got to find the bolts for the headlight rings......

Oh and notice the original '54 Manitoba plate? my oldest daughter found it at a farmers market in Vancouver. Was actually a full plate in '53 (Yellow), and in '54 they just made a small bottom to make the year (Green). why Manitoba? That's where my d-in-law bought the truck in '54.
 
  #128  
Old 04-06-2020, 03:44 PM
56panelford's Avatar
56panelford
56panelford is offline
FTE Legend
Join Date: Oct 2005
Location: northwestern Ontario
Posts: 262,946
Received 4,130 Likes on 2,655 Posts
Emblems turned out great..
 
  #129  
Old 03-14-2021, 03:35 PM
ingo's Avatar
ingo
ingo is offline
More Turbo
Join Date: Jun 2005
Posts: 616
Received 157 Likes on 87 Posts
Originally Posted by Speedcanuck
seats


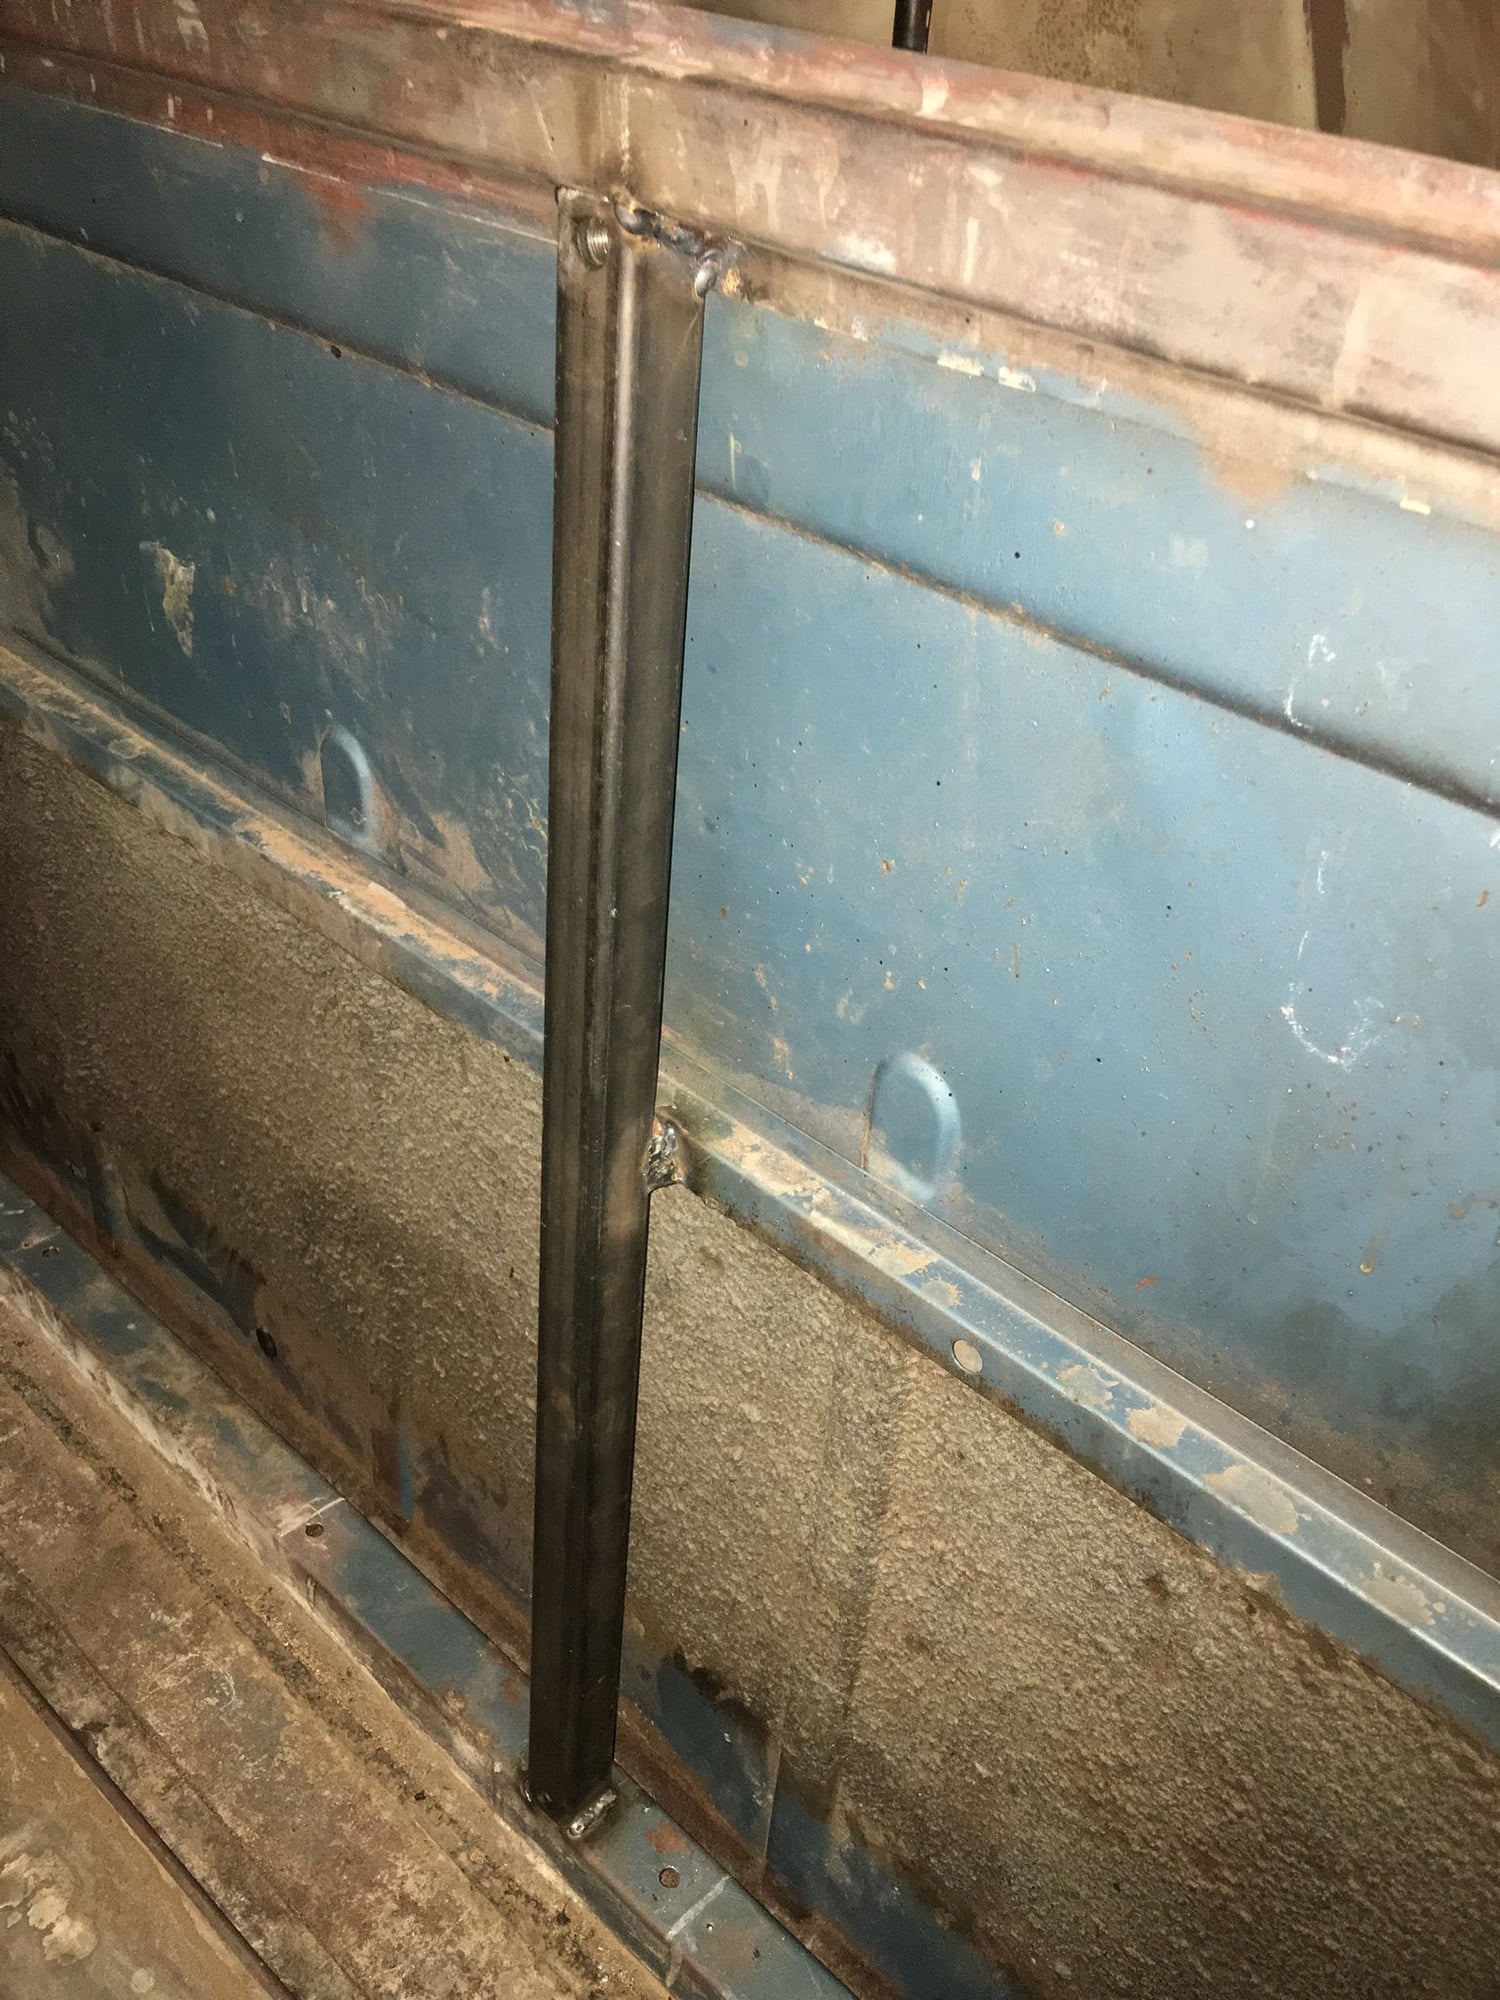
very nice build, would you show pics how you fixed the seatbelt nut in the pillar?

 
  #130  
Old 03-14-2021, 04:50 PM
vetrnz06's Avatar
vetrnz06
vetrnz06 is offline
Cross-Country
Join Date: Jul 2017
Location: ocala,fl
Posts: 60
Likes: 0
Received 6 Likes on 4 Posts
great job to everybody on the build !
 
  #131  
Old 03-14-2021, 08:37 PM
Speedcanuck's Avatar
Speedcanuck
Speedcanuck is offline
Senior User
Thread Starter
Join Date: Mar 2014
Location: Alberta Canada
Posts: 103
Received 5 Likes on 5 Posts
Originally Posted by ingo
very nice build, would you show pics how you fixed the seatbelt nut in the pillar?


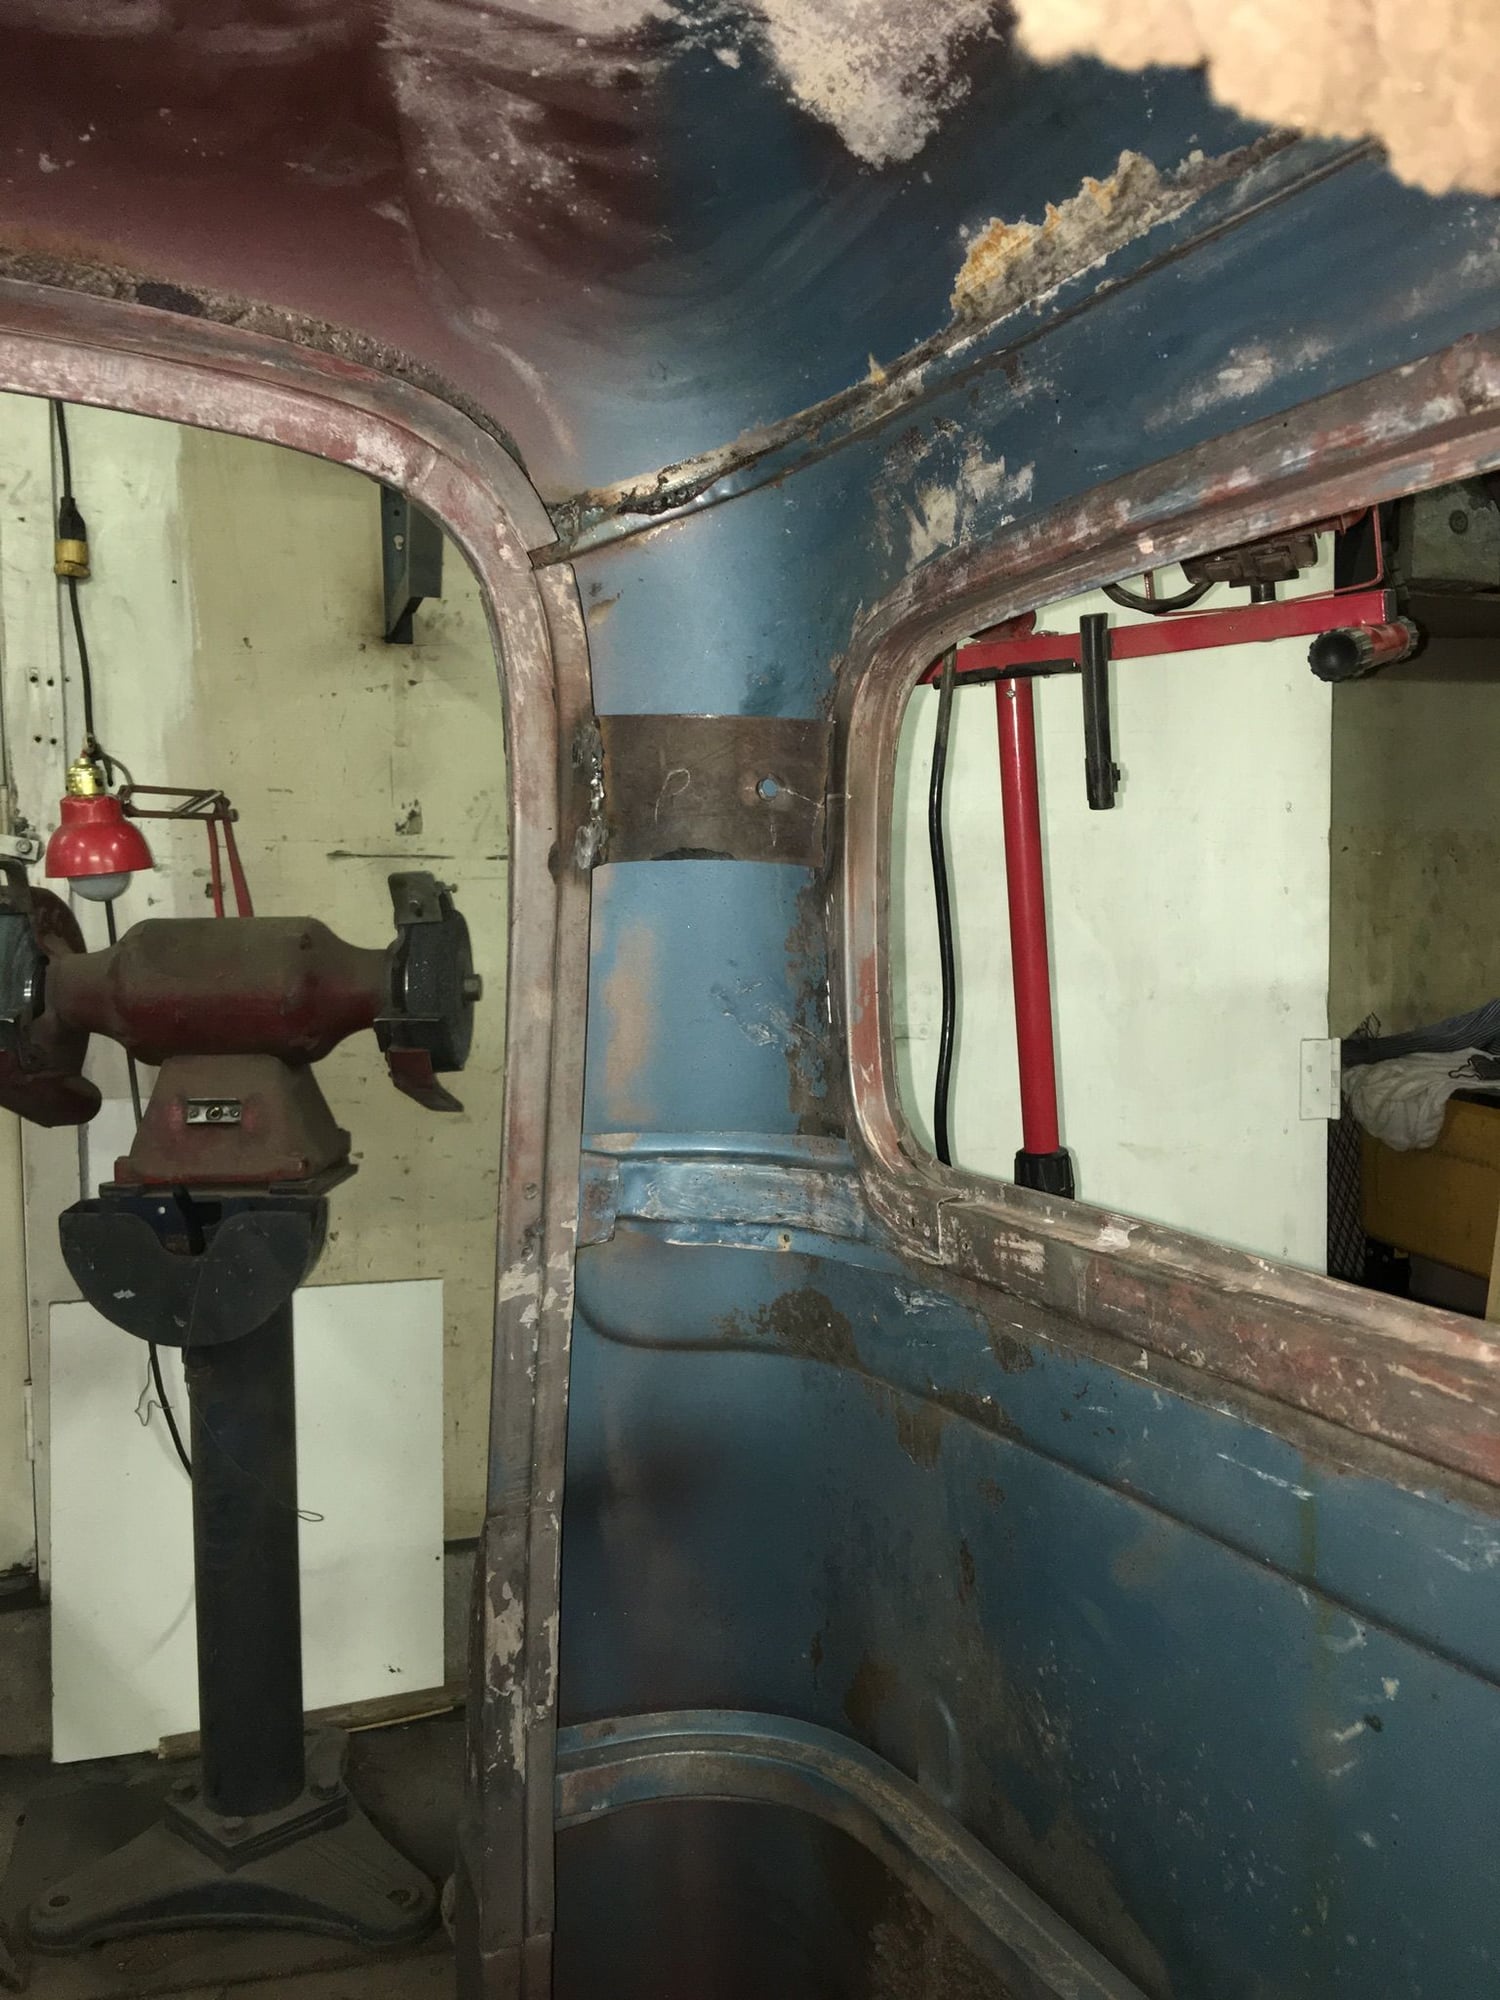
the driver and passenger shoulder strap was mounted in a plate welded right into the upper door frame, with nut welded onto back side. (Put sacrificial bolt into nut then weld in. Allow to cool before removing bolt. Bolt sometimes gets damaged ). Middle shoulder strap was a post mounted to rear frame (new frame for seat belts and speakers). Bolt in 1” square tube, then welded to rear cab straps.
 
  #132  
Old 03-15-2021, 03:30 AM
ingo's Avatar
ingo
ingo is offline
More Turbo
Join Date: Jun 2005
Posts: 616
Received 157 Likes on 87 Posts
Originally Posted by Speedcanuck


the driver and passenger shoulder strap was mounted in a plate welded right into the upper door frame, with nut welded onto back side. (Put sacrificial bolt into nut then weld in. Allow to cool before removing bolt. Bolt sometimes gets damaged ). Middle shoulder strap was a post mounted to rear frame (new frame for seat belts and speakers). Bolt in 1” square tube, then welded to rear cab straps.
saved ... thank you
 
  #133  
Old 03-15-2021, 08:43 AM
Speedcanuck's Avatar
Speedcanuck
Speedcanuck is offline
Senior User
Thread Starter
Join Date: Mar 2014
Location: Alberta Canada
Posts: 103
Received 5 Likes on 5 Posts
Originally Posted by ingo
saved ... thank you
Your welcome.
and please dont quote the pics on a reply.
 
  #134  
Old 03-15-2021, 07:29 PM
Marten's Avatar
Marten
Marten is offline
Laughing Gas
Join Date: Apr 2015
Location: Kemptville, ON,
Posts: 1,199
Received 250 Likes on 158 Posts
Trick my brother showed me. When welding nuts to whatever, put in the bolt to hold it but as soon as the welding is done, remove the bolt right away. it won't be stuck then but does if you let it cool first.
 
  #135  
Old 03-15-2021, 07:43 PM
Speedcanuck's Avatar
Speedcanuck
Speedcanuck is offline
Senior User
Thread Starter
Join Date: Mar 2014
Location: Alberta Canada
Posts: 103
Received 5 Likes on 5 Posts
Thanks marten, but by doing that the nut is likely too tight on the bolt when cool. You have to re cut the threads to make it perfect. By putting sacrificial bolt in, you arent screwing the seat belt bolt, and the bolt holds the shape of the nut as it cools. (Also lets it cool slower as more mass.) if your good with a tap, then go ahead and remove...btw, you reminded me, i did run a tap in after, just to be sure! So either way!


Quick Reply: My daughter's 4 year project and counting


All times are GMT -5. The time now is 02:57 AM.