
1979 F250 4x4 Build
#106
 04-21-2017, 09:27 AM


I believe the choke is set properly, but maybe I did that wrong too.
 Don't say that lol. I need one that's not cracked to replace mine hahaha. I'm really hoping that the used one I'm getting has no cracks, otherwise I'll pass on it.
Thanks!
Mini-update: 7 of 8 bolts in the passenger exhaust manifold are loose. 4 of 8 in the driver exhaust manifold are loose.
Shot everything with some more PB Blaster and SeaFoam Deep Creep to soak over night (4th night in a row).
Parts order came in last night.
1) Felpro full motor gasket kit (minus intake manifold)
2) Front driver turn signal socket
3) Cloyes double roller timing chain
4) Exhaust manifold bolt kit (Dorman Help! kit)
5) Felpro intake manifold gasket
More progress to come, hopefully soon too!
#107
04-21-2017, 09:42 AM
Motorcraft 2150. I believe the "fast idle cam adjustment" needs to be redone.
I believe the choke is set properly, but maybe I did that wrong too.
Don't say that lol. I need one that's not cracked to replace mine hahaha. I'm really hoping that the used one I'm getting has no cracks, otherwise I'll pass on it.
Thanks!
Mini-update: 7 of 8 bolts in the passenger exhaust manifold are loose. 4 of 8 in the driver exhaust manifold are loose.
Shot everything with some more PB Blaster and SeaFoam Deep Creep to soak over night (4th night in a row).
Parts order came in last night.
1) Felpro full motor gasket kit (minus intake manifold)
2) Front driver turn signal socket
3) Cloyes double roller timing chain
4) Exhaust manifold bolt kit (Dorman Help! kit)
5) Felpro intake manifold gasket
More progress to come, hopefully soon too!
I believe the choke is set properly, but maybe I did that wrong too.
Don't say that lol. I need one that's not cracked to replace mine hahaha. I'm really hoping that the used one I'm getting has no cracks, otherwise I'll pass on it.Thanks!
Mini-update: 7 of 8 bolts in the passenger exhaust manifold are loose. 4 of 8 in the driver exhaust manifold are loose.
Shot everything with some more PB Blaster and SeaFoam Deep Creep to soak over night (4th night in a row).
Parts order came in last night.
1) Felpro full motor gasket kit (minus intake manifold)
2) Front driver turn signal socket
3) Cloyes double roller timing chain
4) Exhaust manifold bolt kit (Dorman Help! kit)
5) Felpro intake manifold gasket
More progress to come, hopefully soon too!
#108
04-21-2017, 10:30 AM
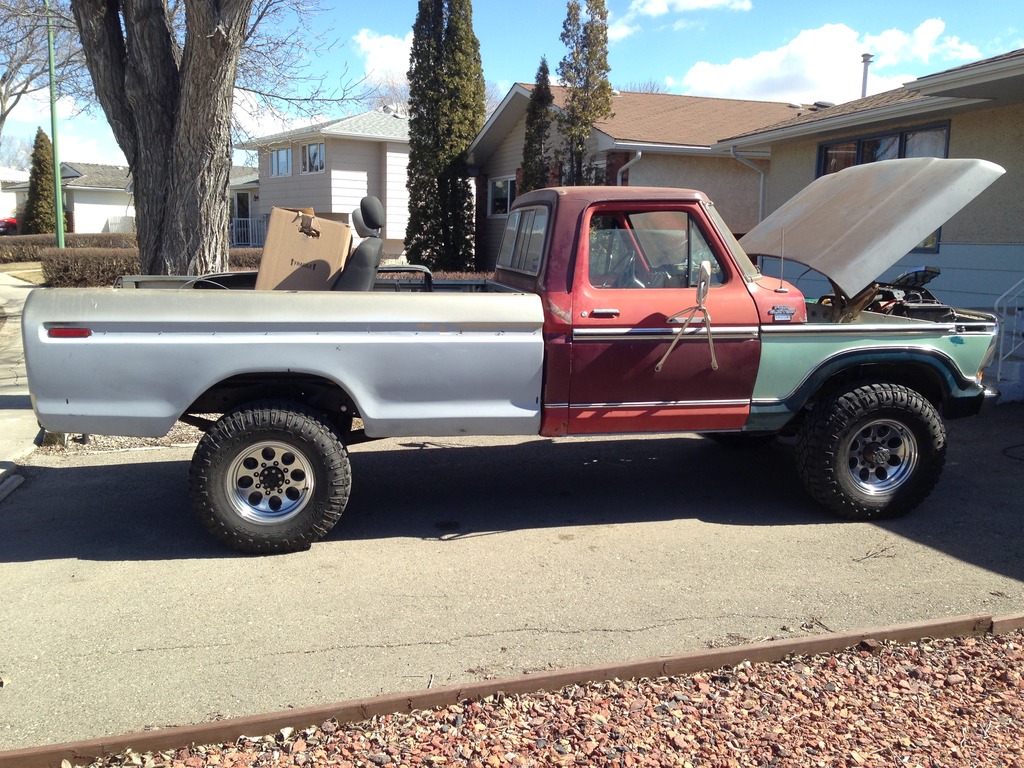
Back on Feb 17 of this year, I got t-boned by a deer. Yes, you read that correctly... a deer came up out of the ditch and hit me in my old beater. Neither my daily driver, nor the deer lived.
So I'm stuck borrowing a friends vehicle since then, but the time has come for me to return it (April 29). I've been lucky enough to have it for over 2 months, so I'm grateful to my friend while I've been chipping away at my 1979 rig.
Stock manifolds are a quick way for me to get this truck up and running, and keep costs extremely low.
Meanwhile I've been searching for a new daily driver since Feb 17 and haven't really come up with anything I want to buy just yet - call me picky
 lol.
lol.
#109
04-21-2017, 10:34 AM
Cost - the canadian dollar is awful right now and I don't want to spend the moola to hang my full exhaust system from my truck just yet. Headers aint cheap!
Back on Feb 17 of this year, I got t-boned by a deer. Yes, you read that correctly... a deer came up out of the ditch and hit me in my old beater. Neither my daily driver, nor the deer lived.
So I'm stuck borrowing a friends vehicle since then, but the time has come for me to return it (April 29). I've been lucky enough to have it for over 2 months, so I'm grateful to my friend while I've been chipping away at my 1979 rig.
Stock manifolds are a quick way for me to get this truck up and running, and keep costs extremely low.
Meanwhile I've been searching for a new daily driver since Feb 17 and haven't really come up with anything I want to buy just yet - call me picky lol.
Back on Feb 17 of this year, I got t-boned by a deer. Yes, you read that correctly... a deer came up out of the ditch and hit me in my old beater. Neither my daily driver, nor the deer lived.
So I'm stuck borrowing a friends vehicle since then, but the time has come for me to return it (April 29). I've been lucky enough to have it for over 2 months, so I'm grateful to my friend while I've been chipping away at my 1979 rig.
Stock manifolds are a quick way for me to get this truck up and running, and keep costs extremely low.
Meanwhile I've been searching for a new daily driver since Feb 17 and haven't really come up with anything I want to buy just yet - call me picky
lol.
#110
04-21-2017, 03:16 PM
Cargo Master
[QUOTE=Aaron-71;17131824]Motorcraft 2150. I believe the "fast idle cam adjustment" needs to be redone.
I believe the choke is set properly, but maybe I did that wrong too.
I hate to admit it but I have never worked on or owned a Motorcraft carb. It's always been Edelbrock mostly, a Carter and Holley once or twice. Every carbed engine either came with an Edel or no carb at all. I'm sure there is a Motorcraft pro or two on FTE to assist you. Sorry, I can't.
#111
04-24-2017, 09:43 AM
Well... I spoke too soon.
I broke an exhaust bolt off in my head.
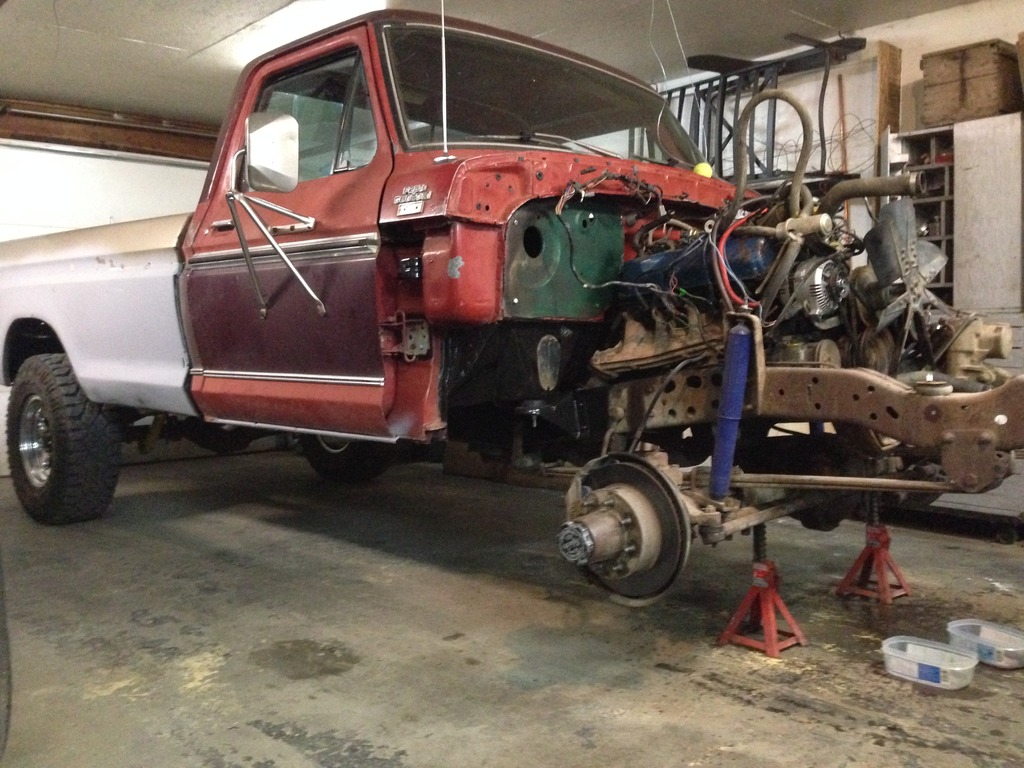
Looks like I'll be pulling the front clip off the truck to do a few things on my to-do list.
With the front clip off, I'll have much better access to the entire motor and be able to de-grease everything fairly well, including the intake and heads.
I'm not super thrilled about breaking my first bolt off, but it's not the end of the world either - working on a bench is easier than drilling it out while on the motor.
Yes it does! I'm a lucky guy
Not a problem. I read through the instructions/threads on FTE, but likely missed or forgot a step.
I know FMC400 has done a couple of really good write-ups which I found recently on tuning the 2100's. Once the front clip is off, I'll probably pull the carb again and re-set everything. Start from scratch and do a full fine-tune.
I broke an exhaust bolt off in my head.
Looks like I'll be pulling the front clip off the truck to do a few things on my to-do list.
With the front clip off, I'll have much better access to the entire motor and be able to de-grease everything fairly well, including the intake and heads.
I'm not super thrilled about breaking my first bolt off, but it's not the end of the world either - working on a bench is easier than drilling it out while on the motor.
I hate to admit it but I have never worked on or owned a Motorcraft carb. It's always been Edelbrock mostly, a Carter and Holley once or twice. Every carbed engine either came with an Edel or no carb at all. I'm sure there is a Motorcraft pro or two on FTE to assist you. Sorry, I can't.
I know FMC400 has done a couple of really good write-ups which I found recently on tuning the 2100's. Once the front clip is off, I'll probably pull the carb again and re-set everything. Start from scratch and do a full fine-tune.
#112
05-03-2017, 03:23 PM
Update time:
What started as this with an exhaust leak...
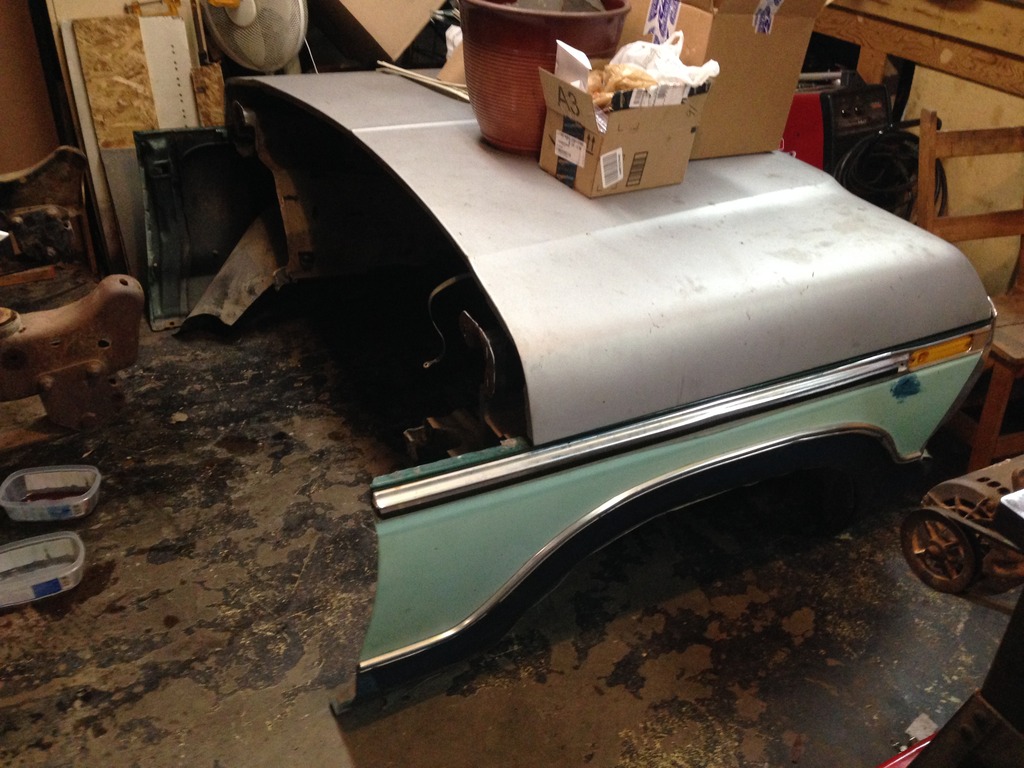
Quickly turned into this:
The front clip is now my new parts bench
So this is where I started:
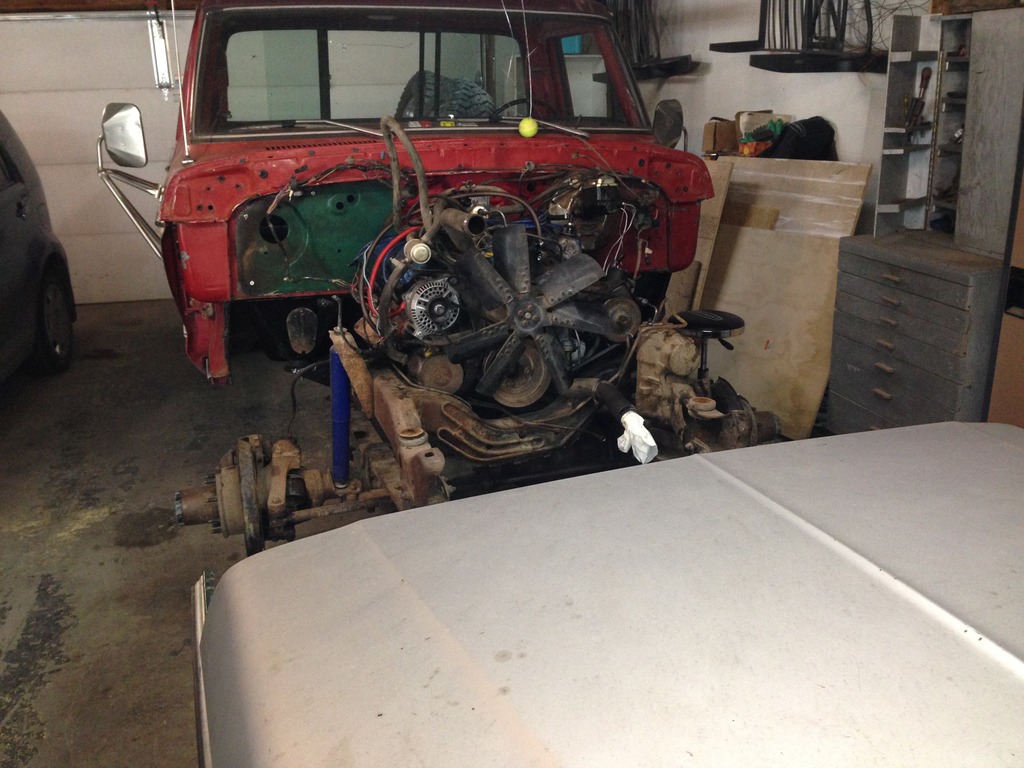
Not surprisingly, the first thing to get removed is the EGR smog pump.
Next, it's time to tackle that pesky exhaust manifold. Notice the Y-pipe is supported under the truck and the manifold is loose + moved forward. I couldn't reach the collector studs no matter how hard I tried!!!
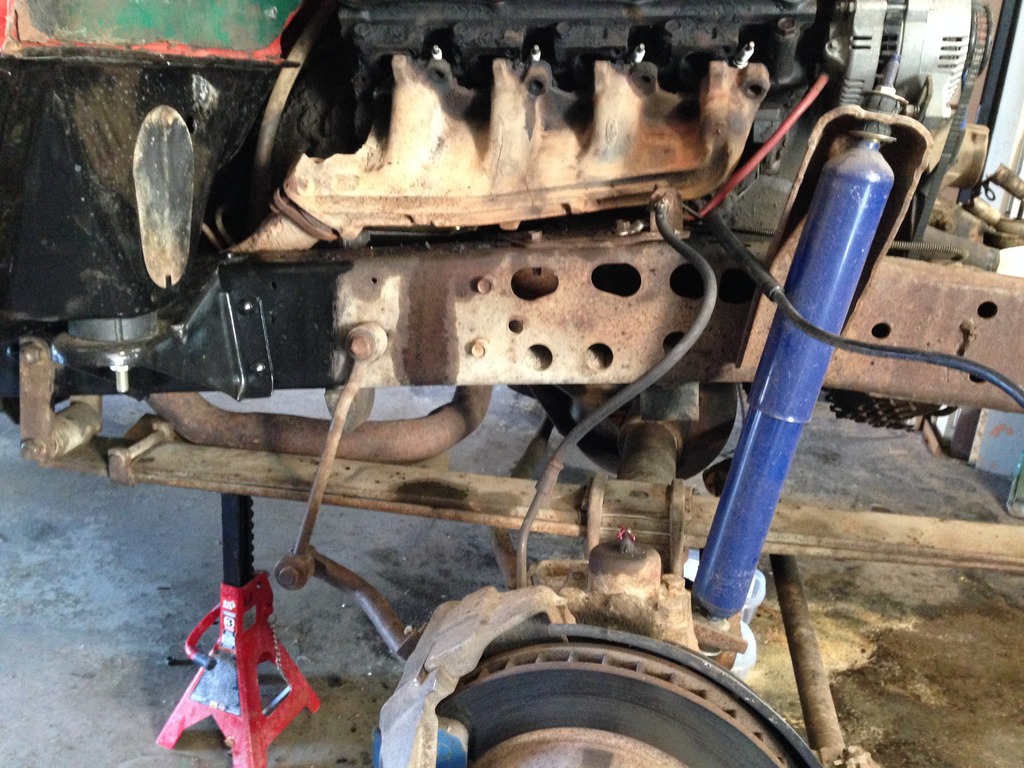
With some help, I crawled under the truck with a long extension and an impact. While the exhaust system was pulled up and forwards, I let the impact do all the work. Took a lot of balancing/coordinating to get the manifold this far forward.
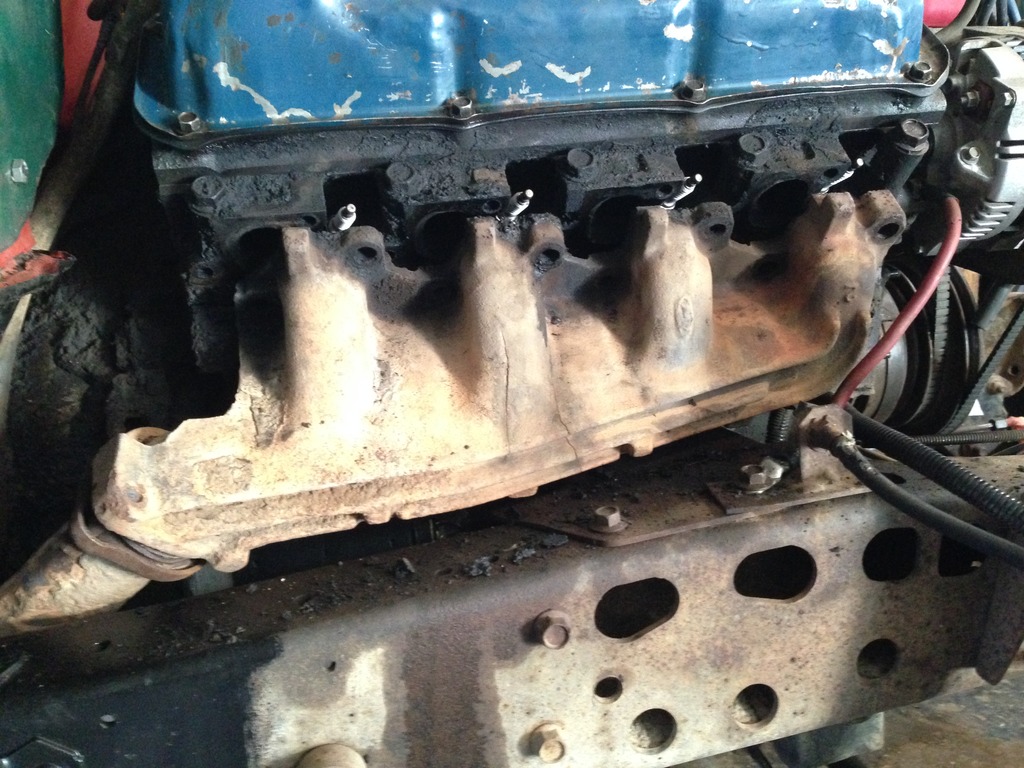
Eventually the exhaust system came off. Both manifolds are cracked, so they're both getting tossed. Headers? Would love to but can't. It's not in the budget right now.
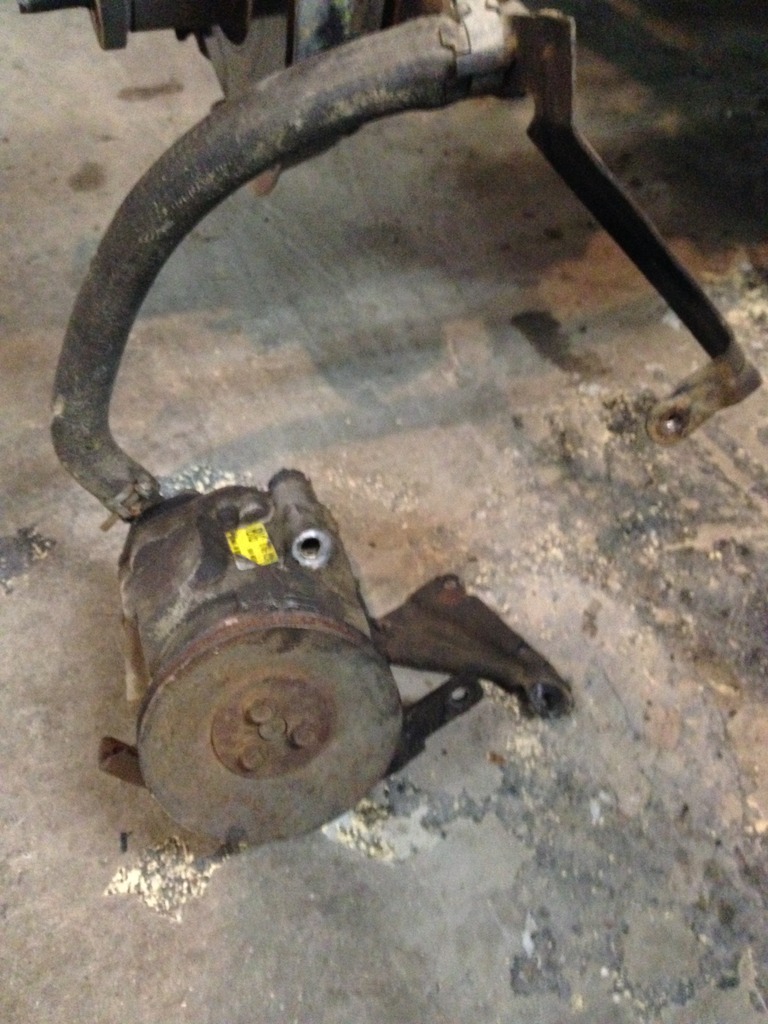
Next I yanked the power steering pump off and brackets.
And looky here what came pouring out of the pump!!!! What the heck would cause this??
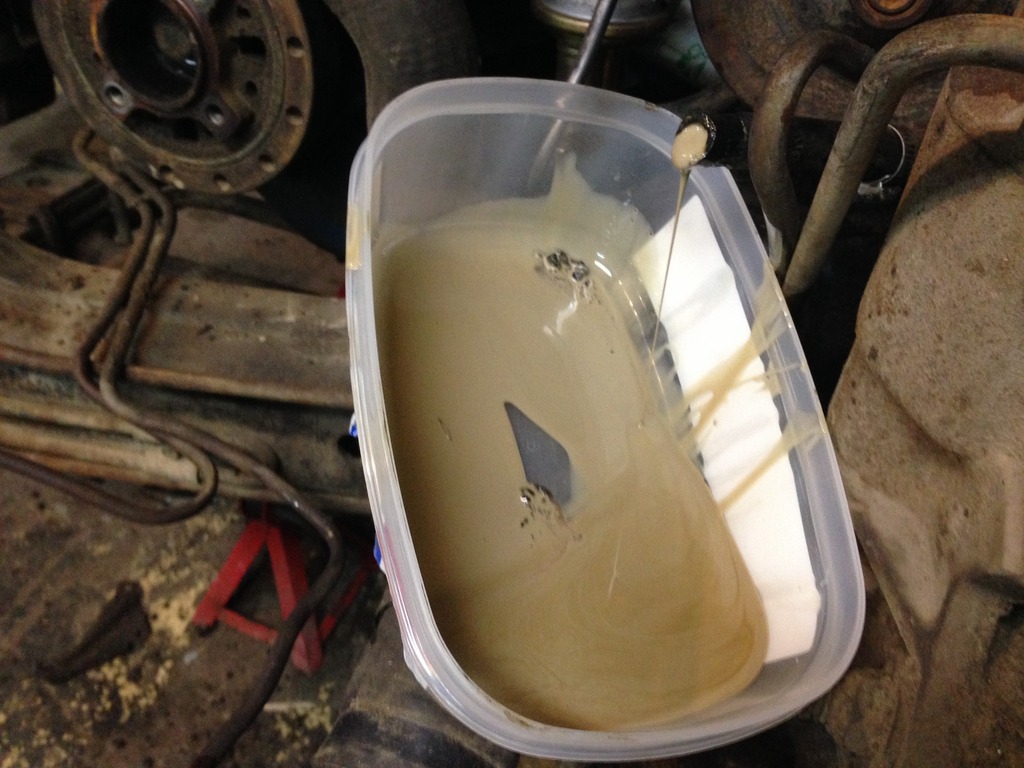
Notice the amount of grease on the driver side of the frame. Pretty sure I've got leaky power steering hoses - which may be the cause of the milky brown power steering fluid (aeration).

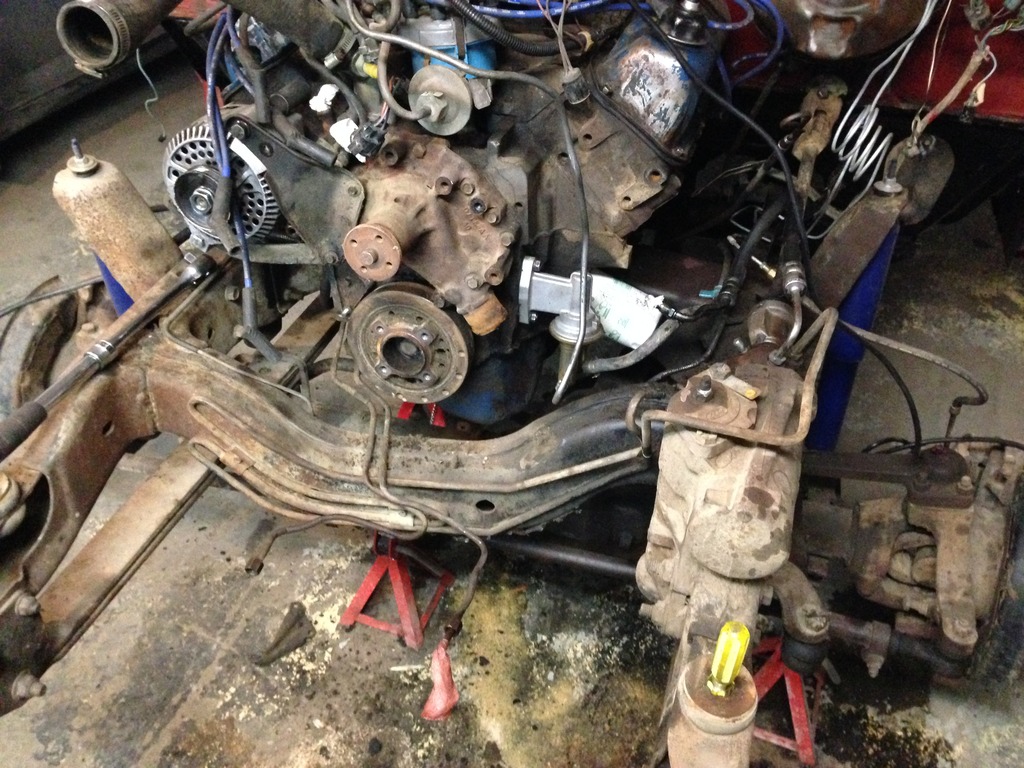
Pulled off as many parts as I could in a single sitting and moved on to a parts order!
Freeze plugs look leaky, so I may as well replace those while I'm at it... and if I'm replacing freeze plugs, I may as well also replace the flywheel. And if I'm replacing the flywheel, I may as well replace the rear main seal... and if I'm....
The fun continues!
More to come. Still haven't thought of a way to tackle that driver side exhaust manifold bolt that's broken off in the head.
What started as this with an exhaust leak...
Quickly turned into this:
The front clip is now my new parts bench
So this is where I started:
Not surprisingly, the first thing to get removed is the EGR smog pump.
Next, it's time to tackle that pesky exhaust manifold. Notice the Y-pipe is supported under the truck and the manifold is loose + moved forward. I couldn't reach the collector studs no matter how hard I tried!!!
With some help, I crawled under the truck with a long extension and an impact. While the exhaust system was pulled up and forwards, I let the impact do all the work. Took a lot of balancing/coordinating to get the manifold this far forward.
Eventually the exhaust system came off. Both manifolds are cracked, so they're both getting tossed. Headers? Would love to but can't. It's not in the budget right now.
Next I yanked the power steering pump off and brackets.
And looky here what came pouring out of the pump!!!! What the heck would cause this??
Notice the amount of grease on the driver side of the frame. Pretty sure I've got leaky power steering hoses - which may be the cause of the milky brown power steering fluid (aeration).
Pulled off as many parts as I could in a single sitting and moved on to a parts order!
Freeze plugs look leaky, so I may as well replace those while I'm at it... and if I'm replacing freeze plugs, I may as well also replace the flywheel. And if I'm replacing the flywheel, I may as well replace the rear main seal... and if I'm....
The fun continues!
More to come. Still haven't thought of a way to tackle that driver side exhaust manifold bolt that's broken off in the head.
#114
05-03-2017, 05:45 PM
Broken bolt
I had 2 of those bad boys on my build..... You have limited options, the best being welding another bolt to it and gently rocking her out....That would imply that you have a welder, some welding skills and or a friend that does  I lacked some of those features
  ... So I drilled them out and heli-coiled them.... Both turned out good and are holding a set of headers today....... And If I can pull off the Heli-Coil install you most certainly can...
I lacked some of those features ... So I drilled them out and heli-coiled them.... Both turned out good and are holding a set of headers today....... And If I can pull off the Heli-Coil install you most certainly can...
#116
05-04-2017, 09:27 PM
#117
05-05-2017, 09:56 AM
Note for myself for later:
Low pressure = 3/8" I.D. line
High Pressure = 28" long with short metal pieces on each end (could even be shortened, doesn't need to be 28" long!)
I had 2 of those bad boys on my build..... You have limited options, the best being welding another bolt to it and gently rocking her out....That would imply that you have a welder, some welding skills and or a friend that does I lacked some of those features ... So I drilled them out and heli-coiled them.... Both turned out good and are holding a set of headers today....... And If I can pull off the Heli-Coil install you most certainly can...
I lacked some of those features ... So I drilled them out and heli-coiled them.... Both turned out good and are holding a set of headers today....... And If I can pull off the Heli-Coil install you most certainly can...Luckily I have a set of reverse-direction drill bits and a full set of shop tools courtesy of my dad. He's an ex-machinist, so we've got all sorts of tricks to tackle the job
Wish me luck!
If possible, I will get that bolt out with the head still on the motor. It's not likely to work out that way, but it's worth a shot.
There's a brass plug on my 4bbl Offenhauser intake (see previous photos) that I'm going to steal to plug/cap that long goose-neck pipe sticking out the top of intake manifold (don't have a photo for reference).
I'll grab some photos of the capping/plugging when I do it and post them up.
My plan of attack is to drill a small pilot hole in the dead center of the broken bolt, then try using a slightly larger sized drill bit (reverse cut). If that doesn't work, I will heat the crap out of it with my propane bottle torch, pound a high-quality easy-out into the center of it and try rotating the broken bolt out.
Teaser to-do list:
1) Drain oil
2) Pull motor
3) Remove flywheel/flexplate
4) Remove all freeze plugs (found that 5 of 7 are leaking very badly)
5) Install new freeze plugs at all locations, including 2 new block heaters (found 2 block heaters on my motor too! Never knew the passenger side had one)
6) Pull alternator
7) Pull water pump
8) Pull timing cover
9) Replace timing set
10) Pull oil pan
11) Replace rear main seal (with the crank still in)
12) Drill/remove broken bolt in the head
13) Clean intake manifold
14) Cap/plug the EGR goose-neck at top of intake manifold
15) Replace flywheel/flexplate with the new one I bought
16) Repair/Replace transmission cooler lines (I banged one up a bit)
17) Remove frame stuff
18) Clean the frame
19) Paint/coat the frame with POR-15 and Chassis Coat
20) Install new front brake lines (nicked/broke both when removing the front clip)
21) Install oil pan + new gasket
22) Clean/degrease the motor
23) Tap/clean the head thread holes
24) Buy high-temp high-nickel content anti-seize to make sure this never happens again
25) Button up the front end of the motor with double roller timing chain, new water pump + all new gaskets
26) Install new motor mounts
27) Figure out routing/lines for transmission cooler + power steering cooler
28) Reinstall all of the frame components at the front
29) Clean/ensure good ground connections + add dielectric grease
30) Reinstall the motor + connect to the trans
31) Fill with oil
32) Reconnect the exhaust manifolds to the exhaust system + Y-pipe
33) Button everything back up
34) Reinstall the front clip
35) Install new Pro-thane front clip frame bushings + all new hardware + use anti-seize on everything
36) Reconnect all electrical
37) Fill motor with coolant
38) Fire it back up
39) Beat myself up because I didn't install headers
40) Drive it for the rest of the summer
 ... with whatever time is left over lol
#118
05-05-2017, 11:19 AM
I haven't done one in the truck but with the front clip off I don't see why it will be that bad. As long as you get it close to the center of the bolt you'll be fine. I'll be surprised if you can get anywhere with a propane torch and easy out. I just did one on my 460 I'm building and I had the manifold red hot and still wouldn't move. I always give the easy out and left hand drill bit a try but it almost always never works. Those easy outs always scare me and once there's one of those in there broke off.....
#119
05-05-2017, 11:26 AM
I haven't done one in the truck but with the front clip off I don't see why it will be that bad. As long as you get it close to the center of the bolt you'll be fine. I'll be surprised if you can get anywhere with a propane torch and easy out. I just did one on my 460 I'm building and I had the manifold red hot and still wouldn't move. I always give the easy out and left hand drill bit a try but it almost always never works. Those easy outs always scare me and once there's one of those in there broke off.....
I've always had really good luck with easy-outs and lots of heat.
How much of the bolt do you drill out before you start using a tap to get the rest out?
I'm having a hard time imagining how you would utilize a tap in a hole where a busted bolt resides. Do you start with a really small-sized tap and work your way up to the correct size???
On the bright side, my dad has some very high quality easy-outs. Not the same kind of ones you see now-a-days... They actually have 4-5 straight flutes/splines that allows you you "bite" into the center of a drilled bolt. The ones I keep seeing today have a "square" flute instead of the "4-5 pointed star" my dad has.
Fingers crossed that I don't break anything off in the head lol (knocks on wood).