1948 F1 Build - IFS/IRS, bags, and burnouts


#18
 12-13-2016, 10:38 AM
Senior User
Join Date: Oct 2014
Location: Fremont, California
Posts: 192
Likes: 0
Received 0 Likes
on
0 Posts

#19
12-13-2016, 11:13 AM

Join Date: Feb 2006
Location: MA
Posts: 165
Likes: 0
Received 0 Likes
on
0 Posts
Thanks!
I saw you dimpled the 3/16", how big of a press did that take?? It loaded up the 55 ton at work pretty good doing the 1/8".
#20
12-13-2016, 11:37 AM
Senior User
Join Date: Oct 2014
Location: Fremont, California
Posts: 192
Likes: 0
Received 0 Likes
on
0 Posts
I'm going to build some adjustable upper arms for the front, and maybe the rear, because there's way too much camber at ride height. I wouldn't mind it if there was only so much when it was dropped, but I don't want to drive around like that.
I saw you dimpled the 3/16", how big of a press did that take?? It loaded up the 55 ton at work pretty good doing the 1/8".
I saw you dimpled the 3/16", how big of a press did that take?? It loaded up the 55 ton at work pretty good doing the 1/8".
#21
12-27-2016, 08:18 PM
Join Date: Feb 2006
Location: MA
Posts: 165
Likes: 0
Received 0 Likes
on
0 Posts
Between being busy at work, and the holidays, I haven't had a lot of time in the shop, but I have made some progress!
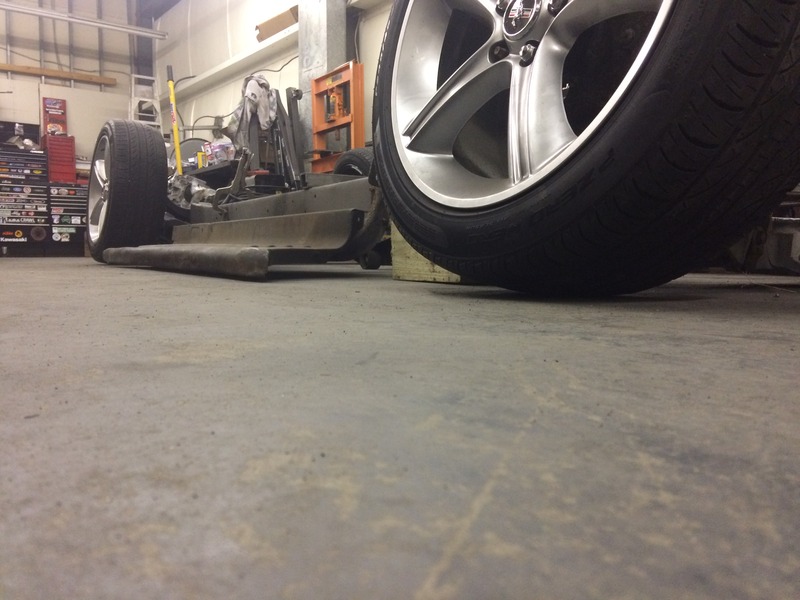
After setting up the suspension I mocked up the running boards to see what the truck would look like at ride height, and slammed. At first the front of the running board was ~3/4" off the ground, which I could live with, but the rear was ~1 5/8" up and that just wasn't low enough for me. It took quite a few hours of screwing around to find and clearance all the little hang ups, but eventually I got the board to sit ~1/2" up in the front, and ~3/4" in the rear. Pretty happy with that!
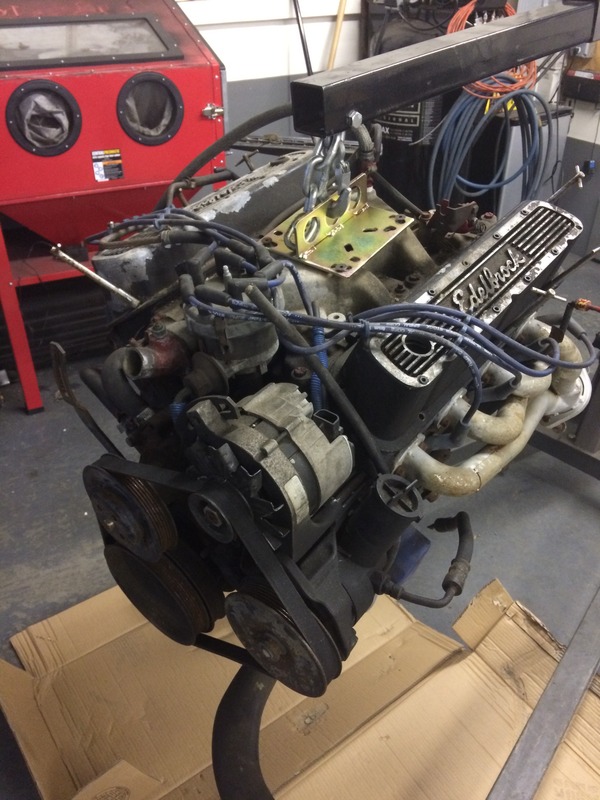
I picked up an engine this weekend too, just a tired old 351W, but it was the last big puzzle piece I needed to finish out the chassis. It was pretty grimy when I picked it up, but after a little cleaning I can stomach looking at it for now. Here's how it looked when I brought it home
And all cleaned up, mocked in it's new home for the first time.
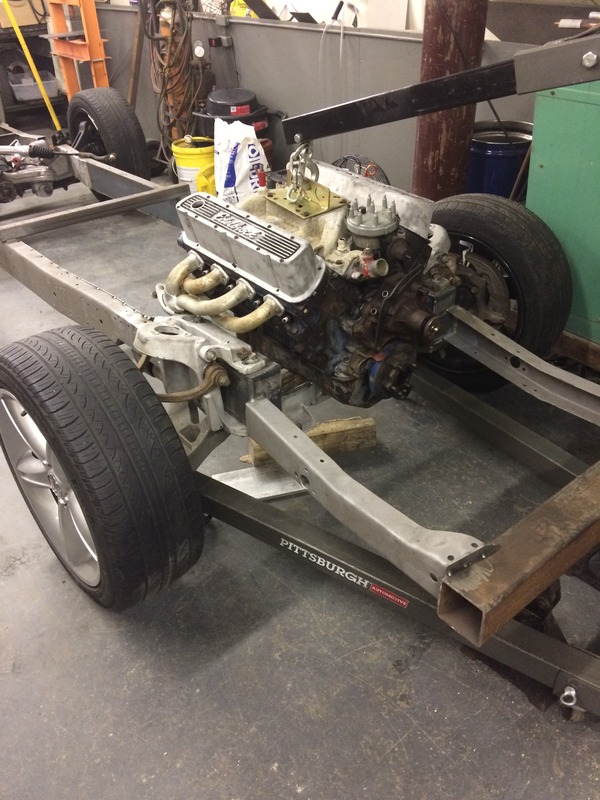
I think it will end up sitting closer to this height, and about 5" further back.
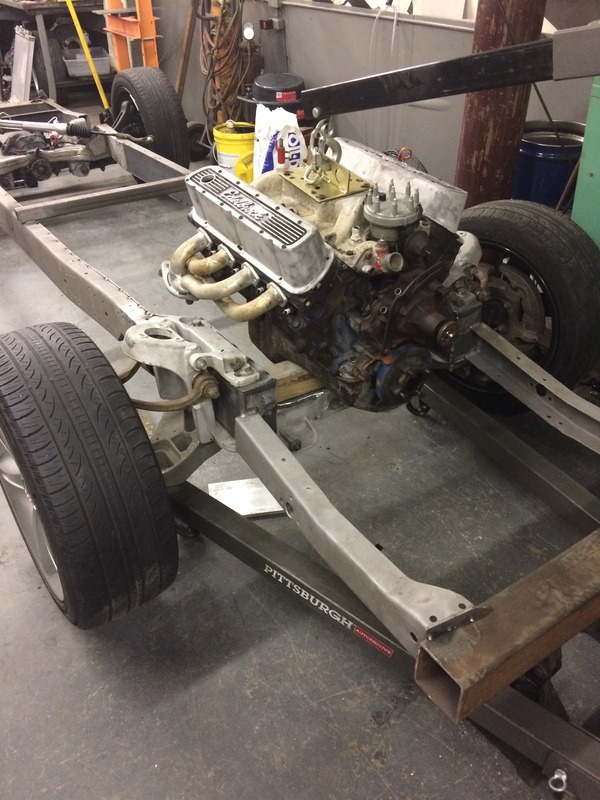
I'm thinking I'll run a remote oil filter setup to get rid of some of the clutter on the driver's side, because I still need room for my steering shaft. I'm really hoping to run longtubes, but it doesn't look like any off the shelf sets are going to fit. Not sure I'm up to the task of building my own headers yet, but I may have to give it a shot! That's all for now, I'm hoping to get started on my engine/transmission mounts this week.
After setting up the suspension I mocked up the running boards to see what the truck would look like at ride height, and slammed. At first the front of the running board was ~3/4" off the ground, which I could live with, but the rear was ~1 5/8" up and that just wasn't low enough for me. It took quite a few hours of screwing around to find and clearance all the little hang ups, but eventually I got the board to sit ~1/2" up in the front, and ~3/4" in the rear. Pretty happy with that!

I picked up an engine this weekend too, just a tired old 351W, but it was the last big puzzle piece I needed to finish out the chassis. It was pretty grimy when I picked it up, but after a little cleaning I can stomach looking at it for now. Here's how it looked when I brought it home

And all cleaned up, mocked in it's new home for the first time.

I think it will end up sitting closer to this height, and about 5" further back.

I'm thinking I'll run a remote oil filter setup to get rid of some of the clutter on the driver's side, because I still need room for my steering shaft. I'm really hoping to run longtubes, but it doesn't look like any off the shelf sets are going to fit. Not sure I'm up to the task of building my own headers yet, but I may have to give it a shot! That's all for now, I'm hoping to get started on my engine/transmission mounts this week.
#24
01-01-2017, 06:56 PM
Join Date: Feb 2006
Location: MA
Posts: 165
Likes: 0
Received 0 Likes
on
0 Posts
It's a pet peeve of mine when someone bags a truck/car, and when it's laid out it doesn't sit on the ground. To each their own, but you spend a lot of money so the car can be low, why not spend the time to get it all the way down?
Thanks for the kind words, but I'm far from a master haha.
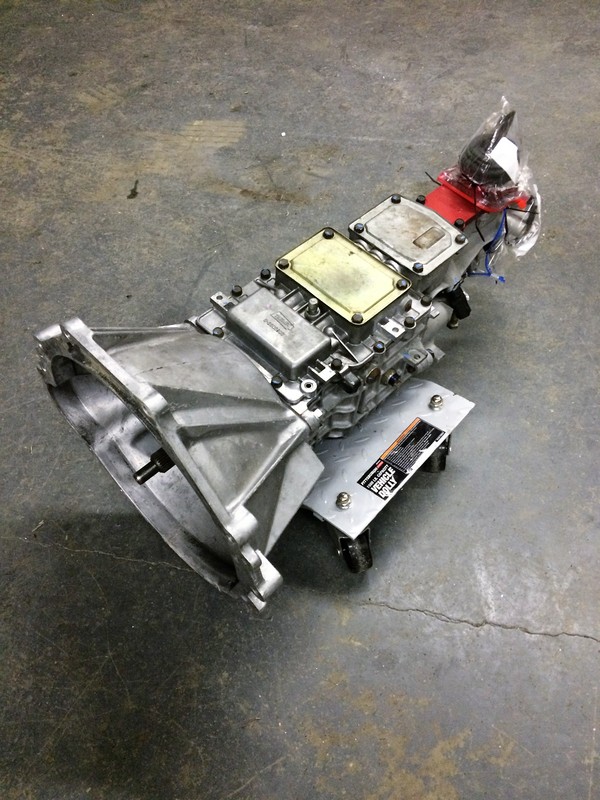
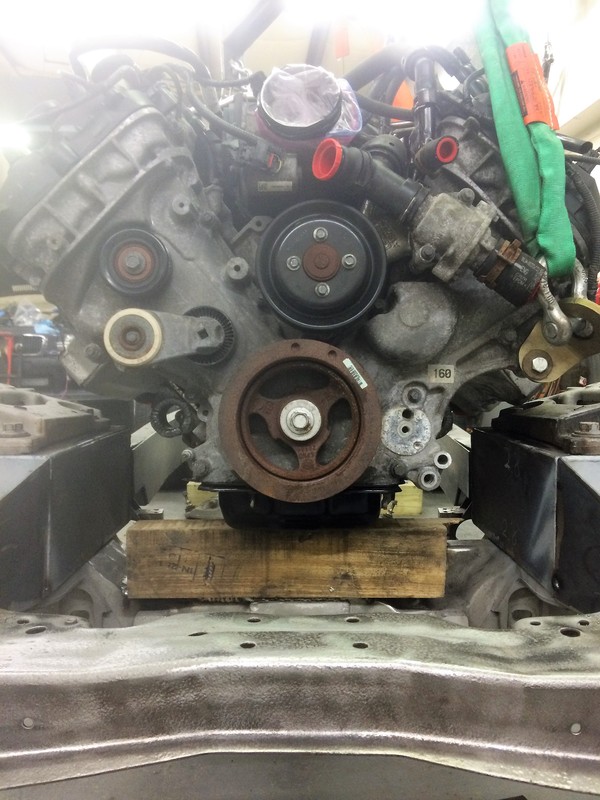
Let's start with some parts ****! This is the TKO600 I picked up a few months ago off of craigslist. It's used, and the guy claimed there were only 5000 easy miles on it, which I completely believe after pulling the inspection cover and taking a peek inside. I finally bolted the bellhousing, which I also got a great craigslist deal on!, up to it, and then mounted it up to the engine to get an idea of overall placement.
Next up was to start making some new engine mounts. I would have bought some block side mounts to save myself the time, but I couldn't find anything on the market I liked. It's more fun when you make it yourself anyway! I started with some 12"x12"x0.25" plate I bent up in the press at work.
Then started trimming away the excess...

Add a few holes...
And cut a little more...
That's as far as I got on Saturday, hoping to finish them up tomorrow.
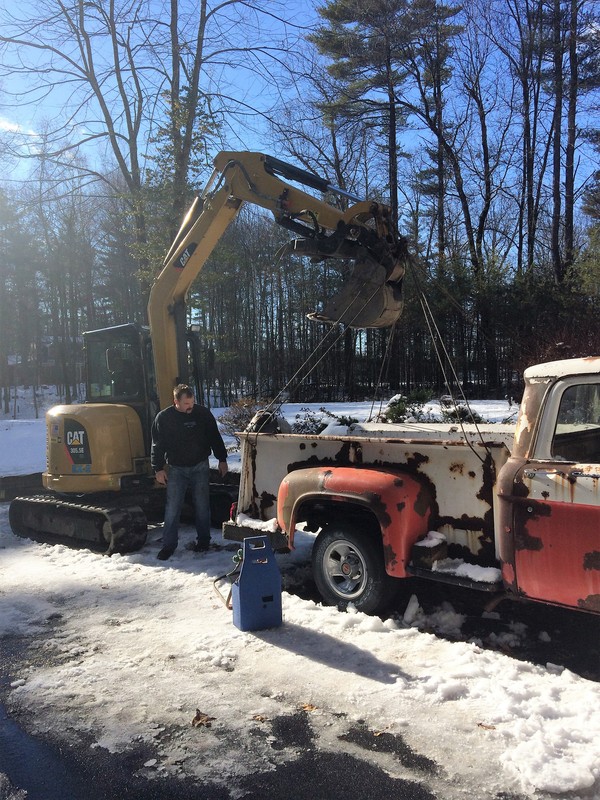
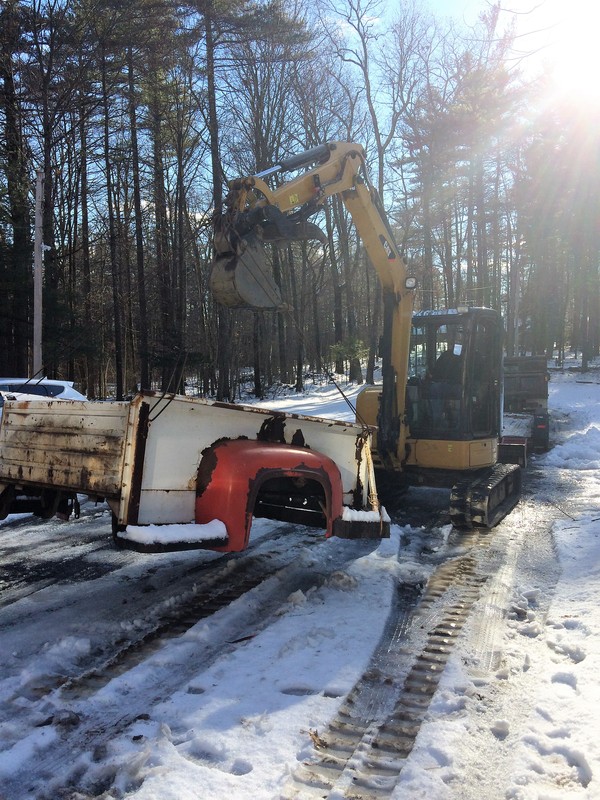
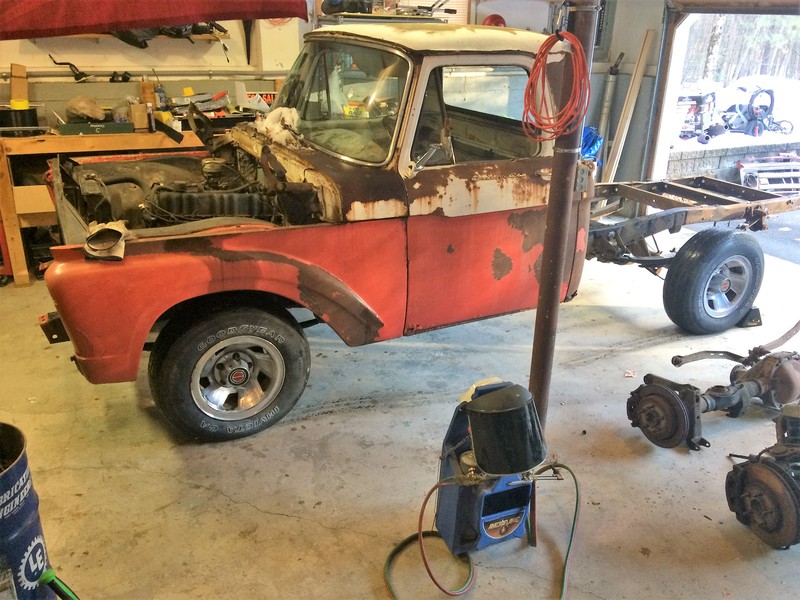
Today I helped a friend with another one of my old farm trucks I gave him back in September. I couldn't stand to watch it rot away, but I don't have the time or money to build two trucks right now, so when he said he was looking for a 60's F100 as a project I was happy to see the old girl go to a good home. We pulled the bed off, started stripping the front sheetmetal, and rolled it into his garage so we can work on it out of the weather. As of now his plans are a Crown Vic IFS and 8.8 rear, and I'm trying to convince him to buy a Terminator driveline because 2V NA Mod motors are lame.
I'll be back with more progress pictures tomorrow night!
Let's start with some parts ****! This is the TKO600 I picked up a few months ago off of craigslist. It's used, and the guy claimed there were only 5000 easy miles on it, which I completely believe after pulling the inspection cover and taking a peek inside. I finally bolted the bellhousing, which I also got a great craigslist deal on!, up to it, and then mounted it up to the engine to get an idea of overall placement.


Next up was to start making some new engine mounts. I would have bought some block side mounts to save myself the time, but I couldn't find anything on the market I liked. It's more fun when you make it yourself anyway! I started with some 12"x12"x0.25" plate I bent up in the press at work.


Then started trimming away the excess...

Add a few holes...

And cut a little more...


That's as far as I got on Saturday, hoping to finish them up tomorrow.
Today I helped a friend with another one of my old farm trucks I gave him back in September. I couldn't stand to watch it rot away, but I don't have the time or money to build two trucks right now, so when he said he was looking for a 60's F100 as a project I was happy to see the old girl go to a good home. We pulled the bed off, started stripping the front sheetmetal, and rolled it into his garage so we can work on it out of the weather. As of now his plans are a Crown Vic IFS and 8.8 rear, and I'm trying to convince him to buy a Terminator driveline because 2V NA Mod motors are lame.


I'll be back with more progress pictures tomorrow night!
#25
02-20-2017, 07:58 PM
Join Date: Feb 2006
Location: MA
Posts: 165
Likes: 0
Received 0 Likes
on
0 Posts
So I disappeared for a while, but I'm back! Progress has been slow for a few reasons I'll get into shortly.
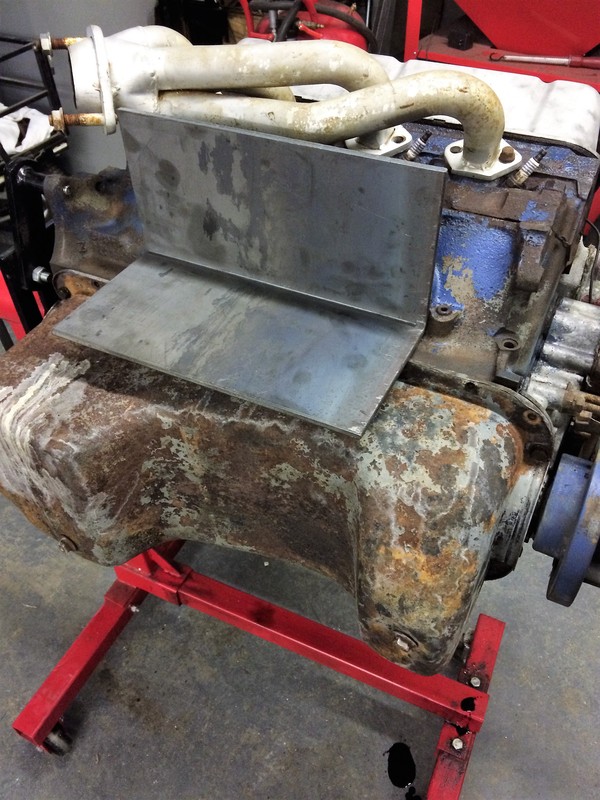
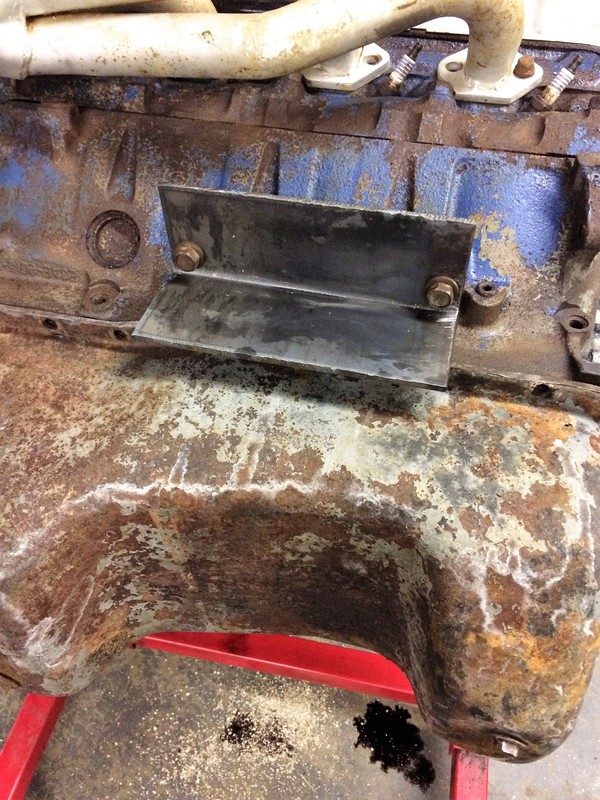
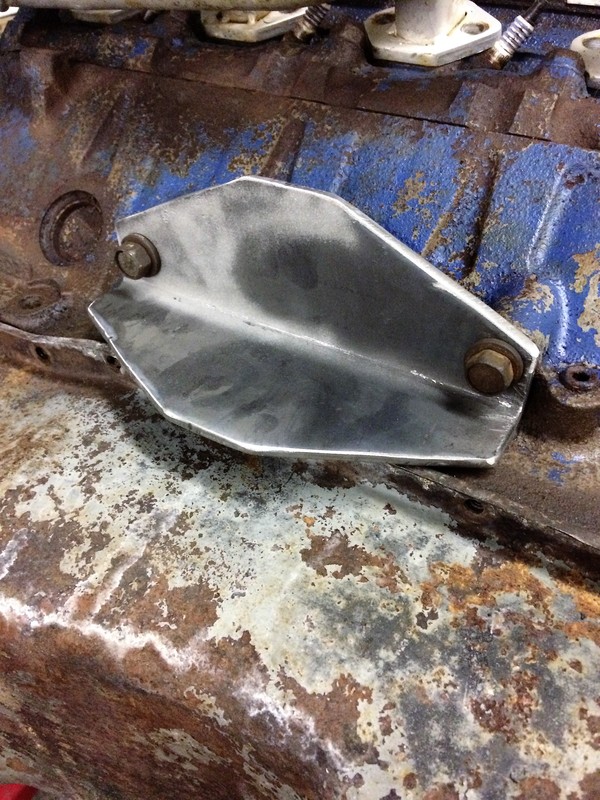
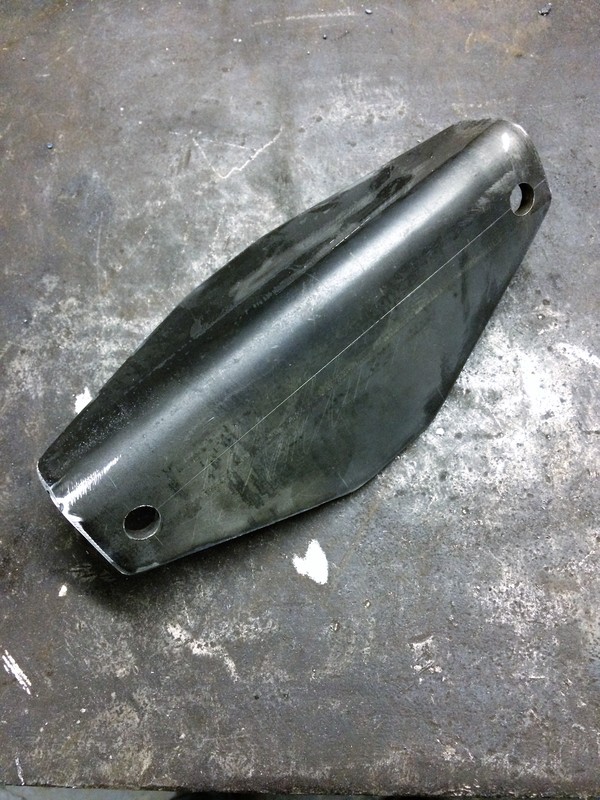
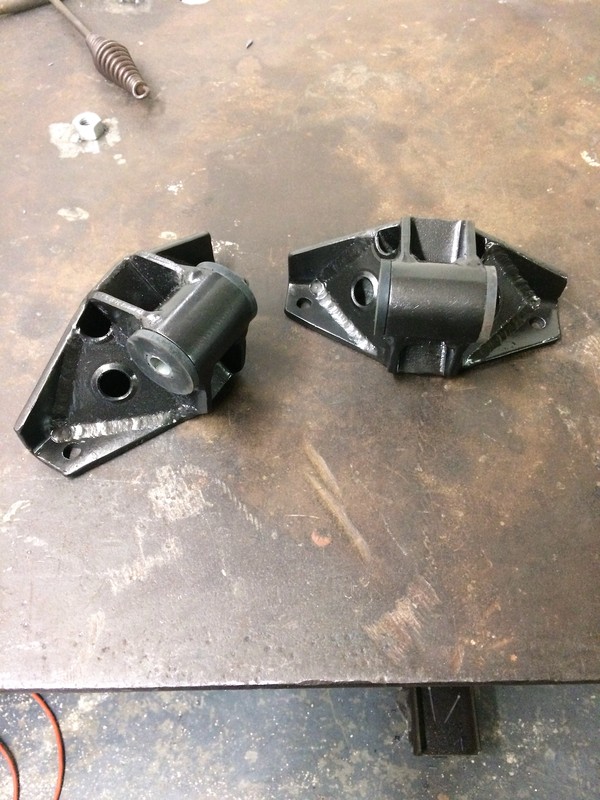
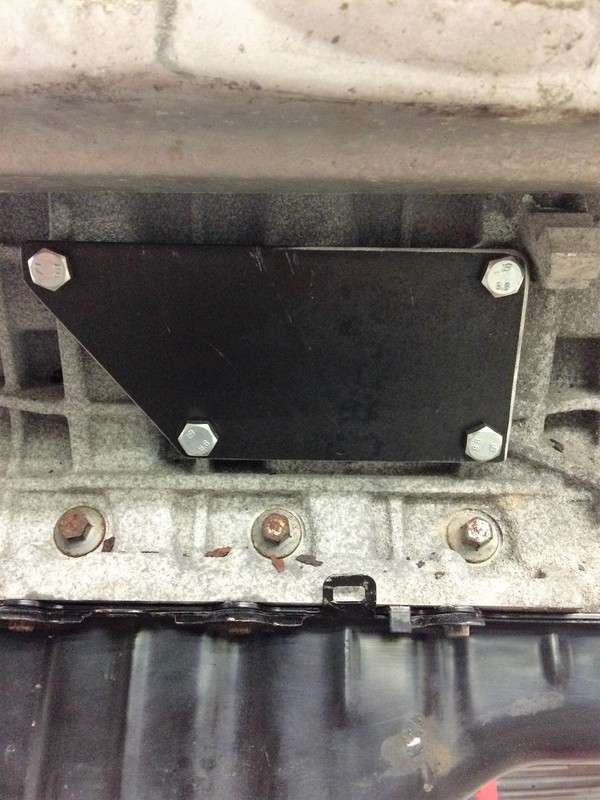
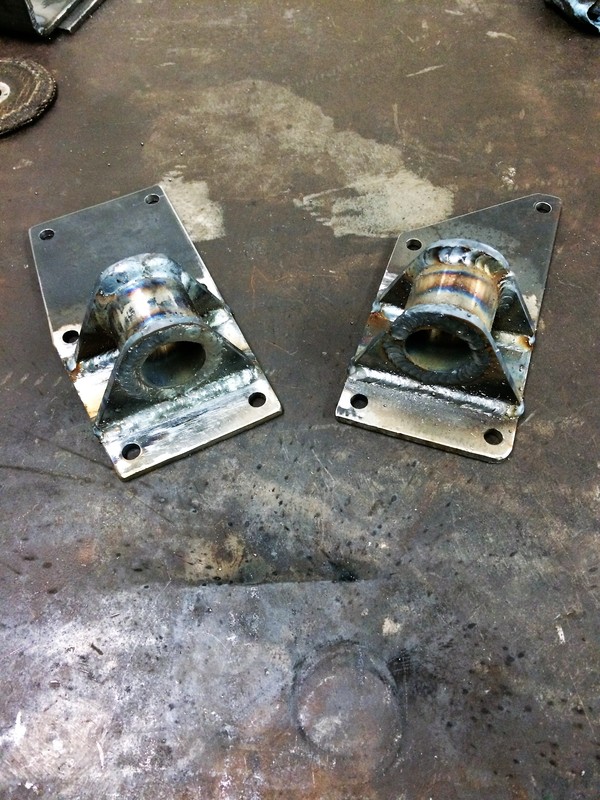
For starters, here's the finished mounts for the 351W
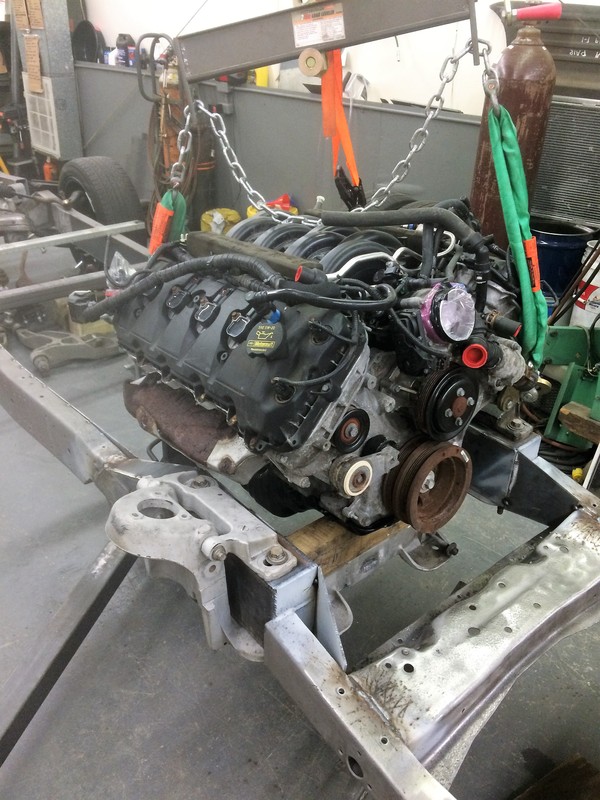
These are up for sale if anyone is interested, which brings me to why I haven't updated in a while. Right as I was finishing up those mounts my friend and I started bench racing over a few cold ones. We added up what it was going to cost to build a 408W stroker the way I wanted; I was looking at $7k or more, and that was with a stock block. This sparked a conversation along the lines of "at that price you might as well buy a Coyote..." Well it turns out he was right, and truck 5.0's were plentiful in the $2000 range. After doing some reading I found out that the differences between the F150 and the Mustang Coyotes is negligible, especially considering the price difference. Long story short, look what followed me home on Friday...
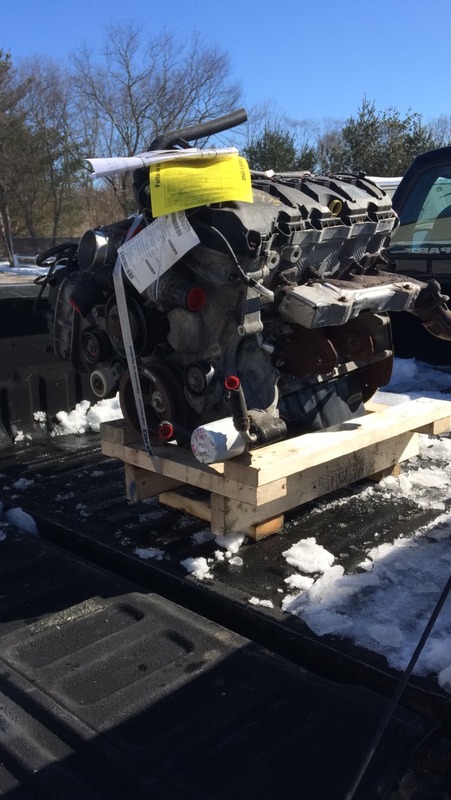
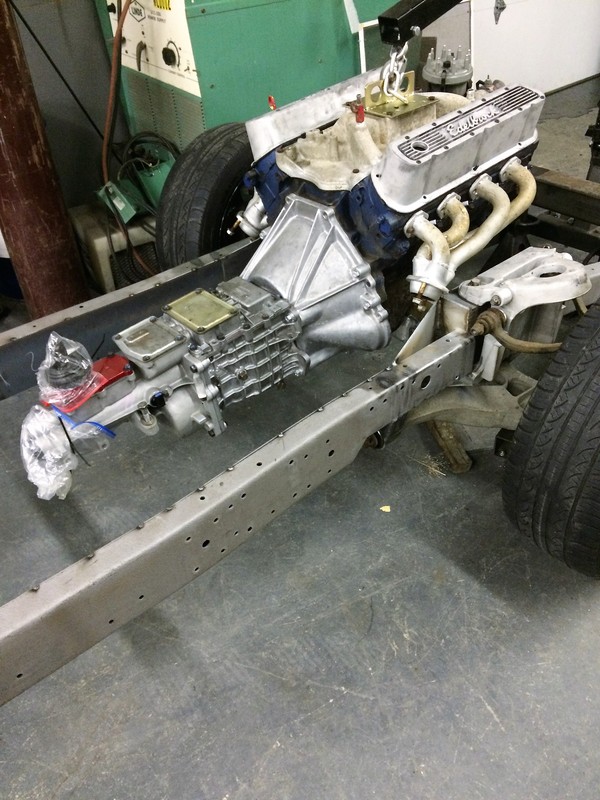
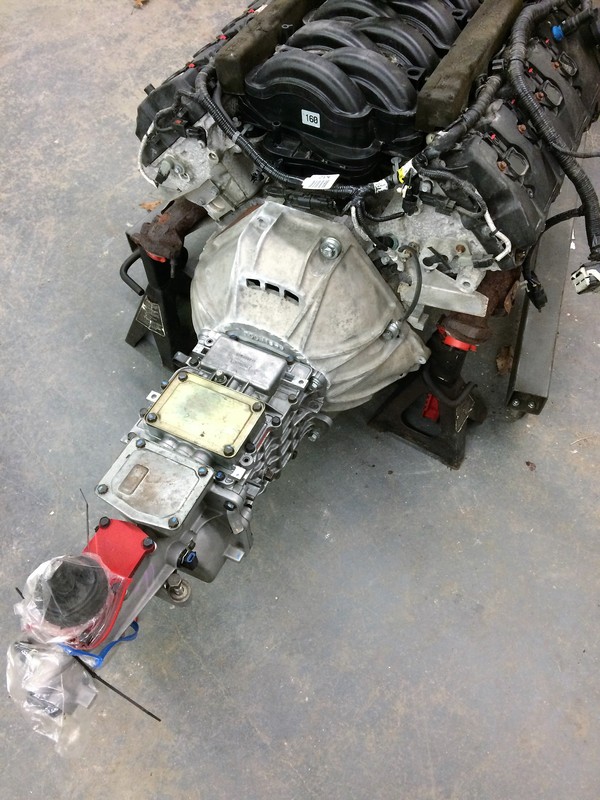
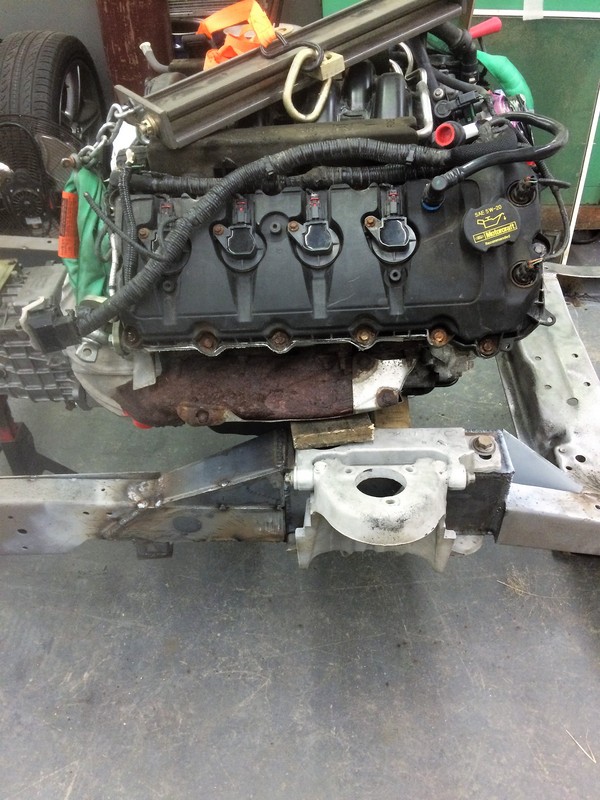
It's out of a 2013 F150 with 70k miles, and I picked it up for $2000 from LKQ. It's definitely bigger than the Windsor was, as you can see with it here just dropped between the frame rails.
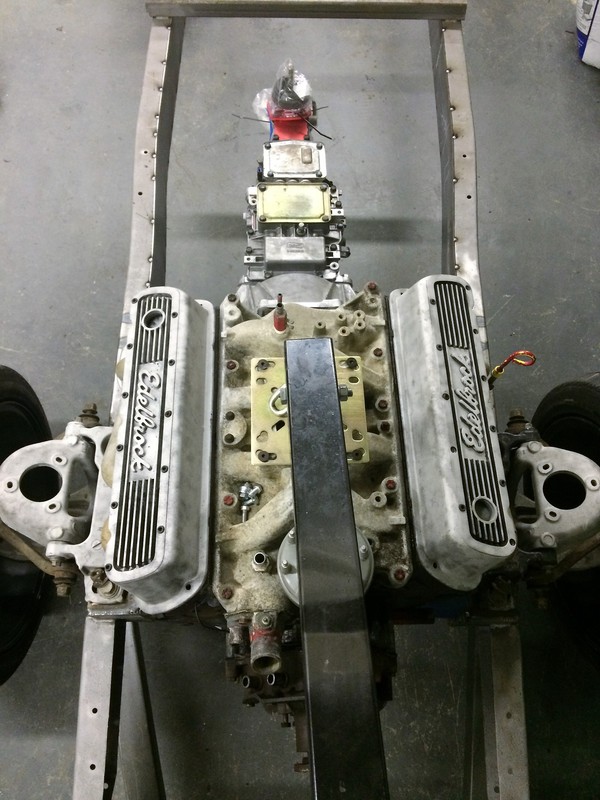
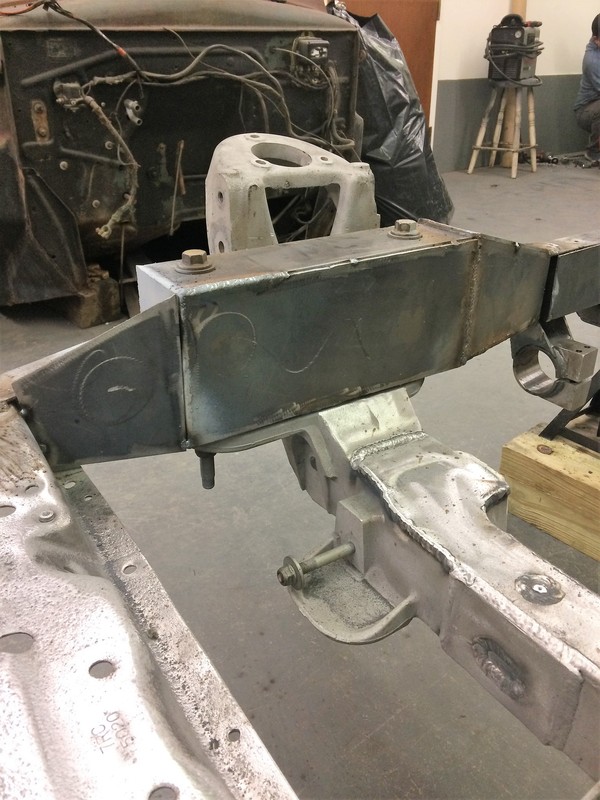
That's not exactly where it's going to sit, but pretty close. I may bring it up another 1'', maybe a little less. Today I started making some mounts for the 5.0, let's hope I don't change my mind again when I finish these haha.

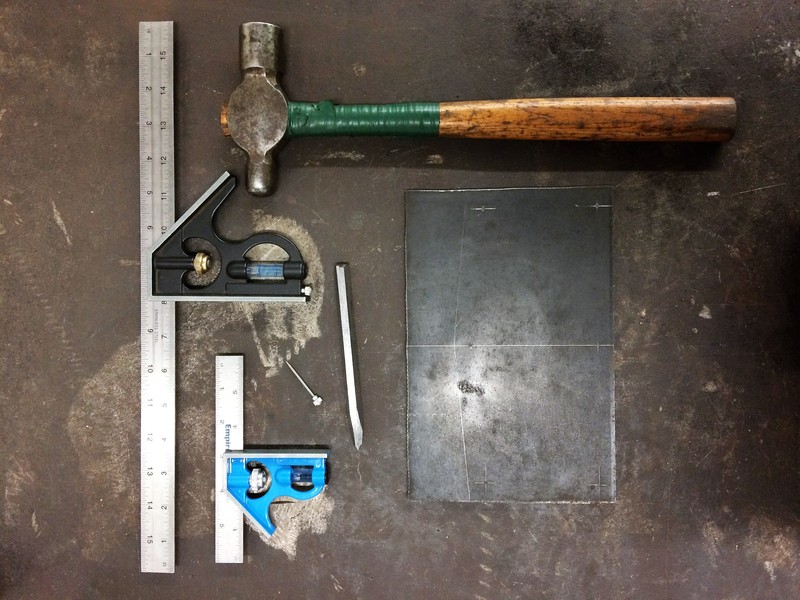
Shy of an angle grinder and a cheap drill press, this is all I used to make the plates so far. All of the holes are only 0.03" oversized, and they all line right up. I've been focusing a lot lately on precision using only basic tools, and I'm pretty happy with how these came out. All it takes is a little patience and attention to detail.
I did get a little done over the last month too, starting with sandblasting and reinstalling the original radiator crossmember. The front sheetmetal on these trucks mounts off of the radiator support, so it was important this made it's way back into the truck.
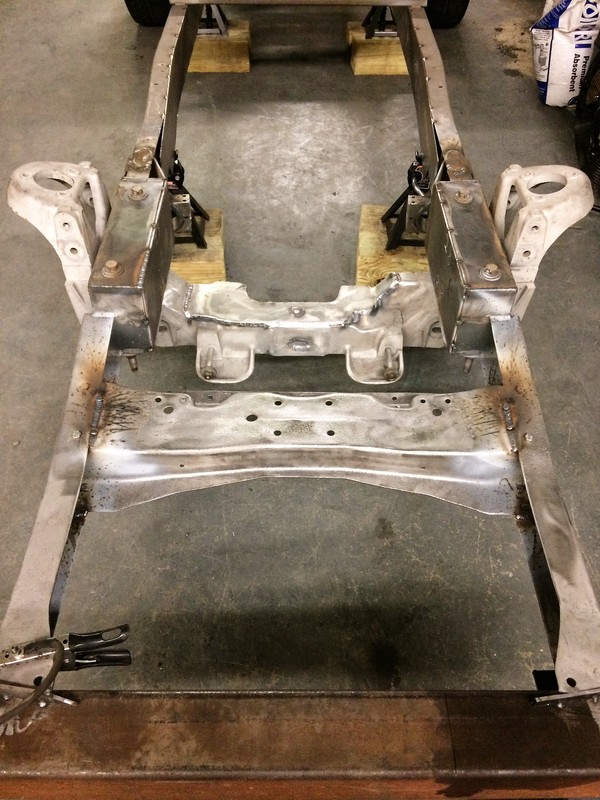
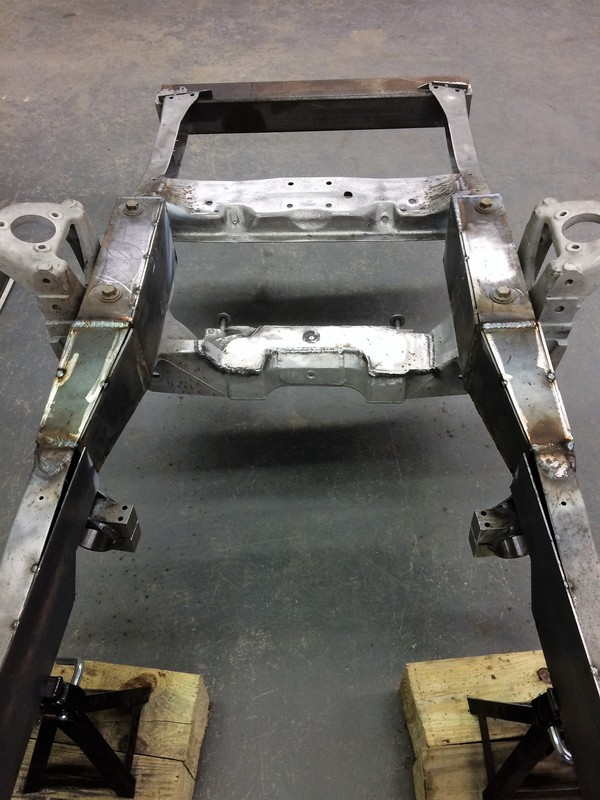
Then I continued boxing in and blending the front section of the frame.

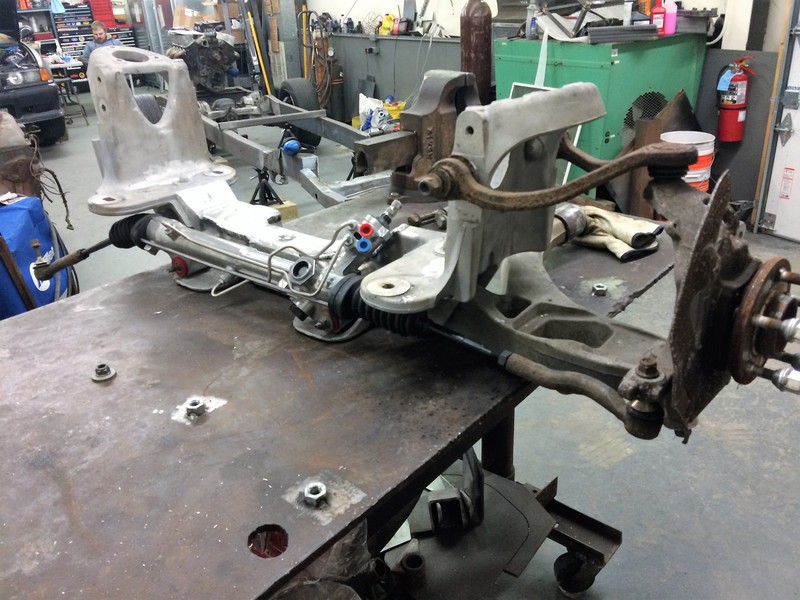
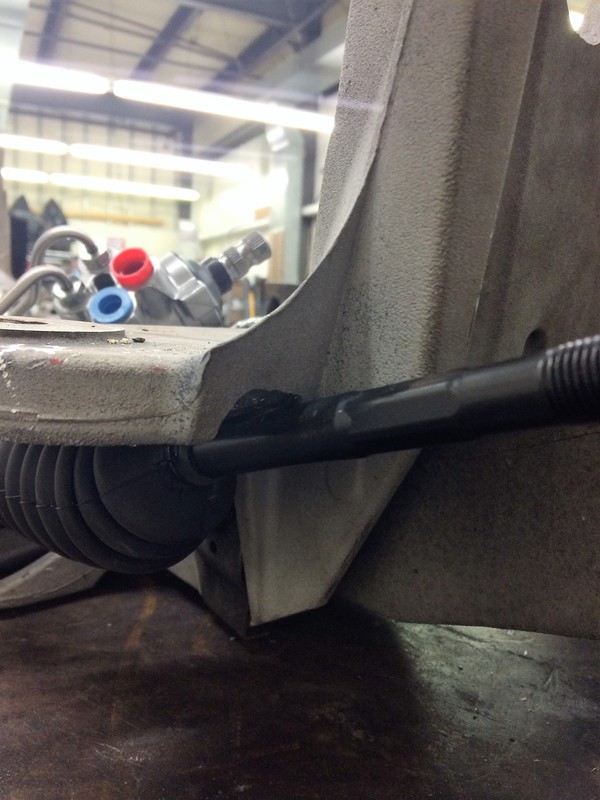
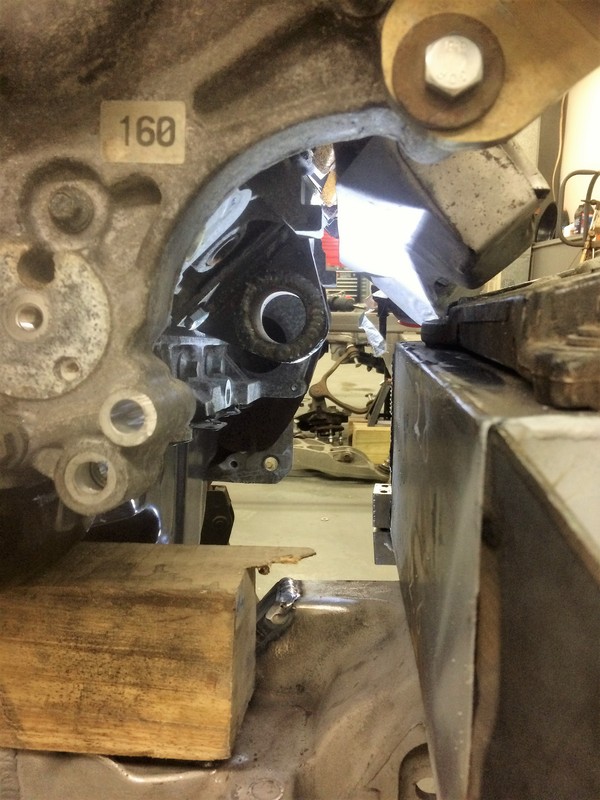
I also pulled the Crown Vic cradle out to clearance in for the tie rods at full dump. I think this will be enough, but I need to recheck it when the truck is on the ground and everything is tight.
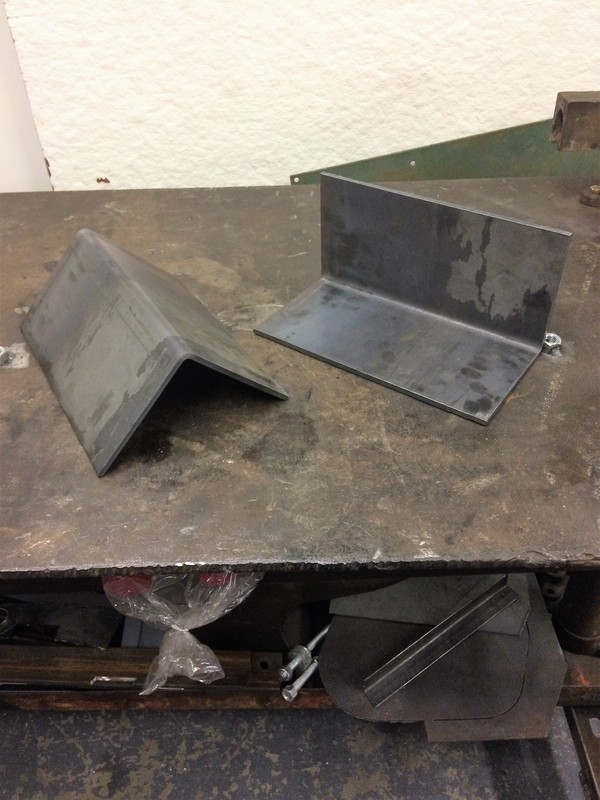
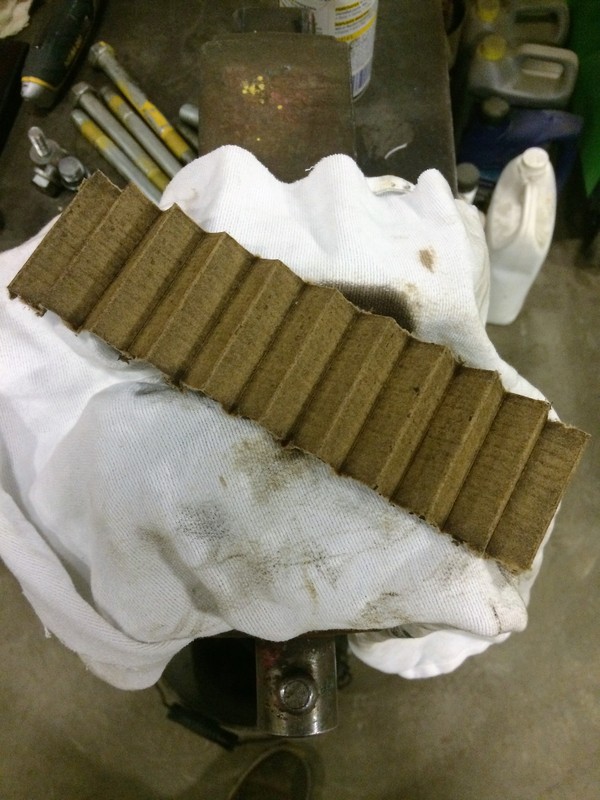
Somewhere along the way I whipped up this quick little brake. It mounts in the vice and is held in place by two bolts on the other side. I'm hoping it will be useful for making some small brackets and tabs, because it bent this 1/8" easily. If not at least it kept me busy for a night!
I should be updating a lot more frequently now, this new engine has me pretty motivated!
For starters, here's the finished mounts for the 351W

These are up for sale if anyone is interested, which brings me to why I haven't updated in a while. Right as I was finishing up those mounts my friend and I started bench racing over a few cold ones. We added up what it was going to cost to build a 408W stroker the way I wanted; I was looking at $7k or more, and that was with a stock block. This sparked a conversation along the lines of "at that price you might as well buy a Coyote..." Well it turns out he was right, and truck 5.0's were plentiful in the $2000 range. After doing some reading I found out that the differences between the F150 and the Mustang Coyotes is negligible, especially considering the price difference. Long story short, look what followed me home on Friday...

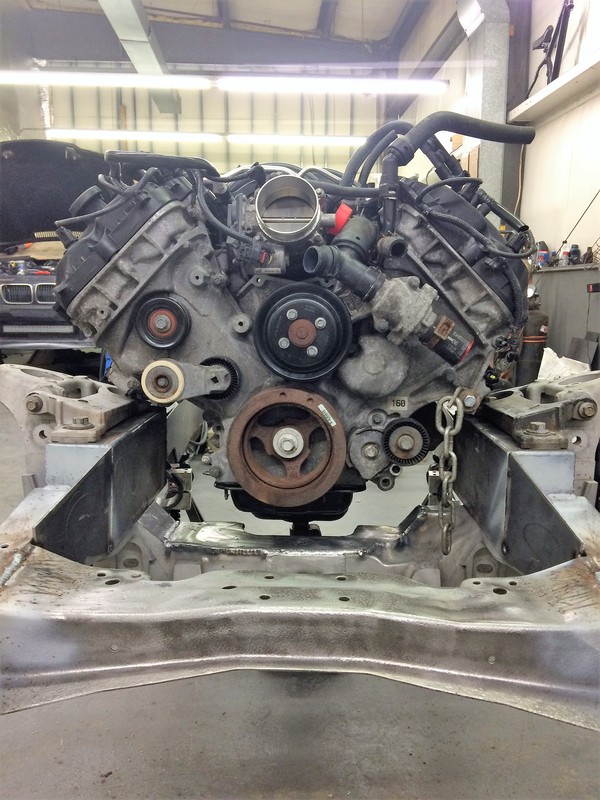
It's out of a 2013 F150 with 70k miles, and I picked it up for $2000 from LKQ. It's definitely bigger than the Windsor was, as you can see with it here just dropped between the frame rails.


That's not exactly where it's going to sit, but pretty close. I may bring it up another 1'', maybe a little less. Today I started making some mounts for the 5.0, let's hope I don't change my mind again when I finish these haha.


Shy of an angle grinder and a cheap drill press, this is all I used to make the plates so far. All of the holes are only 0.03" oversized, and they all line right up. I've been focusing a lot lately on precision using only basic tools, and I'm pretty happy with how these came out. All it takes is a little patience and attention to detail.

I did get a little done over the last month too, starting with sandblasting and reinstalling the original radiator crossmember. The front sheetmetal on these trucks mounts off of the radiator support, so it was important this made it's way back into the truck.

Then I continued boxing in and blending the front section of the frame.


I also pulled the Crown Vic cradle out to clearance in for the tie rods at full dump. I think this will be enough, but I need to recheck it when the truck is on the ground and everything is tight.


Somewhere along the way I whipped up this quick little brake. It mounts in the vice and is held in place by two bolts on the other side. I'm hoping it will be useful for making some small brackets and tabs, because it bent this 1/8" easily. If not at least it kept me busy for a night!

I should be updating a lot more frequently now, this new engine has me pretty motivated!
#27
02-26-2017, 07:22 PM
Join Date: Feb 2006
Location: MA
Posts: 165
Likes: 0
Received 0 Likes
on
0 Posts
You're telling me haha. I certainly didn't plan on dropping this much cash right now, but it was the better choice in the long run.
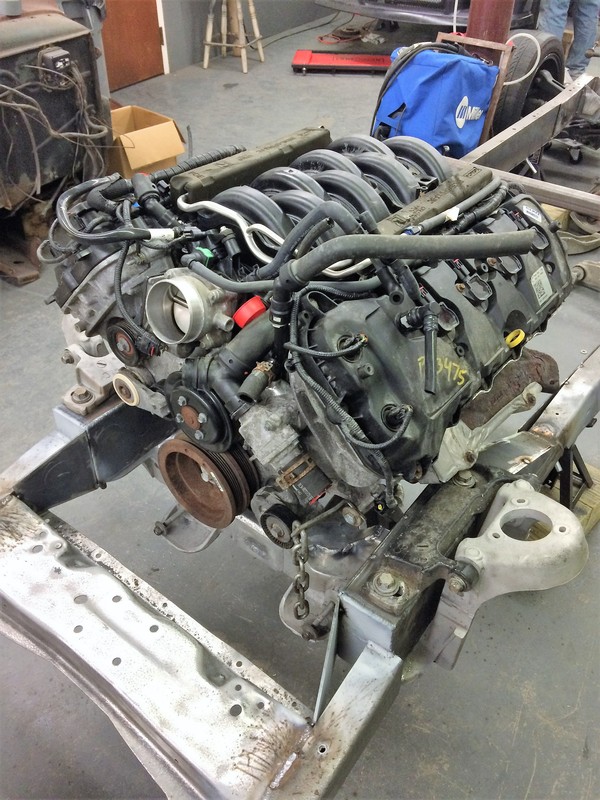
I finished up the mounts on Thursday, but unfortunately I didn't have much time to work on the truck this weekend. All I managed to have time for today was bolting the TKO up to the new engine, hoping to have it sitting between the rails tomorrow night.
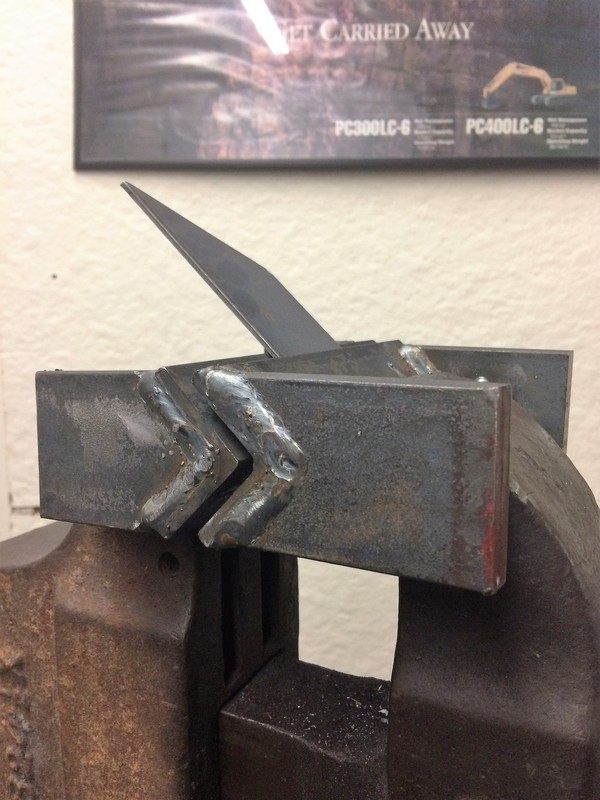
Rough cut of the tabs
A little grinding and they started to look better
Clamped down to keep the plate from warping
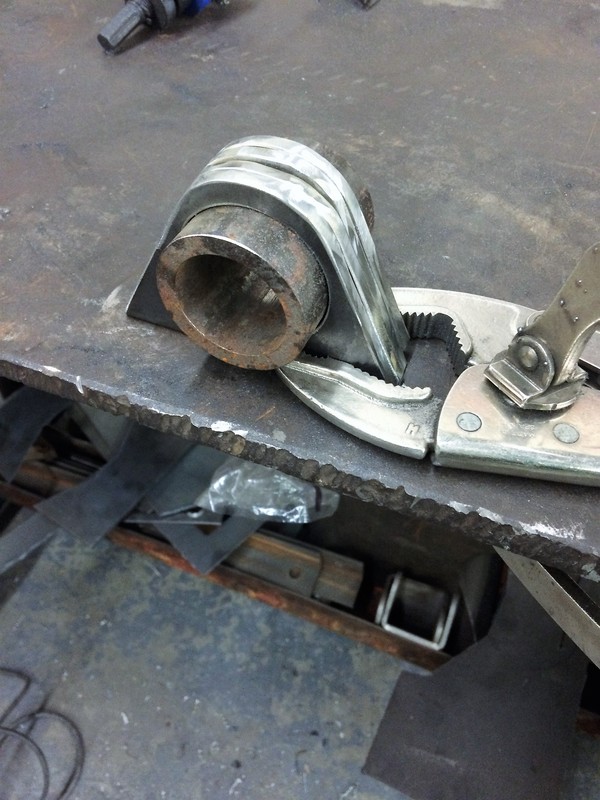
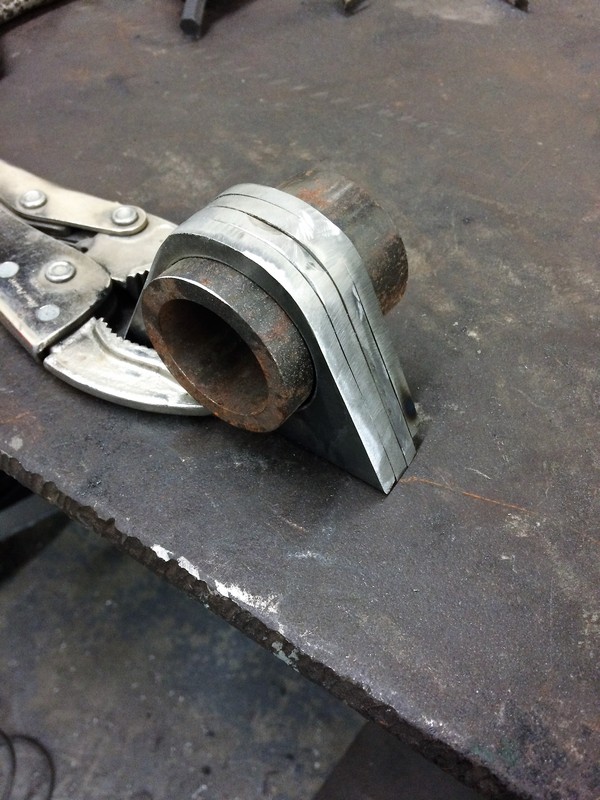
Then I made a decent bevel around the bushing, and boogered up the outside face
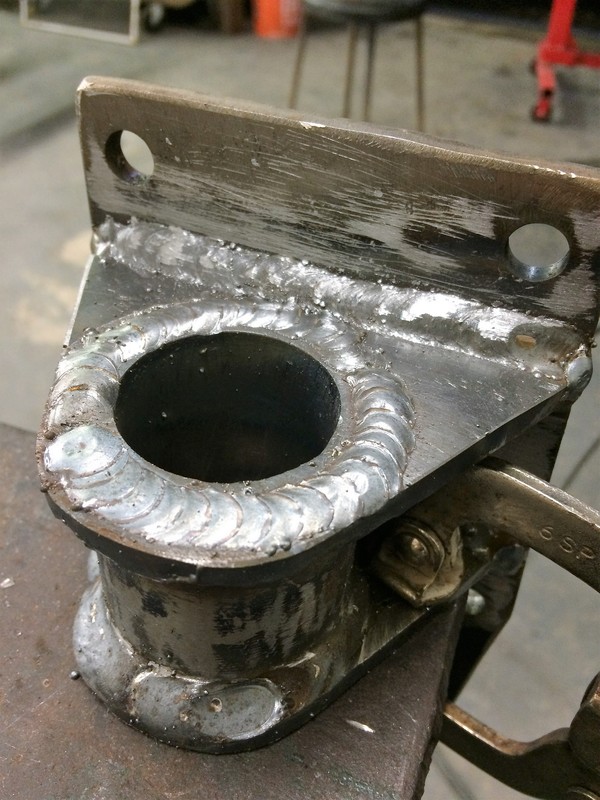
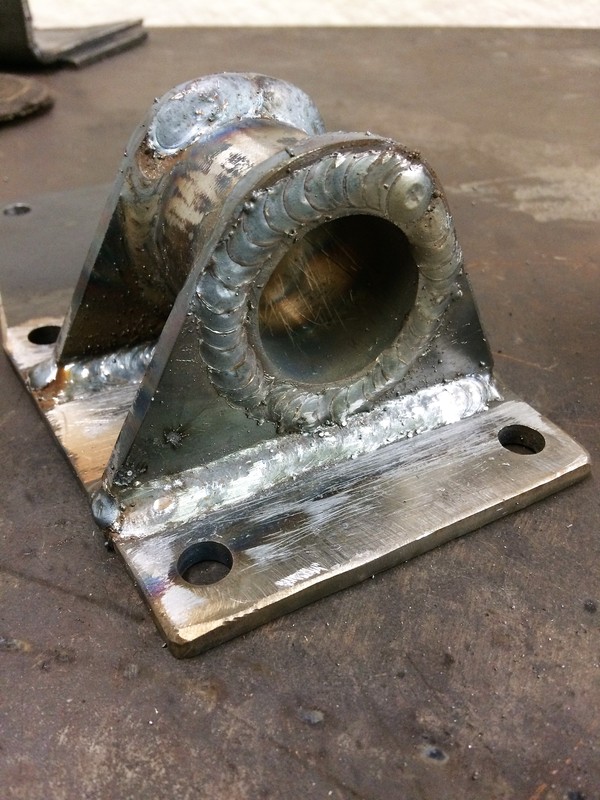
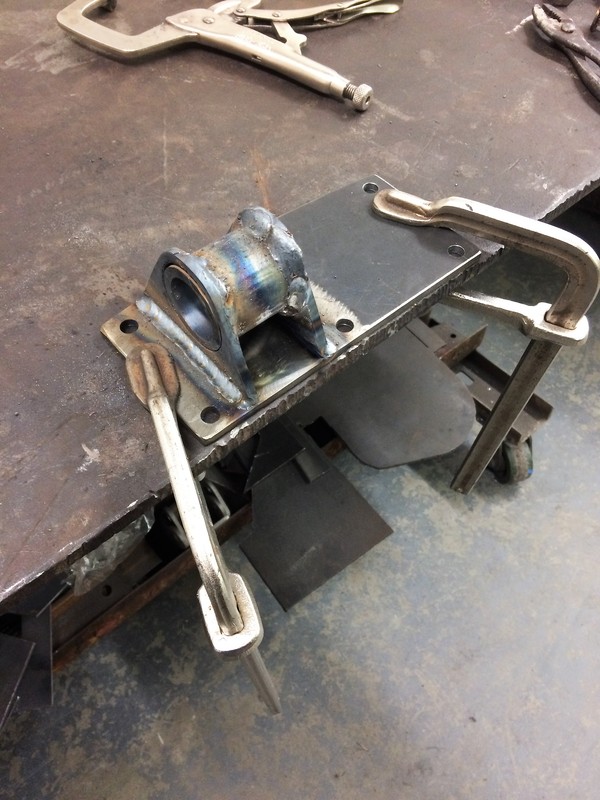
All welded up, but still in need of a lot of finish work before paint
Forgive the stacked washers, I didn't have the right hardware, but I had to get something done this weekend!
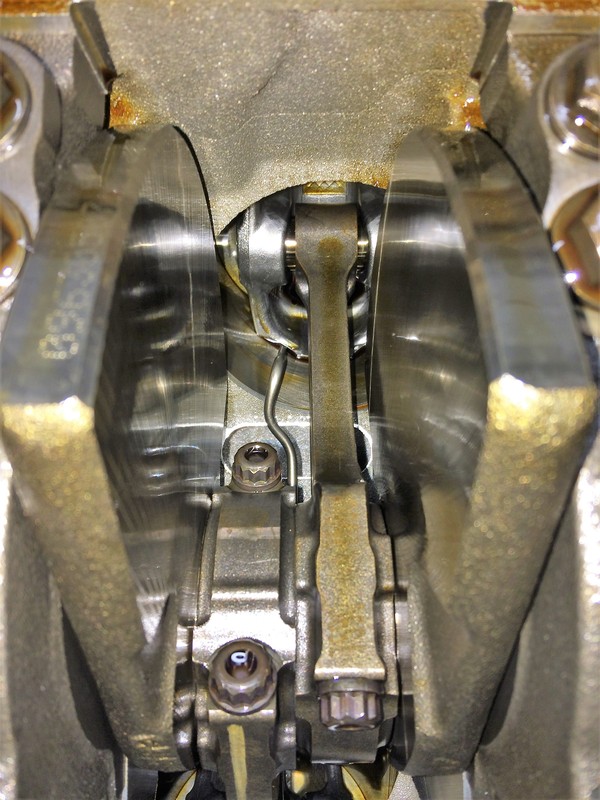
I also cut the oil filter open last week, and dropped the pan, just to make sure nothing was coming apart. Everything looks clean, so hopefully I won't have any issues!
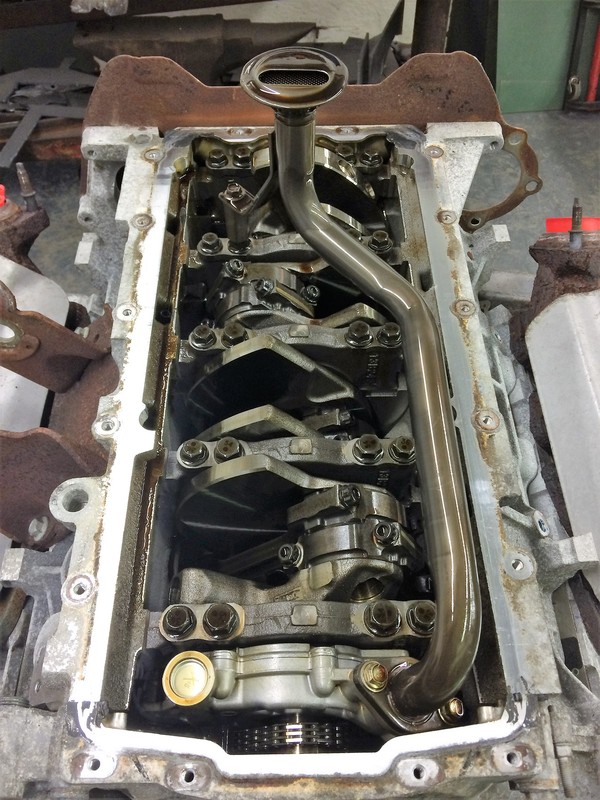
If you look close you can see the oil squirters in there, ready to keep the pistons cool when I throw some boost at it in the future!
I finished up the mounts on Thursday, but unfortunately I didn't have much time to work on the truck this weekend. All I managed to have time for today was bolting the TKO up to the new engine, hoping to have it sitting between the rails tomorrow night.
Rough cut of the tabs

A little grinding and they started to look better

Clamped down to keep the plate from warping

Then I made a decent bevel around the bushing, and boogered up the outside face


All welded up, but still in need of a lot of finish work before paint

Forgive the stacked washers, I didn't have the right hardware, but I had to get something done this weekend!

I also cut the oil filter open last week, and dropped the pan, just to make sure nothing was coming apart. Everything looks clean, so hopefully I won't have any issues!


If you look close you can see the oil squirters in there, ready to keep the pistons cool when I throw some boost at it in the future!

#28
02-28-2017, 08:27 PM
Join Date: Feb 2006
Location: MA
Posts: 165
Likes: 0
Received 0 Likes
on
0 Posts
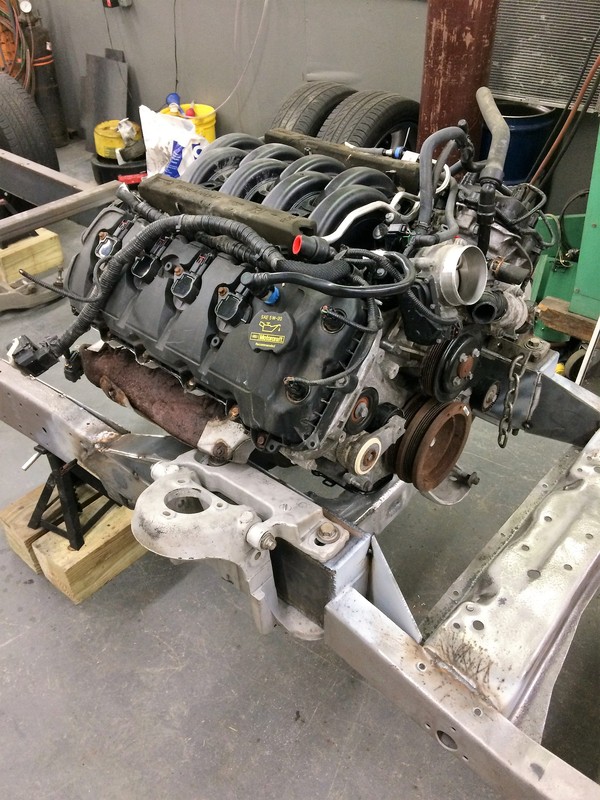
Got the engine and transmission set in the frame, all squared up, and the driveline angle set where it should be last night. Pretty happy with how much room there ended up being, I may actually be able to fit an alternator and power steering pump in there somewhere!

It looks like the floor is going to need some work for all this Tremec goodness to fit, but it needed a little love anyway to fix the rust, so I'm not worried about it.
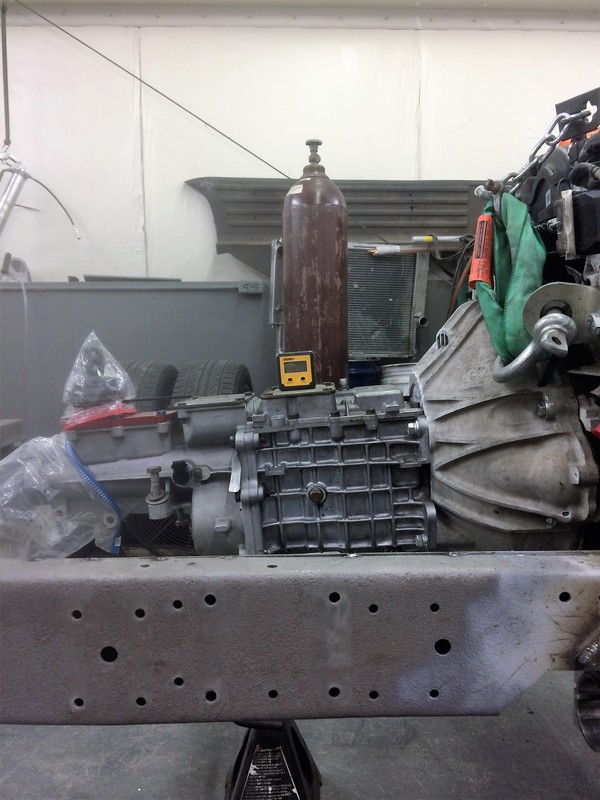
I'm pretty stoked that roughly 3/4 of the engine will be behind the axle centerline. I really want this truck to handle well, not just look cool when it's parked.
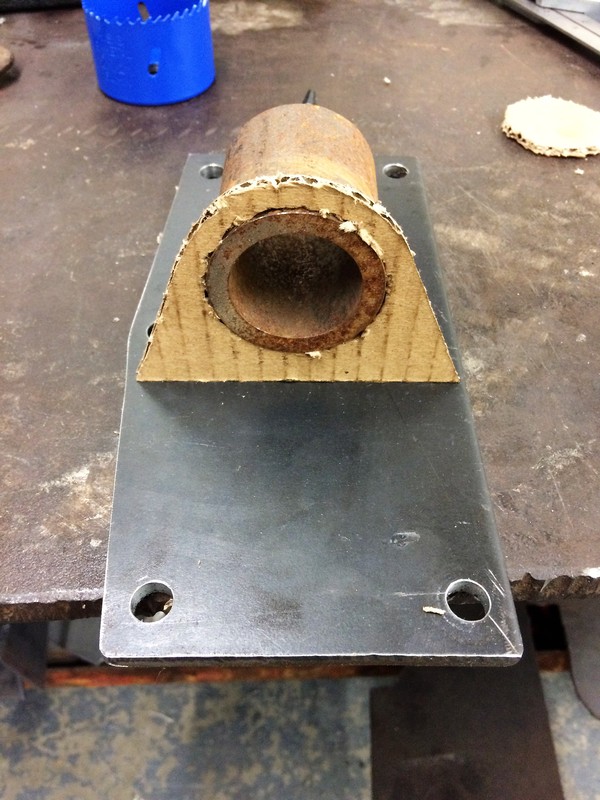
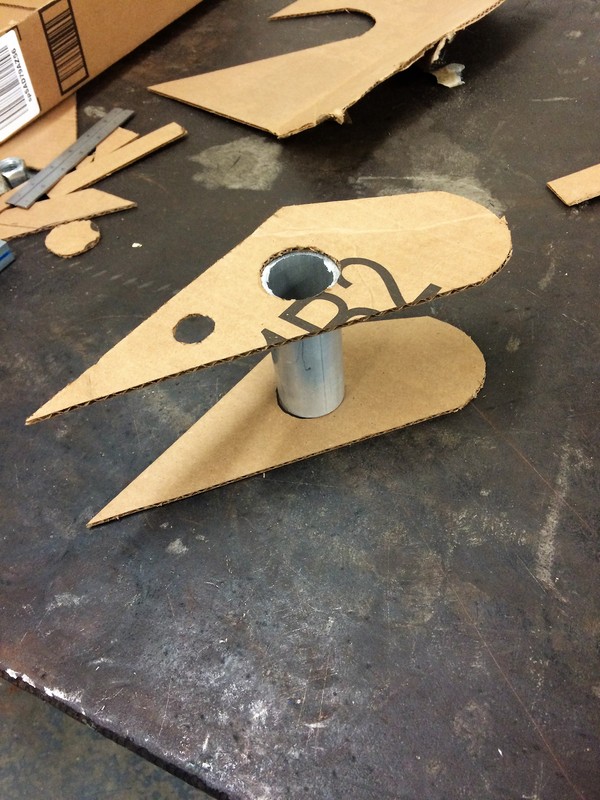
Then tonight I started working on templates for the frame side of the engine mounts.
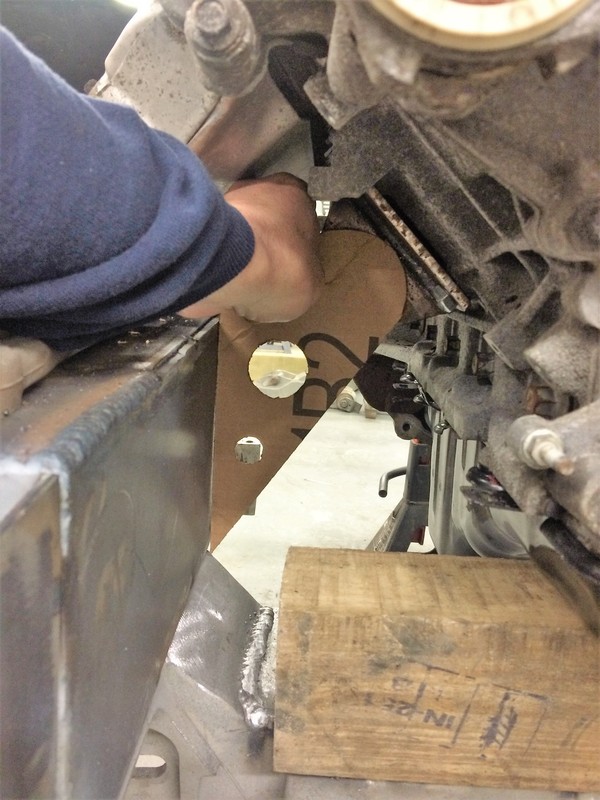
They're going to be 1/4'' plate with a piece of tube tying them together like in this picture. I can't decide if I want to add the lower, smaller hole with another piece of tube or not. I don't think it needs the second piece to tie it together structurally, it would be purely for aesthetics. Opinions?


It looks like the floor is going to need some work for all this Tremec goodness to fit, but it needed a little love anyway to fix the rust, so I'm not worried about it.

I'm pretty stoked that roughly 3/4 of the engine will be behind the axle centerline. I really want this truck to handle well, not just look cool when it's parked.

Then tonight I started working on templates for the frame side of the engine mounts.

They're going to be 1/4'' plate with a piece of tube tying them together like in this picture. I can't decide if I want to add the lower, smaller hole with another piece of tube or not. I don't think it needs the second piece to tie it together structurally, it would be purely for aesthetics. Opinions?
