
1975 F250 Crew Cab CCSB Daily Driver Build
#1
 03-01-2016, 05:03 PM


1975 F250 Crew Cab CCSB Daily Driver Build
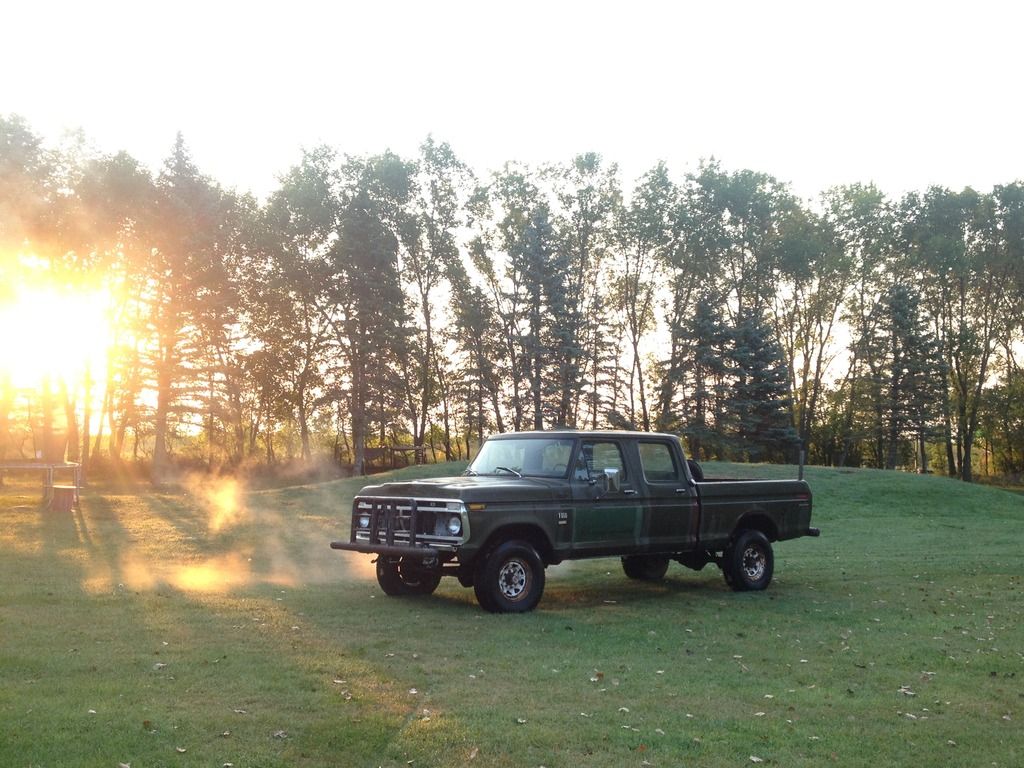
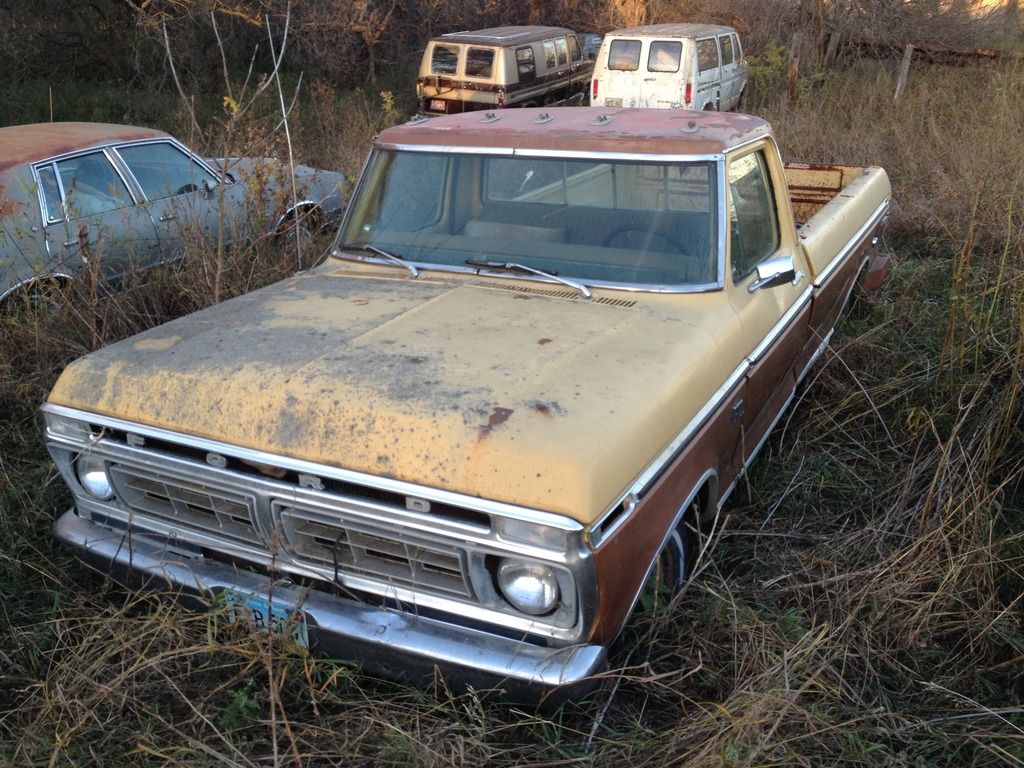
I bought this truck last August knowing nothing about it.
I'm going to build it into a reliable daily driver that is hopefully as capable as my 2005 F250 CCSB/Lariat/FX4/6.0.
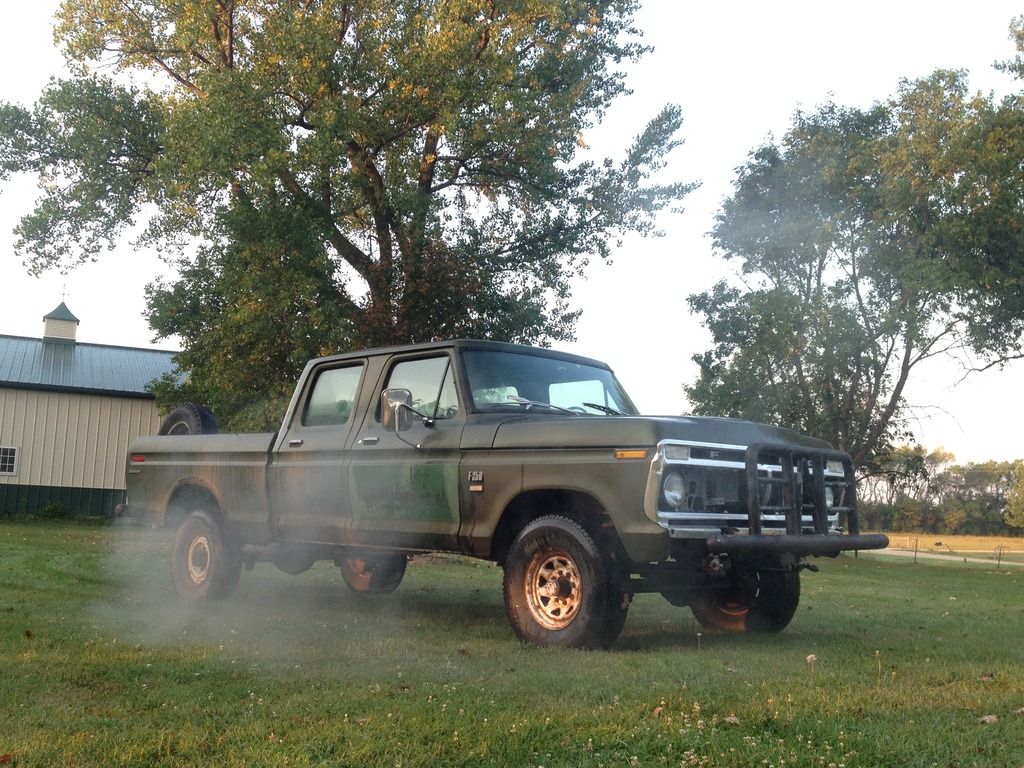
When I bought it, the truck has a
400/c6/married NP205
It started life and is titled as a 1975 F250 COF (Cab on Frame), somewhere along the way it was converted to a crew cab, this is normal for how Crew Cabs were made. From other evidence that I've found, the truck was in an accident and the radiator support and frame are from a newer vehicle, at least a 1977.
I've been repairing things as necessary to get it back to a working condition.
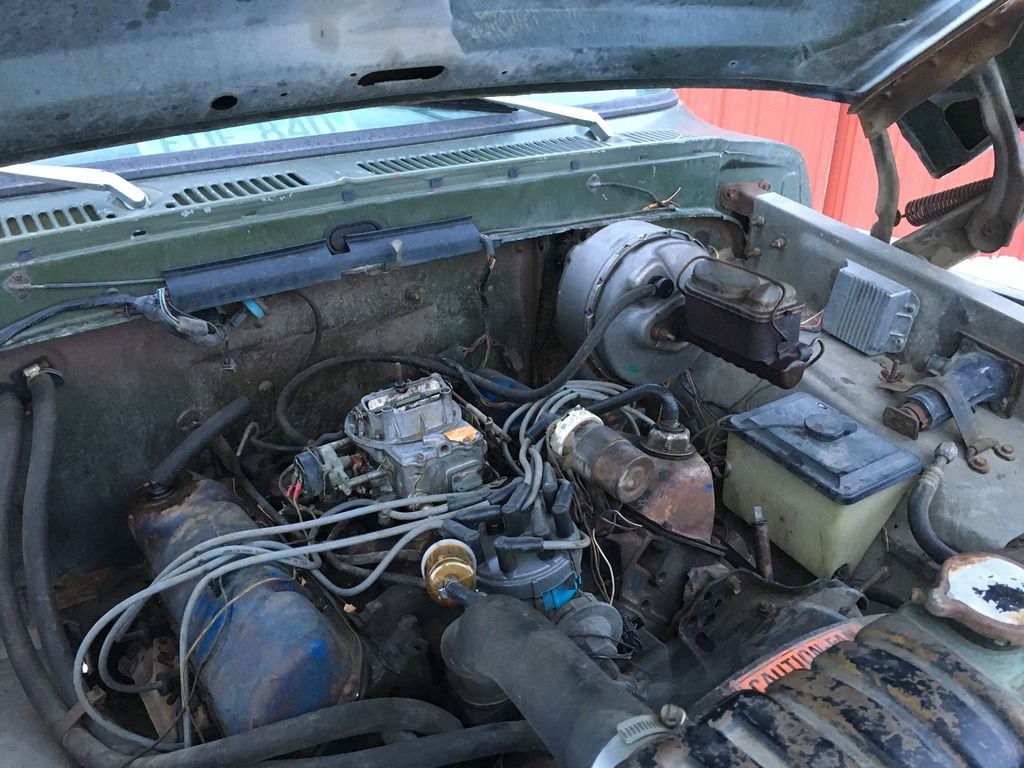
From my local Craigslist, I picked up an Edelbrock 1406 (600cfm) carb, the intake came from a forum member over at the oldfordcrewcabs.com forum for a very reasonable price, I've already read that the S.P.2.P is not a very good intake, but I needed something.
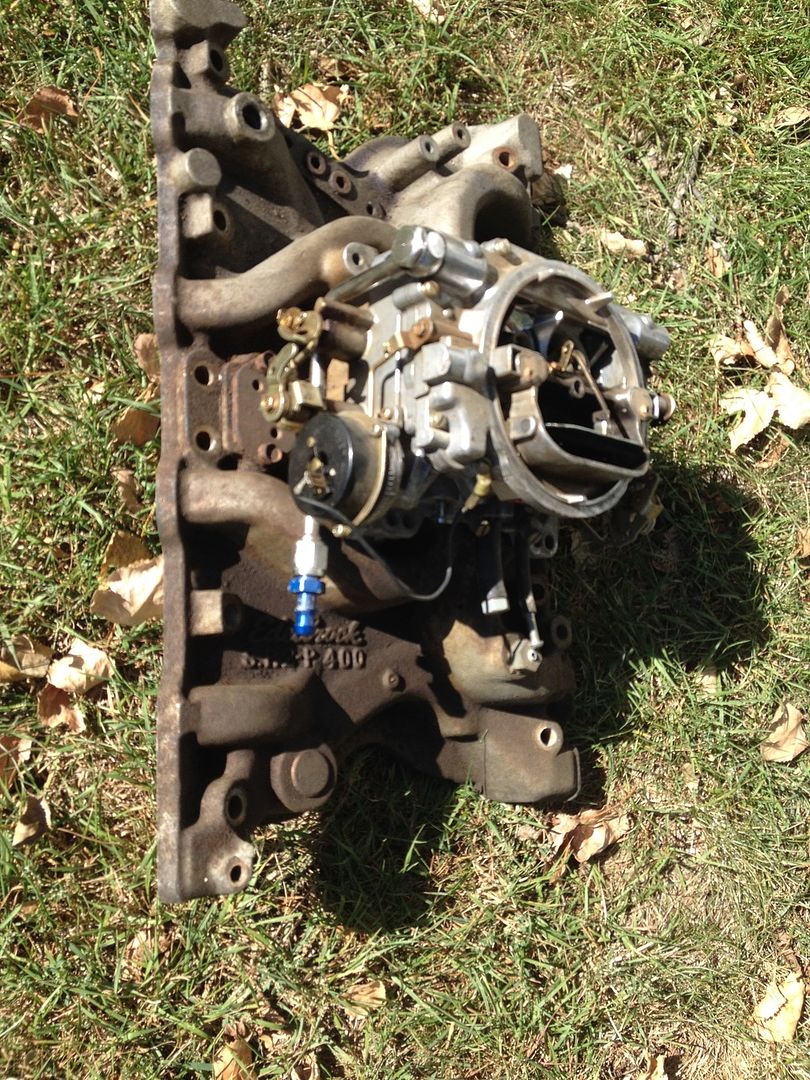
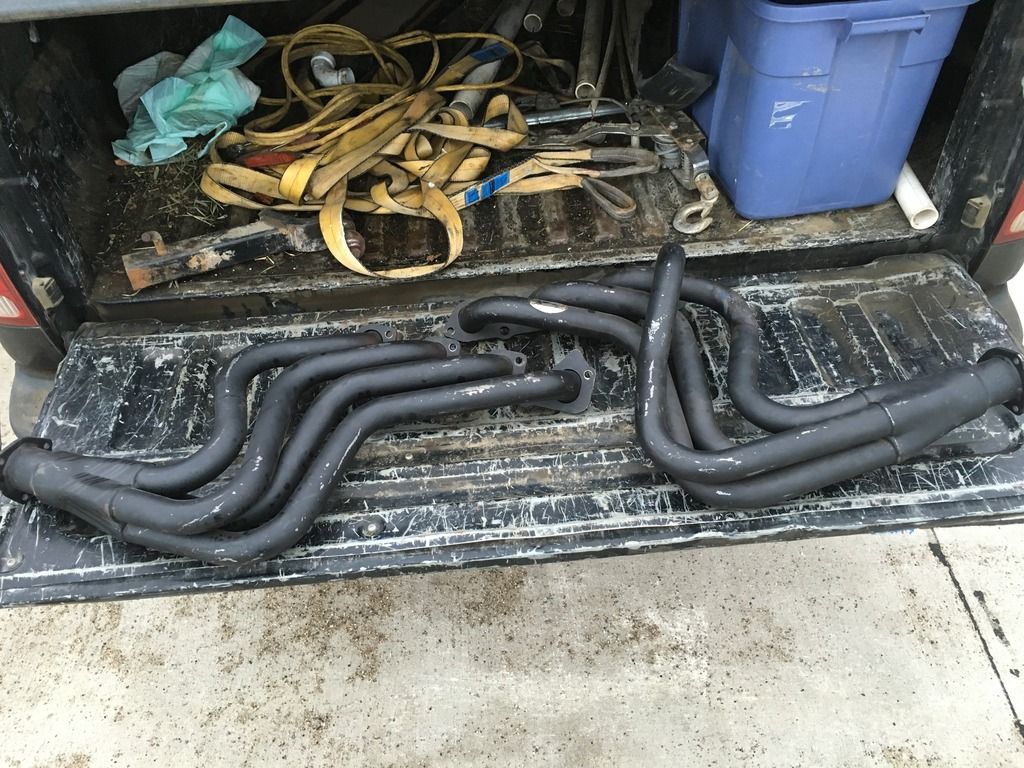
I also picked up a set of Hooker headers that are supposed to be for a 'box' 1980+ F150 from a CL ad also, again, the price was too good to pass up on, I'll see if I can make them fit.
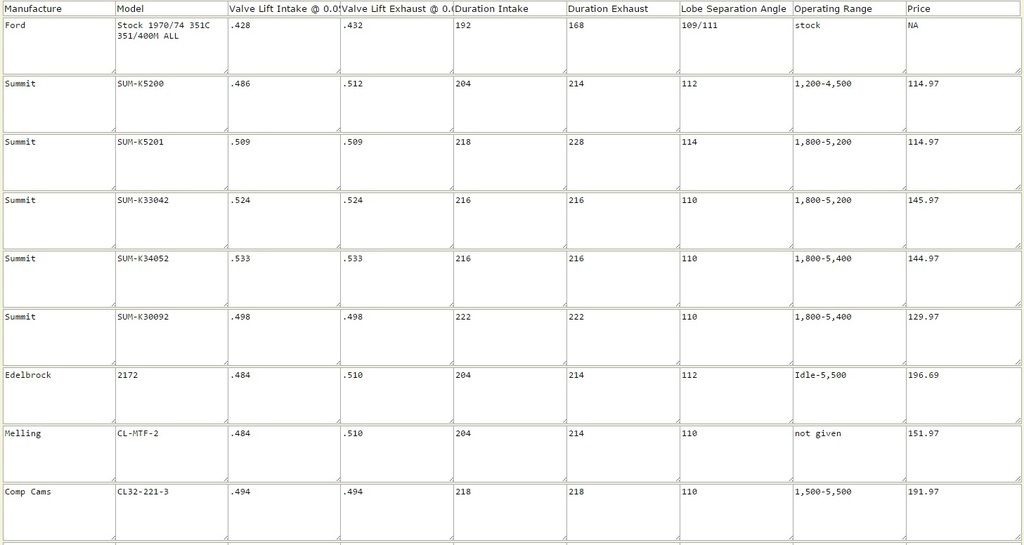
I did a bunch of reading regarding cams and I plan on getting the Melling CL-MTF-2
Once I buy the cam/lifters/timing set; I will tear into the motor and do all the upgrades at one time.
So far for the motor, I've done a basic tune up, cap/rotor/wires/plugs.
And I had to replace the accelerator pump on the carb, it was dumping fuel onto the intake.

And one of the previous owners had installed an electric fuel pump, but left the mechanical pump in place and when the electric pump would run, it would push fuel out of the gap between the stamped top and cast bottom of the mechanical pump.
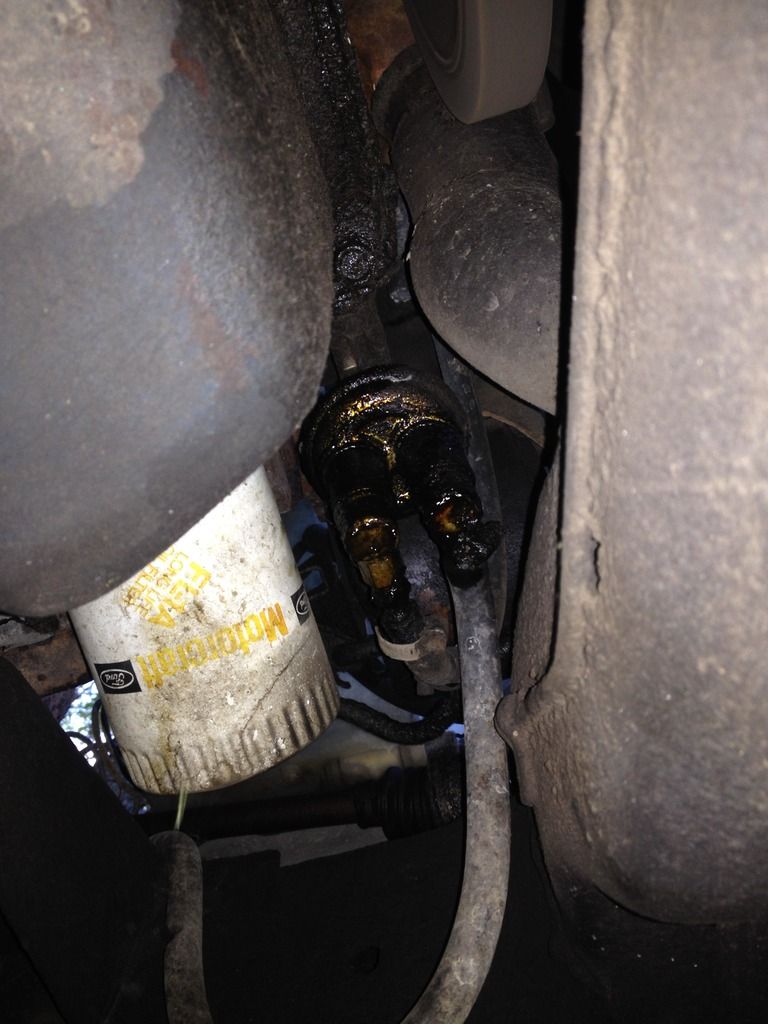
A new mechanical fuel pump and I no longer need the electric pump, but I haven't uninstalled the electric pump yet.
Next on the tune-up/performance hitlist was the vacuum brake booster, the original one was completely shot.
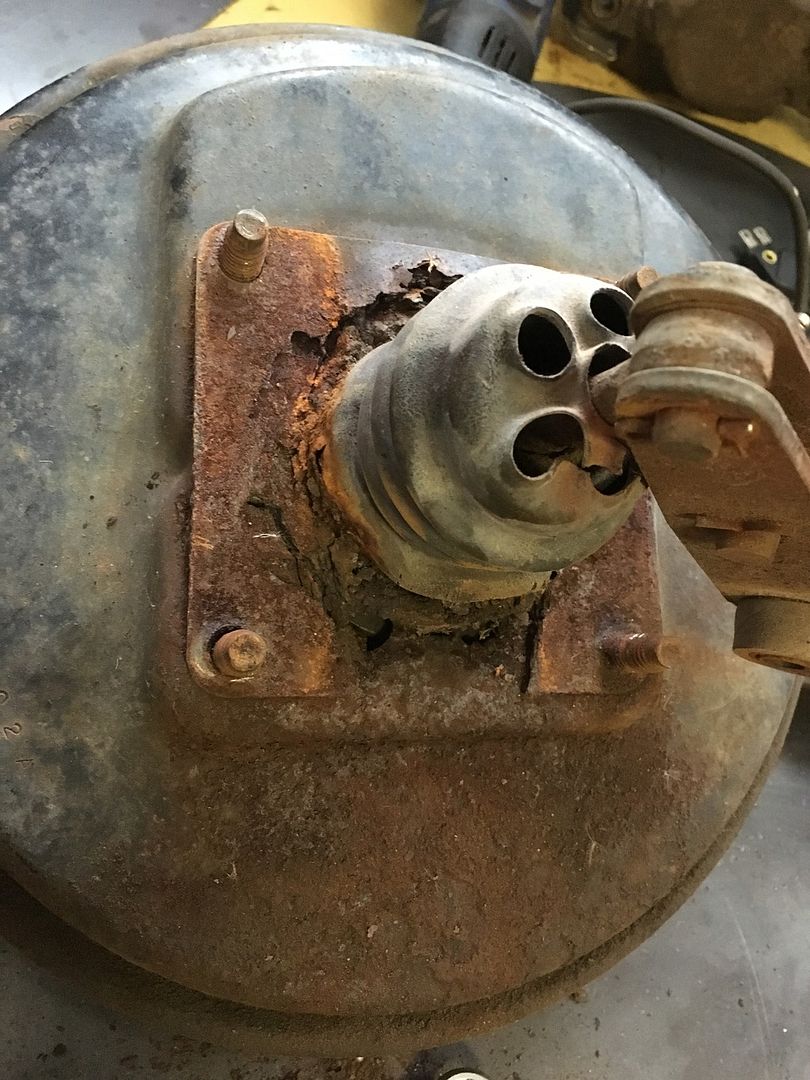
I replaced the bad booster with a 1975 F350 dual diaphram style booster.
I've changed the fuel filter at the carb 6 times now and I haven't even left the yard.
So much rust in the rear tank.
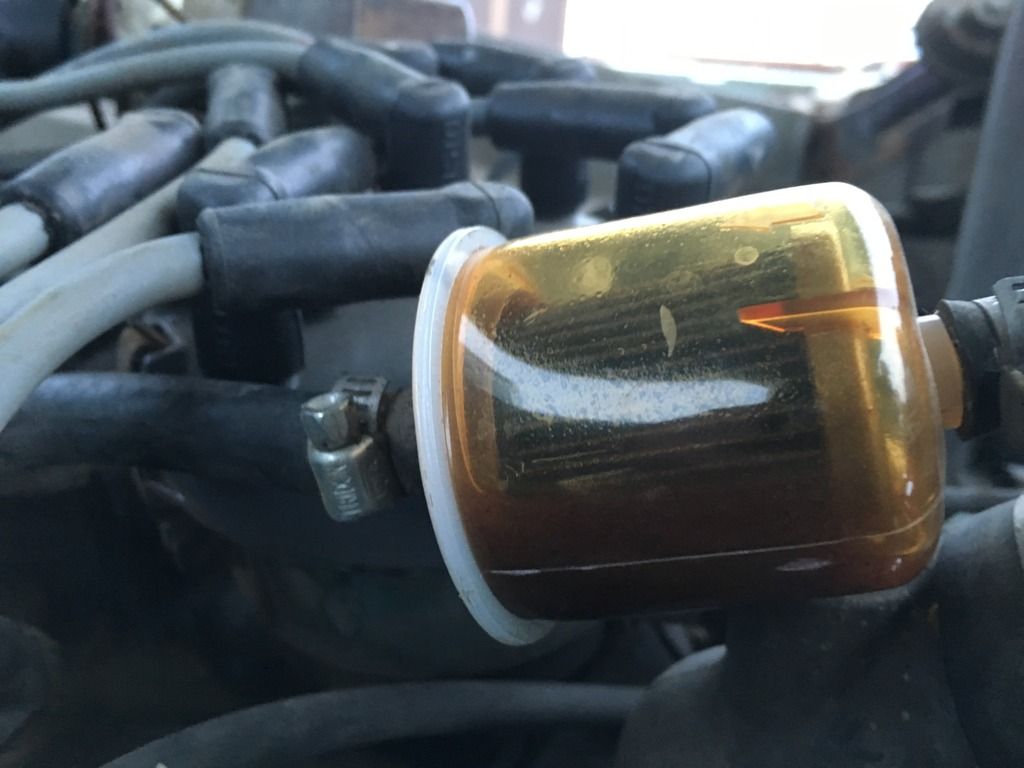
Which leads to the 19g to 38g tank upgrade.
I'm going to build it into a reliable daily driver that is hopefully as capable as my 2005 F250 CCSB/Lariat/FX4/6.0.
When I bought it, the truck has a
400/c6/married NP205
It started life and is titled as a 1975 F250 COF (Cab on Frame), somewhere along the way it was converted to a crew cab, this is normal for how Crew Cabs were made. From other evidence that I've found, the truck was in an accident and the radiator support and frame are from a newer vehicle, at least a 1977.
I've been repairing things as necessary to get it back to a working condition.
From my local Craigslist, I picked up an Edelbrock 1406 (600cfm) carb, the intake came from a forum member over at the oldfordcrewcabs.com forum for a very reasonable price, I've already read that the S.P.2.P is not a very good intake, but I needed something.
I also picked up a set of Hooker headers that are supposed to be for a 'box' 1980+ F150 from a CL ad also, again, the price was too good to pass up on, I'll see if I can make them fit.
I did a bunch of reading regarding cams and I plan on getting the Melling CL-MTF-2
Once I buy the cam/lifters/timing set; I will tear into the motor and do all the upgrades at one time.
So far for the motor, I've done a basic tune up, cap/rotor/wires/plugs.
And I had to replace the accelerator pump on the carb, it was dumping fuel onto the intake.
And one of the previous owners had installed an electric fuel pump, but left the mechanical pump in place and when the electric pump would run, it would push fuel out of the gap between the stamped top and cast bottom of the mechanical pump.
A new mechanical fuel pump and I no longer need the electric pump, but I haven't uninstalled the electric pump yet.
Next on the tune-up/performance hitlist was the vacuum brake booster, the original one was completely shot.
I replaced the bad booster with a 1975 F350 dual diaphram style booster.
I've changed the fuel filter at the carb 6 times now and I haven't even left the yard.
So much rust in the rear tank.
Which leads to the 19g to 38g tank upgrade.
#2
03-01-2016, 05:04 PM
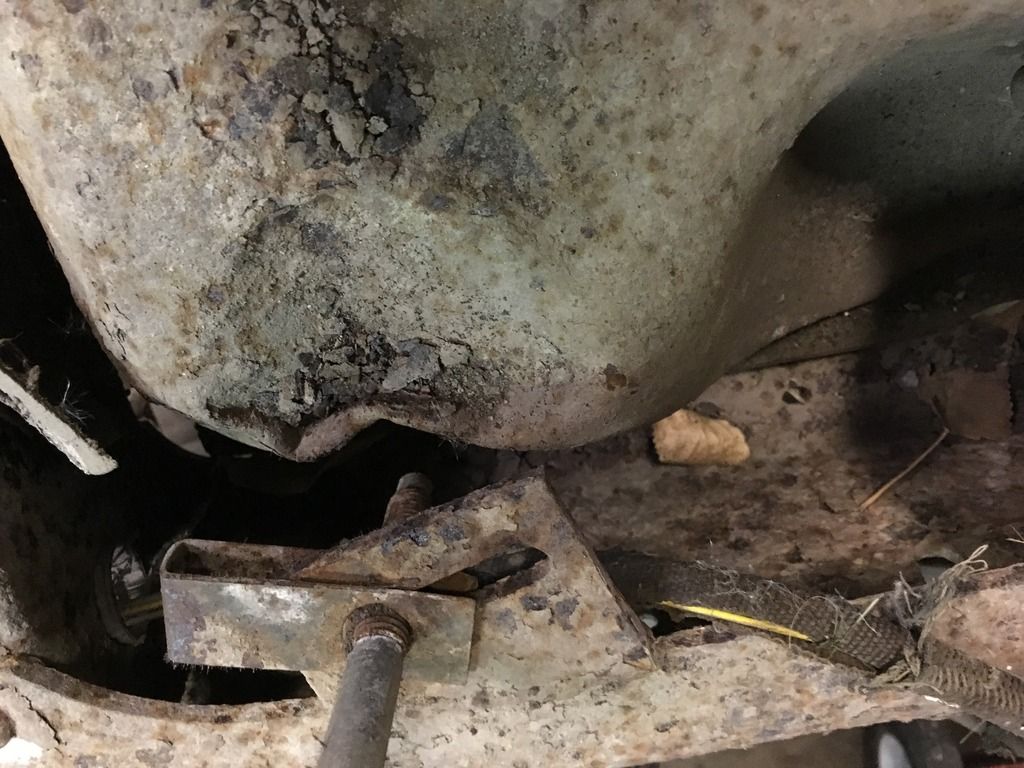
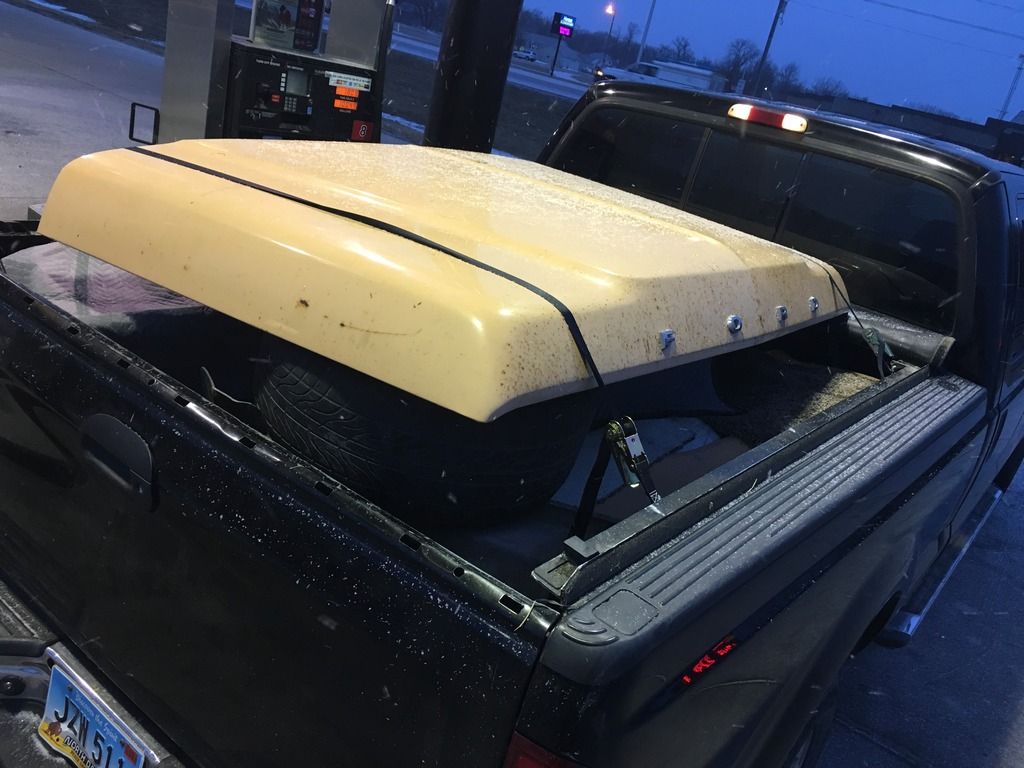
I have a lot of work to do under box, so I took it off.
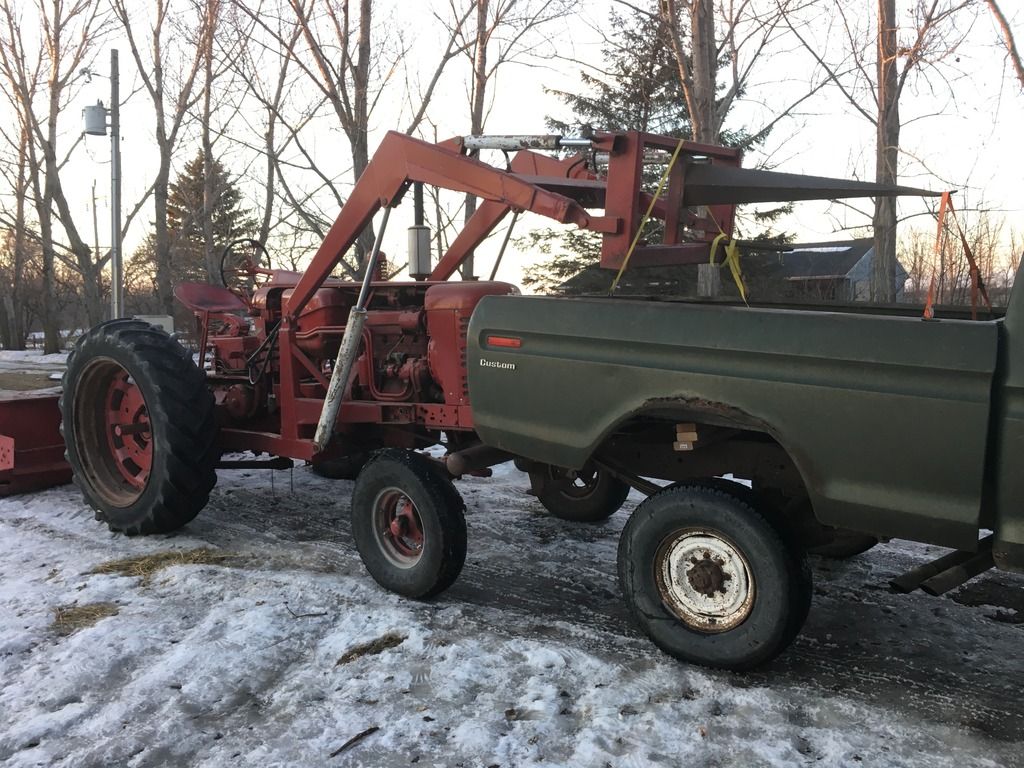
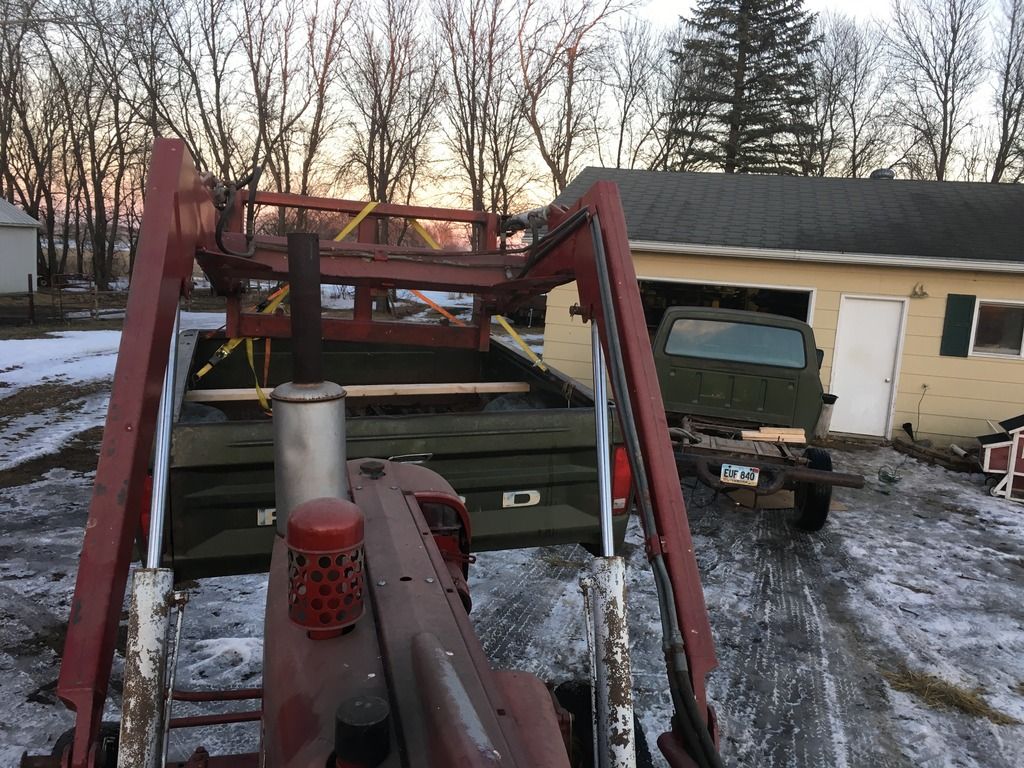
And there's the old 19 gallon tank ready to come out.
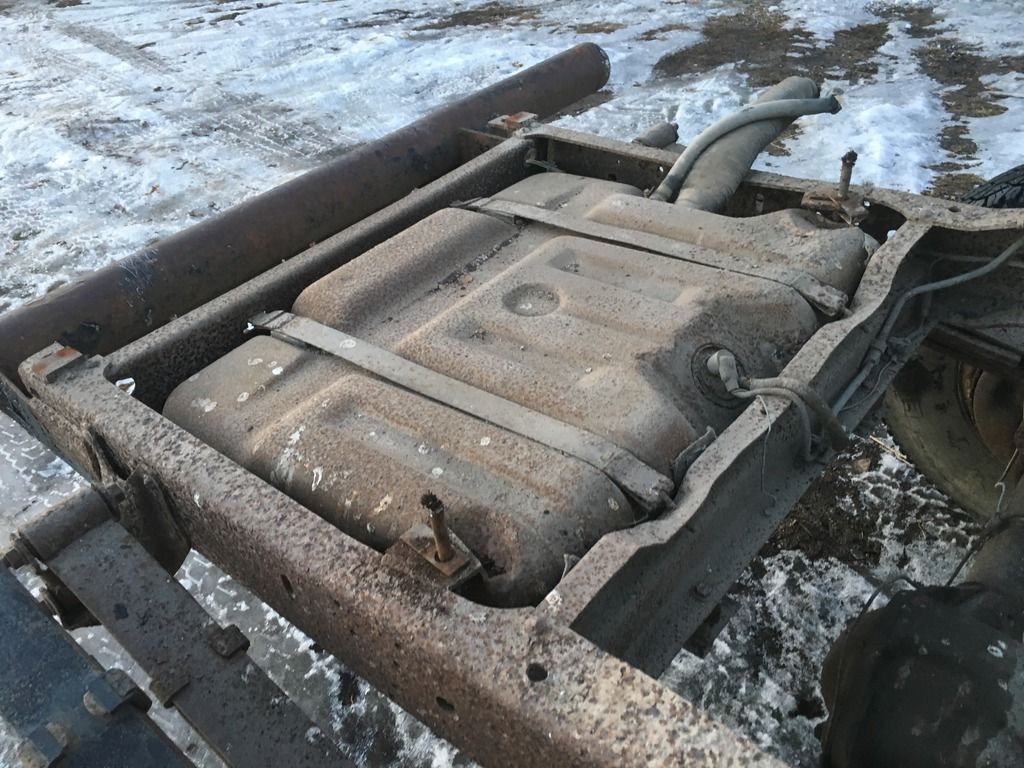
Somebody hammered the leading corners of the 19gallon tank to make it fit.
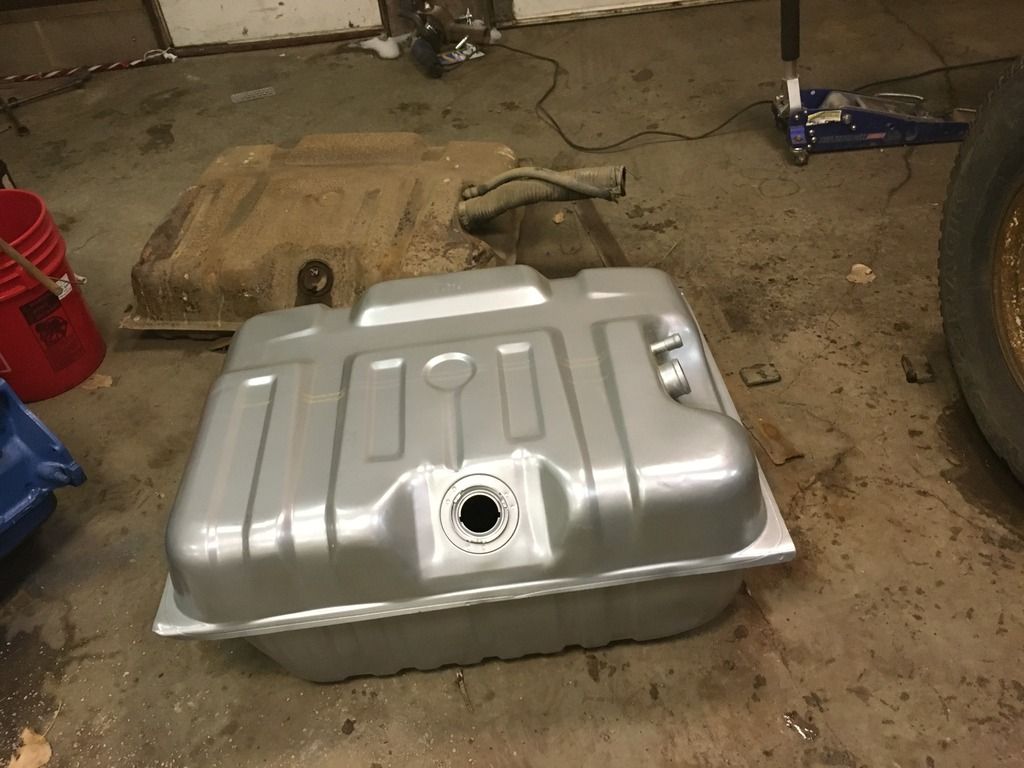
The old tank by the new tank.
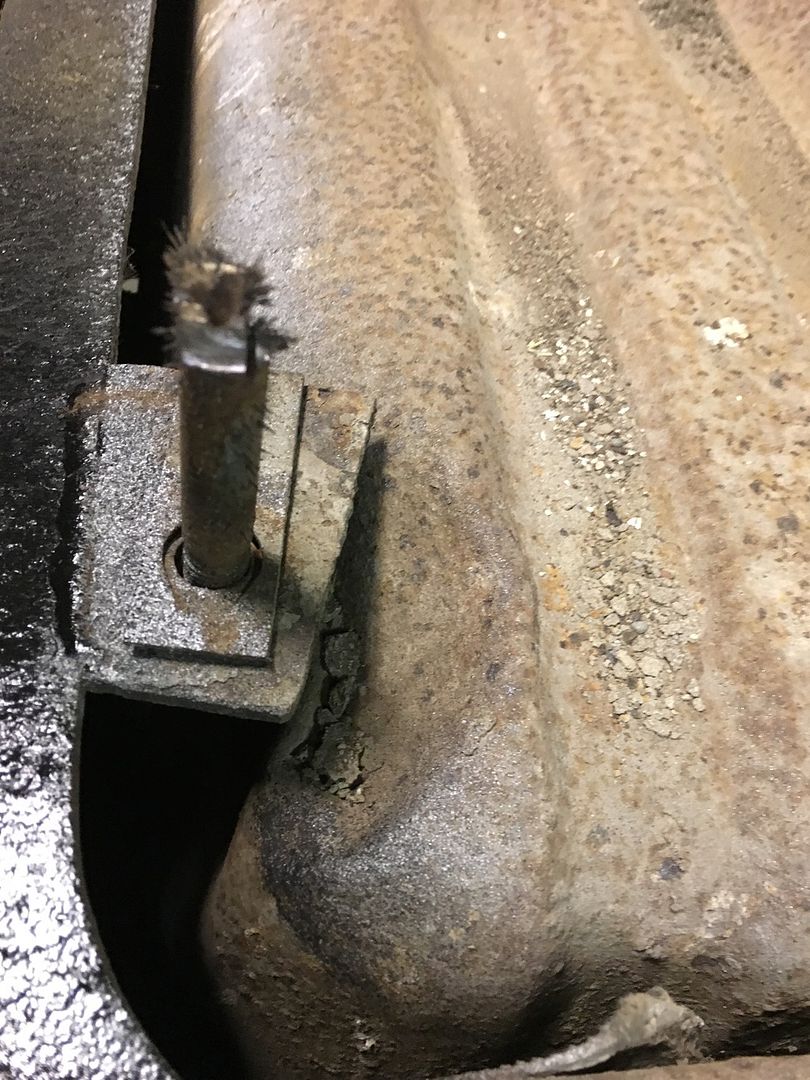
I cut off the tabs that held the bolts, because they also interfered with the installation of the new tank.
New tank installed, but
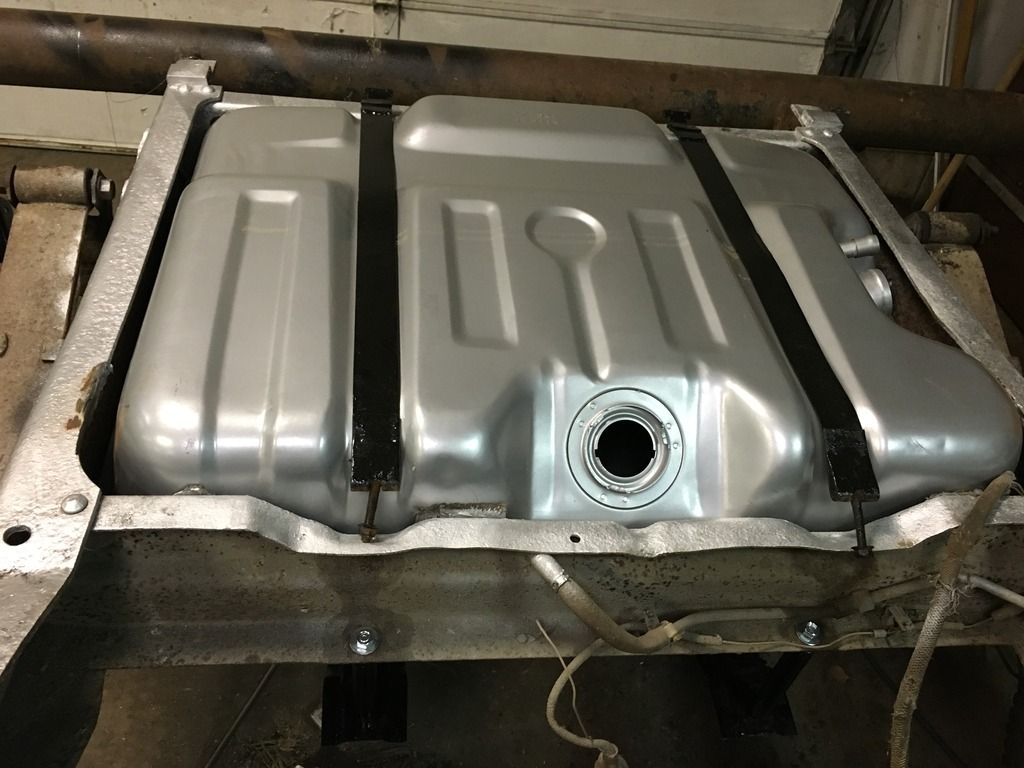
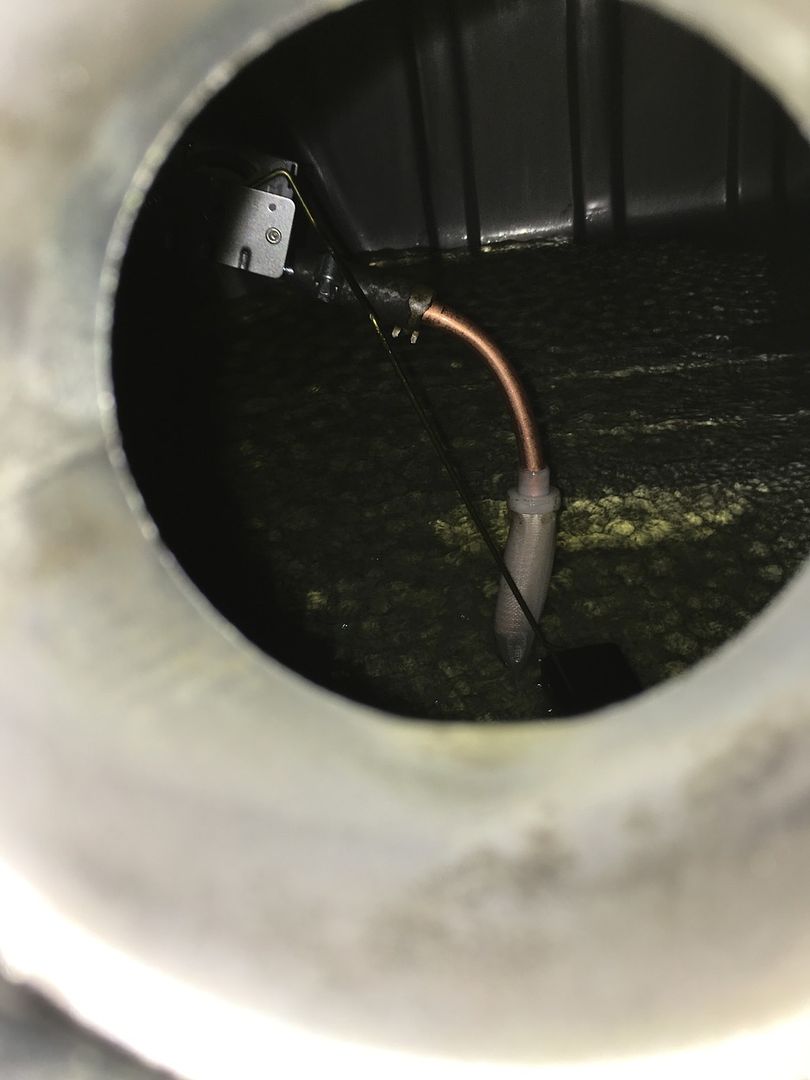
My tank came with a copper extension pipe, I attached it using a piece of 3/8" fuel hose and a pair of hose clamps, then put the screen on the new end.
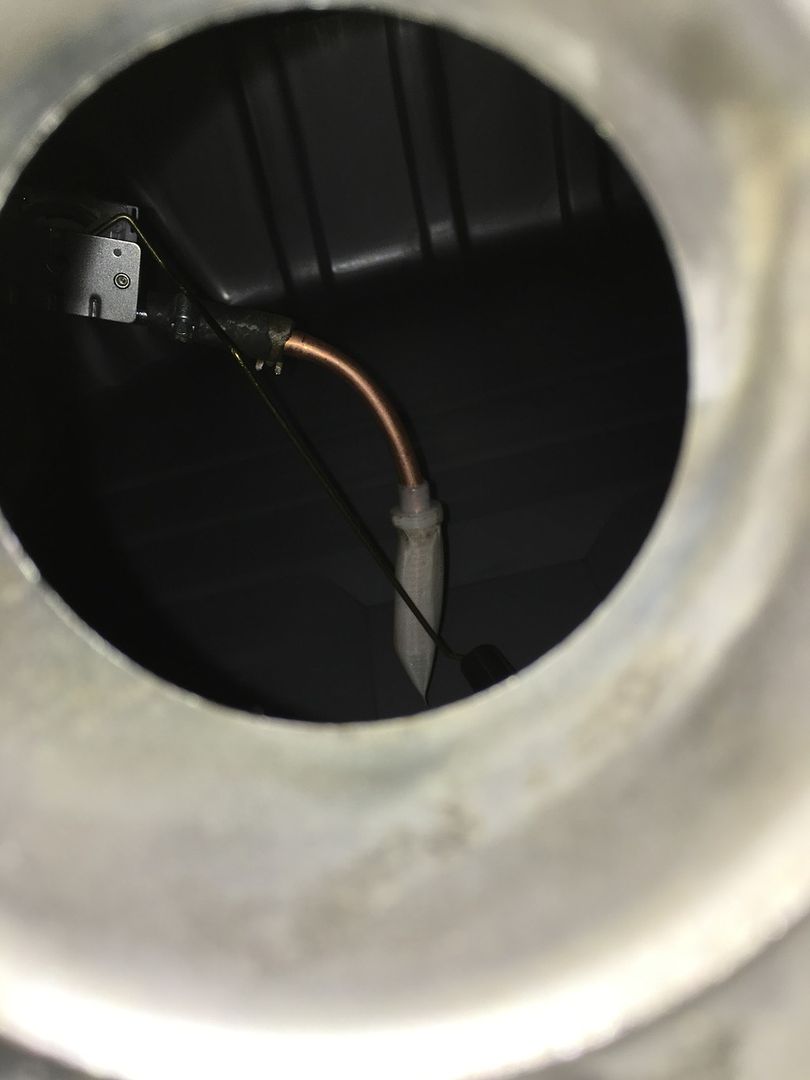
I bent a new fuel float rod out of an old metal/wire clothes hanger.
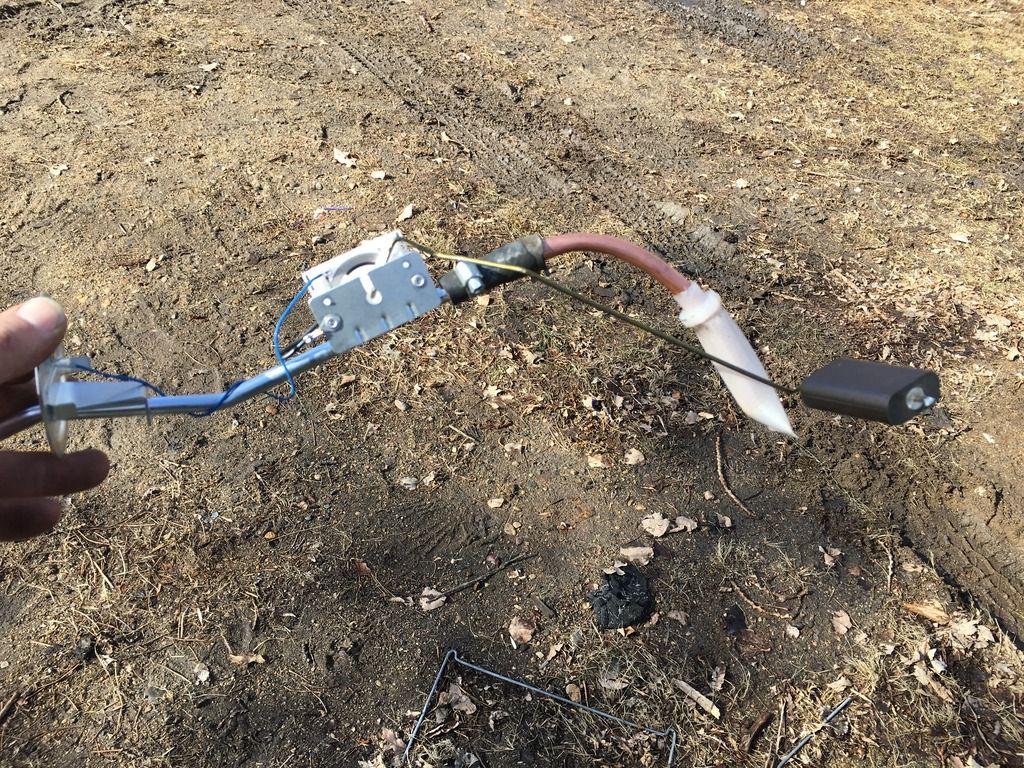
Everything seems to be working fine.
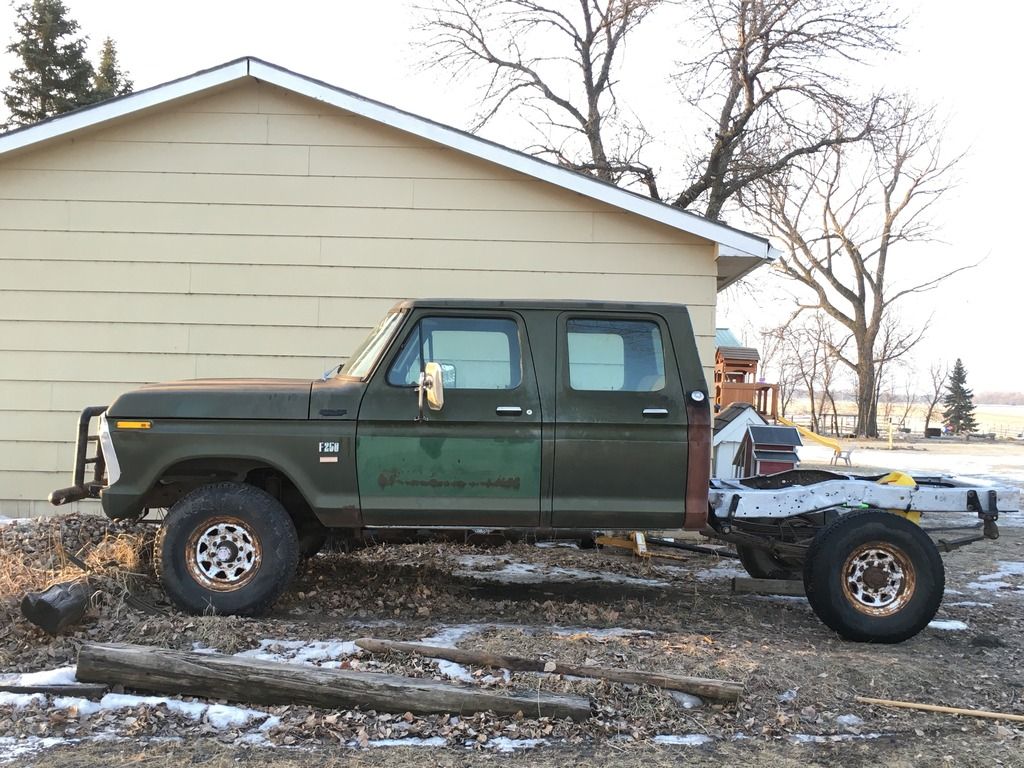
Presto, new fuel tank, I also cut off the rear bumper and associated brackets.
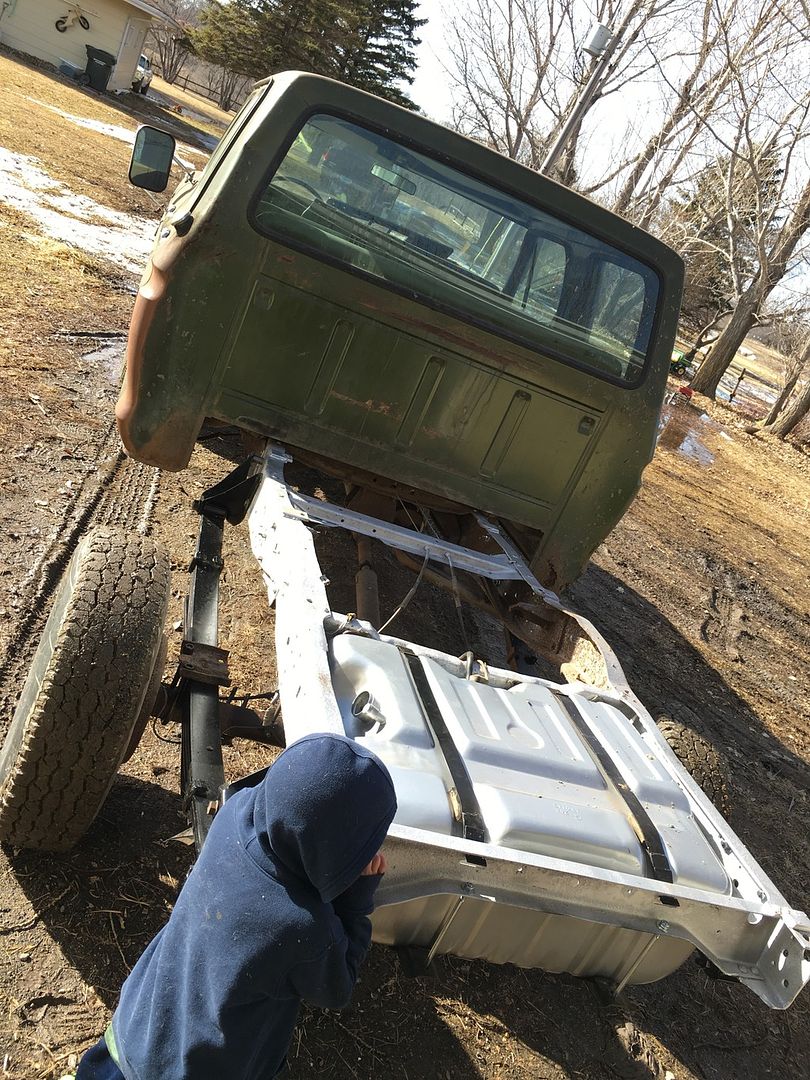
Also visible in this pic is the new leaf springs, they are 2009 F250 66" long.
And there's the old 19 gallon tank ready to come out.
Somebody hammered the leading corners of the 19gallon tank to make it fit.
The old tank by the new tank.
I cut off the tabs that held the bolts, because they also interfered with the installation of the new tank.
New tank installed, but
My tank came with a copper extension pipe, I attached it using a piece of 3/8" fuel hose and a pair of hose clamps, then put the screen on the new end.
I bent a new fuel float rod out of an old metal/wire clothes hanger.
Everything seems to be working fine.
Presto, new fuel tank, I also cut off the rear bumper and associated brackets.
Also visible in this pic is the new leaf springs, they are 2009 F250 66" long.
#3
03-01-2016, 05:33 PM
My original driver side leaf spring had so many broken leaves that it was concerning. It might not be initially obvious, but the stock lift blocks are in backward, the bump stop side is facing the wheel and the bump stop was torched off the lift block. There are no bump stops on the frame.
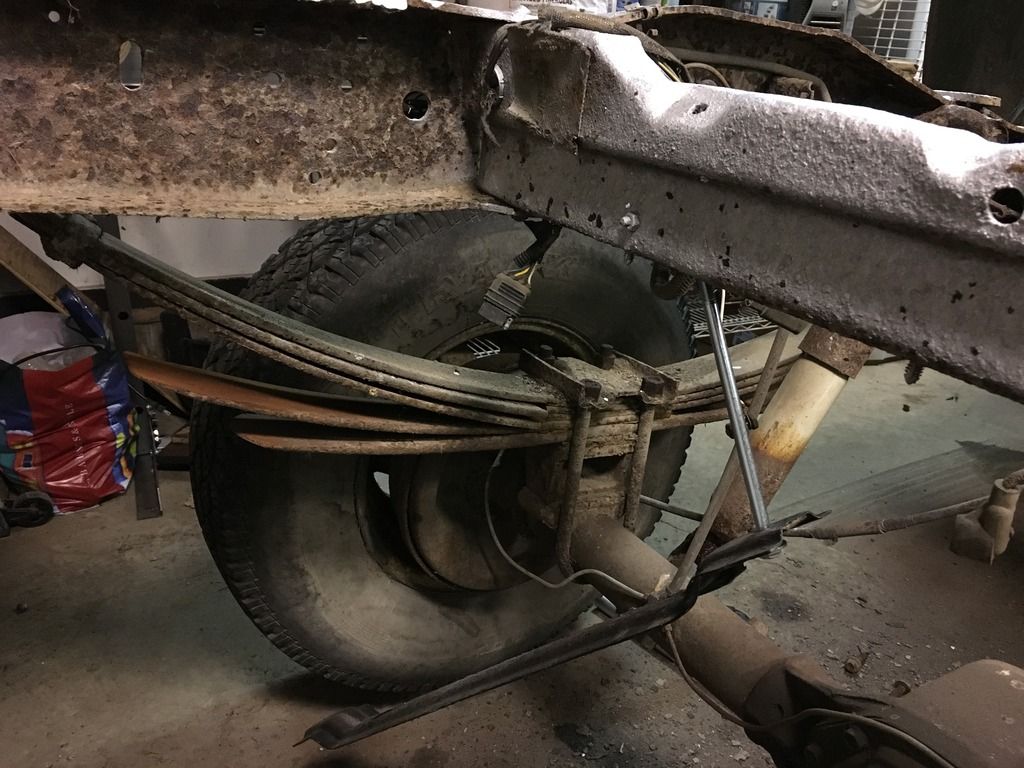
The plan with the leaf springs was to flip the shackle, install 2009 F250 leaves, ditch the lift blocks, and hopefully gain a little altitude.
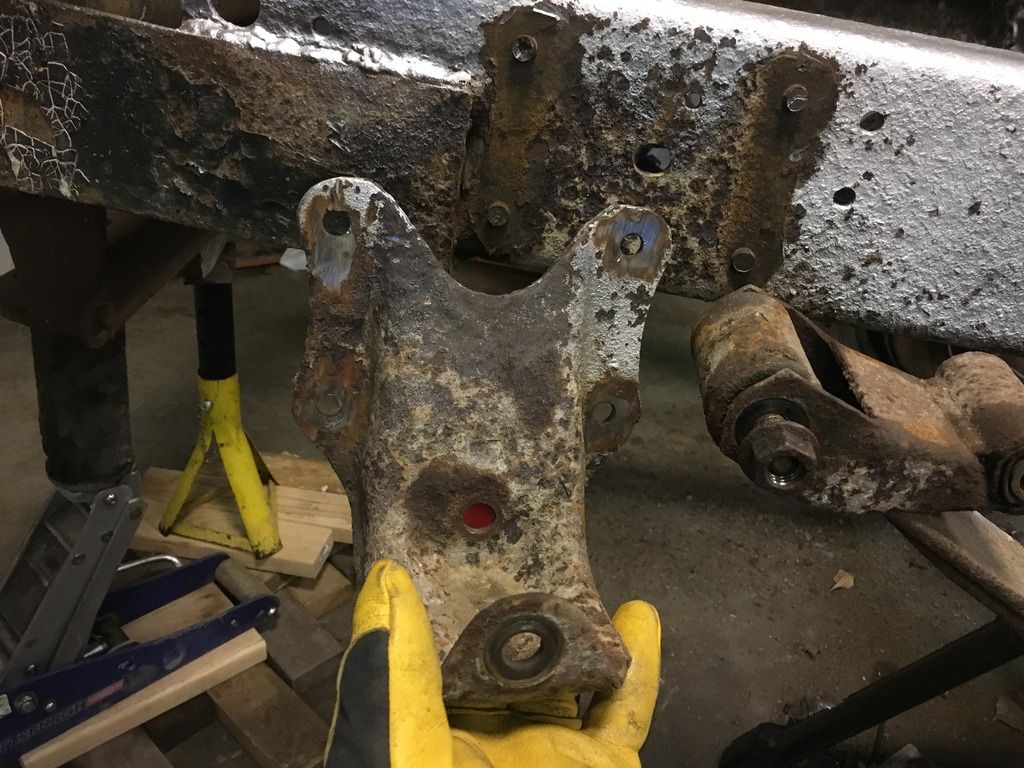
I started by using a grinder to remove the rivet heads.
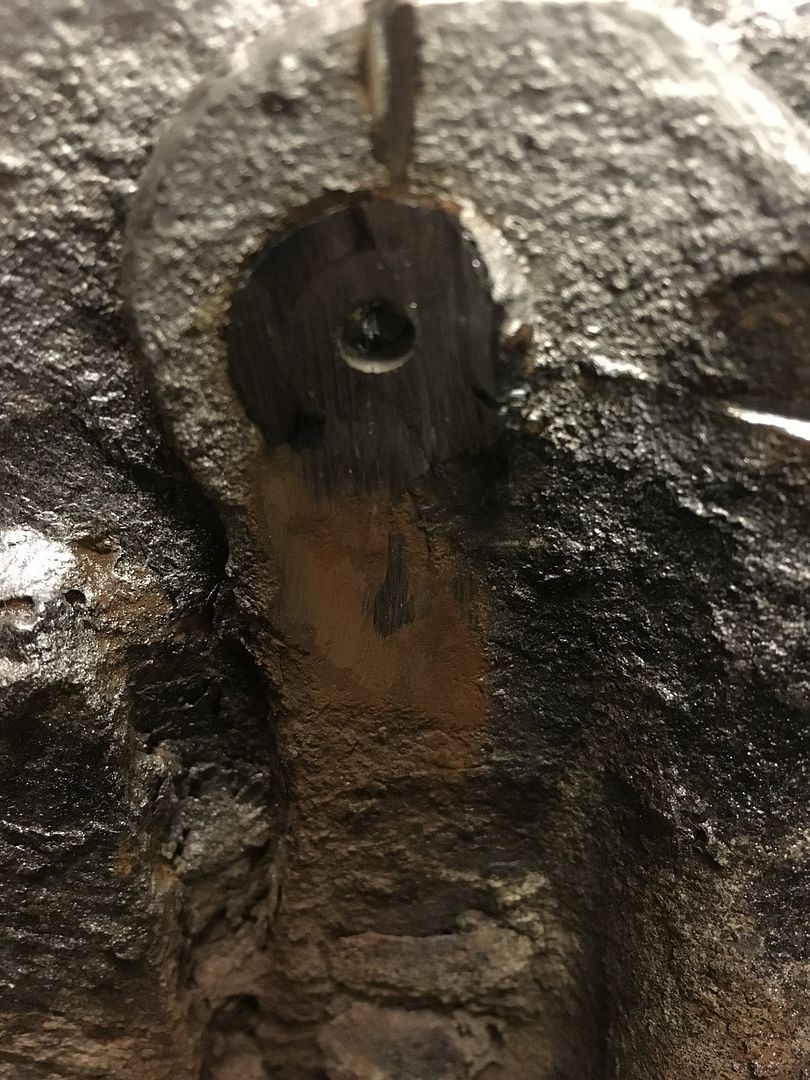
I got pretty good at it after a while.
First shackle bracket removed from the frame
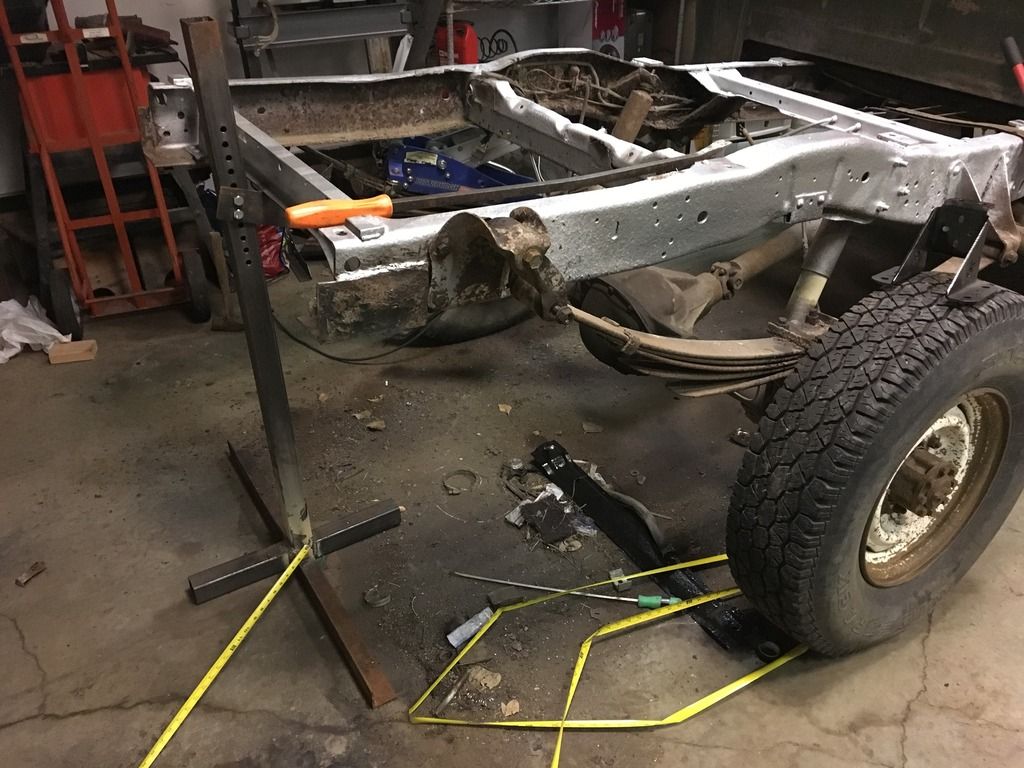
I made this stand to hold up the rear of the frame while I was working back there.
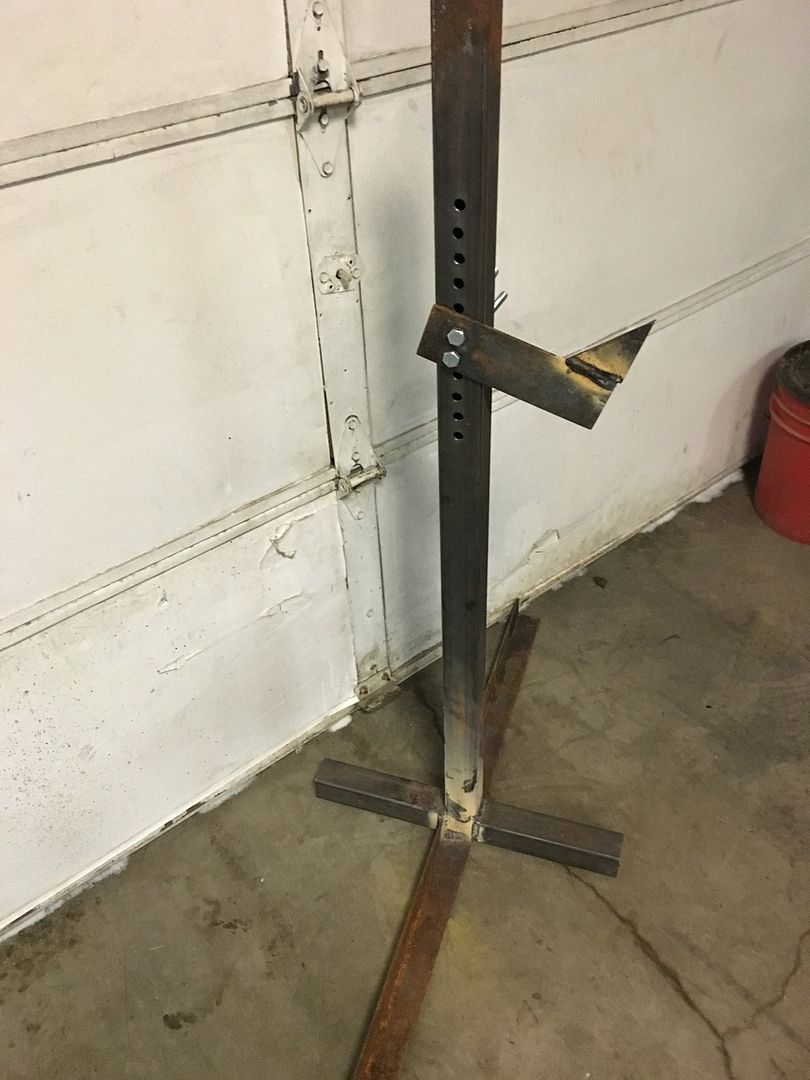
The heavy/high lifting tasks were handled by using an engine hoist.

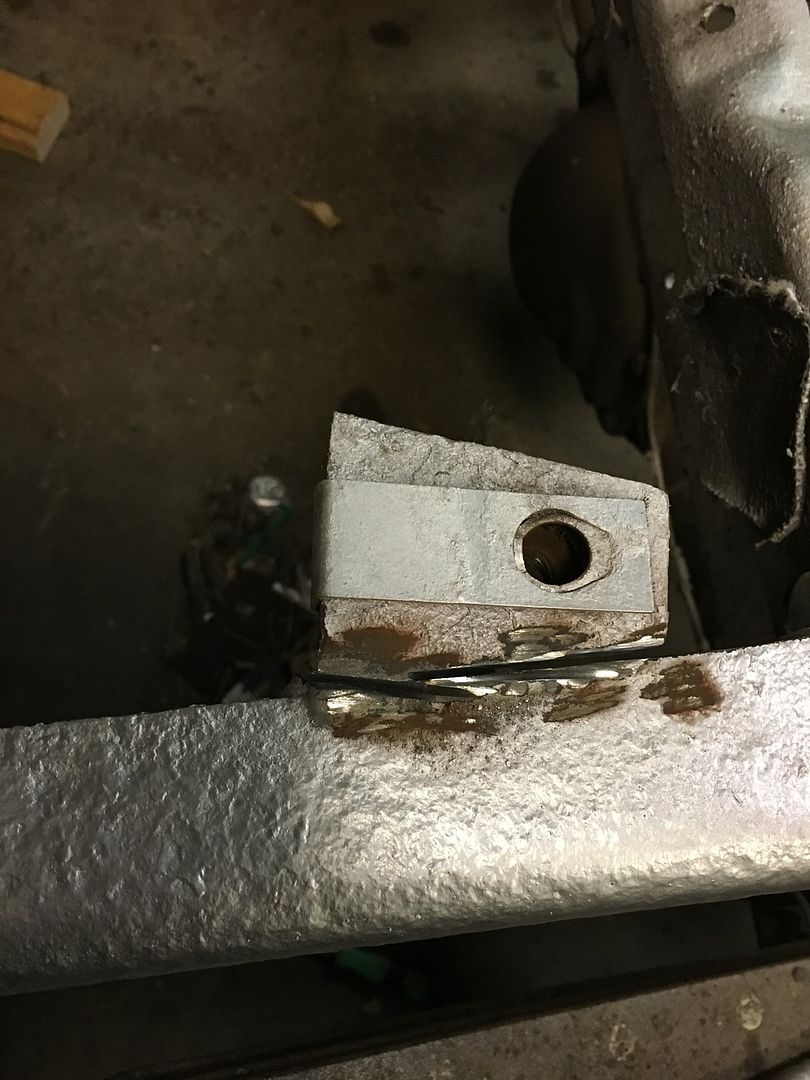
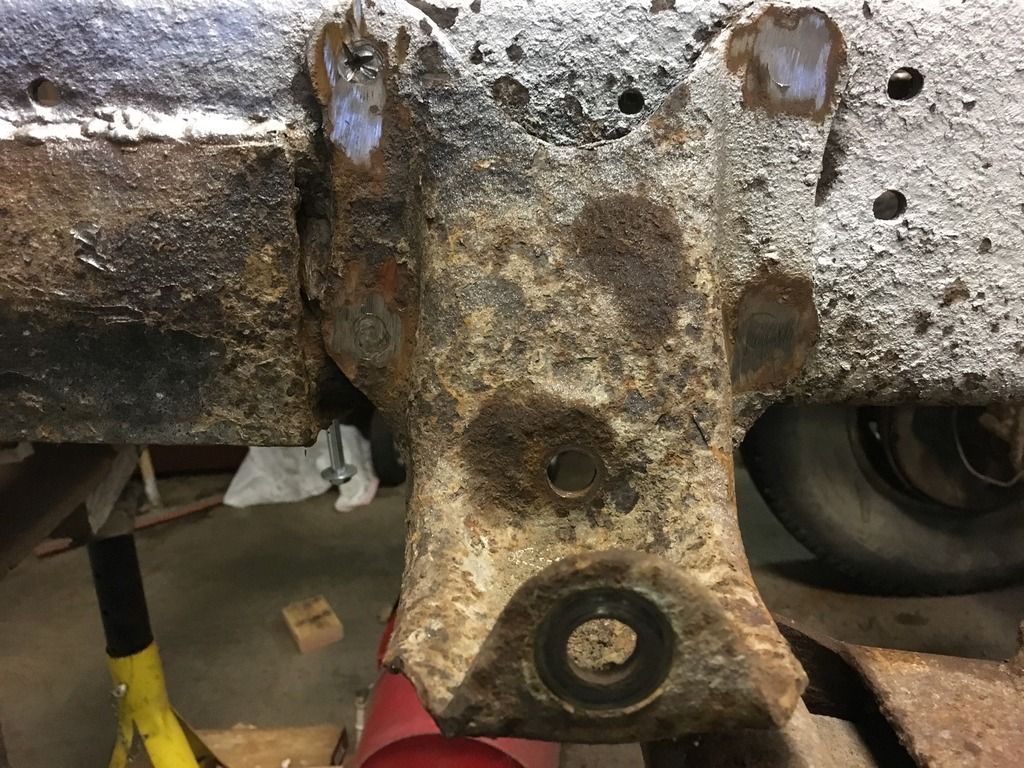
After I ground off the rivets holding the front and rear of the leaf spring, I made this bracket, it has 1/2" bolt holes to locate it on the original leaf spring mount bracket holes on the frame, and a 1/8" hole that is 9.5" forward from the center of the back (far left) bolt hole. This way it may not be perfect, but from left to right it is perfectly symmetric.
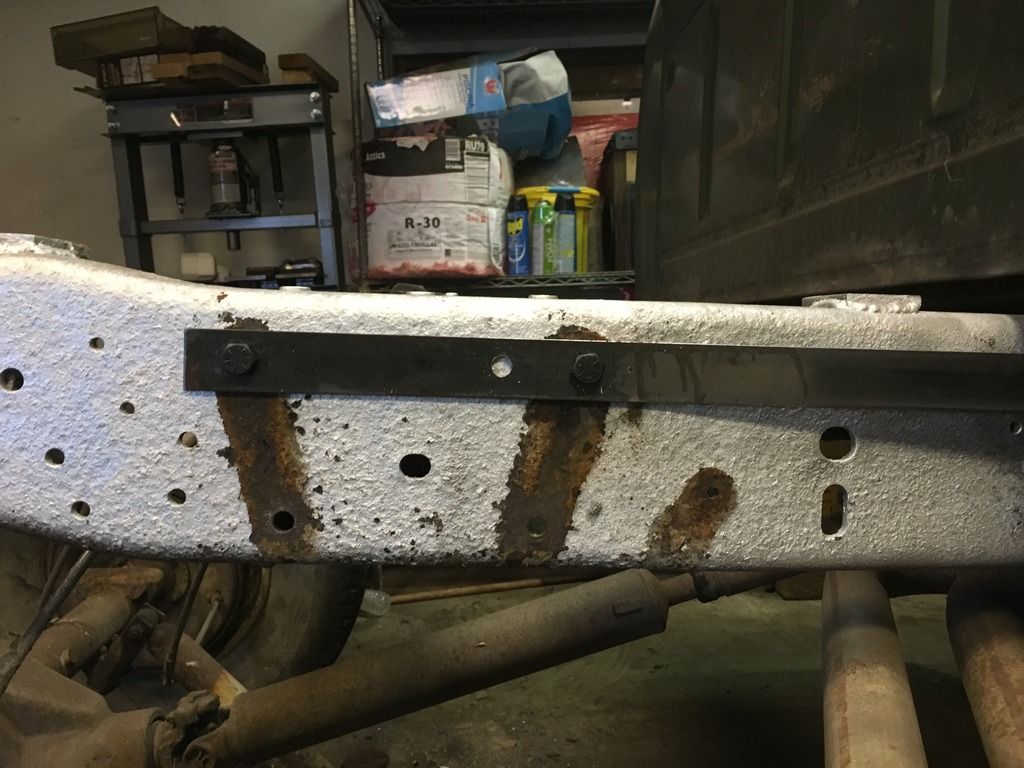
The frame at the front mount narrows right at the point where I needed the mount to be located, since the front bolt holes are not directly above/below it each other, I ended up cutting some DOM to make spacers. 1.5" for the top, 1.25" for the bottom, eventually I will weld these to the frame, right now they are just wedged between the mount and frame.
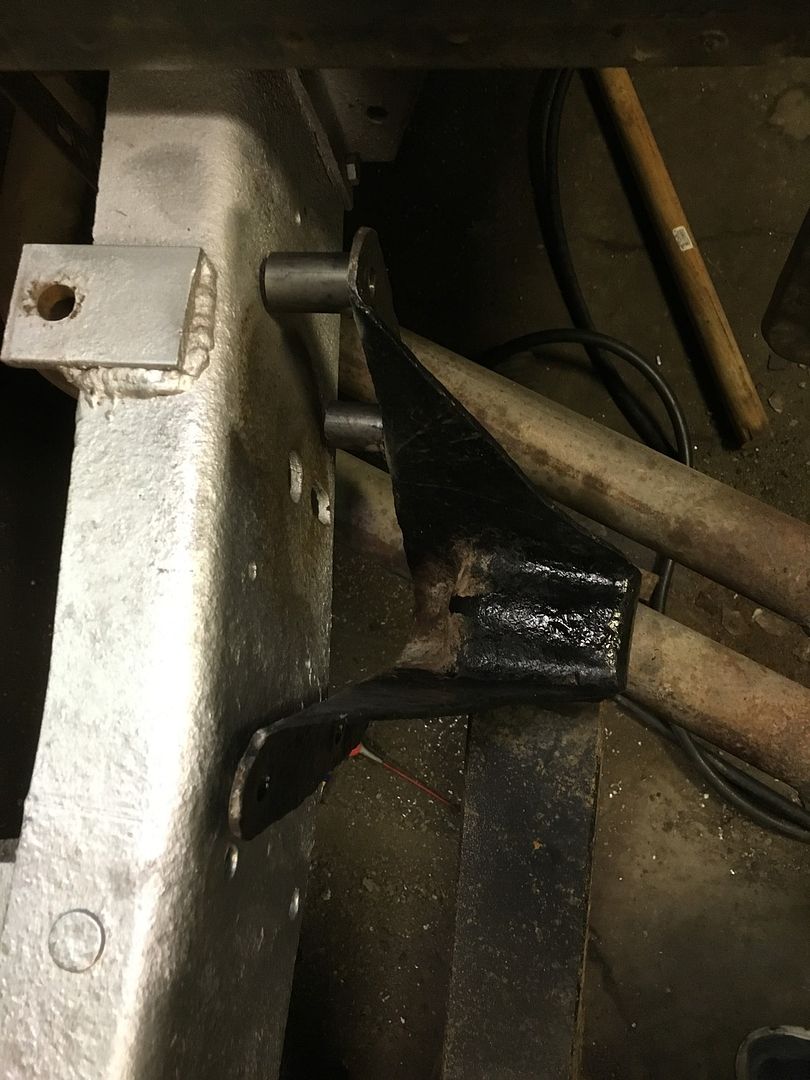
Both the front leaf bracket and the rear shackle brackets were bolted to the frame using 1/2" grade 8 bolts that came pre-loaded with some sort of antiseize, grade 8 flat washers, and swedged self locking nuts.
For the bolts, I reused the 2009 F250 front leaf spring bushing bolt, I used a 51/64 drill bit to open up the holes in the original leaf spring bracket.
For the rear, I used the 2009 bolt in the bushing side, I used a multi-bit to open it up to 5/8", it fit like a glove. I used a stock 1975 bolt in the bushing side of the shackle.
finished product
When I first took the bed off the frame, I had 11" between the top of the axle tube and the bottom of the frame.
When I finished this spring swap, shackle flip, and ditched the stock lift blocks, I had 14.5".
The plan with the leaf springs was to flip the shackle, install 2009 F250 leaves, ditch the lift blocks, and hopefully gain a little altitude.
I started by using a grinder to remove the rivet heads.
I got pretty good at it after a while.
First shackle bracket removed from the frame
I made this stand to hold up the rear of the frame while I was working back there.
The heavy/high lifting tasks were handled by using an engine hoist.
After I ground off the rivets holding the front and rear of the leaf spring, I made this bracket, it has 1/2" bolt holes to locate it on the original leaf spring mount bracket holes on the frame, and a 1/8" hole that is 9.5" forward from the center of the back (far left) bolt hole. This way it may not be perfect, but from left to right it is perfectly symmetric.
The frame at the front mount narrows right at the point where I needed the mount to be located, since the front bolt holes are not directly above/below it each other, I ended up cutting some DOM to make spacers. 1.5" for the top, 1.25" for the bottom, eventually I will weld these to the frame, right now they are just wedged between the mount and frame.
Both the front leaf bracket and the rear shackle brackets were bolted to the frame using 1/2" grade 8 bolts that came pre-loaded with some sort of antiseize, grade 8 flat washers, and swedged self locking nuts.
For the bolts, I reused the 2009 F250 front leaf spring bushing bolt, I used a 51/64 drill bit to open up the holes in the original leaf spring bracket.
For the rear, I used the 2009 bolt in the bushing side, I used a multi-bit to open it up to 5/8", it fit like a glove. I used a stock 1975 bolt in the bushing side of the shackle.
finished product
When I first took the bed off the frame, I had 11" between the top of the axle tube and the bottom of the frame.
When I finished this spring swap, shackle flip, and ditched the stock lift blocks, I had 14.5".


#6
03-01-2016, 09:33 PM
Cargo Master

#7
03-01-2016, 09:49 PM
I build things as necessary.
The stand was built from scrap steel that was laying around my shop.
Regarding the spacers, there has to be something.
What would you recommend?
This truck is a total frankentruck.
On the crew cab only thread, I think this guy nailed it.
everything he said is true.
And a 400 wasn't offered in an f250 until 77. So I always assume I have a 78 frame and running gear.
The stand was built from scrap steel that was laying around my shop.
Regarding the spacers, there has to be something.
What would you recommend?
This truck is a total frankentruck.
On the crew cab only thread, I think this guy nailed it.
Phlegmn,
I saw your build of the 75 crew cab and it's great to see it coming back to be a ranch truck / daily driver.In your write up on Old Crew Cab web site it seems to me that the crew cab was a 2 WD converted to 4 WD using a stock 1978/79 crew cab. Hints to this are the bolt on front spring perches and married style transmission / transfer case/ and it most likely has an integrated power steering box bolted to the frame with 4 bolts.The other tell tale sign is that your frame is 37.5 " wide and all highboys should have been 34" wide frame at rear axle. The bed bolts area another reason as it looks like someone added tabs to bolt bed to frame. I see in one post you have the original door warranty tag with a factory type tag that looks like came in warranty paper work when bought new. If you check the vin I think it will show that it was a 2 WD from factory when decoded. Hope this information is useful with modification you plan for your truck in the future. The build is great and hope it continues as all FTE members like to see what others are building these days.
I saw your build of the 75 crew cab and it's great to see it coming back to be a ranch truck / daily driver.In your write up on Old Crew Cab web site it seems to me that the crew cab was a 2 WD converted to 4 WD using a stock 1978/79 crew cab. Hints to this are the bolt on front spring perches and married style transmission / transfer case/ and it most likely has an integrated power steering box bolted to the frame with 4 bolts.The other tell tale sign is that your frame is 37.5 " wide and all highboys should have been 34" wide frame at rear axle. The bed bolts area another reason as it looks like someone added tabs to bolt bed to frame. I see in one post you have the original door warranty tag with a factory type tag that looks like came in warranty paper work when bought new. If you check the vin I think it will show that it was a 2 WD from factory when decoded. Hope this information is useful with modification you plan for your truck in the future. The build is great and hope it continues as all FTE members like to see what others are building these days.
And a 400 wasn't offered in an f250 until 77. So I always assume I have a 78 frame and running gear.
Trending Topics

#9
03-03-2016, 12:03 PM
Its winter in ND so any body/paint work has to wait another month or two.
A while back, I responded to a local Craigslist ad, a guy was selling a Ford 300 out of a '78 F150, he is swapping in a 460.
I made him an offer on the motor, roughly half of what he was asking. He declined and we went our separate ways. Then a couple weeks ago he called me back ready to sell the motor for what I offered, and offered me anything I wanted off the '78 f150. I told him that I was interested in the front sheet metal.
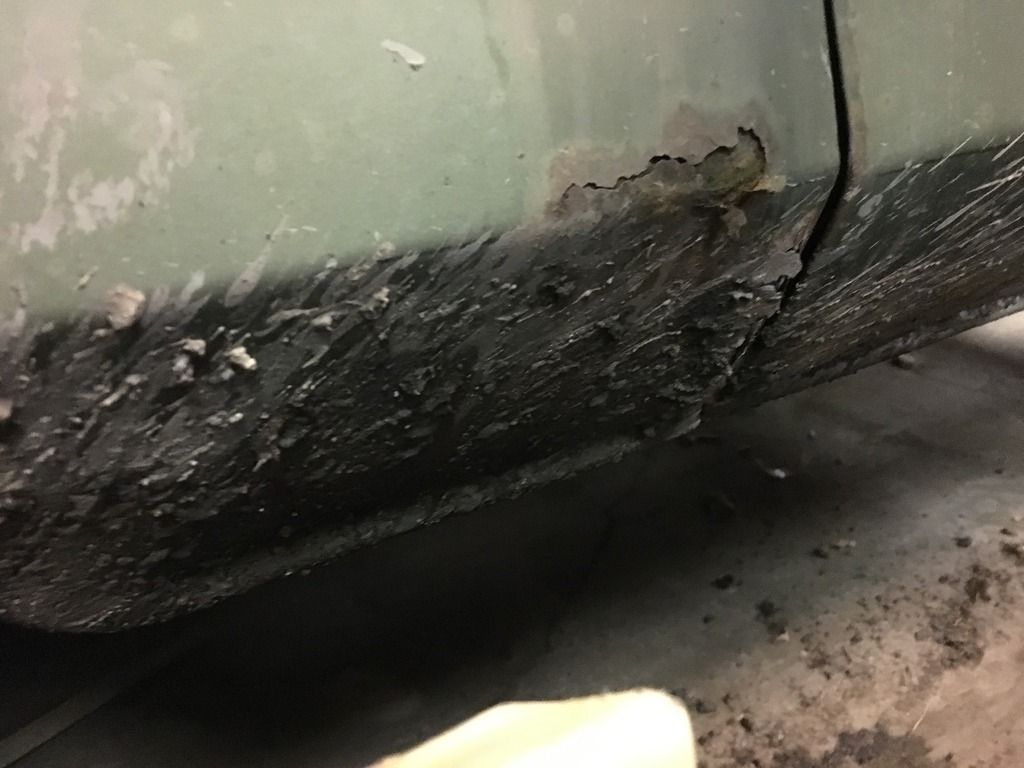
Mine has suffered abuses in its life and I was preparing to buy buy patch panels or replace panels as available from local sources.
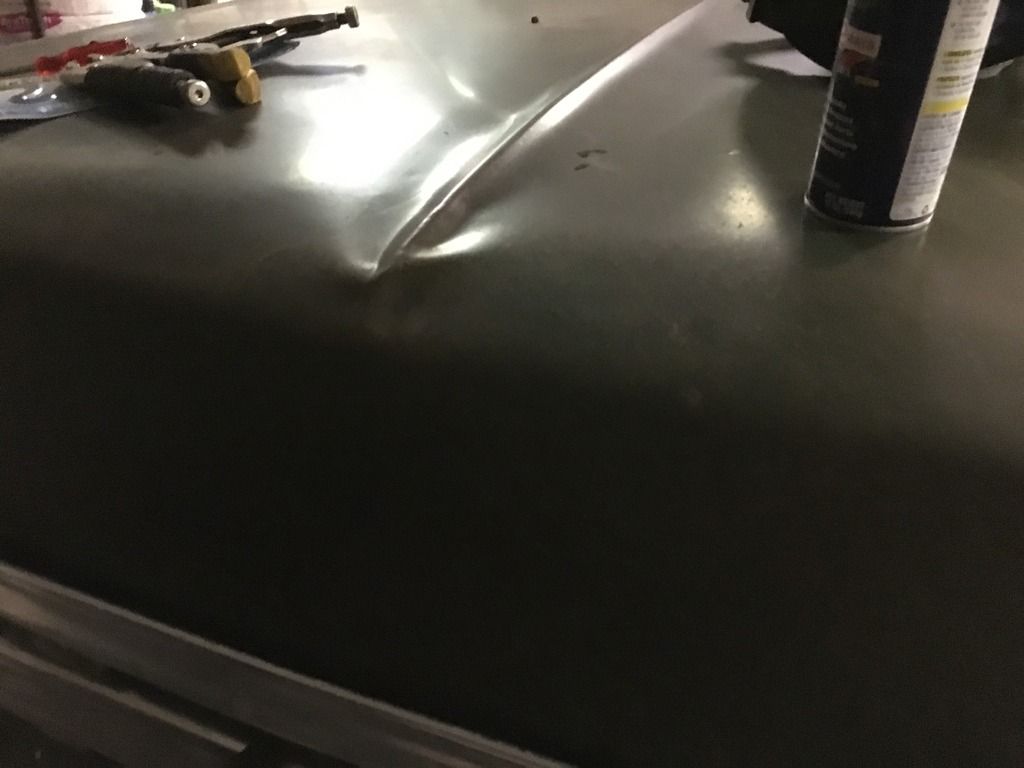
Driver side front fender
Rusted
And dented
Front/top/Center of hood is all dented in.
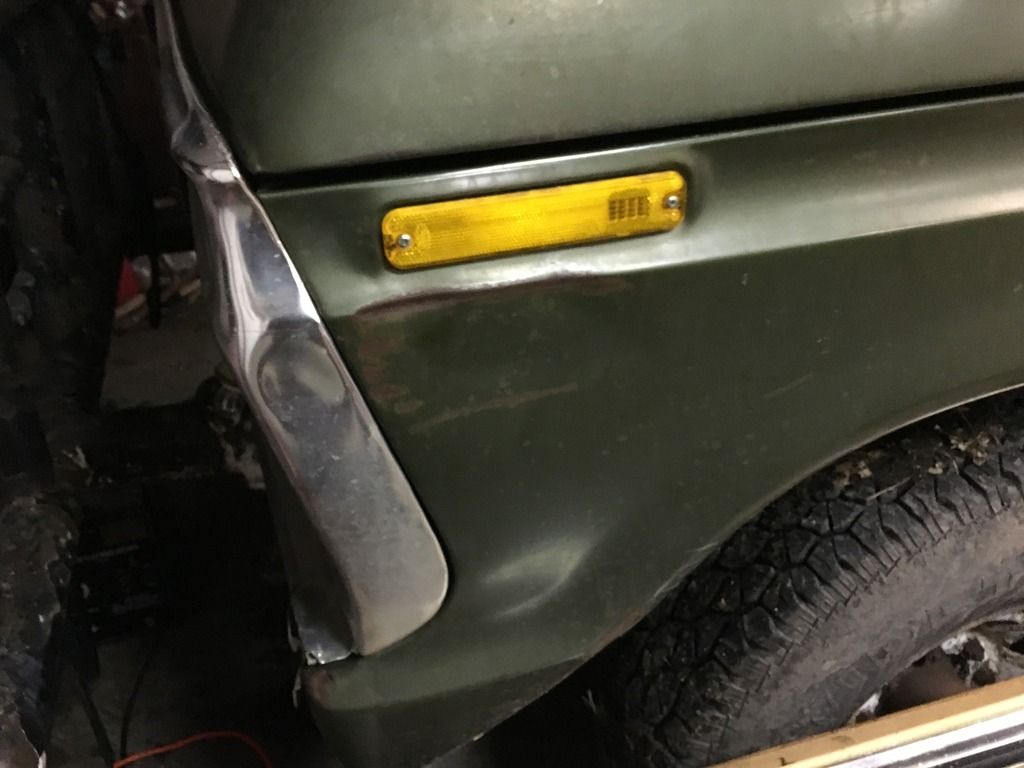
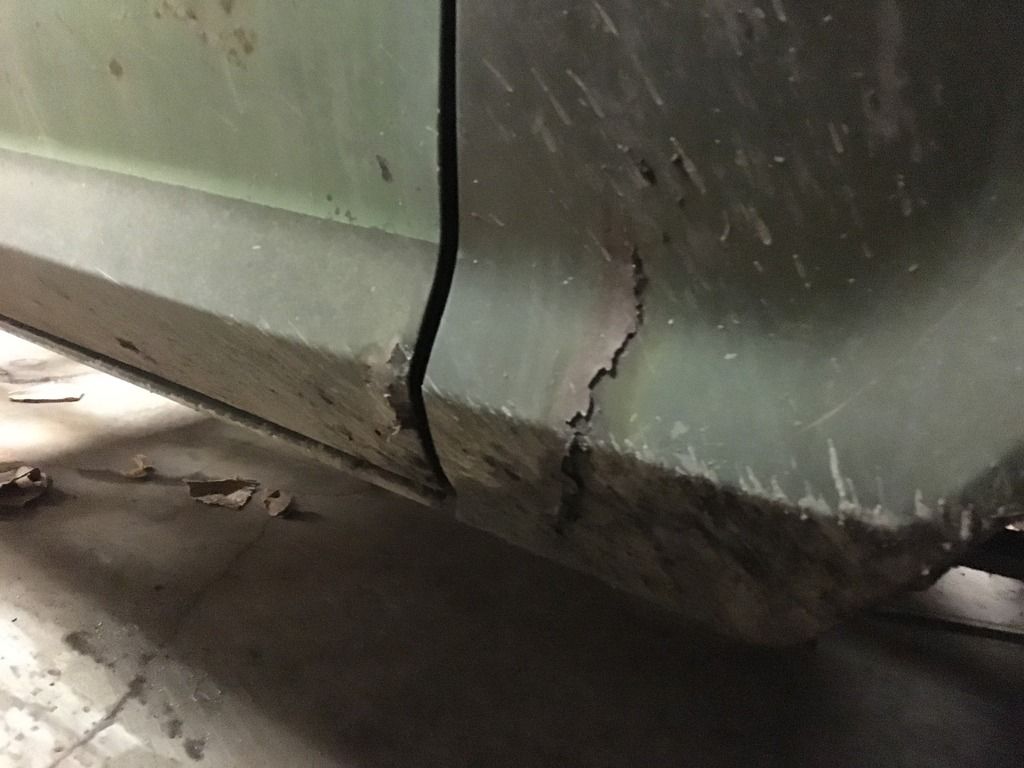
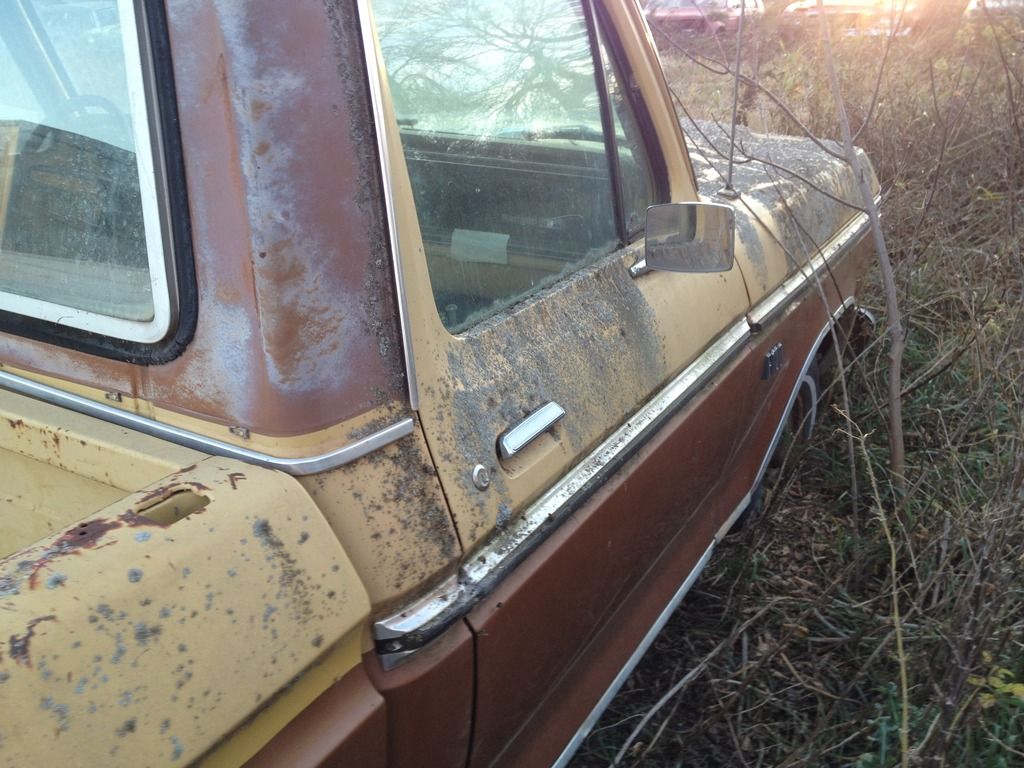
Passenger side Front fender and leading edge of the door
rusted
I had planned on pilfering all the sheet metal I could use off this truck at Dad's house.
But back to the guy from the Craigslist ad.
He texted me Wednesday and said he had sold the motor, but he had the sheetmetal ready to go, best of all... free.
I loaded it all up last night and strapped it down.
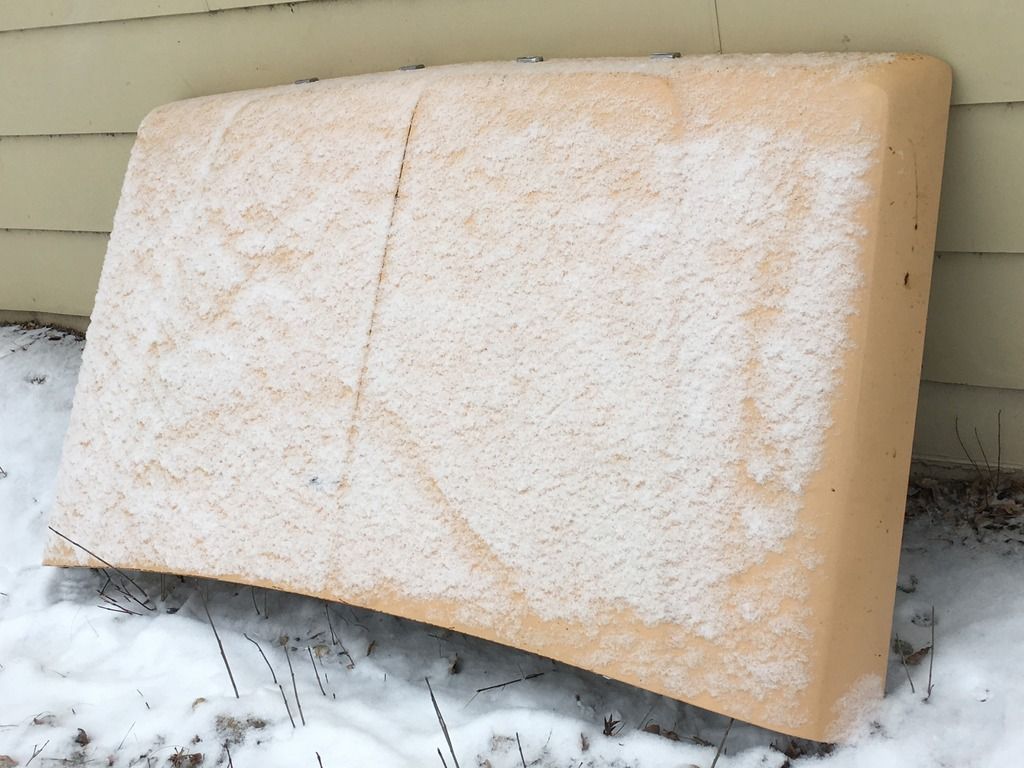
nice hood
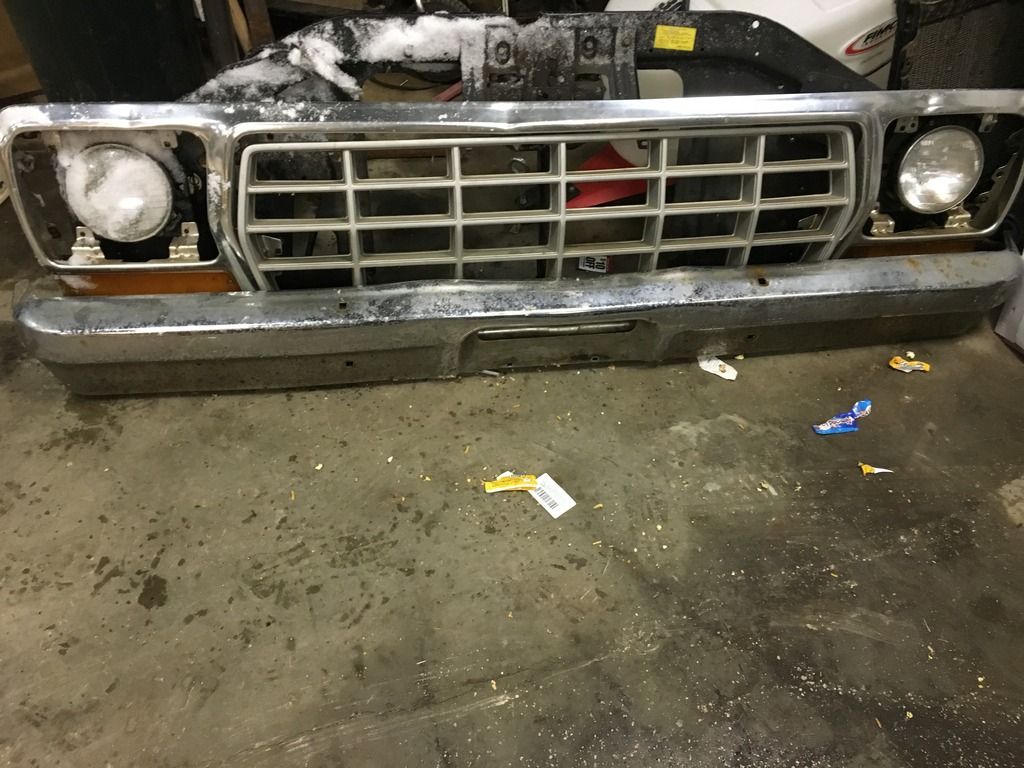
Grill surround, insert, and a front bumper with a lot of pitting.
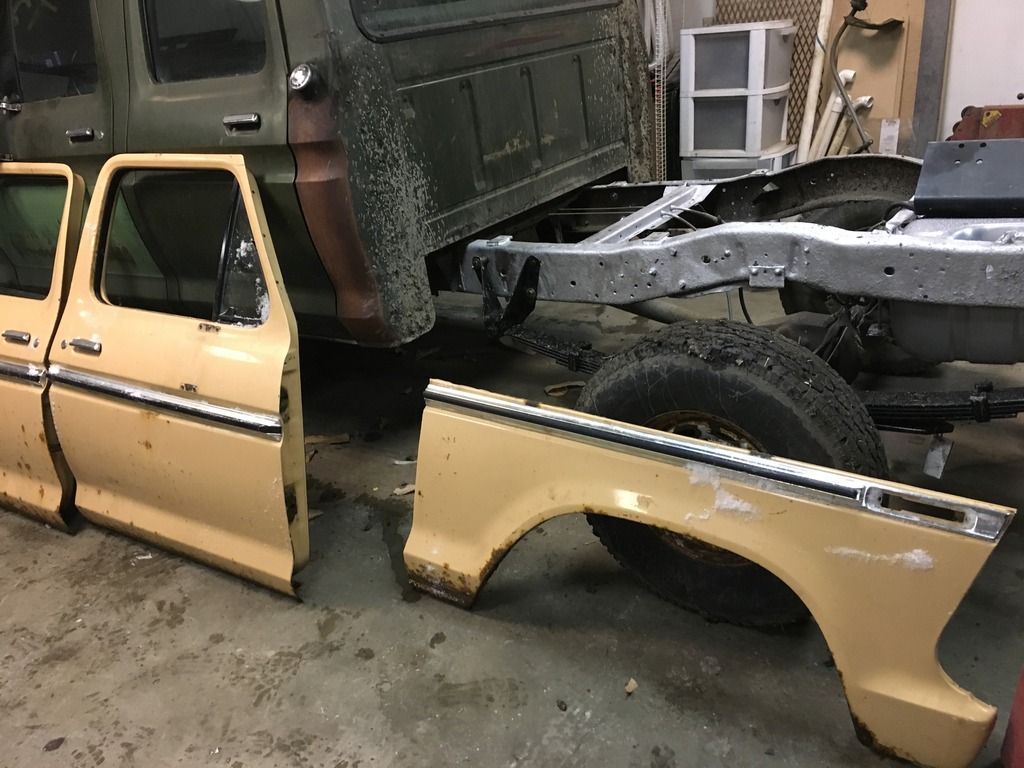
Driver Side front fender and door
Nothing more than surface rust.

Passenger Side front fender and door
Same surface rust, nothing more.
The plan is to strip these down, prep and lay down some epoxy primer.... when the weather warms up anyhow.
Epoxy primer comes in black, grey, red, or white. The guys at Napa said they can tint white if I like, so I will need to figure out what temporary color I ant to live with while I sort out the rest of my body issues..
These pics are from a recent eBay listing and the direction I'm headed.
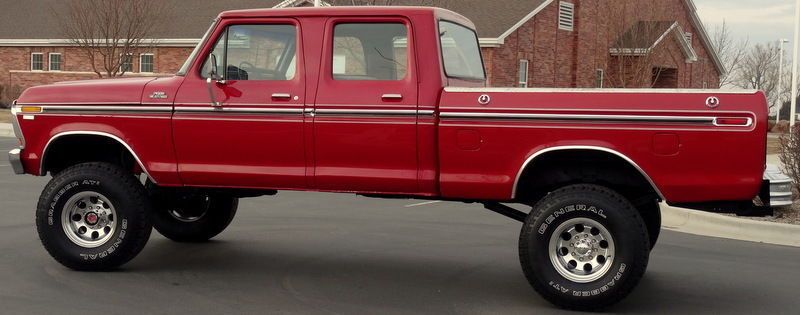
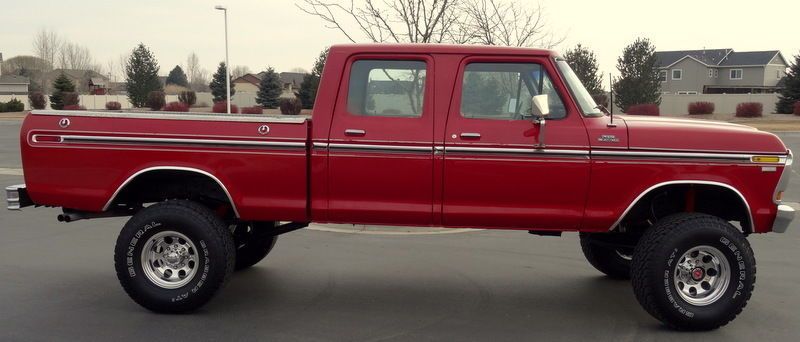
But I just can't shake the notion of the racetrack trim, like the red/white truck in this picture from (I don't remember where)
I'll have to find some articles on adding the trim.
I hate to do things twice and I hate spending money twice to get a job done.
And my personal philosophy is to take care of safety (suspension/brakes/lights) first and then performance.
"Stop first; performance and looks later"
But I really need to swap out that original 2bbl for the 4bbl intake and carb, the 2bbl needs to be rebuilt and I'm tired of messing with it.
A while back, I responded to a local Craigslist ad, a guy was selling a Ford 300 out of a '78 F150, he is swapping in a 460.
I made him an offer on the motor, roughly half of what he was asking. He declined and we went our separate ways. Then a couple weeks ago he called me back ready to sell the motor for what I offered, and offered me anything I wanted off the '78 f150. I told him that I was interested in the front sheet metal.
Mine has suffered abuses in its life and I was preparing to buy buy patch panels or replace panels as available from local sources.
Driver side front fender
Rusted
And dented
Front/top/Center of hood is all dented in.
Passenger side Front fender and leading edge of the door
rusted
I had planned on pilfering all the sheet metal I could use off this truck at Dad's house.
But back to the guy from the Craigslist ad.
He texted me Wednesday and said he had sold the motor, but he had the sheetmetal ready to go, best of all... free.
I loaded it all up last night and strapped it down.
nice hood
Grill surround, insert, and a front bumper with a lot of pitting.
Driver Side front fender and door
Nothing more than surface rust.
Passenger Side front fender and door
Same surface rust, nothing more.
The plan is to strip these down, prep and lay down some epoxy primer.... when the weather warms up anyhow.
Epoxy primer comes in black, grey, red, or white. The guys at Napa said they can tint white if I like, so I will need to figure out what temporary color I ant to live with while I sort out the rest of my body issues..
These pics are from a recent eBay listing and the direction I'm headed.
But I just can't shake the notion of the racetrack trim, like the red/white truck in this picture from (I don't remember where)
I'll have to find some articles on adding the trim.
I hate to do things twice and I hate spending money twice to get a job done.
And my personal philosophy is to take care of safety (suspension/brakes/lights) first and then performance.
"Stop first; performance and looks later"
But I really need to swap out that original 2bbl for the 4bbl intake and carb, the 2bbl needs to be rebuilt and I'm tired of messing with it.
#11
03-03-2016, 12:13 PM
Thanks. My normal working hours are 5am-6:30am weekdays. My wife gets up early and heads to the gym, I head to the shop, but I have to call it quits 6-6:30am to get the kids ready for school (ages 5 and 7). Some days I just don't want to be up that early.
I'll be doing all the work myself; good, bad, or ugly. Its a combination of personal pride and low project budget..
and I have a few other projects to take care of..
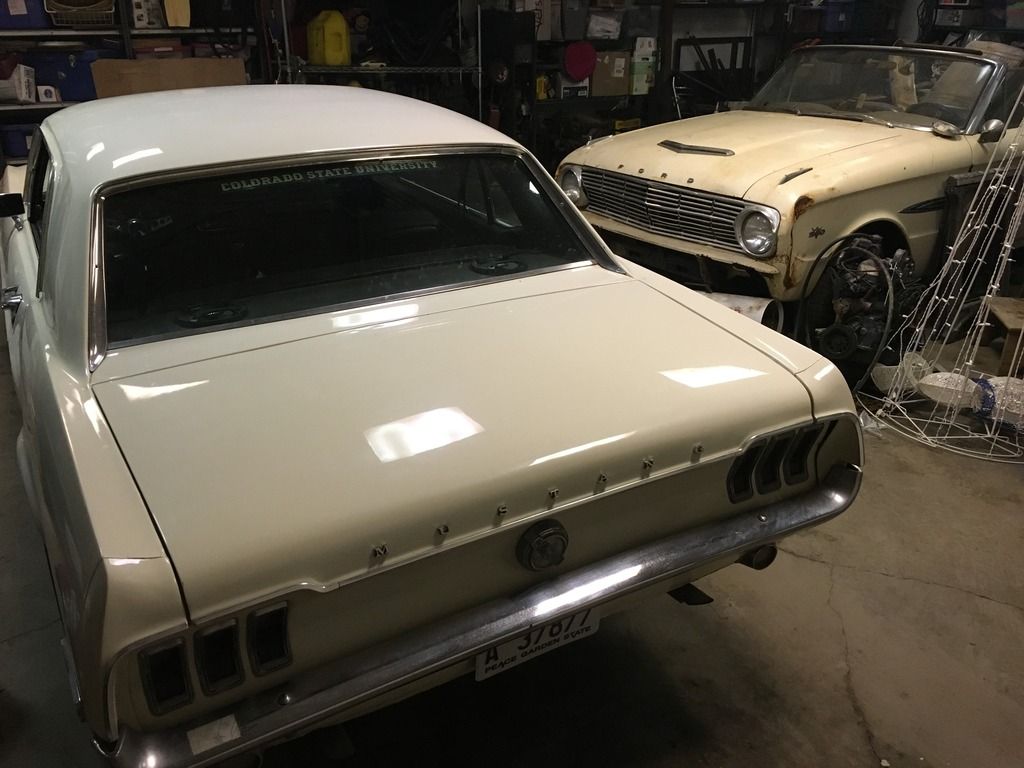
My wife daily drives that '68 Mustang, roughly 13,000-14,000 miles per year (Spring/Summer/Fall)
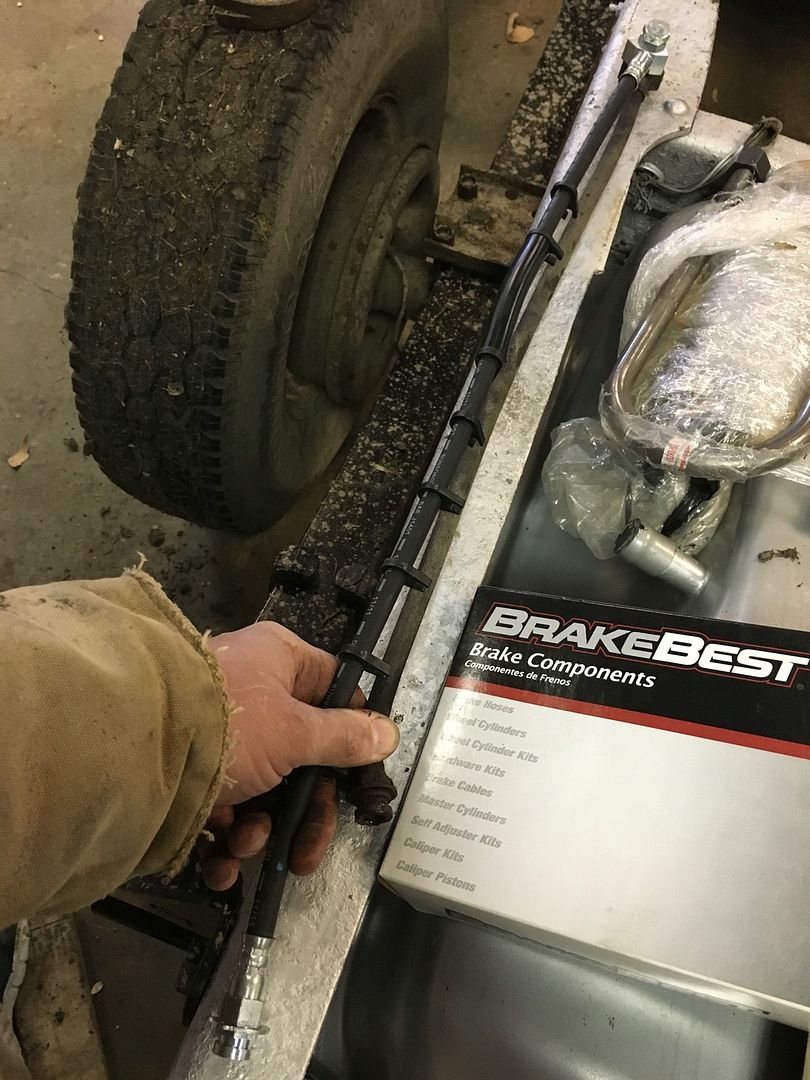
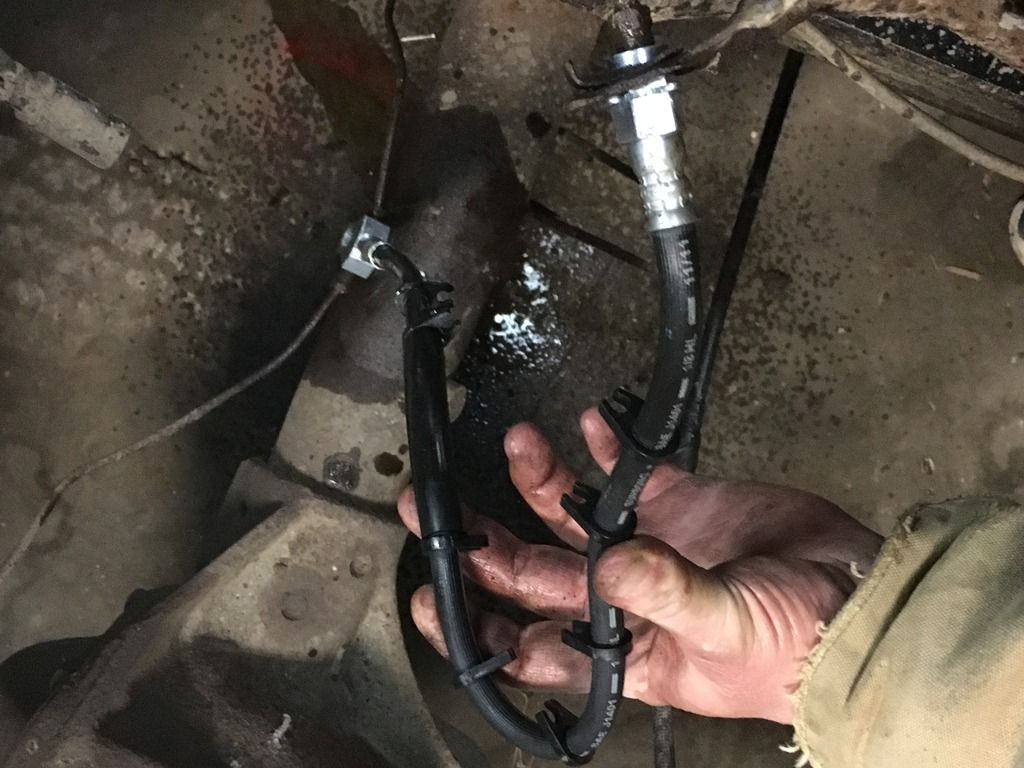
I've got to do a full brake rebuild on it in the next week.
Last year Dad passed the 63.5 Falcon convertible down to me last Spring, it has a SBF and a 4speed, I'd like to put some miles on it before the end of the Summer as well.
I'll be doing all the work myself; good, bad, or ugly. Its a combination of personal pride and low project budget..
and I have a few other projects to take care of..
My wife daily drives that '68 Mustang, roughly 13,000-14,000 miles per year (Spring/Summer/Fall)
I've got to do a full brake rebuild on it in the next week.
Last year Dad passed the 63.5 Falcon convertible down to me last Spring, it has a SBF and a 4speed, I'd like to put some miles on it before the end of the Summer as well.
#12
03-07-2016, 10:50 AM
#13
03-07-2016, 12:13 PM

I decided to add the dent trim and race track trim to my crew. I've always wanted a red/white two tone dent so I decided to do it this time. Originally the truck did not have any trim on it. Looks like I had an advantage over you though since I found a rust free short bed with all the trim on it and a front clip in which the fenders had all the trim on them too. I thought it would be a breeze to put the fenders and bed on then strike a chalk line from the bed to the fenders across the cab. Sounds easy but the chalk just didn't come out precise enough for me to mark the holes in the cab. I ended up measuring from my garage floor up to each spot where I wanted a hole. Took a while but it all turned out good.
#14
03-07-2016, 12:27 PM
I'm constantly watching for a box in better shape. If I don't find one, I'll continue to work/repair the one I have.
I've read through this article a few times about making trim work for the back doors.
Upper side moldings 73-79 -- OFCC.com
I *assume* my truck is going to be in epoxy primer for at least a year, and during that time the body will be an empty canvas to modify as I see fit.
Another guy on here started a thread a while back about 3d printing some plastic inserts that will allow a person to use adhesive to stick the upper trim in place.
I'm nerdy enough to look into it. There is a place here in Fargo that was supposed to be getting a 3d scanner a few months ago (I haven't been back to check) but I could have them scan the trim and dent profiles to make such a thing.
I'd be happy enough with white on bottom and red on top with just the belt trim.
I've read through this article a few times about making trim work for the back doors.
Upper side moldings 73-79 -- OFCC.com
I *assume* my truck is going to be in epoxy primer for at least a year, and during that time the body will be an empty canvas to modify as I see fit.
Another guy on here started a thread a while back about 3d printing some plastic inserts that will allow a person to use adhesive to stick the upper trim in place.
I don't think I've seen one but I'd like to see a thread where everyone could post ideas for the random issues we deal with on these trucks. Original ideas that we might seriously consider trying if we had the time, money and skill. Everyone could shoot holes in them or praise them for being genius.
I'll start with two of my own
- Could we improve tail light brightness by using a dremel to cut another hole beneath the existing hole in the tail light housing for another bulb and daisy chain a socket off of the existing socket?
- Could a clip be designed and 3D printed for the different trim pieces so that I could use 3M trim/panel tape to install it?
I'd be happy enough with white on bottom and red on top with just the belt trim.
#15
03-07-2016, 08:17 PM
Cargo Master
Regarding the leaf hangers I've seen many pics of fabbed ones. You just need to build them with an offset. That DOM/hanger is just going to try and pivot every time you mash the throttle.
Personally I would rethink the leaf swap but that's just me. Maybe there is a leaf pack that doesn't require moving the hanger that far?
I think this is a high stress area as I've seen more than a few hangers cracked especially on the passenger side.
Good luck!
Personally I would rethink the leaf swap but that's just me. Maybe there is a leaf pack that doesn't require moving the hanger that far?
I think this is a high stress area as I've seen more than a few hangers cracked especially on the passenger side.
Good luck!

