Hackster's F100 CV Swap, Coyote, 6 speed 3 link build thread
#46
 10-29-2015, 07:08 AM

Lead Driver

#47
10-29-2015, 02:49 PM
Hotshot
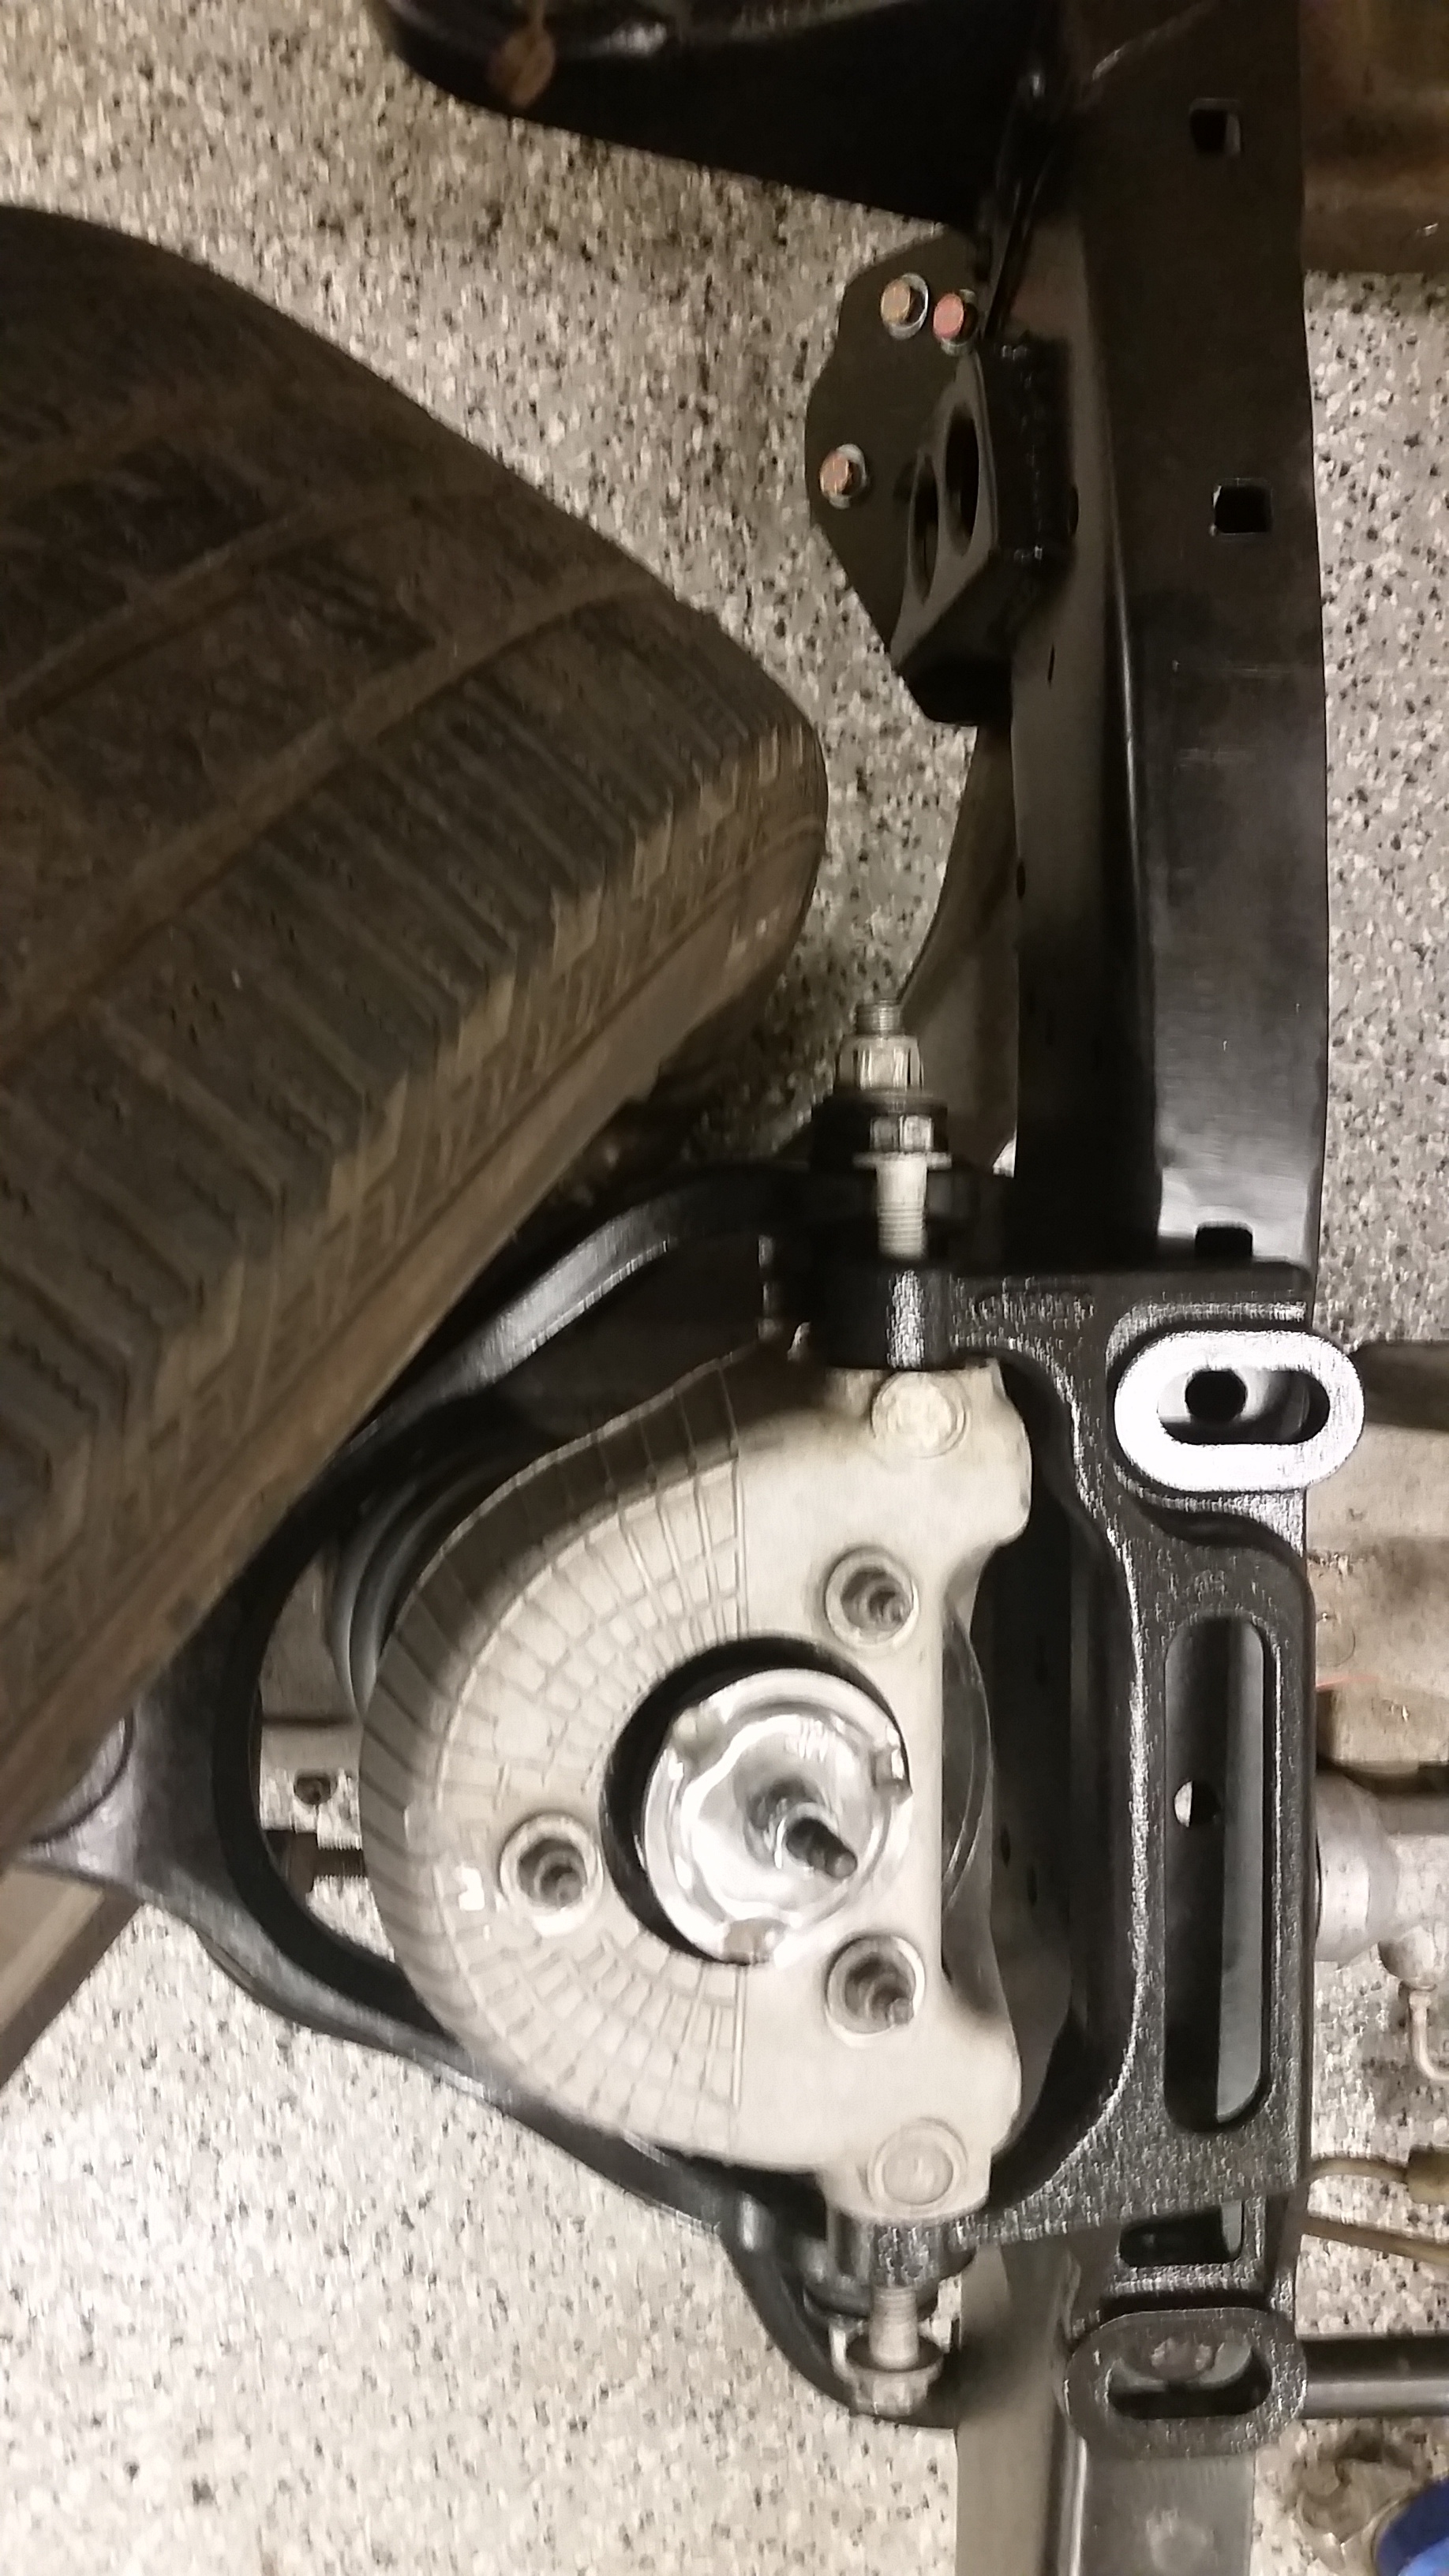
 Is it my 58 year old eyes or is that brake hose a tad short for full right turns?
#48
10-29-2015, 03:12 PM

That is the factory brake line, and it is just sitting there out of my way. It is not mounted or anything. They worked on my old truck just fine but Ill make sure they are the right length on this one =)
I wish they made braided stainless lines for this frontend but I have not been able to find them anywhere.
Sean
#49
10-29-2015, 03:46 PM
Hotshot
#50
10-29-2015, 05:28 PM
Lead Driver
2003 Mercury Marauder Stainless Brake Lines | Braided Brake Lines
The '03/'04 Mercury Marauder had the same front suspension/brakes as the Crown Vic (as you already know with the coilovers you have) but, the Marauder was a sportier version, than the Crown Vic, to compete with the Impala SS of the time.
More performance oriented stuff can generally be found for the Marauder than for the Crown Vic, if you're searching for such parts.
#51
10-29-2015, 06:33 PM
#52
10-29-2015, 10:49 PM
....and, BOOM! Just like that, Bob's your uncle!
2003 Mercury Marauder Stainless Brake Lines | Braided Brake Lines
The '03/'04 Mercury Marauder had the same front suspension/brakes as the Crown Vic (as you already know with the coilovers you have) but, the Marauder was a sportier version, than the Crown Vic, to compete with the Impala SS of the time.
More performance oriented stuff can generally be found for the Marauder than for the Crown Vic, if you're searching for such parts.
Probably try stabbing it in there next week. If I need to make some motor mounts, I have no problem doing that. Probably end up doing it anyway to get the engine in just the right spot.
Oh yeah, gotta get the brake master in and likely run some brake lines as well.
Only managed a little over an hour or so to dink around the garage.
Managed to get the passenger side torn apart and got the coilover built and installed. The swaybar end links were totally hammered so I picked up a couple of those and got them installed on both sides tonight. There was one that I could not get off. I had to cut it off.


Also got a couple boxes from Summit and one from LMC truck

I can get the steering column back together now and stab it back through the firewall when I am ready as well as get the master cylinder installed and the proportioning valve all setup. Should be a fun couple of days.

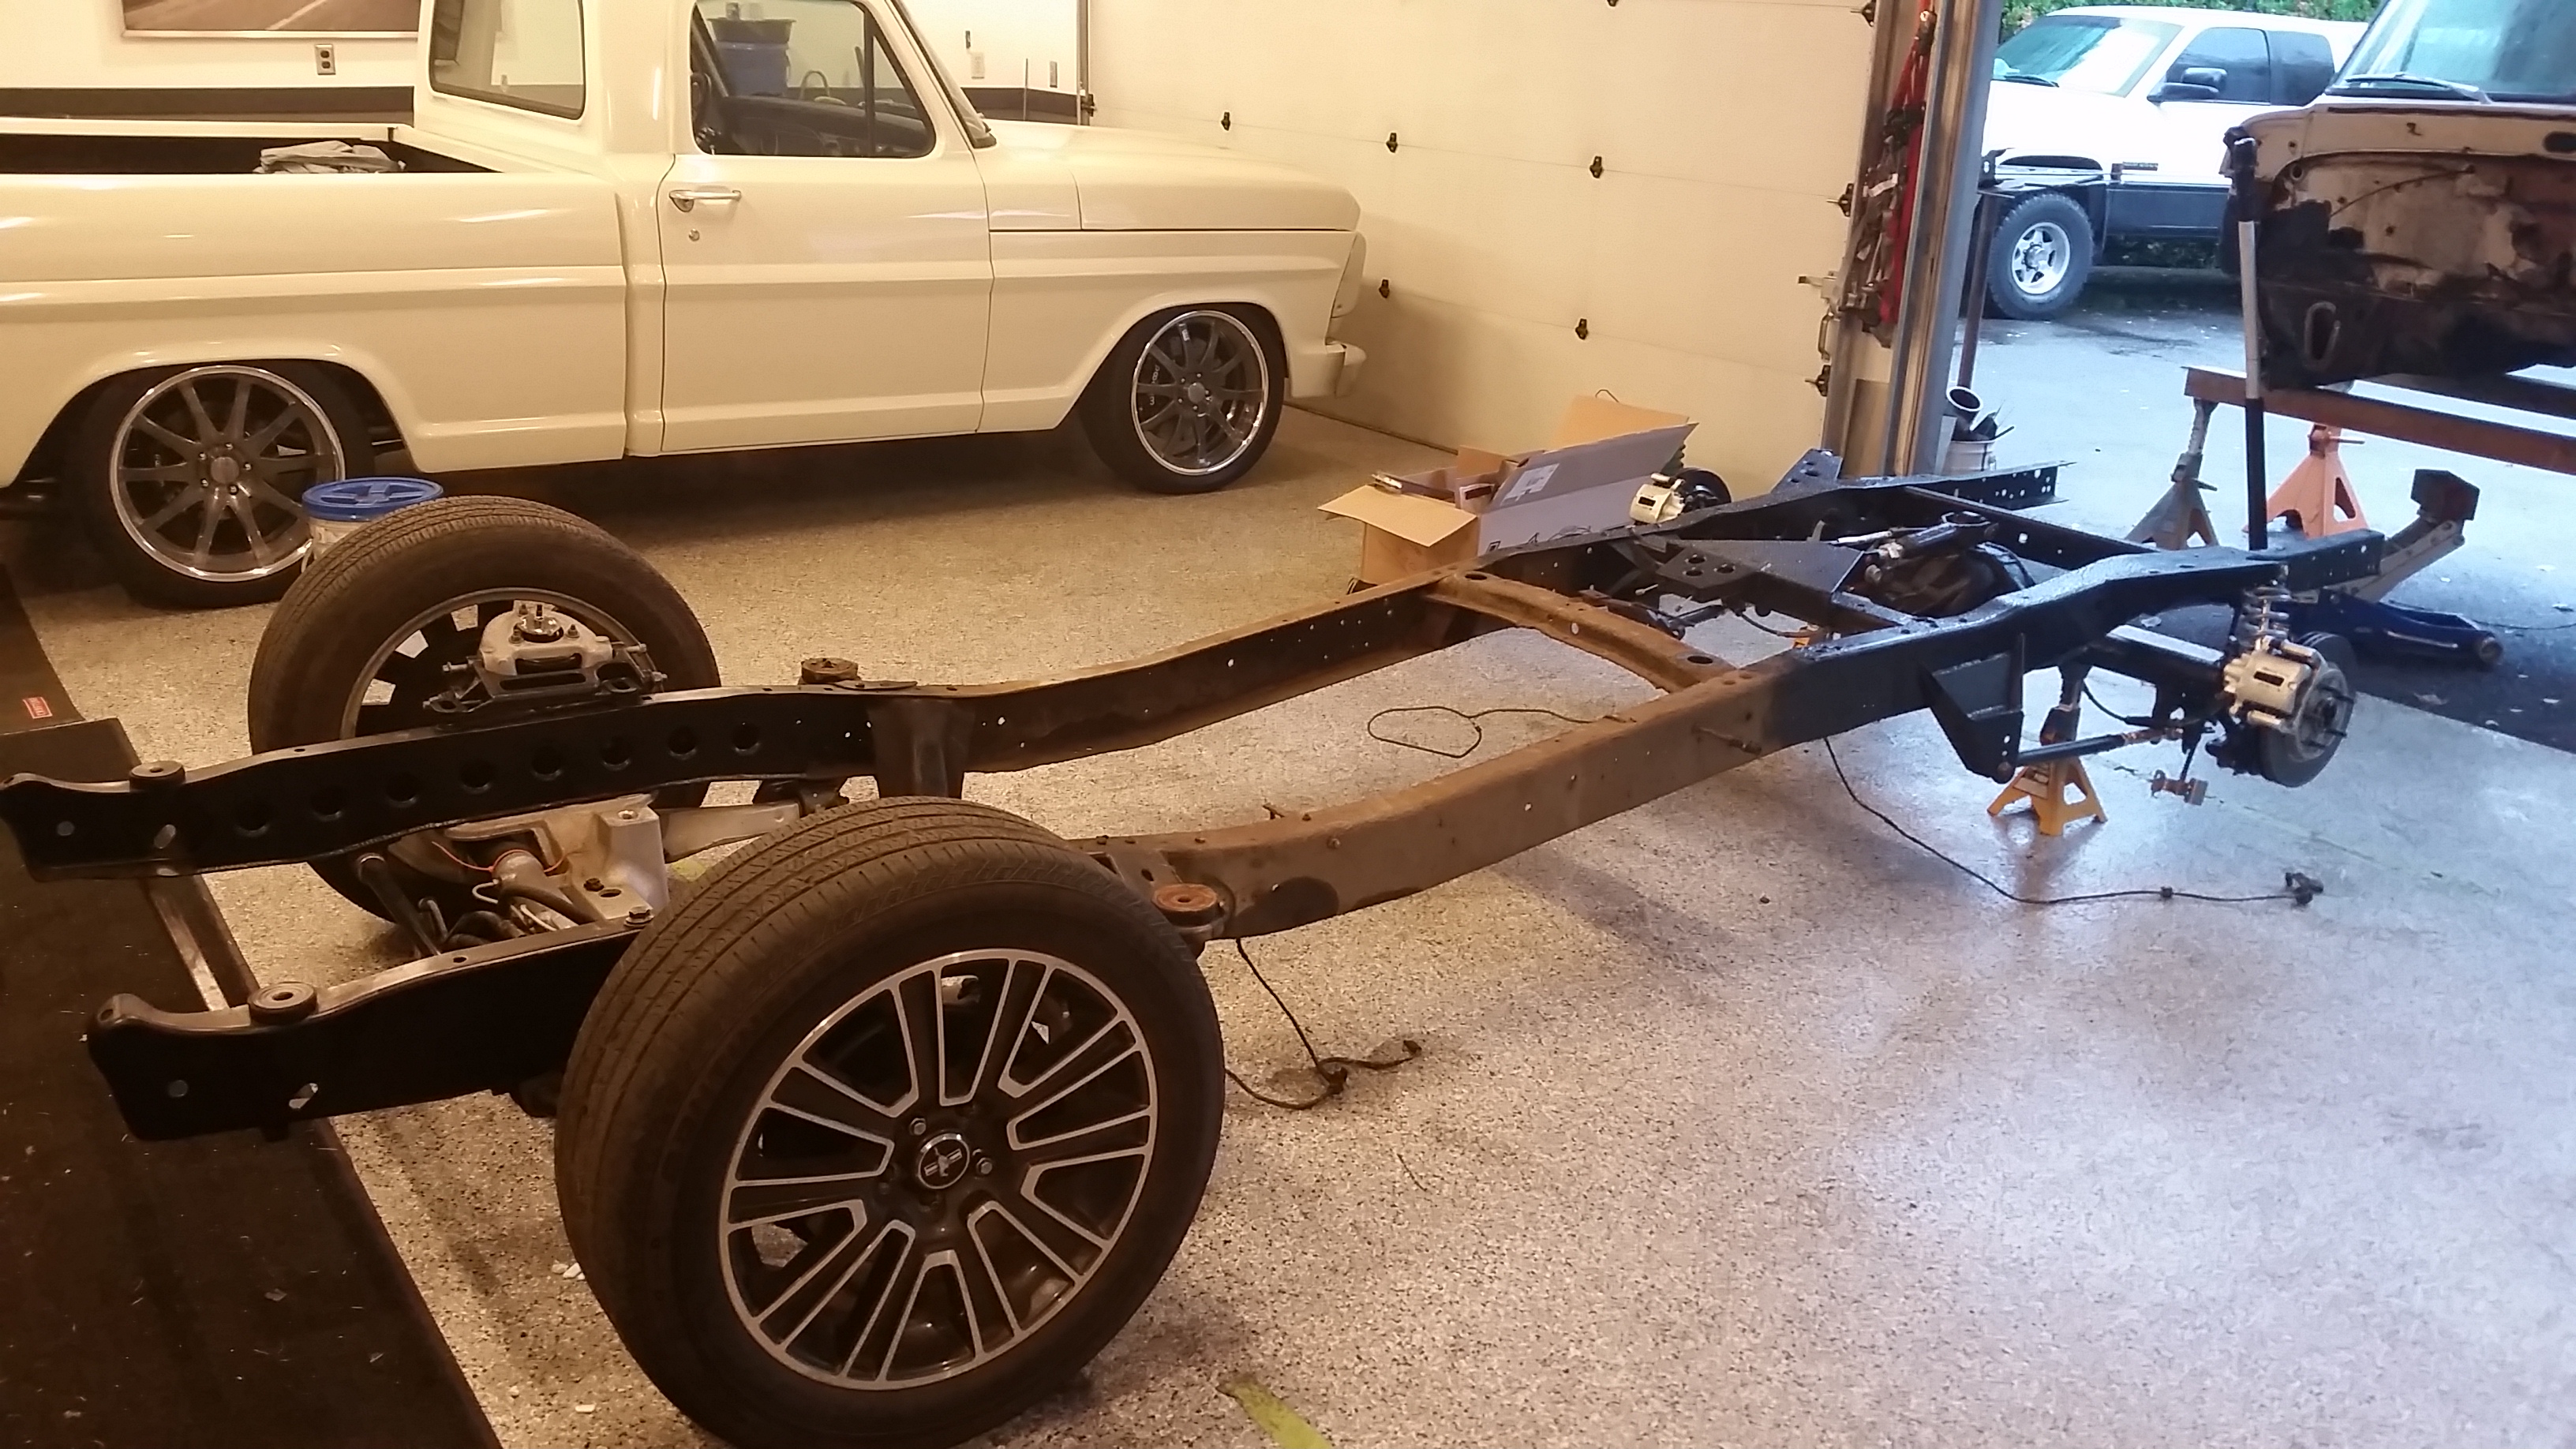
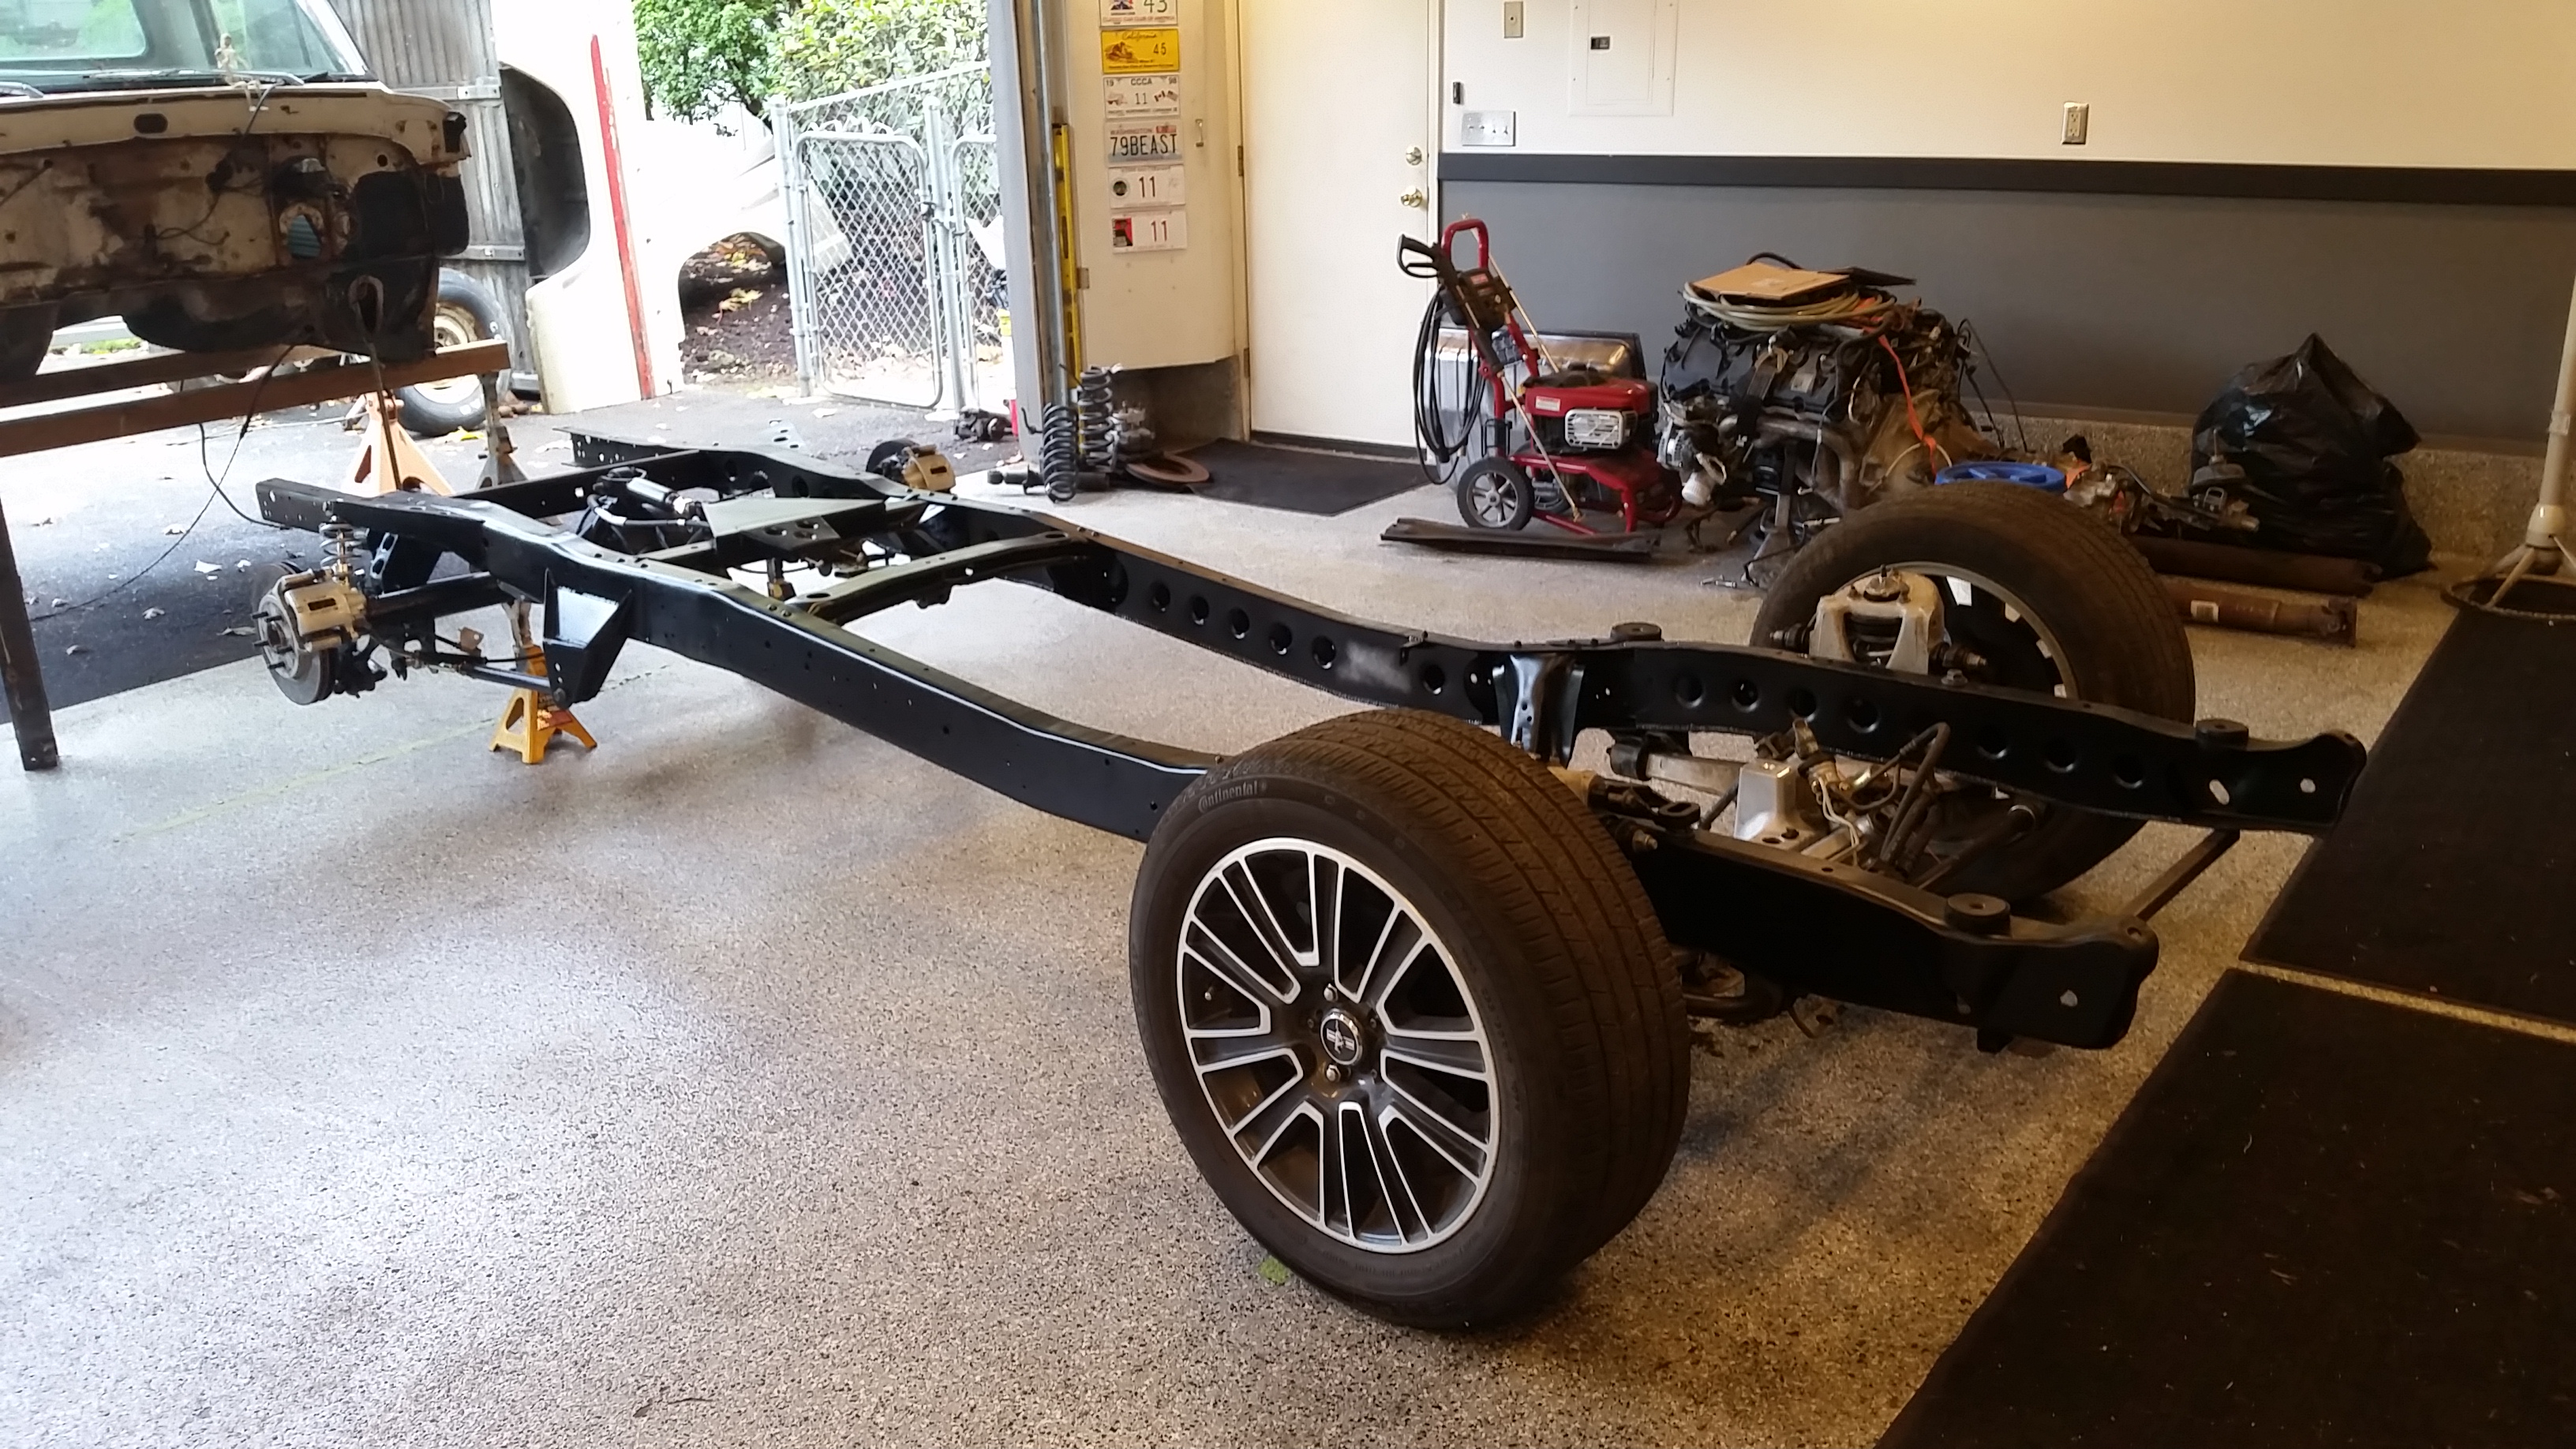
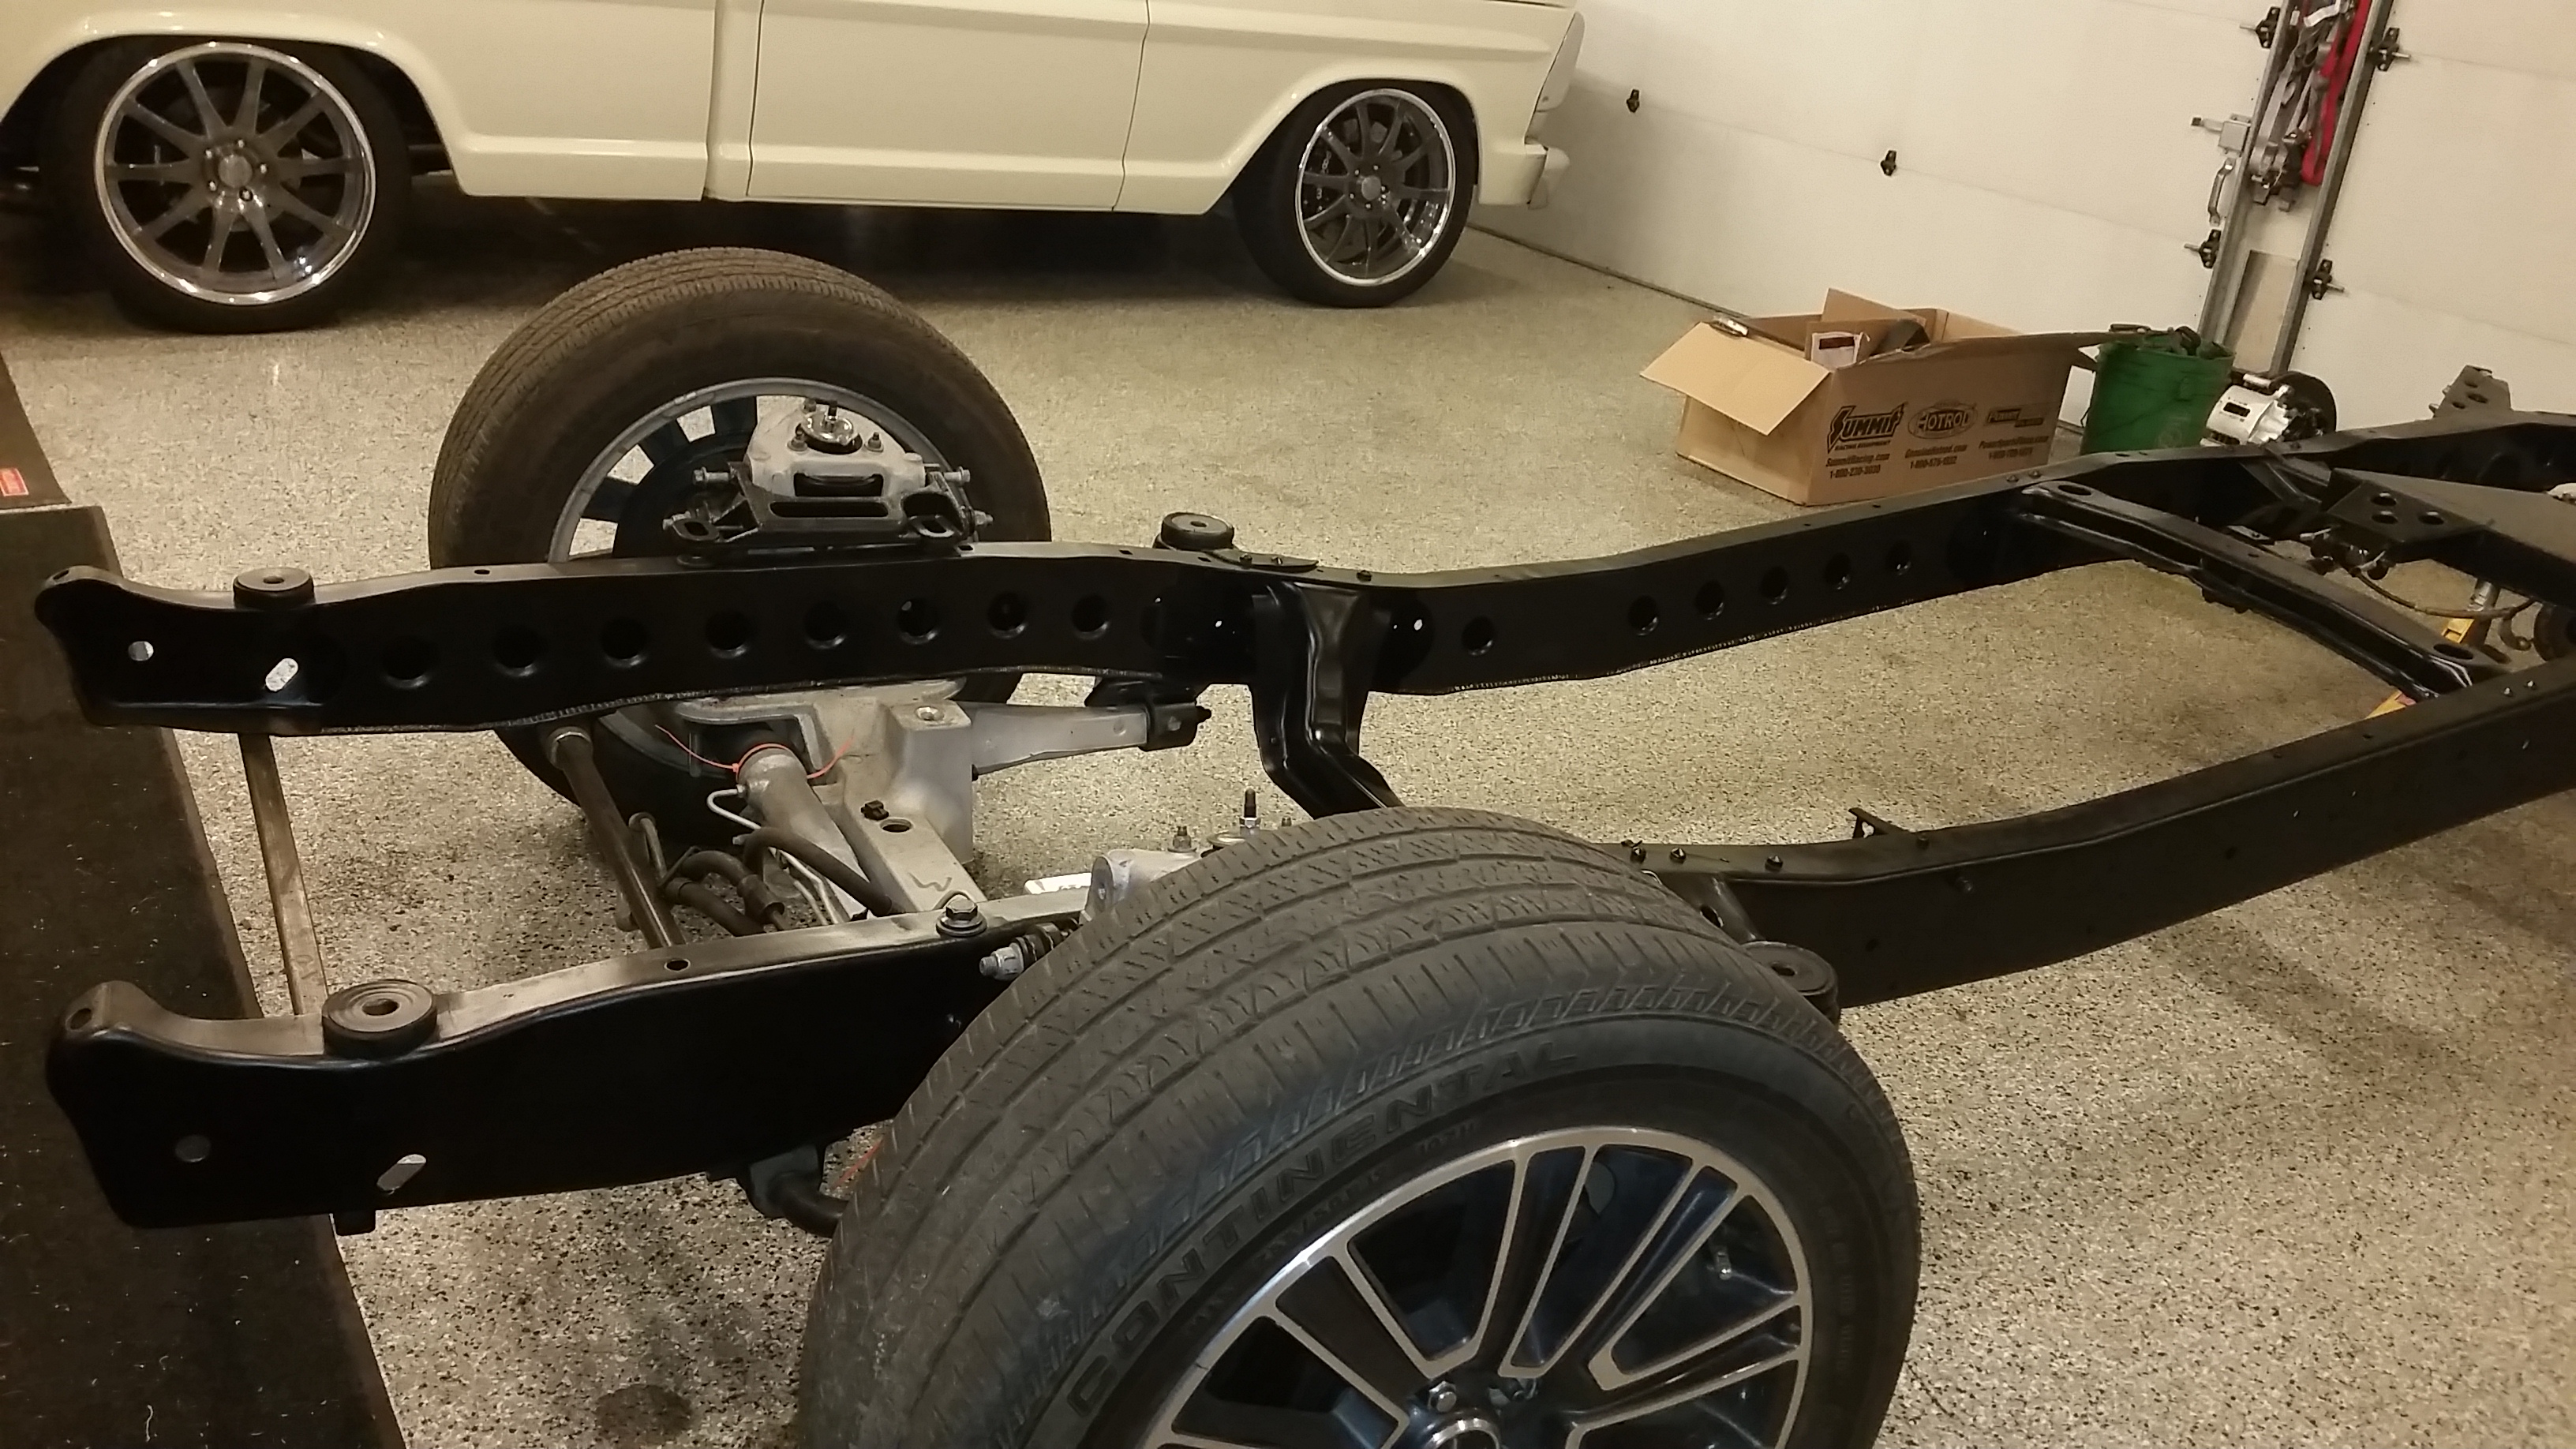
This is still a couple inches above ride height in the front as this front tire is massive compared to what I am planning on running in the truck. These are 255/55/19's. Ill likely be running a 295/40/18.
Looks good this height though doesnt it =)

#53
10-31-2015, 05:21 PM
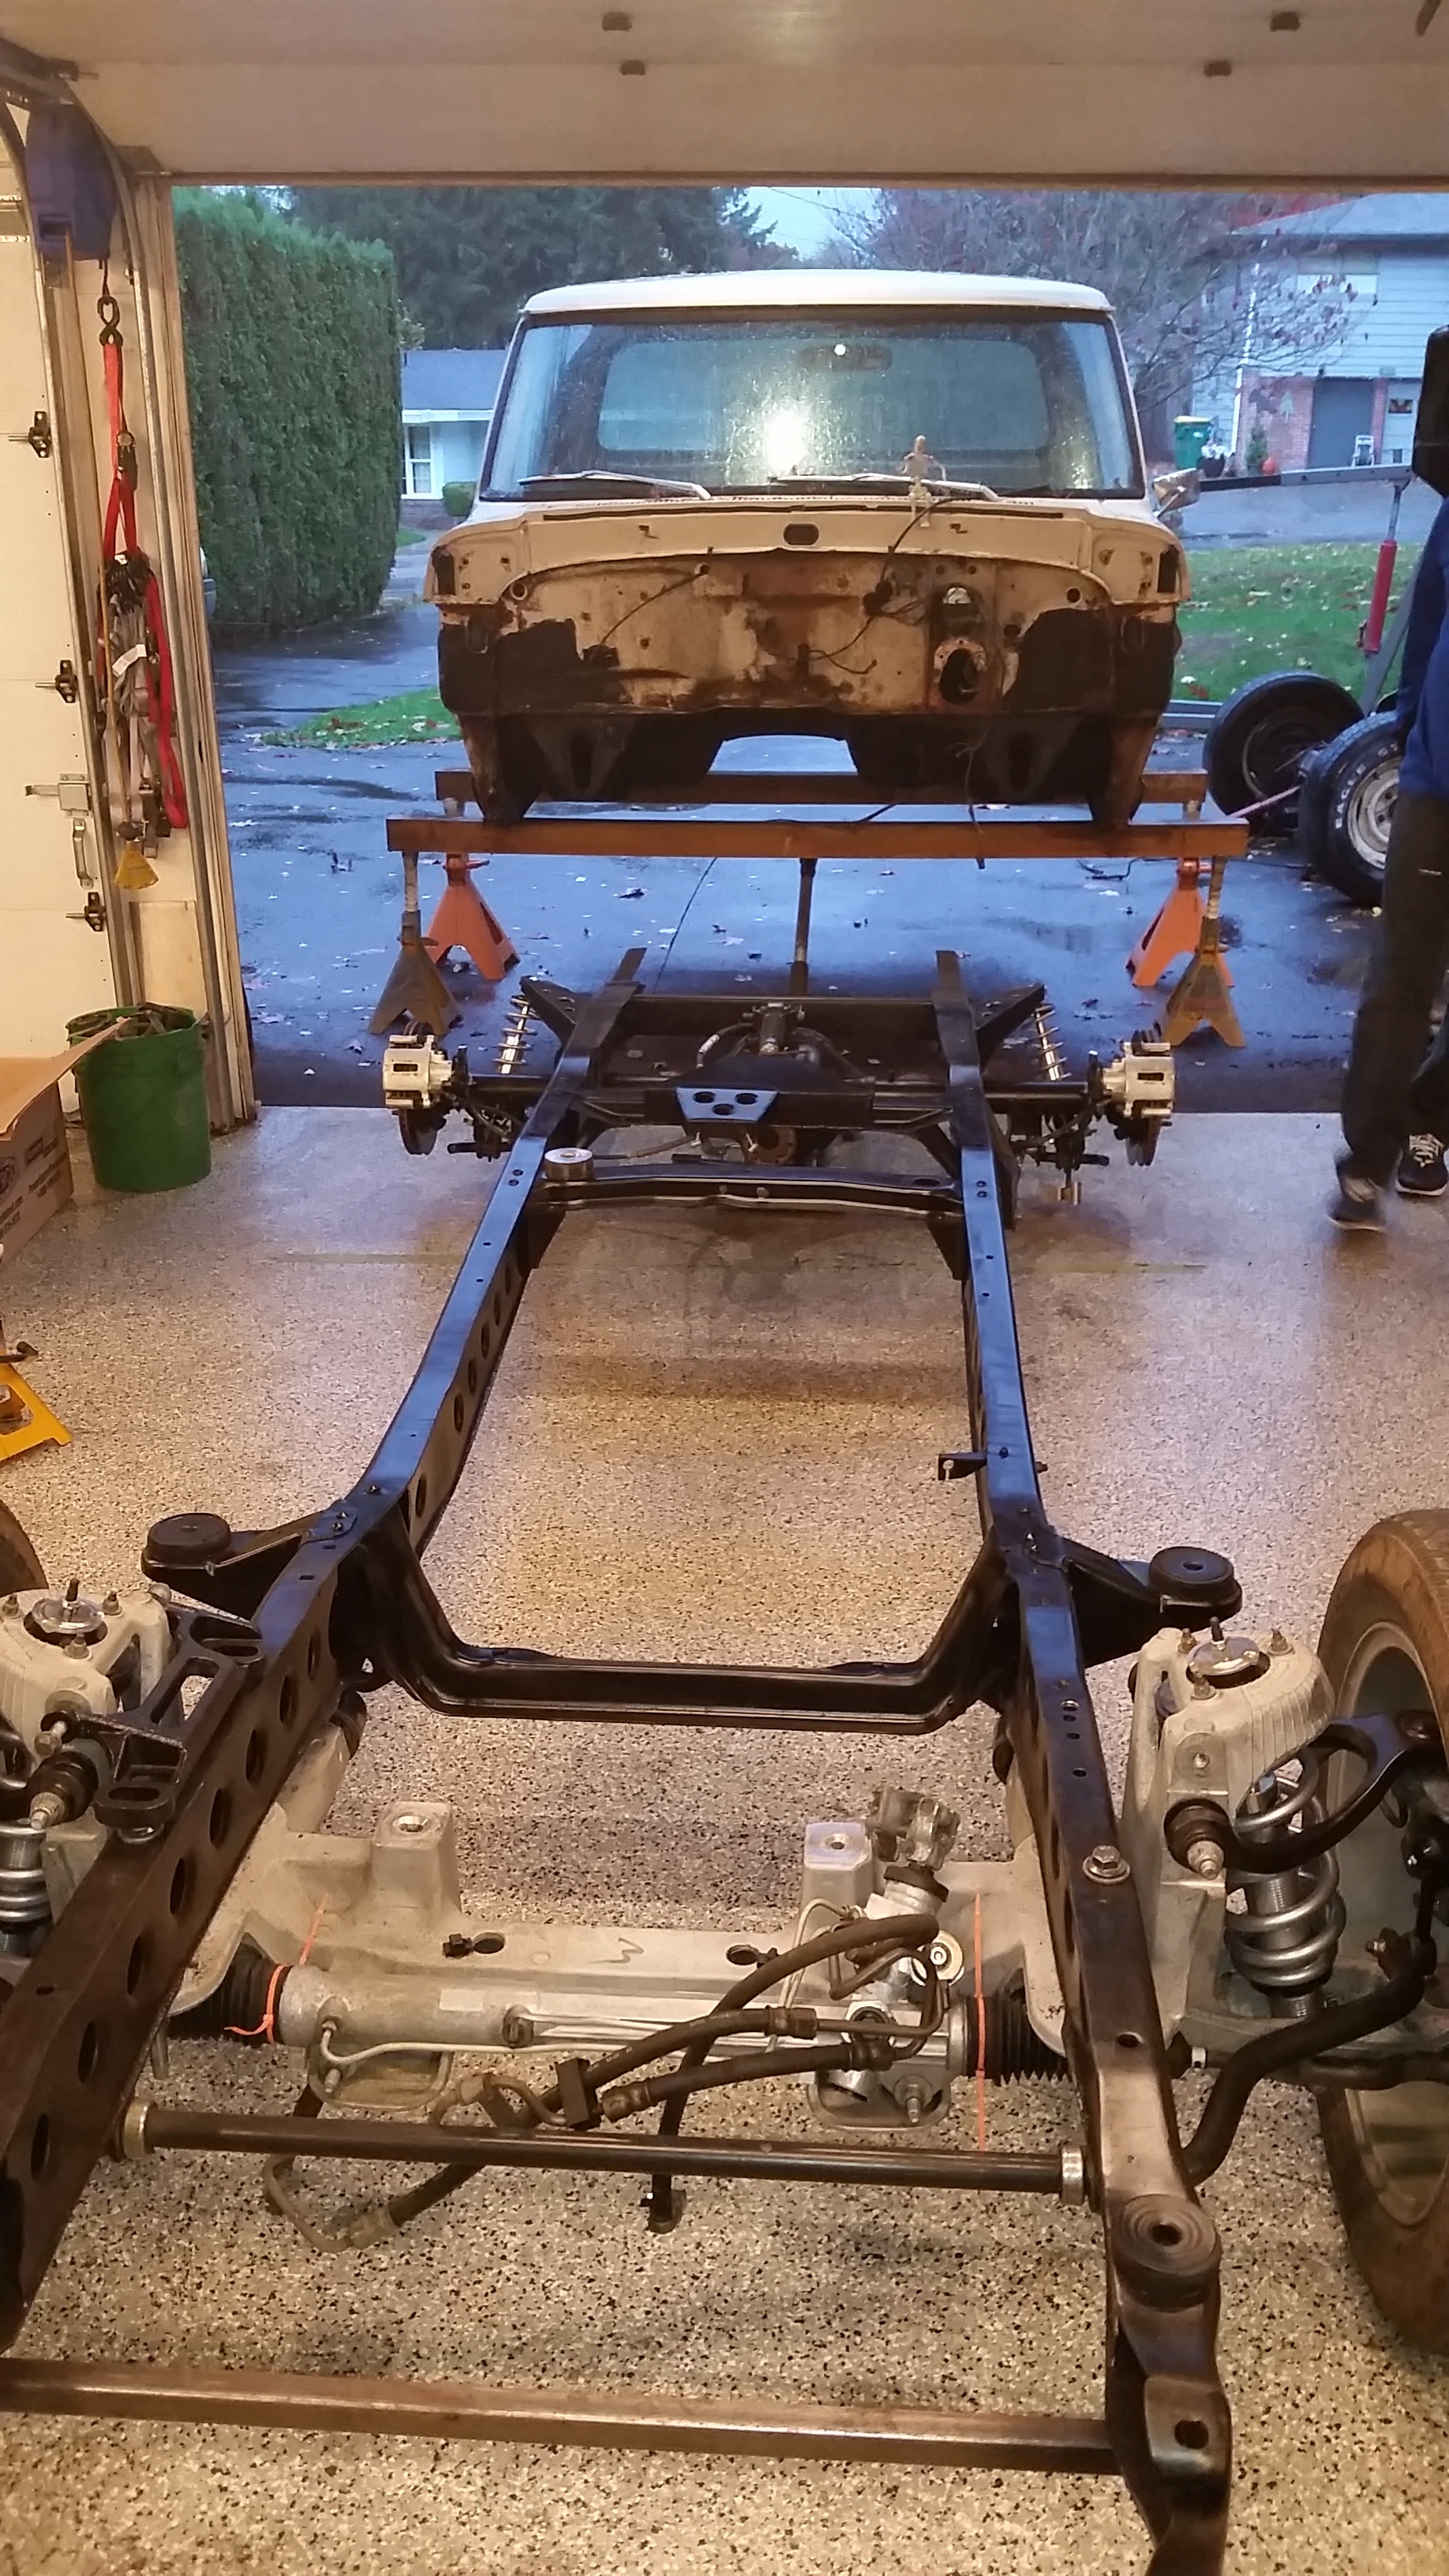
Little bit of mockup to see how it sits with the coilovers on it and measure out some tire and wheel clearances.
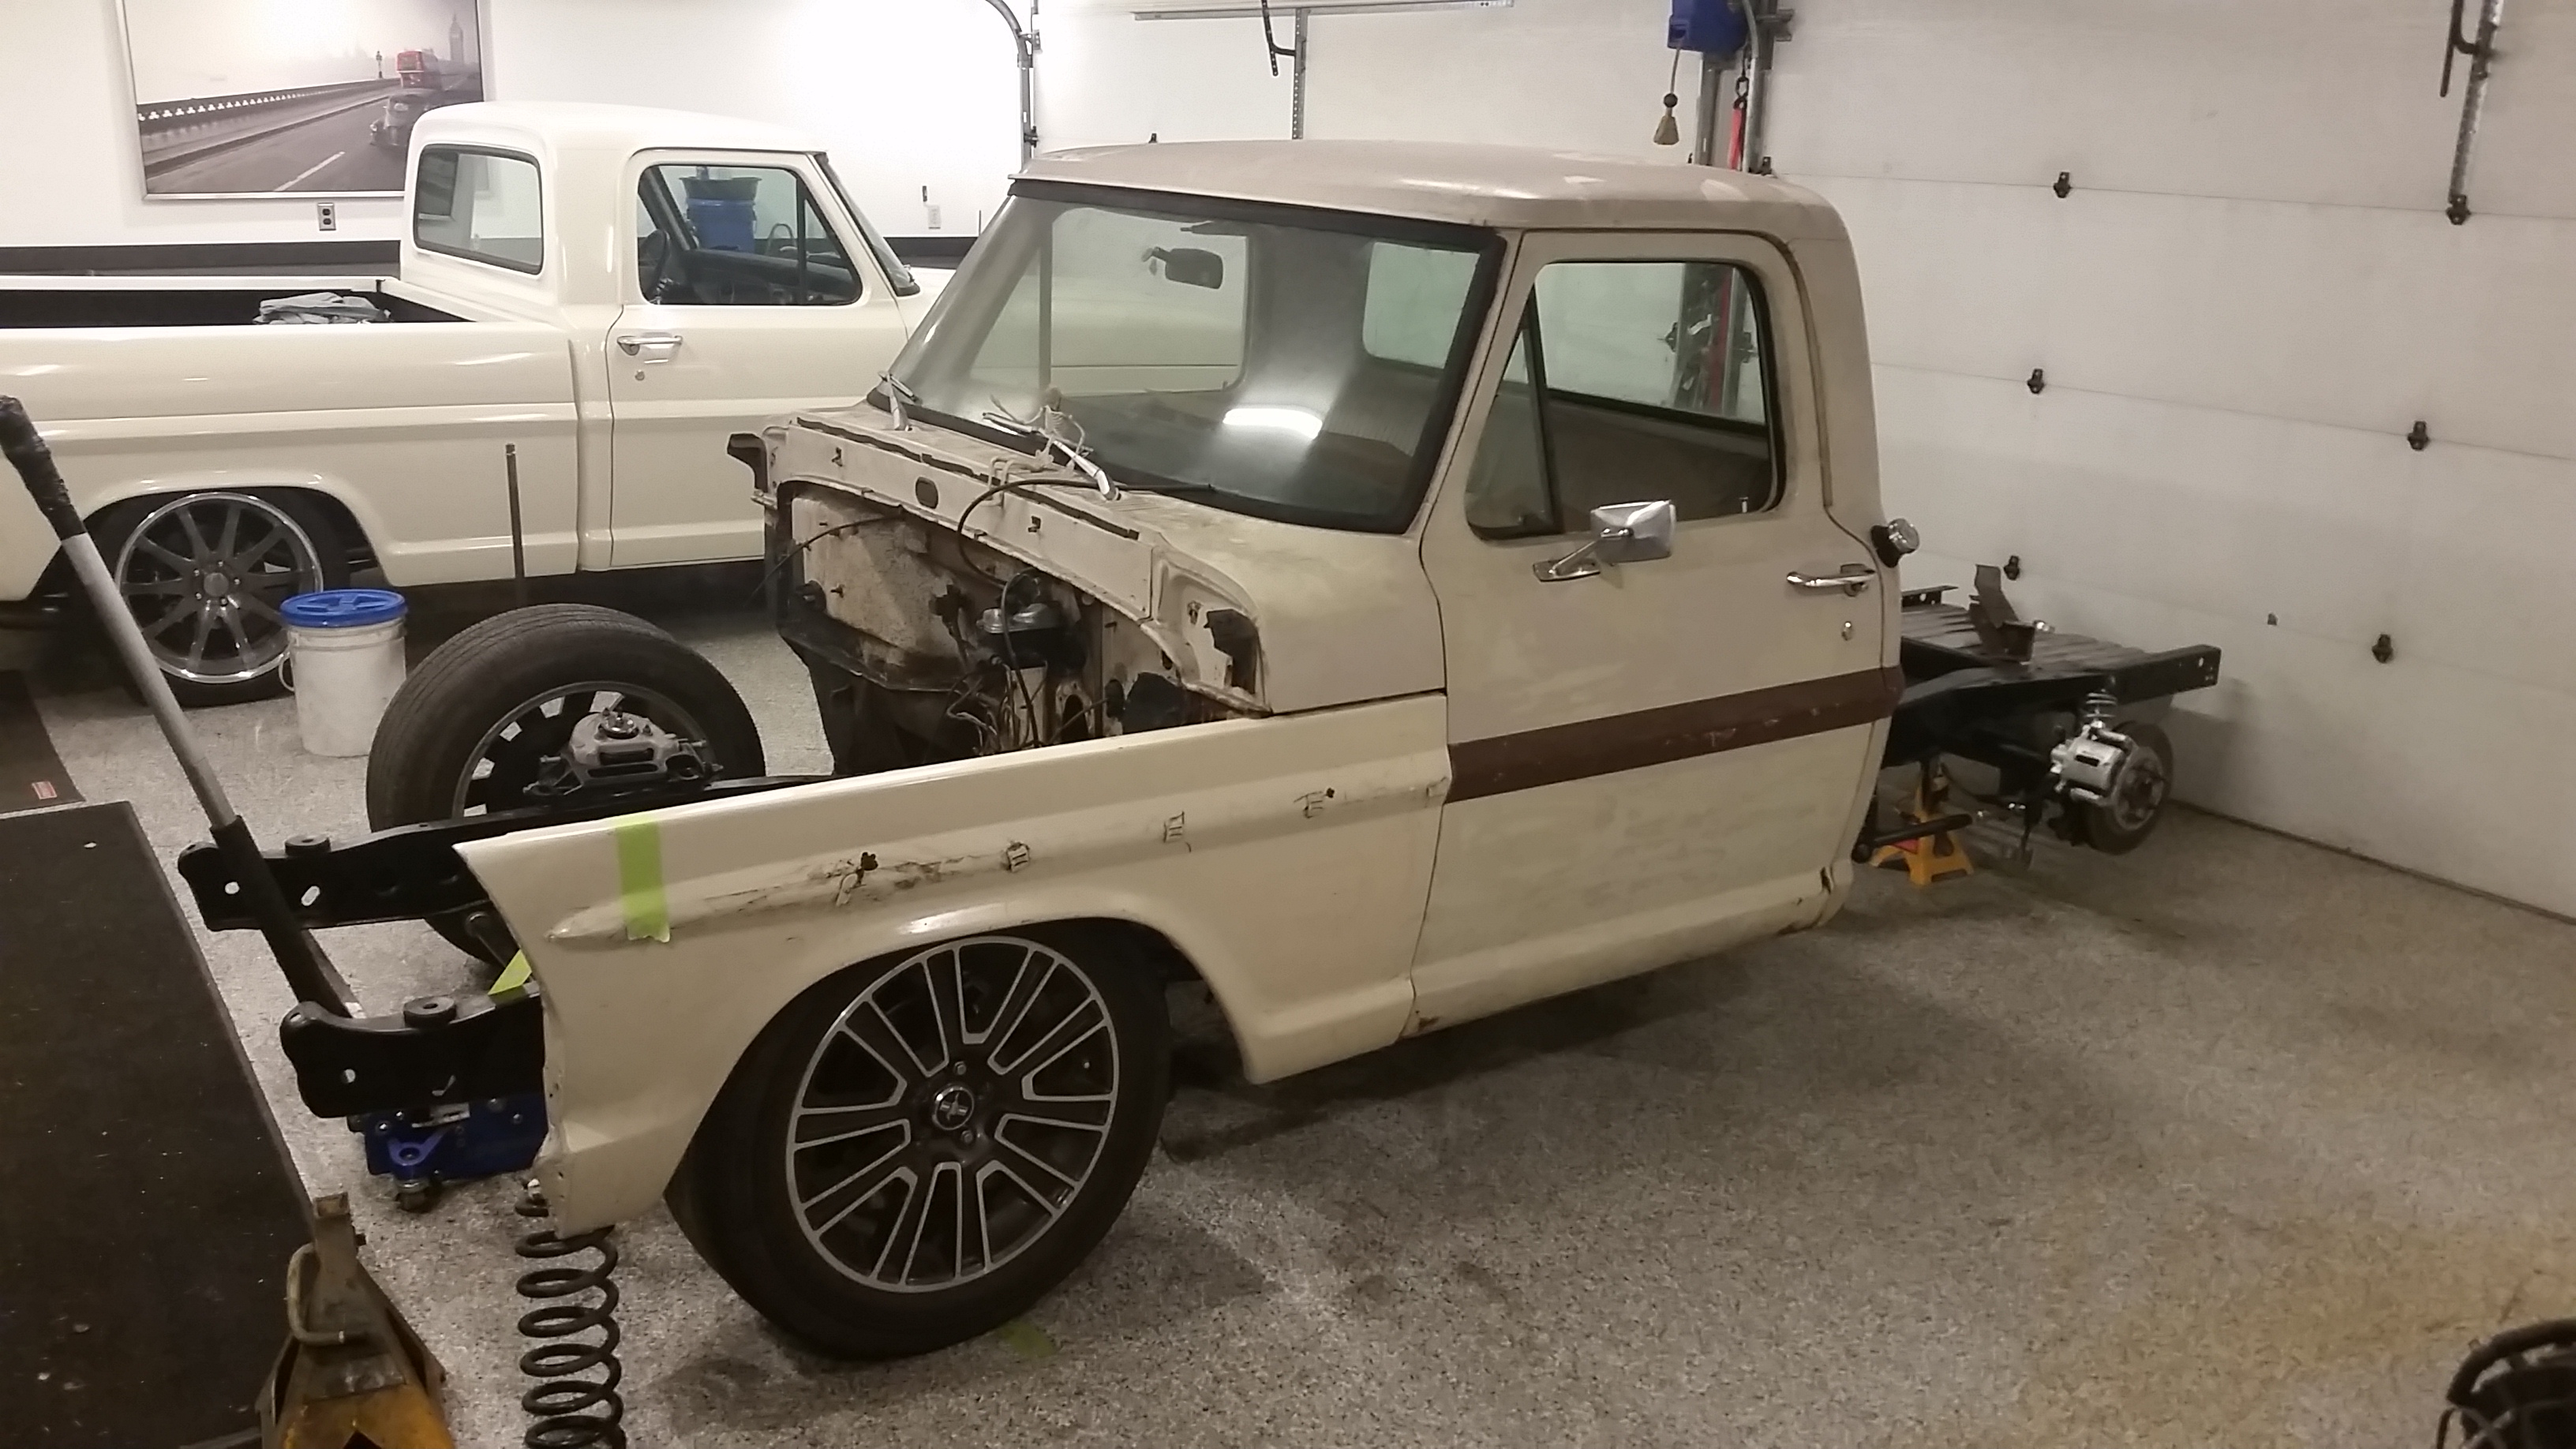
Super happy with the tire in the wheelwell (Wheelbase) location
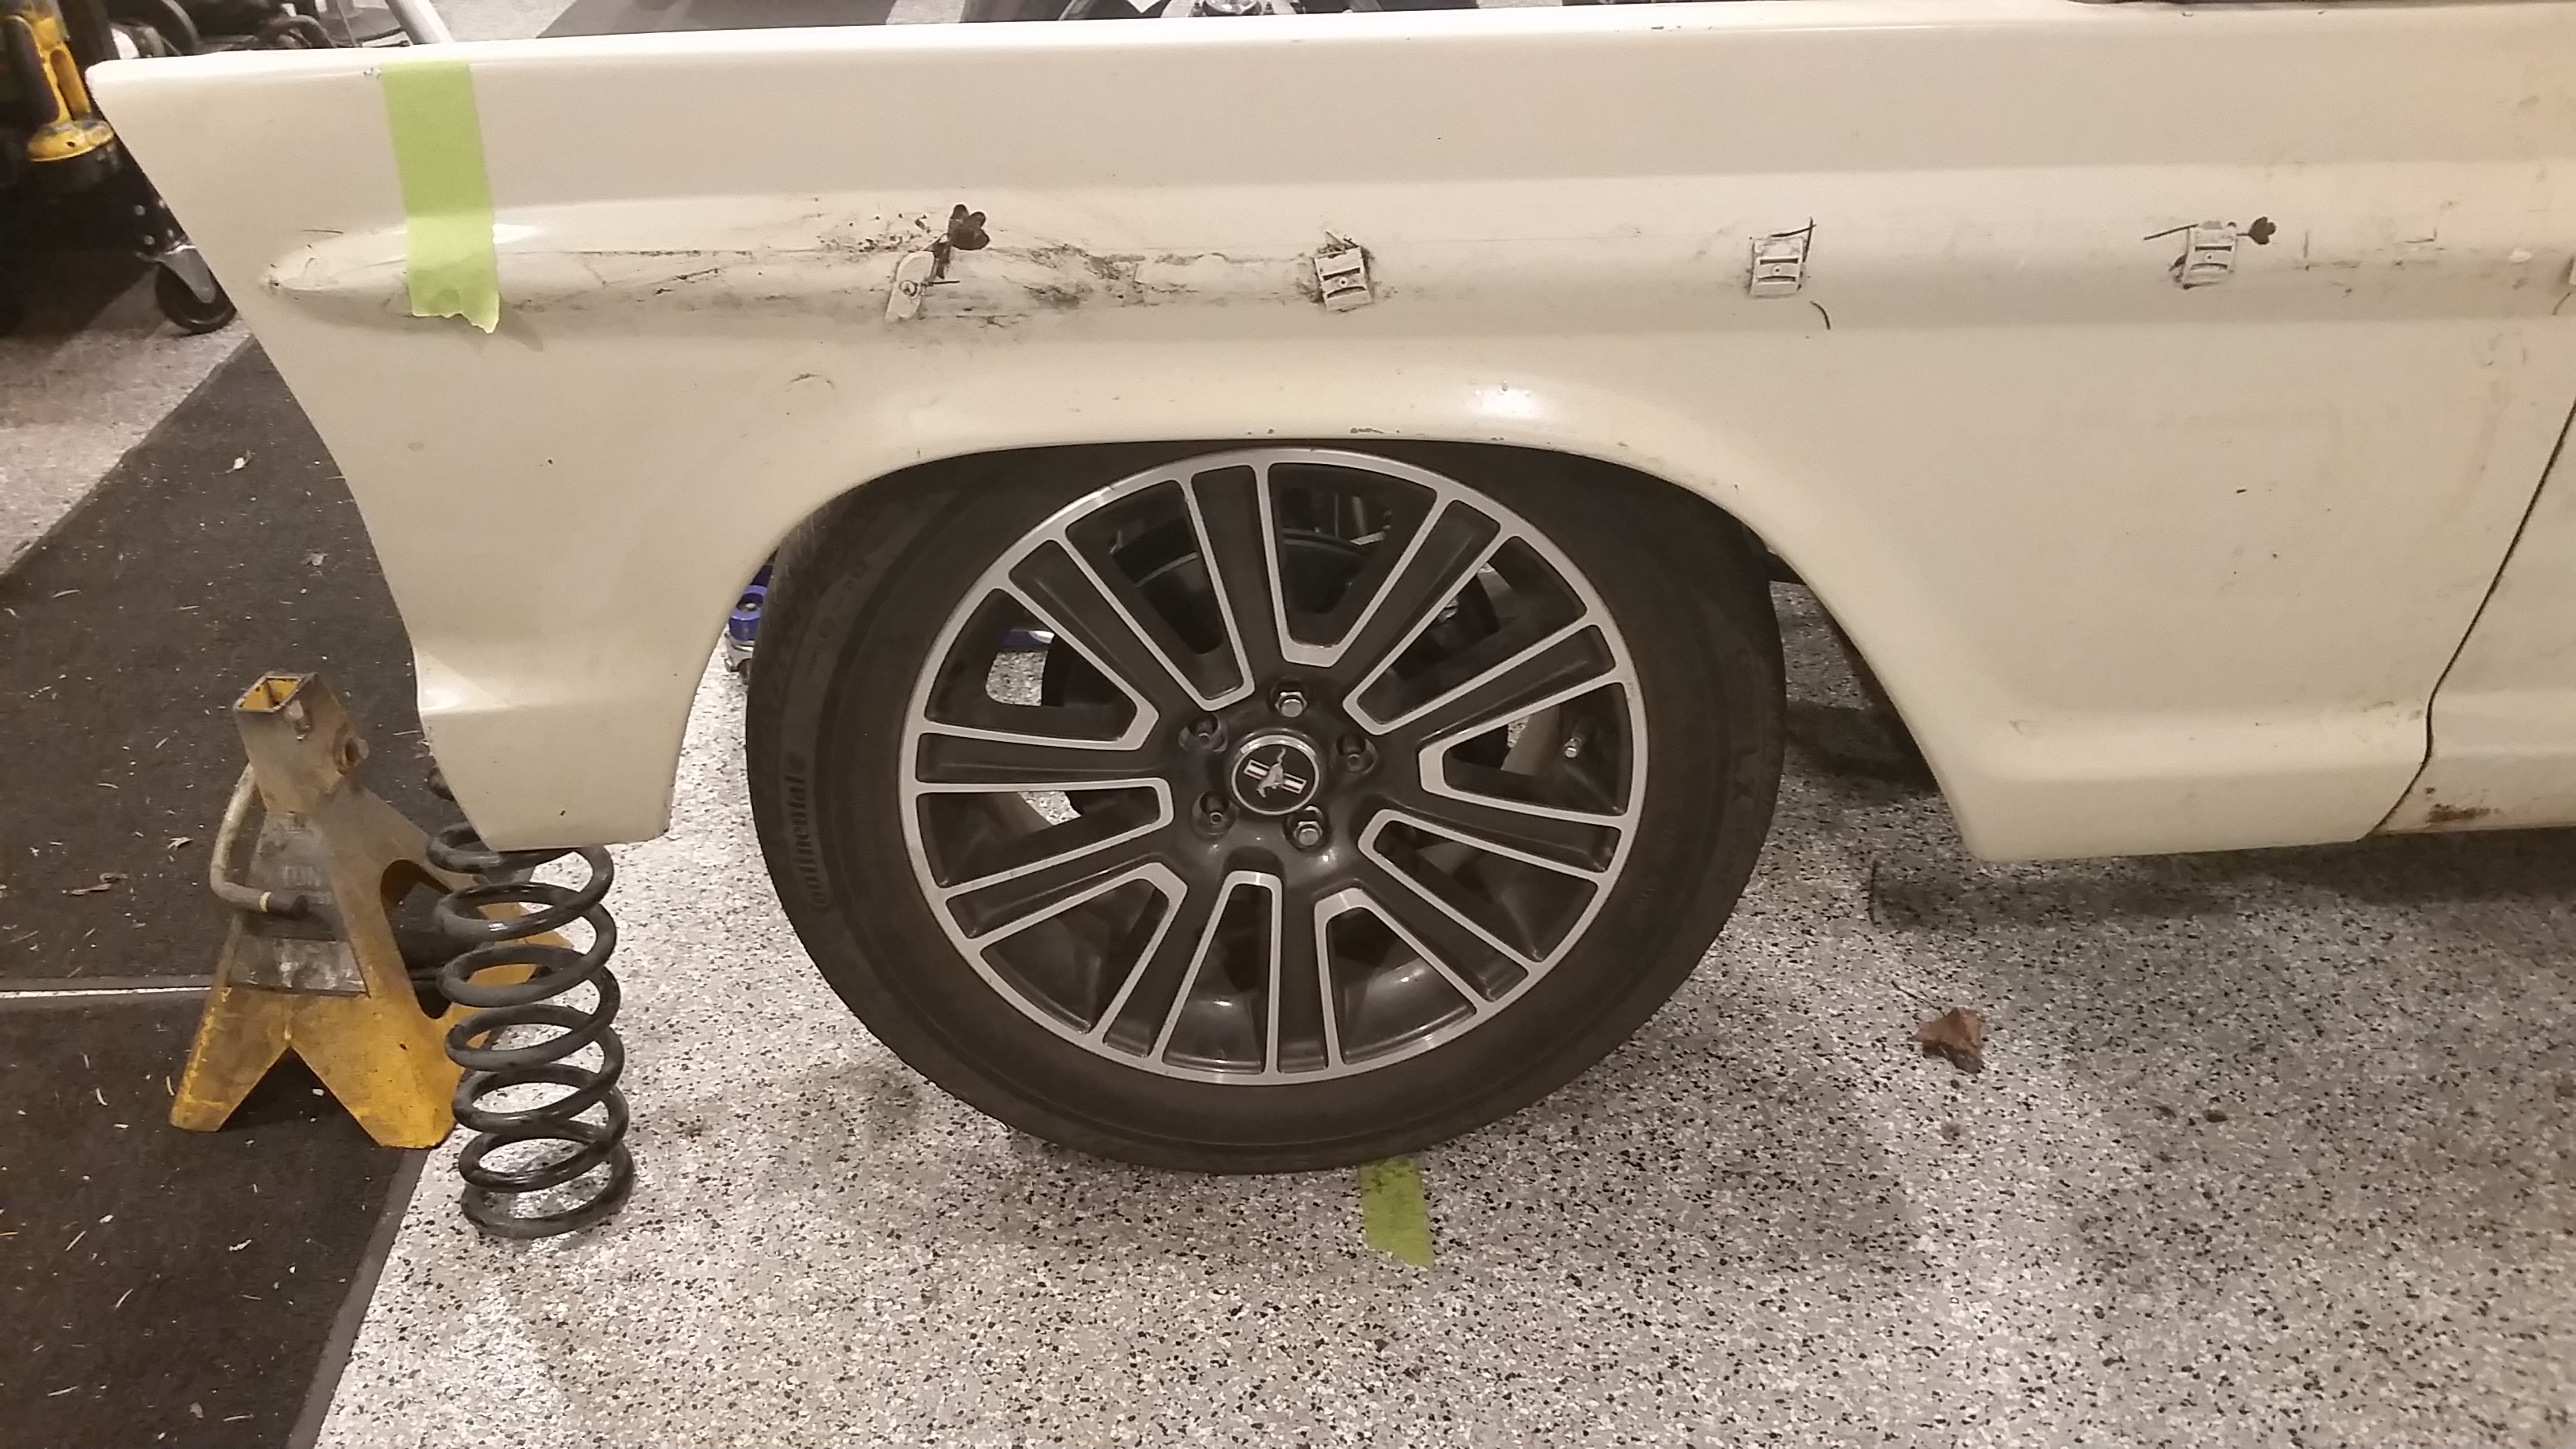
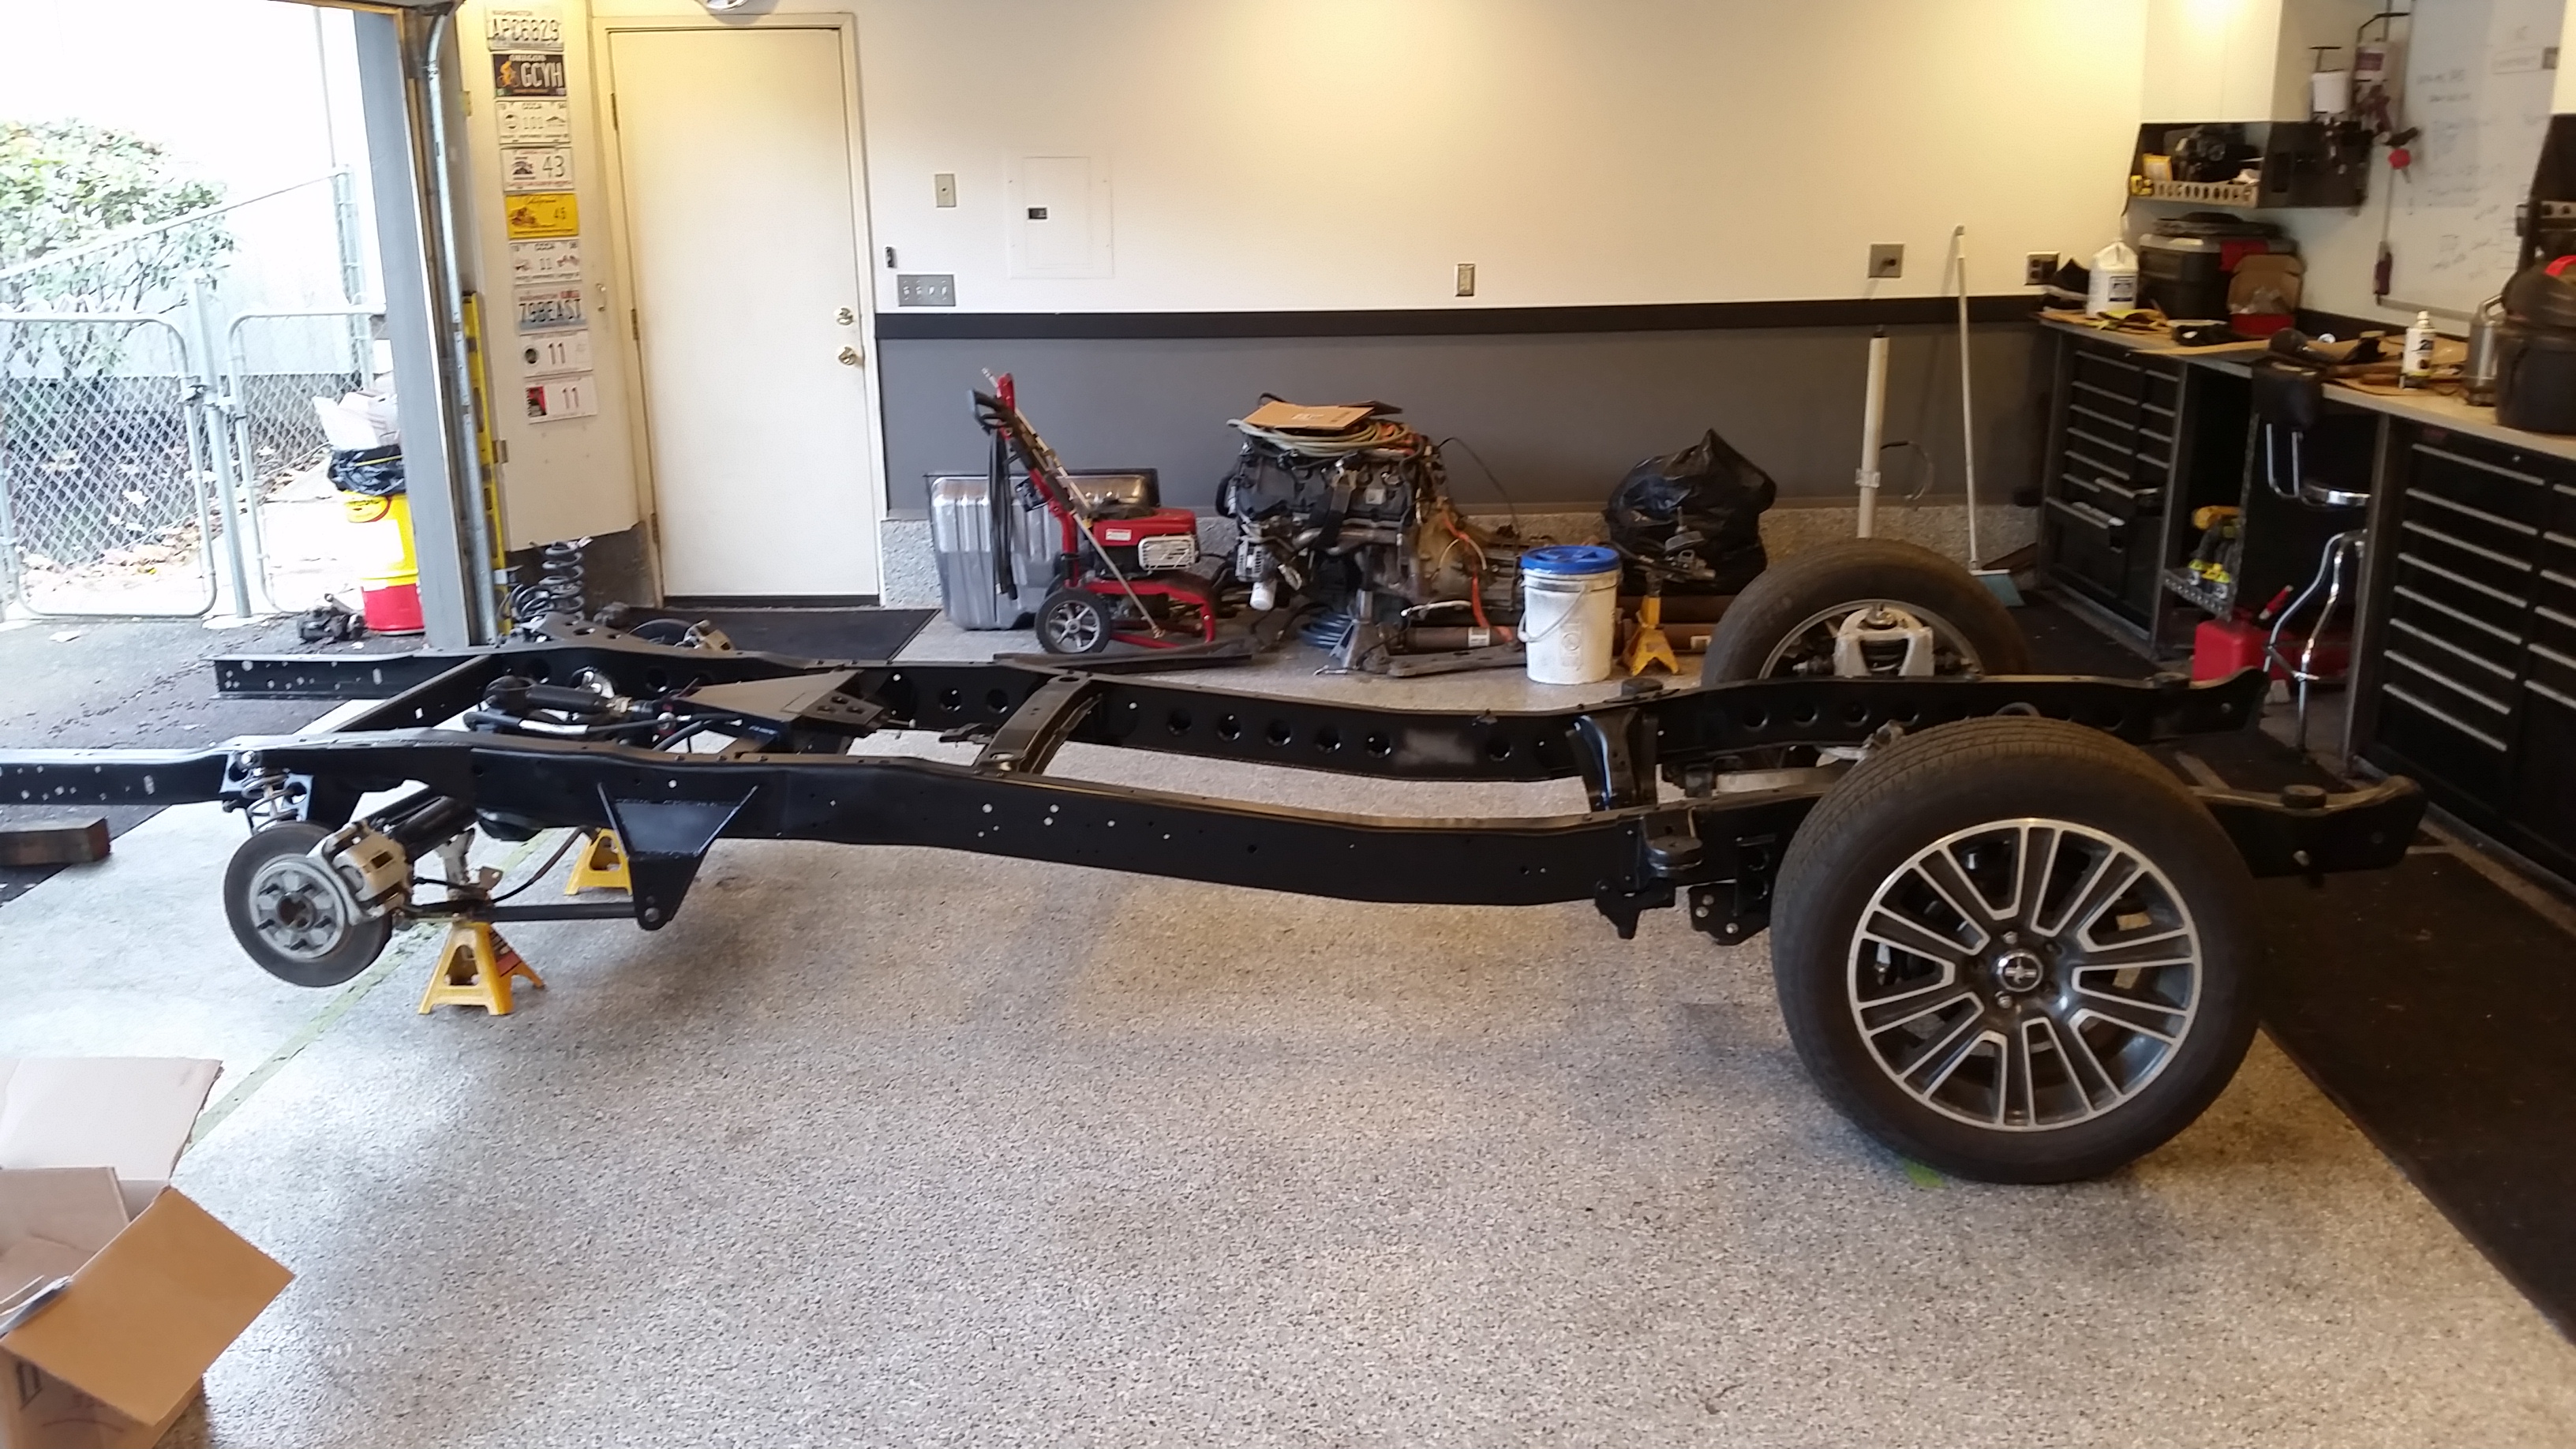
Tire is about to hit the fender.
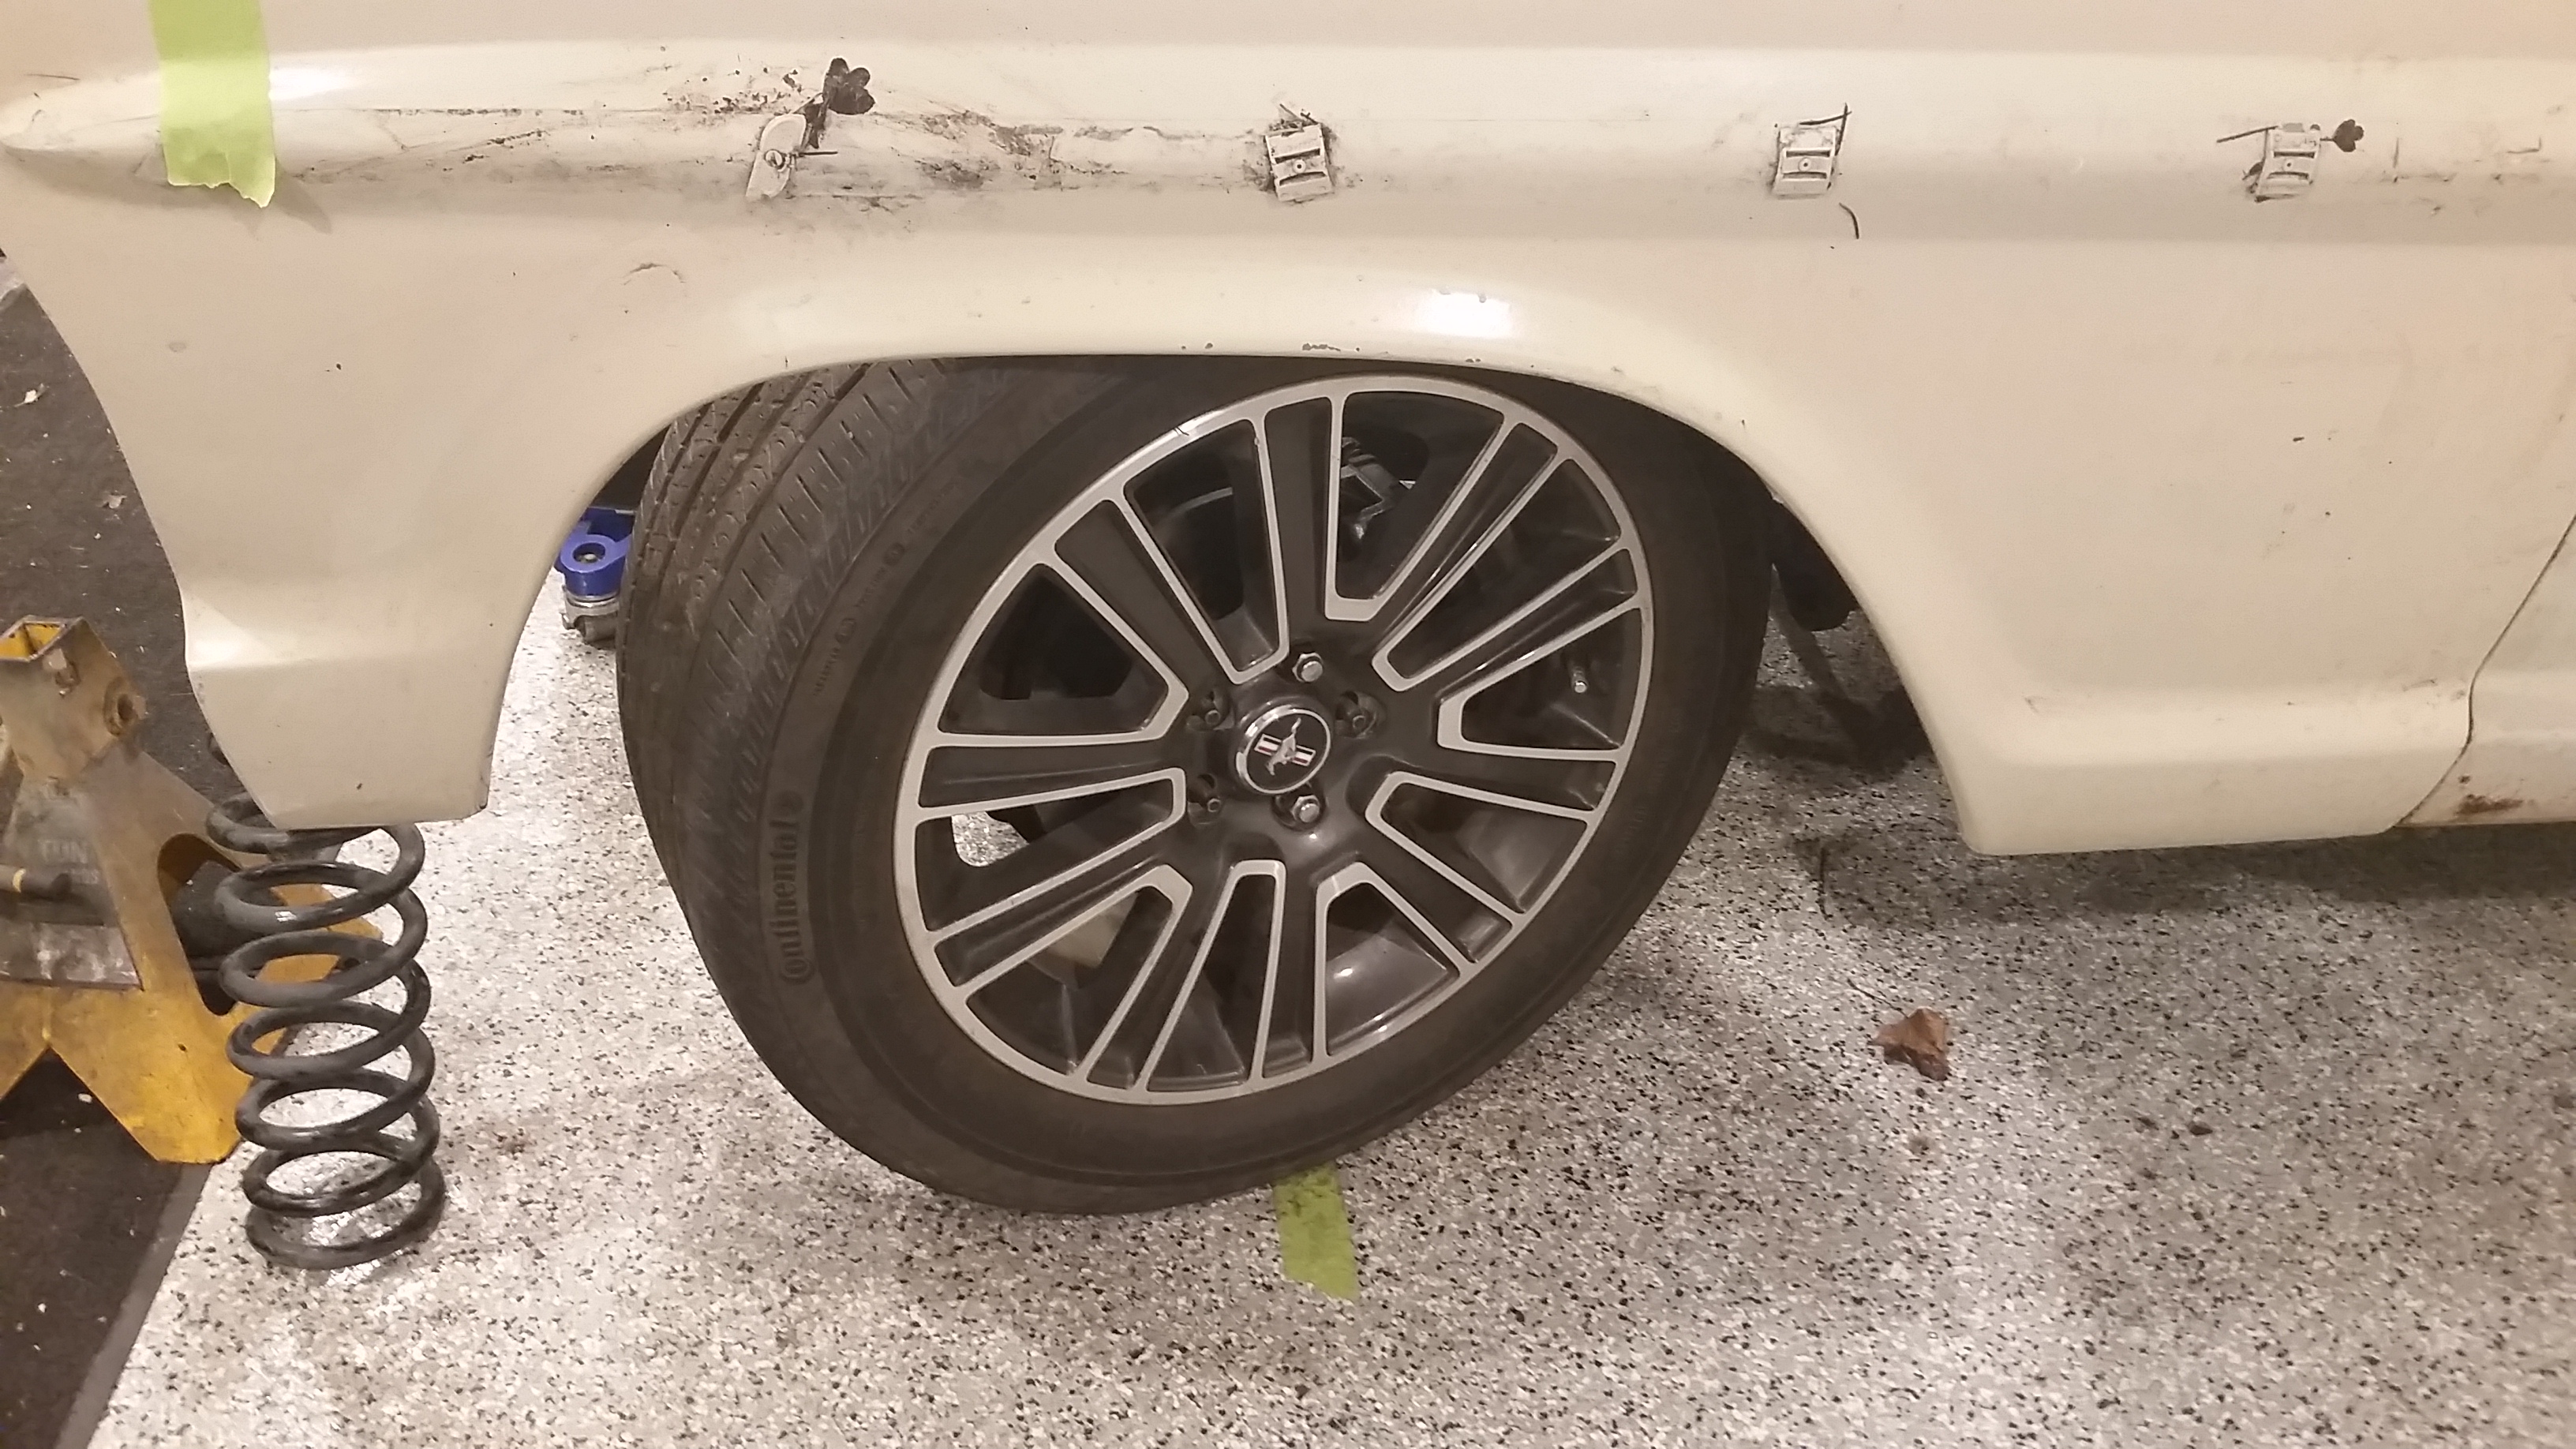
Inner clearance with the monster truck tires and stock mustang wheels.....I will be running a significantly smaller diameter tire than this.
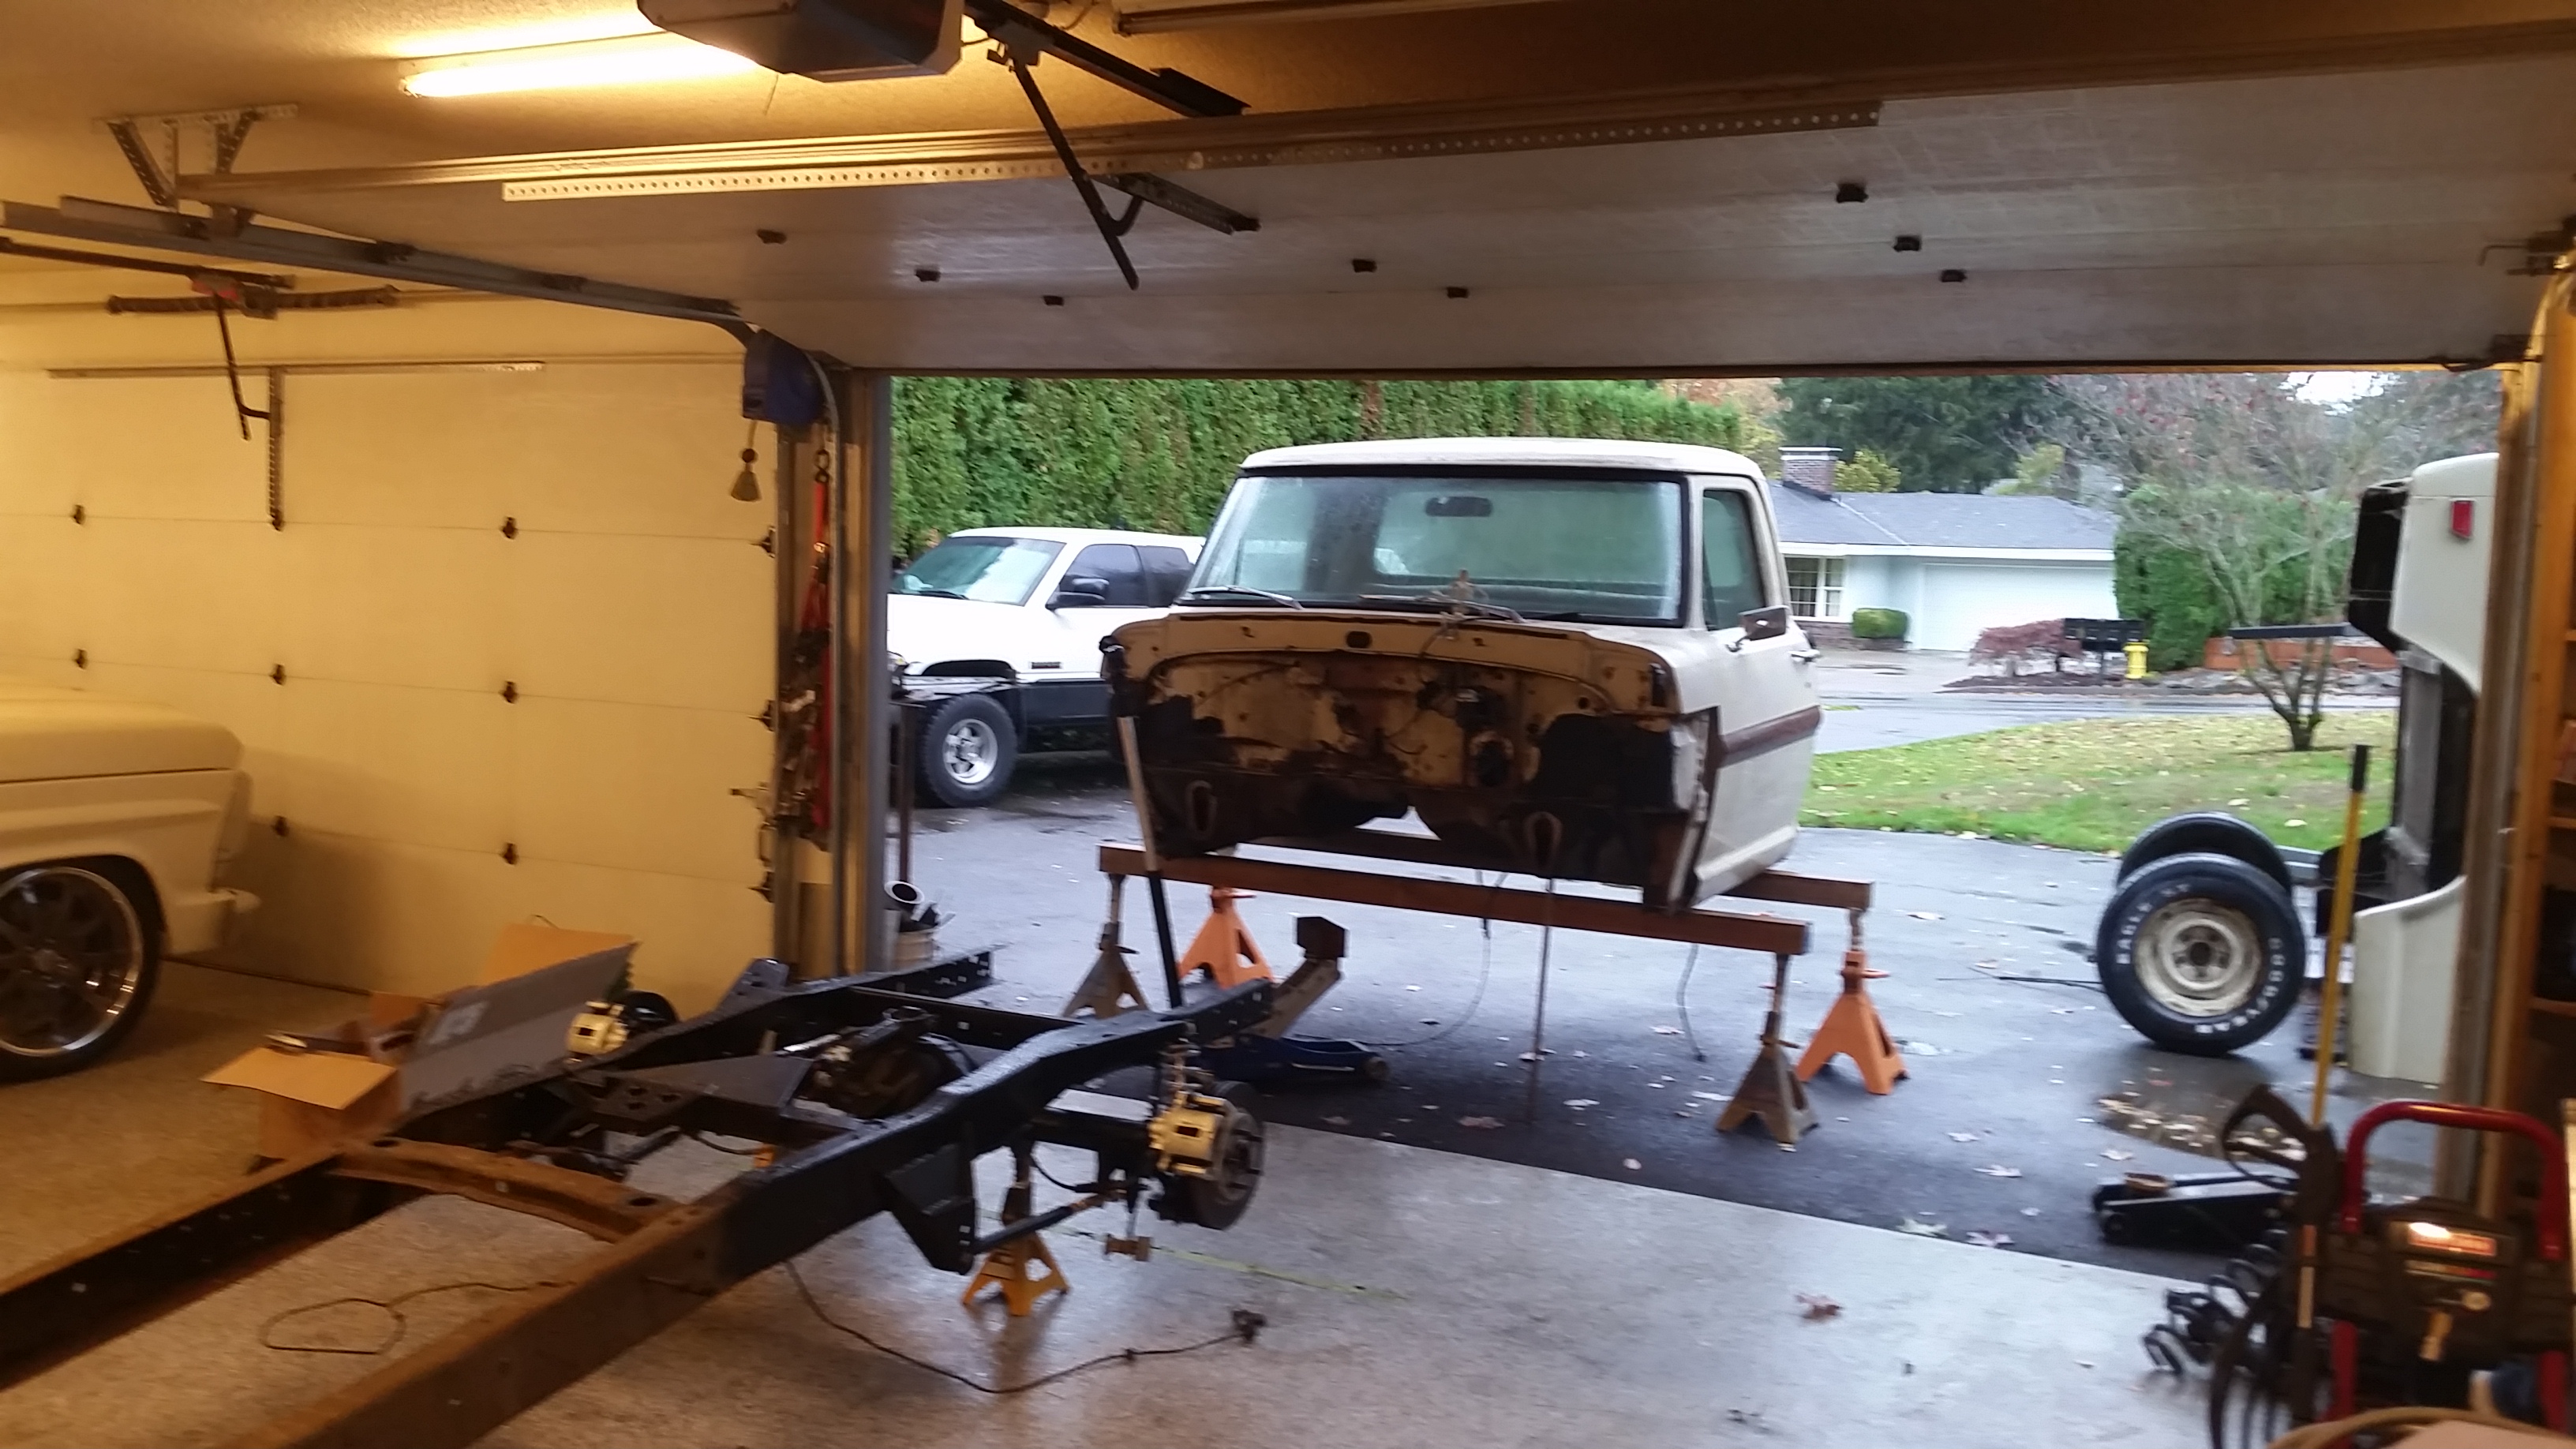
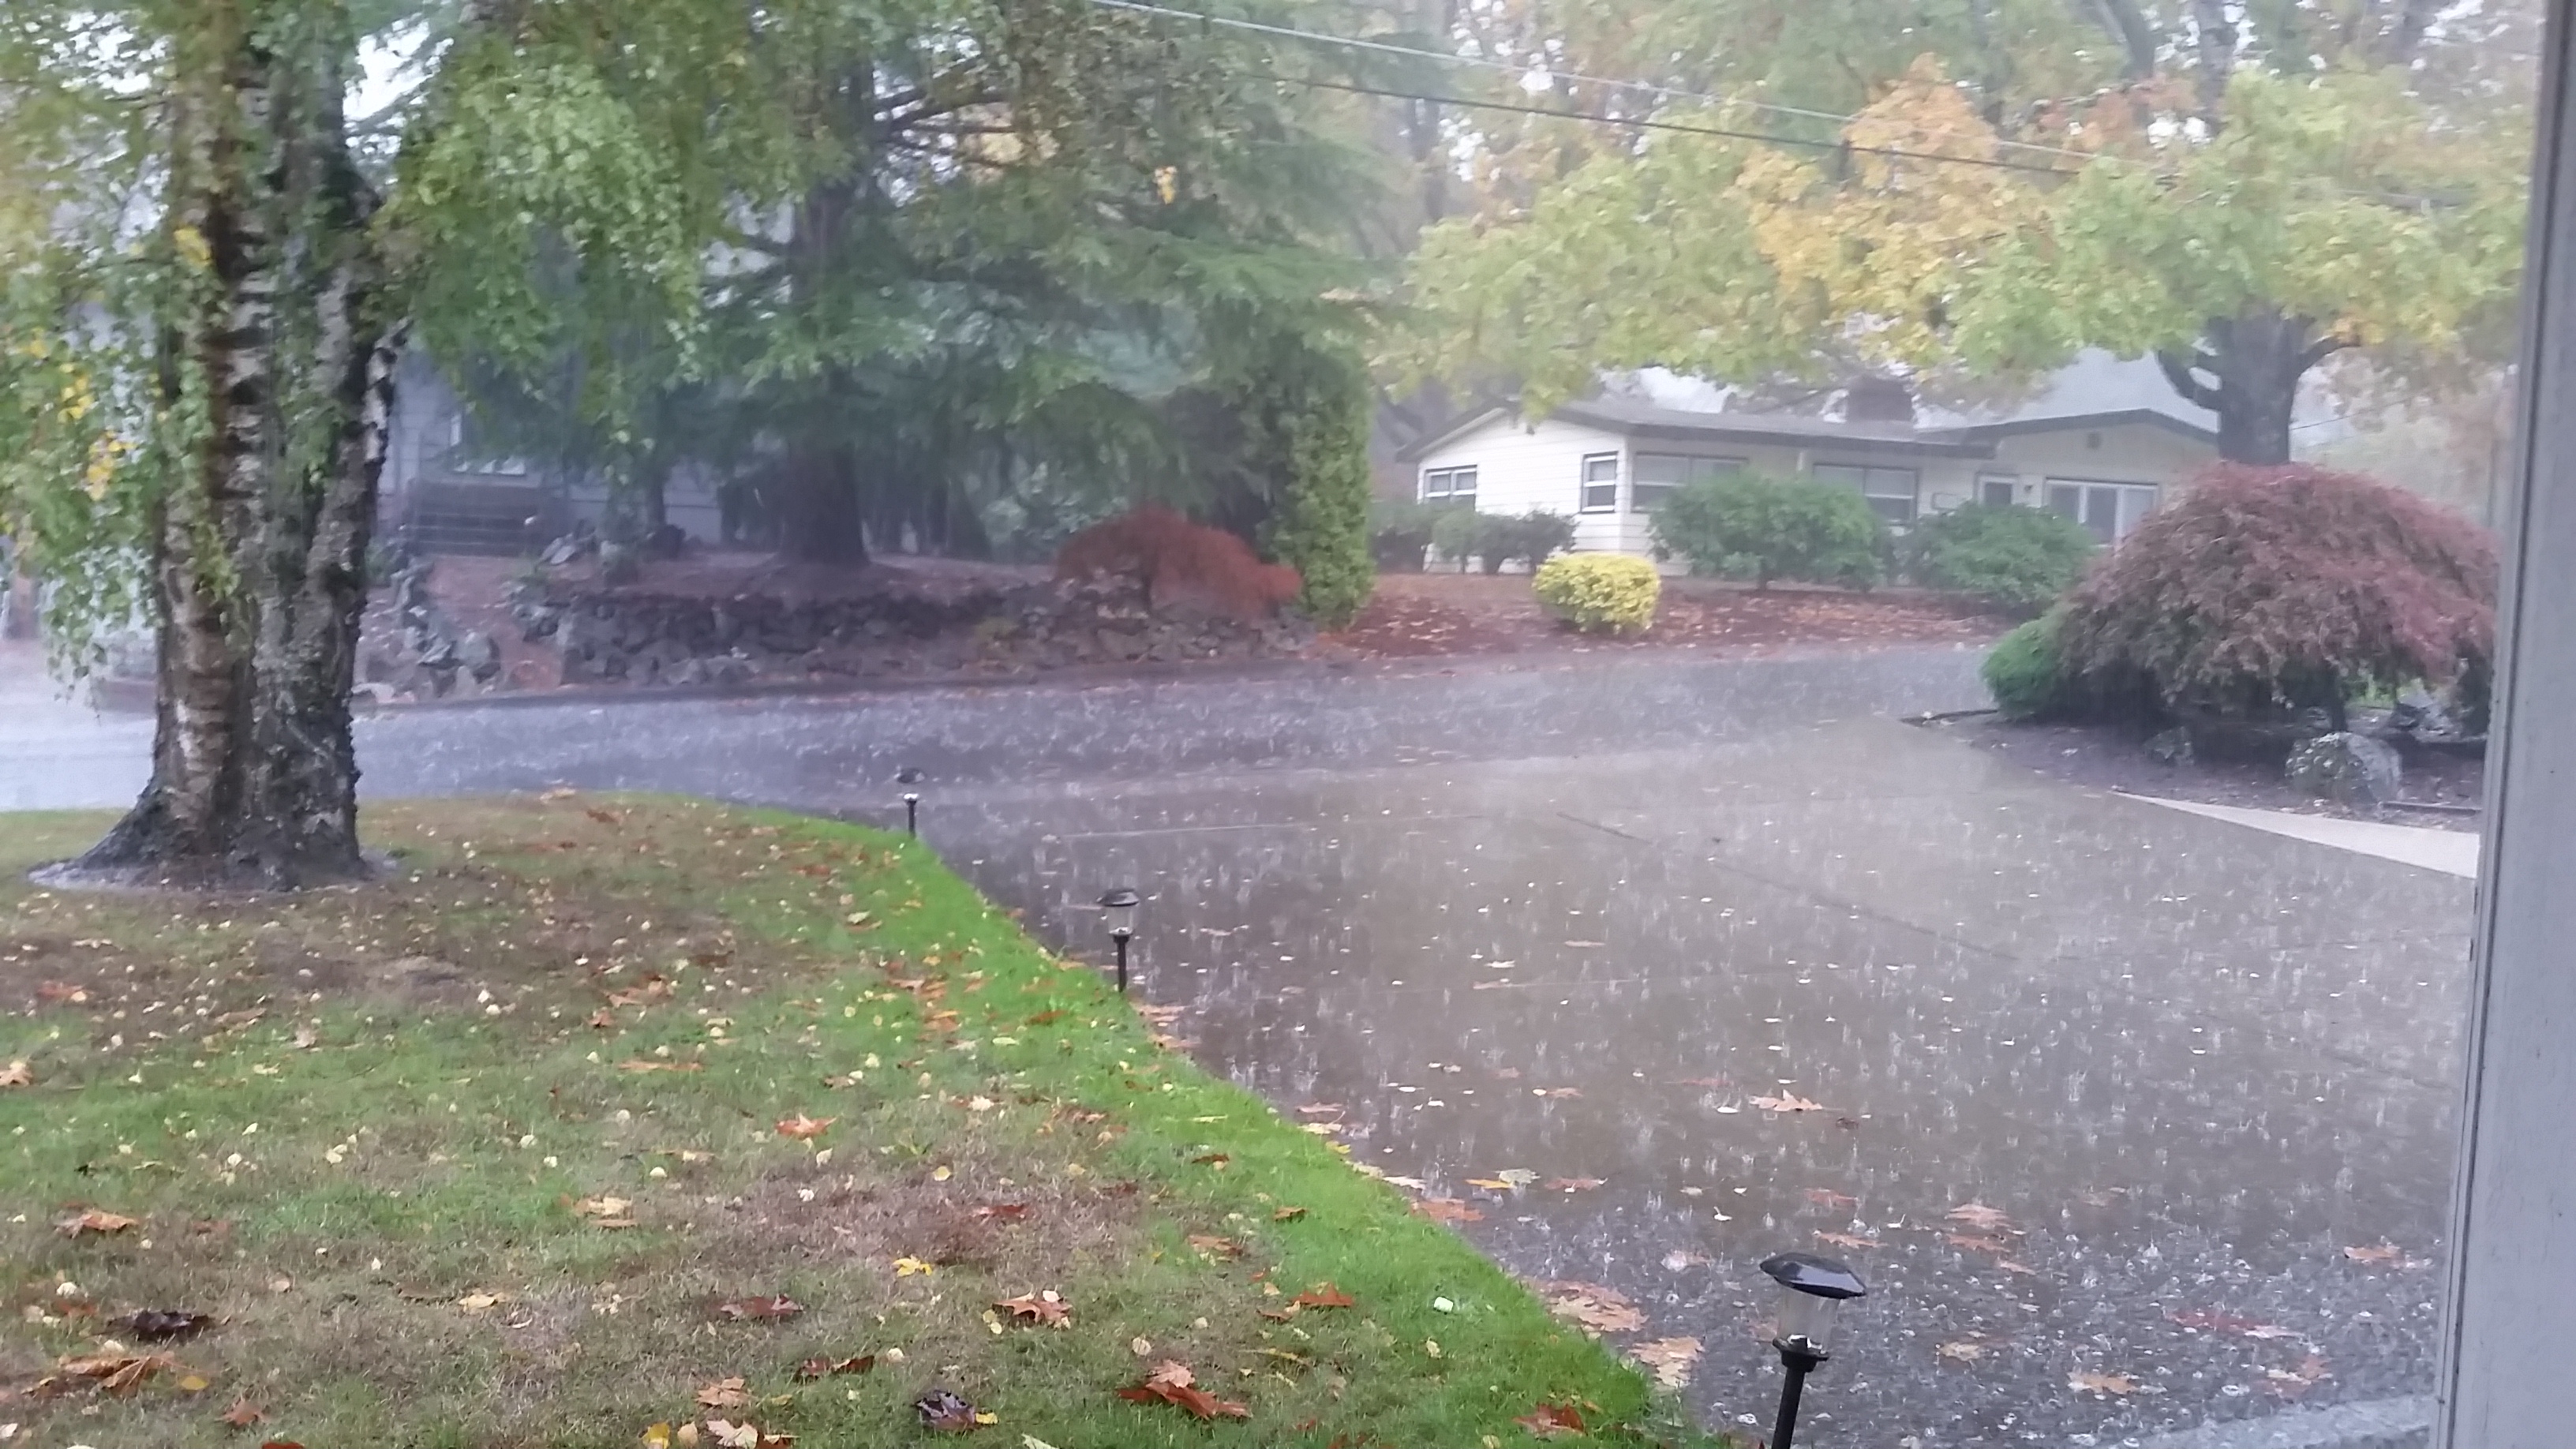
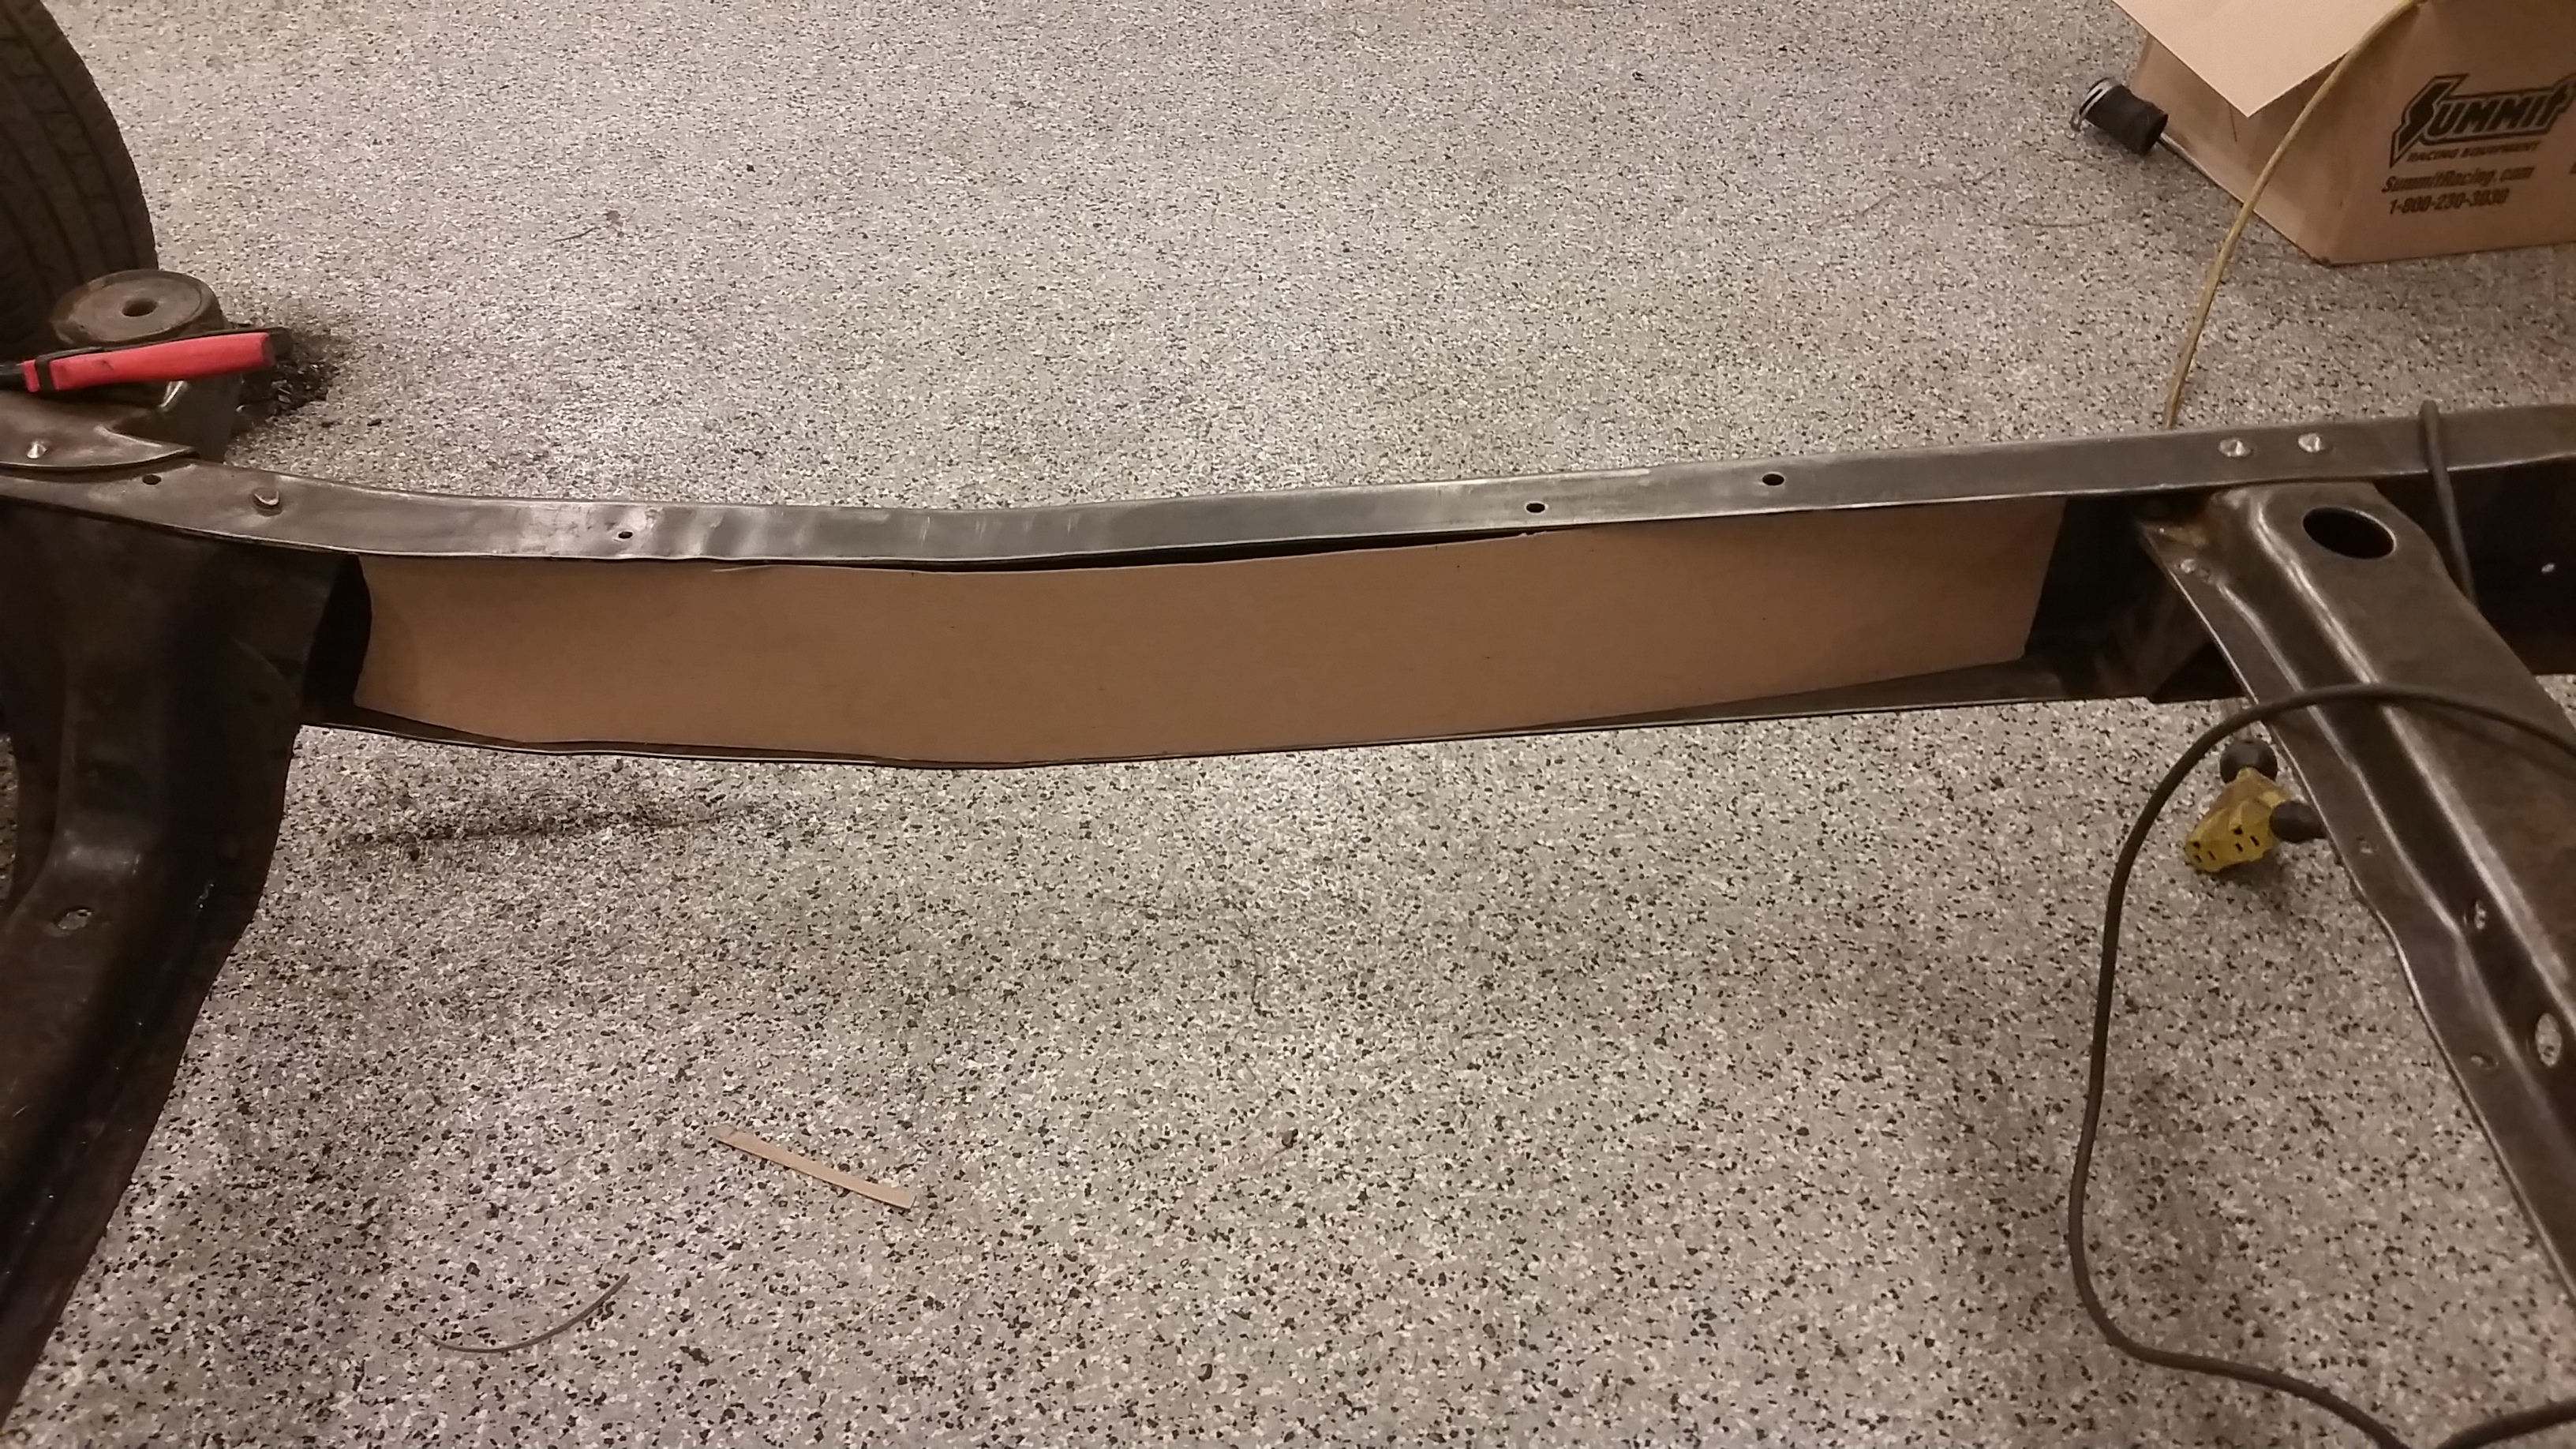
And then this happened today. I guess it was just a matter of time. Have one framerail cleaned up on the outside so far, need to get back out and start mocking up the boxing plates and transmission mount. Keep in mind, no lift, no fancy stuff in this garage =) Oh yeah, it is monsooning today here. Supposed to get between 2 and 3 inches of rain in 24 hours.

Super happy with the tire in the wheelwell (Wheelbase) location

Tire is about to hit the fender.


Inner clearance with the monster truck tires and stock mustang wheels.....I will be running a significantly smaller diameter tire than this.

And then this happened today. I guess it was just a matter of time. Have one framerail cleaned up on the outside so far, need to get back out and start mocking up the boxing plates and transmission mount. Keep in mind, no lift, no fancy stuff in this garage =) Oh yeah, it is monsooning today here. Supposed to get between 2 and 3 inches of rain in 24 hours.


#54
10-31-2015, 08:43 PM
Ok, trying to keep some motivation going but after moving a friend this morning, cleaning out all the gutters and keeping an eye on things in the house I am exhausted.
There was little rivers going down my street earlier today...
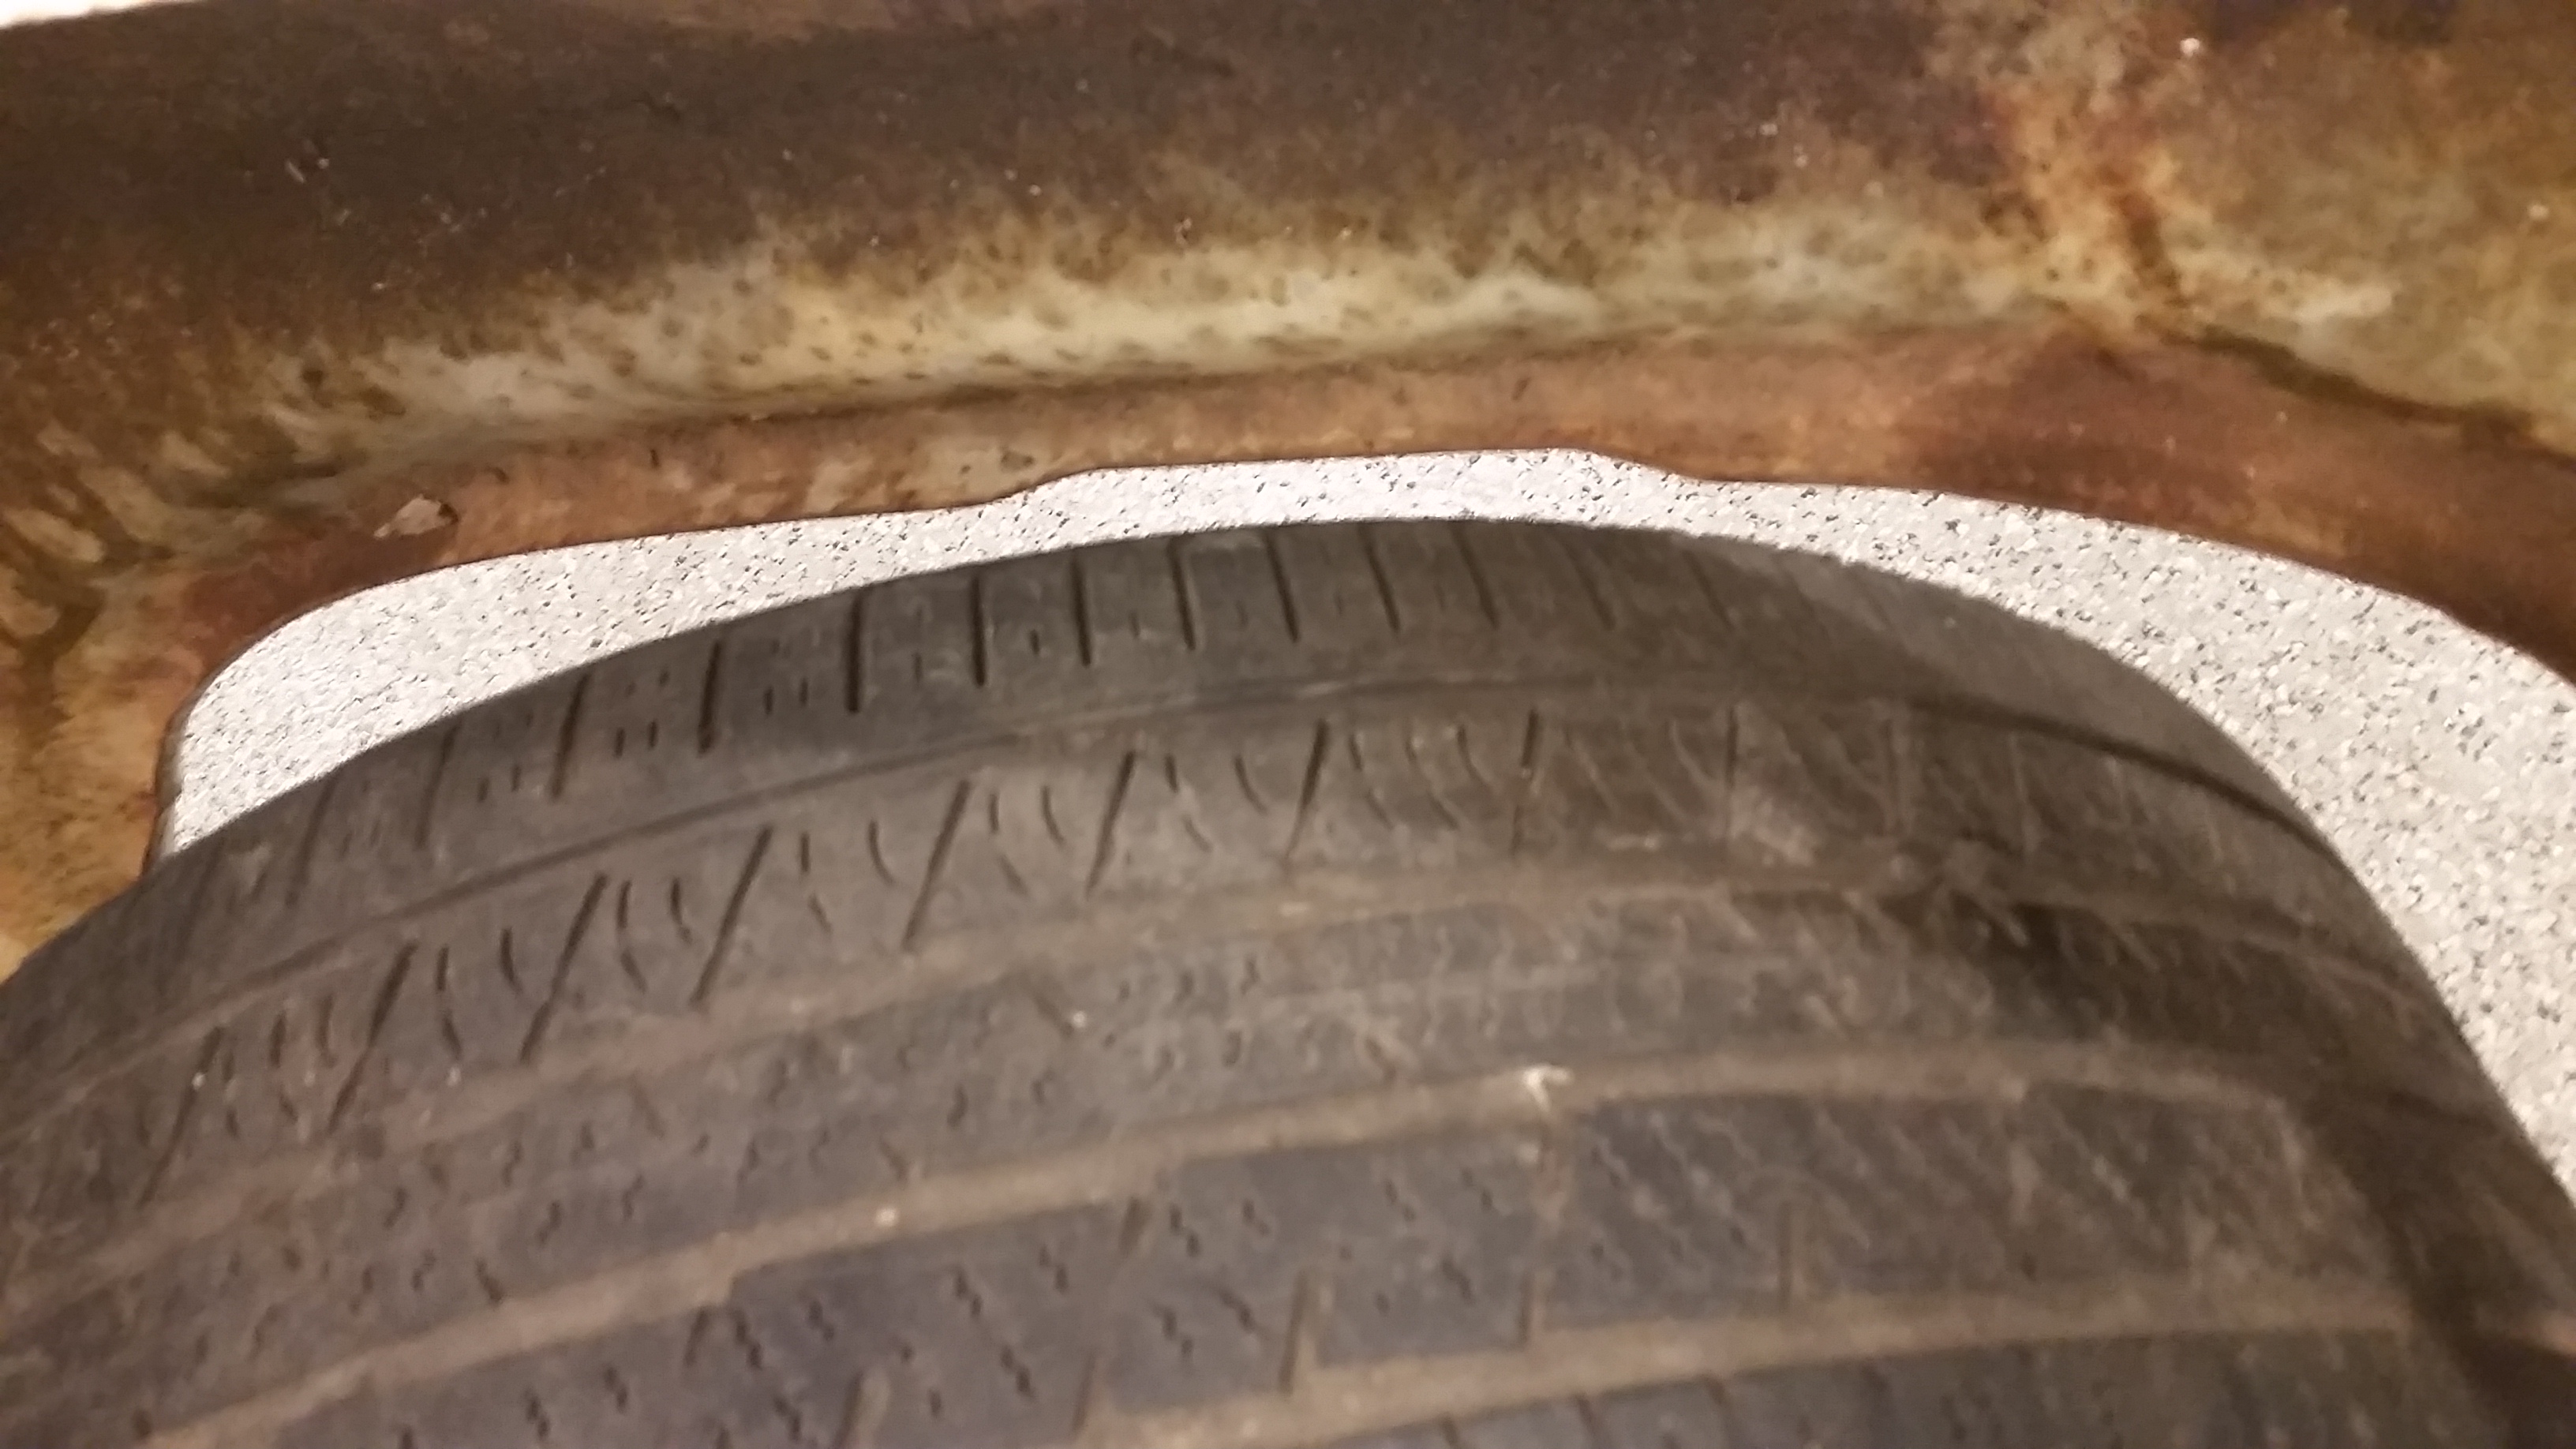
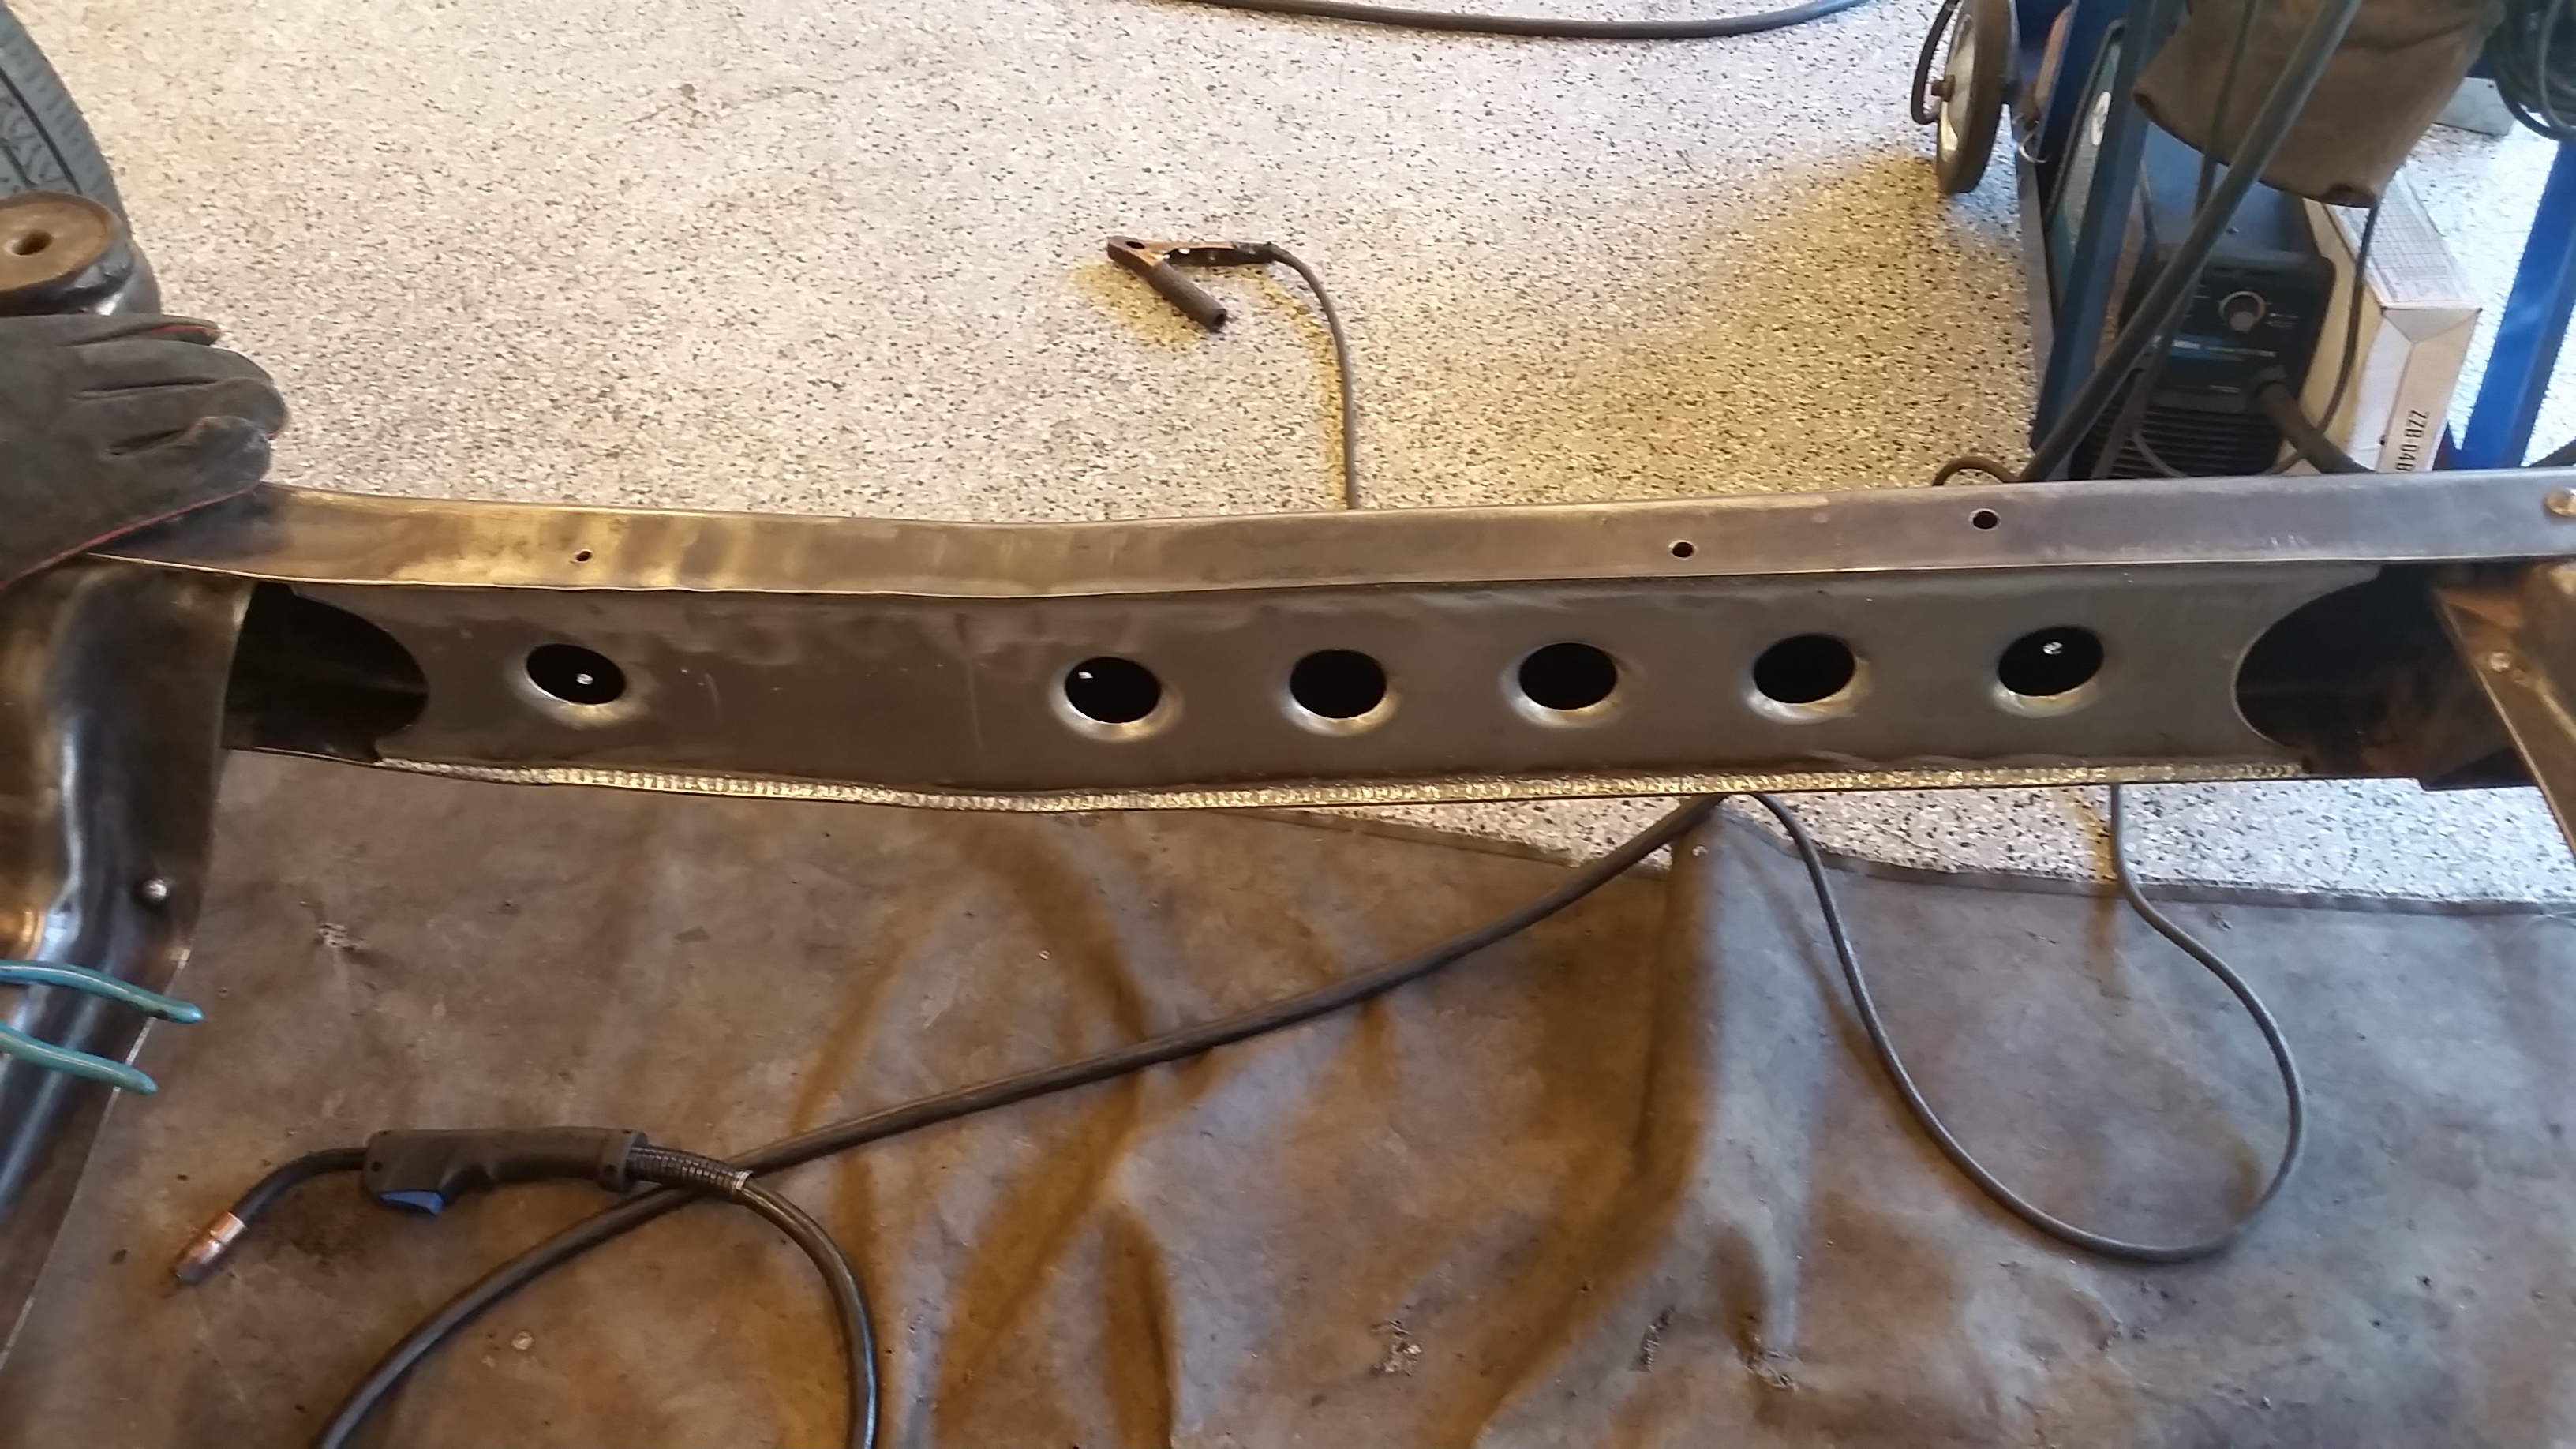
So my process for getting off the god awful but extremely effective undercoating is this.
Chisel off as much as I can in the areas that I can get to with a chisel, then get out the grinder with two different wire wheels.

A cone style for the inner parts and hard to reach areas and a flat wheel for the bigger open areas. I have it down pretty good. This area was particularly thick and difficult to get the undercoating off of. Keep in mind, I have to do top and bottom, inside and outside of the frame and all crossmembers.
This is from the inside of one of the framerails...

My hands are exhausted after hours of chiseling and grinding. Managed to get one template made.
End results though are excellent. Nice clean framerails. Undercoating did its job for sure.
Hope to get the boxing of the frame done tomorrow and get the cab back on the frame. Need to start on the brakes and get the steering dialed in so I can drop in the motor and tranny.
Sean
There was little rivers going down my street earlier today...

So my process for getting off the god awful but extremely effective undercoating is this.
Chisel off as much as I can in the areas that I can get to with a chisel, then get out the grinder with two different wire wheels.

A cone style for the inner parts and hard to reach areas and a flat wheel for the bigger open areas. I have it down pretty good. This area was particularly thick and difficult to get the undercoating off of. Keep in mind, I have to do top and bottom, inside and outside of the frame and all crossmembers.
This is from the inside of one of the framerails...

My hands are exhausted after hours of chiseling and grinding. Managed to get one template made.

End results though are excellent. Nice clean framerails. Undercoating did its job for sure.

Hope to get the boxing of the frame done tomorrow and get the cab back on the frame. Need to start on the brakes and get the steering dialed in so I can drop in the motor and tranny.
Sean

#57
10-31-2015, 10:06 PM
Thanks for the compliment... on the cab removal I improvised.....rolled the truck out of the shop, jacked up the back as far as I could get it, jack stands under the pinch welds on the cab. Lowered the jack. Placed a 4x4 under the back crossmember and jacked up the frame again. Jack stands higher this time.
put the 4x4's under the cab and between the frame, move jackstands under the 4x4's and jockeyed it around a little bit. No tires on the rear, just a jack. Lowered jack as far as it would go and roll the whole ****tery out the front of the cab just where it sits. I had a buddy help me run the front jack and come up with the plan. Worked excellent.
Thank you....I am looking forward to seeing it as well 
Appreciate your kind words by the way.
Sean
put the 4x4's under the cab and between the frame, move jackstands under the 4x4's and jockeyed it around a little bit. No tires on the rear, just a jack. Lowered jack as far as it would go and roll the whole ****tery out the front of the cab just where it sits. I had a buddy help me run the front jack and come up with the plan. Worked excellent.
Appreciate your kind words by the way.
Sean
#58
11-01-2015, 11:05 AM
#59
11-01-2015, 12:12 PM
Had a long debate with myself last night about wheels.... still not settled on anything.
Sean
#60
11-01-2015, 08:31 PM
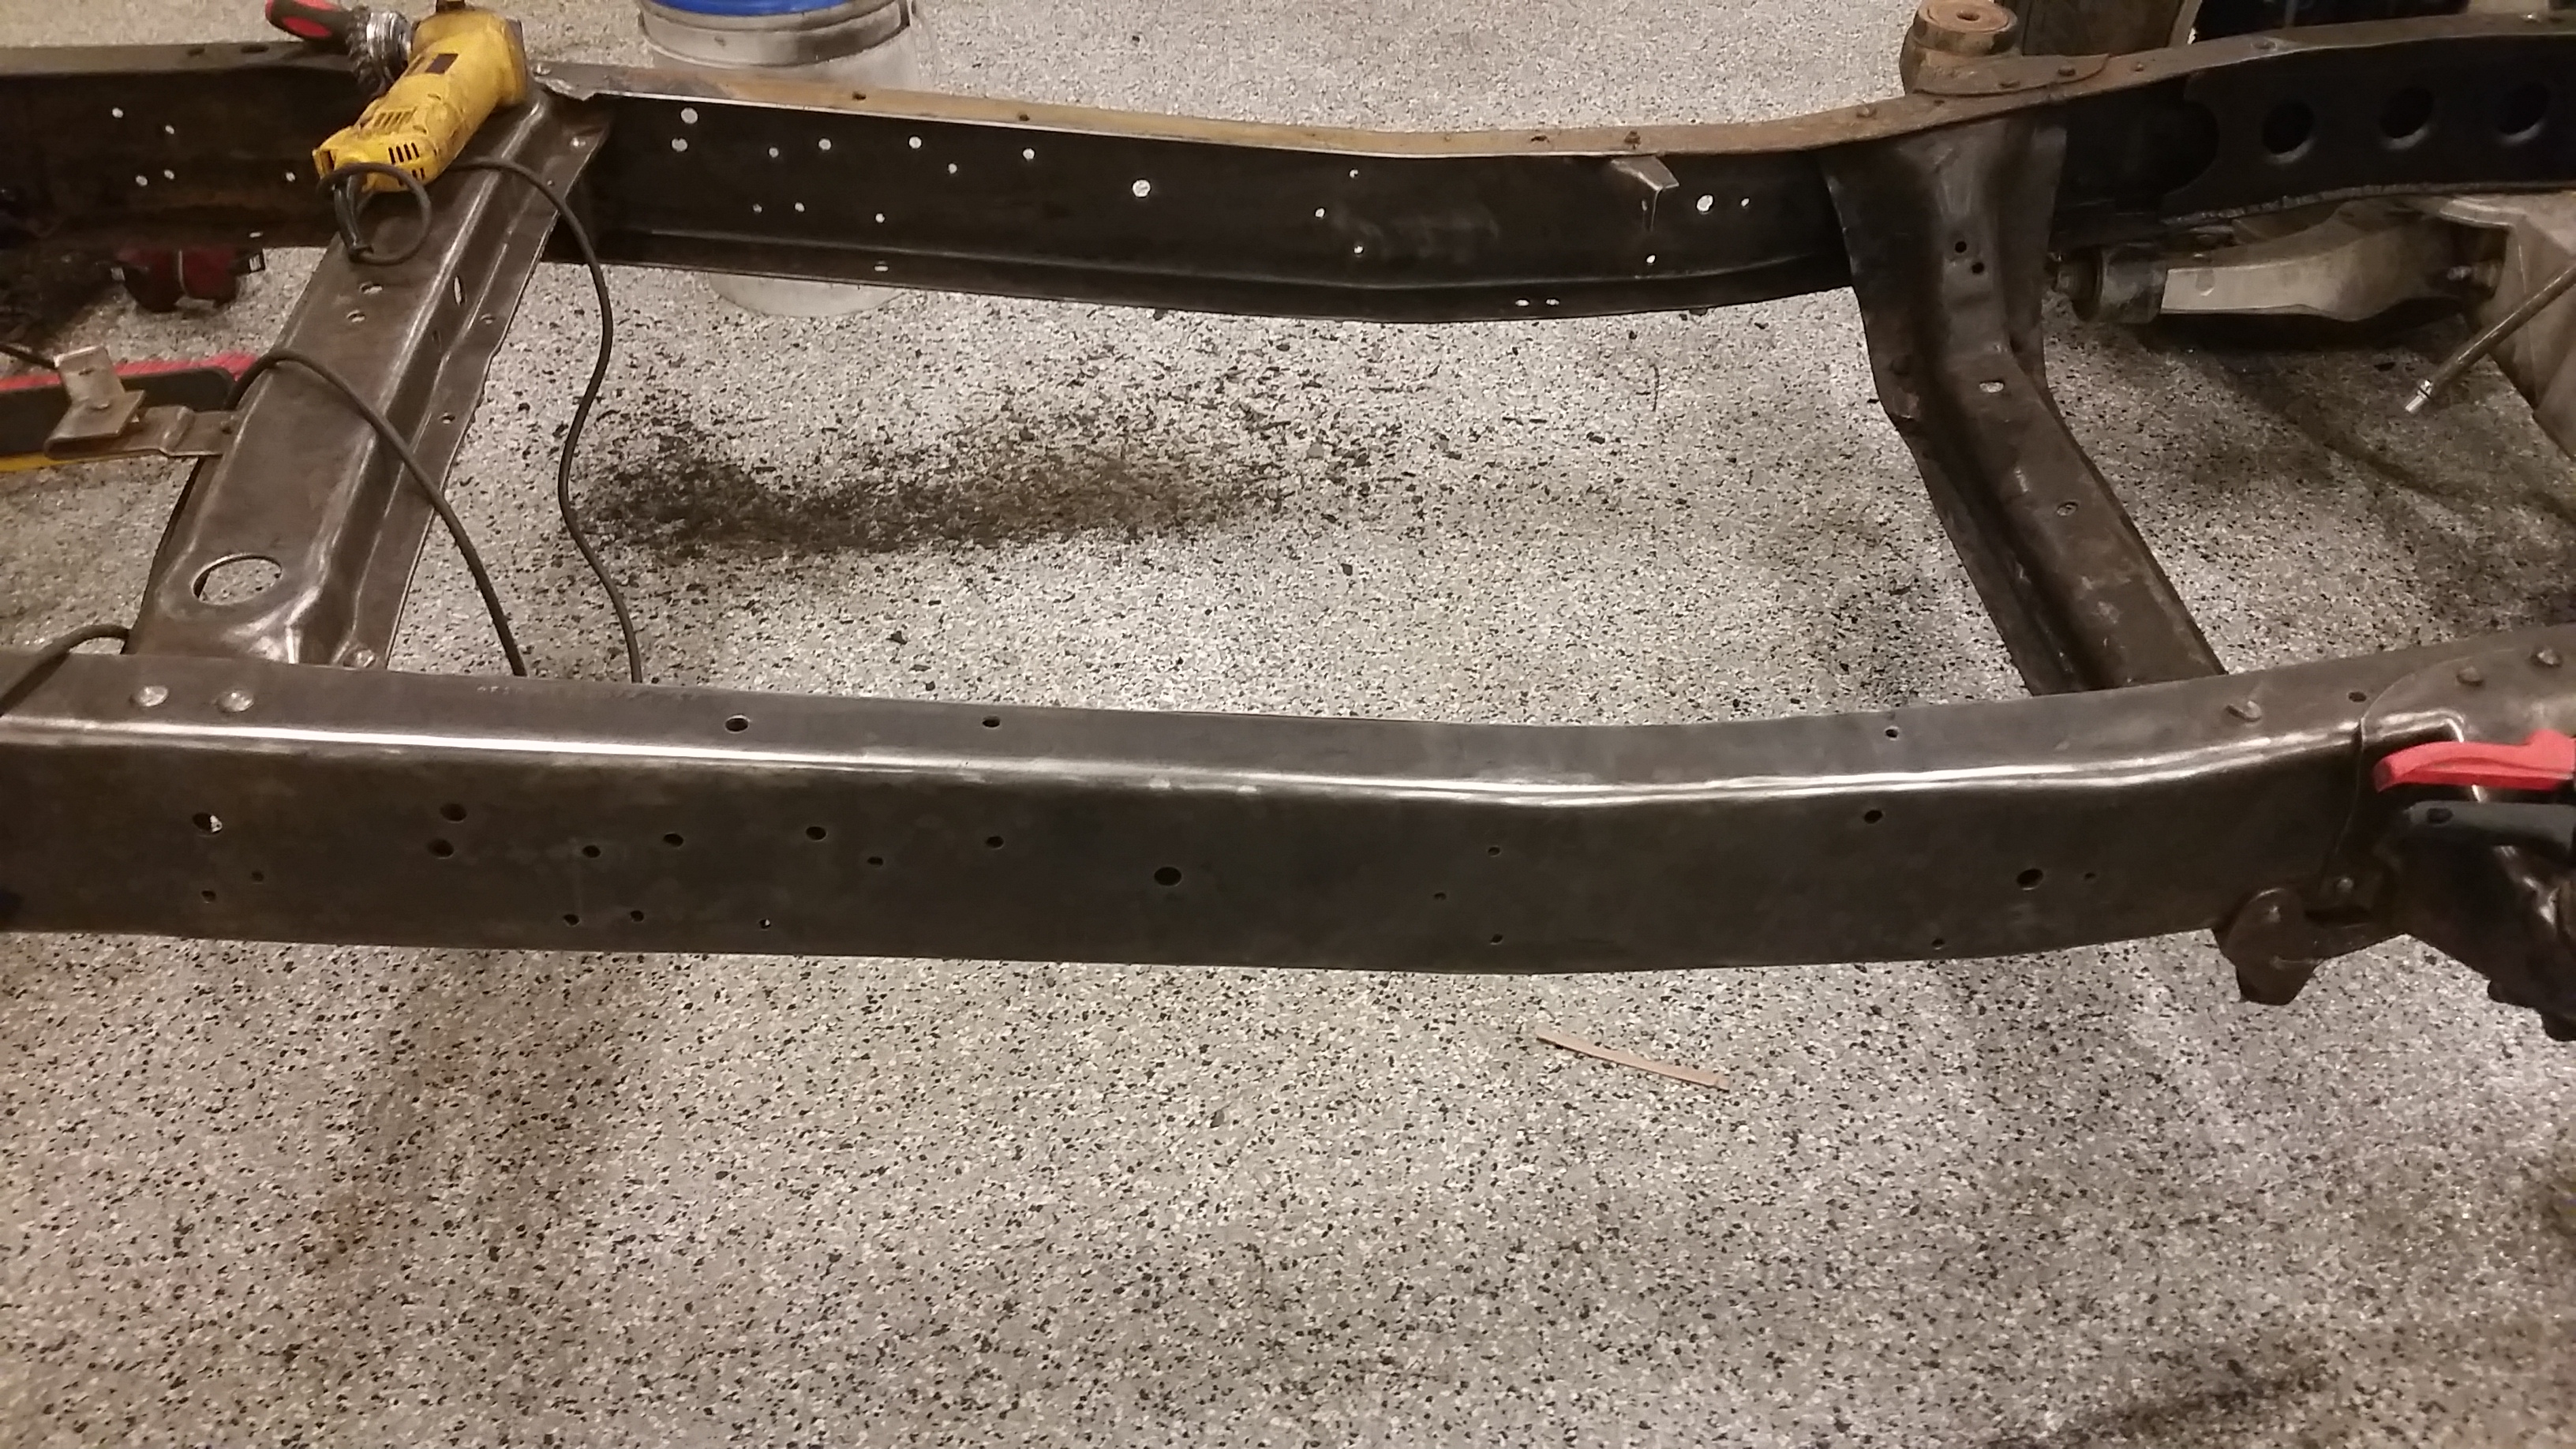
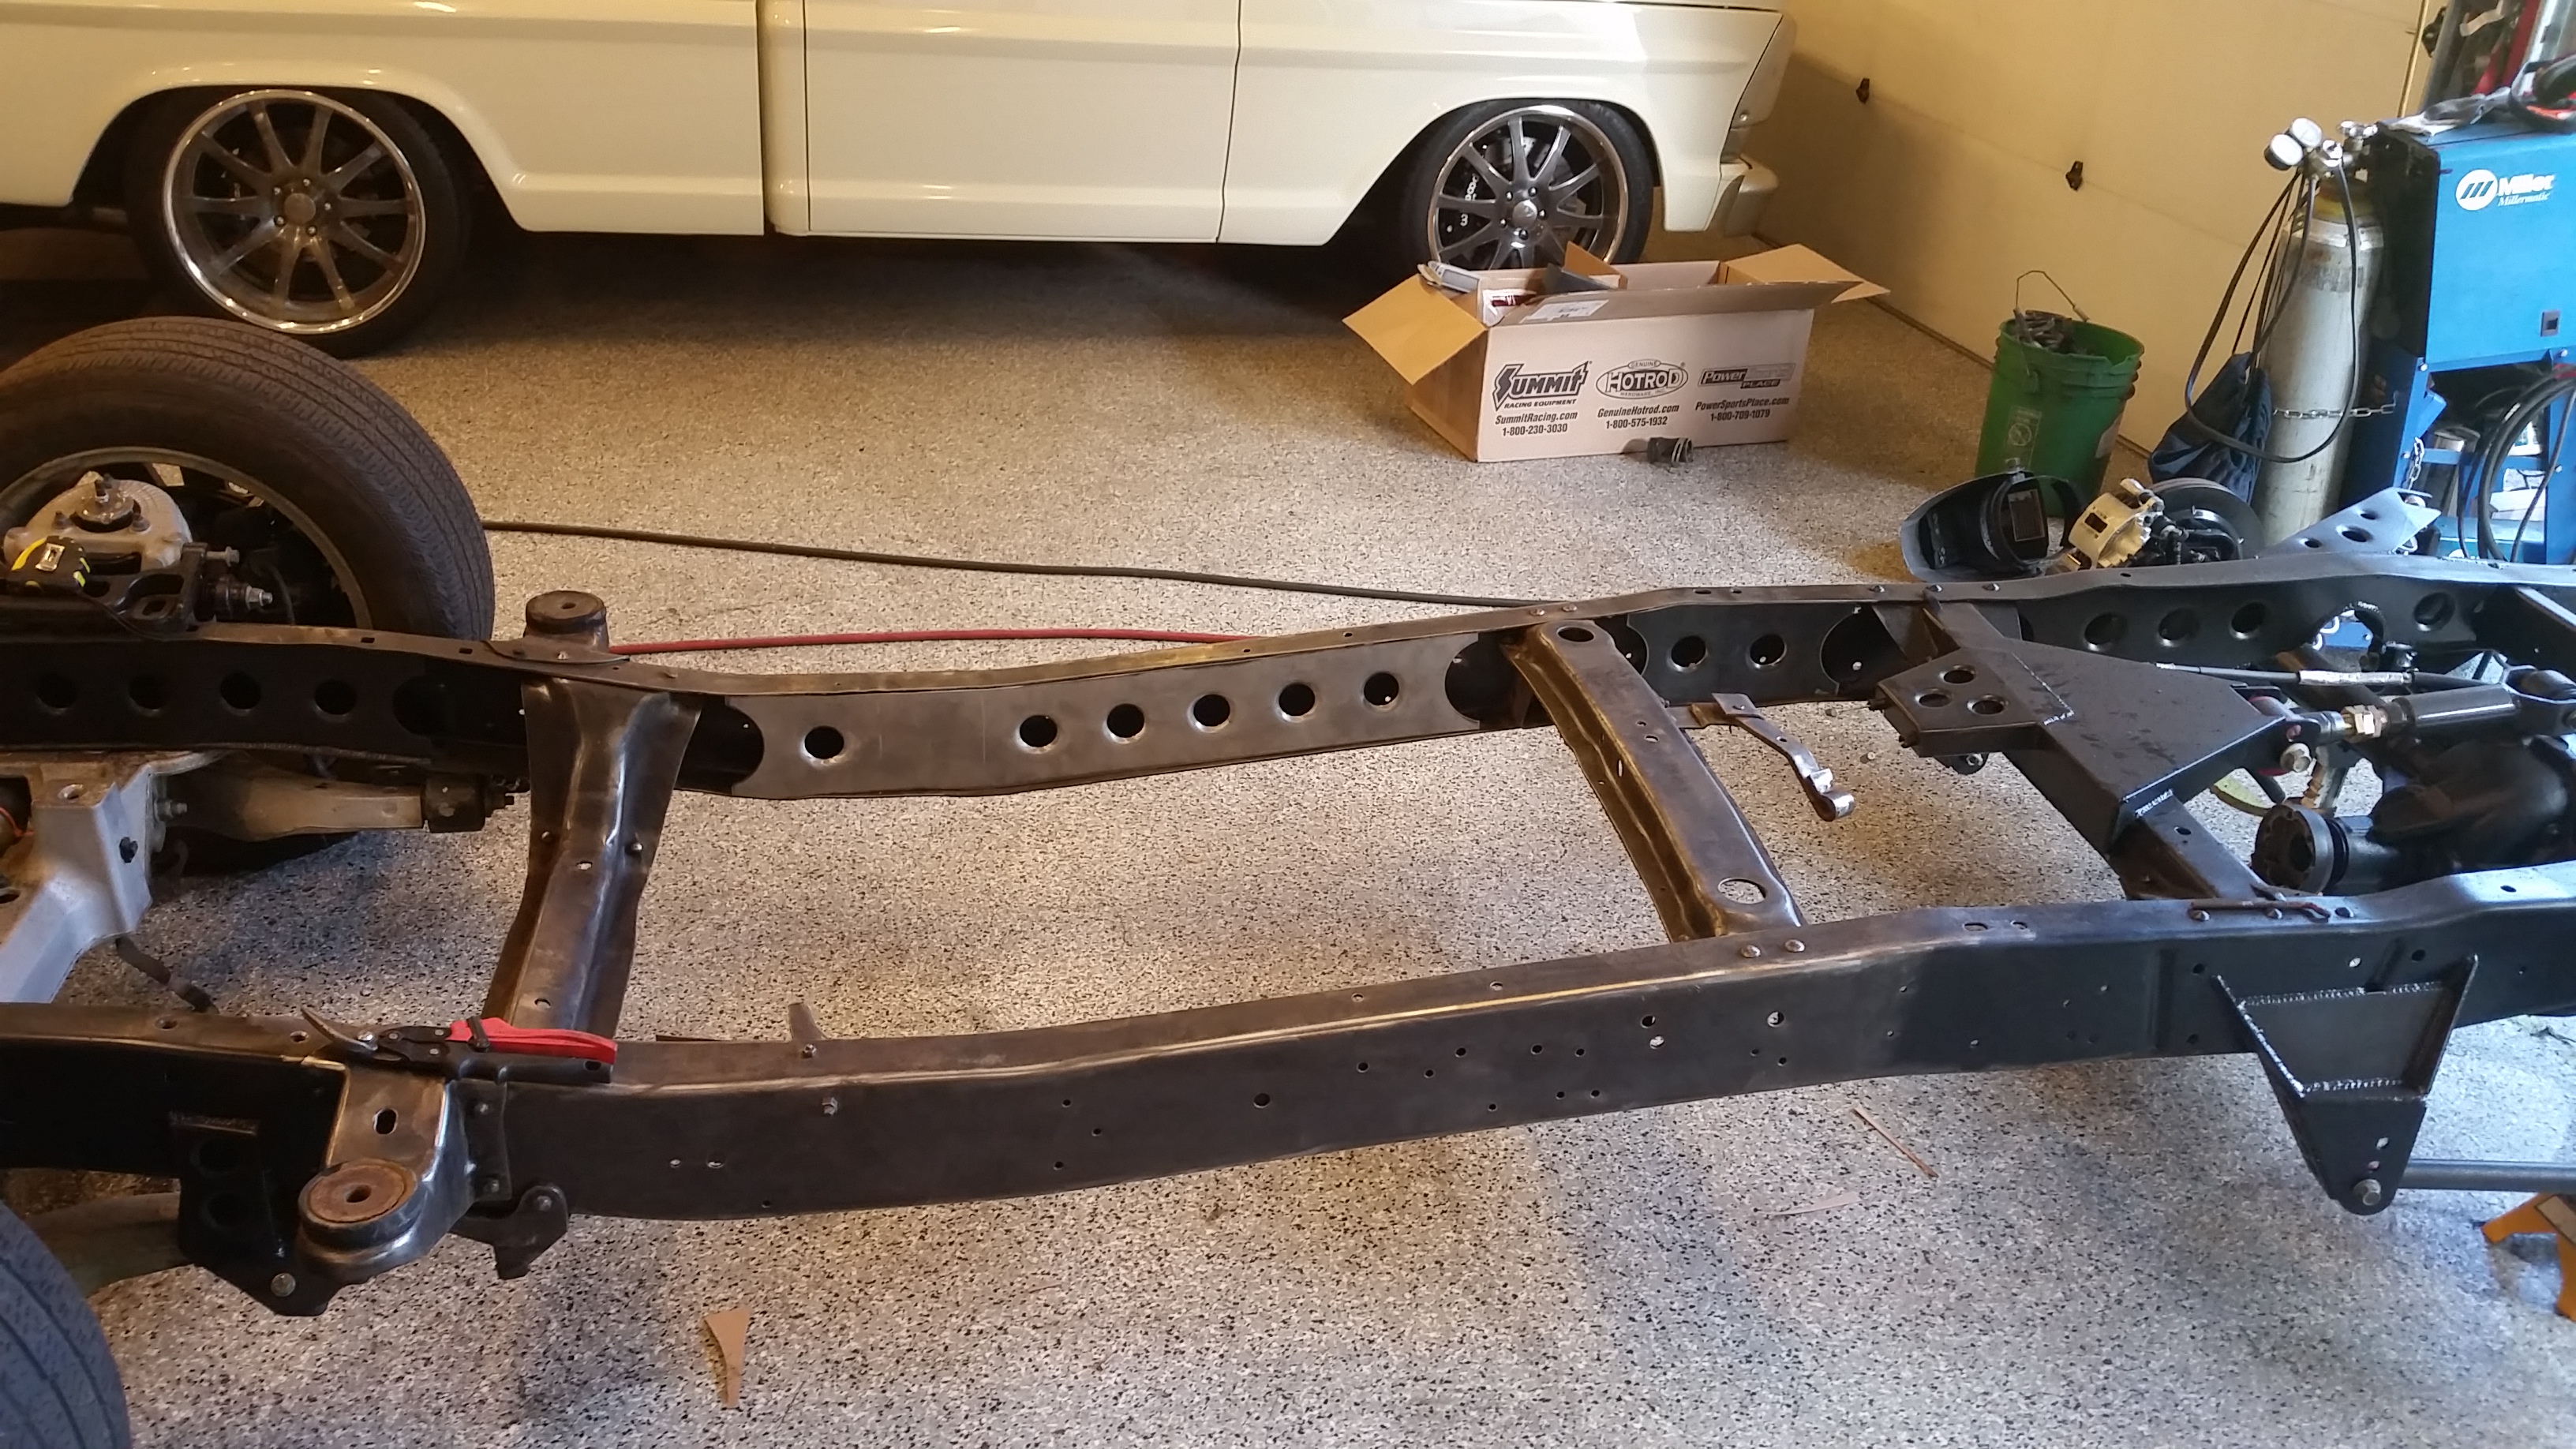
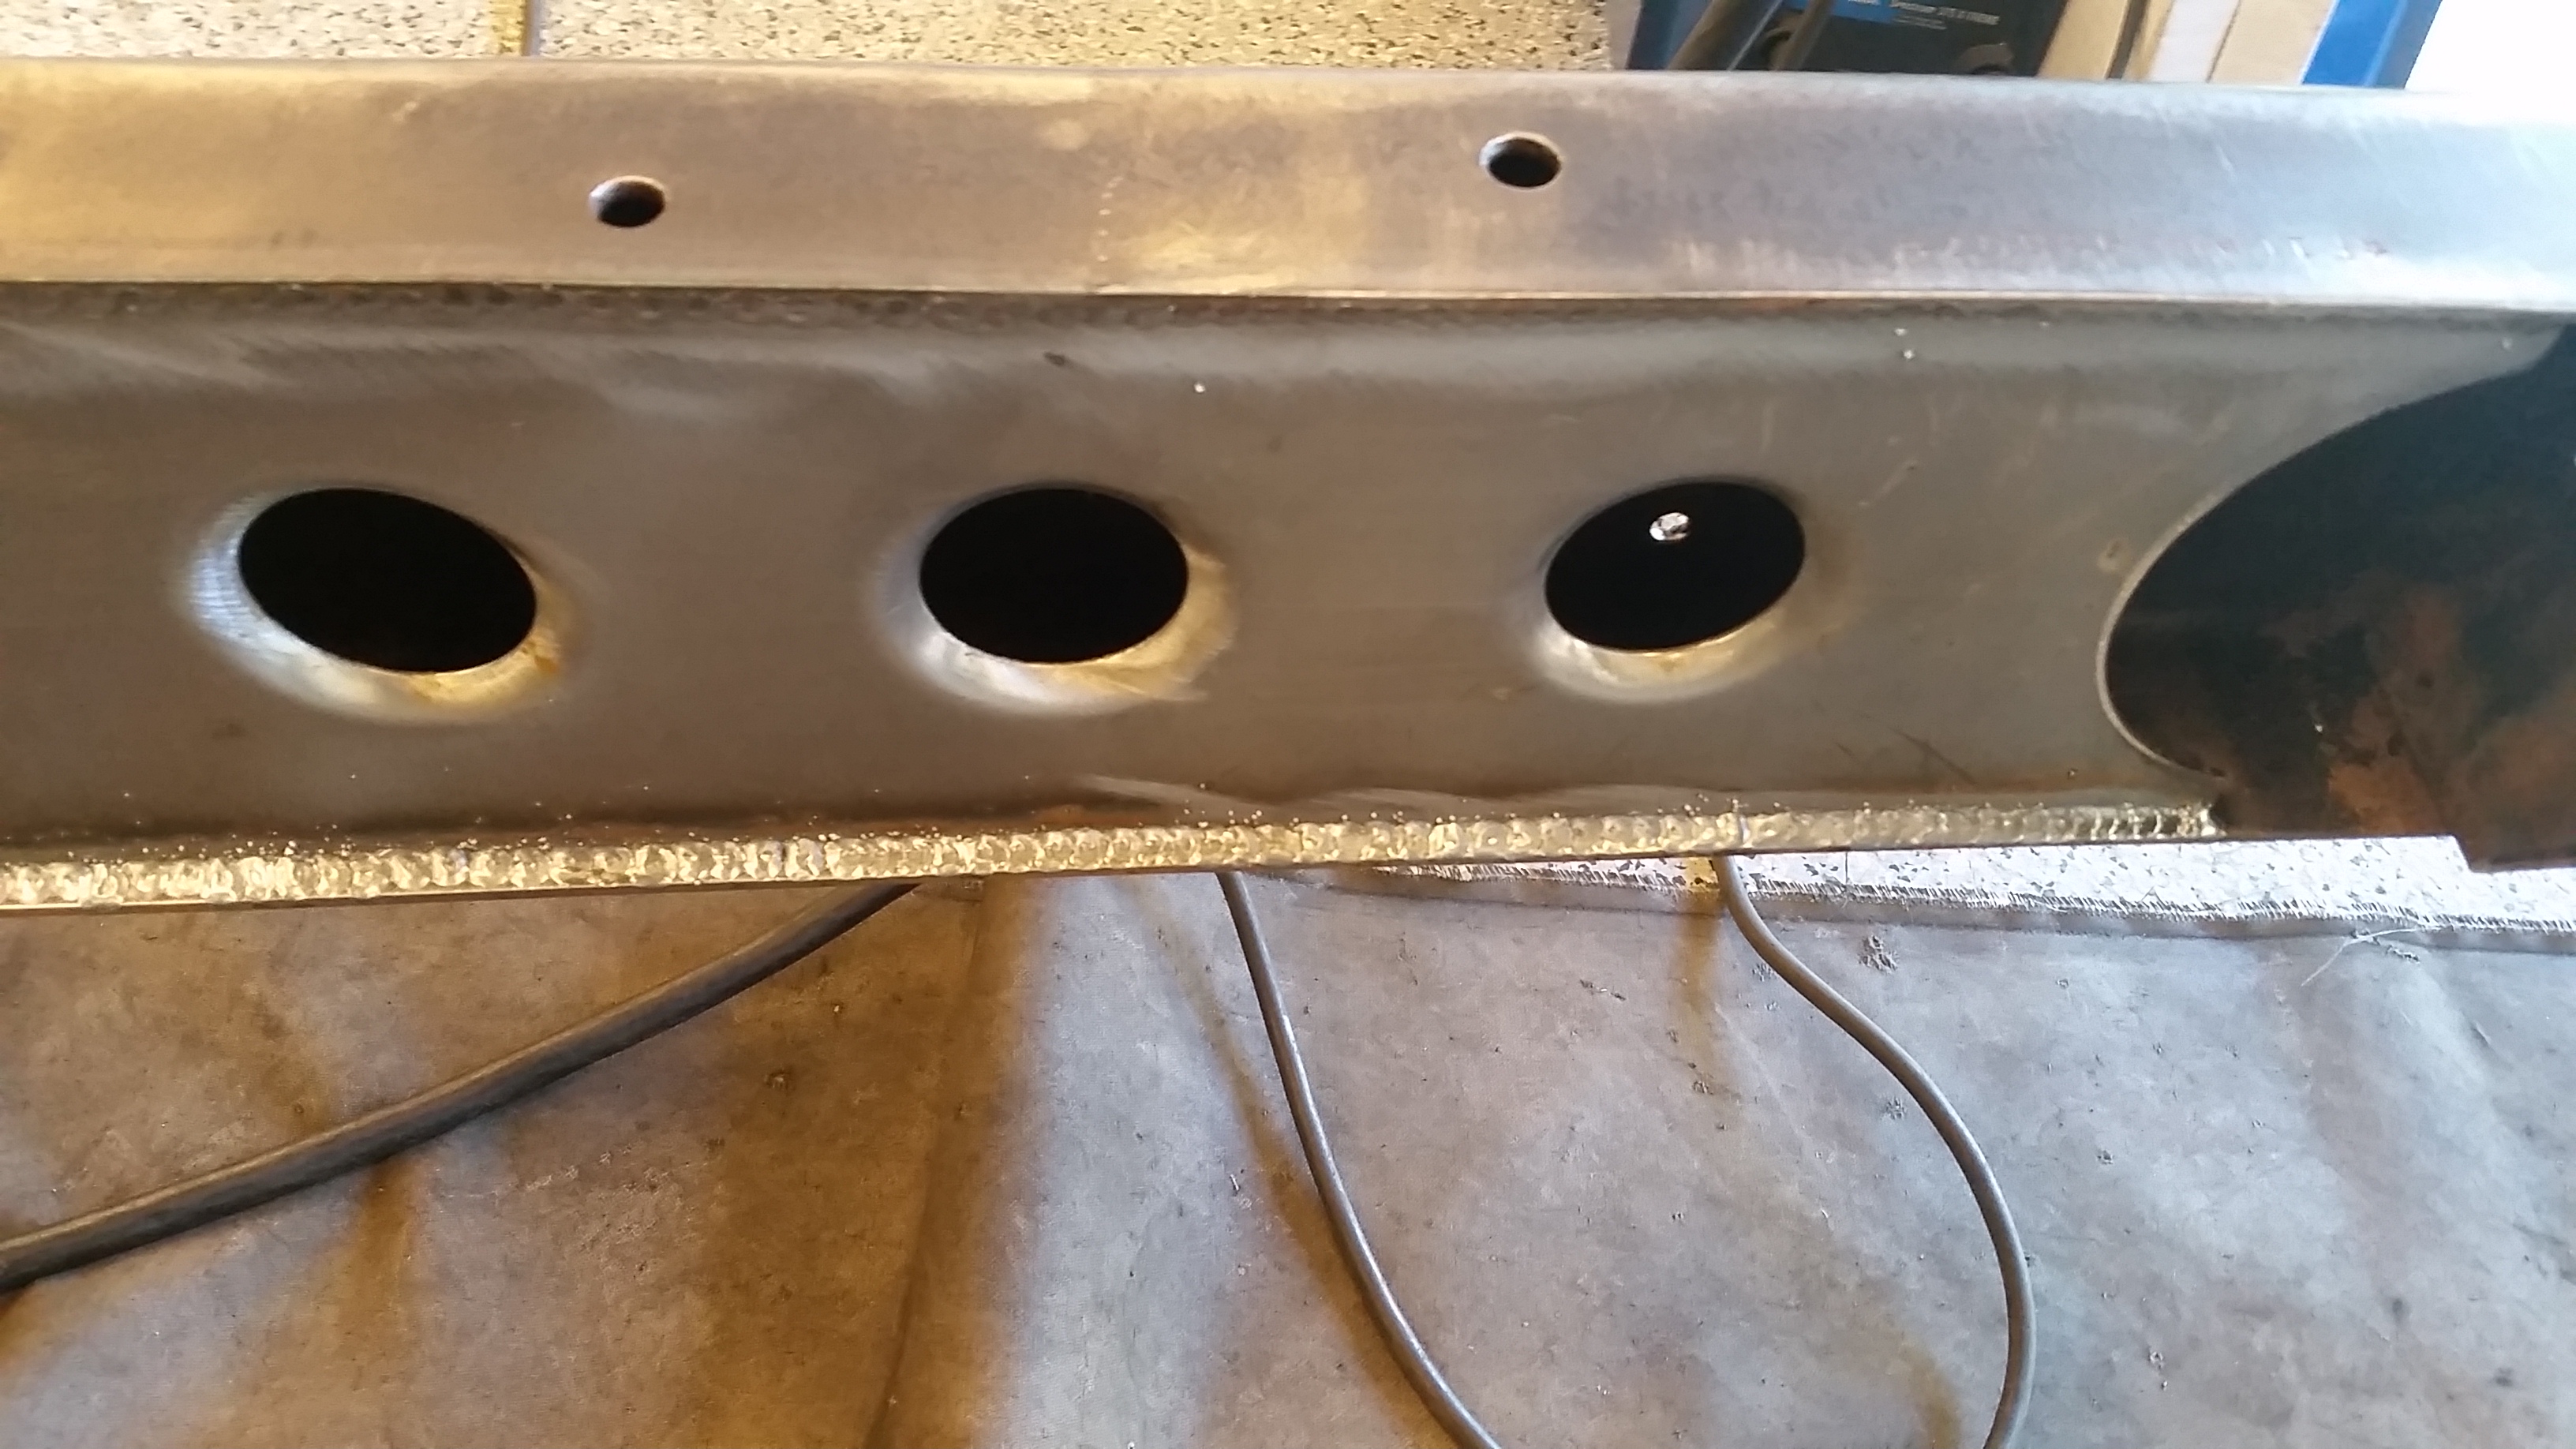
With an extra hour of daylight, I got out in the shop early and got right to it. More templates, more boxing plates, more dimple dies and one messed up drill press. :thup:
Panels built, now get the welder out..
Getting the weld on.
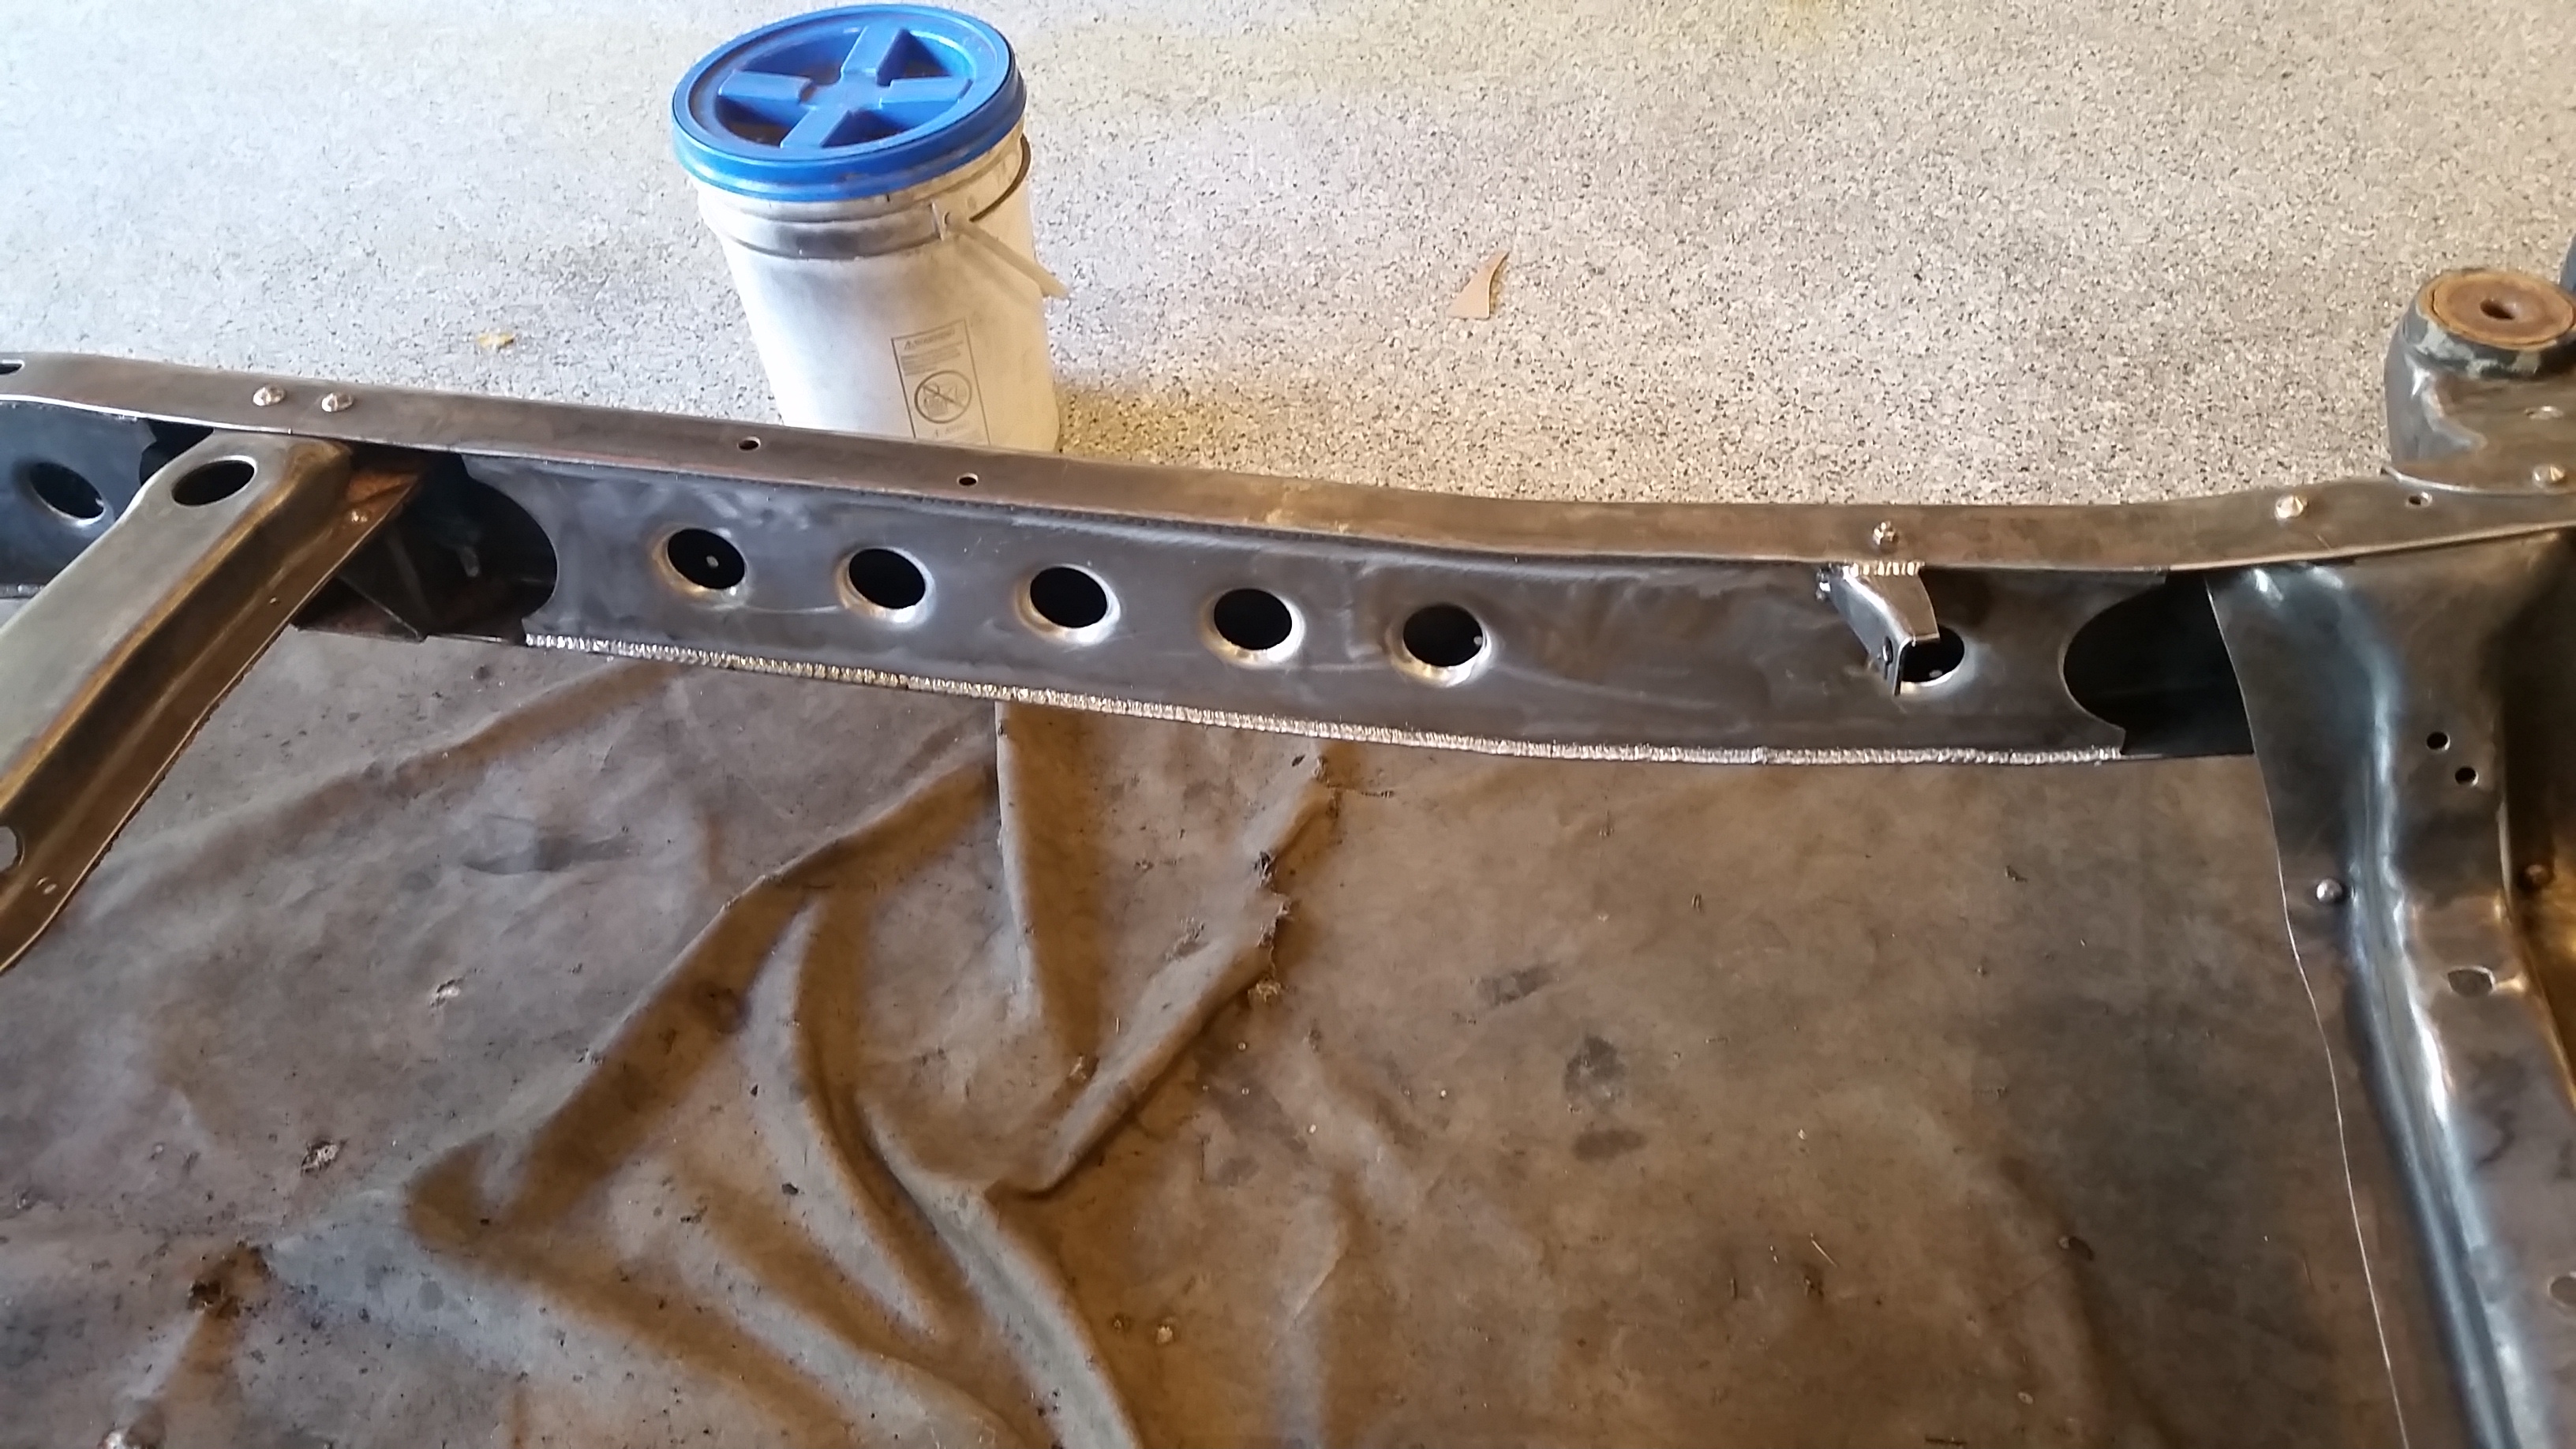
Clean up the welding mess, go over the frame with the wire wheel wipe it down and paint it.

Not in these photos are cleaning up all of the body mount bolts, washers and bushings. Believe it or not the bushings were in like new condition, so they went back in. I also gave the underside of the cab a quick clean up and a shot of satin black so it looks a little more presentable from the bottom... I have issues I know.
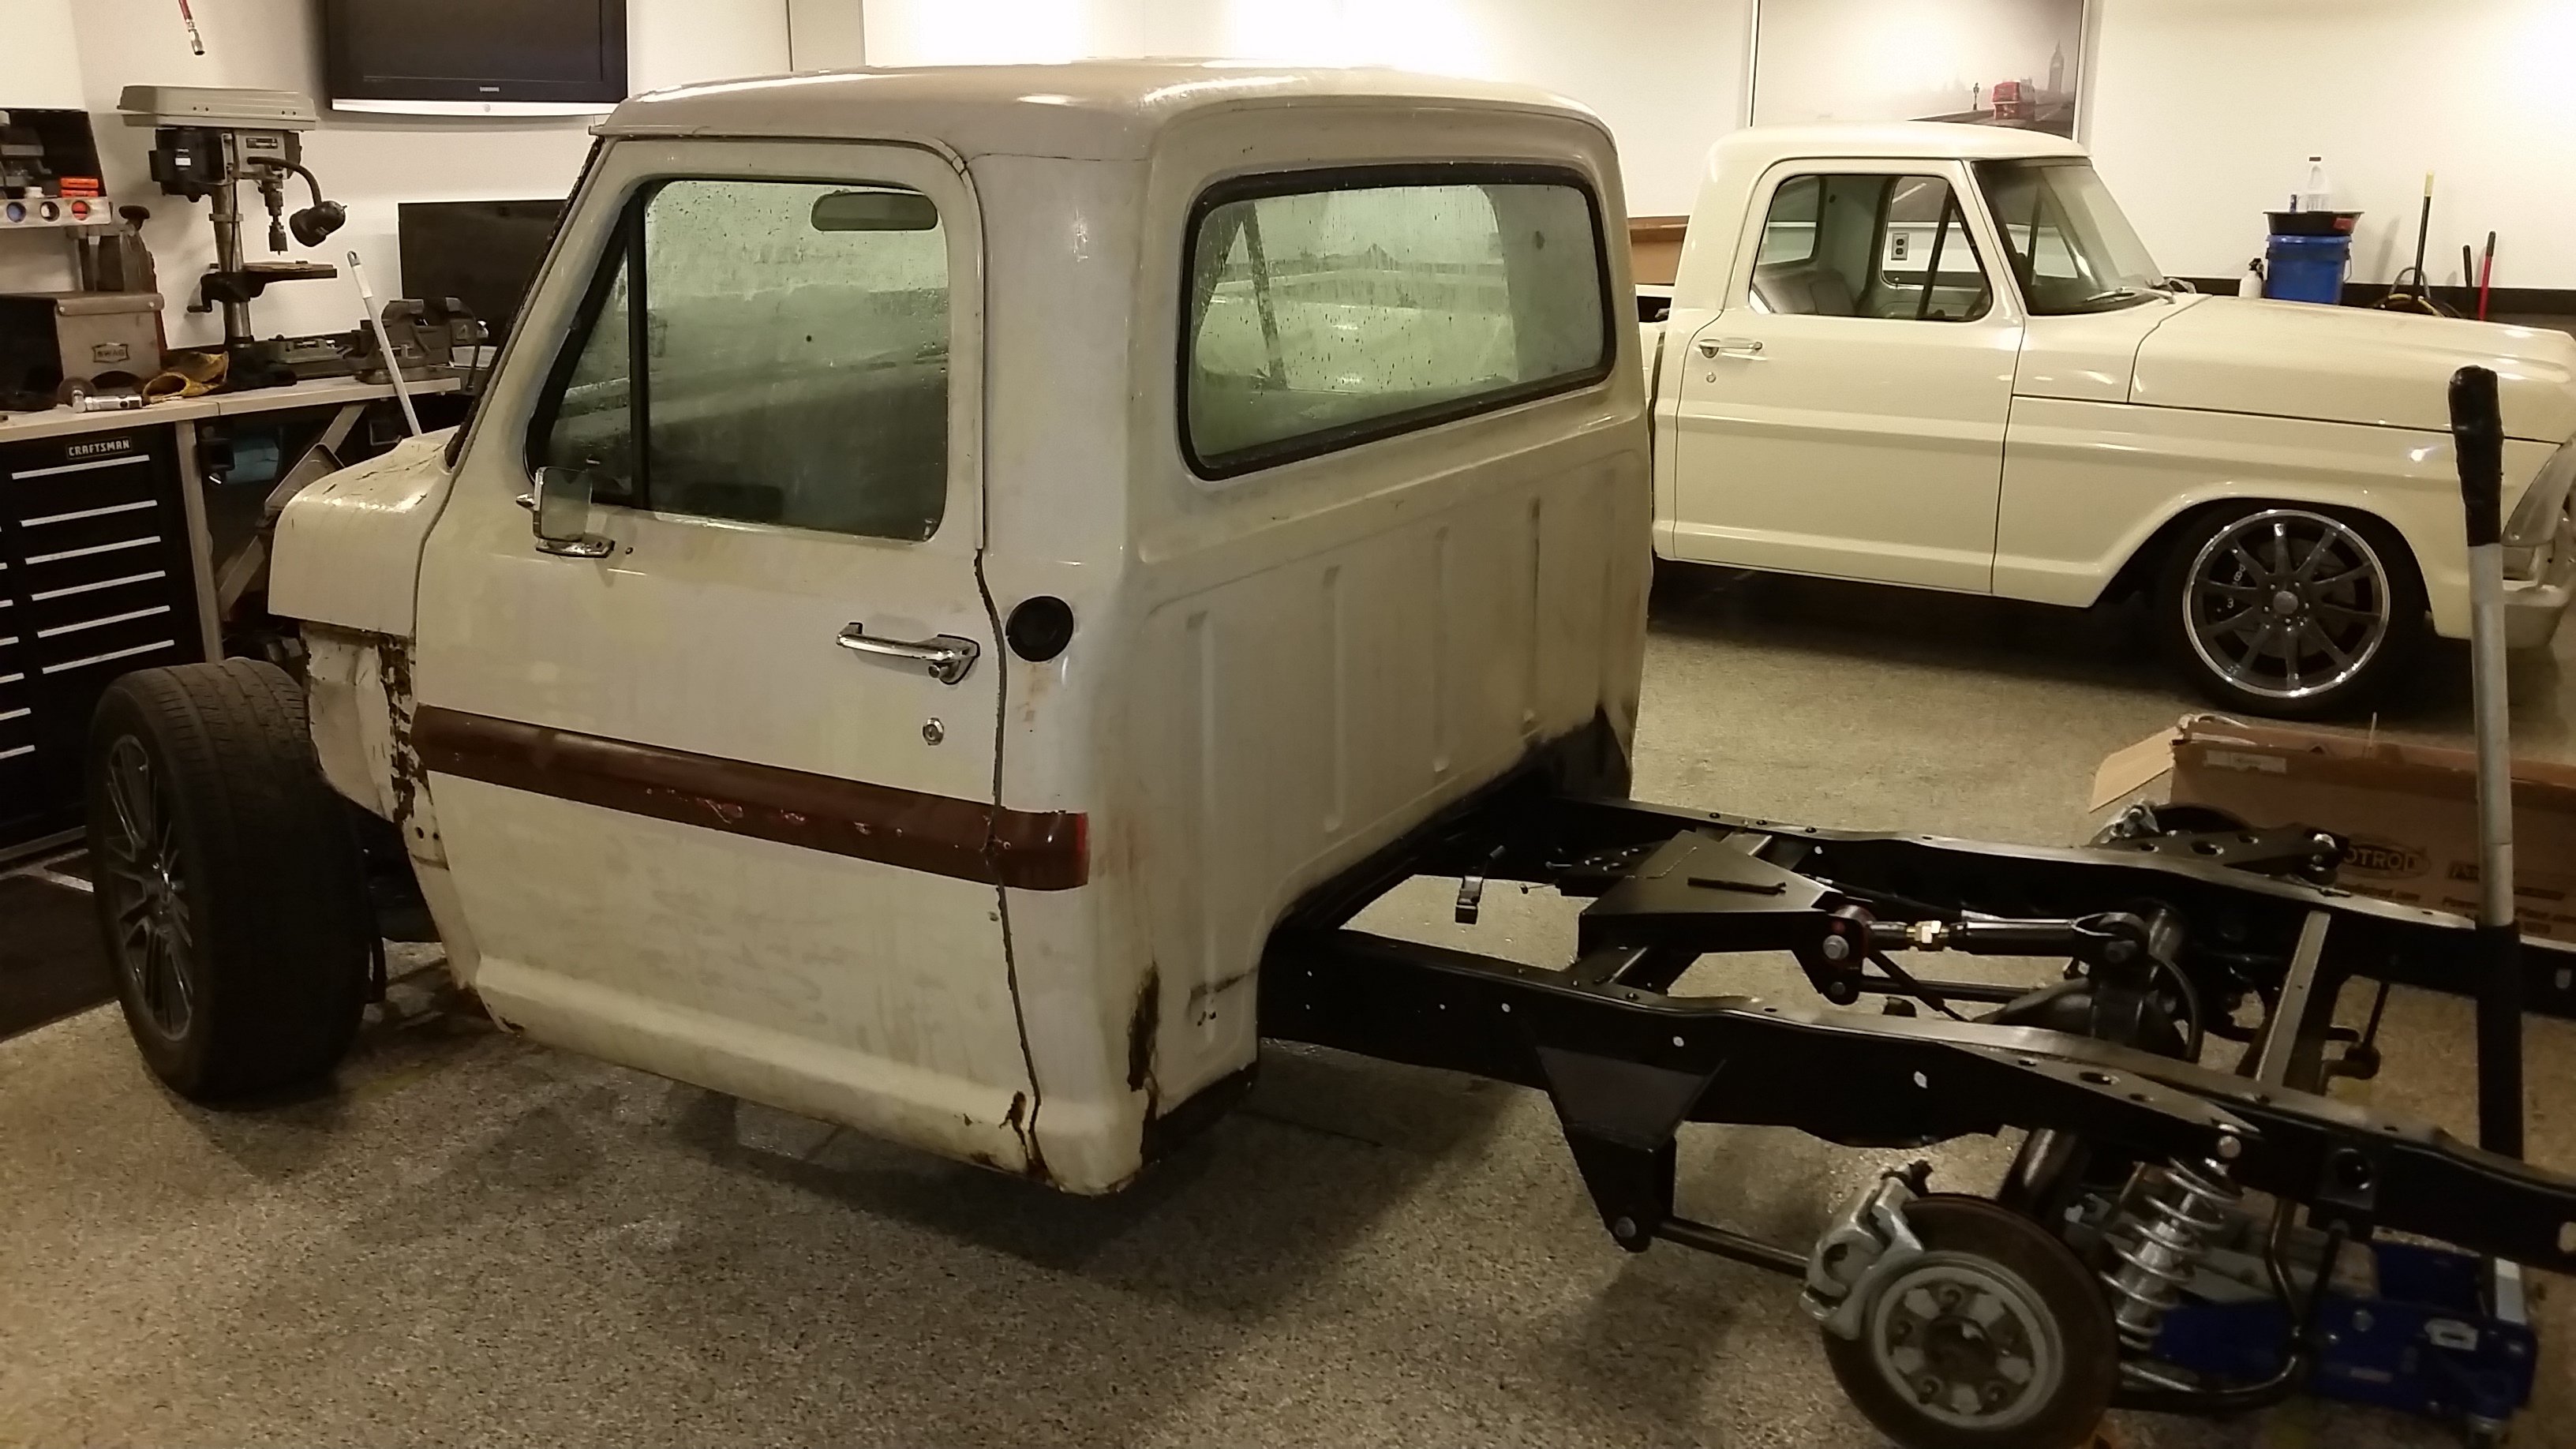
With that said it was time to go back on with the cab. You can get an idea of my process with this photo. Then it got jacked up to the 4x4's and out with the jack stands, then under the pinch welds and pull out the 4x4's. It was pain in the rear but it actually worked really well. My buddy Jeff came over and lent me a hand.
Back on the ground like nothing ever happened =)
Should be able to stab in the steering column as its all back assembled and rebuilt as well. Master cylinder is here and should be able to get to work on building brake and clutch master stuff this week if time allows. I need to work less and build cars more.
Sean
Panels built, now get the welder out..

Getting the weld on.


Clean up the welding mess, go over the frame with the wire wheel wipe it down and paint it.


Not in these photos are cleaning up all of the body mount bolts, washers and bushings. Believe it or not the bushings were in like new condition, so they went back in. I also gave the underside of the cab a quick clean up and a shot of satin black so it looks a little more presentable from the bottom... I have issues I know.
With that said it was time to go back on with the cab. You can get an idea of my process with this photo. Then it got jacked up to the 4x4's and out with the jack stands, then under the pinch welds and pull out the 4x4's. It was pain in the rear but it actually worked really well. My buddy Jeff came over and lent me a hand.

Back on the ground like nothing ever happened =)

Should be able to stab in the steering column as its all back assembled and rebuilt as well. Master cylinder is here and should be able to get to work on building brake and clutch master stuff this week if time allows. I need to work less and build cars more.
Sean