
91 F150 XLT Split Bench to Captains Chairs Swap
#1
 07-04-2015, 10:15 AM

91 F150 XLT Split Bench to Captains Chairs Swap
Well, Yesterday was a fun day- What I thought would be around a two hour job turned into an 8 hour headache- literally- but I got 'er done, as the man says...
I started by removing the original split bench seat: I like the split bench, but always wanted the captains chairs; My bench is a little out of shape- the driver's side is flattening, and the back was bent badly in the middle at the top... It is comfortable to drive in though, but I always felt like I was sliding a little towards the door... A few months back, Jeff (farmallcub) sent me a note about a set of captain's chairs and a console he had available after reading a posting I'd made that I was interested in converting... After a few months of waiting for the money to become available, I was finally able to complete the deal, and he shipped them to me early this past week... You KNOW they HAD to go in on Friday... Thanks Jeff!
Anyway, I got the front bench out: First step was removing the backs form the bench, to make it lighter. Each side has a trim plate on the tilt arm- two phillips screws, and the plate is off: a large hex socket, and the arm is loose, simply slide outward, and put the seat back somewhere safe, repeat on the other side. Then the base. The bolts here take a 15mm socket.(I HATE millimetric) Three bolts came out rather easily: the fourth broke the weldnut loose. LUCKILY, it was easily accessible, and I gripped it below with a pair of Visegrip Needlenose pliers, and finished up easily. I think the fact I brought the air tools out in case I had to cut it may have encouraged cooperation...
Once the base of the bench was out, I pulled & rolled back the carpet. Until you do this, you have NO IDEA how much DUST, DIRT, AND DEBRIS there can be stuck in one of these carpets! I then pulled the bases off the captains chairs, and proceeded to mark out the locations for the holes.
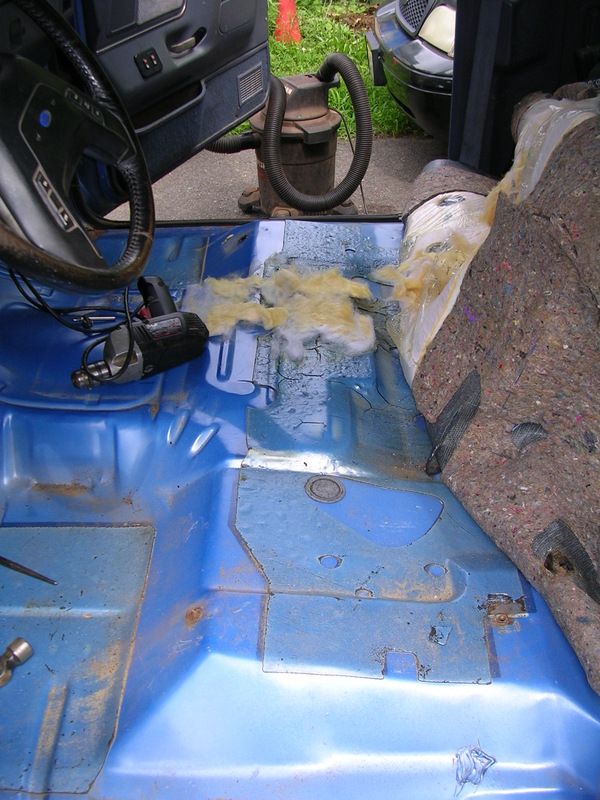
First illusion shattered was that I could reuse the bench bracket bolt locations for the outer tracks for the captains chairs: NOT SO! While the bench comes out to the same place physically, the base sliders are farther inboard. I imagine this is because they have one per side, and it helps support the seat by centralizing under the load(person sitting), rather than having the support at the far end, with all the load between. The captains chairs have two supports, each, so the load is more easily shared.
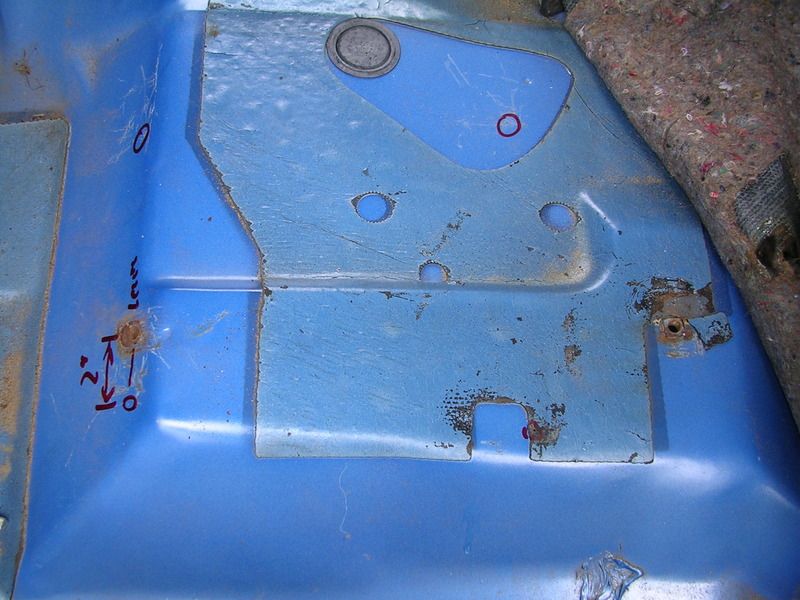
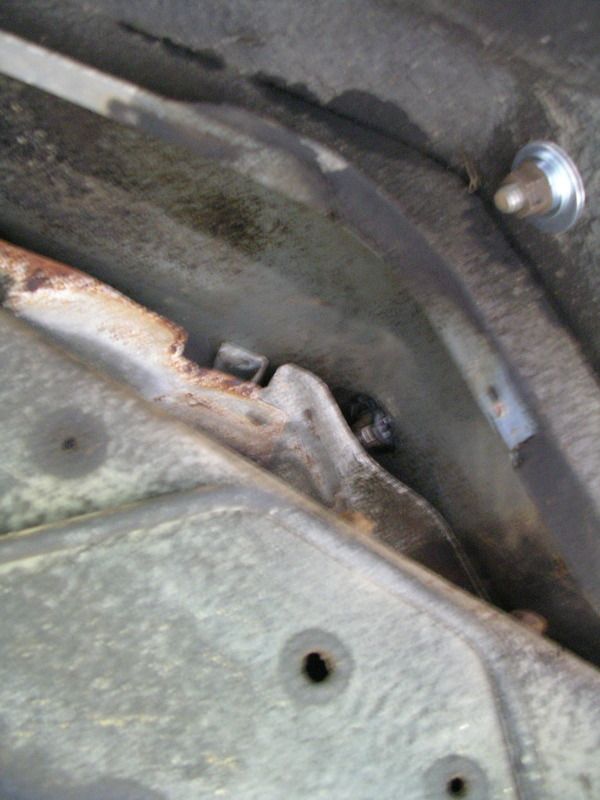
With a little measuring, I determined the captains chairs outer slide was about 2" further towards the outside on each side. Which meant all new holes would need to be drilled, on both sides, as well as bolts, washers, nuts, etc. sourced from the bolt bins... I went with 3/8 coarse thread x 1" grade 5 bolts. Some people have suggested grade 8, but this would be a little bit of overkill for the application. When you look at the original mountings, they have a reinforcement, and a weld nut. Some cars don't even have a reinforcement. Anyway, I marked, then drilled all the holes, as well as found the locations for the console holes: there are raised pads for the front two, and pre-set dimples for drilling all four(although one in mine was off by 1") The carpet also has pre-cut areas in the underlayment for each of the chair rails(pre-removed) and the console(requires removal). The pad on the floor was slightly misaligned, and required a few mods- easy enough to do with a box cutter... But it did give quick confirmation to the idea that the rails went farther out...
A little primer to help seal the holes...

While I had the carpet up, I found a little nasty looking spot in the cab floor at the passenger side "A" post- I hit it with the vacuum, and it became a big hole! I treated this with rust convertor, and then made a temporary patch- sealed underneath, and all the way around topside, with dum-dum strip...

I then primed it, and it now will be a future repair project. The driver's side is similar, but nowhere near as bad: I treated that rust for now.
All that done, the carpet (Still full of dust & dirt- the accumulated accretion of 25 years of service) was put back in place(I did vacuum it- a few times!) and I proceeded to find the holes I had just made, using an awl, and some patience... I used a washer as my guide, and cut 1" holes around the slide mount holes, and 1-1/2" holes for the four holes for the console. (Console uses a 3/16" self tapping screw. Originally they used self drillers. I used what I had, with 1 1/2" fender washers. Seat holes were just over 3/8")
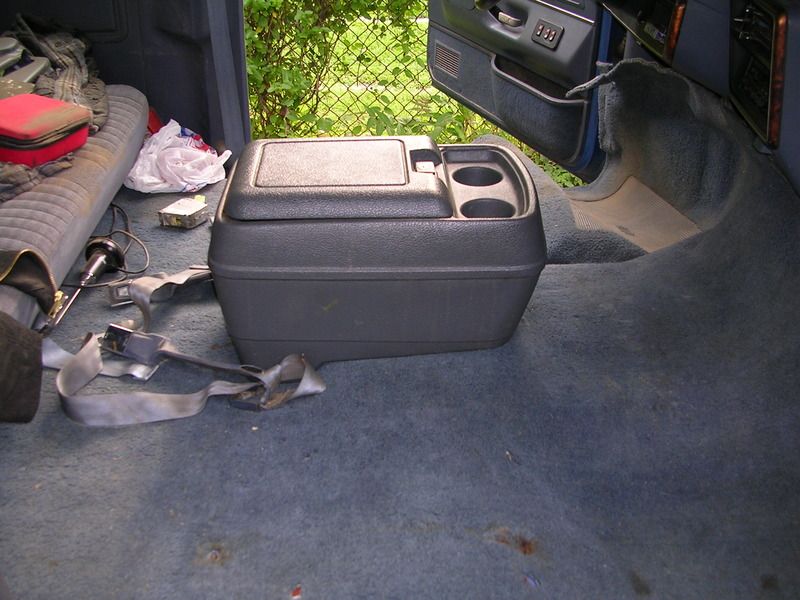
The console went in first- much easier that way- not having to work around the seats...
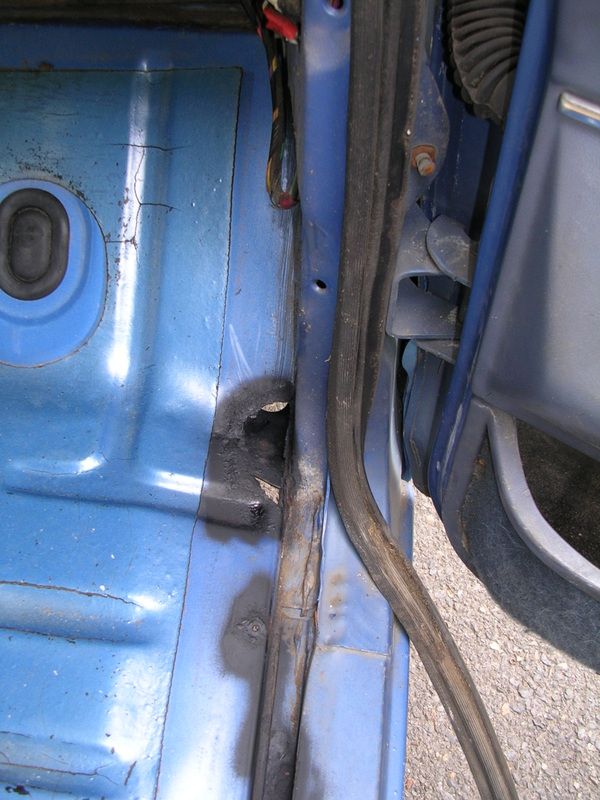
Then the front seats went in. I used a large fender washer(about 1 1/2", with a standard 3/8" washer, and most had flanged locknuts: a few had a flanged nut & split lockwasher. On the passenger side, there is a removable heat shield over the catalytic convertor which goes to the frame which must be removed. This uses 4 teeny-tiny (3/16"?) hex self tappers. They came out easy enough- then it was simply a matter of getting the nut, and flat washers in by hand over the main heat shield, which is pop riveted... The washers were an easy go- on all of the big ones, I put a thin bead of dum-dum tape(sealant) on one side, and on the small one, I put a small dab to hold it in place on the big one. So I simply placed the bolt through the hole, then reached in with the washer, and pressed it onto the bottom of the floorboard, then used the box end of my wrench to offer up the nut, quite easily, to the bolt- which I rotated into the nut with my other hand... I then used a ratchet to tighten them up as I held the wrench still.
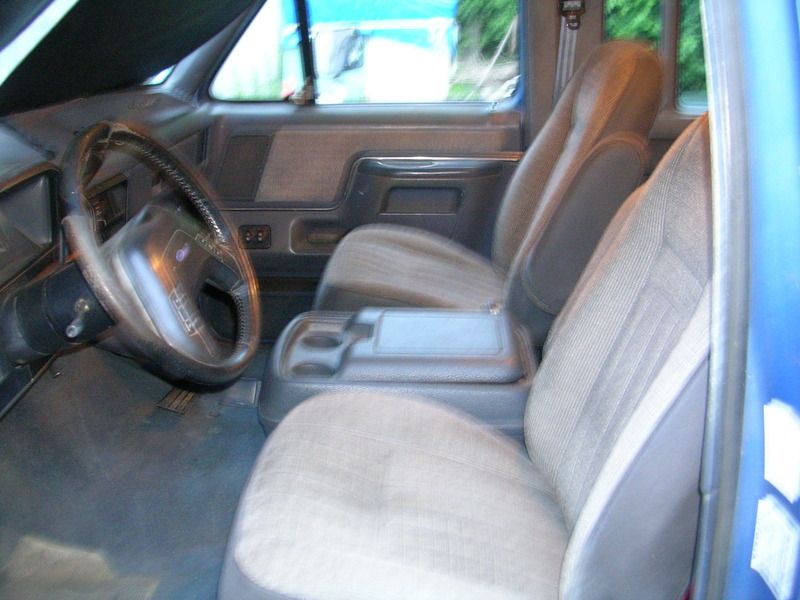
And so the obligatory "Finished Job" photo- I apologize for the shakiness- I'll add a better one later: THIS is where the headache came in- I had been working from around 11am until around 8pm, in 86+ deg. heat, sweating my a$$ off(I had a major case of liquid clothing going on= and I just realized, I NEVER ATE yesterday!) and had pretty much given myself a good case of heat stress: I had a headache, a little dehydrated(despite drinking a good amount of water) and felt nauseated... I had a few other symptoms, but you get the idea. Anyway, by this point, I could barely stand or keep my eyes open... I left final trimming(kick panel and carpet threshold panel) until today...
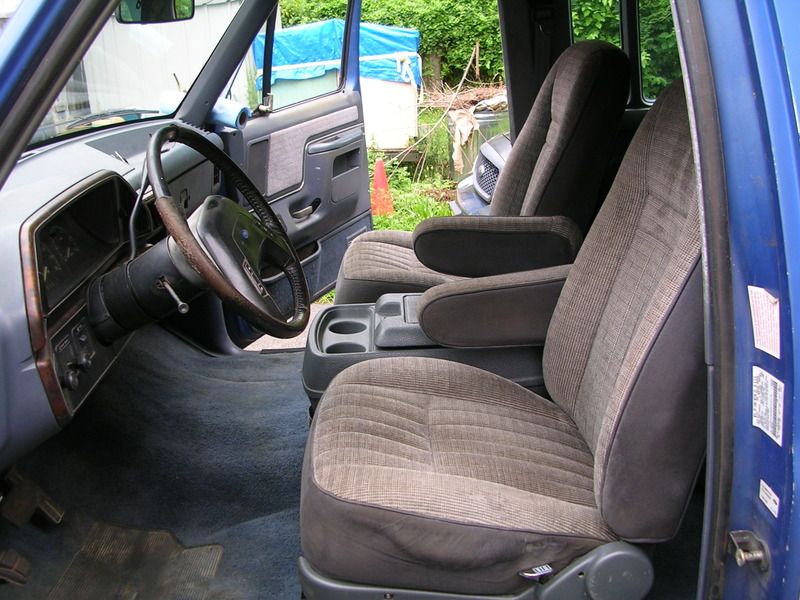
I snapped a quick pic before I came in (took a cold shower, and laid down in a dark air conditioned room- then remembered I had failed to close the sliding windows on the cap & the cab and had to go do that). Due to my condition, the photo is blurry. The color doesn't look too bad- the seats and console are gray- the rest of the interior is crystal blue... (If anyone has a good set of crystal blue captains chair seat covers they'd like to get rid of, let me know!) Looks good for now: I am hoping to "freshen" up the whole interior over the next couple months- as well as repair the cab rear corner, and bed wheel arch rust. I am also attempting to "rebuild" the original catch for the console: but it has a broken internal I'm not sure I can repair... I'll see...
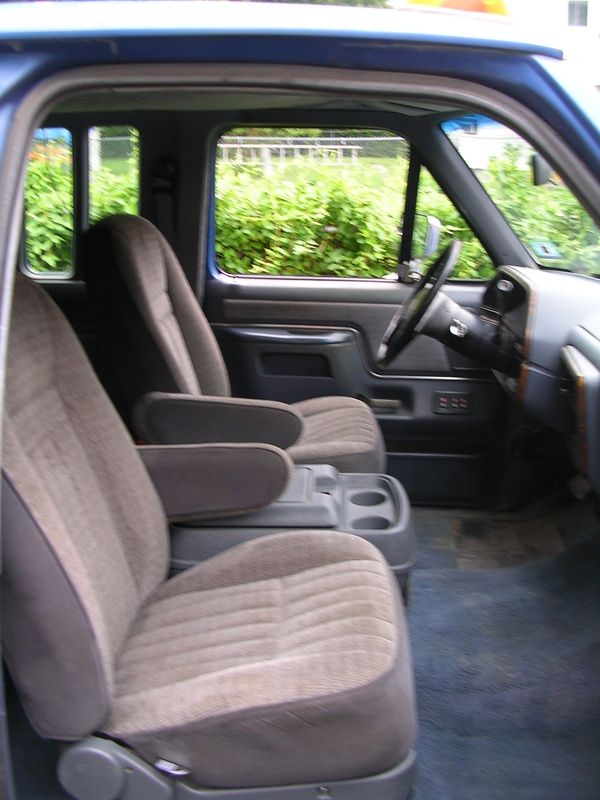
OK- The UNfuzzy driver's side pic:
And the slightly fuzzy Passenger side pic...
Oh, the fun- but now it's done! I'm hoping to do a little inside work today, and grille some steaks for the 4th...
HAPPY BIRTHDAY AMERICA!
Scott
I started by removing the original split bench seat: I like the split bench, but always wanted the captains chairs; My bench is a little out of shape- the driver's side is flattening, and the back was bent badly in the middle at the top... It is comfortable to drive in though, but I always felt like I was sliding a little towards the door... A few months back, Jeff (farmallcub) sent me a note about a set of captain's chairs and a console he had available after reading a posting I'd made that I was interested in converting... After a few months of waiting for the money to become available, I was finally able to complete the deal, and he shipped them to me early this past week... You KNOW they HAD to go in on Friday...
Thanks Jeff!Anyway, I got the front bench out: First step was removing the backs form the bench, to make it lighter. Each side has a trim plate on the tilt arm- two phillips screws, and the plate is off: a large hex socket, and the arm is loose, simply slide outward, and put the seat back somewhere safe, repeat on the other side. Then the base. The bolts here take a 15mm socket.(I HATE millimetric) Three bolts came out rather easily: the fourth broke the weldnut loose. LUCKILY, it was easily accessible, and I gripped it below with a pair of Visegrip Needlenose pliers, and finished up easily. I think the fact I brought the air tools out in case I had to cut it may have encouraged cooperation...
Once the base of the bench was out, I pulled & rolled back the carpet. Until you do this, you have NO IDEA how much DUST, DIRT, AND DEBRIS there can be stuck in one of these carpets! I then pulled the bases off the captains chairs, and proceeded to mark out the locations for the holes.

First illusion shattered was that I could reuse the bench bracket bolt locations for the outer tracks for the captains chairs: NOT SO! While the bench comes out to the same place physically, the base sliders are farther inboard. I imagine this is because they have one per side, and it helps support the seat by centralizing under the load(person sitting), rather than having the support at the far end, with all the load between. The captains chairs have two supports, each, so the load is more easily shared.
With a little measuring, I determined the captains chairs outer slide was about 2" further towards the outside on each side. Which meant all new holes would need to be drilled, on both sides, as well as bolts, washers, nuts, etc. sourced from the bolt bins... I went with 3/8 coarse thread x 1" grade 5 bolts. Some people have suggested grade 8, but this would be a little bit of overkill for the application. When you look at the original mountings, they have a reinforcement, and a weld nut. Some cars don't even have a reinforcement. Anyway, I marked, then drilled all the holes, as well as found the locations for the console holes: there are raised pads for the front two, and pre-set dimples for drilling all four(although one in mine was off by 1") The carpet also has pre-cut areas in the underlayment for each of the chair rails(pre-removed) and the console(requires removal). The pad on the floor was slightly misaligned, and required a few mods- easy enough to do with a box cutter... But it did give quick confirmation to the idea that the rails went farther out...

A little primer to help seal the holes...

While I had the carpet up, I found a little nasty looking spot in the cab floor at the passenger side "A" post- I hit it with the vacuum, and it became a big hole! I treated this with rust convertor, and then made a temporary patch- sealed underneath, and all the way around topside, with dum-dum strip...


I then primed it, and it now will be a future repair project. The driver's side is similar, but nowhere near as bad: I treated that rust for now.
All that done, the carpet (Still full of dust & dirt- the accumulated accretion of 25 years of service) was put back in place(I did vacuum it- a few times!) and I proceeded to find the holes I had just made, using an awl, and some patience... I used a washer as my guide, and cut 1" holes around the slide mount holes, and 1-1/2" holes for the four holes for the console. (Console uses a 3/16" self tapping screw. Originally they used self drillers. I used what I had, with 1 1/2" fender washers. Seat holes were just over 3/8")
The console went in first- much easier that way- not having to work around the seats...

Then the front seats went in. I used a large fender washer(about 1 1/2", with a standard 3/8" washer, and most had flanged locknuts: a few had a flanged nut & split lockwasher. On the passenger side, there is a removable heat shield over the catalytic convertor which goes to the frame which must be removed. This uses 4 teeny-tiny (3/16"?) hex self tappers. They came out easy enough- then it was simply a matter of getting the nut, and flat washers in by hand over the main heat shield, which is pop riveted... The washers were an easy go- on all of the big ones, I put a thin bead of dum-dum tape(sealant) on one side, and on the small one, I put a small dab to hold it in place on the big one. So I simply placed the bolt through the hole, then reached in with the washer, and pressed it onto the bottom of the floorboard, then used the box end of my wrench to offer up the nut, quite easily, to the bolt- which I rotated into the nut with my other hand... I then used a ratchet to tighten them up as I held the wrench still.

And so the obligatory "Finished Job" photo- I apologize for the shakiness- I'll add a better one later: THIS is where the headache came in- I had been working from around 11am until around 8pm, in 86+ deg. heat, sweating my a$$ off(I had a major case of liquid clothing going on= and I just realized, I NEVER ATE yesterday!) and had pretty much given myself a good case of heat stress: I had a headache, a little dehydrated(despite drinking a good amount of water) and felt nauseated... I had a few other symptoms, but you get the idea. Anyway, by this point, I could barely stand or keep my eyes open... I left final trimming(kick panel and carpet threshold panel) until today...
I snapped a quick pic before I came in (took a cold shower, and laid down in a dark air conditioned room- then remembered I had failed to close the sliding windows on the cap & the cab and had to go do that). Due to my condition, the photo is blurry. The color doesn't look too bad- the seats and console are gray- the rest of the interior is crystal blue... (If anyone has a good set of
crystal blue captains chair seat covers they'd like to get rid of, let me know!) Looks good for now: I am hoping to "freshen" up the whole interior over the next couple months- as well as repair the cab rear corner, and bed wheel arch rust. I am also attempting to "rebuild" the original catch for the console: but it has a broken internal I'm not sure I can repair... I'll see...
OK- The UNfuzzy driver's side pic:

And the slightly fuzzy Passenger side pic...

Oh, the fun- but now it's done! I'm hoping to do a little inside work today, and grille some steaks for the 4th...
HAPPY BIRTHDAY AMERICA!
Scott
#2
07-04-2015, 11:17 AM
#3
07-04-2015, 11:35 AM
#4
07-04-2015, 04:38 PM
Took her for her first ride with the "new" seats... I'm sorry to say, not sure where I stand yet. VERY different feeling from my beat up old split bench, and not sure how I feel yet... They are very nice seats, but I feel a little constrained... I'm used to the "wide open space" of the bench... Also, I feel a little more "wobbly" than with the bench. Don't know if this is me, or if I need to make a stronger reinforcement area below the mounts. I do have 14ga. sheet I can make some from, the means and the know how, to cobble something reasonably authentic, but not sure yet...
And should the seat tracks have a forward incline to them, or should they be level? If they should be level, I goofed... But- if I make new reinforcements, I can always shift them at that point...
Trying to work it out in my head...
Any thoughts?
Thanks!
Scott
And should the seat tracks have a forward incline to them, or should they be level? If they should be level, I goofed... But- if I make new reinforcements, I can always shift them at that point...
Trying to work it out in my head...
Any thoughts?
Thanks!
Scott
#5
07-04-2015, 05:08 PM

I put these in my 89 and had the exact same feeling, unsure if I liked them. Well after about a year, I now wouldn't part with them for the world! I made some flat straps with elongated holes to bolt the seats to the original holes, that way I could adjust them from side-to-side and find the sweet spot that made driving the most comfortable. I also put a couple of fender washers between the carpet and the floor pan at the front of the seat to tilt it back slightly, mine tipped forward a bit also.
Yours looks really good and you will like them!
#6
07-05-2015, 08:49 PM
Still working on getting a feel for the seats... I discovered today that they hold heat quite well at the back... The side pads forming so closely around, that I was a tad dampened along the shoulders & back... Still, Giving it a good go, before I make any decisions...
They are comfortable, however...
Scott
They are comfortable, however...
Scott
#7
07-14-2015, 06:05 AM

Trending Topics

Thread
Thread Starter
Forum
Replies
Last Post
ghostwhite
1980 - 1986 Bullnose F100, F150 & Larger F-Series Trucks
7
07-25-2011 09:40 AM
Big John Hance
1980 - 1986 Bullnose F100, F150 & Larger F-Series Trucks
4
05-06-2007 08:59 AM