When you click on links to various merchants on this site and make a purchase, this can result in this site earning a commission. Affiliate programs and affiliations include, but are not limited to, the eBay Partner Network.
Thanks all. I had some questions that I didn't answer. Yes, moving the x member forward will result in the need to fab up new engine mounts and take the locations off something else. I can't comment on things I haven't done yet. But it will get done. As for notching the cross member, again... don't know yet. If it needs a notch I'll give er one. As for the welding, MIG.
Changing my mind last minute to move the front axle 4" forward, ( wheel arches 3 1/2 ) was a rather large decision ha ha. But I though doing the fenders prior to the IFS was the easier choice than doing it later. Fenders are "done". I haven't done any filler and they definitely need some more finesse work, the primer and cell phone pics hides a lot. But they are close enough for now. Once I pick the axle location and take some measurent and scribe some marks.... back in the box the fenders go for quite some time. I just hit them up with some primer quick to keep the oxidation at bay until I get into the body work stage.
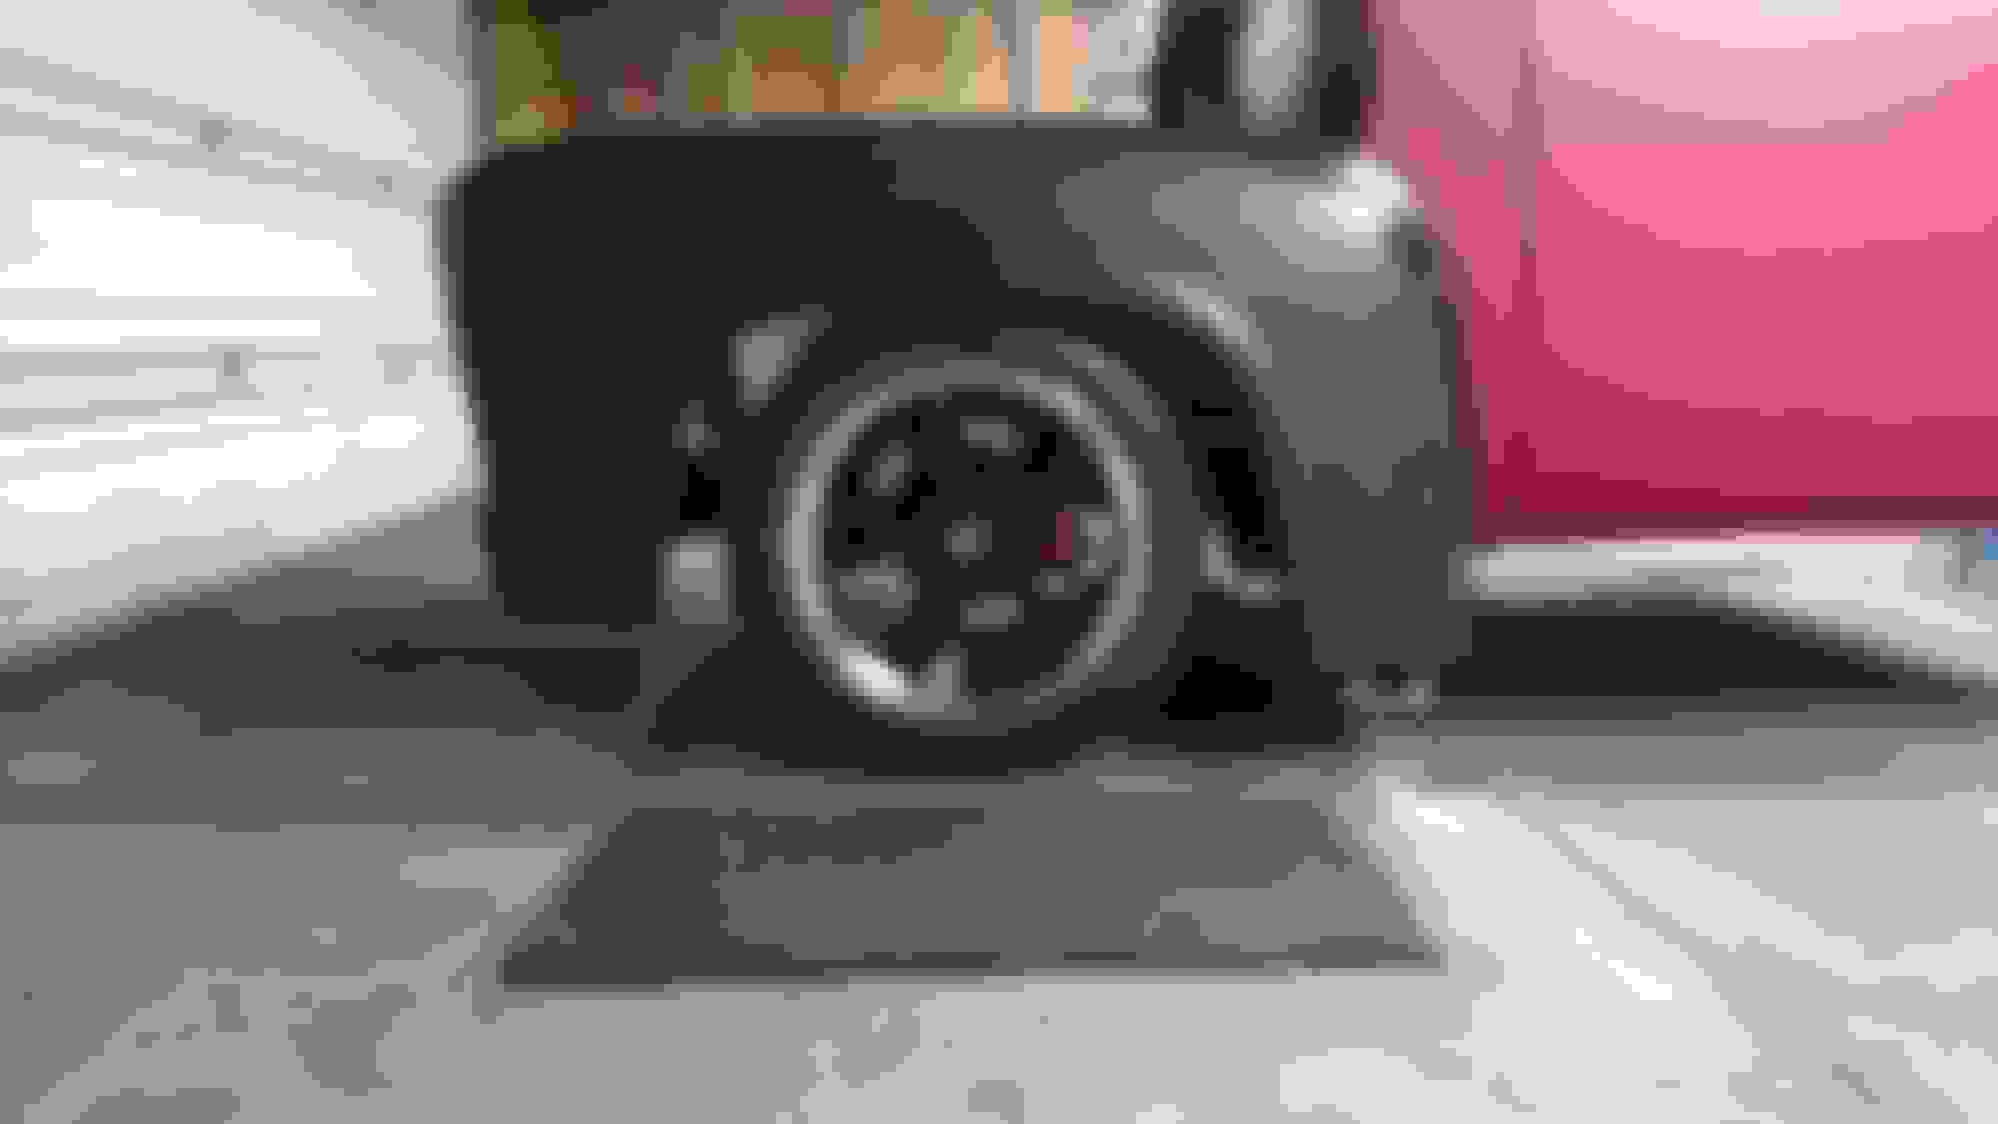
Here are a few pics. One with the wheel centered, and another with it pushed slightly forward in the opening. I like both positions and the has + and - for different angles.... Hmmmm...
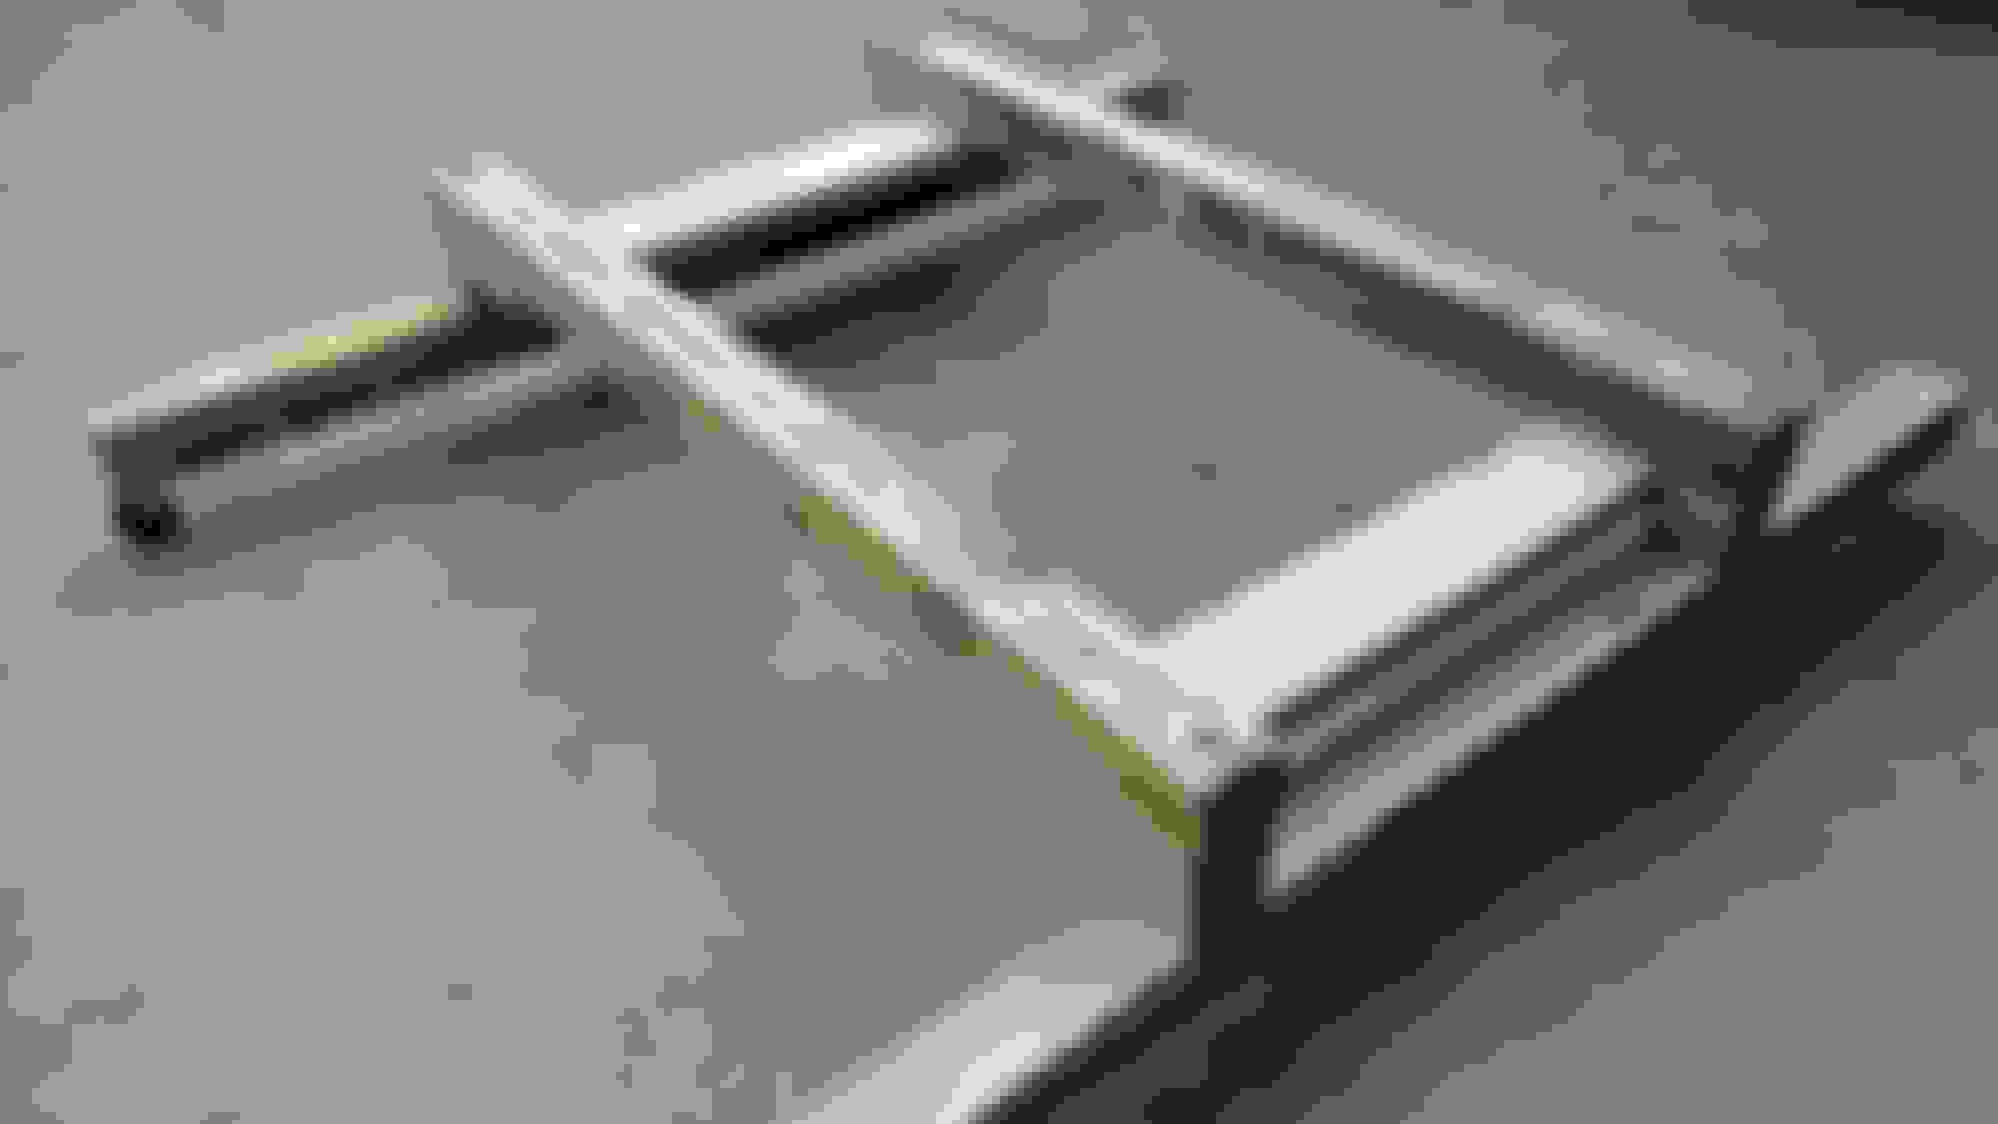
Thanks. I did some mock up today to measure my IFS placement and to check a few other things. I made a quick shock template. I can bolt this in place of the coil over and simulate ride height, and full compression.
I bolted it in place and simulated full compression and turn the wheel through its steering arc to check for fender rub. I should be OK. I've already measured this, and the wheels have been ordered, but I wanted to check with my mock up wheel after the fender work.
I made a quick and dirty caster gauge to ballpark the caster. Moving its adjustment to the extremes will change wheel placement in the wheel arch. So I wanted to get caster reasonable close before I set final IFS measurent. Don't want any susprises after the alignment.
So now I know my wheel and tire size is good. My wheel backspacing is good, and my alignment is in a city block.... I set on the hood ( no hinges ) and gravel pan to be sure there weren't any susprises. Just wanted to make sure the fenders weren't going to have to be adjusted WAY forward or WAY back. Messing with the wheel placement in the arch. I probably should have don't that before putting 40 hours into moving the arches ha ha.
Hello Nick, what are the sizes of your rims and tires as well as the back spacing?
I probably should wait to say till I test fit for sure. The wheel in the pics is just a test mule I had kicking around to take measurements from. Wheels ordered are American Racing Torque Thrust SL:
Front: 18�9- 255/45/18- 4 1/2" BS
Rear: 18�10- 295/45/18- 4 1/2" BS - 56" wide axle. Will need small tubs.
The wheel in the pic's is an 18�9 w/ 6" BS and a 1 1/2" hub spacer. That seems to fit perfect so my measurements should be good, at least for the front.
Oh. And thanks for all the kind comments guys. I do everything myself so I move slow ha ha. Plans for this weekend include to build a cab dolly. Pull cab. Weld in front suspension and....
Mount this big lunk.
Its a Currie 9" for my TCI four link. 56" wide. Detroit True Track Locker. 3.50's. I went with 12" Wildwood rotors and 4 piston calipers for the rear.
Its a Currie 9" for my TCI four link. 56" wide. Detroit True Track Locker. 3.50's. I went with 12" Wildwood rotors and 4 piston calipers for the rear.
Nice stuff, I don't know if you've had experience with the true track before but I had one in the front of a 4x4 and although technically a limited slip, it felt like a full locker especially in low range with 4.56's and traction was never a question. Should be nicer around turns under power than say a full locker as well the torque splitting is seamless. Keep up the great work.
I made a cab dolly. This will be my "transport dolly" as first the cab will go to a media blasting. I sized the dolly 5'�6' so it will fit on a 6' wide uhaul utility trailer. I just had to be sure to keep it high enough for my shop crane to roll out from under.
Then I made a lift bracket for the shop crane. Nothing revolutionary, seen the idea here. I copied it and improved it a bit. Using two 4�4's and three 5/8" threaded rods. The center rod has nuts that hold it snug and centered on the crane mast.
Then I hooked a strap over the end rods in my lift bar and over the roof just for peace of mind. A few jacks and the cab bolts came out easy. Up goes the cab. Super easy. I did this completly by myself. It was very sturdy and balanced. I was going to run some straps down to a few mount points in the floor.... But it was so easy to lift and move around I skipped it.
The cab rolls around easy by myself. I pushed it against the wall and it will stay there for a while.
When I get ready to sent it off for media blasting I'll mount the doors, adjust the gaps and make sure the cab it square. If not I'll make it so, then weld in some bracing. I thought this part was going to suck. It was not bad at all. Took me two hours to make the dolly and lift bar, remove the cab, clean out the garage, have a beer and post this ha ha. But I did spend a few hours planning it out and gathering the wood yesterday.
 06-15-2015, 08:36 AM

 Good to watch someone who knows their stuff.
 . As for notching the cross member, again... don't know yet. If it needs a notch I'll give er one. As for the welding, MIG.