
Rear axle pinion seal change
#1
 03-14-2015, 10:33 PM


Join Date: Jul 2006
Location: East Helena MT
Posts: 930
Likes: 0
Received 0 Likes
on
0 Posts
Rear axle pinion seal change
The weather has been so nice around Billings MT lately I decided to tackle my leaky rear axle. It was hard to tell if the rear cover was leaking or if the pinion had leaked enough to make its way down to the cover so I decided to do both. The rear cover is self explanatory, loosen bolts on cover, allow oil to drain from axle, clean up surface on housing and cover, put gasket maker on and bolt it back up. I let it set for half the day before putting the oil back in, I didn't need the pickup and would rather that setup good before putting oil back in.
As for the rear pinion I had read a bunch on here and it seams people's response was 50/50 to do this your self or take it to a dealer. I am lucky enough to have spent years wrenching at dealers on farm equipment so I have a very well stocked tool box, so sometimes I take that for-granted that others do not have the tools I do. With that being said here is my write up on the process. My pickup is a 2008 F350 single wheel with the Ford axle.
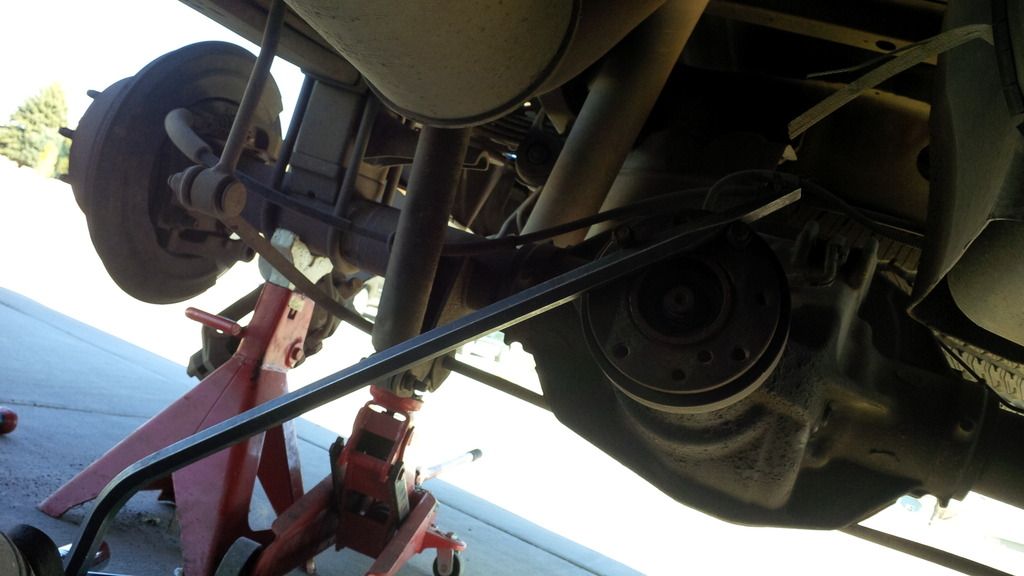
I put the pickup up on jack stands, blocked the front wheels to keep pickup from rolling down drive way, removed the rear tires and then the real calipers. 2 bolts per caliper and they are off. I used bungie cords to hold the calipers to keep the weight off the hoses. Then I removed the drive line, 4 bolts and a pry bar and it was sitting on the ground.
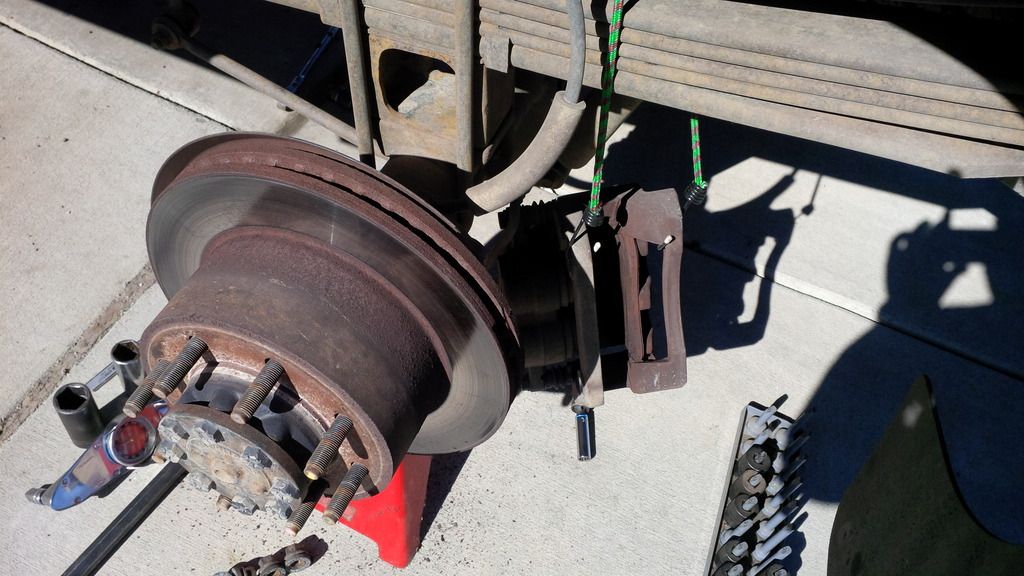
Next I used my inch pound torque wrench to find out what the rolling torque was on the bearings on the pinion shaft. I also marked the nut in relationship to the flange and used a caliper to measure from the end of the shaft to the end of the nut to make sure everything was put back to the same place.
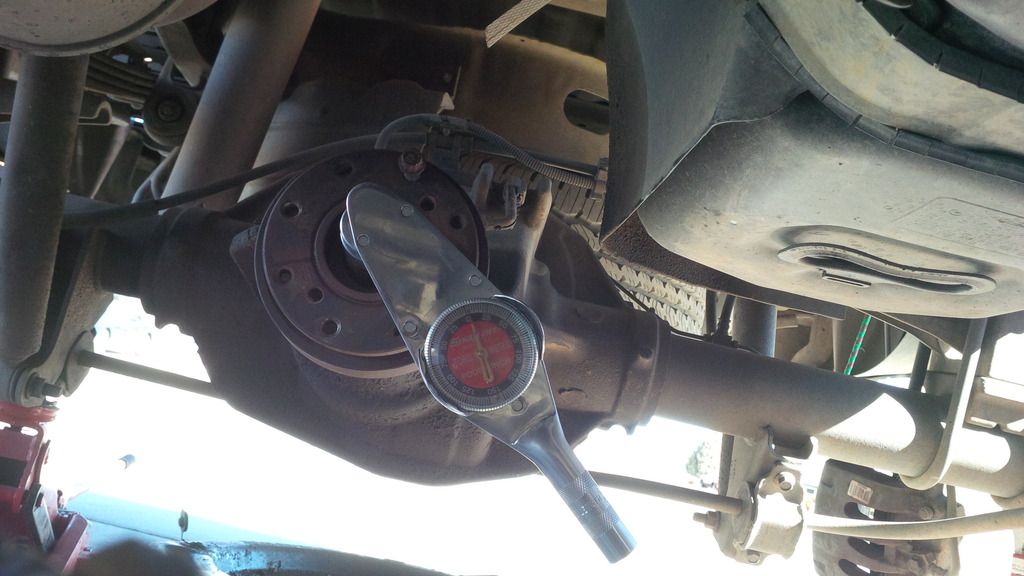
Now it was time to remove the nut retaining the flange. I even counted how many turns to remove it. As you can see from the photos no need for special wrench to hold flange. Put two bolts in where drive haft use to be and use a long pry bar to hold it. I used a regular socket/ratchet to remove the nut, not my torque wrench.
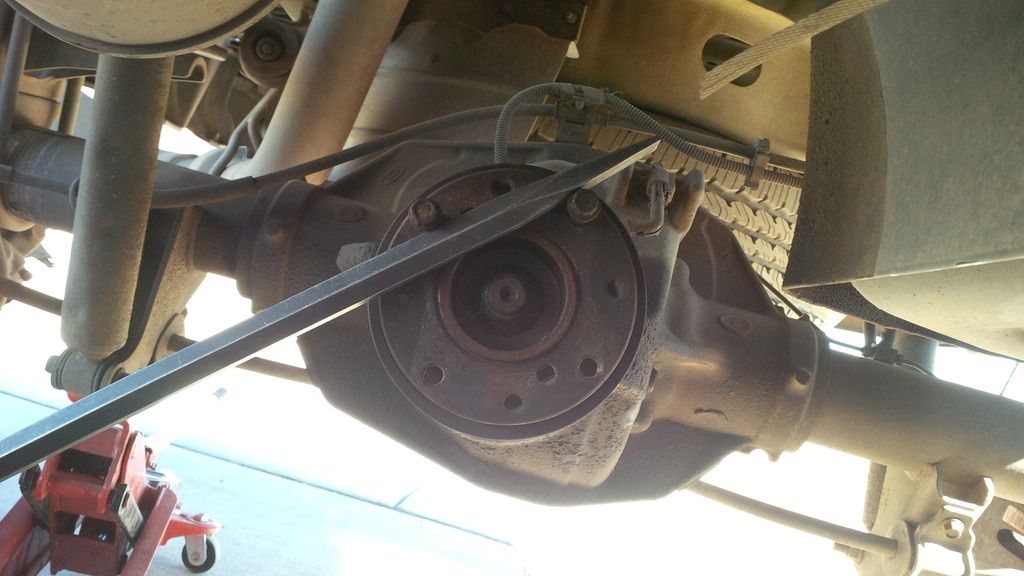
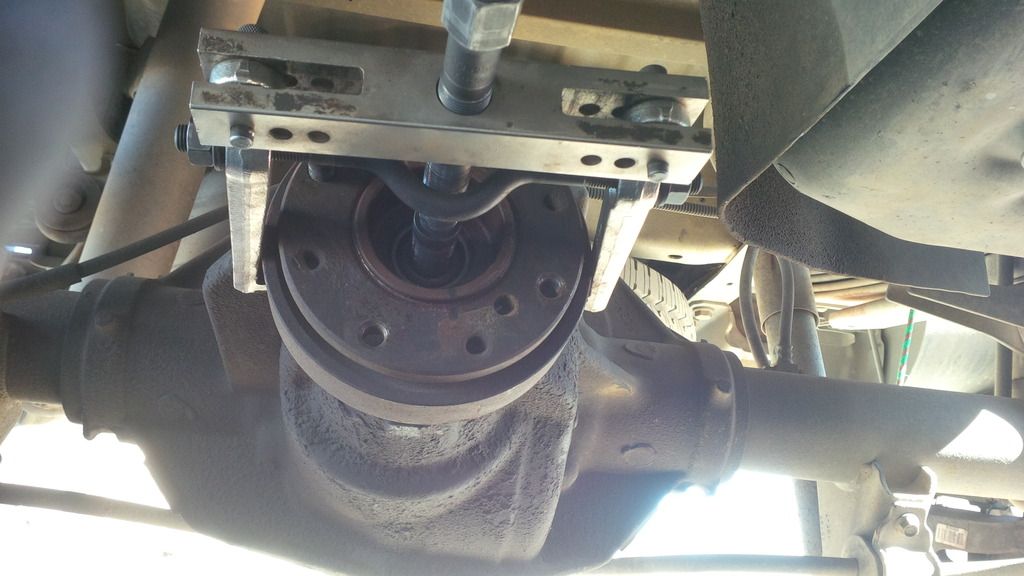
I marked the flange in relationship to the pinion shaft to make sure it was put back on same spot. Then I used my two jaw puller to remove the flange. It does not take a lot of force to remove the flange but it also does not just slip off either. With the flange out of the way the seal can be removed with a hammer and screw driver. When you put the new seal back in make sure to pack the back side with grease, this will keep the spring from popping off while hammering the new seal on plus it will lubricate the seal. I also put gasket maker on the outside of the metal part of the seal to seal it to the axle housing and then tapped in with a hammer.
I put the flange back on, reused the old nut with blue loc-tite (I know you are not suppose to do this) and then began to tighten the nut back to where it was, stopping often to check the distance from end of shaft to nut and the rolling torque. Once it was back I put the drive shaft back on, then the brake calipers, tires, removed from jack stands and filled with 75W140 gear oil. I went for a test drive, no leaks, no noise, no vibration, no heat, everything works as it should.
I had 2 hours from start to finish to swap out the pinion seal and it is not a bad job to complete. Most of the time was spent getting tires off, checking rolling torque, ect.... than actually changing the seal.
Jeff
As for the rear pinion I had read a bunch on here and it seams people's response was 50/50 to do this your self or take it to a dealer. I am lucky enough to have spent years wrenching at dealers on farm equipment so I have a very well stocked tool box, so sometimes I take that for-granted that others do not have the tools I do. With that being said here is my write up on the process. My pickup is a 2008 F350 single wheel with the Ford axle.
I put the pickup up on jack stands, blocked the front wheels to keep pickup from rolling down drive way, removed the rear tires and then the real calipers. 2 bolts per caliper and they are off. I used bungie cords to hold the calipers to keep the weight off the hoses. Then I removed the drive line, 4 bolts and a pry bar and it was sitting on the ground.

Next I used my inch pound torque wrench to find out what the rolling torque was on the bearings on the pinion shaft. I also marked the nut in relationship to the flange and used a caliper to measure from the end of the shaft to the end of the nut to make sure everything was put back to the same place.

Now it was time to remove the nut retaining the flange. I even counted how many turns to remove it. As you can see from the photos no need for special wrench to hold flange. Put two bolts in where drive haft use to be and use a long pry bar to hold it. I used a regular socket/ratchet to remove the nut, not my torque wrench.


I marked the flange in relationship to the pinion shaft to make sure it was put back on same spot. Then I used my two jaw puller to remove the flange. It does not take a lot of force to remove the flange but it also does not just slip off either. With the flange out of the way the seal can be removed with a hammer and screw driver. When you put the new seal back in make sure to pack the back side with grease, this will keep the spring from popping off while hammering the new seal on plus it will lubricate the seal. I also put gasket maker on the outside of the metal part of the seal to seal it to the axle housing and then tapped in with a hammer.

I put the flange back on, reused the old nut with blue loc-tite (I know you are not suppose to do this) and then began to tighten the nut back to where it was, stopping often to check the distance from end of shaft to nut and the rolling torque. Once it was back I put the drive shaft back on, then the brake calipers, tires, removed from jack stands and filled with 75W140 gear oil. I went for a test drive, no leaks, no noise, no vibration, no heat, everything works as it should.
I had 2 hours from start to finish to swap out the pinion seal and it is not a bad job to complete. Most of the time was spent getting tires off, checking rolling torque, ect.... than actually changing the seal.
Jeff
#2
02-23-2017, 07:01 PM

#3
02-23-2017, 09:51 PM
Join Date: Jul 2006
Location: East Helena MT
Posts: 930
Likes: 0
Received 0 Likes
on
0 Posts
Jeff
#4
02-23-2017, 10:07 PM

Just be aware that many pinion seal failures on the Sterling axles is due to the factory bearing preload crush sleeve continuing to crush over time from torque, load, etc. As it continues to crush it releases preload on the pinion bearings, allowing the pinion gear to start to move up and down and side to side. This then causes the seal to fail. If you just replace the seal you are not correcting the root of the problem. Left untreated, eventually the pinion gear will push further into the ring gear, and then gear damage occurs. The fix is a crush sleeve eliminator (aka: solid pinion shim) kit. It uses steel shims of varying thickness that stack to provide proper preload. I recall setting mine at 29 inch lbs on my 06, with brand new oem gears, bearings, and races. Took 5-6 tries to get it right, but now there is no crush sleeve to worry about.
#6
10-07-2018, 10:26 AM

Fleet Mechanic
Just be aware that many pinion seal failures on the Sterling axles is due to the factory bearing preload crush sleeve continuing to crush over time from torque, load, etc. As it continues to crush it releases preload on the pinion bearings, allowing the pinion gear to start to move up and down and side to side. This then causes the seal to fail. If you just replace the seal you are not correcting the root of the problem. Left untreated, eventually the pinion gear will push further into the ring gear, and then gear damage occurs. The fix is a crush sleeve eliminator (aka: solid pinion shim) kit. It uses steel shims of varying thickness that stack to provide proper preload. I recall setting mine at 29 inch lbs on my 06, with brand new oem gears, bearings, and races. Took 5-6 tries to get it right, but now there is no crush sleeve to worry about.

Thread
Thread Starter
Forum
Replies
Last Post
Harfend
1980 - 1986 Bullnose F100, F150 & Larger F-Series Trucks
2
06-13-2008 08:51 PM
vancouverpower
1999 - 2003 7.3L Power Stroke Diesel
8
04-04-2006 09:39 PM
99pickup
1983 - 2012 Ranger & B-Series
5
08-04-2004 11:55 AM