When you click on links to various merchants on this site and make a purchase, this can result in this site earning a commission. Affiliate programs and affiliations include, but are not limited to, the eBay Partner Network.
As many of us do, I'm sure, we order up our parts and start tearing stuff down. Usually I don't throw anything away until I have the new parts and verify they work. This isn't my first go-round on one of these, so this time was no exception.
When I was pulling out the DS wing I noticed the pivot was pretty rotten and would not budge. Well, it budged, but then broke. So I saw they listed them on LMC and ordered one. When it arrived I didn't think it was correct, but checking part numbers it seemed to be the replacement.
Fast forward a couple weeks and I'm looking to put the new one in the wing and decide - "this just isn't the right one" and then I realize I threw the broken part away. So out to the trash and pull out the bags and start diggin' looking for that part. Finally, in the last bag I looked in, I found it. Why is it always in the last place you look?
So here is my repair process:
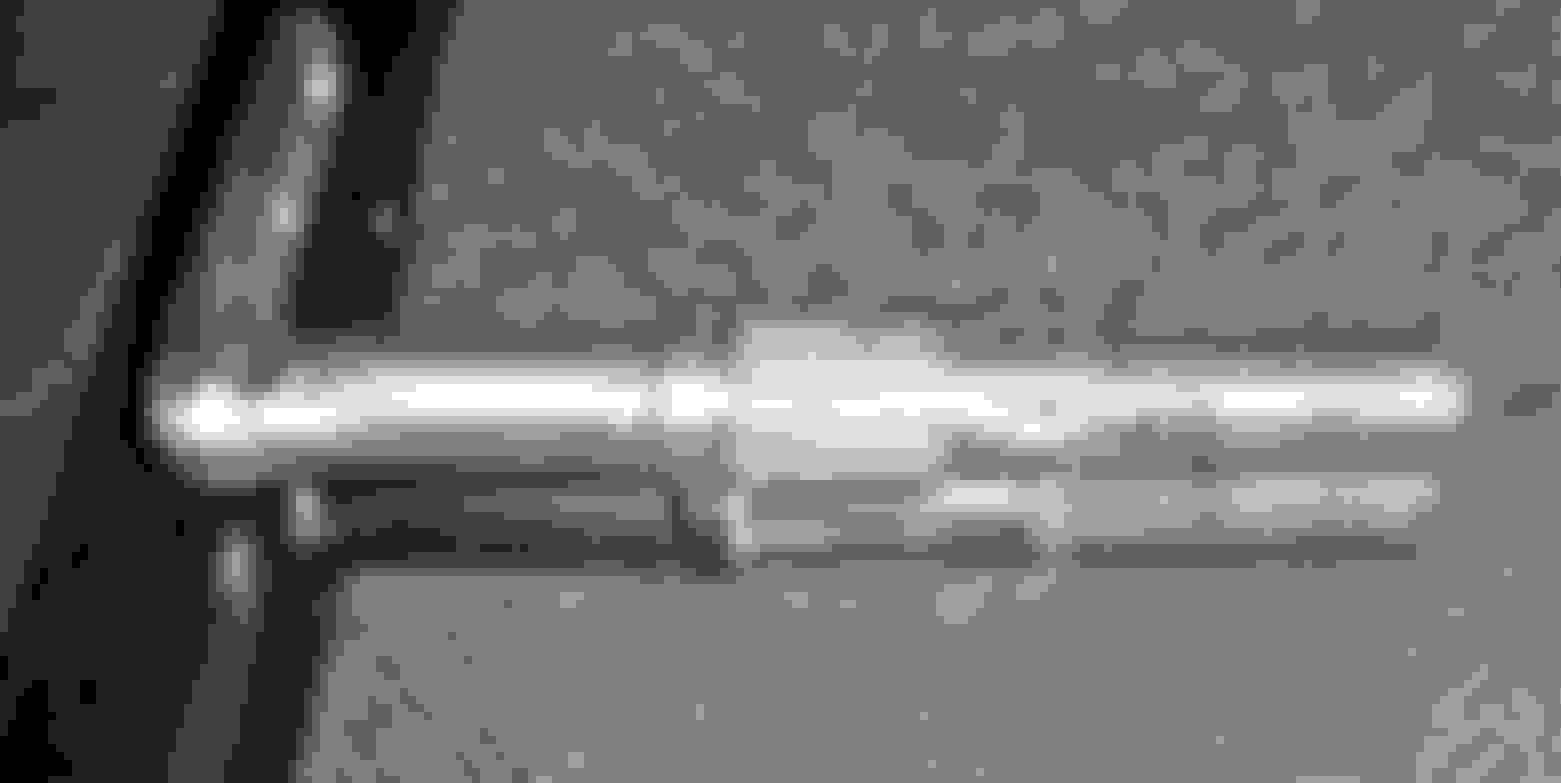
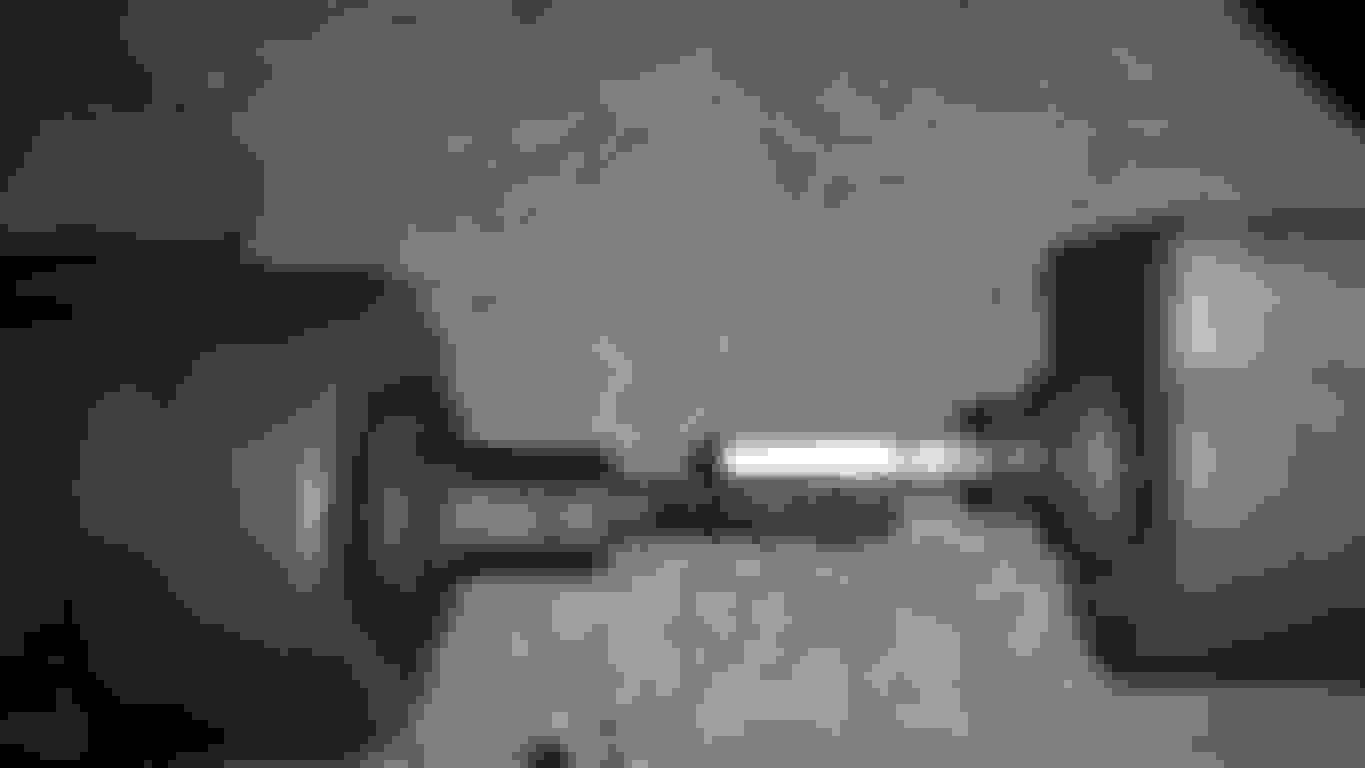
Here's the comparison. Don't look the same to me - though it is the one they call out for it.
Here's the rough piece lay'd up on the stub of the old one. Drilled a hole to weld through and used the two clamps to hold it all together in the correct alignment and angle. You can see the black line showing orientation for the stop.
Welded and rough cut to size. Now comes some filing and grinding to get it to the right dimensions.
Here it is laid up to the PS wing. Ready to paint and rivet in.
Just like used! New seals and all. Pivots nicely now.
Hope it helps someone needing to do the same thing. Seems they'd make the right one... but it's not hard to do if you have something left to work with.
Yeah, I always thought L was equalock as well... Odd
L in the tag is for Equalock. That much is for sure.
I have asked around and this is still somewhat a mystery. The 3L00 tag marking is for-sure a 3.00 Equalock rear-end. The rear-end is a lock'r of some sort because both wheels turn and in the same direction.
The WES-AA marking would seem to only point to an open diff in all the charts you find on the interweb, but clearly that's not 100% true. The charts are clearly wrong to specify the type as you can clearly have a WES-AA with a lock'r regardless of what the charts show. I have the evidence.
It was added by a previous owner - probably about the time they put the "supposed" 390 and C6 in the truck. They also put in power steering from a '66 Tbird according to a shop receipt that came in the glove-box. All part of the history of the truck I can only surmise, not know for sure.
Looking through the catalogs I was wondering why they didn't sell heater box rebuild kits for this. Then I pulled the heater out. Ford used rivets to close up the flapper portion of these. After a half-hour of carefully removing all the rivets, I got inside to find this:
Heat flap
And this:
Defrost flap
So after a bit of cleaning the box and giving it a coat of satin black and cleaning and painting the metal shield, I wrapped the flaps with some sheet felt and used #10 screws to put it back together. I replaced the heater core even though the FoMoCo branded core actually looked OK. I'm venturing that this was it's first heater removal.
Both fresh air vents were missing their handles and were duck-taped shut. While looking at a 66 in a wrecker (already picked clean, sadly) I did manage to pull one vent out with a handle. I wanted to close both of them so I took the new-to-me vent apart and fabricated a new handle. Not factory looking, but I'll keep my eye out for others if it bugs me too much. Here's what I did:
Found a piece of scrap metal in my bins the right width. Cut it to length (bends considered) and filed the D-shaped hole. Not quite done in this pic.
Here's the factory parts and my replacement parts.
Replaced all the seals first on the doors and then used spring washers to add tension (as did Ford) and used a pair of thin nuts to lock it in place. Good as new.
The headliner and other interior upholstery in this truck had been treated with a custom job some time in its past. The bench seat is being replaced with leather buckets, but the headliner I'm going to leave in. I pulled it and used some upholstery dye and made them all a solid blue. I'm dying all the other parts this color blue too - since I can't find the original color on-line or at the auto-body supply. It's looking OK so far.
Despite the 20 degree outside and 54 degree garage temps I got a lot done over the long weekend. Tried to stay at least 30 degrees warmer and did as much indoor work as I could, which included blasting and painting all the visor parts, the rear-view mirror, the little kick-panel plates - as well as cleaning and lubing all the heater controls for the rebuilt heater.
I managed to re-dye the carpet in the truck using the same dye I used to recolor the leather seats I'm installing. The carpeting, though a little faded in spots, was in really good shape. It took to the dye nicely! Had to tape-off the windows and put a heater in the truck to get it above freezing, but it eventually dried. After scrubbing the leather seats and using some leather prep I recolored those too.
So now if it warms up a little bit, I can finally start putting stuff back in!
These are from a 2001 Buick Regal. Leather, and only $45 a piece. Drivers side is power.
Not sure if this is original, but sure seems like it is. Now recolored.
Something I've done to all my old Ford's is to an install intermittent wiper switch setup from a late 70's, early 80's Ford. Each vary based upon the **** you use, but here's what I did for this truck tonight.
Here's the old '66 parts on the left and the new parts on the right. I could have used the 66 wiper motor, but I used the newer one for the simple addition of the bullet connector for power.
A closer view of the new parts. The main addition is the control box, which goes in-between the switch and the motor. The switch differs from the 2-speed switch due to the reverse rotation potentiometer to adjust speed.
The shaft is too long, so I pushed on the **** and pressed it to actuate the washer pump switch and then measured the space. This is the amount to shorten the shaft.
Two thing to notice here: 1) the shaft has a grove cut, which I did using a jewelers file - after lengthening the flat on the shaft and 2) The threaded portion is too long as well. I used two washers and another bezel nut I had to space it the same as the '66 switch.
Can't believe a month has past since I updated this. The holidays? But man, my thread was already 12 pages back!
Have been doing a lot to the truck - given the chance - and now have the instrument cluster, e-brakes w/Econoline handle, hitch and bumper, all new brakes (dual M/C with 4-way drums), new shocks, door glass runs and all that stuff, heater box and cables, 2-speed intermittent wiper setup, C6 tranny filter and 20 y.o. fluid replaced, and shoulder belt retractors installed. It's always dark outside when I'm working on it, so pictures are forthcoming. I snapped this picture of my hitch and bumper (bumper hanging on awaiting bolts to arrive).
I only discovered I didn't order the bolts when I went to install it. Had a couple, so it's just hanging there at the moment so I could determine the location of the hitch and drill those mounting holes.
I'm awaiting an upper radiator hose and still digging through my bins and bins of parts to find my new heater control valve to finally get the coolant back into it.
I'm beginning to work under the hood a little too. In preparation to upgrade the ignition system to DuraSpark II distributor I'm going to do the same ignition module setup I did in my '67, which utilizes the GM HEI ignition module. I'm stuffing it all in a DSII case and using the wires. Just started this last night, but this shows the basics of that update. I know this doesn't use the retard feature of the DSII setup, but that was really only added because of the emission stuff they were doing in the late 70's, early 80's. As a straight-forward ignition module, the GM module is simple and cheap.
Working on my own ignition module.
I also made my own junction block (I'll update my other thread on this too). I have 2 spares now, which I'll offer up to anyone who may want them.
Made 3 of them 'while I was at it.'
I'm awaiting a set of rims from a freind who owns a powdercoat shop. He has a 66 Bronco and pulled them from it and is powdercoating them Wimbledon White - then I can get some new tires and drop her on the ground.
The whole drive-train was swapped, as best I can tell. It came with a 352, 3-speed column shift, and a 3.50 open diff - according to the warranty plate. I've not got into the motor yet, but it's either the original 352 or came from the same vehicle that the C6 came from (it's a 390 according to the previous owner).
The oddity on the tag - as discussed back when I posted that picture - was that the WES-AA letters didn't indicate it being a trac-loc (as shown in the above chart and any others I've found on-line), but the 3'L'00 on the tag did. It is, for sure NOT an open diff. And it is for sure a 3.00 ratio.
Friend of mine in the Falcon club has a powder-coat shop and had these wheels laying around. So he blasted and coated them for my truck. Now I just need a decent set of tires and some poverty caps to fit them and I can finally put the truck on the ground!
 11-19-2014, 02:55 PM


 69-70 Mustang


 But man, my thread was already 12 pages back!